Optima M88APLUS - Hand dryer Mediclinics - Free user manual and instructions
Find the device manual for free Optima M88APLUS Mediclinics in PDF.
Frequently Asked Questions - Optima M88APLUS Mediclinics
Download the instructions for your Hand dryer in PDF format for free! Find your manual Optima M88APLUS - Mediclinics and take your electronic device back in hand. On this page are published all the documents necessary for the use of your device. Optima M88APLUS by Mediclinics.
USER MANUAL Optima M88APLUS Mediclinics
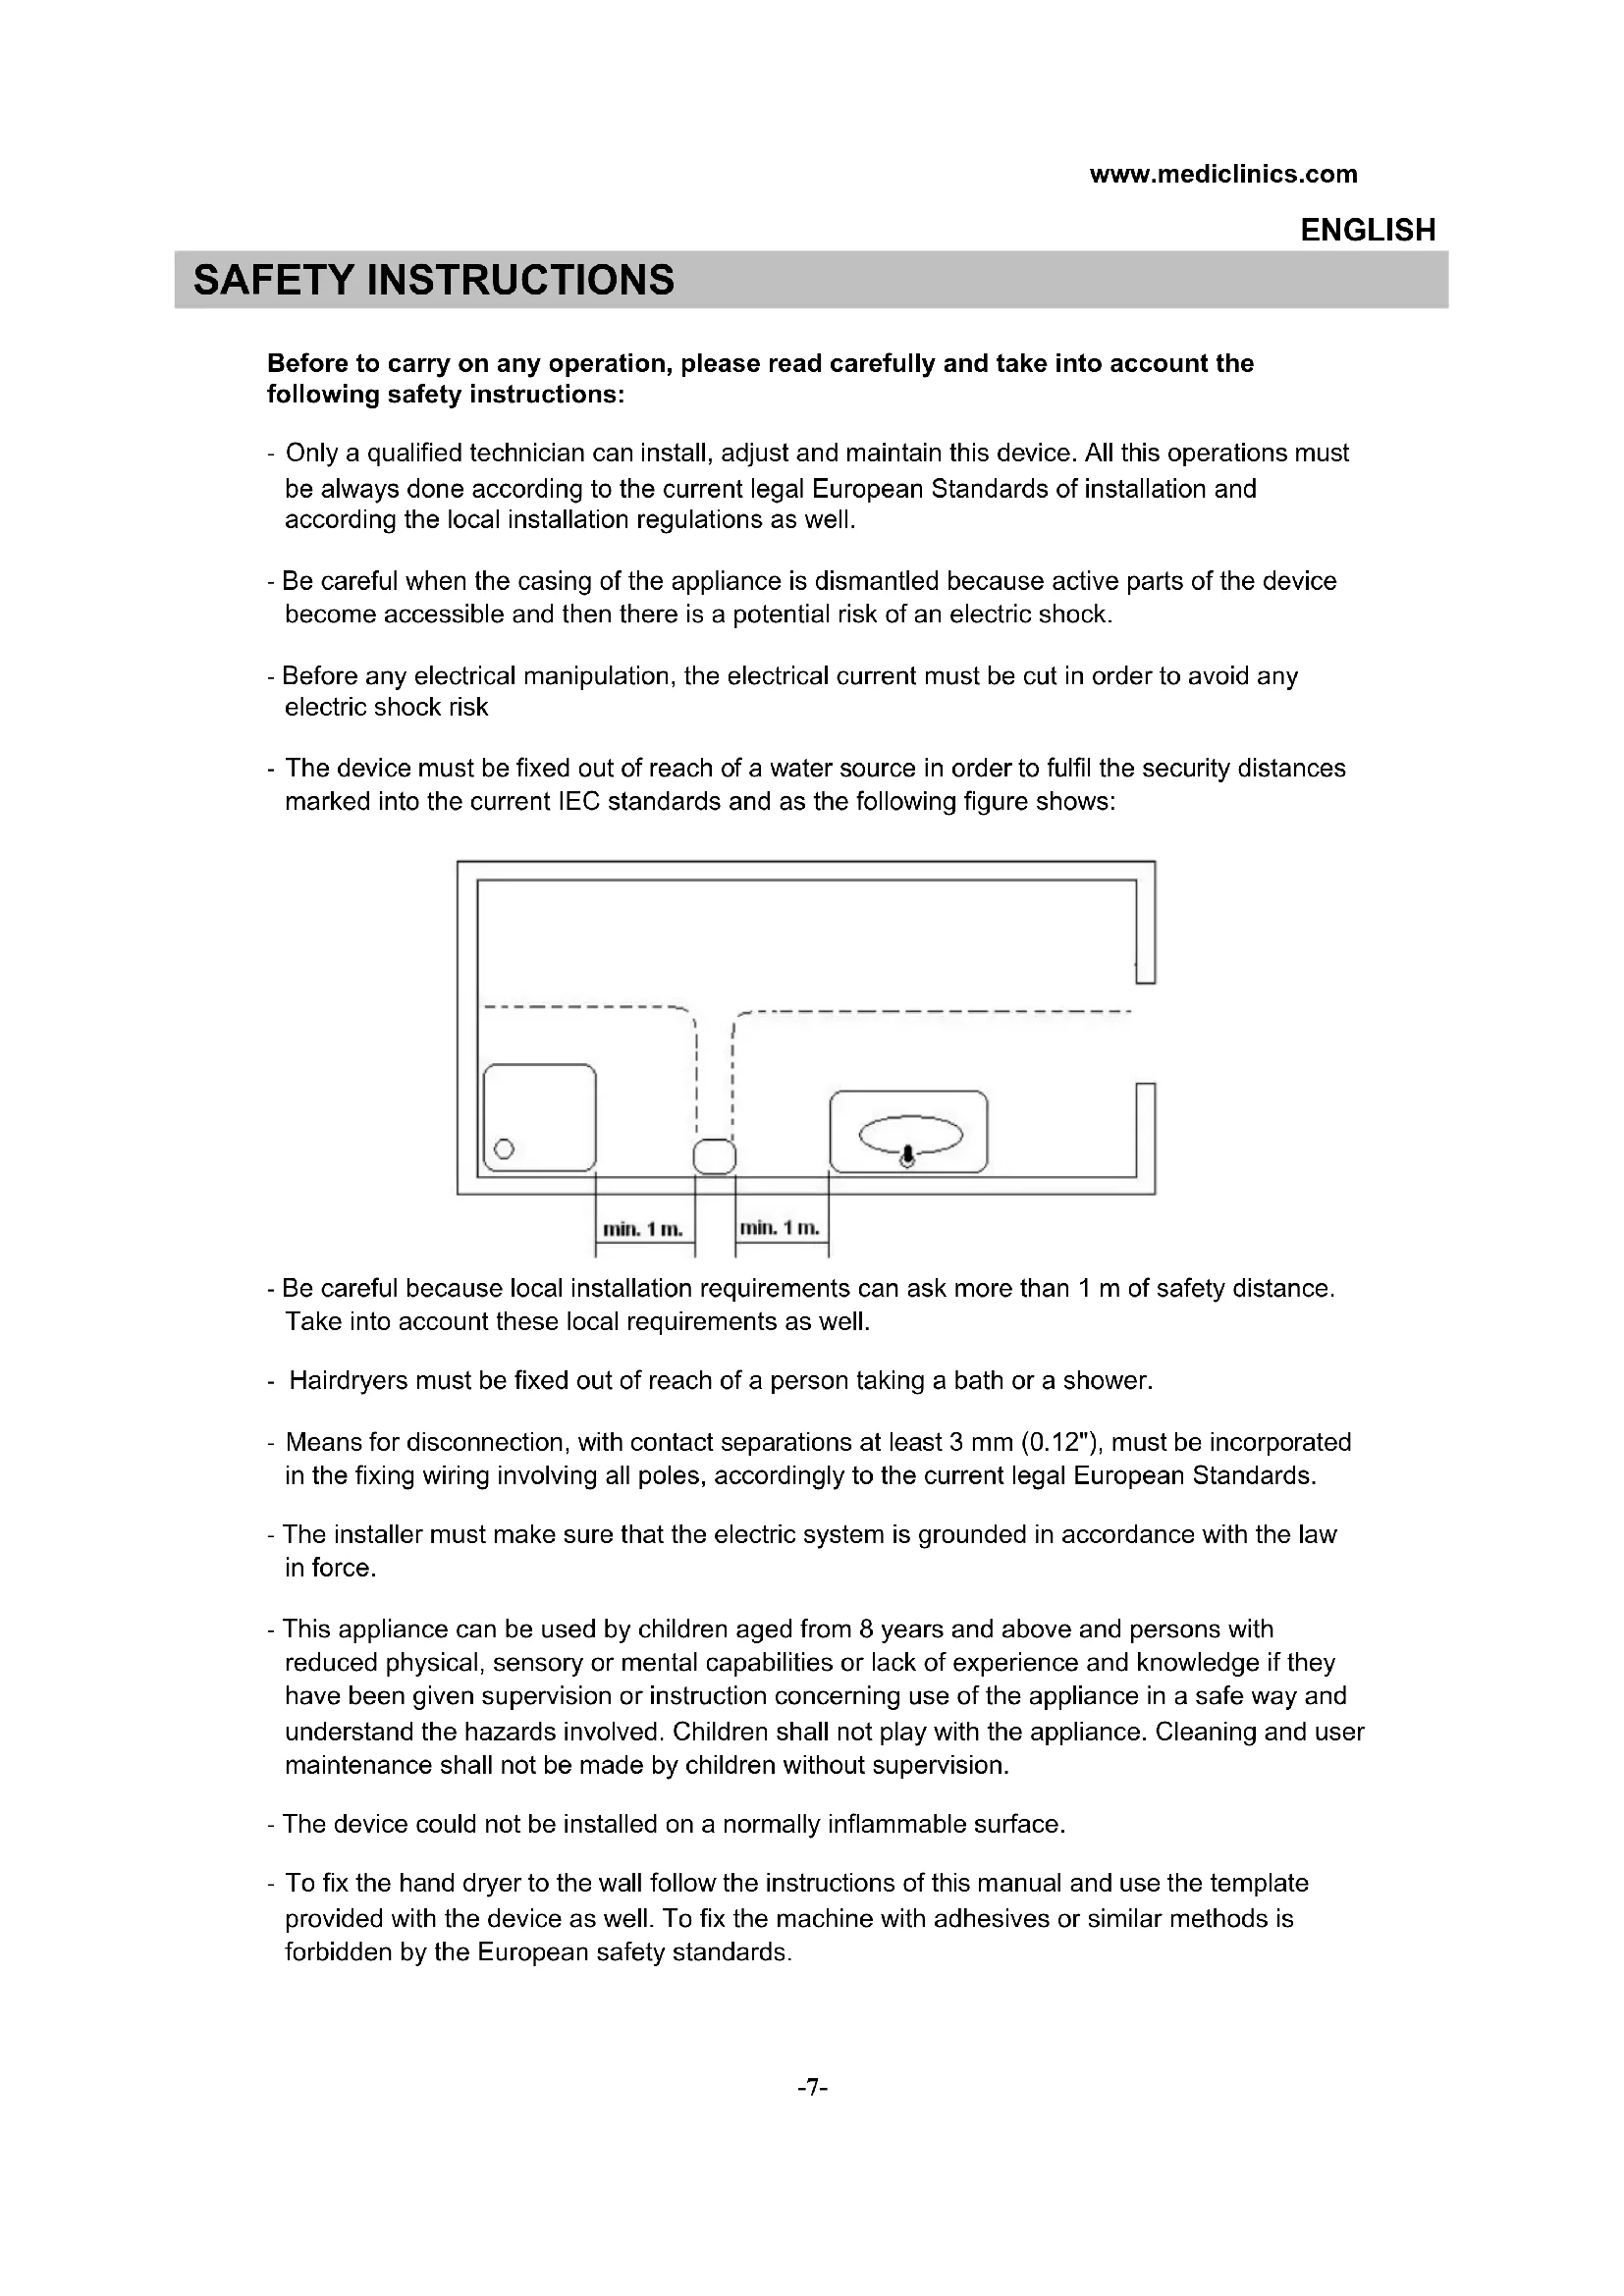
Before to carry on any operation, please read carefully and take into account the following safety instructions: - Only a qualified technician can install, adjust and maintain this device. All this operations must be always done according to the current legal European Standards of installation and according the local installation regulations as well. - Be careful when the casing of the appliance is dismantled because active parts of the device become accessible and then there is a potential risk of an electric shock. - Before any electrical manipulation, the electrical current must be cut in order to avoid any electric shock risk - The device must be fixed out of reach of a water source in order to fulfil the security distances marked into the current IEC standards and as the following figure shows: - Be careful because local installation requirements can ask more than 1 m of safety distance. Take into account these local requirements as well. - Hairdryers must be fixed out of reach of a person taking a bath or a shower. - Means for disconnection, with contact separations at least 3 mm (0.12"), must be incorporated in the fixing wiring involving all poles, accordingly to the current legal European Standards. - The installer must make sure that the electric system is grounded in accordance with the law in force. - This appliance can be used by children aged from 8 years and above and persons with reduced physical, sensory or mental capabilities or lack of experience and knowledge if they have been given supervision or instruction concerning use of the appliance in a safe way and understand the hazards involved. Children shall not play with the appliance. Cleaning and user maintenance shall not be made by children without supervision. - The device could not be installed on a normally inflammable surface. - To fix the hand dryer to the wall follow the instructions of this manual and use the template provided with the device as well. To fix the machine with adhesives or similar methods is forbidden by the European safety standards. ENGLISH
Dismantling for installation
- The dryer is supplied with a pressure-mounted cover, and is not screwed down.
- The 4 attachment screws are provided in the plastic bag with the plugs and lag bolts.
- Remove the cover vertically from the machine supporting base, taking care to avoid: - Damaging the internal components. - Damaging the cover. We recommend resting it on a flat surface with the visible part upwards, or on top of a cloth. Mounting
- Mount the machine along the rear channels.
- Insert the electric ducting through the hole next to the terminal strip.
- Use the drill template provided to fix the dryer to the wall.
- Drill 4 holes with a diameter of 8 mm(5/16"), and take care to clean all traces of dust from the holes.
- Screw down the base firmly to the wall using a flat ended screwdriver of 6 -7mm (1/4").
- Connect the electric ducting to the terminal strip. Screw down the 3 locking screws firmly.
Machine must be handled only by an autorized technician.
WARNING: When dismantle the cover, electrical live and basic insulated parts are accesible.
Means for disconnection of the mains should be predicted, with a contact separation at least 3 mm (0.12”) in all poles. The mentioned means of disconnection must be incorporated in the fixing wiring. During the installation process, the protection areas should be considered according to norm VDE 0100. The hand dryer must only be installed on a closed surface (wall, partition or similar).
Models with pushbutton
The hand dryer has means to adjust manually the distance for detecting hands. These adjustments of the motor speed must be made by a qualified technician only. The adjustments can be made by moving the cursor of the linear potentiometer.
To dry hands correctly, we recommend rising well to remove all traces of soap. Button models: Press the start button. Immediately after approach the hands to the air outlet and rub them together. The hands can be gradually taken away from the dryer and will continue drying up to a maximum distance of 10-15 cm (3,9-5,9").The handryer worksduring 40 seconds. After that it stops and will be ready to work again. Automatic models: These models operate by hand detection. If hands are held 10-15 cm (3,9-5,9") from the air outlet, the dryer will start working. Immediately after the hands can be gradually taken away from the dryer and will continue drying up to a maximum distance of 15-20 cm (5,9-7,9"). The machine stops will stop 2-3 seconds after use. If the sensor isblocked due to vandalism, the dryer will completely stop working.Please let a minimum separation of 40 cm (15,75") between appliance and any shelf, marble, worktop or washbasin.
This appliance is not intended for use by persons (including children) with reduced physical, sensory or mental capabilities, or lack of experience and knowledge, unless they have been given supervision or instruction concerning use of the appliance by a person responsible for their safety. CHILDREN SHOULD BE SUPERVISED TO ENSURE THAT THEY DO NOT PLAY WITH THE HAND DRYER.
Correct cleaning of the machine will lenghten its working life considerably. When in use, the machine will accumulate dust inside which should be cleaned out if used regularly, at least once a year. Cleaning method:
1. Disconnect the dryer lead-in wire.
2. Unscrew the 4 side attachment screws using the supplied Allen key.
3. Remove cover (See dismantling for installation).
4. Remove the accumulated dust in the fan wheel with a soft bristle brush.
5. Using the same brush, remove the dust accumulated in the out grill.
6. Brush the sides between the support and the wall.
7. We recommend removing the machine from the wall and unscrewing the four mounting bolts
to remove any obstructions (paper, cigarette ends, etc.).
8. In case of having dismantled the air outlet, install it again in its place and ensure that it is in
its proper position.
9. When maintenance is complete, screw the base to the wall (if applicable), re-mount the
cover, tighten up the screws and plug in.
10. Switch on the machine and leave running until all traces of dust from the cleaning proces
have been discharged from the air stream.
11. Clean the casing using a damp cloth moistened in a solution of neutral soap and water.
After cleaning the entire surface rinse the soap from the casing using another cloth moistened in water and dry using a dry cloth. CLEANING OF CHROMED AND GOLD PLATED COVERS For cleaning purposes only a wet cloth is to be used. Do not use any kind of detergent, acids, lye, abrasives, hydrochloric acid, etc. Take care not to damage or force any component.