JumpArenA Allin 1 - Trampoline EXIT - Free user manual and instructions
Find the device manual for free JumpArenA Allin 1 EXIT in PDF.

Frequently Asked Questions - JumpArenA Allin 1 EXIT
User questions about JumpArenA Allin 1 EXIT
0 question about this device. Answer the ones you know or ask your own.
Ask a new question about this device
Download the instructions for your Trampoline in PDF format for free! Find your manual JumpArenA Allin 1 - EXIT and take your electronic device back in hand. On this page are published all the documents necessary for the use of your device. JumpArenA Allin 1 by EXIT.
USER MANUAL JumpArenA Allin 1 EXIT
natural_image
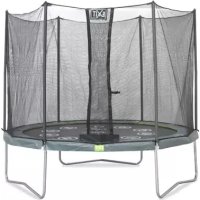
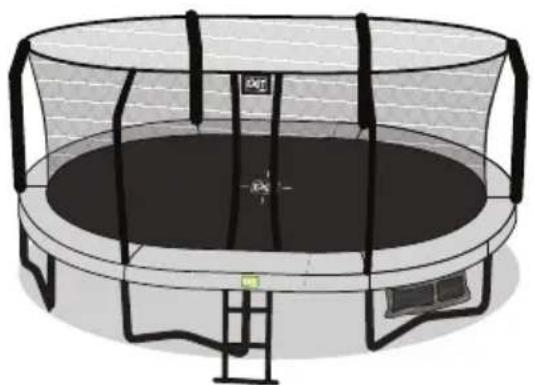
Illustration of a trampoline with a highlighted center and ladder, no text or symbols presentJumpArena Dual
8x12,5FT / 244x380cm
10.95.12.02
English4

Deutsch16

Nederlands28

Français40

1.0 Introduction
Congratulations on choosing a EXIT JumpArenA Safetynet!
Have fun, be active and play outdoors.....
That's what keeps driving us to develop innovative, quality toys for cool kids.
We do everything possible to develop safe products for children. As our products are classed as toys, we comply with the toughest consumer safety regulations. Before launching our products onto the market, we have independent tests carried out for certification. We also continuously test our production runs and periodically have independent tests performed again as a further check. Only products which live up to the highest EXIT Toys standard are marked with and recognized by the EXIT-brand.
"We want to thank you for your custom and your confidence in this product. We're sure your kids will have as much fun as we did during development. Being open-minded, we really appreciate all comments and ideas which will help us improve our products or develop new ones. You are invited to send your ideas to us at info@exit-toys.com"
Please visit www.exittoys.com and discover more cool new products.
The EXIT Toys team
2.0 Guidelines for safe use
Using your product as instructed in this manual will eliminate virtually all hazards. However, please bear in mind that children have a natural urge to play and that this may lead to unforeseen dangerous situations for which the manufacturer cannot be held responsible. Teach your children how to use the product and point out possible dangers to them.
BEFORE YOU BEGIN USING YOUR TRAMPOLINE:
Read and understand all this information provided to you in this manual. As with all physical sports and activities there is the risk of participants receiving an injury. To ensure your future enjoyment and the prevention of injury, be sure to follow appropriate safety rules and tips.

WARNING
To avoid serious injury:
- Read and understand the manual before use.
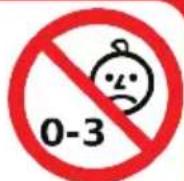
• WARNING: Only for domestic use - WARNING: CHOKING HAZARD! - Small parts. Not for Children under 3 years old.
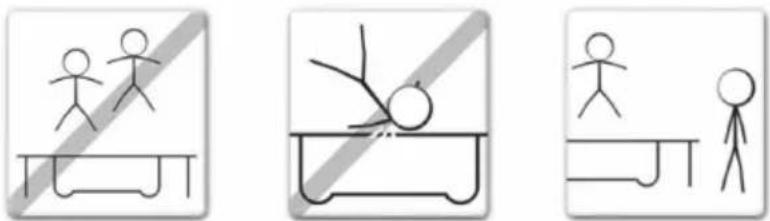
• WARNING: Only one user. Collision hazard!
• WARNING: Do not perform summersaults or other difficult jumps!
• WARNING: Empty pockets and hands before jumping.
• WARNING: The trampoline is intended for outdoor use.
• WARNING: Always jump in the middle of the mat.
• WARNING: Jump without shoes.
• WARNING: Do not eat while jumping.
• WARNING: Do not exit by a jump. - WARNING: Limit the time of continuous usage (make regular stops).
- WARNING: Do not use in strong wind conditions and secure the trampoline.
- Protect children
- Prevent falls and strangulation - Exit through the door only, and use caution.
- Assist young children in and out of Safety net.
Continuous adult supervision is required. - Don't use the trampoline when it's wet.
• The trampoline is to be assembled by an adult prior to use. - In case of missing or broken parts, please contact place of purchase for assistance.
• We are not liable for any injuries that may occur when using the trampoline.
Max. User weight:• 100 kg.
2.1 General Safety Instructions
- Please read and follow all instructions before you start exercising with your safety net.
- Please inspect the safety net before each use for bent steel tubes, torn mat, loose and broken springs and overall stability of the trampoline.
- You shall always be sure that the equipment is working normally and safety before you work out on your safety net
- Never have more than one person bouncing on the trampoline. The safety net has been made for only one person
- A supervisor is absolutely necessary when children use this trampoline.
- Safety net isn't created in order to replace adult supervision.
- This product is intended for home use only.
- Wind or air movement shall be calm and gentle, Don't use trampoline in gusty or severe wind
- Ensure that a person always supervises the user of the trampoline.
- WARNING: Always close the entrance of the safetynet before using the trampoline.
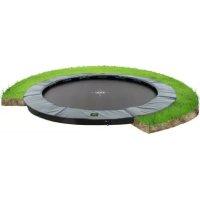
- The trampoline is not intended to be buried into the ground.
3.0 General Information
- It is not necessary to break-down the trampoline during winter.
- Self-securing nuts and screws are suitable only for one time setting-up, and must be replaced after breakdown of the trampoline and/or safetynet.
- The safetynet has a minimum durability of 1 years after purchasing.
- It is recommended to place the trampolines on a flat and level surface with at least 2 m distance to other superstructures, or barriers, e.g. fence, garage, house, tree branches, washing lines, or electrical cables.
- The trampoline shall not be placed over hard surfaces like asphalt, concrete etc.
Exchange defective parts according to the supplier's recommendation. - Changes to the trampoline (e.g. addition of an accessory) must be done according to the supplier's instruction.
4.0 SAFETY NET ASSEMBLY
STEP BY STEP CONSTRUCTION
Please read the assembly instructions before beginning to assemble the product.
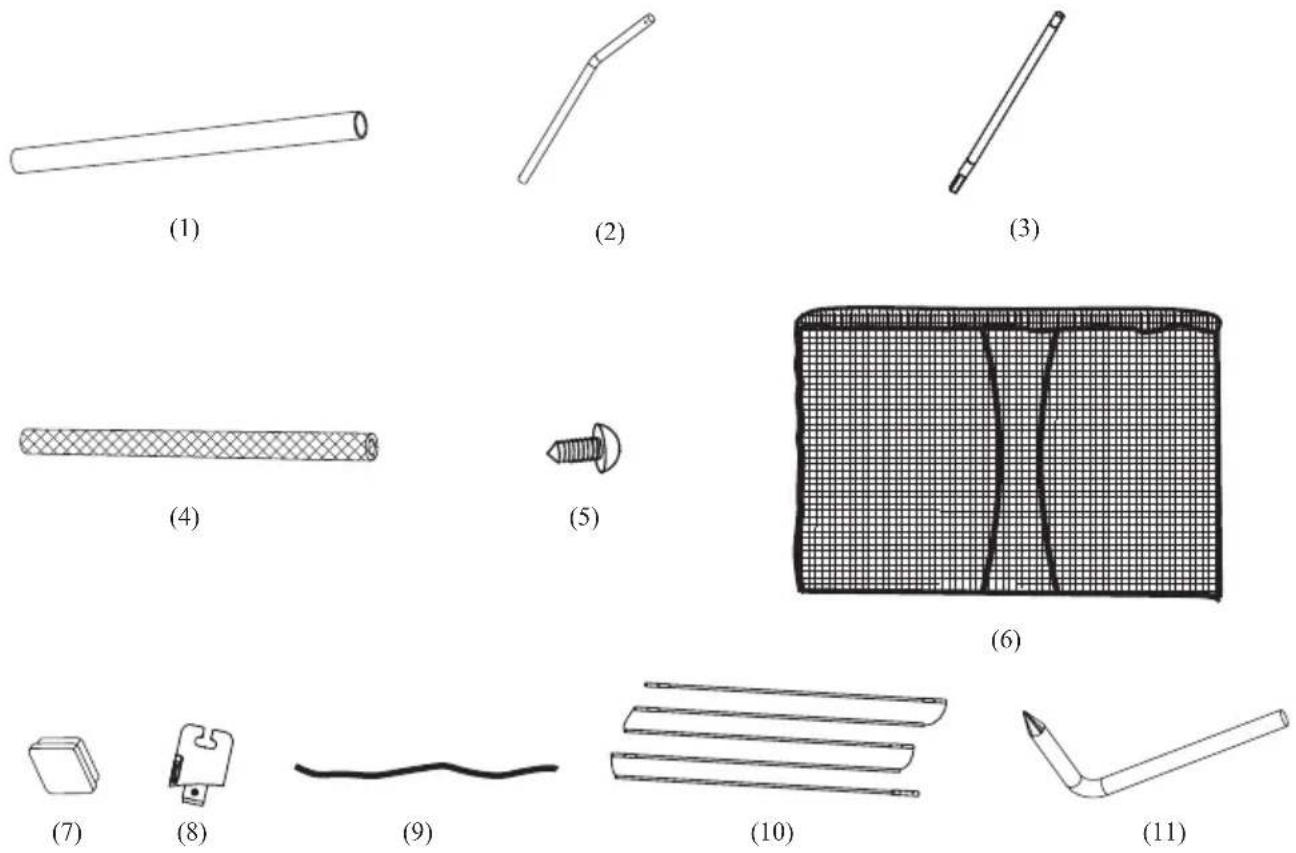
Please refer to the table below for parts description and numbering.
Make sure you have all the parts listed. If you are missing any parts, please contact place of purchase.
Please use gloves to protect your hands from pinch points during assembly. When you are ready to start, make sure that you have plenty of space and a clean dry area for assembly.
Parts list
| Part.Nr. | Description 8x12,5ft | |
| 1 Foam sleeve | 6 | |
| 2 Upper Tube | 6 | |
| 3 Lower tube | 6 | |
| 4 Foam 12 | ||
| 5 Screw | 6 | |
| 6 Net 1 | ||
| 7 End cap | 6 | |
| 8 Pole cap | 6 | |
| 9 Cord 2 | ||
| 10 Cable wire | 1 | |
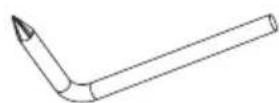
| 11 Tool | 1 |
Enclosed are the current specifications and product features available at time of printing, however, changes may be made in equipment, availability, specifications and features without notice.
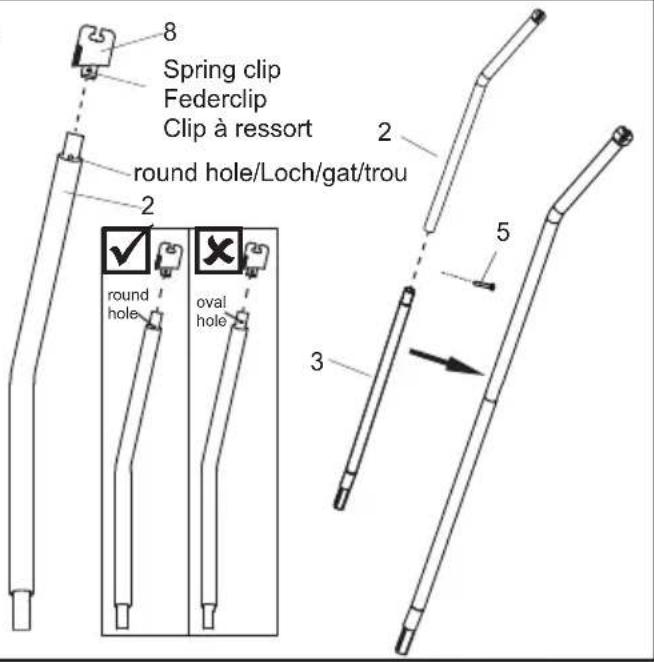
Step 1
Insert Pole Cap(8) into the upper tube(2) with foam (4) as shown.
Lay one upper tube(2) with foam(4) and lower tube(3) with foam(4) on the ground, insert the lower tube(3) into the upper tube(2) secure with screw(5).
1
text_image
8 Spring clip Federclip Clip à ressort round hole/Loch/gat/trou 2 2 round hole oval hole 5 3Then insert the assembled tubes into the Foam sleeve(1).
Repeat this step to attach the remaining Upper tubes(2) and Lower tubes(3) together (not shown).
text_image
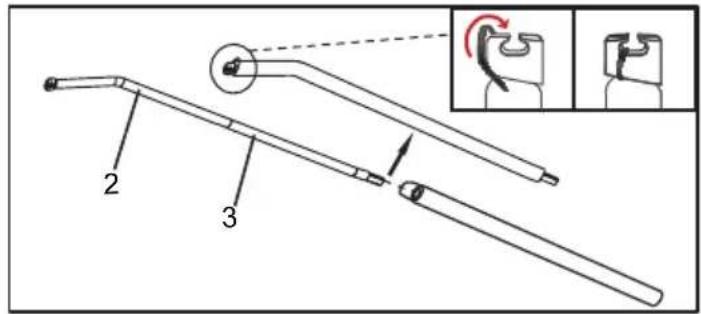
Technical diagram of a mechanical device with labeled parts and an inset showing a close-up of the component being turned.Step 2
Insert the enclosure pole into the Socket of the trampoline as shown.
Attach other enclosure poles in the same way.
2
natural_image
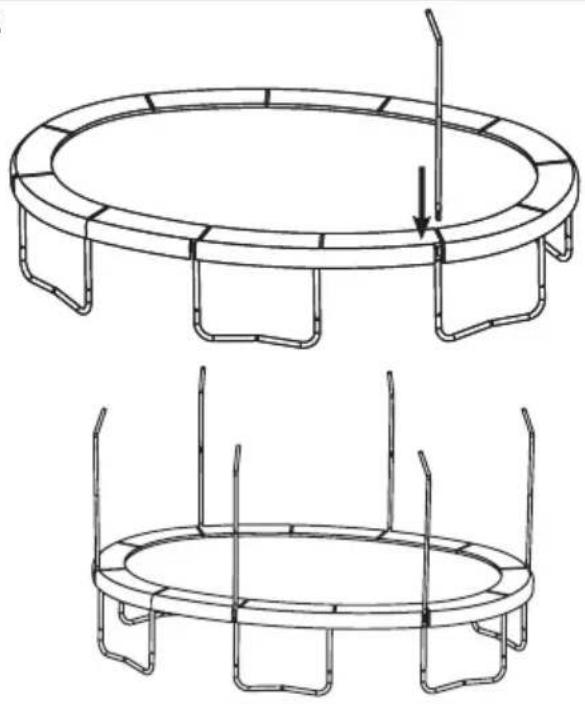
Technical line drawings of a circular trampoline structure with vertical supports and an arrow indicating rotation (no text or symbols)Step 3
Insert the end cap(7) into the bottom hole of the socket.
3
natural_image
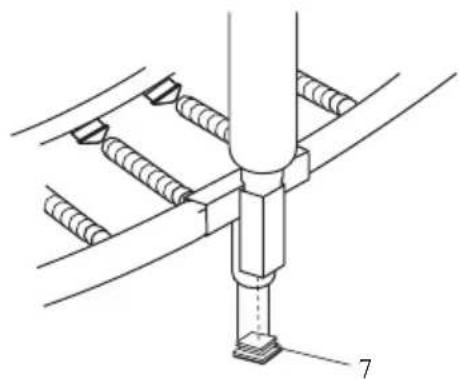
Technical line drawing of a mechanical assembly with bolts and a central shaft (no text or symbols)Step 4
Identify the Cable wire with small sections attached by thread, then insert the end B of cable into the end A as shown, repeat this process to attach the remaining cables C,D,E,F..... to form the first assembled cable.
Repeat this process to attach other set Cable wire together by same manner.
4
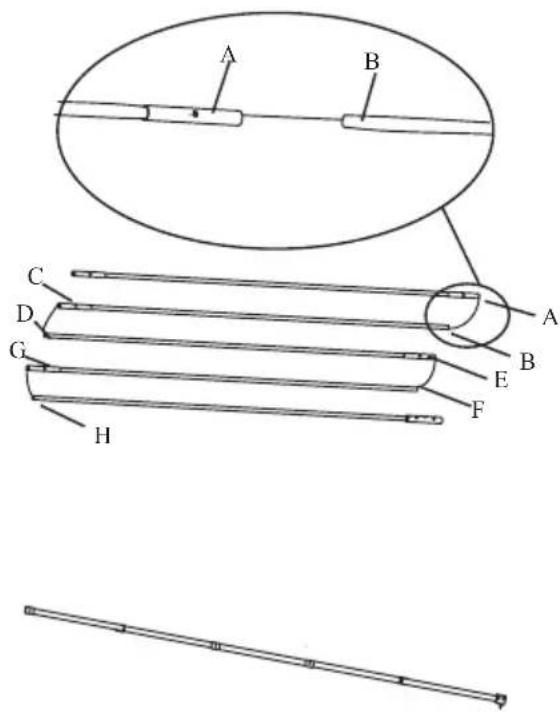
text_image
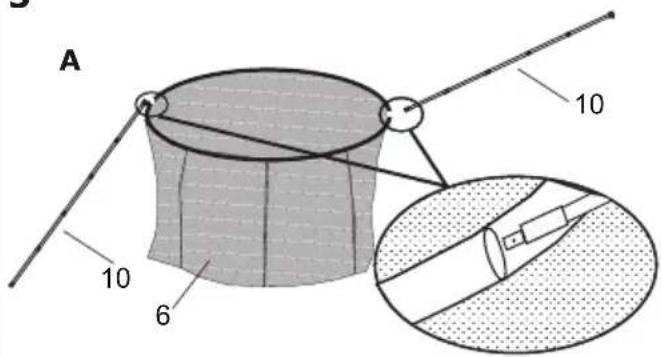
A B C D G H A B E FStep 5
A
Insert one assembled Cable (10) wire into sleeve on the top of the enclosure net (6) as shown A.
Notice: Two adults are required when assemble.
Insert the second assembled Cable wire (11) into sleeve on the top of the enclosure net by the same manner.
B
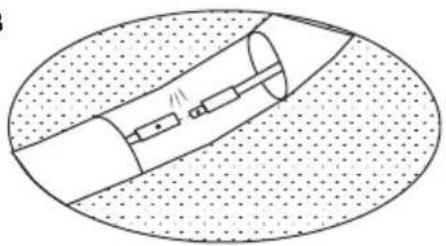
Attach two ends of the entire Cable wire together as shown B.
Notice: Put the net on the inside of the poles on the frame pad. Now go stand on the jumpmat.
Place the Cable Wire with enclosure to the plastic cap. Make sure the cable wire fit into the slot properly.
Repeat for all the cable wire and plastic cap.
Make sure the center of the enclosure doos and center of the two legs are aligned.
5
text_image
A 10 10 6B
natural_image
Diagram of a mechanical component inside an oval shape, showing internal components and motion direction (no text or symbols)
natural_image
Diagram of a mechanical or fluidic component inside an oval boundary, showing internal channels and textured surface (no text or symbols)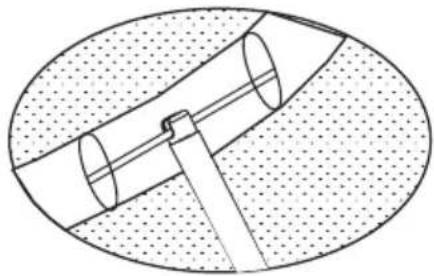
natural_image
Pure technical diagram of a mechanical component with no text or symbols
natural_image
3D rendering of a circular trampoline with horizontal bars and a central pool, no text or symbols visibleStep 6
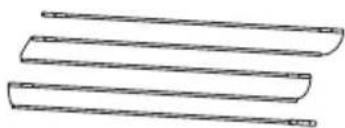
Notice: During step6, you will "sew" the lower edge of the Netting(6) to the V-rings on the mat using the Cords(9) Locate the V-ring closest to the door. thread one end of a Cord(9) through the lower eage of the netting(6) above the V-ring and then thread the cord through the V-ring. Tie the Netting to the V-ring by making a double knot in the cord.
Thread the cord(9) through the lower edge of the netting(6) halfway between the first V-ring and the V-ring to the left. and then thread the cord through the V-ring to the left, Repeat this procedure until the entire cord is threaded through the netting and V-ring as shown. keep the cord taut. Tie the end of the cord to the last V-ring that it reaches. Repeat this process until all the cords are attached.
Tie a second cord(not shown) to the last V-ring reached by the first cord. thread the second cord through the netting(6) and V-ring as described above. Make sure that netting is sewn to every V-ring on the trampoline bed.
Congratulations! Your trampoline enclosure is now fully assembled (put together).
Make sure that all parts are securely attached. Familiarize yourself and all users with the trampoline and enclosure with the safety precautions, use and instructional materials, and care and maintenance instructions in this manual before using the trampoline and enclosure.
natural_image
3D rendering of a circular trampoline with metal frame and control panel (no text or symbols)5.0 CARE AND MAINTENANCE
This trampoline was designed and manufactured with quality materials and craftsmanship. If proper care and maintenance is provided, it will provide all jumpers with years of exercise, fun, and enjoyment as well as reduce the risk of injury. Please follow the guidelines listed below:
This trampoline is designed to withhold a certain amount of weight and use. Please make sure that only one person at any one time uses the trampoline. Jumpers should either wear socks, gymnastics shoes, or be barefoot when using the trampoline. Please be aware that street shoes or tennis shoes should NOT be worn while using the trampoline. In order to prevent the trampoline mat from getting cut or damaged please do not allow any pets onto the mat. Also, jumpers should remove all sharp objects from their person prior to using the trampoline. Any type of sharp or pointed objects should be kept off the trampoline mat at all times.
Maintenance instructions
It is particularly important to follow the following maintenance instructions at the beginning of each season and periodically during the use season:
- It is necessary to determine whether all nuts and bolts are tight, and if necessary they are tightened;
- It shall be verified that all spring-loaded connections (locking pin) are undamaged and not move while playing;
- Any cover screws and sharp edges must be checked and replaced if necessary;
• The maintenance manual shall be kept;
Always inspect the trampoline before each use for worn, abused or missing parts. A number of conditions could arise that may increase your chances of getting injured. Please be aware of:
- Punctures, holes, or tears in the trampoline mat
- Sagging trampoline mat
- Loose stitching or any kind of deterioration of the mat
- Bent or broken frame parts, such as the legs
• Broken, missing, or damaged springs - Damaged, missing, or insecurely attached frame pad
- Protrusions of any types (especially sharp types) on the frame, springs, or mat
IF YOU FIND ANY OF THE PREVIOUS CONDITIONS, OR ANYTHING ELSE THAT YOU FEEL COULD CAUSE HARM TO ANY USER, THE TRAMPOLINE SHOULD BE DISASSEMBLED OR SECURED FROM USE UNTIL THE CONDITION(S) HAS BEEN RESOLVED.
WINDY CONDITIONS
In severe wind situations, the trampoline can be blown about. If you expect windy weather conditions, the trampoline should be moved to a sheltered area or disassembled. Another option is to tie the round, outside portion (top frame) of the trampoline to the ground using ropes and stakes. To ensure security, at least three (3) tie downs should be used. Do not just secure the legs of the trampoline to the ground because they can pull out the frame sockets.
MOVING THE TRAMPOLINE
If you need to move the trampoline, two people should be used. All connector points should be wrapped secured with weather resistant tape, such as duct tape. This will keep the frame intact during the move and prevent the connector points from dislocating and separating. When moving, lift the trampoline slightly of the ground and keep it horizontal to the ground. For any type of other move, you should disassemble the trampoline.
6.0 Warranty
-
After the date of the purchase invoice, the owner of the EXIT Toys JumpArena has a:
-
2 year warranty on the breaking of the frame
-
1 year warranty on the tearing of the net
-
The warranty applies only to the material and construction defects with respect to this product or its components.
-
The warranty becomes defunct if:
-
This product is used incorrectly and/or carelessly and is used in such a way that it does not comply with its purpose.
- This product is not assembled and maintained according to the instruction booklet.
• Technical repairs to this product are not carried out professionally. - Parts, which are mounted afterwards, do not comply with the technical specifications of the product concerned or are mounted incorrectly.
- Defects are a result of climatic influences such as corrosion, UV rays or normal disintegration.
- The product is rented out or was made available to various unspecified persons in any other manner.
- EXIT Toys will repair or replace according to its choice all material and construction defects that have been ascertained by EXIT Toys during the warranty period.
- The owner is only entitled to the warranty by presenting the product for inspection at a EXIT Toys dealer. It should be handed to the EXIT Toys dealer, accompanied by the original purchase invoice.
- In case of material and construction defects that have been ascertained by EXIT Toys, the product or its components will be repaired or replaced – according to its choice – free of charge during the warranty period mentioned in Article 1.
- If the claim for warranty is not justifiable, all the costs are at the expense of the owner.
- This warranty cannot be transferred to third parties.
- The trampoline is designed for personal use. It is not permitted to rent out or place the trampoline in public areas like schools or day-care centres. The guarantee and any other liabilities shall expire if the playhouse is rented out or used in public areas.
1.0 Einführung
natural_image
Simple line drawing of two stick figures standing on a table with a diagonal line above (no text or symbols)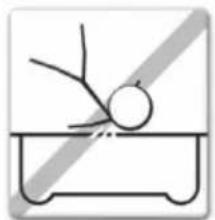
natural_image
Simple line drawing of a person bending over a table with a diagonal line above (no text or symbols)
natural_image
Simple line drawing of two stick figures standing at a table with a horizontal bar (no text or symbols)text_image
Technical diagram of a mechanical device with labeled parts and an inset showing a close-up of the component being turned.Schritt 2
natural_image
Technical line drawing of a circular trampoline structure with vertical supports and an arrow indicating rotation (no text or symbols)Schritt 3
natural_image
Technical diagram of a mechanical assembly with labeled parts (no text or symbols present)Step 4
natural_image
Diagram of a mechanical component inside an oval shape, showing internal components and motion direction (no text or symbols)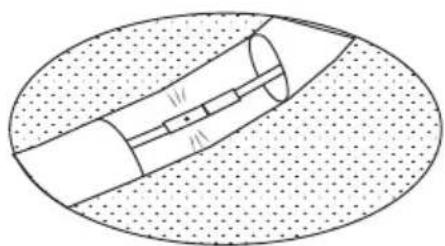
natural_image
Diagram of a cylindrical object with internal segments, enclosed in an oval boundary (no text or symbols)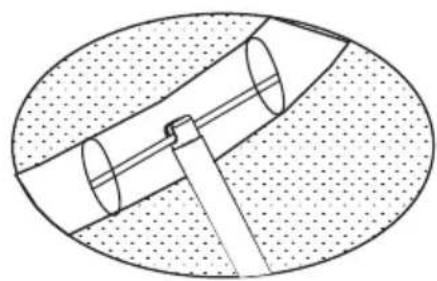
natural_image
Pure technical diagram of a mechanical component inside an oval frame (no text or symbols)
natural_image
3D rendering of a circular trampoline with horizontal bars and a central pool, no text or symbols visibleSchritt 6
natural_image
3D rendering of a circular trampoline with metal frame and ladder (no text or symbols)5.0 PFLEGE UND UNTERHALT
natural_image
Simple line drawing of two stick figures standing on a table with a diagonal stripe above (no text or symbols)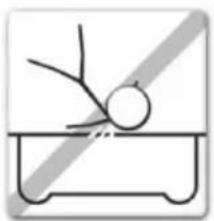
natural_image
Simple line drawing of a person bending over a table with a diagonal line (no text or symbols)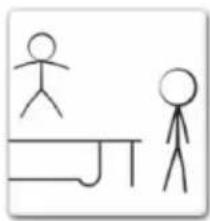
natural_image
Simple line drawing of two stick figures standing at a table with a horizontal line and a vertical line above (no text or symbols)text_image
Technical diagram of a mechanical device with labeled parts and an inset showing a close-up of the component being turned.Stap 2
natural_image
Technical line drawings of a circular trampoline structure with vertical supports and an arrow indicating rotation (no text or symbols)Stap 3
natural_image
Technical line drawing of a mechanical assembly with bolts and a central shaft (no text or symbols)Stap 4
natural_image
Diagram of a mechanical component inside an oval shape, showing internal components and motion direction (no text or symbols)
natural_image
Diagram of a mechanical or fluidic component inside an oval boundary, showing internal channels and textured surface (no text or symbols)
natural_image
Pure technical diagram of a mechanical component with no text or symbols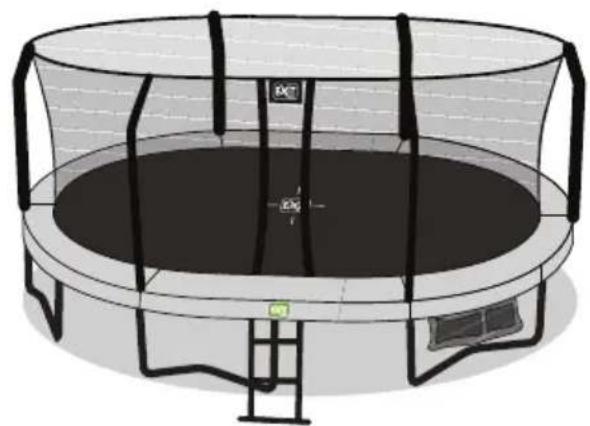
natural_image
3D rendering of a circular trampoline with horizontal bars and a central pool, no text or symbols visibleStap 6
natural_image
3D rendering of a circular trampoline with horizontal bars and a small green box at the center (no text or symbols)5.0 ZORG EN ONDERHOUD
natural_image
Simple line drawing of two stick figures standing on a table with a diagonal line above (no text or symbols)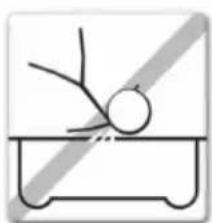
natural_image
Simple line drawing of a person bending over a table with a diagonal line above (no text or symbols)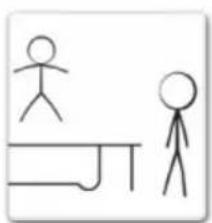
natural_image
Simple line drawing of two stick figures standing at a table, no text or symbols presentnatural_image
Grid-patterned surface with a central black line and a small mark (no text or symbols)(6)

(7)

(8)

(9)
natural_image
Simple line drawing of three parallel curved lines with rounded ends, no text or symbols present.(10)
(11)
Étape 1
text_image
Technical diagram of a mechanical device with labeled parts and an inset showing a close-up of the component being turned.Étape 2
natural_image
Technical line drawing of a circular mechanical component with vertical supports and a central hole, shown from two different angles (no text or symbols)Étape 3
natural_image
Technical diagram of a mechanical assembly with labeled parts (no text or symbols present)Étape 4
natural_image
Diagram of a mechanical component inside an oval shape, showing internal components and motion direction (no text or symbols)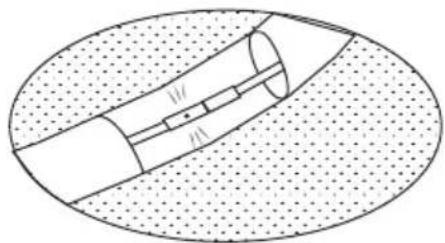
natural_image
Diagram of a mechanical or fluidic component inside an oval boundary, showing internal channels and textured surface (no text or symbols)
natural_image
Pure technical diagram of a mechanical component with no text or symbols
natural_image
3D rendering of a circular trampoline with horizontal bars and a central pool, no text or symbols visibleÉtape 6
natural_image
3D rendering of a circular trampoline with metal frame and ladder (no text or symbols)5.0 SOINS ET ENTRETIEN
natural_image
Illustration of a trampoline with visible exit signs and ladder (no text or symbols on the diagram itself)JumpArena Dual Safety Net 8x12,5FT
Contact:
Dutch Toys Group
EXIT is a registered trade mark of Dutch Toys Group