
43901 - Audio/video converter Lindy - Free user manual and instructions
Find the device manual for free 43901 Lindy in PDF.
Frequently Asked Questions - 43901 Lindy
User questions about 43901 Lindy
0 question about this device. Answer the ones you know or ask your own.
Ask a new question about this device
Download the instructions for your Audio/video converter in PDF format for free! Find your manual 43901 - Lindy and take your electronic device back in hand. On this page are published all the documents necessary for the use of your device. 43901 by Lindy.
USER MANUAL 43901 Lindy
Thunderbolt 3 to Dual DisplayPort Adapter
User Manual English Benutzerhandbuch Deutsch Manuel utiliseur Francais Manuale Italiano
No. 43901
www.lindy.com

Tested to Comply with FCC Standards For Home and Office Use!
Introduction
Thank you for purchasing this Thunderbolt 3 to Dual DisplayPort Adapter. This product has been designed to provide trouble free, reliable operation. It benefits from both a LINDY 2 year warranty and free lifetime technical support. To ensure correct use, please read this manual carefully and retain it for future reference.
The Thunderbolt 3 to Dual DisplayPort 1.2 Adapter uses a single Type C port to attach two Ultra HD 4K DisplayPort monitors or a single Ultra HD 5K DisplayPort monitor (using both DisplayPort connections), giving you a simple way to experience an Ultra HD resolution desktop environment.
Please Note: A computer system which supports Thunderbolt 3 is required. Early Thunderbolt 3 PCs (2015 and early 2016) might require firmware and software updates before all adapters will work.
Package Contents
Thunderbolt 3 to Dual DisplayPort Adapter
This Manual
Features
- Compatible with all Thunderbolt 3 USB Type C equipped computers
Input: Thunderbolt 3 USB Type C connector - male - Outputs: 2x DisplayPort female
Max. resolutions:
4K 4096 x 2160@60Hz
5K 5120 x 2880@60Hz when both DP outputs are connected to a single 5K monitor
Chipset: TPS65983
- Bus powered
Installation & Operation
When first connecting a Thunderbolt 3 device, it must be authenticated through Intel's Thunderbolt 3 software. Use the following instructions as a guide:
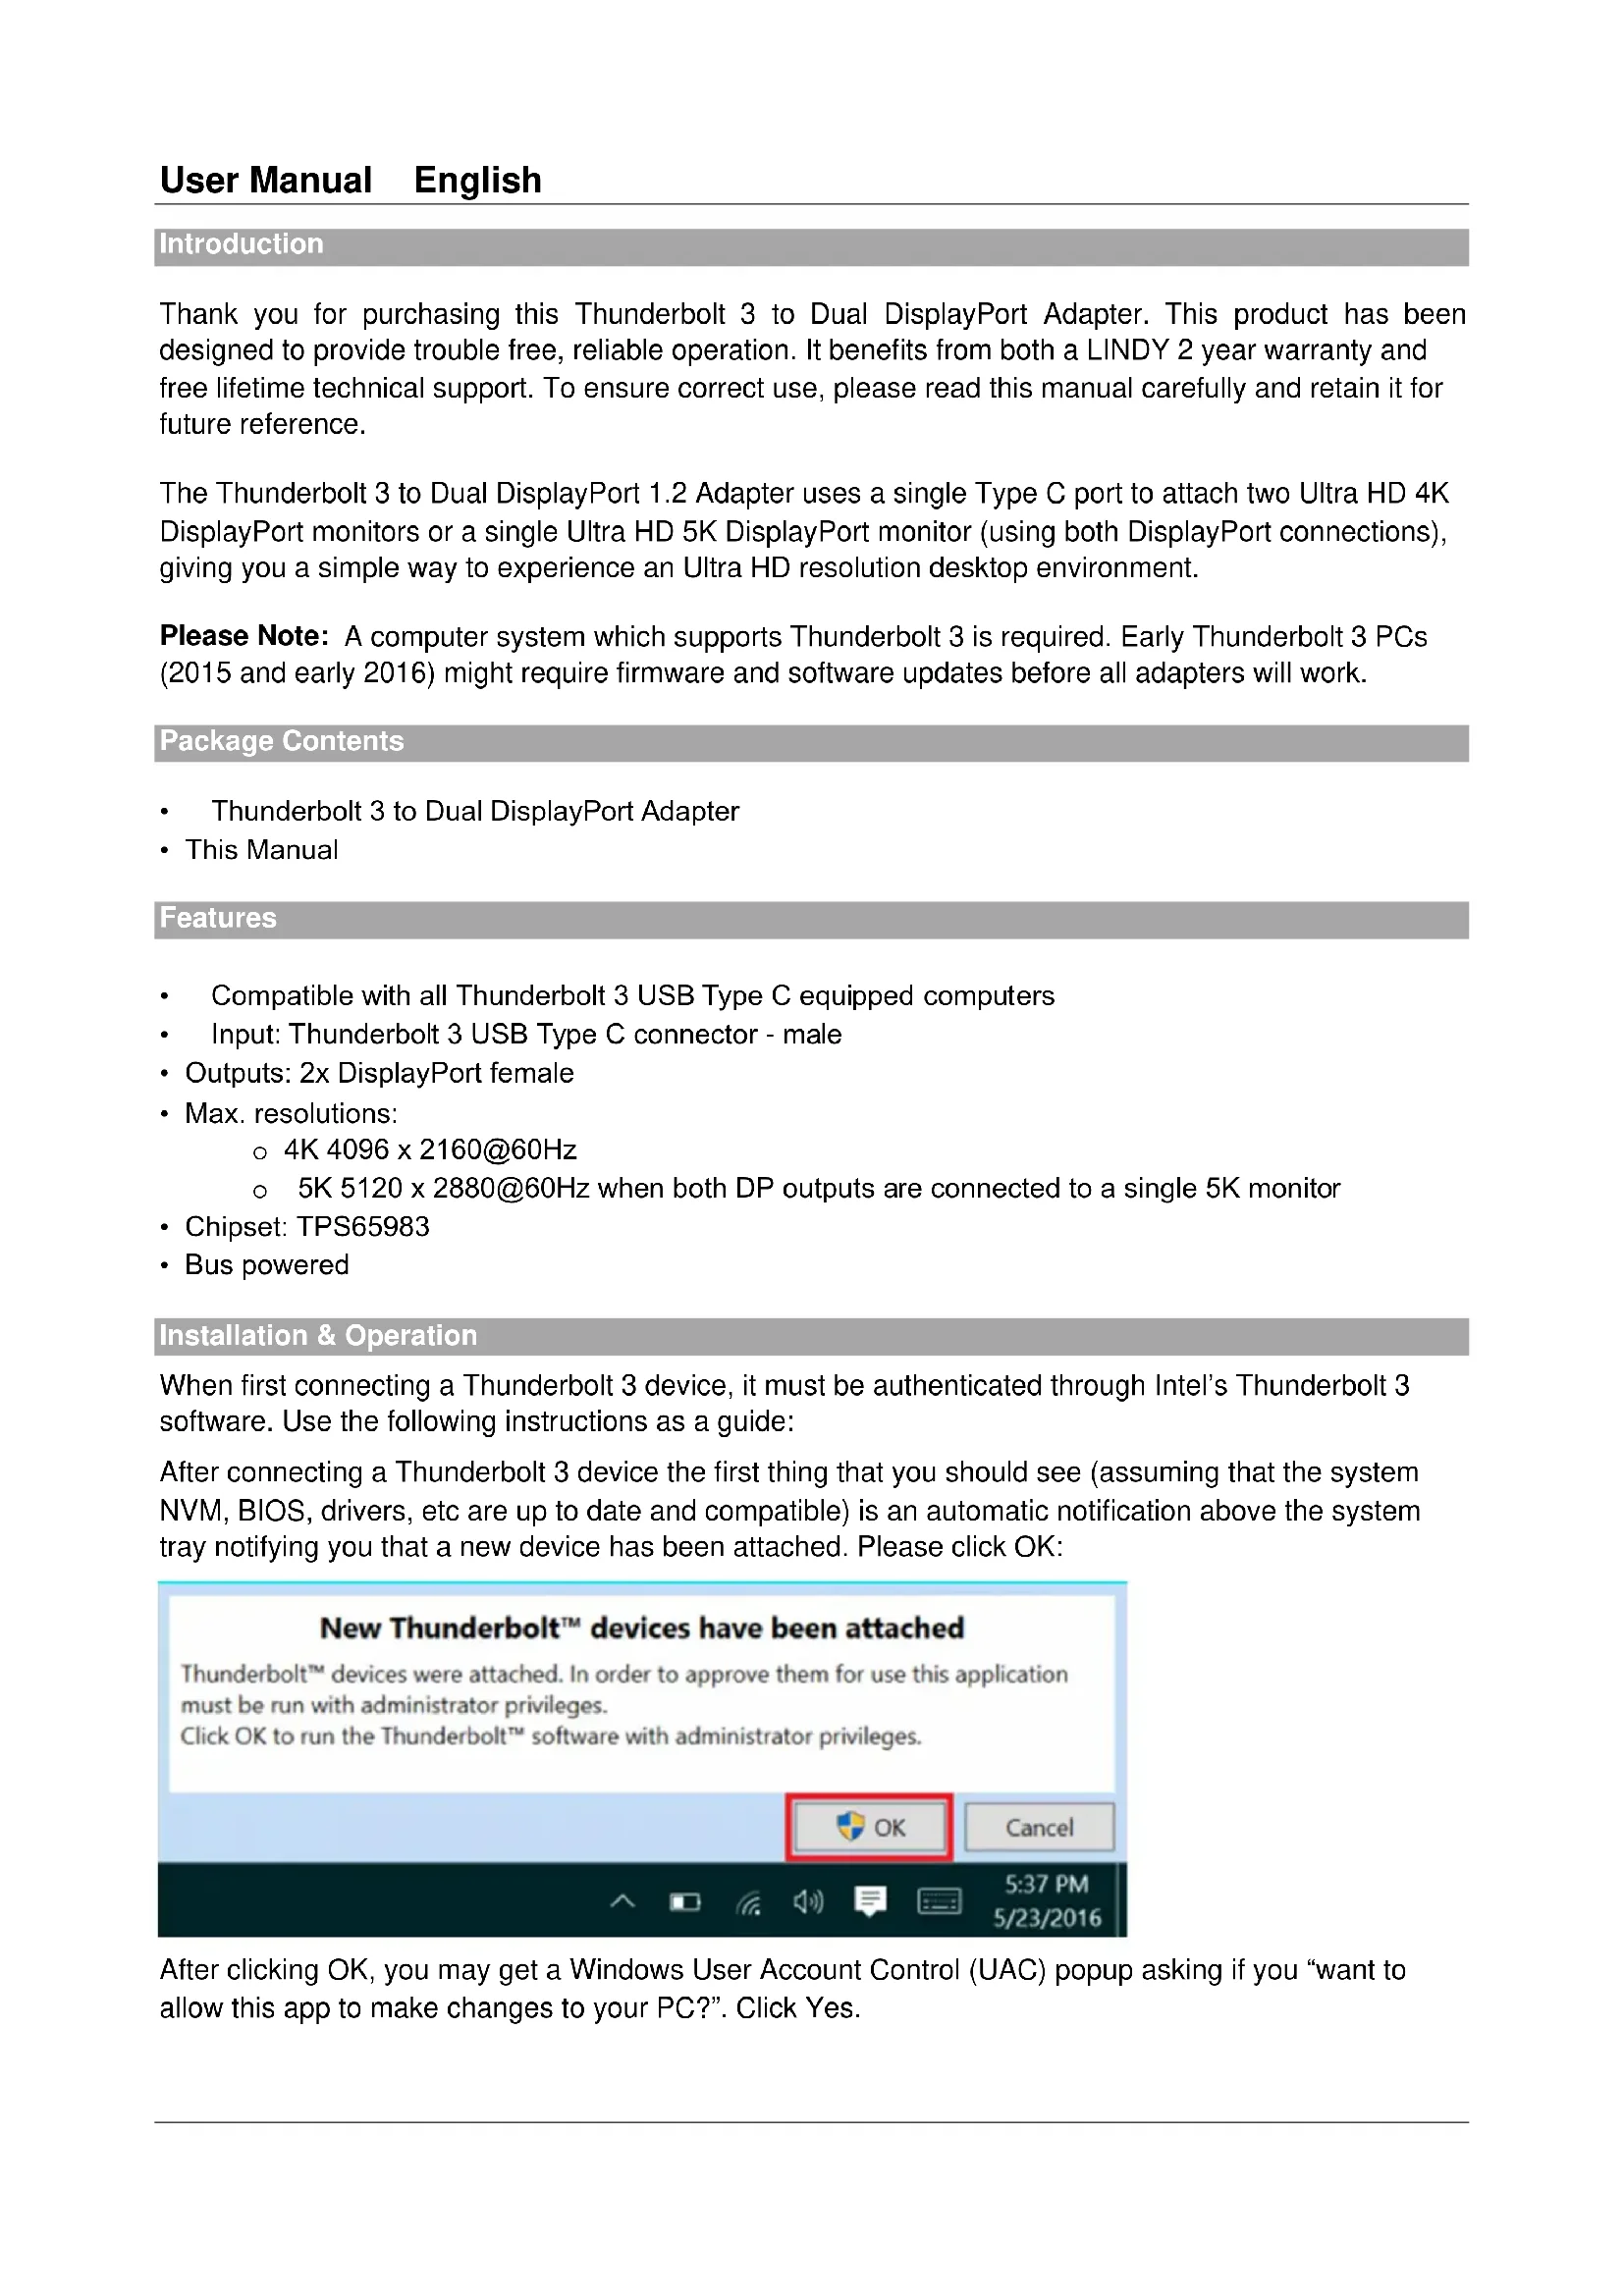
After connecting a Thunderbolt 3 device the first thing that you should see (assuming that the system NVM, BIOS, drivers, etc are up to date and compatible) is an automatic notification above the system tray notifying you that a new device has been attached. Please click OK:
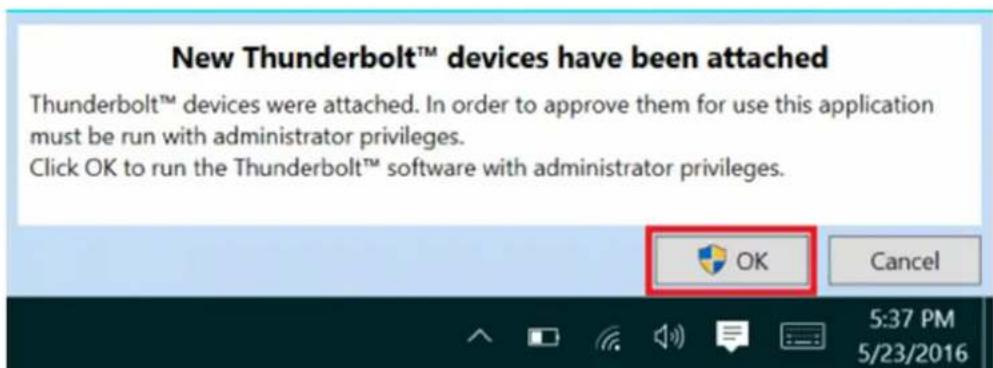
After clicking OK, you may get a Windows User Account Control (UAC) popup asking if you "want to allow this app to make changes to your PC?" Click Yes.
User Manual English
After clicking Yes a window will open, here you can approve the Thunderbolt 3 device that was just attached. Click on the drop down menu where it says "Do Not Connect" and select "Always Connect". Then click OK.
Identifying the NVM:
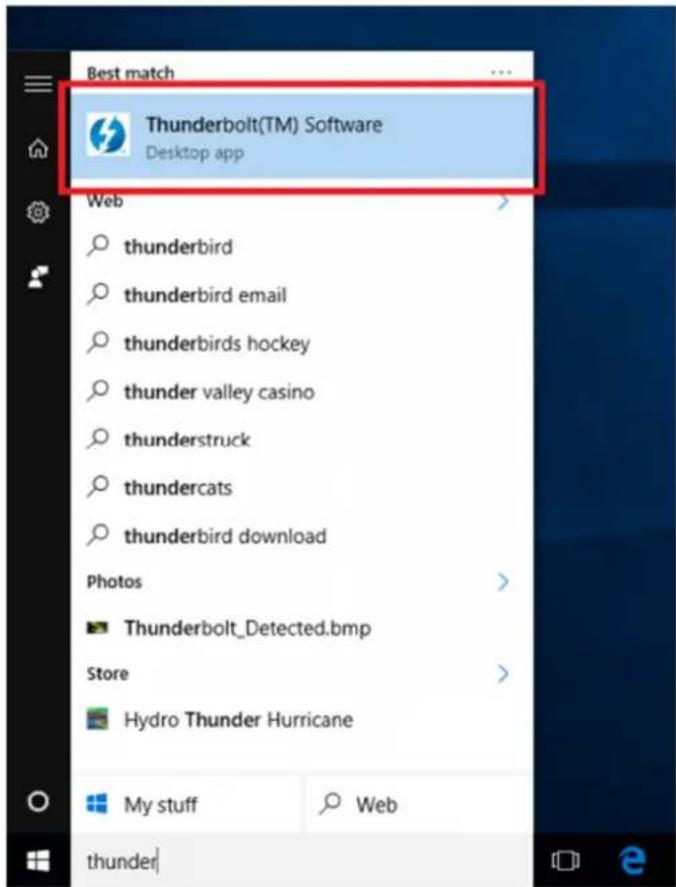
To find out what version of NVM firmware your system has, the first step is to ensure you have the latest Thunderbolt software version which varies depending on the system manufacturer. You should be able to download it from your system manufacturer's website. Once installed you can open the software by searching the start menu for Thunderbolt:
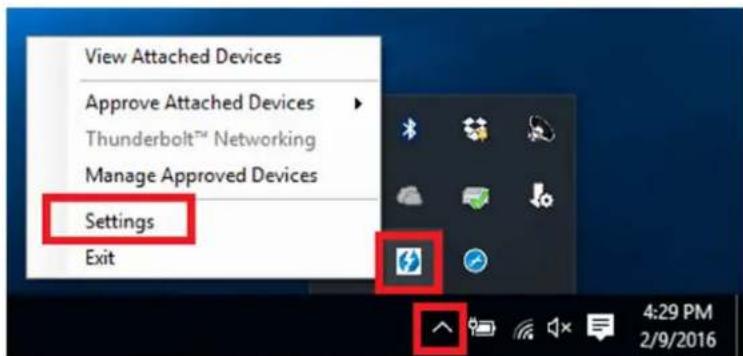
Once open you can find the program sitting in the system tray. You may need to click the caret (up arrow icon) to show all of the running programs then right click on the Thunderbolt icon it and select Settings:
Now you should see the settings window. Click on Details to find out all of the Thunderbolt software and controller information. Unfortunately if a Thunderbolt device has not yet been connected to the system, the information about the NVM firmware may not be available within the utility.
Dual Display Installation
- Power on your computer and connect the Thunderbolt Type C connector of the Adapter to a Thunderbolt 3 equipped port.
- Connect a standard DisplayPort Male/Male cable (not included) to the DisplayPort outputs of the Adapter and to the input ports of your displays. If you are using 4K 60Hz graphics it is recommended to keep the cable distance to 2m maximum)
- Power on the displays and your computer will detect them as two separate displays which can be configured in Display Settings as usual.
Single 5K Monitor Installation
- Power on your computer and connect the Thunderbolt Type C connector of the Adapter to a Thunderbolt 3 equipped port.
- Connect a standard DisplayPort Male/Male cable (not included) to the DisplayPort outputs of the Adapter and to the input ports of your 5K display. It is recommended to keep the cable distance to 2m maximum)
- Power on the display and your computer will then detect it and allow it to be configured in Display Settings as usual.
Einführung
Chipset: TPS65983
- Bus powered
This equipment complies with the requirements relating to Electromagnetic Compatibility Standards EN55022/EN55024 and the further standards cited therein. It must be used with shielded cables only. It has been manufactured under the scope of RoHS compliance.
This equipment has been tested and found to comply with the limits for a Class B digital device, pursuant to part 15 of the FCC Rules. These limits are designed to provide reasonable protection against harmful interference in a residential installation.
You are cautioned that changes or modification not expressly approved by the party responsible for compliance could void your authority to operate the equipment.
This device complies with part 15 of the FCC Rules.
Operation is subject to the following two conditions:
- This device may not cause harmful interference, and
- This device must accept any interference received, including interference that may cause undesired operation.
WEEE (Waste of Electrical and Electronic Equipment), Recycling of Electronic Products
Europe, United Kingdom
In 2006 the European Union introduced regulations (WEEE) for the collection and recycling of all waste electrical and electronic equipment. It is no longer allowable to simply throw away electrical and electronic equipment. Instead, these products must enter the recycling process.
Each individual EU member state has implemented the WEEE regulations into national law in slightly different ways. Please follow your national law when you want to dispose of any electrical or electronic products. More details can be obtained from your national WEEE recycling agency.