USER MANUAL GC9500 PHILIPS
natural_image
White Philips 450 press device with control buttons and a black handle, set against a pink fabric background (no text or symbols on device body)
ENGLISH 3
FRANCAIS 13
ΕΛΛΗΝΙΚΑ 24
text_image
A
M
I
J
K
L

natural_image
Anatomical illustration of a biological structure with labeled part B (no text or symbols present)
natural_image
Anatomical sketch of a joint or ligament structure (no text or labels visible)
natural_image
Medical illustration of a hand holding a small object, possibly a valve or connector (no text or symbols present)
text_image
F
G
natural_image
Pure mechanical component outline without any text, numbers, or symbols
text_image
A
H
E
B
C
N
D
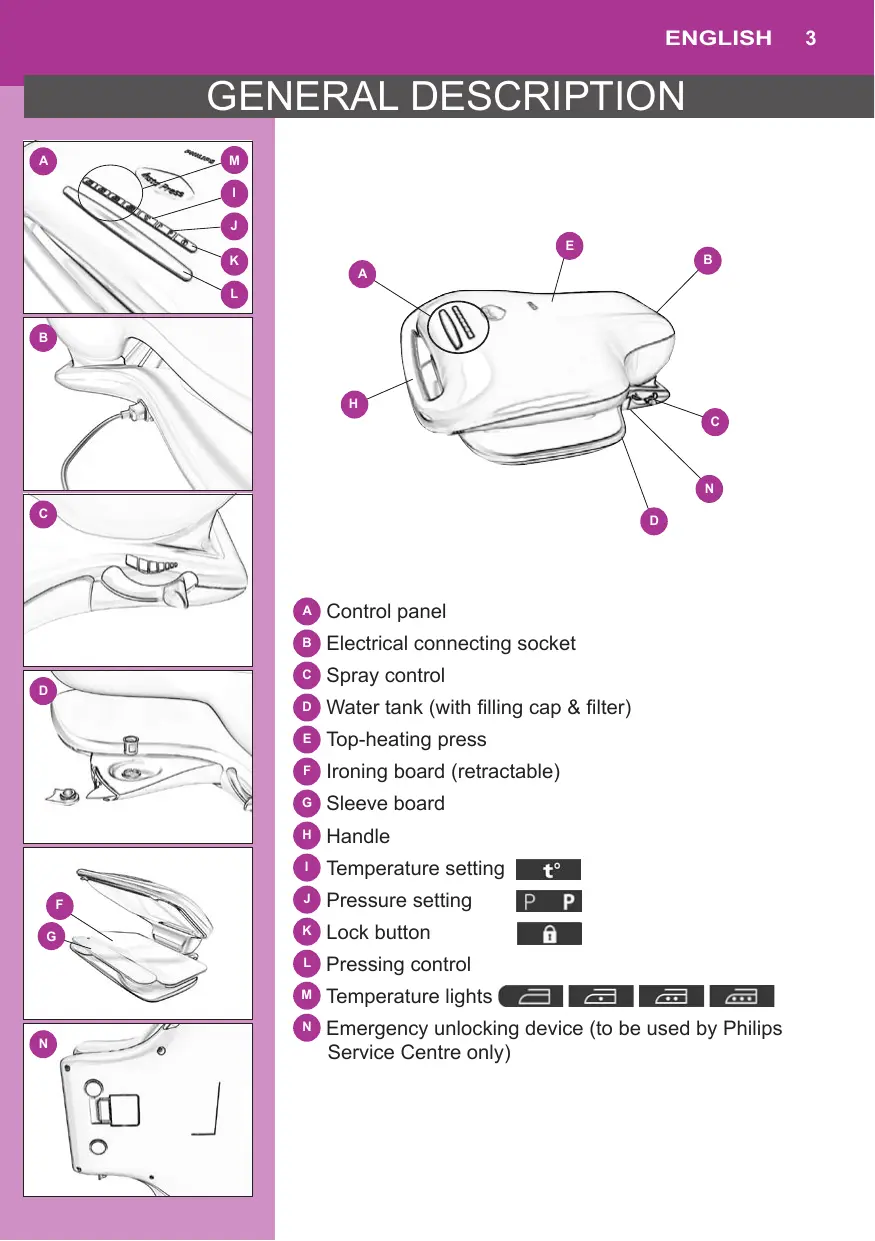
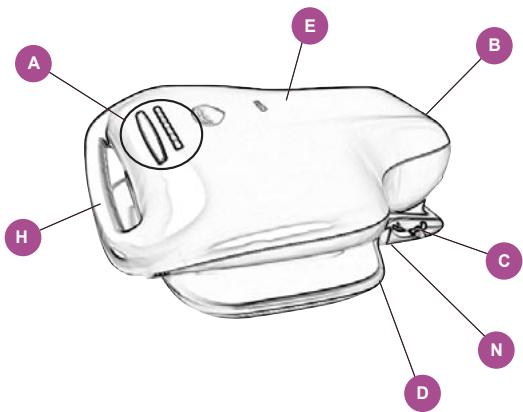
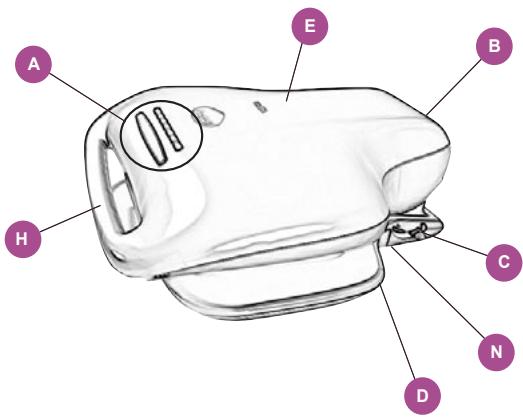
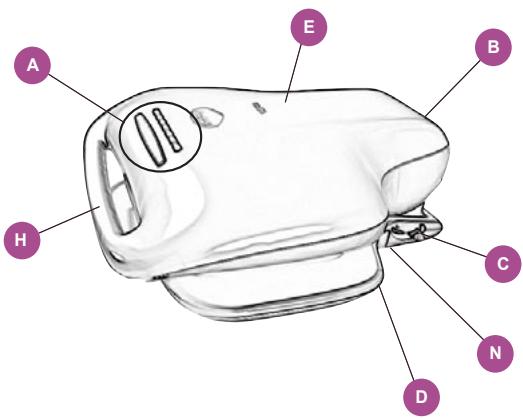
A Control panel
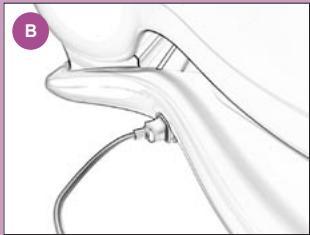
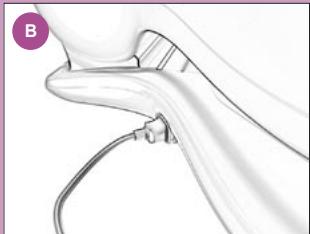
B Electrical connecting socket
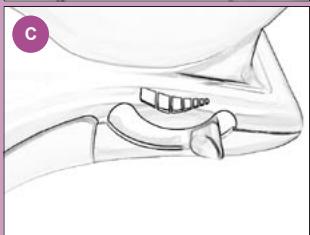
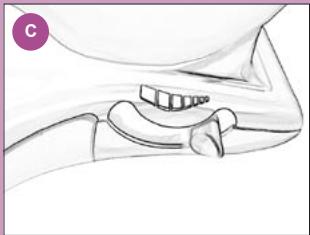
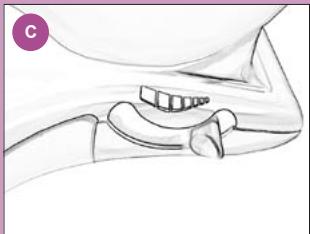
c Spray control
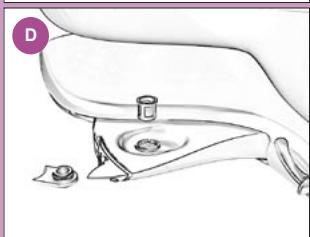
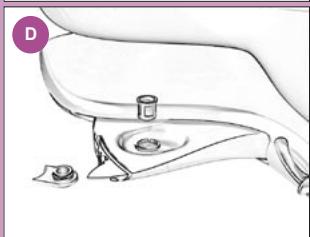
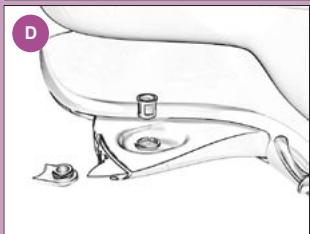
D Water tank (with filling cap & filter)
E Top-heating press
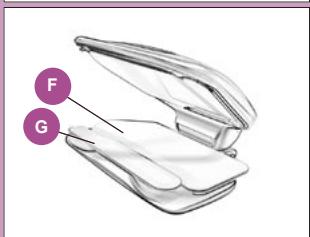
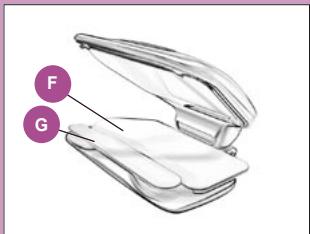
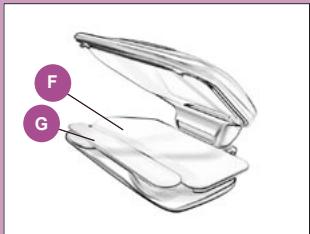
F Ironing board (retractable)
G Sleeve board
H Handle
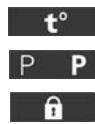
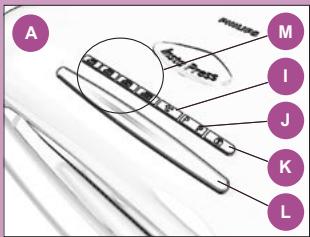
I Temperature setting
J Pressure setting
K Lock button
L Pressing control
M Temperature lights
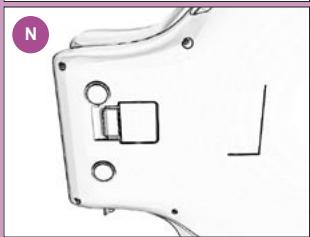
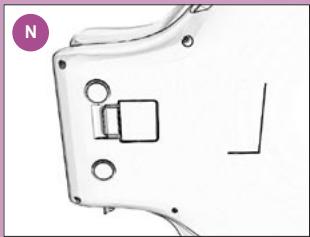
N Emergency unlocking device (to be used by Philips Service Centre only)

IMPORTANT SAFETY INSTRUCTIONS
Read all instructions carefully before using your Insta Press
The press is intended for household use only.
In order to avoid any risk of electric shock, burns or injuries, the following rules must be observed carefully:
- Ensure that voltage is the same as stated on the manufacturer's plate on the appliance.
To reduce the likelihood of circuit overload, do not operate another high wattage appliance on the same circuit.
Do not immerse the appliance in water or other liquid.
Do not touch the appliance with wet or damp hands or feet.
Do not leave the appliance exposed to the weather (rain, sun, etc.).
Do not use the appliance if the plug, the cord or the appliance itself is damaged. Do not disassemble or attempt to repair the appliance, as incorrect reassembling or repair could cause of risk of fire, electric shock, or injury. Repair must be carried out by Philips, a service centre authorised by Philips or similarly qualified persons in order to avoid a hazard.
When you fill with water, replace accessories or have finished ironing and even when you leave the appliance for a short while, unplug the appliance.
▶ Never yank cord to avoid contact with any hot surface. Let appliance cool completely before putting away.
Burns could occur from touching hot metal parts. Do not touch metal ironing surface when appliance is "ON", or during prolonged cool-down period after use.
If an extension cord is absolutely necessary, a 10-Ampere rated cord should be used. Cord rated for less amperage may overheat. Care should taken to arrange the cord so that the cord cannot be pulled or tripped over.
- Close supervision is necessary for any appliance being used by or near children. Do not leave appliance unattended while connected.
▶ Always place the appliance on a stable, level and
horizontal surface. Do not put the appliance on the soft part of an ironing board.
- Never place damp cloths or clothes on the appliance to dry.
When the appliance is in use, never touch the hot surfaces.
Do not clean the inside of the appliance with flammable substances.
Do not place it on damp or wet surfaces.
Do not leave the packaging within the reach of children - it could be a source of danger.
Use the appliance only for its intended purpose. Any other use is improper and thus dangerous. PHILIPS will not be liable for any damages caused by its improper, wrongful or unreasonable use.
Before carrying out any cleaning or maintenance operations, switch off the appliance and cut off the power supply by removing the plug from the mains socket.
In the case of failure and/or incorrect functioning of the appliance, switch it off at once and do not tamper with it. For any repairs, contact a Technical Assistance Center authorized by PHILIPS to ensure use of genuine manufacturer's spare parts. Any failure to comply with these requirements may render the appliance dangerous and will invalidate the guarantee.
If it is decided to scrap the appliance because it is no longer working, after removing the plug from the socket, it is recommended to cut off the plug thus rendering the machine unusable. You are also advised to make safe any parts of the appliance that could represent a hazard, in particular to children who could use it as a toy.
The press must be immediately unplugged from the mains socket after use, when left unattended, during maintenance or when replacing parts or accessories.
- Never pull on the power cord to remove the plug from the socket or the mains, hold onto the plug for pulling.
In case of abrupt cut off in power supply, the press will remain closed. Unplug the appliance from the socket, reinstate the power, and plug in the cord to
enable unlock.
KEEP THESE INSTRUCTIONS!
SAFETY
Never leave the appliance unattended when it is connected to the mains.
PREPARING FOR USE
Place the appliance on a table or on a stable & level surface.
Locking device
natural_image
Close-up illustration of a curved mechanical component with a small attached bracket (no text or symbols visible)
To unlock:
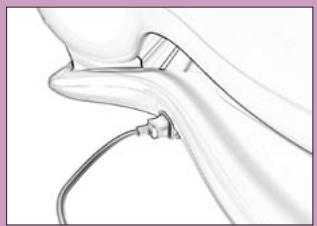
1 Plug the connecting cable into the mains and the socket of the press.
2 The lock button ( 🔍 ) will light up.
3 Press the lock button ( 🔍 ) once; the press will be unlocked and the top-heating panel opens up.
▶Note: The press will be locked again if the lock button is pressed twice. To unlock the press, unplug from the mains once and plug in again. Press the lock button once to unlock.
To lock;
1 When the appliance has cooled down sufficiently; Plug the connecting cable into the mains, close the top-heating press, and press the lock button ( 🔍 ) once to lock it.
▶Note: The locking device is only possible when the press is cooled down sufficiently (to below 50^ c).
natural_image
Line drawing of a toilet seat with a sink and handle (no text or symbols)
Filling water
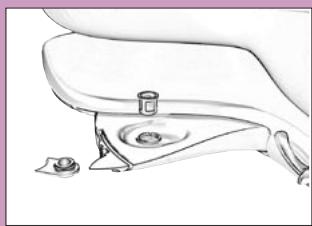
1 Slide out the water tank from the casing.
2 Open the filling cap and fill with tap water.
3 Close the filling cap and push the water tank back to the original position.
Do not fill the tank without the filter in place.
Do not forget to put back the filling cap properly after refilling.
Do not put perfume, vinegar, starch, descaling agents, ironing aids or other chemicals in the water tank.
Setting the spray
text_image
MAX
OFF
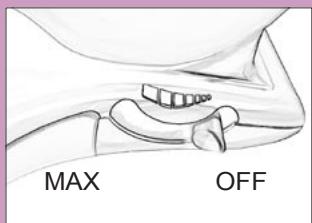
1 By adjusting the spray control, the amount of spray is regulated according to the fabric type.
- Dry; synthetic fabrics, silk.
- Moist; cotton, linen, cotton blends, wool.
2 To get the required amount of spray for easy removal of creases, adjust the spray control towards the ‘MAX’ position. Full amount of spray can be obtained with spray control adjusted to the far-end of the ‘MAX’ position.
3 For dry ironing, spray can be turned off completely by adjusting the spray control to the far end of the 'OFF' position.
4 Spray can be adjusted anytime during ironing.
▶Note: When the appliance is new or after extended period of storage, the spray needs to be primed for first use. Priming is to fill up the internal tubing with water before the spray can start to function properly.
To do this:
1 Fill the water tank.
2 Adjust the spray control to 'OFF' position.
natural_image
Illustration of a transparent plastic container with a curved arrow indicating rotation (no text or symbols)
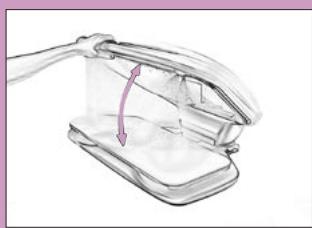
3 Move the top-heating press in quick succession for 15-20 times.
4 Adjust the spray control to 'MAX' position.
5 Move the top-heating press in quick succession for a few times, spray will commence.
Setting the temperature and pressure
text_image
Scanned document with Chinese text and two horizontal lines, likely part of a form or diagram.
1 Unlock the top-heating press (see "Locking device" section).
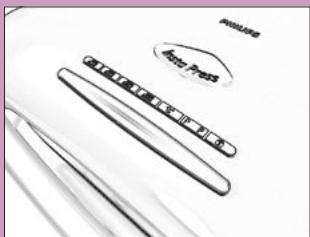
2 When the top-heating panel is unlocked, then the temperature can be adjusted by pressing the temperature setting ( t^ ) accordingly.
3 When the required temperature is selected, the temperature light will light up.
- Synthetic fabrics
- Silk
- Wool
- Cotton, Linen
4 As soon as the temperature is ready, the temperature setting ( t^ ) light goes off.
5 Select the required pressure by pressing the pressure setting.
- P P 1 lamp lights up; 50% pressure (23-25kg)
- P R 2 lamps light up; 100% pressure (45-50kg)
▶Note: Use lighter pressure for delicate fabrics and higher pressure for tough creases or thick fabrics.
6 The appliance is ready for use when the required temperature is reached, within about 5 minutes.
Adjusting the ironing board
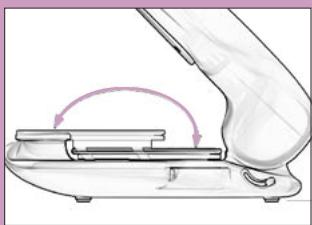
1 The ironing boards are inter-changeable anytime during ironing.
natural_image
Diagram of a robotic arm gripping a mechanical component, with no visible text or symbols
2 Adjust the ironing board accordingly:
- The large ironing board provides fast ironing on normal and bulky garments or several small items put together.
- The sleeve (smaller) ironing board allows ironing on difficult parts or smaller pieces of garment.
USING THE APPLIANCE
Pressing process

natural_image
Illustration of a medical device with a purple arrow indicating rotation or movement (no text or symbols)
1 Set the required temperature and adjust the amount of spray accordingly.
2 Layout the garment on the ironing board, smooth out the garment to avoid unwanted creases in pressing (see ironing tips).
3 Apply spray according to the type of fabric (see setting the spray' or 'ironing tips').
4 Spray is dispensed when the top-heating press is closed in quick action. Repeat this a few times if more moisture is needed on the garment.
Take care not to over moisten the fabric to avoid big water droplets.
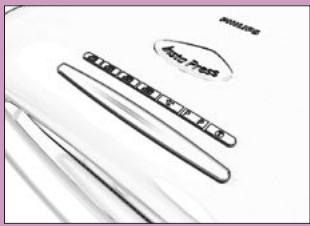
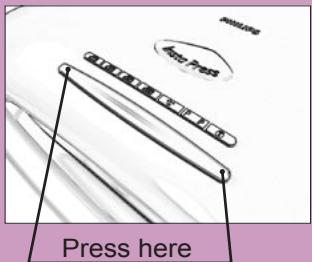
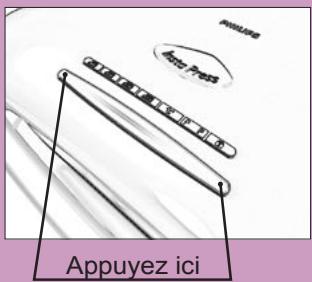
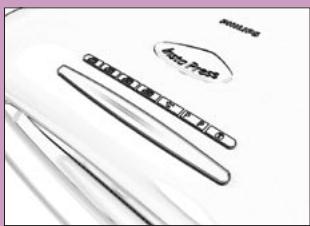
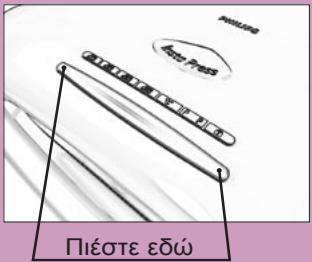
5 Close the top-heating press fully and activate the pressing control, by pressing onto the right or left side of the pressing control.
6 Press & hold the pressing control for a few seconds, automatic pressing will be applied.
7 Release the pressing control and the press will open up. If the garment is still moist, repeat the pressing process.
8 Lift up the top-heating press and rearrange the garment to continue ironing.
9 Repeat this until the entire garment is pressed to satisfaction.
text_image
Press here
10 If the pressing control is held for more than 7 seconds, there is a warning signal to prevent overheating of garment (see ‘Safety Feature’ section).
Do not touch the hot heating press (metallic plate). Keep the hand away from the hot plate during arrangement of garment.
SAFETY FEATURES
1 The duration of each pressing cycle should not be more than 10 seconds.
2 When the top-heating press is closed and the pressing control pressed, the caution buzzer signal will signal after 7 seconds.
3 The heating and pressing control will switch off automatically after 10 seconds.
4 The heating will be switched off automatically when the press is not used for 15 minutes.
▶Note: Keep both hands on the press handle when closing the top-heating press, to prevent the hand from accidental clamping and scorching.
▶Note: The plastic housing of the appliance keeps the temperature low for comfort in usage, and to save energy consumption.
▶Note: In case of abrupt cut off in power supply, the press will remain closed. Unplug the appliance from the socket and send it to the local Philips dealer or Service Department of Philips Domestic Appliances and Personal Care BV.
Ironing tips
natural_image
Line drawing of a closed mechanical device with a textured internal component (no text or symbols)
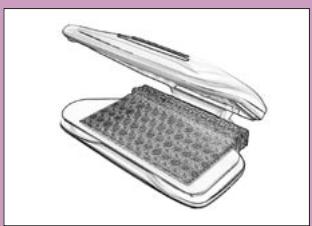
1 When pressing monograms or embroideries, place them face down onto the ironing board; this is to avoid direct contact with the top-heating press.
2 For woolens, knitwear, jersey, starched & added finished fabrics, place a piece of pressing cloth on top of fabric before pressing. Lightly moisten the
pressing cloth with the spray.
3 To avoid scorching the fabric, start off with items that require low temperature, as the cooling down process is longer.
4 Large garments should be arranged behind the ironing board, in order not to crease again after pressing. Move the garment progressively towards you during pressing. Alternatively, move the large garment from left to right.
5 To take care of buttons or zip fasteners made of synthetic materials, place the garment face down to avoid direct contact with the top heating press while ironing.
text_image
here
Max Press
MAX OFF
1 To switch off the heating, press the temperature setting t^ until all the temperature lights switch off.
2 Switch of the spray supply by setting the spray control to 'OFF' position.
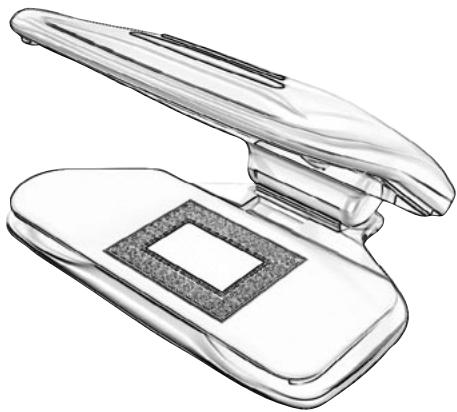
3 Leave the top-heating press opened and let it cool down to room temperature.
Do not touch the hot heating press (metallic plate). Keep the hand away from the hot plate, keep appliance away from children.
4 When the appliance has cooled down sufficiently; plug the connecting cable into the mains, close the top-heating press, and press the lock button once to lock it.
5 Unplug the connecting cable from the mains.
6 The appliance can be transported or stored.
▶Note: The locking device is only possible when the press is cooled down sufficiently (to below 50^ c).
Maintenance
1 To keep the top-heating press clean, clean it at lukewarm temperature.
2 Use a piece of moist cotton cloth (without fluff) to wipe away stain from the metallic surface of the press.
3 For persistent stain, wipe the press with vinegar, and clear away the vinegar with moist cloth.
Do not use alkaline cleaning agent or abrasive material (eg. steel wool) for cleaning.
▶Note: The ironing board cover can be replaced from time to time. Replacement parts (ironing / sleeve board cover/ foam, water tank filter, filling cap & spray nozzle) can be obtained from the local Philips dealer (see “Guarantee & service” section).
GUARANTEE & SERVICE
If you need information or if you have a problem, please visit the Philips website at www.philips.com or contact the Philips Customer Care Centre in your country (you will find its phone number in the worldwide guarantee leaflet). If there is no Customer Care Centre in your country, turn to your local Philips dealer or contact the Service Department of Philips Domestic Appliances and Personal Care BV
Replacement parts:
4239 022 55171 Ironing board foam
4239 022 55181 Ironing board cover
4239 022 55191 Sleeve board foam
4239 022 55201 Sleeve board cover
4239 022 55211 Filling cap
4239 022 55221 Water tank filter
4239 022 55231 Spray nozzle
DESCRIPTION GÉNÉRALE
text_image
A
M
I
J
K
L
natural_image
Medical illustration of a surgical procedure on a hip joint (no text or labels)
natural_image
Anatomical sketch of a human hip joint (no text or labels)
natural_image
Medical illustration of a hand holding a small object, possibly a valve or connector (no text or symbols present)
text_image
F
G

natural_image
Mechanical component diagram with mounting holes and a central square feature (no text or symbols)
text_image
A
E
B
H
C
N
D
natural_image
Medical illustration of a joint with surgical instrument (no text or labels)
natural_image
Line drawing of a toilet with a sink and handle, no text or symbols present
natural_image
Illustration of a hand holding a transparent plastic device with a purple arrow indicating rotation (no text or symbols)
natural_image
Diagram of a mechanical device with a curved arm and internal components, showing motion arrows (no text or symbols)
natural_image
Diagram of a mechanical device with a curved arrow indicating rotation or movement (no text or symbols present)
natural_image
Illustration of a closed open electronic device with a grid-patterned substrate (no text or symbols)
text_image
A
M
I
J
K
L
natural_image
Medical illustration of a surgical procedure on pelvic region, showing anatomical structures without any text or labels
natural_image
Anatomical sketch of a joint or bone structure with no visible text or labels
natural_image
Medical illustration of a hand holding a small object, possibly a valve or instrument, with no visible text or symbols.
text_image
F
G
natural_image
Pure mechanical component outline without any text, numbers, or symbols
text_image
A
E
B
H
C
N
D
natural_image
Medical illustration of a surgical procedure on a hip joint (no text or labels)
natural_image
Sketch of a toilet seat with a small sink and a small object on the side (no text or symbols)
natural_image
Illustration of a hand holding a transparent plastic device with a purple arrow indicating rotation (no text or symbols)
natural_image
Diagram of a robotic arm joint with a hand holding the blade (no text or symbols present)
natural_image
Illustration of a hand holding a transparent plastic device with a purple arrow indicating rotation (no text or symbols)
natural_image
Line drawing of a closed electronic device with a textured surface (no text or symbols)
natural_image
Illustration of a mechanical device with a flanged top and a textured base (no text or symbols)
Towels
Centre the towel on the ironing board, then press.
Serviettes
Fold twice by turning the edges at the front and back over to the centre (or as necessary), then press.
natural_image
Illustration of a mechanical device with internal components and a textured surface (no text or symbols)
natural_image
Technical line drawing of a handheld electronic device with a square button and handle (no text or symbols)
Napkins, Handkerchiefs, etc.
Place one or more napkins or handkerchiefs on the ironing board and press.
Serviettes, foulards, etc.
If necessary, unfurl the edges of handkerchiefs by pressing them beforehand on the sleeve board.
natural_image
Line drawing of a mechanical device with a textured base and open lid (no text or symbols)
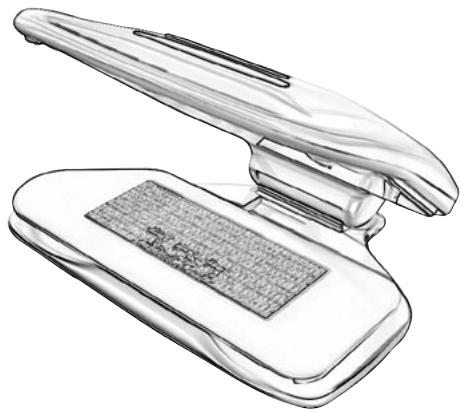
natural_image
Line drawing of a mechanical device with a textured base and open lid (no text or symbols)
Folding is done in the usual way: fold, press and so on. Finish by folding the ends over to the centre, then press.
For considerable time saving, fold serviettes, hankies, small garments, briefs, etc. in advance. Place two or three of them on the ironing board and iron them all in one go.
natural_image
Line drawing of a handheld electronic device with a grid display (no text or symbols)
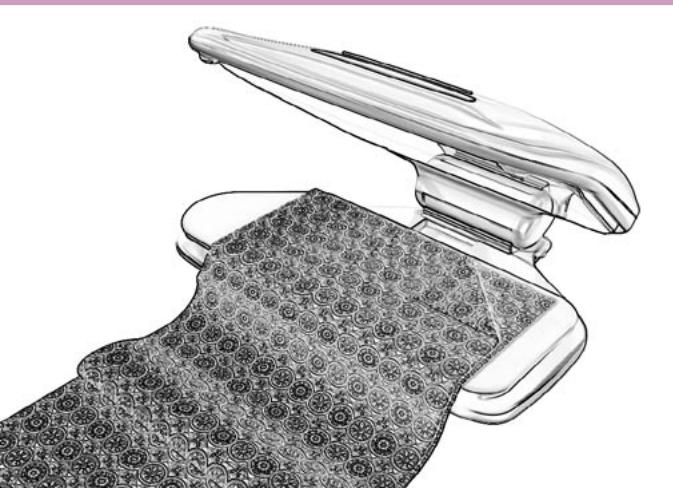
natural_image
Illustration of a medical device with open lid and patterned fabric underneath (no text or symbols)
Sheets
Fold the sheet two or three times before placing it on the ironing board.
Draps
Fold the sheet gradually on the ironing board, so as to be able to...
natural_image
Illustration of a hand holding a device with a patterned fabric underneath (no text or symbols)
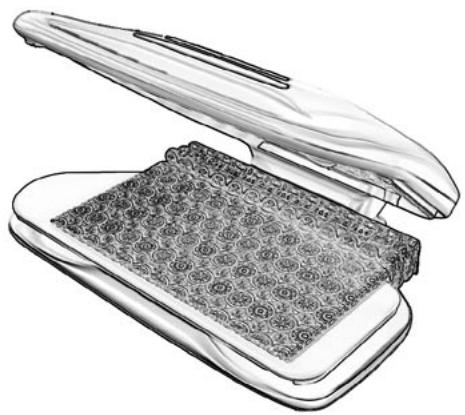
natural_image
Illustration of a closed open electronic device with a textured surface underneath (no text or symbols)
...arrange it easily in the space behind the board. Make it a habit to hold the sheet on either side, beyond the edge of the board. This avoids touching the top heating press with the hands.
Always iron by moving the sheet towards you, from back to front. This is also how to proceed with most large items.
natural_image
Line drawing of a folded garment with patterned fabric underneath, no text or symbols present
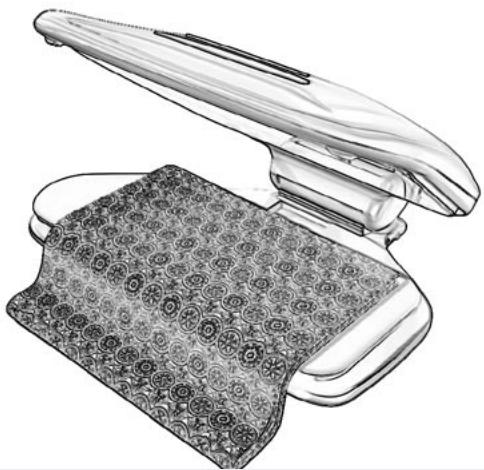
natural_image
Illustration of a hand holding an open device and a patterned fabric item (no text or symbols)
Then fold the sheet by turning it over a few times on the board.
Finish the folding. Close the press at mini-pressure, keeping the top heating press pressed against the sheet for a few seconds.
The sheet is thus folded, ready to be put away.
Double Bed Sheets
They can also be ironed by folding them beforehand and then moving them across the ironing board from left to right.
natural_image
Illustration of a mechanical device with a textured base and open lid (no text or symbols)
natural_image
Line drawing of a hand holding a cloth, with a mechanical device above (no text or symbols)
Fitted Sheets with Elastic Corners
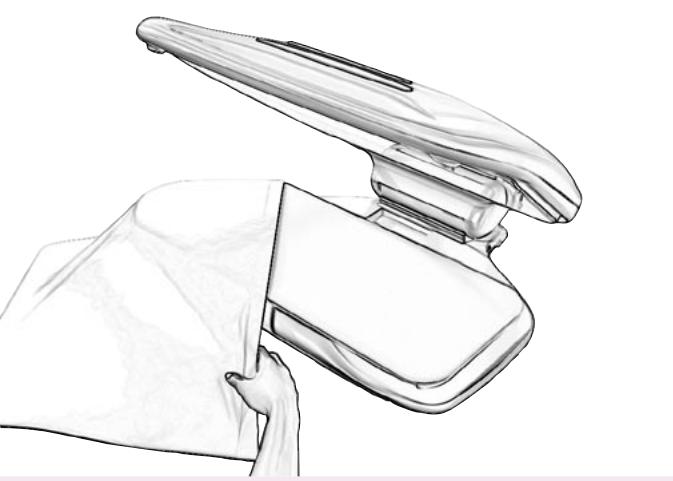
Start with the corners. To avoid creases, stretch the fabric by pulling the elastic while pressing.
Insert one corner into another and continue by pressing two-fold, shifting the edges from left to right.
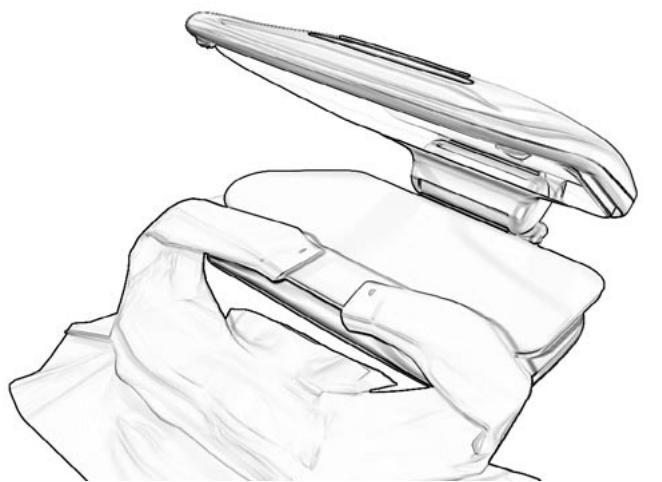
Sleeve board: arrange the shoulders (yoke) on the sleeve board. Let the collar hang over.
Chemises
natural_image
Line drawing of a garment with a textured fabric underneath (no text or symbols)
natural_image
Line drawing of a robotic arm gripping a device, with no visible text or symbols
Sleeve board: put the cuffs in place, spreading out the pleats if necessary. Press all the way round.
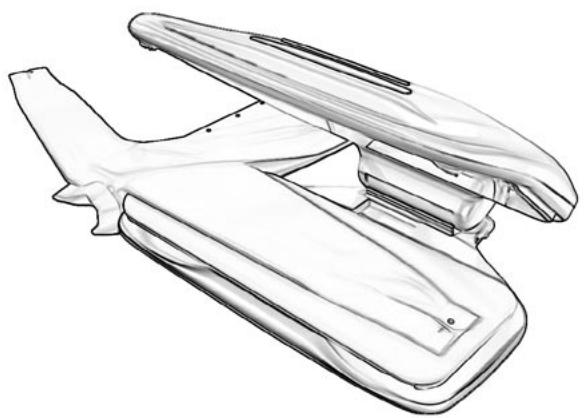
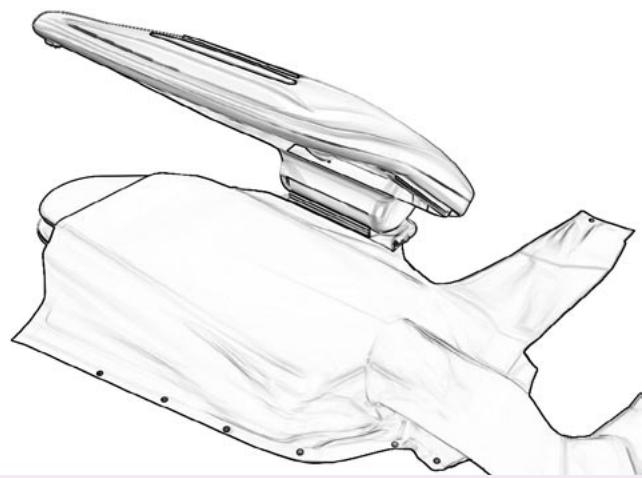
Ironing board: stretch out the shirt to the back, at the left, with the collar towards you, in order to place the sleeve correctly on the ironing board. Adapt the top of the sleeve to the shape of the board.
natural_image
Technical line drawing of a mechanical component or assembly (no text or symbols visible)
natural_image
Line drawing of a mechanical component or device with no visible text, numbers, or symbols
Press the second sleeve as well.
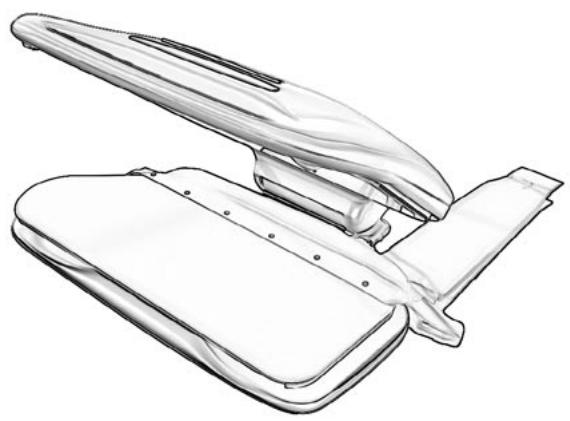
Take the two cuffs with your right hand and the collar with your left. Pass everything behind the ironing board. Spread out the sleeves backwards at the right.
natural_image
Technical line drawing of a mechanical component or device (no text or symbols visible)
natural_image
Technical line drawing of a mechanical component with flanges and a rectangular base (no text or symbols)
The collar being on the right, hold its tip and the bottom end of the shirt front outside the board and draw the shirt opening to the front edge. The end of the board fits the shoulder and collar seams.
Hold the collar with your finger tips so that the curved edge of the neck opening is flat against the ironing board. Press.
natural_image
Technical line drawing of a mechanical component or bracket (no text or symbols)
natural_image
Technical line drawing of a medical or surgical device with a clamped component (no text or symbols)
Move the shirt towards you. Press the side below the sleeve.
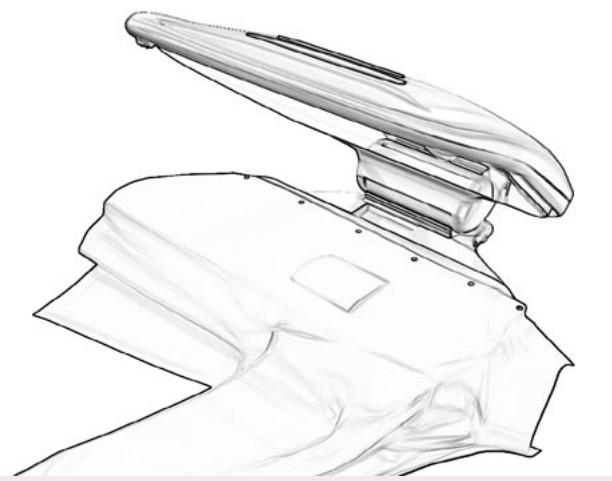
Back: Continue in the same way, drawing the shirt towards you, until you reach the front opening.
natural_image
Technical line drawing of a mechanical component with layered structure (no text or symbols)
natural_image
Technical line drawing of a mechanical component with layered structure (no text or symbols)
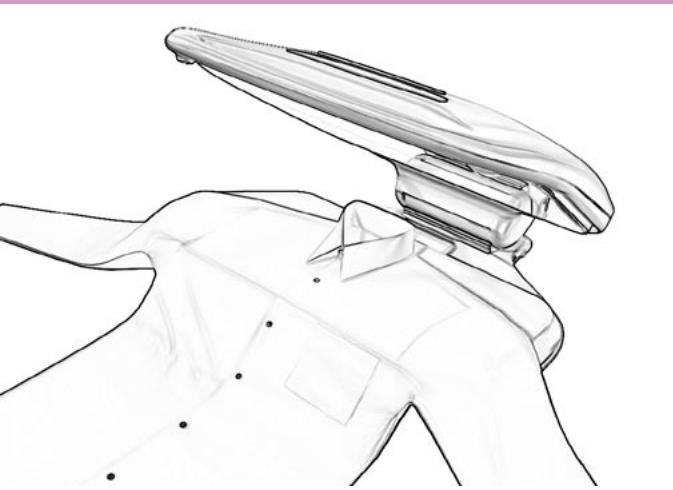
For the front opening, hold the collar with your finger tips again, so that the curved edge of the neck opening is flat against the ironing board.
Collar: Slightly lower the top heating press to dampen the collar properly with the vaporizer. Stretch the collar well with your hands, then press it right side up.
natural_image
Line drawing of a medical device with a clamped arm and gauze, no text or symbols present
natural_image
Line drawing of a person in a shirt with a high-shoulder hat (no text or symbols)
Fold the collar by hand, closing the buttons while still warm. Bottom of the shirt: Spray (dampen) and press it on the ironing board. Put the shirt on a hanger or fold it on the ironing board. Use the sleeve board to press folds that you want well marked.
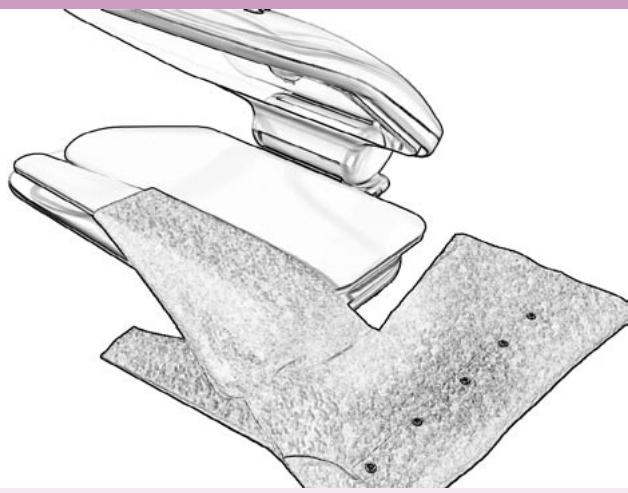
According to the pattern, place the flounces either on the edge of the sleeve board or on the left side of the ironing board.
Volants
natural_image
Line drawing of a mechanical component with layered structure (no text or symbols)
natural_image
Technical line drawing of a mechanical assembly with textured base and clamping mechanism (no text or symbols)
Sleeve without fold
Sleeve board: place the two layers on the sleeve board, folding the seam and making the upper part hang over the front edge.
Manche sans pli
Sleeve board or ironing board: press them on the right side, with the seam underneath (against the padding of the plate). Only apply a mini-pressure.
Cravates
natural_image
Line drawing of a mechanical device with a handle and blade, no text or symbols present
natural_image
Illustration of a hand holding a medical device with a clamped device above it (no text or symbols)
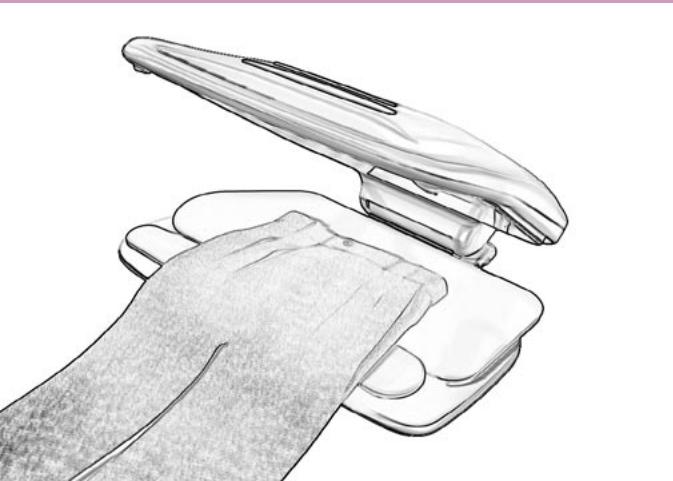
Trousers
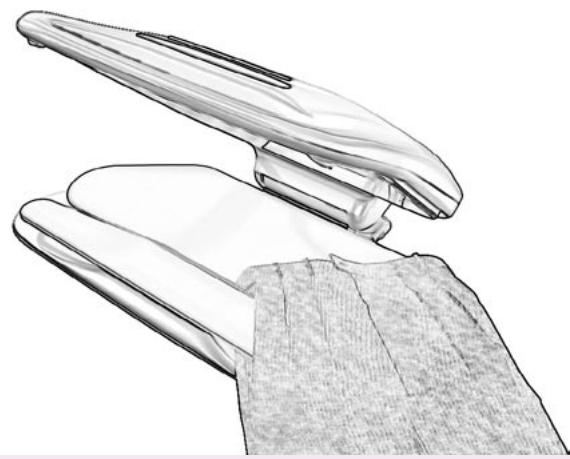
For wool and other fabrics, depending on the composition, it is advisable to use a pressing cloth. Sleeve board: place the top of the trousers on the sleeve board and dampen with the vaporizer before pressing.
Pantalons
Sleeve board: press the waistband and the pleats, rotate them around the sleeve board.
natural_image
Line drawing of a hand holding a flat object, with textured fabric underneath (no text or symbols)
natural_image
Technical line drawing of a mechanical component with layered structure (no text or symbols)
Sleeve board: slide the pockets over the end of the sleeve board. Press.
Ironing board: Press the inside of the crotch front.
natural_image
Line drawing of a modern mechanical device with a strap and handle (no text or symbols)
natural_image
Technical line drawing of a mechanical device with a handle and lever (no text or symbols)
Front crease at the top of the trousers.
Front crease, bottom of trousers.
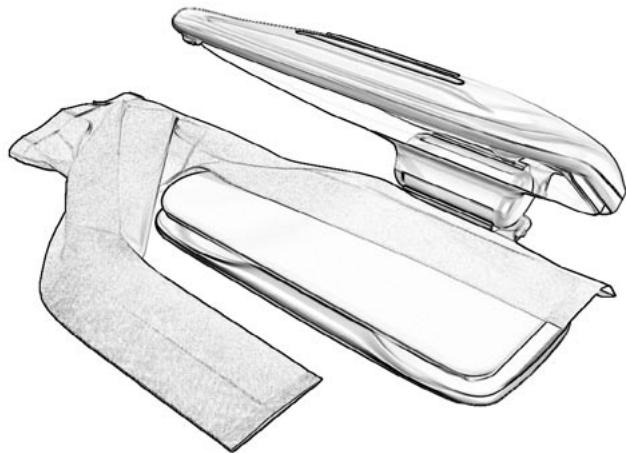
Let the hem or turn-up hang off the end of the board, in order not to leave a mark on the fabric. Give the hem a slight press after having ironed the rest.
Plis avant, bas des pantalons.
natural_image
Line drawing of a robotic arm with a handle and wrist strap (no text or symbols)
natural_image
Technical line drawing of a garment sleeve and collar assembly (no text or symbols)
Back crease, bottom of trousers. Let the hem or turn-up hang off the end of the board, in order not to leave a mark on the fabric.
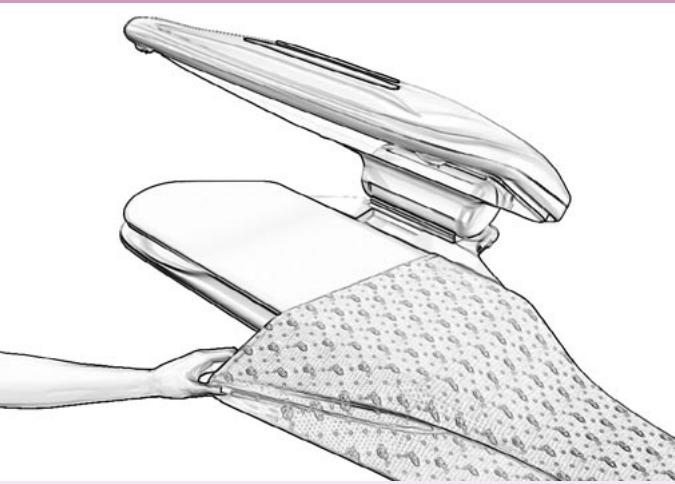
Back crease at the top of the trousers. Give the hem or turn-up a light press to finish the job.
natural_image
Technical line drawing of a mechanical component with layered structure (no text or symbols)
natural_image
Line drawing of a mechanical device with a handle and textured fabric (no text or symbols)
Pyjamas
Rotate the waist around the ironing board, keeping the elastic stretched in order to avoid unwanted creases.
Pyjamas
They are generally pressed flat on the ironing board. Depending on the shape, start by pressing the sleeves. T-shirts with fancy decorations like pearls, sequins or relief transfers are ironed with the fancy pattern against the padding of the board in order to avoid that they will stick to the hot top heating press.
T-shirts
natural_image
Line drawing of a ship's deck with warning symbols (no text or labels)
natural_image
Technical line drawing of a mechanical device with open lid and internal cutout (no text or symbols)
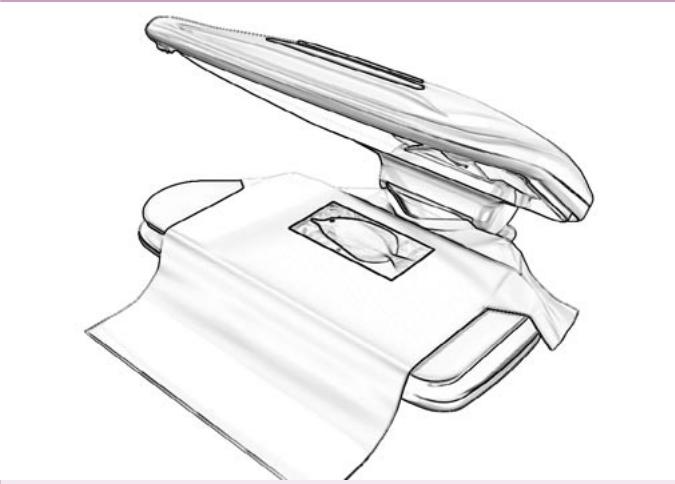
A wide variety of transfers can be found in the shops. Apply these transfers according to the heating time recommended by the supplier. If the heating time should be more that 10 seconds, release the «Pressing control» button as soon as the buzzer sounds in order to avoid automatic disconnection of the press. Then push it again.