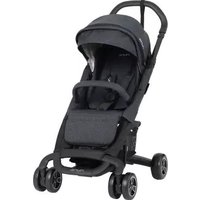
USER MANUAL Zaaz Nuna
Designed around your life

IMPORTANT! KEEP THESE INSTRUCTIONS FOR FUTURE REFERENCE:
READ CAREFULLY
Contents
English 1-18
Product Information
Product Registration 4
Warranty
Contact
Child Usage Requirements 5
Warnings 6
Parts List 7
Product Set Up 8
Product Use 12
Cleaning and Maintenance 18
French 19-40

4 5
Model Number:
Manufactured in (date):
Product Registration
Please fill in the above information. The model number and the manufactured in date are located on a label on the bottom of the seat. Fill out the prepaid registration postcard attached to the product and mail it today.
To register your product please visit:
www.nuna.eu/register-gear
Warranty
We have purposely designed our high-quality products so that they can grow with both your child and your family. Because we stand by our product, our gear is covered by a custom warranty per product, starting from the day it was purchased. Please have the proof of purchase, model number and manufactured in date available when you contact us.
For warranty information please visit:
www.nuna.eu/warranty
For replacement parts, service, or additional warranty questions, please contact our customer service department.
In the USA:
infousa@nuna.eu
www.nuna.eu
1.855.NUNA.USA
In Canada:
info@nunababy.ca
1.800.667.4111
Child Usage Requirements
This product is suitable for use with children who can sit upright unassisted.
WARNING
Failure to follow these warnings and instructions could result in serious injury or death.
To avoid any danger of suffocation, remove all plastic covers before using this product and destroy or keep away from babies and children! Keep small parts away from children as they pose a choking hazard.
Discontinue using these products should they become damaged or broken.
Use original Nuna parts and accessories only. ALWAYS use ZAAZ on a level, stable surface.
- The child should be secured in the high chair at all times by the restraining system.
- The tray and arm bar are not designed to hold the child in the chair.
It is recommended that the high chair be used only by children capable of sitting upright unassisted.
FALL HAZARD: Children have suffered severe head injuries including skull fractures when falling from high chairs. Falls can happen suddenly if child is not restrained properly.
Always use the restraints, and adjust to fit snugly.
- Tray is not designed to hold child in chair.
- Never leave child unattended.
- Stay near and watch child during use.
STRANGULATION HAZARD Do not place this product in any location where there are cords, such as window blind cords, drapes, phone cords, etc.
NEVER use the arm bar without using the cushion.
Parts List
Make sure all parts are available before assembly. If any part is missing, please contact Nuna (see page 4 for information). No tools are required for assembly.
1 Seat
8 Arm Bar Center
2 Tray
Attachment
3 Arm Bar
9 Seat Latch
4 Seat Cushion
10 Seat Release Buttons
5 Footrest
11 Leg Frame
6 Seat Flap
12 Release Key
7 Harness Restraint

Product Set Up
1 - Place the leg frame on the floor facing you.
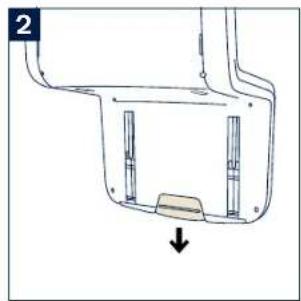
2 - From the back of the seat, release the lock by pulling down on the seat latch.
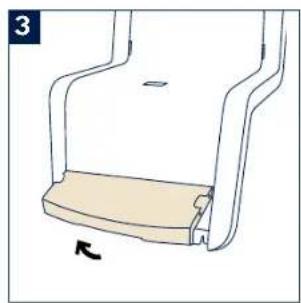
3 - Rotate the seat flap up.
4 - Position the seat over the leg frame to line up the slots behind the seat flap with the white tracks on the leg frame. Keep the seat flap up and firmly push the seat down. If the seat flap is not completely up, you will not be able to push the seat down.
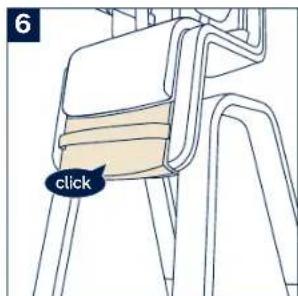
5 - To lock the seat in the desired position, lower the seat flap and listen for a click. A "click" sound means the seat is locked into place.
The seat is now permanently mounted to the legs and can be adjusted within the range between the highest and lowest positions.


Once the seat is attached to the legs, it is considered to be a permanent assembly. However, it is possible to reverse this assembly if the seat needs to be put into storage or shipped. We recommend this should not be a regular occurrence.
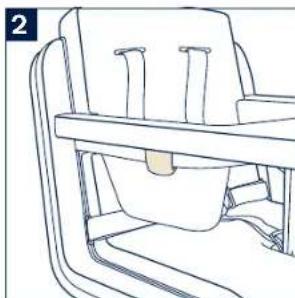
To remove the seat from the leg frame, slide the seat latch down and rotate the seat flap up. The seat automatically rises up to the highest position.
1 - Gently pull the two seat release buttons on each side forward.
2 - Slide the seat up and remove from the leg frame. If the flap is not completely up, you will not be able to slide the seat up.
Arm Bar
The arm bar is not intended to restrain your child. ALWAYS secure your child with the harness restraint.
3 - With the arm bar tilted up, hook the arm bar ends into the holes in the backrest. Rotate the arm bar down, locking the ends of the arm bar to the seat back.
4 - Insert the arm bar center attachment into the outer slot on the seat.
Check that the arm bar is secure by pulling out on the front of the arm bar and up on the arm bar center attachment.
To remove the arm bar, push the button on the arm bar center attachment and pull up to release it from the seat.
Then, unhook the two ends from the backrest, by rotating the arm bar up and pulling the arm bar out.


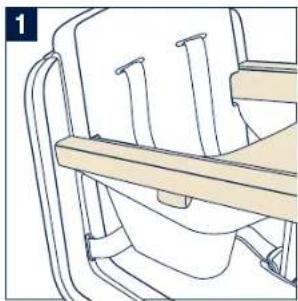
Tray
The tray and arm bar are not intended to restrain your child. ALWAYS secure your child with the harness restraint.
1 - With the tray slightly tilted up, slide the tray onto the top of the arm bar and then slide the tray back into the slots.
2 - Push the tray down until both side clips fasten around the arm bar and you hear a click. A "click" sound means the tray is attached. Check that the tray is secure by pulling up and out on the front of the tray.
To remove the tray, release the tray clips from both sides under the tray. Gently lift the tray up from the arm bar and then pull the tray from the back of the seat.
Product Use
Seat Height
DO NOT adjust the height of ZAAZ while a child is in the seat!
3 - Slide the seat latch down.
4 - Rotate the seat flap up. The seat automatically rises up to the highest position.
5 - Keep the seat flap up and firmly push the seat down until you hear a click. If the seat flap is not completely up, you will not be able to push the seat down.
6 - To lock the seat in the desired position, lower the seat flap and listen for the click. A "click" sound means the seat is locked into place.


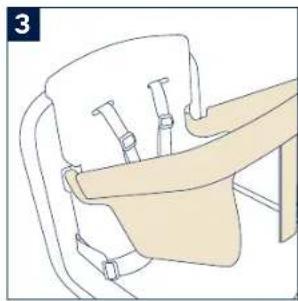
Harness Restraint and Buckle
1 - Push the center button on the buckle to release the buckle latch, remove the clips and place your child in the high chair.
2- Connect the shoulder buckle and hip buckle.
3 - Secure the shoulder buckle and hip buckle to the buckle latch and repeat on the opposite side.
4 - Fit the harness snugly to your child by sliding the waist and shoulder adjustment buckles.
When used as a high chair, the child must always wear the harness restraint correctly fitted and adjusted.
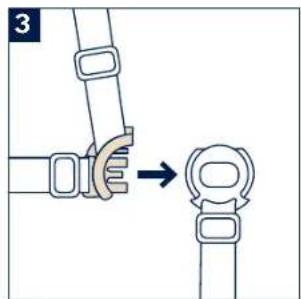
5 - The harness can be removed for cleaning or when the high chair is used for an older child. To remove the harness, insert the release key into each of the harness restraint slots, at the back and underside of the seat. Pull on the harness to remove.
6 - To install the harness, insert the waist clips into the lower backrest holes, the shoulder harness clips into the upper backrest holes and the center buckle clip into the inner of the two holes in the seat. If the seat cushion is used, the harness should go through the seat cushion.
Check that the harness attachment is secure by pulling on each attachment point.


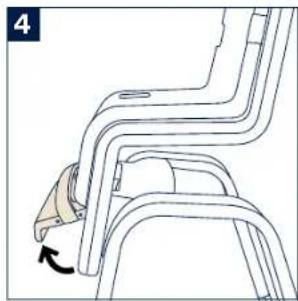
Seat Cushion
When installing or uninstalling the seat cushion, remove the harness restraint, arm bar and tray.
1 - To remove the seat cushion, insert the release key into the slot at the underside of the seat to release the plastic clip.
2 - To attach the seat cushion, insert the seat cushion clip into the inner of the two holes in the seat surface and listen for a "click."
For easier attachment of the footrest, raise the seat flap up.
3 - Attach the footrest on one side of the seat flap and then flex the footrest to attach it on the other side.
Remember to lower the seat flap down into position to lock the seat in place.
To remove the footrest, unhook the footrest from one side of the seat flap and then the other.


Cleaning and Maintenance
You can clean ZAAZ and accessories with a damp cloth or a mild detergent, but do not use abrasive products or solvents which could damage the material.
The ZAAZ tray and arm bar are dishwasher safe.
The anodized aluminum legs are maintenance-free but will be damaged by impact or scratching.
Continued and extended exposure to sunlight can change the color of many materials.
Inspect ZAAZ regularly in order to detect any damage.
©2018 Nuna Baby Essentials, Inc. Nuna and all associated logos are trademarks.