
CHD550X11 - Basket Carrefour Home - Free user manual and instructions
Find the device manual for free CHD550X11 Carrefour Home in PDF.

| Type | Extractor hood |
| Marque | Carrefour Home |
| Modèle | CHD550X11 |
| Poids net | 17 kg |
| Tension | 220-240 V ~ 50 Hz |
| Puissance totale | 180 W |
| Puissance moteur | 100 W |
| Éclairage | 2 x 40 W max (type GU10) |
| Classe de protection | Class I |
| Nombre de vitesses | 3 (Low, Medium, High) |
| Type de commande | Control panel with push buttons |
| Distance minimale de la surface de cuisson | 65 to 75 cm |
| Filtres | Washable metal grease filters (dishwasher safe) |
| Entretien des filtres | Every 2 months |
| Remplacement de l'ampoule | Max. 40 W GU10, manual unscrewing |
| Sécurité | Automatic safety shut-off; do not flambé under the hood |
| Contenu de l'emballage | Hood, glass panel, hooks, screws, wall plugs, seals, manual |
| Évacuation | Via external duct (expandable tube included) |
| Service consommateurs | 09 69 39 7000 (non-surcharged call) |
Frequently Asked Questions - CHD550X11 Carrefour Home
User questions about CHD550X11 Carrefour Home
0 question about this device. Answer the ones you know or ask your own.
Ask a new question about this device
Download the instructions for your Basket in PDF format for free! Find your manual CHD550X11 - Carrefour Home and take your electronic device back in hand. On this page are published all the documents necessary for the use of your device. CHD550X11 by Carrefour Home.
USER MANUAL CHD550X11 Carrefour Home
natural_image
Modern stainless steel kitchen range hood with curved glass cover (no text or symbols visible)CHD550X-11

natural_image
Abstract geometric design with black shapes on white background, no text or symbols presentF
E
GB
HOTTE ASPIRANTE
MISE AU REBUT DU PRODUIT 9
PRÉCAUTIONS DE SÉCURITÉ
natural_image
Diagram of a brick wall with two small protrusions and label 'Crochet' (no other text or symbols)natural_image
Two technical diagrams showing a cylindrical object mounted on a base and a brick wall with curved pipe connection (no text or symbols)natural_image
Two identical line drawings of a conical chimney or fan shape, shown from different angles (no text or symbols)Incorrect correct
3. Fonctionnement
natural_image
Line drawing of a kitchen air conditioner unit with a chimney and ventilation duct (no text or symbols)natural_image
Line drawing of a kitchen chimney with a handle and door (no text or symbols)GUIDE DE DÉPANNAGE
MISE AU REBUT DU PRODUIT
natural_image
Simple line drawing of a conical chimney (no text or symbols)correcto
natural_image
Simple line drawing of a conical chimney or coat (no text or symbols)incorrecto
3. Operación
natural_image
Line drawing of a kitchen air conditioner unit with a chimney and ventilation cover (no text or symbols)natural_image
Line drawing of a kitchen chimney with a hand inserting a component (no text or symbols)Thank you to have chosen the Carrefour quality. This product has been created by our professional team and according to the European regulation. For a better use of your new device, we recommend you to read carefully this user manual and keep it for record.
TABLE OF CONTENTS
SAFETY PRECAUTION....3
PACKAGE CONTENTS 3
FEATURES....4
TECHNICAL SPECIFICATION 4
INSTALLATION AND MAINTENANCE 4
- Installation....4
- Notice of installation....6
- Operation 6
- Maintenance....7
TROUBLE SHOOTING 8
DISCLAIMER....9
TRADEMARKS 9
RECYCLING 9
SAFETY PRECAUTION
- This appliance is not intended for use by person (including children) with reduced physical, sensory or mental capabilities, or lack of experience and knowledge, unless they have been given supervision or instruction concerning use of the appliance by a person responsible for their safety.
- Children should be supervised to ensure that they do not play with the appliance.
- This appliance is designed for domestic use only.
- Do not pull on the connection cord, but rather on the plug, to separate the appliance from the mains.
- Do not leave the appliance unattended when it is switched on, as this may be a source of danger.
- If the supply cord is damaged, it must be replaced by the manufacturer, its service agent or similarly qualified persons in order to avoid a hazard.
- There shall be adequate ventilation of the room when the cooker hood is used at the same time as appliances burning gas or other fuels.
- There is a fire risk if cleaning is not carried out in accordance with the instructions. Details concerning the method and frequency of cleaning are stated in the section "INSTALLATION AND MAINTENANCE".
- Do not flambé under the range hood.
- The air must not be discharged into a flue that is used for exhausting fumes from appliances burning gas or other fuels.
- The minimum distance between the cooking surface and the lowest part of the cooker hood is 65 - 75cm.
- Follow the local laws applicable for external air evacuation.
- CAUTION: Accessible parts may become hot when used with cooking appliances.
- Never use bulb over the rating of this instruction regulated.
- Bulb is hot when lighting, therefore do not attempt to touch the bulb until the bulb cool down while the lamp is off.
- When cleaning and changing the bulb, it must be off power first.
PACKAGE CONTENTS
• Instruction manual (1 pc)
- Cooker hood (1 pc)
- Glass (1 pc)
- Hook (1 pc)
• Chimney hook (2 pcs/set)
- Screws (17 pcs)
• Drywall anchors (9 pcs) - Gasket (4 pcs)
- Glass gasket (4 pcs)
FEATURES
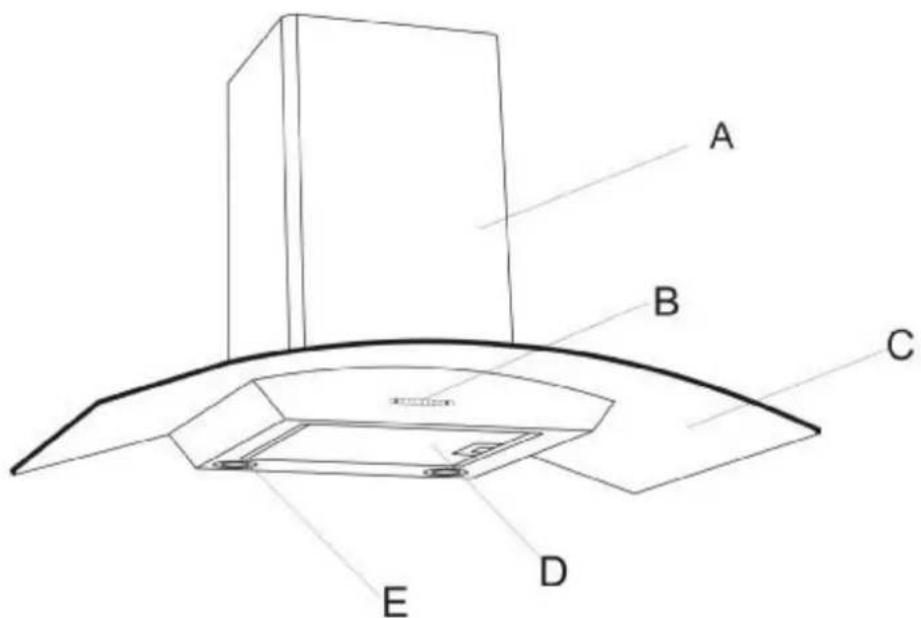
text_image
A B C D E| A Chimney | |
| B | Control Panel |
| C Glass | |
| D | Al Filter |
| E Lamp |
TECHNICAL SPECIFICATION
Rated voltage 220-240V\~50Hz
Rated power 180W
(Motor: 100W + GU10 Lamp (included): 2 x 40W Max)
Protection class I
INSTALLATION AND MAINTENANCE
1. Installation
1) The cooker hood should be placed at a distance of 65-75cm (26-30inch) from the cooking surface for the best effect.
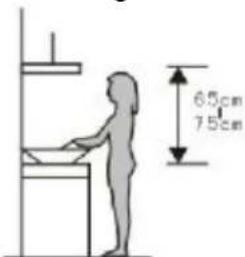
text_image
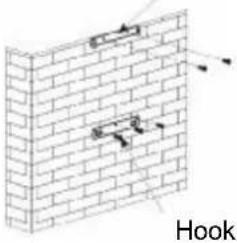
6.5cm 7.5cm2) Install the hook on a suitable place once the installation height is fixed, and keep it in line. The fixed position of the inside chimney bracket is the place of chimney.
Inside chimney bracket
natural_image
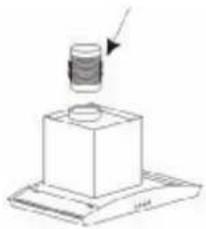
Diagram of a brick wall with embedded arrows and a label 'Hook' (no text or symbols on the diagram itself)3) Fix the extensible tube on the hood, and put the cooker hood on the hook.
Extensible tube
natural_image
Simple line drawing of a mechanical component with a cylindrical top and base, no text or symbols present.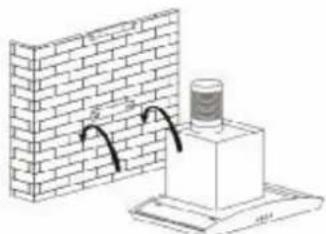
natural_image
Diagram showing a brick wall section with curved arrows and a cylindrical component mounted on a base (no text or symbols)4) Put the glass according to the lead direction and way on the cooker hood, and then use the screws to fix the glass, also lead the extensible pipe outside of the room, meanwhile adjust the height of the inside chimney to the position of the inside chimney bracket and fix on it by screw, here should be sure the inside chimney can be flexed freely.
text_image
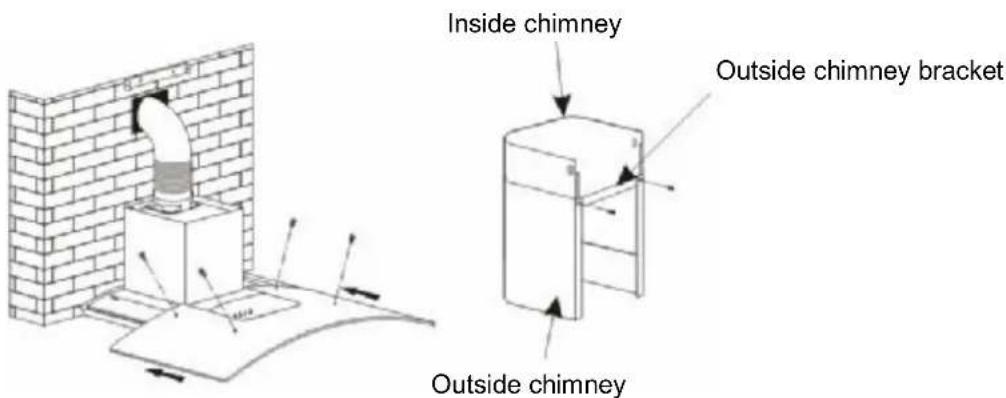
Inside chimney Outside chimney bracket Outside chimney5) Install the chimney, and adjust the height of the inside chimney to the position of the inside chimney bracket, then fix on it by screw. After adjusting the position, fix the body with safety screw.
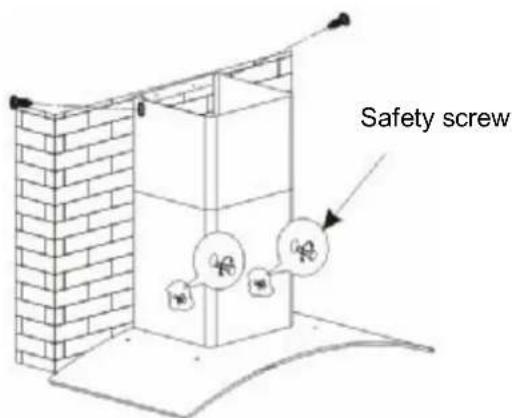
text_image
Safety screwNote: The two safety vents are positioned on the back casing, with diameter of 6mm.
2. Notice of installation
1) Any installation work must be carried out by a qualified electrician or competent person.
2) Do not connect the ducting system of the hood to any existing ventilation system which is being used for any other appliance, such as warmer tube, gas tube, and hot wind tube.
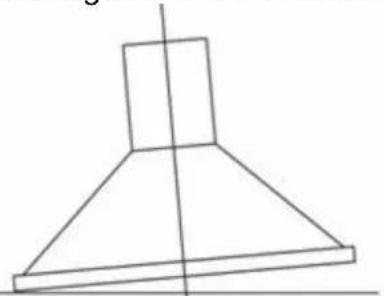
3) After installation, make sure that the cooker hood is level to avoid grease collection at one end.
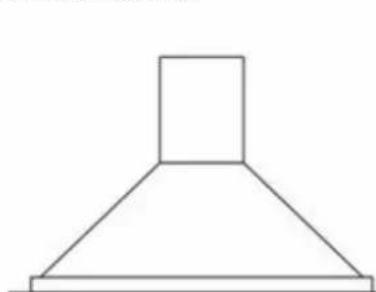
natural_image
Simple line drawing of a conical chimney (no text or symbols)correct
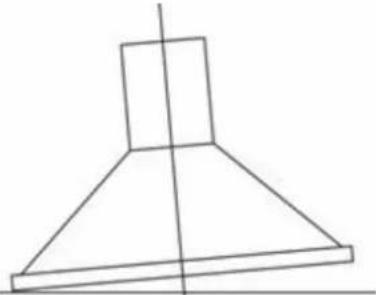
natural_image
Simple line drawing of a conical chimney or chimney (no text or symbols)wrong
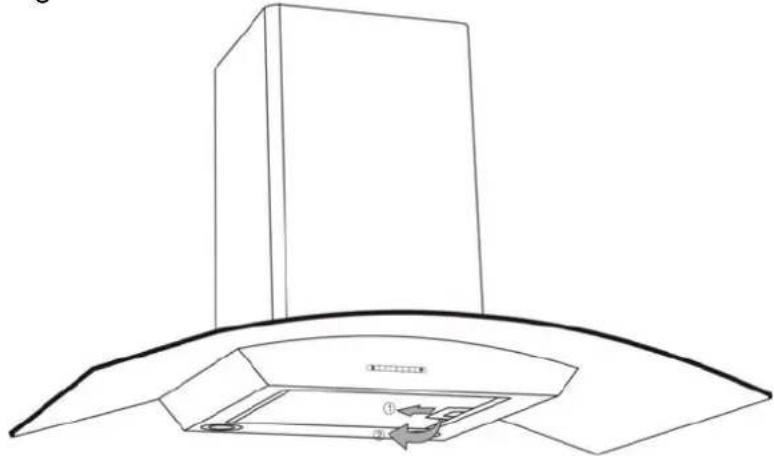
3. Operation
1) Press the Stop button, and the motor will stop.
2) Press the Low button, the motor runs at low speed.
3) Press the Mid button, the motor runs at mid speed.
4) Press the High button, the motor runs at high speed.
5) Press the Light button and the two lights will be turned on. Press again to turn off the light
| 1 | 2 | 3 | ||
| Stop | Low | Mid | High | Light |
It is recommended to leave the appliance in operation for 15 minutes after cooking is terminated in order to completely eliminate cooking vapours and odours.
4. Maintenance
1) Changing and cleaning the anti-grease filters.
In order to prevent fire hazard, it is recommendable to clean the filter at a maximum of 2 months by carrying out the following instructions.
- Before cleaning, make sure that the appliance is plugged off.
- Removing the filters.
natural_image
Line drawing of a kitchen air duct with a chimney and ventilation unit (no text or symbols)- Clean the filter as below measure:
i. Soak them for about 3 minutes in hot water (40-50 degrees) with a grease-loosening detergent then brush it gently with a soft brush. Please do not apply too much pressure to avoid damaging it.
ii. It can be put into a dishwasher with detergent, set the temperature at around 60 degrees.
- Do not use abrasive detergent otherwise it will damage the hood.
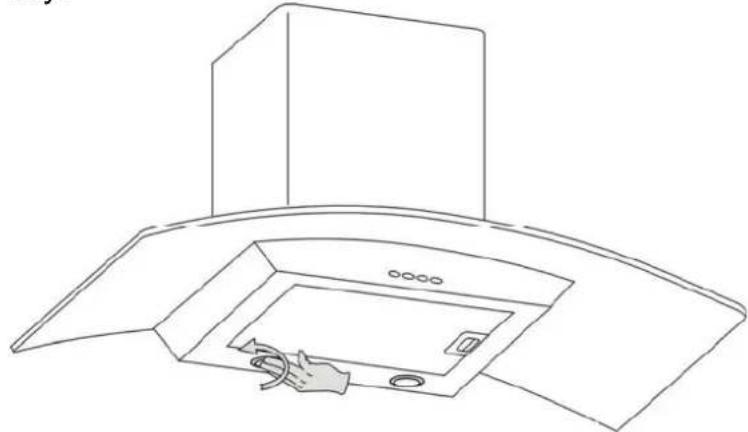
2) Changing the light
- Before changing the lights, make sure that the appliance is plugged off.
- Press out the glass of lamp and turn it contradictorily until the lamp loosen
- Take out the fault lamp and fix the new lamp (Max. 40W GU10 lamp) as the opposite way.
natural_image
Line drawing of a kitchen chimney with a hand inserting a cable (no text or symbols)TROUBLE SHOOTING
| Symptom | Solution |
| The cooker hood does not start | Check that the hood is connected to the electricity supply.Check that the fan speed control is set properly. |
| The cooker hood is not working effectively | The fan speed is not set high enough.The grease filter is dirty.The kitchen is not ventilated well enough.If the hood is set for recirculation, check that the carbon filters have not expired.If the hood is set for extraction, check that the ducting and outlets are not blocked. |
| The cooker hood has switched off during operation | The safety cut-out device has been tripped.Turn off the hob and then wait for the device to reset.Note that if you have installed your cooker hood too low, this will happen.If it happens frequently, it will be damaged. |
DISCLAIMER
Updates to hardware components are made regularly. Therefore some of the instruction, specifications and pictures in this documentation may differ slightly from your particular situation. All items described in this guide for illustration purposes only and may not apply to particular situation. No legal right or entitlements may be obtained from the description made in this manual.
TRADEMARKS
CARREFOUR HOME is a registered trademark of Carrefour group. All other company names are trademarks, registered trademarks or service marks of their respective owners.
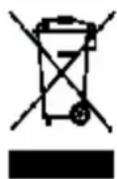
RECYCLING
This product bears the selective sorting symbol for waste electrical and electronic equipment (WEEE).
This means that this product must be handled pursuant to European Directive 2002/96/EC in order to be recycled or dismantled to minimize its impact on the environment.
For further information, please contact your local or regional authorities. Electronic products not included in the selective sorting process are potentially dangerous for the environment and human heath due to the presence of hazardous substances.
Net weight: 17kg