Luna 390 - Tent TRIGANO - Free user manual and instructions
Find the device manual for free Luna 390 TRIGANO in PDF.
| Brand | Trigano |
| Model | Luna 390 |
| Product type | Inflatable awning for caravan |
| Frame | Inflatable arches in TPU with Oxford polyester protective cover |
| Number of arches | 4 |
| Recommended inflation pressure | 0.344 bar / 5 PSI |
| Pump included | Double-action manual pump (inflation and deflation) |
| Ridge poles | 3 inflatable ridge poles (adjustable position for water drainage) |
| Included accessories | Pegs, bottom skirt, wheel cover |
| Fabric | Polyester with UV protection |
| Intended use | Short stays (≤1 month), camping-caravanning |
| Maintenance | Cleaning with mild soapy water, drying within 24h |
| Fire precautions | Keep heating/cooking appliances away, keep entrances clear |
| Repairability | Complete replacement of the arch (bladder + cover) in case of puncture |
| Warranty | 1 year against manufacturing defects (excluding misuse, extreme conditions) |
Frequently Asked Questions - Luna 390 TRIGANO
User questions about Luna 390 TRIGANO
0 question about this device. Answer the ones you know or ask your own.
Ask a new question about this device
Download the instructions for your Tent in PDF format for free! Find your manual Luna 390 - TRIGANO and take your electronic device back in hand. On this page are published all the documents necessary for the use of your device. Luna 390 by TRIGANO.
USER MANUAL Luna 390 TRIGANO
PITCHING INSTRUCTIONS
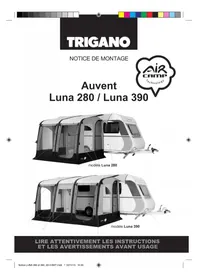
AWNING Luna 280 / Luna 390
READ INSTRUCTIONS AND WARNINGS CAREFULLY BEFORE USE
Package content
Before use, always check that the following items are present:
1 awning
1 set of pegs
4 upright poles
1 hand pump with pressure gauge
Inflatable extra tubes (2 for model 280 and 3 for model 390)
1 caravan awning skirt
1 caravan wheel cover
SUMMARY
RECOMMENDATIONS 11
BEFORE ASSEMBLY 11
ABOUT THE INFLATABLE FRAME 11
PUMP and INFLATION 12-13
ERECTING THE AWNING 14-15
FIRE PRECAUTIONS 16
MAINTENANCE INSTRUCTIONS 16
REPAIR 16
U.V.AGING 16
CONDENSATION 16
AIR PRESSURE 16
WARRANTY 16
As our products are also yours, your feedback is a great help for us in the continuous improvement of the quality and design of our products. Please send your feedback, comments and suggestions to:
TRIGANO MDC - ZA La Croix des Marais - 26600 La Roche de Glun - France
RECOMMENDATIONS
- Assemble the awning at home before setting off on your trip in order to familiarise yourself with its assembly and ensure you have not forgotten anything.
- Choose with preference a smooth, level plot and remove all stones, twigs, etc...
- Avoid placing the entrance facing the wind.
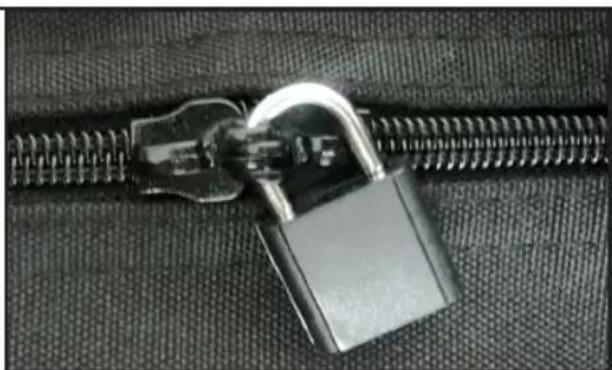
- Close all zippers before assembly.
- Open all zippers before packing up your tent.
- It is not sufficient that your awning is waterproof from the outside in order to avoid inconveniences in relation with humidity; condensation (natural phenomenon) is caused by the humidity given off by the occupants themselves, but also the air and ground. Droplets therefore form on the inside surface of the awning and may give the impression that the awning is leaking, but this is not the case!
- In order to limit this condensation, simply air the awning as much as possible using the double doors with mosquito netting.
BEFORE ASSEMBLY
- Remove all elements from the bag and place them on the ground.
ABOUT THE INFLATABLE FRAME
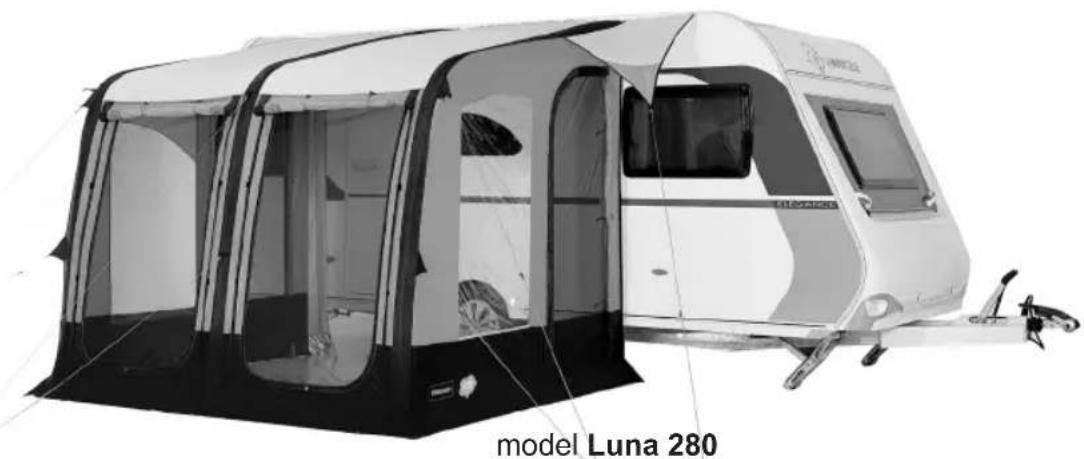
The frame of the LUNA 280 awning is composed of 3 inflatable poles, whereas the LUNA 390 awning has 4.
These inflatable poles are placed in a zipped cover. They are therefore easy to replace.
- The poles are made of polyurethane (TPU), a material which resists well against wear and its porosity to air is almost zero
To provide efficient protection against bursting, each TPU pole is covered with a high-resistance protection made polyethylene-lined OXFORD polyester. This cover is closed with a zipper.
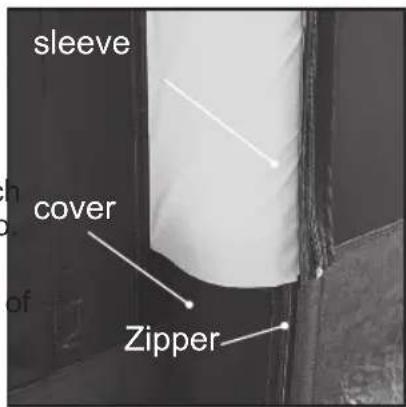
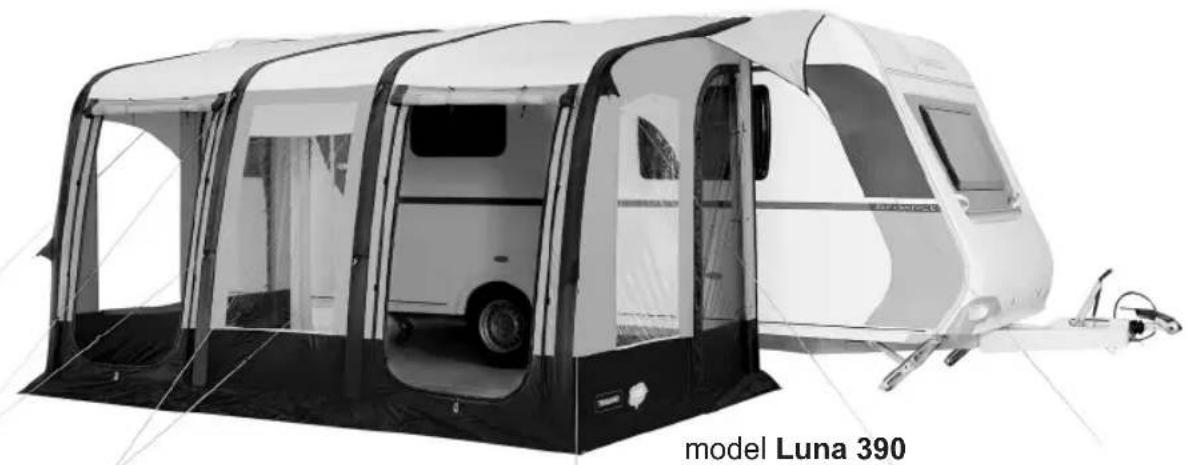
ATTENTION
THE 2 CURSORS OF THE ZIPPER ARE ATTACHED TO-GETHER WITH A PLASTIC BINDER. THIS BINDER MUST NEVER BE REMOVED AS THIS WILL RESULT IN BURSTING OF THE TUBE DURING INFLATION.
ENGLISH
PUMP and INFLATION
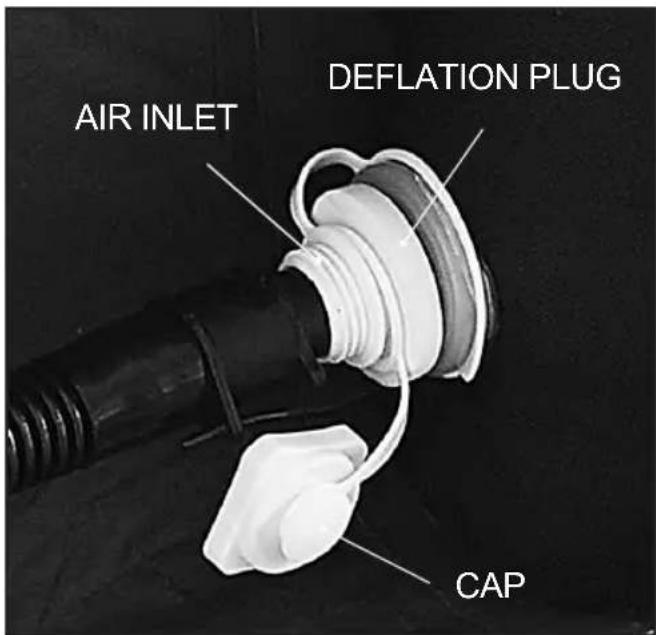
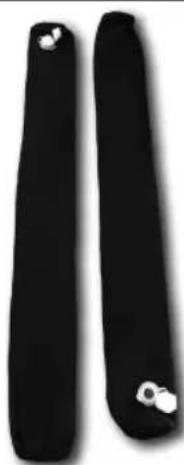
An inflation valve is located at the end of each pole. This is a "non-return" valve for easy inflation.
Each awning is supplied with a double-action, hand pump.
It may therefore be used for inflation as well as deflation.
NOTE: Use of the pump for deflation is not necessary with this model.
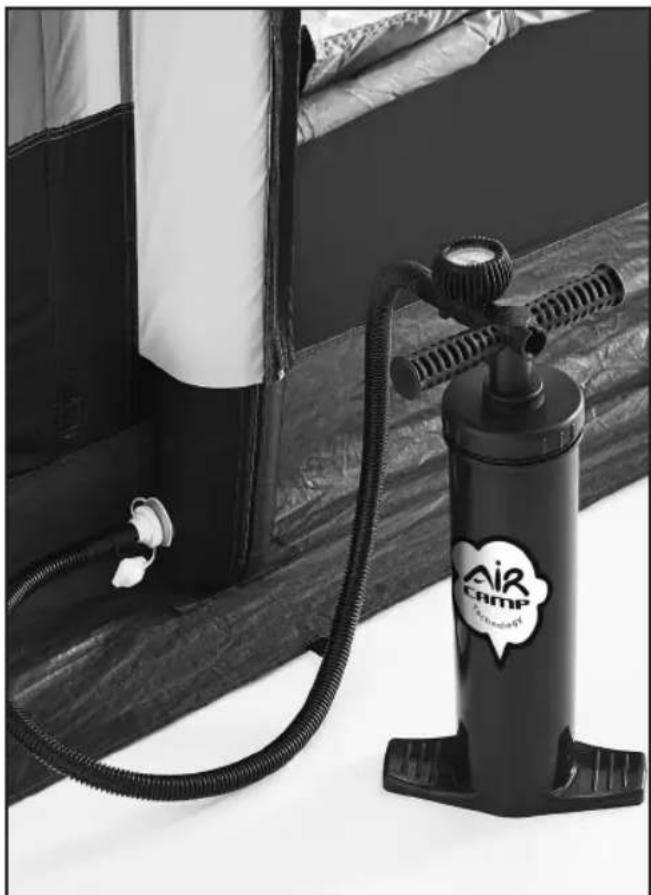
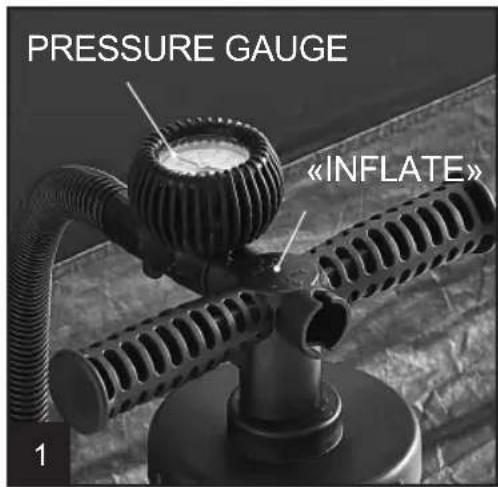
FOR INFLATION
- On the pump (1): Connect the inflation tube to "INFLATE"
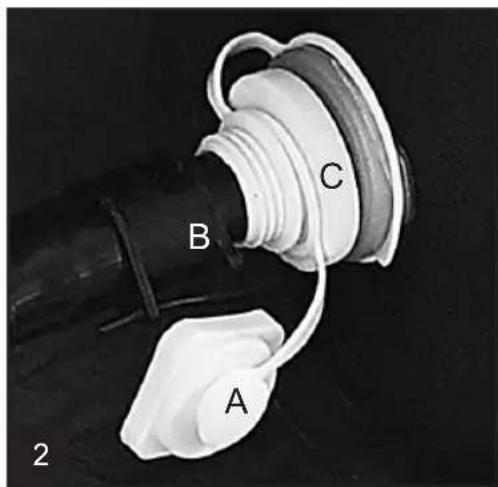
- On the valve (2): Remove the valve cap (A), fit the appropriate valve adapter to the end of the inflation tube (B) and connect it to the valve.
You may now begin inflating the pole with smooth and regular pump strokes.
Once the pole is inflated to the correct pressure, remove the tube (B) end and refit the valve cap (A).
Inflate each pole to: 0.344 BARS / 5 PSI.
DO NOT INFLATE ABOVE THESE VALUES AS THIS MAY RESULT IN BURSTING OF THE POLES.
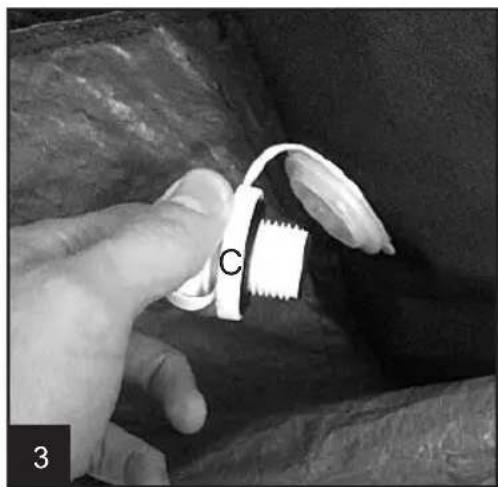
TO DEFLATE
- Simply unscrew the deflation plug (refer to the picture above) (C).
ENGLISH
ERECTING THE AWNING
1 - Once your caravan is correctly positioned, carefully clean the ground under the awning surface in order to avoid any risk of damage.
The doors and windows of the caravan must be closed.
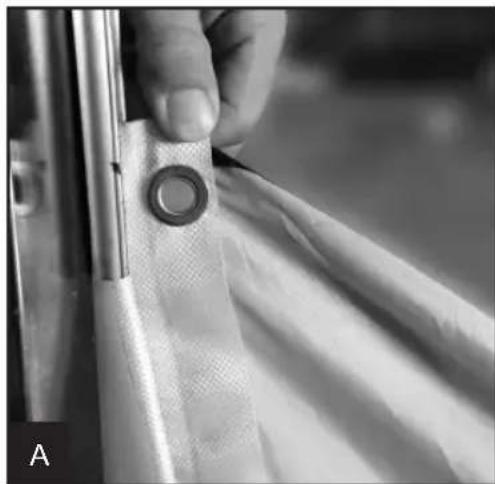
2 - Place the awning beading on the awning close to the caravan channel. Insert it in the beading and slide it until the awning is in the correct position (A).
3 - Take the pump and enter the awning in order to gain access to the inflation valves.
4 - Ensure the Velcro strips at the end of each pole are correctly aligned with those of the awning.
5 - Begin inflation while respecting the instructions given in the section PUMP and INFLATION of this booklet.
Begin by inflating the pole located closest to the nose of the caravan and then inflate the other poles one after another.

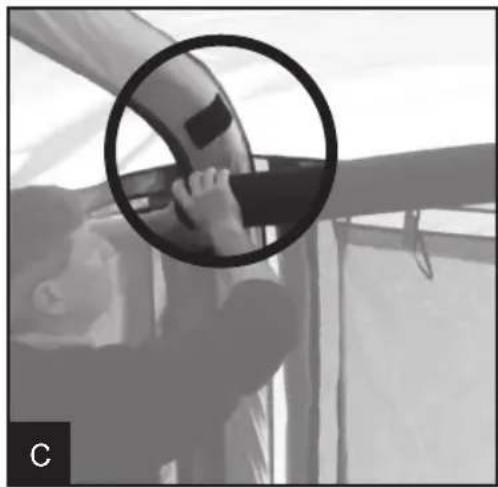
ATTENTION: During the inflation process the pole will need to be manually held to ensure it takes its rounded form.
To do this, pull the guying ropes located in the rounded section of the pole towards you (B).
Do not continue inflating if the pole does not take its rounded form.
2 extra tubes for model luna 280
3 extra tubes for model luna 390
RAPPEL : INFLATE EACH POLE TO: 0.344 BARS / 5 PSI. DO NOT INFLATE ABOVE THESE VALUES AS THIS MAY RESULT IN BURSTING OF THE POLES.
6 - Once all poles have been inflated, take the extra tubes and inflate them while respecting the same instructions as for inflation of the poles.
For the model 280: 2 extra tubes
For the model 390: 3 extra tubes
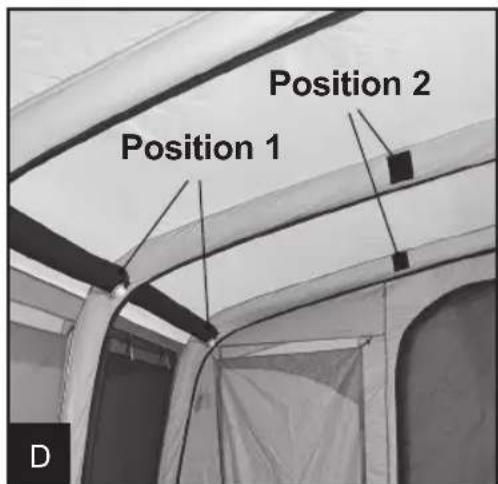
The Velcro strips indicate the position of the extra tubes, 2 positions are possible:
- Position 1: in the rounded section of the pole: In this position, the extra tube provides a perfect support for the awning.
- Position 2 : in the descent of the awning roof: Move the extra tubes to this position in case of rain to prevent water pockets forming on the roof.
7 - Now that the awning structure is in place, all that is left is to peg it to the ground, this stage is imperative.
- Peg the entire surface of the awning using the pegs provided.
- Peg all guying ropes to the ground using the pegs provided.
INCORRECT PEGGING AND INSUFFICIENT TIE-DOWNS MAY RESULT IN WATER PENETRATION. CHECK THE AWNING TENSION REGULARLY.
Your awning is now ready for use.

ENGLISH
FIRE PRECAUTIONS
To guarantee safe camping, the following common-sense rules must be respected:
- Do not place heating or cooking appliances and do not suspend lighting elements close to the walls, roof or curtains.
- Respect the safety instructions provided with these appliances.
- Never allow children to play close to these appliances when connected.
- Keep the access ways free.
- Check the regulations and measures applicable and available on site in case of fire.
MAINTENANCE INSTRUCTIONS
- Store the awning in a dry place at a safe distance from any heat source.
- The awning can be packed humid, but it must be unpacked again and dried within 24 hours.
- If necessary, clean the canvas using a mild soap and soft brush. Never clean it in a wash machine. Never apply detergents or chemical products.
REPAIR
In case of a pole puncture or bursting, it is not possible to repair it with a rubber puncture patch. The arch will need to be replaced completely and we propose spare pole in all sizes for this purpose. Contact your local dealer to place an order.
SUNLIGHTAGING
This awning is made of polyester which offers a natural high resistance to UV rays and various climatic conditions. Nevertheless, excessive, or continuous exposition to UV rays (for example: a whole summer in direct sunlight) may lead to premature wear of the most exposed parts of the awning. Whenever possible, consider installing your awning in a shaded location.
CONDENSATION
Condensation is a natural phenomenon. Humidity in the surrounding air forms condensation on the inside of the awning walls as soon as the canvas is colder than the interior temperature of the awning.
Certain factors favour the forming of condensation:
- When the hot air which has built up inside the
awning throughout the day remains present when the outside temperature drops > solution: Air the awning.
- When it has rained all day and the air and earth are saturated with humidity.
- The humidity present in the occupants breath.
- The occupants' body heat.
Under no circumstances does the presence of condensation mean that the canvas has lost its waterproofing properties.
AIR PRESSURE
The nature of the inflatable arch material offers them a level of porosity to air which is almost zero. Your awning therefore remains self-supporting for a certain time without the need to be re-inflated.
However, it is important to note that changes in climatic conditions (temperature variations...) could result in a pressure increase or drop.
This normal phenomenon is therefore not to be mistaken for an air leak.
WARRANTY
- Your awning comes with a 1-year warranty from the date of purchase for any product defects.
- The warranty does not cover damage due to incorrect assembly, inappropriate use, incorrect storage, condensation or abnormal climatic conditions (storms, floods, etc).
- The warranty under no circumstances covers puncturing or busting of poles.
- This awning is designed for short stays and is not suitable to prolonged use (longer than 1 month). It is therefore not designed to resist against harsh climatic conditions (frost, storms, excessive exposition to UV rays...)
- Contact your retailer for any warranty claims and don't forget to take your purchase invoice along. The retailer will then channel your claim on an official document. After appraisal, if your claim proves to be founded, we will either repair the awning free of charge or replace the defective element.
In case of a warranty claim refusal, we will transmit a quote to your retailer and we will carry out the repairs necessary after your acceptance of this quote. If you refuse this quote, the awning will be returned to you in the same state as we received it. No product will be replaced by the retailer without our prior approval.