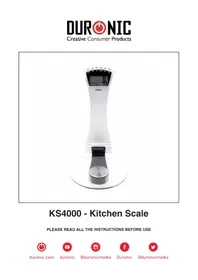
KS4000 - Kitchen scales Duronic - Free user manual and instructions
Find the device manual for free KS4000 Duronic in PDF.


| Product type | Electronic wall kitchen scale |
| Brand | Duronic |
| Model | KS4000 |
| Power supply | 2 AAA batteries (not included) |
| Minimum weight | 5 g |
| Maximum weight | 3 kg / 6.6 lb |
| Increment | 1 g / 0.1 oz |
| Weight units | g, lb, oz |
| Main functions | Weighing, tare, timer, 12/24h clock |
| Buttons | ON/OFF, UNIT, TARE, SET, HRS, MIN |
| Display | Digital LCD screen |
| Weighing platform | Round glass |
| Automatic shut-off | After 60 seconds of inactivity |
| Timer | Programmable, 20-second audible alarm |
| Installation | Wall mounting via fixing bar (screws and wall plugs included) |
| Alert indicators | Low battery, weighing error, overload |
| Cleaning | Slightly damp cloth, do not immerse |
| Warranty | 1 year (Shine-Mart Ltd) |
| Material | Plastic and glass |
| Color | White / Transparent (based on visual) |
Frequently Asked Questions - KS4000 Duronic
User questions about KS4000 Duronic
0 question about this device. Answer the ones you know or ask your own.
Ask a new question about this device
Download the instructions for your Kitchen scales in PDF format for free! Find your manual KS4000 - Duronic and take your electronic device back in hand. On this page are published all the documents necessary for the use of your device. KS4000 by Duronic.
USER MANUAL KS4000 Duronic
KS4000 - Kitchen Scale
PLEASE READ ALL THE INSTRUCTIONS BEFORE USE
DURONIC
Contents
English Manual 4
Manuel d'utilisation en Francais 9
Gebrauchsanleitung auf Deutsch 14
Manual de Instrucciones en Espanol 19
Manuale D'istruzioni In Italiano 24
Instrukcja obslugi. Polski 29
Gebruikershandleiding in Nederlands 34
English Manual
Features and Specifications
| Model Batteries Minimum Weight | Maximum Weight | Units Graduation | |
| KS4000 2 x | AAA 5g 3kg / | 6.6lb g / lb / oz | 1g / 0.1oz |
ON/TARE button
- UNIT button
TARE button
- SET button
HRS button
- MINS button
- Weighing platform
- Clock and Timer
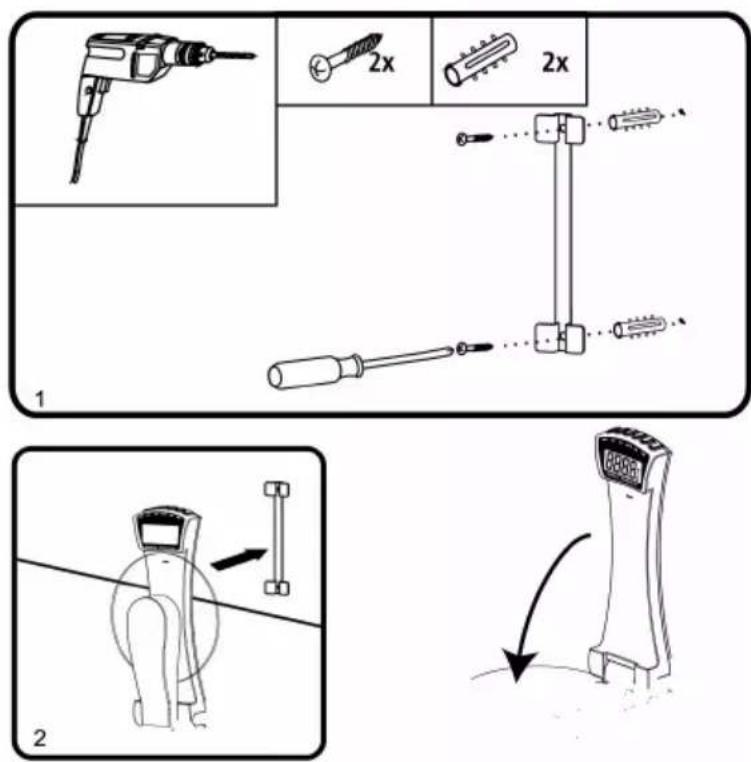
Installation
- Make two holes in the wall, ensuring that they are the same distance to each other as the mounting holes on the back of the mounting bar.
- Insert 2 raw plugs into the wall
- Place the mounting bar onto the wall over ensuring the holes align with each other.
- Carefully fix the bar to the wall using 2 screws.
- Then fix the scale onto the top of the mounting bar.
Batteries
Replacing the batteries
Remove the cover of the battery compartment on the back of the scale.
Take out the old batteries and and replace with 2 new ones, ensuring that they are positioned according to the correct polarities +/-.
Fix the back cover back on top of the battery compartment.
When discarding of old unwanted batteries, it is important to follow local recycling guidelines to ensure they are disposed of safely and responsibly.
Setting the Clock
When the batteries are inserted, the time will need to be reset. On the digital display it will flash "TM" to show it is in Time Setting Mode.
To set the time:
- Press the "HRS" button to select the hour figure.
- Press the "MIN" button to select the minute figure.
- Press the "SET" button once to confirm the time you have selected, and the "TM" will stop flashing.
- The display will only show in the Time Setting Mode for 20 seconds if there is no operation.
Note: 24hr clock display format will be shown only when the grams (g) unit is selected. 12hr clock display format will be shown only when the pounds (lb) unit is selected.
Setting the Timer
- Press the "SET" button to enter the Timer Mode, the display will then show "0:00" and "TMR".
- Press and hold the "SET" button for 2 seconds to enter the Timer Set Mode and 'TMR' will flash.
- Press the "HRS" button to adjust the hour figure.
- Press the "MIN" button to adjust the minute figure.
- Press the "SET" button once to confirm and 'TMR' will stop flashing. The time will now begin counting down.
- When the time counting has finished, you will hear a beeping for 20 seconds. 7. Press "HRS" or "MIN" or "SET" to stop the alarm.
- The scale will return to Clock Mode 40 seconds after the alarm.
Using the Scale
To Weigh
- Place your scale in an upright position.
- Press the ON/OFF button to switch on the scale.
- Wait until the screen display shows
-
Press UNIT button to select the desired unit.
-
Place the item you wish to weigh on the round glass platform.
- The weight will be displayed.
- The scales will return to Clock Mode automatically after 60 seconds of inactivity.
To Add and Weigh
To weight several different ingredients in the same bowl as each other, press the TARE button between each ingredient to reset the scale.
Automatic Switch Off
The scale will automatically switch off after 60 seconds of no use.
Manual Switch Off
You can manually switch the scale off at any time by pressing the ON/OFF button.
Warning Indicators
| Low battery This symbol gives advance warning that the battery will run out soon. It's time to change the batteries. | |
| Error | Error This means the weight is not stabilised. Check that the scale is level, press TARE and start to weigh again. |
| Error | Overload This means that the maximum weight limit has been exceeded. Remove some ingredients to prevent damaging the scale. |
Cleaning and Care
The scale is not waterproof, therefore should not be exposed to moisture or submerged under water.
To clean the scale, use a slightly damp cloth to wipe over it. Do not use any chemical or abrasive cleaning products to clean the scale.
If you plan to not use the scale for a long time, remove the batteries before storing away.
Warranty
1 Year Guarantee from Shine-Mart Ltd, Trademark owners of Duronic Products. NOTE: THESE STATEMENTS DO NOT AFFECT YOUR STATUTORY RIGHTS AS A CONSUMER
This product has been manufactured under the strictest or quality control procedures, and using the highest quality of materials, to ensure excellent performance and reliability. It will give very good and long lasting service, provided it is properly used and maintained. The product is guaranteed for 1 years from the date of original purchase. If any defect arises due to a faulty materials or poor workmanship, the faulty product must be returned to the original place of purchase. Refund or replacement is at the discretion of that company. Duronic Products are offered with a 1 year guarantee under the following conditions:
- The product must be returned to the retailer with original proof of purchase.
- The product must be installed and used in accordance with the instructions contained in this operating manual.
- It must be used only for domestic purposes.
- It does not cover wear and tear, malicious damage, misuse, neglect, inexpert repairs or consumable parts.
- Shine-Mart Ltd has no responsibilities for accidental or consequential loss or damage.
- Shine-Mart Ltd are not liable to carry out any type of servicing work, under the guarantee
- Valid in the UK only
This product is fitted with CE:1363 plug and fuse. Imported by Shine-Mart Ltd, RM3 8SB

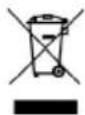
Information on waste Disposal for Consumers of Electrical & Electronic Equipment.
This mark on a product and/or accompanying documents indicates that when it is to be disposed of, it must be treated as Waste Electrical & Electronic Equipment, (WEEE).
Any WEEE marked products must not be mixed with general household waste, but kept separate for the treatment, recovery and recycling of the materials used.
For proper treatment, recovery and recycling; please take all WEEE marked waste to your Local Authority Civic waste site, where it will be accepted free of charge.
If customers dispose of Waste Electrical & Electronic Equipment correctly, they will be helping to save valuable resources and preventing any potential negative effects upon human health and the environment, of any hazardous materials that the waste may contain.
Follow Us

duronic.com

duronic

@duronicmedia

Duronic

aduronicmedia
Features and Specifications




Brand : Duronic
Model : KS4000
Category : Kitchen scales