
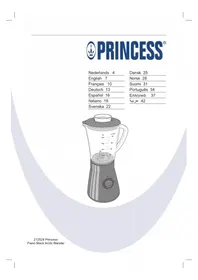
Royal Compact 212010 - Food Processor PRINCESS - Free user manual and instructions
Find the device manual for free Royal Compact 212010 PRINCESS in PDF.

Frequently Asked Questions - Royal Compact 212010 PRINCESS
User questions about Royal Compact 212010 PRINCESS
0 question about this device. Answer the ones you know or ask your own.
Ask a new question about this device
Download the instructions for your Food Processor in PDF format for free! Find your manual Royal Compact 212010 - PRINCESS and take your electronic device back in hand. On this page are published all the documents necessary for the use of your device. Royal Compact 212010 by PRINCESS.
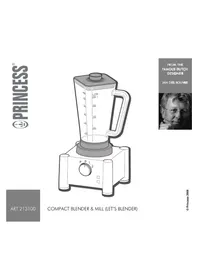
USER MANUAL Royal Compact 212010 PRINCESS
Princess Royal Compact Blender 0.8L Article 212010
You can use this attractive Princess Royal Compact Blender to finely chop vegetables and fruit, and to prepare delicious shakes and juices.
The blender is equipped with a powerful motor that can be set to one of two continuous speeds or a pulse mode. The sharp stainless-steel knives enable you to finely chop or purée both small and large pieces of fruit and vegetables with the greatest of ease. This useful appliance also has a closable lid; the filling opening in the lid can be used to add ingredients during blending without spillage. The rubber feet under the blender prevent it from moving whilst in use. Connect the appliance to the mains power supply (220 - 240V).

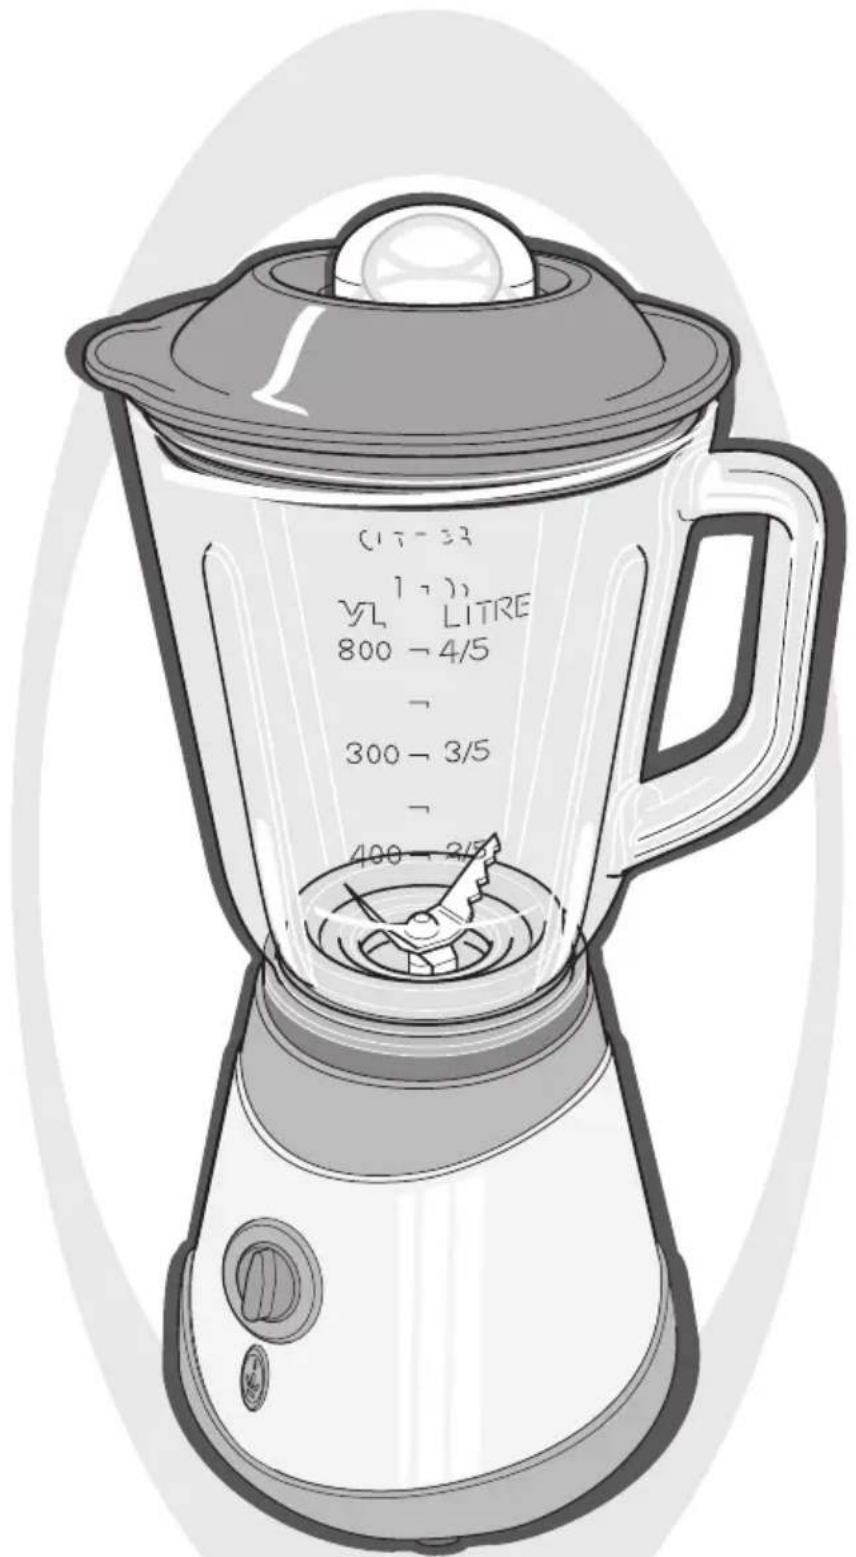
Operation and controls
See Figure 1.
The appliance has the following features:
1 Housing
2 On/Off switch
3 Calibrated jug
4 Lid
5 L i d i n s e r t
6 Power cord and plug
Before use for the first time
1 Remove the packaging.
2 Clean the appliance. See 'Maintenance and cleaning'.
Fitting the parts
1 Fit the jug to the housing. The three lugs on the housingmust fit precisely into the slots in the base of the jug.
2 Place the lid on the jug.
3 Fit the lid insert in the lid, and lock it by turning it through 90 degrees.
4 Dismantle the parts in the reverse sequence.
Blending products
1 Cut the fruit and/or vegetables into pieces that fit in the jug. Do not cut into pieces that are too large, since they will need to be small enough to fall to the base of the jug.
2 Open the lid, and put the pieces in the jug.
3 Fit the lid back onto the jug to prevent splashing.
4 Switch on the blender in position 1 or 2, or in the pulse mode (P). The smoothness of the blend increases with longer blending times.
5 If necessary, top up the contents by opening the lid insert; turn the lid insert through 90 degrees and remove it from the lid. If the pieces are too large for the filling opening then switch off the blender, remove the lid, and add the product. Put the lid back on the jug before switching the blender on again.
6 Switch off the blender (position 0) once you have processed the required quantity of fruit and/or vegetables.
7 Remove the plug from the wall socket.

Maintenance and cleaning

- Make sure no moisture gets into the interior of the housing.
- Do not immerse the appliance in water, or in other liquids. If this happens do not use the appliance any more; dispose of the appliance.
- Only the loose parts may be cleaned in a dishwasher.
- Never use corrosive or scouring cleaning agents.
- This blender uses sharp knives, which are located in the bottom of the container. Therefore, be very careful when emptying and cleaning the blender. Avoid cutting yourself on the knives.
1 Clean the exterior of the appliance with a soft, damp cloth.
2 Clean the interior of the jug and the accessories with a damp cloth and a few drops of washing-up liquid. This will prevent pulp residues from caking onto the appliance.
3 In particular, thoroughly clean the rotating knives at the bottom of the jug to make sure you remove all food residues.
4 After cleaning fit all the parts to the blender (see 'Fitting the parts'), close the lid, and store the appliance.

Safety
General
- Please read these instructions carefully and retain them for reference.
- Use this appliance only in accordance with the instructions.
- This appliance is intended solely for domestic use.
- The use of this appliance by children or persons with a physical, sensory, mental or motorial disability, or lack of experience and knowledge can give cause to hazards. Persons responsible for their safety should give explicit instructions or supervise the use of the appliance.
Children should be supervised to ensure that they do not play with the appliance. - Have the appliance repaired only by a qualified electrician. Never try to repair the appliance yourself.
Electricity and heat
- Verify that the mains voltage is the same as that indicated on the type plate on the appliance before use.
- Plug the appliance into an earthed wall socket.
Always remove the plug from the socket when the appliance is not in use.
Always remove the plug from the wall socket by pulling on the plug, not the power cord. - Do not use the equipment if it is damaged, or if the lead is damaged. Send it to our Service Department in order to avoid a hazard. With this type
of appliance, a damaged cord should only be replaced by our Service Department using special tools.
- Make sure that the appliance and the power cord do not come in contact with sources of heat, such as a hot hob or naked flame.
- Make sure that the appliance, the power cord and plug do not come in contact with water.
- Take care when touching the appliance and its parts. Allow the appliance to cool down first. The appliance and its parts will become hot whilst the appliance is in use. The appliance's housing will also become hot, since the housing is an excellent conductor of heat.
During use
- Never use the appliance outdoors.
- Place the appliance on a flat, stable surface where it cannot fall.
- Never allow the power cord to hang over the edge of the draining board, worktop or table.
- Make sure that your hands are dry before touching the appliance, power cord or plug.
- Never use the appliance in a humid room.
- Always close the lid before switching on the appliance.
- Switch off the appliance and remove the plug from the wall socket in the event of a malfunction during use, and before cleaning the appliance, fitting or removing an accessory, or storing the appliance after use.
-
Do not pick up the appliance if it falls into water. Remove the plug from the wall socket immediately. No not use the device again.
-
Clean the appliance thoroughly after use (see the 'Maintenance and cleaning' Section).
- Never immerse the appliance, the cord or the plug in water or any other fluid.
- The blender works very quickly. The ingredients are ground within just a few seconds. The longer the blender is turned on, the finer the products will be ground.
- Hot liquids in the blender may result in the lid flying off due to the steam and pressure caused by the hot liquid. Prevent this from happening by holding the lid down with a cloth whilst the blender is in use.
U.K. WIRING INSTRUCTIONS
The wires in the mains lead are coloured in accordance with the following code:
As the colours of the wire in the mains lead of this appliance may not correspond with the colour markings identifying the terminals on your plug, proceed as follows:
- The wire which is coloured BLUE must be connected to the terminal which is marked with the letter N or coloured black.
- The wire which is coloured BROWN must be connected to the terminal which is marked with the letter L or coloured red.
- The wire which is coloured GREEN/YELLOW must be connected to the terminal which is marked with the letter E or (earth symbol) and is coloured GREEN or GREEN/YELLOW

WARNING: THIS APPLIANCE MUST BE EARTHED
With this appliance, if a 13A plug is used a 3A fuse should be fitted. If any other type of plug is used, a 15A fuse must be fitted either in the plug or at the distribution board.

The Environment
Dispose of packaging material, such as plastic and boxes, in the appropriate waste containers.
You should ensure for the reuse of the appliance if you wish to dispose of it whilst it is still in good working order or needs only a minor repair.
When the appliance reaches the end of its useful life it must be disposed of in a responsible manner, thereby ensuring for the reuse of (parts of) the appliance. Do not dispose of the appliance with unsorted refuse; hand it in at the store, or take it to a recognized collection point. Contact your municipality for information about the reception and collection systems in your area.

Généralités
glll wgl gclll prrr lsl
gglgglgall g
a11jLg11i0sglnLo5.aJgawl gic
pLsio!JLSO! 20: JIuJUe sLc gLo
LgSll aLx gaii
aolal j0s Ls
a. p12x: w81 fli 45-9g0 b3
1.5 - 5 - 7 - 1 = 4
()

#
在 Rt ABN 中:
i. lo1
J 1
wlaJslc g.
sbc.2
[\left( {k - 1}\right) k \leq 0,]
LJIg LJJI UUw.
Jg21 aalp
a.11 10
aillal"jbj jldi bii
"iihjjg

40
aolo cLog120
Lg jia1g jyra11 oioj 1
gos5 golaiw
laogllagjgl11o puiiwl
jzjjlplu wJlg11
jglao Jlaoiwl c bniin jn cn S
gnoa Jlajb21 abwgl
aiae gl a u wI aIc81
aiai Ia Ia WwWg
ghj Bn jBn Jhbs2000.
giosx n c yolgi
pssw lgc Hs
jlg
poc Jlaabglc fgr
jlgbl
abwgljgl Cw! jybnj
jlgcl JgJgJgS
a|g<|g≤
g 11 j 12 g 13 14 15 16 17 18 19 20 21 22 23 24 25 26 27 28 29 30 31 32 33 34 35 36 37 38 39 40 41 42 43 44 45 46 47 48 49 50 51 52 53 54 55 56 57 58 59 60 61 62 63 64 65 66 67 68 69 70 71 72 73 74 75 76 77 78 79 80 81 82 83 84 85 86 87 88 89 90

a

jglj1 j1s1 s1o1 1000000000000000000000000000000000000000000000000000000000000000000000000000000000000000000000
a h o 1
a b g a c l jL a
la u g q y 1
a u Lg j
u 1
g E 2
g u b g L a a
g 2
Jg Jg Jg Jg Jg Jg Jg Jg Jg Jg Jg Jg Jg Jg Jg Jg Jg Jg Jg Jg Jg Jg Jg Jg Jg Jg Jg Jg Jg Jg Jg Jg Jg Jg Jg Jg Jg Jg Jg Jg Jg Jg Jg Jg Jg Jg Jg Jg Jg Jg Jg
Jn Jn Jn Jn Jn Jn Jn Jn Jn Jn Jn Jn Jn Jn Jn Jn Jn Jn Jn Jn Jn Jn Jn Jn Jn Jn Jn Jn Jn Jn Jn Jn Jn Jn Jn Jn Jn Jn Jn Jn Jn Jn Jn Jn Jn Jn Jn Jn Jn Jn Jn

A
LwJ1 J 100 100
. wLi1 C Lla:Jg LiJg
aJgjLg1pLsIwOlaS 5ll j
Cg 10d 11b aio yol 1
.aaab cL
J 10000000000000000000000000000000000000000000000000000000000000000000000000000000
ae:II aagg 1 L2E EC/2002/95 EC/2002/96
JLW 8 JI LwJgJgJgJgJgJgJgJgJgJgJgJgJgJgJgJgJgJgJgJgJgJgJgJgJgJgJgJgJgJgJgJgJgJgJgJgJgJgJgJgJgJgJgJgJgJgJgJgJgJgJ g
p1suiw81cl
JSL81gjlg31plaswpa 2 .
.
.
.
.
.
.
.
.
.
.
.
.
.
.
.
.
.
.
.
.
.
.
.
.
.
.
.
.
.
.
.
.
.
.
.
.
.
.
.
.
.
.
.
.
.
.
.
.
.
.
.
.
.
.
.
.
.
.
.
.
.
.
.
.
.
.
.
.
.
.
.
.
.
.
.
.
.
.
.
.
.
.
.
.
.
.
.
.
.
.
.
.
.
.
.
.
.
.
.
.
.
.
.
.
.
.
.
.
.
.
.
.
.
.
.
.
.
.
.
.
.
.
.
.
.
.
.
.
.
.
.
.
.
.
.
.
.
JGL
JG
JL
JG
JL
JG
JL
JG
JL
JG
JL
JG
JL
JG
JL
JG
JL
JG
JL
JG
JL
JG
JL
JG
JL
JG
JL
JG
JL
JG
JL
JG
JL
JG
JL
JG


Brand : PRINCESS
Model : Royal Compact 212010
Category : Food Processor