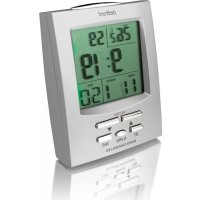
RCT 170 - Alarm bell Dexford - Free user manual and instructions
Find the device manual for free RCT 170 Dexford in PDF.
| Product type | Radio-controlled LCD clock with alarm function (alarm buzzer) |
| Brand | Dexford |
| Model | RCT 170 |
| Power supply | 2 AAA batteries (not included) |
| Display | LCD |
| Main functions | Alarm (2 alarms), radio-controlled clock (DCF signal), indoor temperature, moon phases, date and day, international time, backlight (5 s), snooze (5 min), 12/24 h format, display language |
| Display languages | German, French, Italian, Spanish, English |
| Number of alarms | 2 (Alarm 1 and Alarm 2) |
| Time signal | DCF (radio-controlled) |
| Snooze function | Approximately 5 minutes |
| Backlight | Key activation, duration 5 seconds |
| Temperature display | Indoor, switchable °C/°F |
| Moon phases | Displayed on screen |
| Time format | 12 h (AM/PM) or 24 h |
| Maintenance and cleaning | Clean with a soft, lint-free cloth; do not use cleaning products or solvents |
| Safety | Do not open or repair yourself; do not dispose of in household waste; dispose of batteries separately |
| Warranty | 24 months from date of purchase (excluding batteries) |
| Customer service | Swiss hotline: 0900 00 1675 (CHF 2.60/min) |
| Disposal | Device: local collection center; batteries: point of sale or collection center |
Frequently Asked Questions - RCT 170 Dexford
User questions about RCT 170 Dexford
0 question about this device. Answer the ones you know or ask your own.
Ask a new question about this device
Download the instructions for your Alarm bell in PDF format for free! Find your manual RCT 170 - Dexford and take your electronic device back in hand. On this page are published all the documents necessary for the use of your device. RCT 170 by Dexford.
USER MANUAL RCT 170 Dexford
natural_image
Technical line drawing of a device casing with internal components and a labeled section (8), no readable text or symbols beyond the number.natural_image
Technical line drawing of a device casing with internal components and a labeled section (8), no readable text or symbols beyond the number.natural_image
Technical line drawing of a device casing with internal components and a labeled section (8), no readable text or symbols beyond the number.RCT170 Operating Instructions GB
Radio-controlled, LCD Clock with Alarm Function
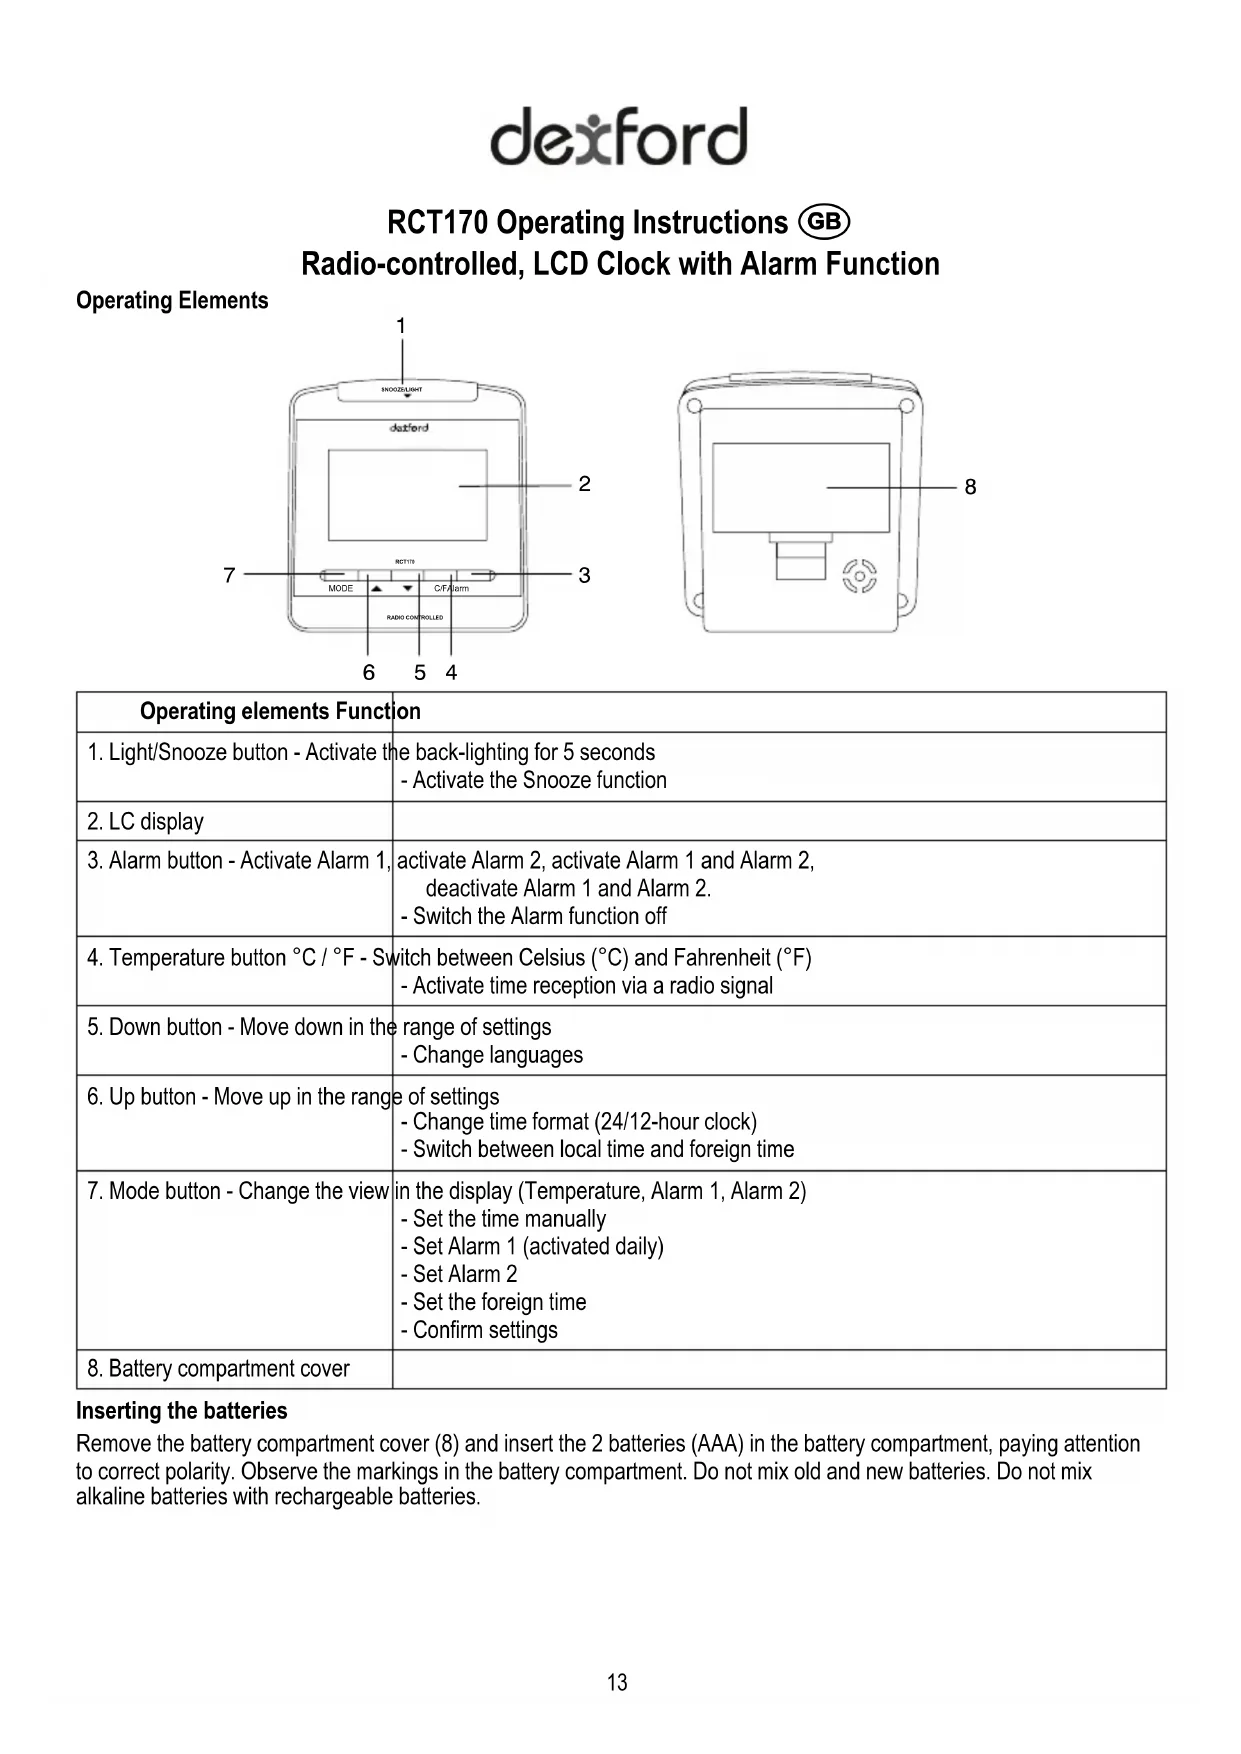
Operating Elements
text_image
1 SKOOTSLIGHT daxford 2 3 7 ROT-14 MODE C/F alarm RADIO CONTROLLED 6 5 4
natural_image
Technical line drawing of a device casing with internal components and a labeled section (8), no readable text or symbols beyond the number.| Operating elements Function | |
| 1. Light/Snooze button - Activate the back-lighting for 5 seconds- Activate the Snooze function | |
| 2. LC display | |
| 3. Alarm button - Activate Alarm 1, activate Alarm 2, activate Alarm 1 and Alarm 2,deactivate Alarm 1 and Alarm 2.- Switch the Alarm function off | |
| 4. Temperature button °C / °F - Switch between Celsius (°C) and Fahrenheit (°F)- Activate time reception via a radio signal | |
| 5. Down button - Move down in the range of settings- Change languages | |
| 6. Up button - Move up in the range of settings- Change time format (24/12-hour clock)- Switch between local time and foreign time | |
| 7. Mode button - Change the view in the display (Temperature, Alarm 1, Alarm 2)- Set the time manually- Set Alarm 1 (activated daily)- Set Alarm 2- Set the foreign time- Confirm settings | |
| 8. Battery compartment cover | |
Inserting the batteries
Remove the battery compartment cover (8) and insert the 2 batteries (AAA) in the battery compartment, paying attention to correct polarity. Observe the markings in the battery compartment. Do not mix old and new batteries. Do not mix alkaline batteries with rechargeable batteries.
Display
dexford

text_image
7:16:45 10 9 z² 11 12 13 14 15 28 8 mo | ○ | 2 3.9 ° 1617181920- Time display 15. Alarm 2 is activated
- Snooze function 16. Temperature display
- Summer time 17. Moon phase display
- Reception indicator 18. Weekday / Year
- Temperature unit 19. Month
- Alarm 1 is activated 20. Day
Intended use
This radio-controlled clock is designed to be used indoors and for setting and reading the time and date. The clock can also be used as an alarm clock and displays both the moon phases as well as the temperature. Any other use is considered unintended use. Unauthorised modification or reconstruction is not permitted. Under no circumstances open the device or complete any repair work yourself.
Changing the display language
You can change the language for the display of the weekdays. The languages available are German (GE), French (FR), Italian (IT), Spanish (SP) and English (EN).
- Press and hold the Down button (5) for 3 seconds when the default display is shown.
The language currently set appears in the display. - Press the Down button (5) to select the language required.
- Press the Mode button (7) to confirm the selection.
Setting the date and time
The radio-controlled clock automatically sets the correct time and date within 3 to 5 minutes.
If the clock does not have a good reception, you can set the time and date manually. The clock attempts to synchronise with the DCF signal every hour. If synchronisation continues to fail after several hours, move the clock to a different location.
- Press the Mode button (7) until the temperature display appears.
- Press and hold the Mode button (7) for 3 seconds (year digits flash).
- Use the Up/Down buttons (6/5) to set the required year and confirm your selection by pressing the Mode button (7).
- Complete exactly the same procedure to set the month, day, hour and minute.
Note! If you do not complete any input for a setting for 30 seconds, the process is cancelled and the clock returns to its default display.
dexford
Setting the alarm time
You can programme 2 different alarm times in the radio-controlled clock.
- Press and hold the Mode button (7) until Alarm 1 or Alarm 2 appears in the display.
- Press and hold the Mode button (7) for 3 seconds (hour digits flash).
- Use the Up/Down buttons (6/5) to set the required hour and confirm the selection by pressing the Mode button (7).
- Use the Up/Down buttons (6/5) to set the required minute.
- Press the Mode button (7) to confirm the setting and activate the alarm time.
Note! If you do not complete any input for a setting for 30 seconds, the process is cancelled and the clock returns to the Alarm 1 or Alarm 2 display.
Switching the alarm on/off
- Press the Alarm button (3) to switch the alarm function settings in the following cycle: Alarm 1 activated, Alarm 2 activated, Alarm 1 and Alarm 2 activated, Alarm 1 and Alarm 2 deactivated.
- When the alarm time activated is reached and the alarm goes off, press the Light/Snooze button (1) to interrupt the alarm for approx. 5 minutes before it continues again.
- Press the Alarm button (3) to switch the alarm off, whereby it is switched off permanently for Alarm 2 or switched off until the same time the next day for Alarm 1.
Note! If you do not press the Alarm button (3) or Light/Snooze button (1), the alarm is automatically switched off after 4 minutes.
Setting the foreign time
In addition to setting the local time, you can also set the time of a location abroad and switch the display between the two times.
- Press and hold the Up button (6) for 3 seconds when the default display is shown. The foreign time display appears together with an "F".
- Press and hold the Mode button (7) for 3 seconds (hour digits flash).
- Use the Up/Down buttons (6/5) to set the required hour and confirm the selection by pressing the Mode button (7).
Note! If you do not complete any input for a setting for 30 seconds, the process is cancelled and the clock returns to the foreign time display.
- Press and hold the Up button (6) for 3 seconds when the foreign time display appears. The default display reappears and the "F" disappears. You can switch between default display and foreign time display at any time.
Back-lighting
Press the Light/Snooze button (1) to switch on the back-lighting for 5 seconds.
Changing the time format
Press and hold the Up button (6) when the default display is shown in order to switch between the 24-hour and 12-hour time format (AM/PM).
Radio signal reception
The clock attempts to synchronise with the DCF signal every hour. You can also initiate reception of the DCF signal manually by pressing and holding the Temperature button (4) for 3 seconds. The reception indicator (12) appears in the display during the process.
Possible sources of interference for radio signals
●Domestic household equipment without RFI suppression
•TV sets less than 2 m away
●Machines producing HF stray fields (high frequency)
dexford
Cleaning
Clean the housing surfaces with a soft, fluff-free cloth. Do not use any cleaning agents or solvents.
Declaration of Conformity
This device fulfils the requirements stipulated in the EU directive. To view the complete Declaration of Conformity, please refer to the free download available on our web site at www.dexford.com.
Disposal
In order to dispose of your device, take it to a collection point provided by your local public waste authorities (e.g. recycling centre). According to laws on the disposal of electronic and electrical devices, owners are obliged to dispose of old electronic and electrical devices in a separate waste container. The adjacent symbol indicates that the device must not be disposed of in normal domestic waste!
Risks to health and the environment from batteries!
Never open, damage or swallow batteries or allow them to pollute the environment. They could contain toxic and ecologically harmful heavy metals. You are legally obliged to dispose of power packs and batteries at the point of sale or in the corresponding containers provided at collection points by local public waste authorities. Disposal is free of charge. The above symbols indicate that the batteries must not be disposed of in domestic waste and that they must be disposed of at an authorised collection point.
Packaging materials must be disposed of according to local regulations.
Guarantee
DEXFORD equipment is produced and tested according to the latest production methods. The implementation of carefully chosen materials and highly developed technologies ensure trouble-free functioning and a long service life. The terms of guarantee do not apply to the batteries or power packs used in the products. The period of guarantee is 24 months from the date of purchase. All deficiencies related to material or manufacturing errors within the period of guarantee will be redressed free of charge. Rights to claims under the terms of guarantee are annulled following tampering by the purchaser or third parties. Damage caused as the result of improper handling or operation, normal wear and tear, incorrect positioning or storage, improper connection or installation or Acts of God and other external influences are excluded from the terms of guarantee. In the case of complaints, we reserve the right to repair defect parts, replace them or replace the entire device. Replaced parts or devices become our property. Rights to compensation in the case of damage are excluded where there is no evidence of intent or gross negligence by the manufacturer. If your device does show signs of a defect within the period of guarantee, please contact the sales outlet where you purchased the DEXFORD device, producing the purchase receipt as evidence. All claims under the terms of guarantee in accordance with this agreement can only be asserted at the sales outlet. No claims under the terms of guarantee can be asserted after a period of two years from the date of purchase and hand-over of the product.
Hotline
In the case of technical problems, you can contact our hotline service, Tel. 0900 00 1675 within Switzerland (Swisscom fees at time of going to print: CHF 2.60/min).