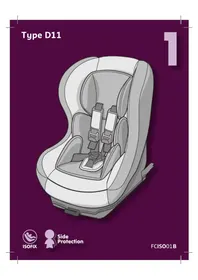
Ferrari Cosmo SP LX Isofix - Car seat Nania - Free user manual and instructions
Find the device manual for free Ferrari Cosmo SP LX Isofix Nania in PDF.


| Product type | ISOFIX Car Seat Group 1 |
| Brand | Nania |
| Model | Ferrari Cosmo SP LX Isofix |
| Category | Car seat |
| Weight group | 9 to 18 kg (approx. 9 months to 4 years) |
| ISOFIX size class | A, B, B1 |
| Vehicle attachment | Universal ISOFIX + Top Tether strap |
| Harness | 5-point, adjustable height (2 positions) |
| Recline | Adjustable (lever under the front of the seat) |
| Buckle | With audible alarm (option on some models) |
| Cover | Removable, hand washable at 30°C |
| Care and cleaning | Clean with a damp sponge and soapy water or hand wash at 30°C. Do not use bleach, do not iron, do not machine wash, do not tumble dry. |
| Safety | Approved R44/04. Installation mandatory with Top Tether strap. Harness must be adjusted without twisting. Regularly check for wear. |
| Seat weight | Approximately 6 kg (estimated) |
| Dimensions (W x D x H) | Approximately 44 x 50 x 65 cm (estimated) |
| Spare parts and repairability | Covers and accessories available via consumer service. Do not modify the seat. |
| General information | Use only on rear seat. Do not leave child unattended. Keep instruction manual in designated pocket. |
Frequently Asked Questions - Ferrari Cosmo SP LX Isofix Nania
User questions about Ferrari Cosmo SP LX Isofix Nania
0 question about this device. Answer the ones you know or ask your own.
Ask a new question about this device
Download the instructions for your Car seat in PDF format for free! Find your manual Ferrari Cosmo SP LX Isofix - Nania and take your electronic device back in hand. On this page are published all the documents necessary for the use of your device. Ferrari Cosmo SP LX Isofix by Nania.
USER MANUAL Ferrari Cosmo SP LX Isofix Nania
IMPORTANT: Your car seat may be fitted with an alarm buckle containing an electronic circuit and an electric battery. Never discard a product at the end of its useful life in a dustbin or public space. According to environmental regulations in force, you must contact the relevant services to collect any Waste Electrical and Electronic Equipment (WEEE). Failure to do so may be punishable by a penalty.
from 9 to 18kg (from approximately 9 months to 4 years)
IMPORTANT: The ISOFIX size class of this car seat is A, B and B1. It can be fitted in vehicles with seats approved as universal ISOFIX positions. Please refer to your car manual.
WICHTIG: This is a German translation of the German translation of Wichtig.
WARNING! Your ISOFIX Group 1 Car Seat MUST be fitted using the Top Tether Strap provided! Your child's safety cannot be guaranteed if you fit your ISOFIX Group 1 Car Seat without using the Top Tether Strap.
We would like to thank you for choosing the ISOFIX Group 1 Car Seat. If you would like help with this product or need to change an accessory, please get in touch with your our Consumer Department (contact details on the back of this manual).
SAFETY INSTRUCTIONS
THESE INSTRUCTIONS MUST BE READ CAREFULLY BEFORE INSTALLATION. FITTING THE SEAT INCORRECTLY CAN PUT YOUR CHILD AT RISK. This car seat must only be fitted on the rear seat of a vehicle equipped with ISOFIX fastenings and a Top Tether anchor (universal ISOFIX approval). Please refer to your car manual.
Always remember to attach and correctly adjust the child's harness and never drive away without checking that the seat is securely fastened to the car's rear seat as indicated in this manual. Make sure the harness buckle is fitted as low as possible to keep the lap section safely across the child's pelvis. Check that the harness straps are not twisted. The child car seat must be firmly attached to the seat as closely as possible (no gap) to ensure maximum protection. See the procedure recommended in these instructions. Under no circumstances should the car seat be altered in any way or should parts be added to it. You should replace this car seat if it is severely impacted during an accident or if it shows wear and tear. Regularly check that the harness shows no sign of wear and tear, particularly the fastening points, the stitching and the adjuster belts. Never leave your child in the seat unsupervised. Make sure that no part of the seat is trapped in a door or folding seat. If your car is fitted with a rear folding seat, check that it is securely locked in the upright position. Direct exposure to the sun increases the temperature inside the vehicle. You should therefore cover the car seat when it is empty so that the parts, especially the buckles, do not heat up and burn the child. Never use the car seat without its cover or use any other cover than that recommended by the manufacturer. In the event of an emergency, the child must be able to be released quickly. The buckle, which opens easily, should therefore never be covered. Tell your child that he/she must never play with the belt buckle. Always remember to check that there is no food or other waste in the belt buckle or the central adjuster. Luggage and all other heavy or sharp objects in the vehicle must be securely held down. Objects that are not fastened can injure the child if an accident occurs. Do not dress your child in overly-bulky clothing in winter.
Your ISOFIX Group 1 Car Seat
This child seat is classified Group 1 and is suitable for children weighing 9 to 18 kg (approx. age 9 months to 4 years). (1)
- Base + cover
- Adjuster (x2)
- Harness adjuster strap (x2)
- Crotch strap
5.ISOFIX system adjustment handle
6.ISOFIX base
7.ISOFIX connector (x2) -
Belt buckle
-
Safety pad + harness shoulder strap (x2)
- Top Tether Strap
11.ISOFIX connector release button (x2)
12.ISOFIX system strap
Fitting the ISOFIX Car Seat
Fold the Top Tether Strap over the back of the car seat so that it does not get trapped during installation (2). Extend the ISOFIX connectors from the car seat as much as possible by pulling simultaneously on the red handle on the base and the red ISOFIX system strap (3).
Position the car seat on the vehicle's rear seat and bring the ISOFIX connectors so that they are in line with the seat's ISOFIX anchor points (4). Click the ISO connectors into the anchor points; the indicators on each connector should turn from red to green (5). Release the safety catch of the ISOFIX system by pulling the red handle attached to the base and gently pushing the car seat (6). With the safety catch released, push the car seat by exerting equal pressure on both sides until the rear of the car seat is pressed firmly against the rear seat (7).
Bring the Top Tether Strap over the vehicle's rear seat and attach the clasp to the vehicle's Top Tether anchor point (8).
The additional Top Tether anchor point may be located, depending on the make of your car:
Behind the vehicle's rear seat.
- On the floor, at the rear of the vehicle.
- On the ceiling, at the rear of the vehicle.
Refer to your car user manual to locate the additional Top Tether anchor point. Never attach the Top Tether to a point that is not recommended by the vehicle manufacturer. Never alter the vehicle yourself in order to try and fasten the Top Tether (e.g. by piercing, screwing or attaching an anchor point).
Push the seat against the back of the rear seat and pull on the loose end of the Top Tether Strap. When the belt is as taut as it will go, the indicator on the Top Tether Strap will turn from red to green (9).
Belt buckle
To fasten the harness, bring the two shoulder straps together (10) (11) and insert them into the buckle; you should hear a "click" (12).
To release the harness, press the buckle's red button (13).
Some ISOFIX car seat models are fitted with an optional alarm. The alarm sounds to alert the parents if the child releases the buckle during a journey.
Fitting the harness
Put the harness shoulder straps in one of the two positions indicated (14) so that they
always pass over your child's shoulders (see paragraph on "Adjusting the harness").
To tighten the harness: Pull on the adjusting straps positioned on the harness. You do not need to press on the adjuster buttons (15).
IMPORTANT: A poorly fitting harness can be dangerous. You should not be able to insert two fingers between the shoulder strap and your child's chest.
To loosen the harness: Press on the adjuster buttons positioned on the upper section of the harness, grasp the lower section and pull simultaneously (16).
Adjusting the harness
Make sure that the harness of your car seat is adapted to the height of your child before starting to install the seat in your car.
The harness can be adjusted to two different heights. The straps must pass through the holes that are closest to your child's shoulders. If your child's shoulders are between two levels, always use the higher of the two.
To adjust the height of the harness, remove the upper section of one of the harness straps by twisting the metal keeper located behind the backrest and then pulling the end of the harness strap through the slots of the shell and the cover (17). Feed the end of the harness strap through the same slots at the desired height, both in the cover and the shell and reattach it behind the backrest (18). Make sure that the metal anchor is correctly positioned and that the harness strap is not twisted. Repeat the operation on the second strap.
Inclining the ISOFIX Car Seat
Push the adjustment lever located under the front of the seat upwards, then pull or push the base towards or away from you (19).
Removing the ISOFIX Car Seat
Loosen the Top Tether Strap by pulling on the tensioner to tilt it (20) then release the strap from its anchor point and bring the strap towards you (21). Pull the car seat using the red handle on the ISOFIX base (22). On either side of the seat, release the ISOFIX connectors from their anchor points by pulling the release buttons on the connectors towards you. The indicators will turn from green to red (23) (24). The seat is now unattached and can be removed from the rear side (25).
Storage of the instruction manual
Always read the safety instructions. Read these instructions carefully before use and keep them to hand in the pocket provided for future reference (26).
Cleaning
All the material can be removed. For light stains, clean with a wet sponge and soapy water or hand wash at 30°C in soapy water. Do not use bleach, do not iron, do not machine wash, do not dry in a tumble-dryer.
WARNING
1- This is an ISOFIX SAFETY RESTRAINT DEVICE FOR CHILDREN. It conforms to the Regulation 44 standard and 04 amendments for use in a vehicle fitted with an ISOFIX anchoring system.
2 - It can be used in vehicles fitted with seats approved as universal ISOFIX positions (refer to your car manual), according to the category and size of the child safety restraint.
3 - The mass group and the ISOFIX size class for which this product is suitable are: A, B and B1/9-18 kg.
If you are unsure, please contact the manufacturer of the safety restraint or the retailer.


Brand : Nania
Model : Ferrari Cosmo SP LX Isofix
Category : Car seat