4K - Media player Zappiti - Free user manual and instructions
Find the device manual for free 4K Zappiti in PDF.
| Product type | Media player |
| Brand | Zappiti |
| Model | Zappiti Player 4K |
| Operating system | Android |
| Maximum resolution | Ultra HD 4K (3840 x 2160) |
| Supported video formats | HEVC/H.265, MKV, BD ISO, 3D (MVC, SBS, Top/Bottom), up to 120 Mbps |
| Supported audio formats | High quality up to 192 kHz / 24 bits, multichannel bitstream, stereo downmix |
| Connectivity | Wi-Fi, Gigabit Ethernet |
| Ports | 2x USB 2.0, 1x USB 3.0, HDMI In/Out, optical SPDIF, analog AV output (3.5mm jack), SD/MMC reader |
| Internal storage | Rack for 3.5\" SATA hard drive up to 8 TB (hard drive not included) |
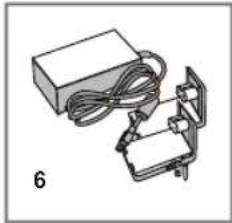
| Power supply | 12V power adapter |
| Dimensions (approx.) | 200 x 150 x 60 mm |
| Weight (approx.) | 0.5 kg |
| Remote control | IR + Air Mouse RF (2.4 GHz) with keyboard on back |
| Main features | 4K upscaling, 3D playback, network (SMB, NAS), Zappiti Media Center V4, multi-room, subtitles, trailers |
| Zappiti Media Center | Cover art interface, automatic indexing, search engine, multi-account, offline mode |
| Care and cleaning | Dust with a soft, dry cloth. Do not use liquid or abrasive products. |
| Safety precautions | Do not open the casing, avoid exposure to moisture and extreme temperatures, unplug before cleaning. |
Frequently Asked Questions - 4K Zappiti
User questions about 4K Zappiti
0 question about this device. Answer the ones you know or ask your own.
Ask a new question about this device
Download the instructions for your Media player in PDF format for free! Find your manual 4K - Zappiti and take your electronic device back in hand. On this page are published all the documents necessary for the use of your device. 4K by Zappiti.
USER MANUAL 4K Zappiti
Manufactured under license from Dolby Laboratories.
Dolby and the double-D symbol are trademarks of Dolby Laboratories.

dt
2.0+Digital Out
DTS, the Symbol, & DTS and the Symbol together are registered trademarks & DTS 2.0+Digital Out is a trademark of DTS, Inc. Product includes software. © DTS, Inc. All Rights Reserved.

Table of Contents Table des matieres
4 English
Quick Start Guide
16 François
- Introduction
Key Features - Extra Functions
Package Contents - Exterior
Remote Control - Getting Started
Connect to PlayStore - Set your personal home page
- Connecting USB Drives
- Using Internal HDD
Using SD Memory Cards - Using USB 3.0 Host Function
- Accessing Network Drives
- Switching the Player On and Off
- NAS (Network Attached Storage)
Wi-Fi - Limitations
- Updating Your Player and Getting More Information
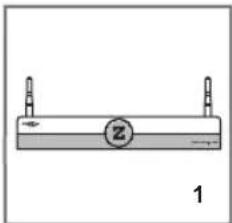
Zappiti Player 4k is an all-in-one solution for video playback with upscaling (up to 4K) and 3D video playback.
Key Features
- Android: Android Apps friendly. Easy access with streaming contents providers, VOD/SVOD, catch up TV, musical playback, social networks, news, weather info, trailers, games, internet radio and more...
- Up-Scaling 4K: Display your videos with an ultra high quality upscaling Ultra HD 4K (3840x2160 and 4096x2160).
- 3D video friendly: Supports most of the 3D video formats such as BD ISO 3D, MVC, SBS, and Top/Bottom.
Network Player: Connect your player on a local network and enjoy your content from a PC, a MAC or a NAS via SMB. - MKV Player: Playback HD and SD video in MKV containers and other modern video file formats, including top quality HD video with very high bit-rates >120 Mbp/s.
HDD Rack Option with Hot Swap Function: Easily and quickly insert and exchange internal 3.5" SATA HDDs (up to 8 TB pre formed HDDs). - USB Ports: Conveniently connect HDDs, USB flash drives, USB card readers and other USB storage devices.
- USB Port 3.0: Read or copy your files in high speed.
Full Range of A/V Connectors: S/PDIF Optical Audio outputs, AV analogue output via an adaptor, HDMI CEC output. - Multichannel home cinema audio: Bitstream, downmix stereo.
High-Quality Music Playback: Plays very high-quality (up to 192 kHz / 24-bit) music files in various formats.
Video Output Flexibility: Output video in any resolution and format from SD to 1080p (1920x1080, 24p/PAL/NTSC), Ultra HD (3840x2160, 24p/25p/30p) and 4K (4096x2160, 24p). True 24p (23.976 Hz output). - Playback memory: Resume playback from the last position.
Computer Mouse Friendly: Connect a computer mouse (air or not) to control the player and Android Apps.
Advanced File Browser: Convenient file browser with powerful file management (copy, move, delete, rename). - Open GUI: Add your own Android Apps, customize the Home Page of the player, add any widgets (weather, news...).
Zappiti Media Center V4 friendly
Zappiti Media Center interface: Cover arts exploration system for your Movies, TV Shows and musical files with presenting informations (subtitles, actors, director, release date, ...). Automatic indexation of Movies and TV Shows by category.
Search Engine: Easy access to your movies or TV Shows thanks to Zappiti powerful search engine combined with smart filters (actors, director, length, ratings, release date,...).
Zappiti edit functions: Edit or delete the movie covers directly via the remote control.
Change the posters, edit the groups, edit the synopsis, change the genre of the movie, etc....
- Zappiti on startup: Enable/disable startup for Zappiti Media Center from system boot by Zappiti setting.
Video sharing: Share your videos with your friends or family (require a MAC or PC).
Package Contents
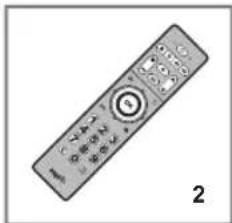
- Zappiti Player 4K
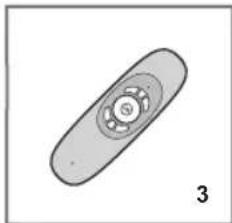
- IR remote control
3.2.4G air mouse
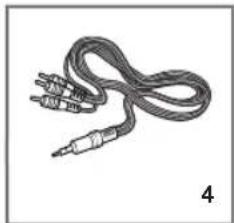
4.AV cable
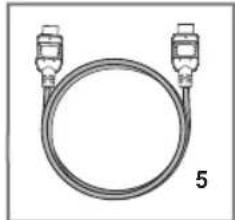
5.HDMI cable - Power adaptor
- Quick Install Guide
English
Exterior
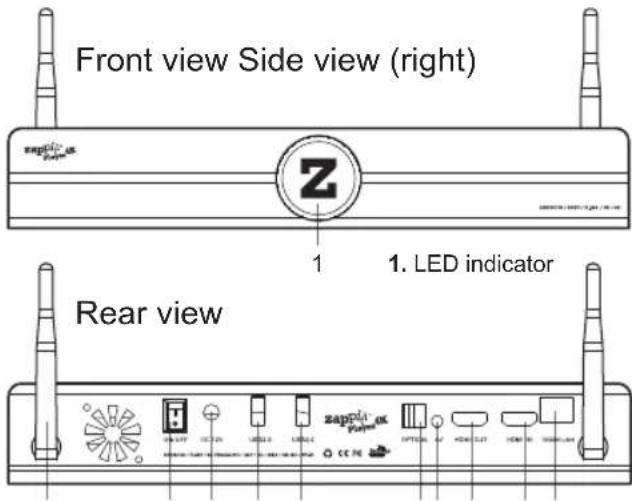
- Wi-Fi antenna
- Power switch
3.DC power 12V - USB 2.0 host
- USB 2.0 host
-
Optical digital audio output (SPDIF)
-
3.5mm AV out
8.HDMI OUT
9.HDMI IN
10.LAN 10/100/1000
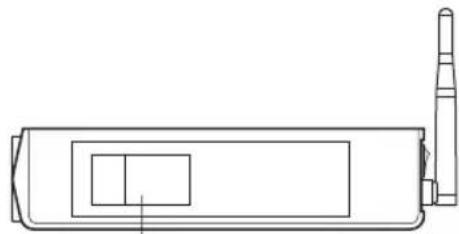
1. Rack HDD door
1123456789102
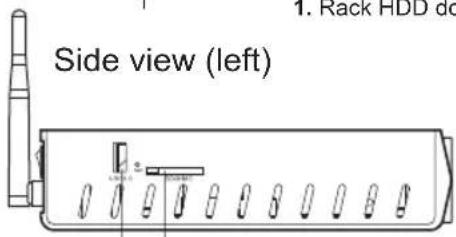
- USB 3.0 host
- SD/MMC card reader
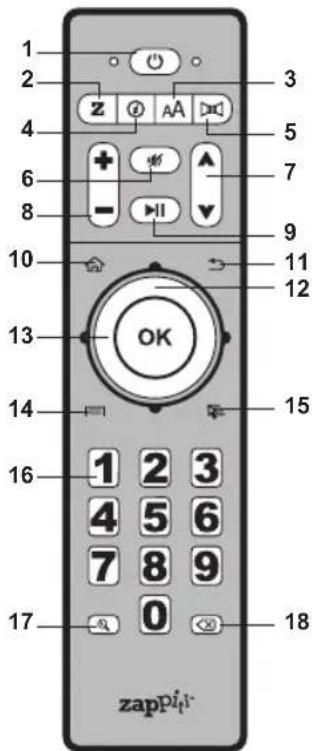
Remote Control
- POWER — Toggle power OFF and ON.
- Z—Toggle Front LED OFF and ON.
- SUBTITLE — Change subtitle language.
- INFO - Show / Hide the pop-up info.
- AUDIO — Change audio language or channel.
- MUTE — Mute audio.
- PAGE UP/PAGE DOWN — Scroll up and down in various lists — Next / Previous chapter.
- VOLUME + / - Increase/Decrease volume.
- PLAY/PAUSE - Start playback / Pause playback.
- HOME - Go to Home Menu to select application.
- RETURN - Stop Playback / Return to the previous menu or mode.
- DOWN/UP - Fast reverse / Fast forward play.
- LEFT/RIGHT — Jump to 1 min backward/forward.
ARROW and OK Buttons — Navigate menu selection. - MENU - Show/hide the pop-up menu.
- MOUSE — Switch to the virtual mouse mode.
- NUMBER Buttons — Enter numeric values;
1-9: direct access from 10 to 90% of the timeline or total pages.
0: reset the playback position to the beginning. - ZOOM — Zoom in / Zoom out.
- DELETE — Delete the previous character/item.
NOTES:
- Use alkaline AAA batteries.
- Observe polarity when inserting batteries.
- Direct the remote control to the player. There must be no obstacles between the RC and the player.
- If RC functions only at short distances or stops functioning, make sure to replace the batteries.
- Some RC buttons may have several functions depending on the current player mode.
- Some RC buttons may be available only in certain player modes or only during playback of a certain content.
Getting Started
Ensure there is enough space around the player for proper cooling. The space at each side should be not less than 10 cm. Ensure the RC has batteries installed.
Connect the player to your TV and to other A/V equipment in an appropriate way. Use HDMI connection to get the best possible quality of video and audio. Make sure to switch off the player and all relevant A/V equipment before connecting them. Ensure your TV and other A/V equipment are configured to use proper inputs.
Make sure to use HDMI OUT (not HDMI IN) connection to link your ZAPPITI PLAYER 4K to your TV.
Switch on the player. The player will perform its initial loading procedure, which may take up to about 1 minute. During the loading procedure, "ZAPPITI PLAYER" logo is shown on the TV.
- If you do not see "ZAPPITI PLAYER" logo on the TV when you switch on the player, it may mean some problem with the connection between the player and the TV or that a wrong video input is chosen in the TV or A/V receiver/switch. In such a case, recheck the cables and the settings of the TV or A/V receiver/switch, or try to use different cables or a different way of connecting the player to the TV.
Finally, you should see the main screen of the player menu. The main screen shows items allowing to use different applications and access all storage devices and network drives connected to the player.
Adjust the player settings as needed using "SETUP" item on the main screen of the player menu. In particular, you may want to adjust video settings, audio settings, and network settings.
WARNING: after firmware update and restart, please restart again the Zappiti Player 4K.
To choose the language of the player menu, use "Settings / Personal / Language & input" setting.
Use the RC buttons UP, DOWN, LEFT, RIGHT, OK, RETURN to navigate through the player menu. Use the MENU RC button to show the list of available commands. Use the INFO RC button to show the INFO pannel.
Before to start using your Zappiti Player 4K, you need to update Android apps:
- On the home page, please click the GooglePlay button.
- Please fill your Google email and password. If you don't have any Google email, please create an account on Google from any computer connected to the Internet.
Add your own applications
The Zappiti Player 4K is compatible with GooglePlay. So you can install your own Android applications.
Set your personal home page
The home page of the Zappiti Player 4K can be modified. To add a new application previously installed as shortcut on the home page, click on the "+" icon located on the bottom of the page. Then, click the selected application. A shortcut of the app will appear on the bottom of the Home Page. To delete an application form the home page, press MENU button of your RC then select DELETE.
NOTE: To stop the process of an application in use, click on the "All Task Killer" button located on the top of the home page. To uninstall an app, go to "Settings / Apps", click on the app icon you want to uninstall, then please click on the Uninstall button located on the application settings page.
Connecting USB Drives
Before connecting a USB drive, start ES Explorer. The player will recognize the USB drive, and will show an item corresponding to the USB drive on the local source list located on the left.
When connecting a USB drive requiring significant power (such as USB HDD), use an external power supply for the USB drive. Power provided by the USB ports of the player may not be enough for correct functioning of the USB drive. Do not disconnect or switch off the USB drive when some write operation is in progress.
Using Internal HDD
To insert the internal 3.5" SATA HDD, open the HDD rack door, insert the HDD into the HDD rack and close the HDD rack door. The player will recognize the internal HDD, and will show an item corresponding to the internal HDD on the local source list in ES Explorer.
Do not eject the internal HDD when some write operation is in progress. It is recommended to use "green" HDD models with small RPM value, small heat emission, and small power consumption. The Zappiti Player 4K is not able to format HDD. To format an HDD, please use dedicated format software on your computer. The Zappiti Player 4K is compatible with pre formatted HDDs up to 6 TB (NTFS, FAT16, FAT32, HFS, EXT2/3).
Using SD Memory Cards
To use a memory card, insert it in the memory card slot located on the left side of the media player. The Zappiti Player 4K will recognize the memory card, and will show an item corresponding to the memory card on the local source list in ES Explorer. Some SD memory cards may not be recognized by the player or may work incorrectly; in such a case, use other models of memory cards. Do not eject the SD memory card when some write operation is in progress.
Using USB 3.0 Host Function
The Zappiti Player 4K feature a USB 3.0 port. This port can be used to transfer files to on from an external HDD with very high speed.
Accessing Network Drives
ES Explorer feature Samba client which explores the pictures, musics, videos, documents and other files on your server NAS or your computers. With ES Explorer you can manage your files like you do on your desktop or laptop using Multiple Select, Cut/Copy/Paste, Move, Create, Delete, Rename, Search, Share, Send, Hide, Create Shortcut, and Bookmark.
Switching the Player On and Off
To put the player into the standby mode, press the "POWER" RC button. To exit the standby mode, press this button again.
To switch the player off completely, disconnect the power plug.
NOTE: After switching off the player completely, it is recommended to wait about 1 minute before switching it on again.
Wi-Fi
Your player is equipped with a built-in wireless LAN adapter. You can use it to connect the player to the local network via Wi-Fi.
Updating your Zappiti Player 4K and Getting More Information
Please check here for updated versions of player firmware (which may improve player functioning and extend player capabilities):
zappiti.com/firmwares
Please check here for more detailed and up-to-date documentation and information on player usage: zappiti.uservoice.com/knowledgebase
Zappiti Media Center V4
Zappiti Player 4K offers a "Zappiti Media Center Premium" licence. The licence number (Token) is printed on the underside of the unit. To launch Zappiti Media Center, please click the "Z" icon on the main page. Zappiti organizes automatically your media collection (Movies, TV Shows) in categories and offers a simple, easy and stylish navigation by using cover arts or album thumbnails browsing with synopsis and various media info. Before you start using Zappiti, you must create two different folders:
Movies
-
Please, create a folder named "MOVIES" and copy all your movie and concert files in it.
-
Rename the movie files with the exact movie title. For example : the movie
"Metropolis" in MKV format should be named as "Metropolis.mkv".
Introduction
zappiti.uservice.com/knowledgebase
zappiti.com/assistance
http://zappiti.uservoice.com