EB2000 - Heated blanket/cushion Carmen - Free user manual and instructions
Find the device manual for free EB2000 Carmen in PDF.

| Product type | Heating blanket/pad |
| Brand | Carmen |
| Model | EB2000 |
| Power supply | 230-240 V ~ 50 Hz |
| Number of persons | 2 persons (double model) |
| Foot heating function | Yes, separate and adjustable |
| Heat levels | 3 levels (preheat, medium, low) + off |
| Indicators | Light indicator of heat levels and Braille markings |
| Overheat protection | Built-in anti-overheat system |
| Setup | On mattress, with control button at top of bed, elastic corners |
| Night use | Yes, level 1 recommended |
| Preheat | Levels 2-3, duration 60-90 min |
| Control type | Rotary knob with off, Braille and indicator light |
| Cord length | Not specified, adaptable with extension cord |
| Maintenance | Machine wash wool program 40°C or hand wash |
| Drying | Line dry or machine dry at low temperature |
| Ironing | Do not iron |
| Dry cleaning | Not allowed |
| Storage | Fold carefully after cooling, avoid creases |
| Dimensions (approx.) | Approximately 150x130 cm (double size, estimated) |
| Weight | Approximately 1.5 kg (estimated) |
| Color | Not specified, usually white or cream |
| Warranty | 2 years, excluding wear parts |
Frequently Asked Questions - EB2000 Carmen
User questions about EB2000 Carmen
0 question about this device. Answer the ones you know or ask your own.
Ask a new question about this device
Download the instructions for your Heated blanket/cushion in PDF format for free! Find your manual EB2000 - Carmen and take your electronic device back in hand. On this page are published all the documents necessary for the use of your device. EB2000 by Carmen.
USER MANUAL EB2000 Carmen
text_image
D 10-15 cm 4-6 inches EB0500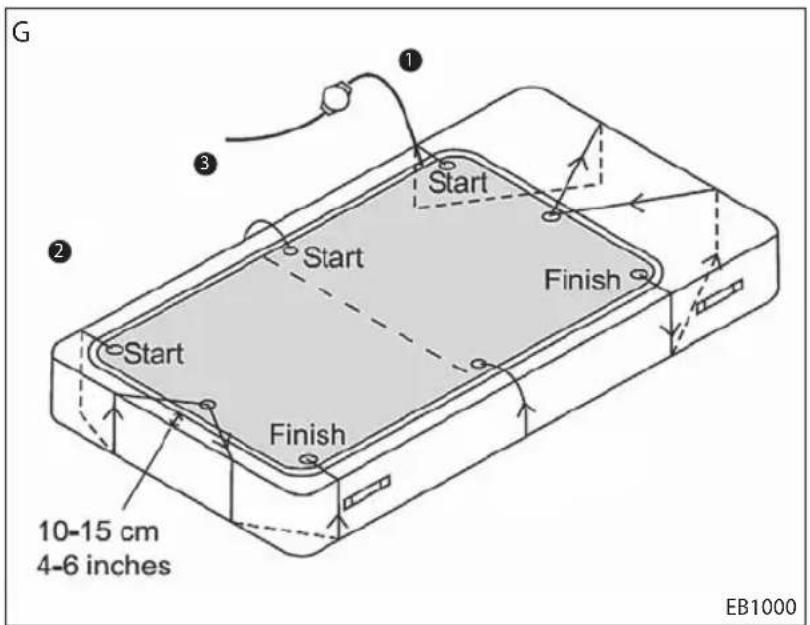
text_image
G Start Start Finish 2 Start Finish 10-15 cm 4-6 inches EB1000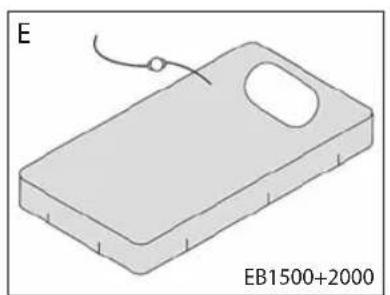
natural_image
Isometric illustration of a rectangular electronic device with a handle and circular cutout, labeled E and EB1500+2000 (no text or symbols on the device itself)
text_image
Prohibition sign with crossed scissors and a hammer, indicating no use or prohibition of scissors and scissors.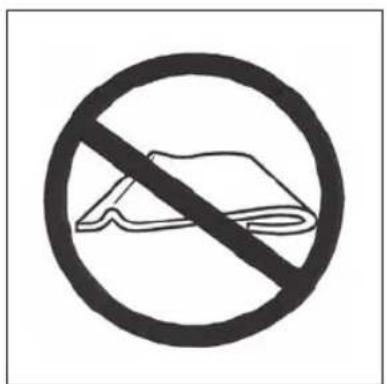
text_image
Prohibition sign with a diagonal line crossing over a document, indicating no prohibition or exclusion.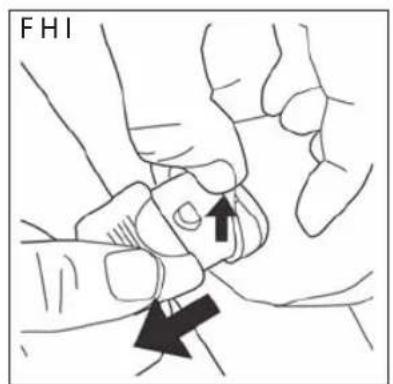
text_image
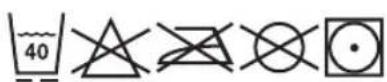
FHI
> Instructions for use
ThankyouforpurchasingtheCarmenelectricunderblanket.Please readtheseinstructionscarefullybeforeusingtheproductandkeep them in a safe place for future reference.
> The product
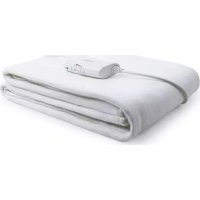
Name:CarmenSingleCottonblanket, CarmenSingleFleeceblanket, CarmenSingleFleececoverwithfootwarmthenCarmenDouble Fleece cover with foot warmth
Model: EB0500, EB1000, EB1500 and EB2000
Voltage: 230 - 240 V ^-50 Hz AC
> Part of the appliance
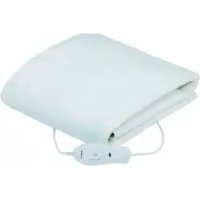
- Blanket
- Switch with cord and plug (model EB2000 2x)
> For your safety
The instructions include safety guidelines and other information important for the proper functioning of the appliance. Pleaseread the instructions carefully and keep them in a safe place.
If the appliance changes hands, be sure to give the instructions to the new owner. It is in your own interest to follow all safety guidelines.


> Safety instructions
- AllCarmen heatedblanketshavebeen manufactured to the highest European standards. This product has been comprehensively tested for all known safety situations, so you can relax in the knowledge that it will provide warmth, comfort and peace of mind.
- Beforeusing this appliance ensure that the voltage indicated on the product corresponds with themains voltage in your home. If you are in any doubt about your supply, ask you electrical dealer or local electricity company.
- Only specialists are allowed to do reparations. Improperly reparations can cause considerable danger!
- Thereisalwaysriskofinjurywhenusingelectricalappliances improperly!
Personal safety
- This appliance is not intended for the use by persons (including children) with reduced physical, sensory or mental capabilities, or lack of experience and knowledge, unless they have been given supervision or instruction concerning use of the appliance by a person responsible for their safety.
- Childrenshouldbesupervisedtoensurethattheydonotplay with the appliance.
- Donotusewithahelplessperson,aninfantorapersoninsensitive to heat.
- Youngchildrenshouldbeinstructedonhowtooperatethecontrolssafelyandheatsettingscontrolledbyaparentorguardian.
- Do not use a hot water bottle at the same time as using the blanket.
Product safety
- Ensuretheblanketisusedinthemannerinwhichitisintended, as an under blanket.
- Ifusedonanadjustablebed,checktheblanketorcordcannot become trapped or rucked.
- Ensure the product is correctly fitted to the bed, following the instructions in this booklet.
- Do not insert pins or any sharp objects into the blanket (H).
- Donottucktheheatedpartofblanketmaterialunderthemattress.
- Do not use if the blanket is wet.
- Avoidpressing creases or folds into the blanket. Donot switch on if the blanket is folded, creased or rucked (I).
- Donotuseanylead, switchorcordotherthantheonesupplied with this blanket.
- Do not coil or lay the lead on the blanket.
- If you are unsure about electrical connections please contact a qualified engineer.
Safeguard overheat protection system
- The system will remain dormant indefinitely as long as the blanketisoperatinginthenormaltemperaturerange.Ifforany reasontheblanketisoperatedinanabnormalsituationorconditionwhichwouldotherwisehaveinducedarapidtemperature risehighenoughtoconstituteahazard,theoverheatsystem shouldintervenebycuttingoffthesupplycurrentbeforethe temperaturereachesthepointatwhichdamagemayoccur.
- Intheeventoftheoverheatsystemoperating,theblanketwill cease to function.
- It is normal for the lead from the blanket to the switch to become warm as this is part of the heater protection circuit extended to the switch.
- Thefactthatthisblanketincorporatestheoverheatsystemdoes not absolve the user from observing these instructions.
Safety instructions for cleaning and maintenance
- Donotdrycleantheblanket, followwashinginstructions on the label attached to the blanket and the detail that relate to your blanket (Cleaning and Maintenance).
- Whenstoringtheblanket,allowittocooldownbeforefolding.
- Donotcreasetheblanketbyplacingitemsontopofitduring storage.
> Use in accordance with purpose
The appliance is only intended for (pre) heating your bed. Use only as an under blanket and donot use abov the occupant of the bed.
Noliability is accepted for any damager resulting from use for other purposes, faulty operation or amateurrepairs. Guaranteeservices are also excluded in such cases.
The appliance is not intended for medical use in hospitals!
> Operating instructions model EB0500
Switch control (A)
- Heat levels 3 and 4
- Heat levels 1 and 2
- Braille markings
- Off position
How to use switch
- Ensure the blanket is fitted to the bed correctly.
- Plug the power lead into the closest socket, using an extension lead if needed to ensure that the lead is not stretched.
Preheating the bed
Move the heat setting on the control switch to heat level 3 or 4, depending on the level of the heat required. Allow approximately 60-90 minutes for the blanket to heat the bed thoroughly, although this may vary depending on the room temperature and type of bedding used.
All night use
Movetheatsetting on the control switch to heat level 1 or 2.
- Thesesettingswill providesafeandcomfortableheattosleep on all night.
• These settings can also be used to air the bed.
Warning!
Alwaysensure that the heat setting is moved to the OFF position when you get up the next day, or after airing the bed.
Braille markings
- Braillemarkingsarelocatedonthebackoftheswitchtohelp identifythedirectionoftheheatlevelinthedark,orifvisually impaired.
- The highest heat level 'pre-heat' is identified by 3 raised nodules, 'midlevel' by 2 raised nodules and 'lowlevel' (all night) by 1 raised nodule Fitting underblanket.
Fitting instructions
- Place the blanket directly on the mattress, with the control switch end at the head of the bed (D).
- The blanket must be positioned to them atress in the following manner. Place the blanket directly on them atress and ensure that a space of 10-15cm (4-6 inches) is left between the bottom edge of the blanket and mattress.
- Positiontheblanketonthebedensuringthepillowareaisclear.
> Operating instructions model EB1000
Switch control (B)
- Illuminated heat setting light
- Heat levels 3 and 4
- Heat level 1 and 2
- Braille markings
- Off position
How to use switch
- Ensure the blanket is fitted to the bed correctly.
- Plug the power lead into the closest socket, using an extension lead if needed to ensure that the lead is not stretched.
Preheating the bed
Move the heat setting on the control switch to heat level 3 or 4, depending on the level of the heat required. Allow approximately 60-90 minutes for the blanket to heat the bed thoroughly, although this time may vary depending on the room temperature and type of bedding used.
All night use
Move the heat setting on the control switch to heat level 1 or 2.
- Thesesettingswill providesafeandcomfortableheattosleep on all night.
• These settings can also be used to air the bed.
Warning!
Alwaysensure that the heat setting is moved to the OFF position when you get up the next day, or after airing the bed.
Braille markings
- Braillemarkingsarelocatedonthebackoftheswitchtohelp identifythedirectionoftheheatlevelinthedark,orifvisually impaired.
- The highest heat level 'pre-heat' is identified by 3 raised nodules, 'mid level' by 2 raised nodules and 'low level' (all night) by 1 raised nodule Fitting underblanket.

Fitting instructions
- Place the blanket directly on the mattress, with the control switch end at the head of the bed.
- The blanket must be positioned to them at the following manner. Place the blanket directly on them at the mattress and ensure that a space of 10-15cm (4-6 inches) is left between the bottom edge of the blanket and mattress. Position the blanket on the bed ensuring the pillow area is clear. (G).
• Each blanket is fitted with 3 tie tapes.
- Donot stretch the tape toottightly. Allows some 'give' to avoid edged distortion. Ensure knots are not tied toottightly so that they can be undone easily.
- Pass the first tape (1) under the corner of the mattress.
- Thread up through the centre eyelet.
- Pass under the adjacent corner and tie off to opposite loop.
- Repeat for the second tape(2) at opposite end of the blanket.
- Pass the centre tape (3) underneath the mattress and tie to opposite loop.
- If the tape is too long you can cut off the ends.
> Operating instructions model EB1500 and EB2000
Switch control (C)
- Illuminated heat setting light
- Heat levels 2 and 3
- Heat level 1
- Braille markings
- Off position
- Foot warmth only on/off switch
How to use switch
- Ensure the blanket is fitted to the bed correctly.
- Plug the power lead into the closest socket, using an extension lead if needed to ensure that the lead is not stretched.
Preheating the bed
Movetheatsettingonthecontrolswitchtoheatlevel2and3, dependingontheleveloftheheatrequired.Allowapproximately60-90minutesfortheblankettoheatthebedthoroughly, althoughhistimemayvarydependingontheroomtemperature and type of bedding used.
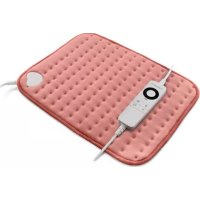
Foot warmth
Models EB1500 and EB2000 have the possibility to switch on separateandonlythefootwarmthfunction.Movetheatsetting on the control switch to the level indicated with foot symbol. Switchoffthefootwarmthafterreachingcorrecttemperature. The foot warmth is too warm for all night use.
All night use
- Move the heat setting on the control switch to heat level 1.
- Thissettingwillprovidesafeandcomfortableheattosleepon all night.
• This setting can be used to air the bed.
Warning!
Alwaysensure that the heat setting is moved to the OFF position when you get up the next day, or after airing the bed.
Braille markings
- Braillemarkings are located on the back of the switch to help identify the direction of the heat level in the dark, or if visually impaired.
- The highest heat level 'pre-heat' is identified by 3 raised nodules, 'midlevel' by 2 raised nodules and 'lowlevel' (allnight) by 1 raised nodule Fitting under blanket.
Fitting instructions
- Placetheunderblanketdirectlyonthemattresswiththecontrol switchendattheheadofthebed.Donotturntheblanketover, ensure that the socket on the blanket is facing upwards.
- Fittheshapedcornerstothemattressandturntheelasticated edges of the skirt under the mattress (E).
- Ensure all creases are smoothed out and the skirt fits tightly round the sides of the mattress.
> Cleaning and maintenance
- Examine frequently for any signs of wear or damage to the blanket, switch or cord. In case of damage or misuse, please return immediately following instructions underservicing.
-
Iftheblanketfailstoperate,checkthefollowingbeforereturning:
-
Ensure that the plug and socket havenot become disconnected.
-
Check that the supply plug is corrected tot the flex.
- No attempt should be made to repair the blanket or have it repaired locally and the switch supplied must never be replaced other than by the manufacturer's specialized components are not generally available.
Storage
- Tostore, fold carefully and placebo into original packaging.
- Whenstoringtheblanket,allowittocooldownbeforefolding.
- Donotcreasetheblanketbyplacingitemsontopofitduring storage.

Washing instructions
- Do NOT dry clean.
- Do NOT iron.
- Only use in a washing machine with a drum large enough to take the blanket without forcing it in.
- Beforewashing ensure that you detach all the controls from the blanket.
- Measure the blanket so it can be stretched back to its original size whilst wet.
Machine washing
- Unplug the blanket from the power socket.
- Disconnect the control switch and cord from the blanket by lifting the locking lever over theraised button and pull apart (F).
- Wash on the WOOL setting at 40^ C.
- Gentlystretch the blanket back to its original shape and size before drying without applying clothespegstothewiredareas of the blanket or see instructions for tumble drying.
Hand washing
- Unplug the blanket from the power socket.
- Disconnect the control switch and cord from the blanket by lifting the locking lever over theraised button and pull apart (F).
- Useamildwashingliquidordetergentandlukewarmwater.
- Immerse the blanket in the water and allow to soak for 5-10 minutes.
- Squeeze the soapy water through the fabric.
- Rinsethe blanketthoroughlyincoolwater, gently squeezing the fabric. Warning: Do not wring dry!
- Gently stretch the blanket back to its original shape and size before drying without applying clothes pegstothewired areas of the blanket or see instructions for tumble drying.
Tumble drying
- Controls must be removed.
- Gentlystretchtheblanketbacktoitsoriginalshapebeforedrying.
- Tumbledryonthelowheatsetting, following the manufacturer's instructions for the required drying time.
> Environment and disposal
Never dispose of your appliance with the regular household waste. Follow the wasted disposal regulations of your locality or return your appliance to retailer.
> Guarantee
The guarantee covers this product for a period of 2 years, with the exception of individual parts, beginning on the date of original purchase. Use of the guaranteedoes not result in extension of the guarantee period. The guarantee covers manufacturing faults and material faults in original parts.
This guarantee does not include normal wear and tear and damagetotheproductbyaccidentormisuse,abuse,alterationto theproductoruseinconsistentwiththetechnicaland/orsafety instructions required.
If your product requires repair, you should contact an authorized service dealer.
Neverdisposeofyourappliancewiththeregularhouseholdwaste. Followthewastedisposalregulationsforyourlocalityorreturn yourappliancetotheretailer.Retaintheretailer'sreceiptasproof of purchase.
Carmenhasapolicyofcontinuousimprovementinproductquality anddesign.Carmenthereforereservestherighttochangethe specifications of its products at any time.

CARMEN®
Underblanket Single/Dual
model EB0500, B1000, EB1500, EB2000
Glen Dimplex Benelux BV
NL
Tel.: +31 (0)513 65 65 00
Fax: +31 (0)513 65 65 01
www.carmen.nl
info@glendimplex.nl
B
Tel.: +32 (0)9 210 02 17
Fax: +32 (0)9 210 02 18
www.carmen-personalcare.be
info@glendimplex.be