USER MANUAL Wanda KORONA
natural_image
Exterior view of a modern office or appliance with a digital display and circular base (no visible text or symbols)
GB MOUNTED KITCHEN SCALE Instructions for use 6
F BALANCE CULINAIRE MURALE Instructions d'utilisation 9
natural_image
Illustration of a hand pressing a button on a floppy disk (no text or symbols visible)
natural_image
Simple line drawing of a game controller with a pencil, no text or symbols present
natural_image
Simple line drawing of a tool interacting with a rectangular object, no text or symbols present

natural_image
Diagram showing three screws inserted into a socket with a shaded area between them (no text or symbols)
natural_image
Diagram showing a device with a digital display and a control panel connected by an arrow (no text or symbols present)
natural_image
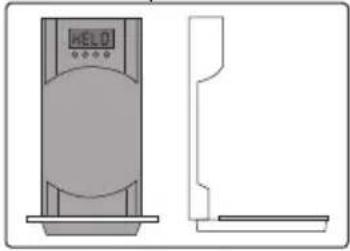
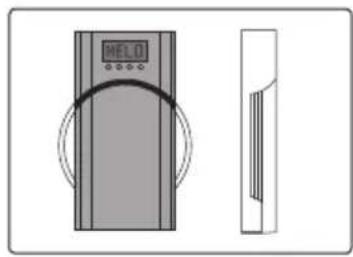
Technical line drawings of a device with two views: one showing a display labeled 'HELO' and the other showing a circular component with a curved line (no text or symbols present)
Einstellen der Uhr
text_image
Tāre 22.9
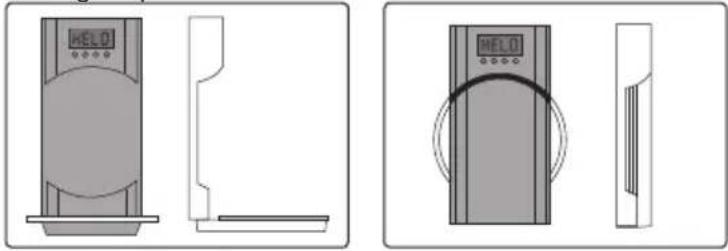
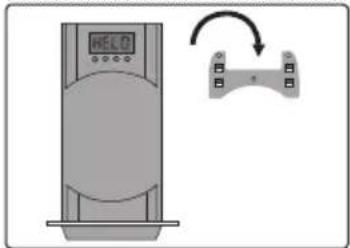
The scale is designed to mount on the wall or to sit on the counter.
Wall mount
Important Insert 2 "AAA" Alkaline batteries first. Battery compartment located at the back top of the scale.
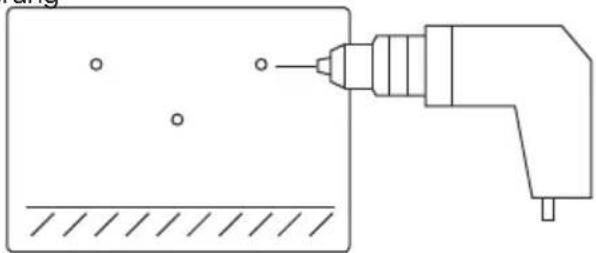
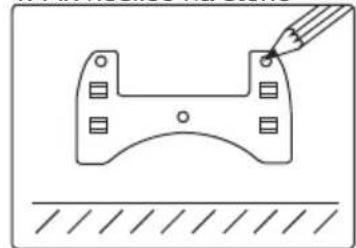
- Remove the metal bracket from the package
natural_image
Illustration of a hand pressing a button on a computer floppy disk (no text or symbols visible)
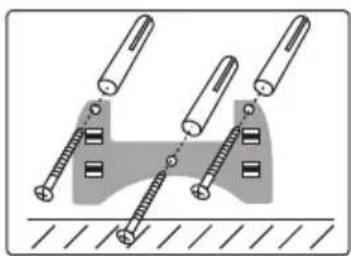
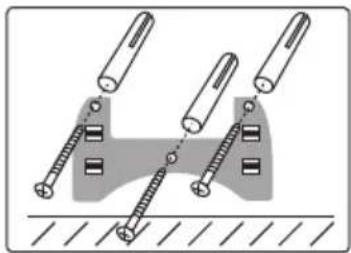
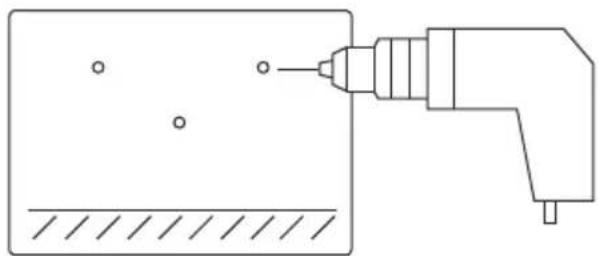
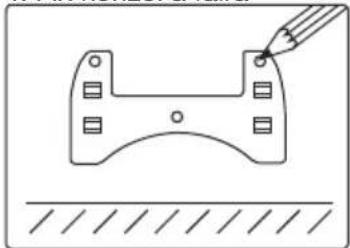
- Using the bracket mark 3 holes location on the wall
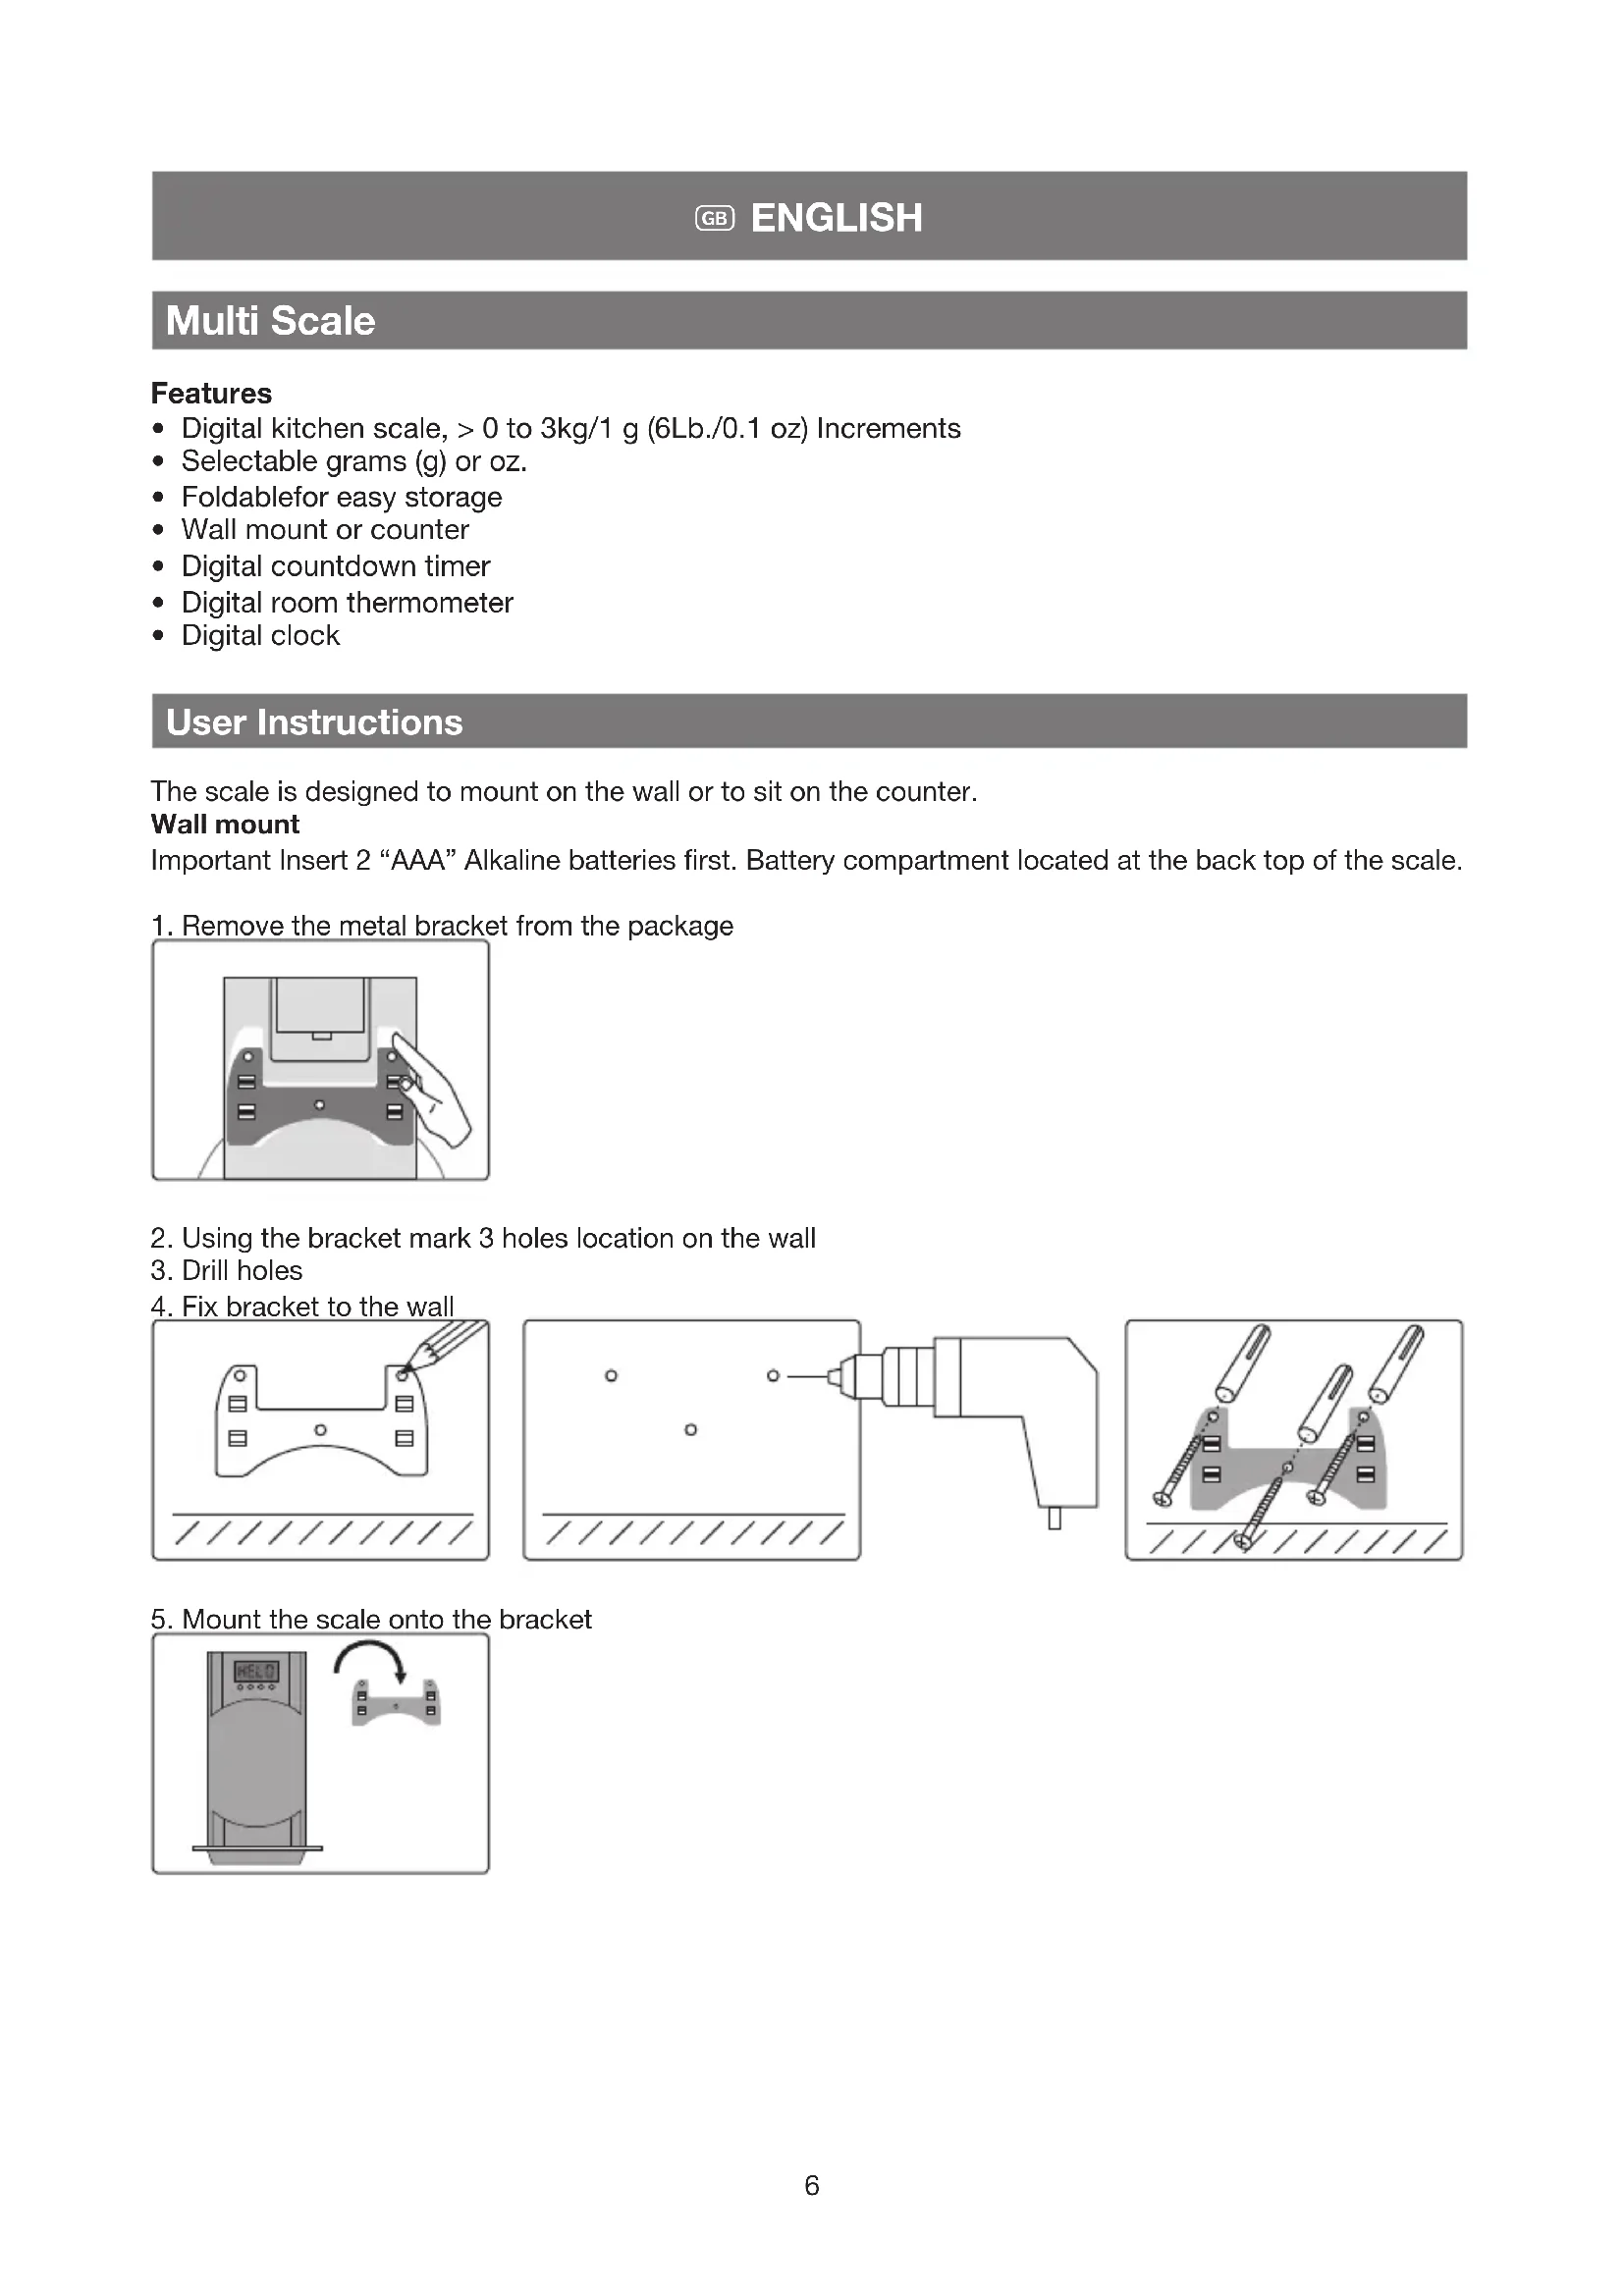
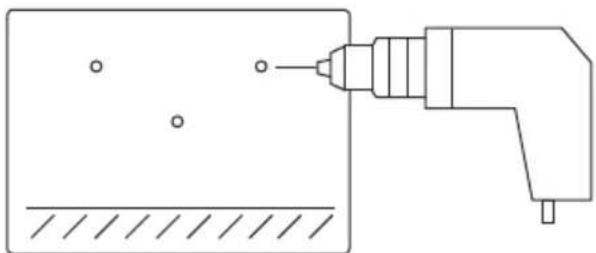
- Drill holes
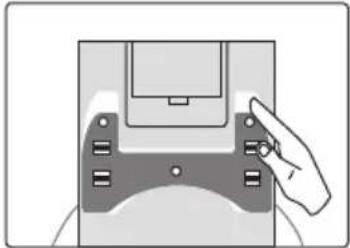
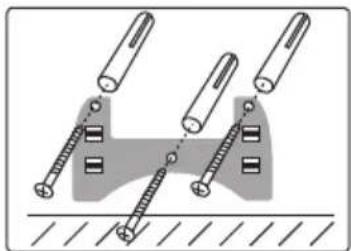
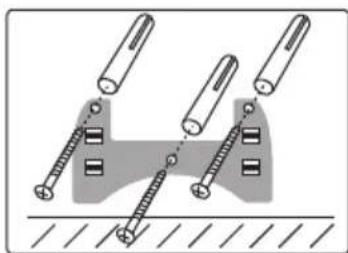
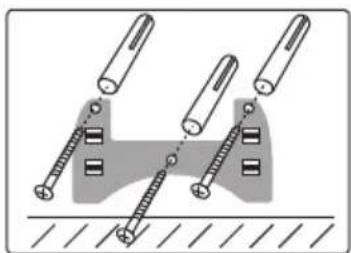
- Fix bracket to the wall

natural_image
Simple line drawing of a mechanical component with a pencil, no text or symbols present

natural_image
Simple line drawing of a tool applying material to a rectangular block (no text or symbols)
natural_image
Diagram of mechanical fasteners interacting with a base plate (no text or symbols)
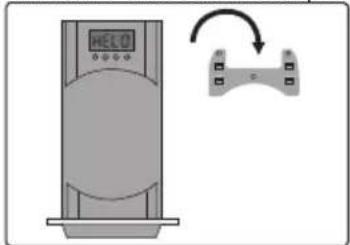
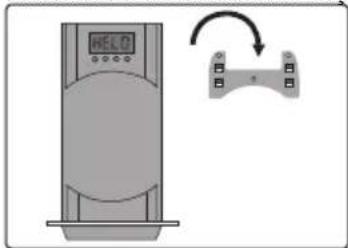
- Mount the scale onto the bracket

text_image
Diagram showing a digital display unit connected to a device with an arrow indicating rotation or adjustment.
- Fold to open or close
natural_image
Technical line drawing of a vertical device with a circular base and side profile view (no text or symbols)

natural_image
Diagram showing a vertical control panel with a digital display and curved arrow, alongside a side-view schematic (no text or symbols)
Adjusting the clock
- Press "TARE/ON" button and bring the LCD display to read a 0 g (0.0 oz). Reading
- Press "TIME" button for 4-5 seconds until the LCD display change to time mode and the Hours flash.
- Press "UNIT" button to set the Hours up or C° / F° to set the Hours down
- Press the "TIME" button again to set the Minutes.
- Press the "TIME" button again to save your setting,
Timer / Count Down Operation
- While displaying the time, press and hold the "TIME" button for 3 seconds, then release. Once released the 2 zeros on the left of the timer would flash.
- Press the "UNIT" to increase the timer and the C^ / F^ to decrease.
- Press the "TIME" button again to start the count down.
- When time is over the buzzer will sound for about 20 seconds. To stop the buzzer any time, press the "TIME" button.
Weighing procedures
- Press the "TARE/ON" button to change from clock function to scale and to zero up the scale.
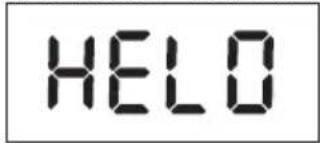
text_image
HELO
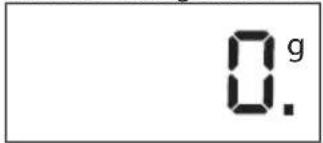
text_image
0.g
0.
- Change from g to oz. by pressing the "UNIT" button.
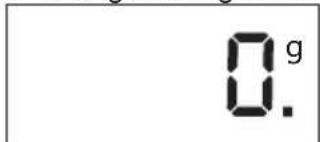
text_image
0.g
0.
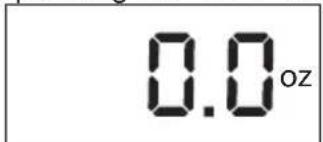
text_image
0.0 oz
- Put the food on the glass platform and read the measurement.
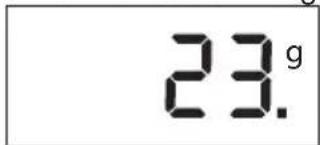
text_image
23.g
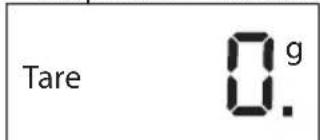
- When some food already weighing on the platform, press the "TARE" button and add another food onto the platform. The scale will now display the new added weight. Repeat this function if needed.
text_image
Tare
0.g.
0.
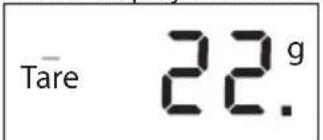
text_image
Tare 22.9
- Press the "TARE/ON" button for 3 seconds to change back to clock function.
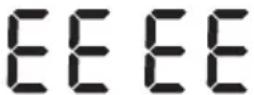
- "EEEE" is displayed in over load status. Do not put over 3 kg(6 Lb) on the platform.
The room temperature is displayed at the top right corner of the LCD display. Change from C^ to F^ by press the “ C^/F^ button.
Note: Extreme sources of electromagnetic radiation, such as those caused by the operation of radio equipment in the vicinity of the scales, can affect the value displayed. The product will return to proper function as soon as the interference has been eliminated. Note: the unit may need to be restarted.
Legal information obligation regarding the disposal of batteries
Do not dispose of batteries in domestic waste. As a consumer, you are legally required to return used batteries. You may return your used batteries to public collection points in your community or to any retailer that sells batteries of the same type.
Note
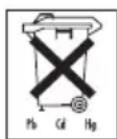
Pb = Battery contains lead,
Cd = Battery contains cadmium
Hg = Battery contains mercury
CR (Li); AA (Al, Mn); AAA (Al, Mn)
Safety information for lithium batteries (CR2032/CR2430)
- Lithium batteries are lithium-manganese cells. If you are not intending to use the scales for a long period of time, you should remove the batteries from the device.
- Never open the lithium batteries or throw them into fire or expose them to shocks, as harmful vapours could escape or batteries might explode.
- Never touch leaking batteries with your bare hands:
- If your eyes or hands are contaminated, rinse with a lot of water; in case of skin or eye irritation, consult a doctor.
- Only dispose of cells that are completely discharged or packaged protected against polarity reversal in accordance with local disposal regulations.
- Do not subject the cells to direct sunlight and extreme heat; otherwise, there is a risk of overheating.
- Maintain a storage temperature of < 40 QC.
Disposal of electrical and electronic devices

Follow local regulations regarding the disposal of materials. The appliance should be disposed of according to Regulation 2002/96/EC-WEEE (Waste Electrical and Electronic Equipment). In case of queries, contact the municipal authorities responsible for waste disposal in your area.
Multi échelle
Traits
natural_image
Illustration of a hand pressing a button on a floppy disk (no text or symbols visible)
natural_image
Simple line drawing of a game controller with a pencil, no text or symbols present

natural_image
Simple line drawing of a tool applying material to a rectangular block (no text or symbols)

natural_image
Diagram showing three screws inserted into a socket with a shaded area between them (no text or symbols)
natural_image
Diagram showing a device with a digital display and a control panel connected by an arrow (no text or symbols)
natural_image
Technical line drawings of a device with 'HELO' display and side panel, no text or symbols present
natural_image
Illustration of a hand pressing a button on a floppy disk (no text or symbols visible)
natural_image
Simple line drawing of a game controller with a pencil, no text or symbols present

natural_image
Simple line drawing of a tool applying material to a rectangular block (no text or symbols)

natural_image
Diagram showing three screws inserted into a socket with a shaded area between them (no text or symbols)
natural_image
Diagram showing a vertical device with a digital display and a curved arrow pointing to a control panel (no text or symbols present)
- Piegare para abrir o cerrar
natural_image
Technical line drawings of a device with two views: one showing a digital display labeled 'HELO' and the other showing a circular component with a curved line (no text or symbols present)
Ajuste del reloj
natural_image
Illustration of a hand interacting with a floppy disk (no text or symbols visible)
natural_image
Simple line drawing of a game controller with a pencil, no text or symbols present

natural_image
Simple line drawing of a tool interacting with a surface, showing no text or symbols
natural_image
Diagram of mechanical clamping or disassembly process with three screws and a base, no text or symbols present
natural_image
Illustration of a vertical control panel with a digital display and a curved arrow indicating rotation (no text or symbols)
natural_image
Technical line drawings of a device with 'HELO' display and side panel, no text or symbols present
natural_image
Illustration of a hand pressing a button on a floppy disk (no text or symbols visible)
natural_image
Simple line drawing of a game controller with a pencil, no text or symbols present

natural_image
Simple line drawing of a tool applying material to a rectangular block (no text or symbols)

natural_image
Diagram showing three screws inserted into a socket with a shaded area between them (no text or symbols)
natural_image
Illustration of a handheld device with a digital display and a control panel, showing no text or symbols.
natural_image
Technical line drawings of a device with control panel and display screen (no text or symbols)
text_image
Tāre 22.9
natural_image
Illustration of a hand interacting with a floppy disk (no text or symbols visible)
natural_image
Simple line drawing of a game controller with a pencil, no text or symbols present

natural_image
Simple line drawing of a tool applying material to a rectangular block (no text or symbols)

natural_image
Diagram of three screws mounted on a surface with a shaded area between them, no text or symbols present.
natural_image
Illustration of a vertical control panel with a digital display and a curved arrow indicating rotation (no text or symbols)
natural_image
Technical line drawings of a device with two views: one showing a vertical profile and another showing a circular component (no text or symbols)
Установка часов
natural_image
Illustration of a hand pressing a button on a computer floppy disk (no text or symbols visible)
natural_image
Pure technical line drawing of a mechanical component with no text or symbols

natural_image
Simple line drawing of a tool applying material to a rectangular block (no text or symbols)

natural_image
Diagram of mechanical assembly with three screws and a base, no text or symbols present
text_image
Diagram showing a digital display unit next to a device with an arrow indicating rotation or adjustment.
natural_image
Technical line drawings of a device with two views: one showing a display labeled 'HELO' and the other showing a circular component with a curved line (no text or symbols present)
Ustawianie zegara
natural_image
Illustration of a hand pressing a button on a floppy disk (no text or symbols)
natural_image
Simple line drawing of a game controller with a pencil, no text or symbols present

natural_image
Simple line drawing of a tool interacting with a rectangular object, no text or symbols present

natural_image
Diagram of mechanical clamping or disassembly process with screws and pins (no text or symbols)
natural_image
Diagram showing a device with a digital display and a control panel connected by an arrow (no text or symbols)
natural_image
Technical line drawing of a vertical cylindrical device with a side profile view showing front and top views (no text or symbols)

natural_image
Diagram showing a digital display unit and its side profile (no text or symbols)
De klok instellen
natural_image
Illustration of a hand pressing a button on a floppy disk (no text or symbols visible)
natural_image
Simple line drawing of a game controller with a pencil, no text or symbols present

natural_image
Simple line drawing of a tool interacting with a rectangular object, no text or symbols present
natural_image
Diagram of mechanical clamping or disassembly process with two screws and a base, no text or symbols present
- Monte a escala no suporte
natural_image
Diagram showing a device with a digital display and a control panel connected by an arrow (no text or symbols)
natural_image
Technical line drawing of a vertical cylindrical device with a side profile view showing front and top views (no text or symbols)

natural_image
Diagram showing a vertical control panel with a digital display and curved arrow, alongside a side-view schematic (no text or symbols)
Acertar o relógio
text_image
Tāre 22.9
natural_image
Illustration of a hand pressing a button on a computer floppy disk (no text or symbols visible)
natural_image
Simple line drawing of a mechanical component with a pencil, no text or symbols present

natural_image
Simple line drawing of a tool interacting with a rectangular object, no text or symbols present

natural_image
Diagram of mechanical clamping or disassembly process with two screws and a central rod (no text or symbols)
- Monte Dirsek üzerine ölçek
text_image
Diagram showing a digital display unit connected to a device with an arrow indicating rotation or adjustment.
natural_image
Technical line drawings of a device with two views: one showing a digital display labeled 'HELO' and the other showing a circular component with a curved line (no text or symbols present)
Saat ayarlama
natural_image
Illustration of a hand pressing a button on a computer floppy disk (no text or symbols visible)
natural_image
Simple line drawing of a mechanical component with a pencil and hatched base (no text or symbols)

natural_image
Simple line drawing of a tool applying material to a rectangular block (no text or symbols)

natural_image
Diagram of mechanical assembly with screws and fasteners (no text or symbols)
natural_image
Diagram showing a digital display unit next to a device with an arrow indicating rotation (no text or symbols present)
natural_image
Technical illustration of a vertical shelf with a digital display and side profile view (no text or symbols)

natural_image
Diagram showing a vertical panel with 'HEL01' and a side view of a rectangular structure (no text or symbols)
Indstilling af uret
- Tryk på "TARE / ON" for at LCD-displayet til at starte. Det ser nu 0 g (0,0 oz).
- Tryk på "TIME"-knappen i 4-5 sekunder, indtil LCD-displayet skifter til anden tilstand, og timer flash.
- Tryk på "UNIT" for at justere timerne op eller °C / °F for at indstille timerne ned
- Tryk på "TIME"-knappen for at indstille minutter.
- Tryk på "TIME"-knappen for at gemme indstillingen
natural_image
Illustration of a hand pressing a button on a computer floppy disk (no text or symbols visible)
natural_image
Simple line drawing of a mechanical component with a pencil and hatched base (no text or symbols)

natural_image
Simple line drawing of a tool applying material to a rectangular block (no text or symbols)
natural_image
Diagram of mechanical clamping or mounting mechanism with two screws and a base, no text or symbols present
text_image
Diagram showing a digital display unit connected to a device with an arrow indicating rotation or adjustment.
natural_image
Technical line drawings of a device with two views: one showing a digital display labeled 'HELO' and the other showing a circular component with a curved line (no text or symbols present)
Ställa klockan
natural_image
Illustration of a hand pressing a button on a floppy disk (no text or symbols)
natural_image
Simple line drawing of a mechanical component with a pencil, no text or symbols present

natural_image
Simple line drawing of a tool applying material to a rectangular block (no text or symbols)

natural_image
Diagram of mechanical assembly with screws and fasteners (no text or symbols)
text_image
Diagram showing a digital display unit connected to a device with an arrow indicating rotation or adjustment.
natural_image
Technical line drawing of a vertical cylindrical device with a digital display and side profile view (no text or symbols)

natural_image
Diagram showing a vertical panel with 'HEL01' and a side view of a rectangular panel (no text or symbols)
Kellon asetus
natural_image
Illustration of a hand interacting with a floppy disk (no text or symbols visible)
natural_image
Simple line drawing of a game controller with a pencil, no text or symbols present
natural_image
Simple line drawing of a tool applying material to a rectangular block (no text or symbols)

natural_image
Diagram showing three screws inserted into a socket with a shaded area between them (no text or symbols)
natural_image
Illustration of a vertical control panel with a digital display and a curved arrow indicating rotation (no text or symbols)
natural_image
Technical line drawings of a device with two views: one showing a display labeled 'HELO' and the other showing a circular component with a curved line (no text or symbols present)
Nastavení hodin
natural_image
Illustration of a hand pressing a button on a computer floppy disk (no text or symbols visible)
-
Using konzoli znamki 3 luknje mesto na steni
-
Drill luknje
-
Fix nosilec na steno
natural_image
Simple line drawing of a mechanical component with a pencil, no text or symbols present

natural_image
Simple line drawing of a tool interacting with a rectangular object, no text or symbols present
natural_image
Diagram of two mechanical components with bolts and a central rod, no text or symbols present
- Mount lestvice na nosilcu
text_image
Diagram showing a digital display unit connected to a device with an arrow indicating rotation or adjustment.
natural_image
Technical line drawings of a device with two views: one showing a display labeled 'HELO' and the other showing a circular component with a curved line (no text or symbols present)
Nastavitev ure
- Pritisnite "TARE / ON" gumb na LCD zaslonu, da začnete. Zdi se, zdaj 0 g (0,0 oz).
- Pritisnite gumb "čas" za 4-5 sekund, dokler se na zaslonu LCD spremenite v časovnem načinu in ure bliskavico.
- Pritisnite "ENOTA" ključno, da se prilagodijo ur gor ali °C / °F nastavite ure navzdol
- Pritisnite tipko "TIME", da nastavite minute.
- Pritisnite gumb "čas", da shranite nastavitev
natural_image
Illustration of a hand pressing a button on a computer floppy disk (no text or symbols visible)
- Using a konzol jel 3 lyuk helyét a falon
- Drill Iyukak
- Fix konzol a faira
natural_image
Simple line drawing of a mechanical component with a pencil, no text or symbols present
natural_image
Simple line drawing of a tool interacting with a rectangular object, no text or symbols present
natural_image
Diagram of mechanical clamping or disassembly process with two screws and a central rod (no text or symbols)
text_image
Diagram showing a digital display unit connected to a device with an arrow indicating rotation or adjustment.
natural_image
Technical line drawing of a vertical shelf with a digital display and side profile (no text or symbols)
natural_image
Diagram showing a vertical panel with 'HEL01' and a side view of a rectangular panel (no text or symbols)
Az óra beállítása