
EM 9 - Knife TEAM - Free user manual and instructions
Find the device manual for free EM 9 TEAM in PDF.
| Product type | Electric knife |
| Brand | Team |
| Model | EM 9 |
| Power supply | Mains (230 V ~ 50 Hz) |
| Power | Approximately 150 W (estimate) |
| Blade length | Approximately 18 cm (estimate) |
| Weight | Approximately 1.2 kg (estimate) |
| Blade material | Stainless steel |
| Main functions | Cutting deboned meat (raw or cooked), bread |
| Usage type | Domestic (non-professional) |
| Maximum continuous operation time | Varies by model (e.g., 10 minutes) – check rating plate |
| Minimum rest time | At least 10 minutes |
| Safety | Push-to-run switch, auto stop on release |
| Blade ejection | Yes, via dedicated button |
| Blade assembly | Push into slots until locking click |
| Appliance cleaning | Slightly damp cloth – do not immerse |
| Blade cleaning | Washable separately, dry before storing in case |
| Sharpening | Not necessary – self-sharpening by blade friction |
| Included accessories | Protective blade case |
| Repairability | Qualified after-sales service only |
| Warranty | 2 years (standard) |
Frequently Asked Questions - EM 9 TEAM
User questions about EM 9 TEAM
0 question about this device. Answer the ones you know or ask your own.
Ask a new question about this device
Download the instructions for your Knife in PDF format for free! Find your manual EM 9 - TEAM and take your electronic device back in hand. On this page are published all the documents necessary for the use of your device. EM 9 by TEAM.
USER MANUAL EM 9 TEAM
Generated by Unregistered Batch DOC TO PDF Converter 2011.3.804.1511, please register!
Copies of the I/B. Please reproduce them without any changes except under special instruction from Team International BELGIUM. The page must reproduced and folded in order to obtain a mini booklet B5 (+/- 150 mm width x 210 mm height). The page must be folded in order to keep the good numbering when you turn the page of the I/B. Don't change the page numbering. Keep the languages integrity.

Elektrömesser
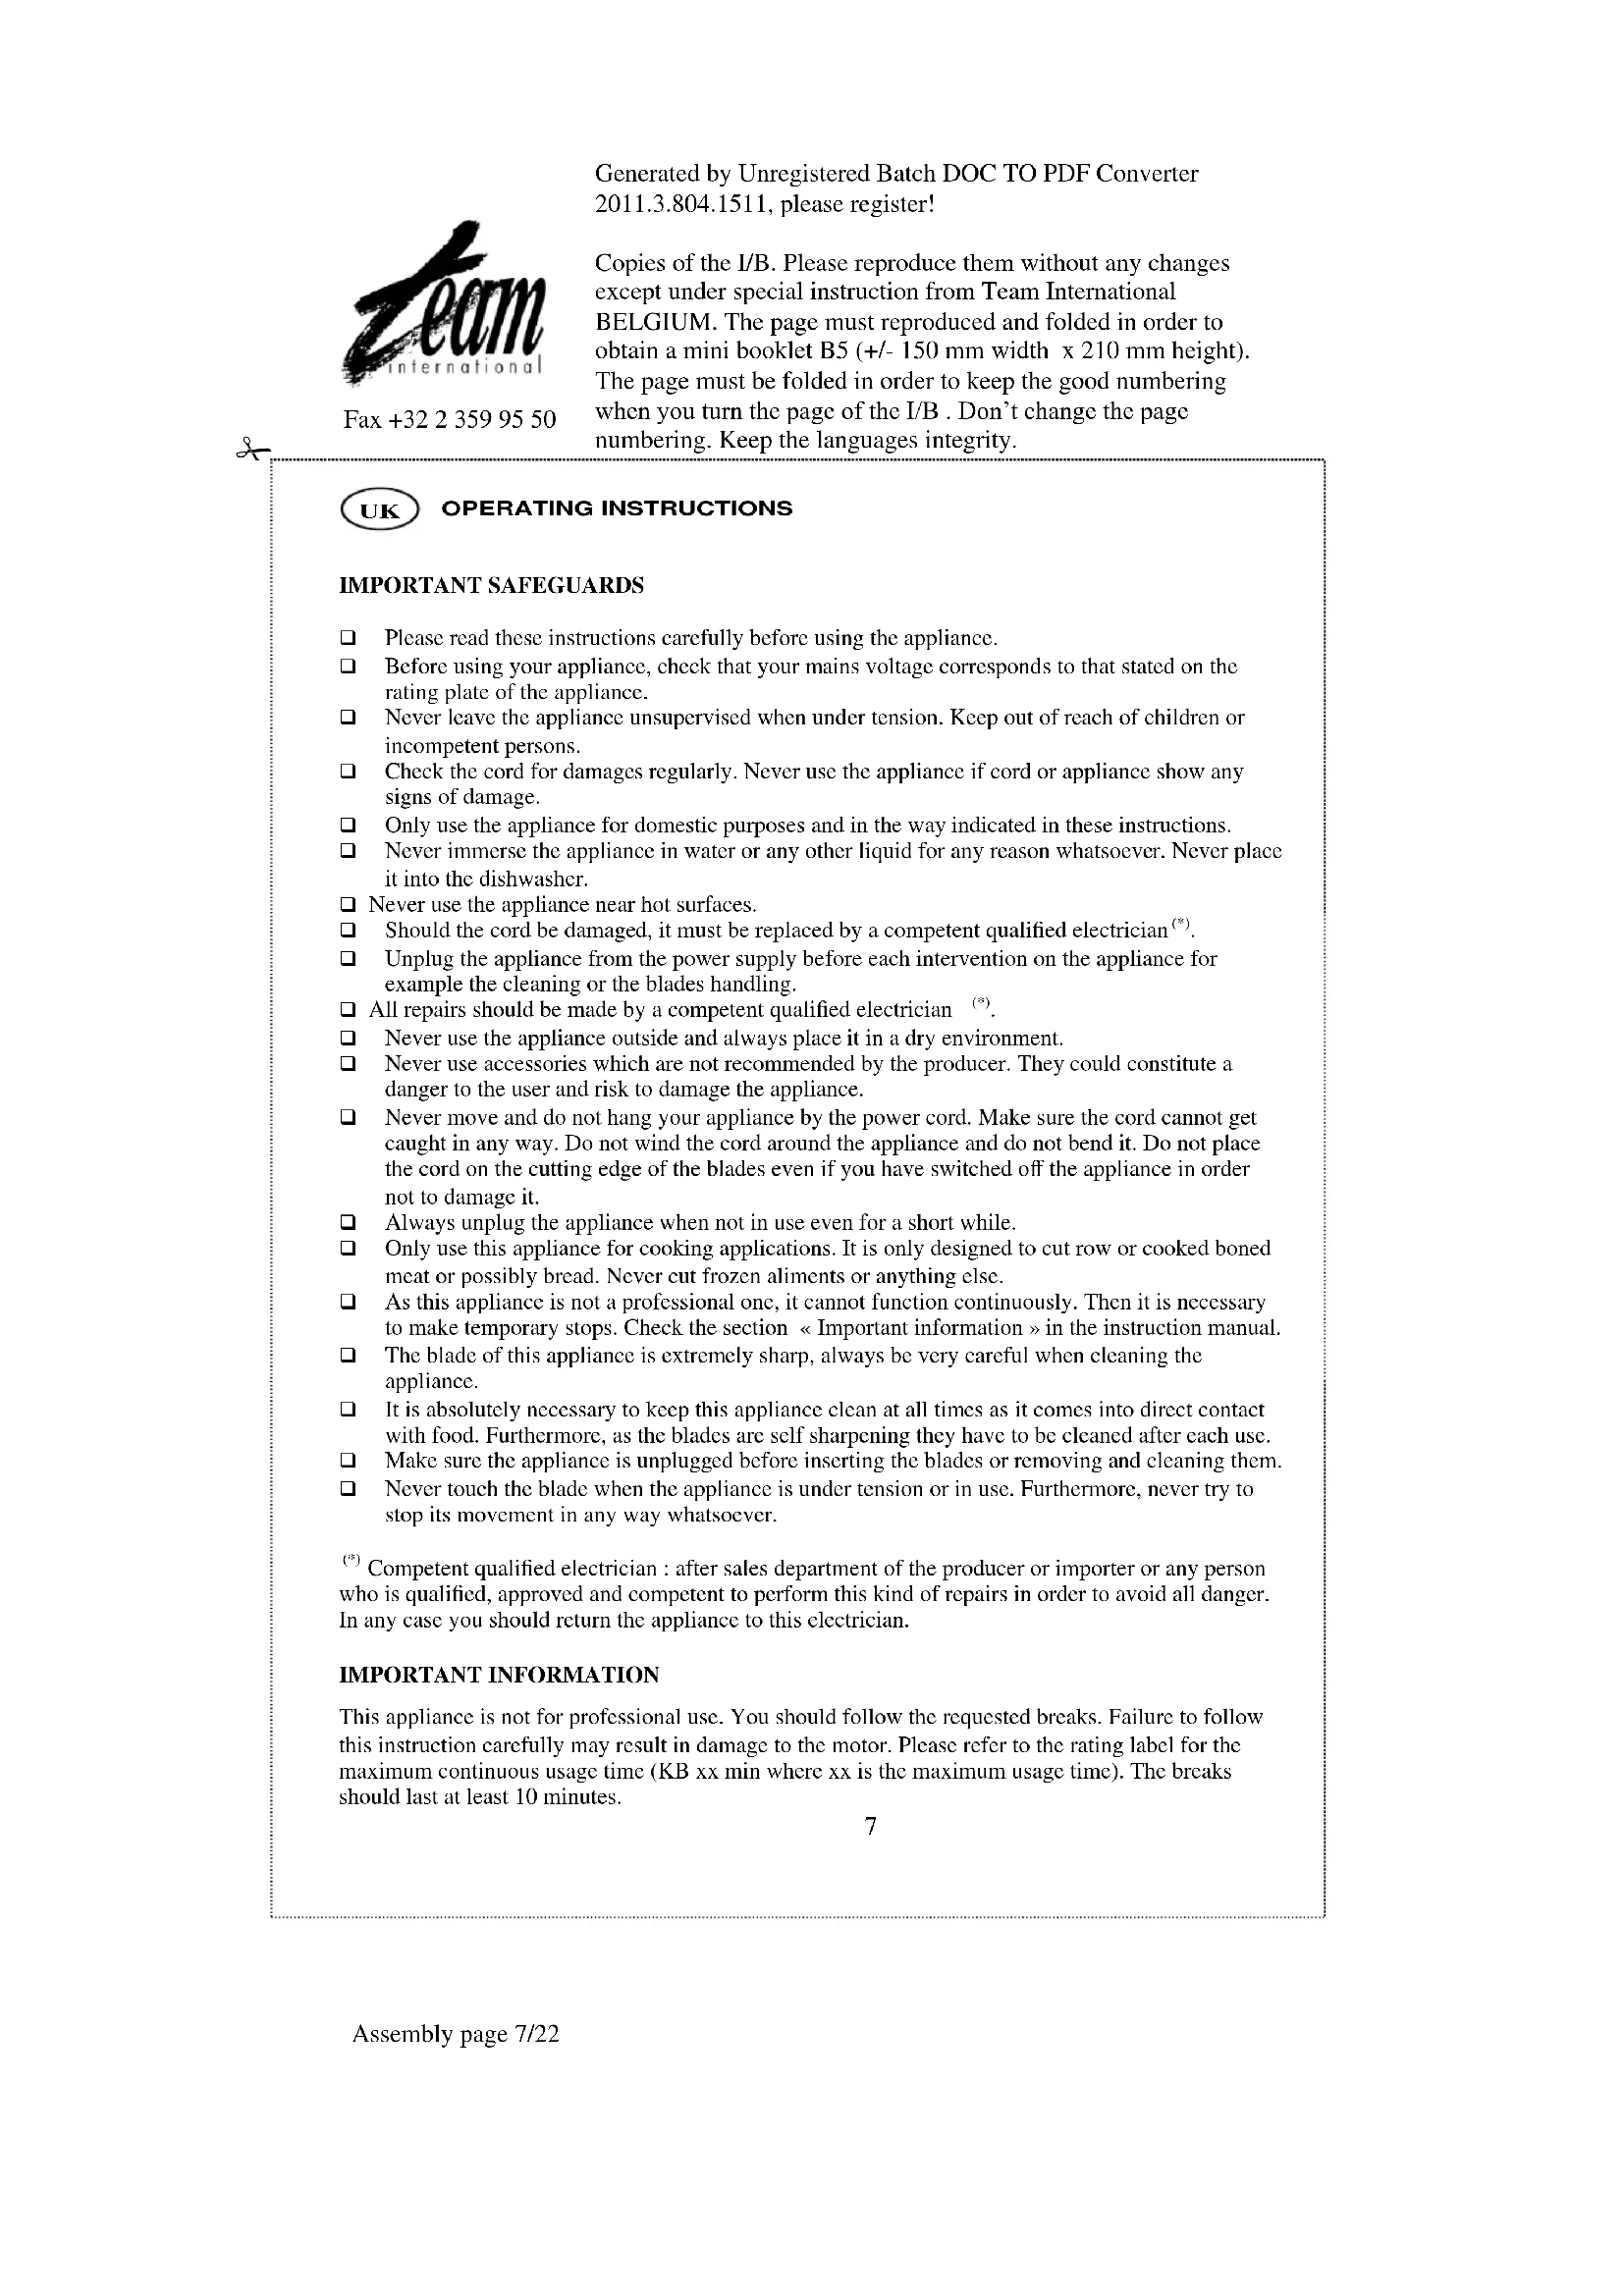
Electric Knife
Couteau Electrique
Electrisch Mes
Cuchillo Electrico
Faca Electrical
Cottello Elettrico
CE
I/B Version
020211
TEAM EM 9
230 V ~ 120 W

Fax +32 23599550
Generated by Unregistered Batch DOC TO PDF Converter 2011.3.804.1511, please register!
Copies of the I/B. Please reproduce them without any changes except under special instruction from Team International BELGIUM. The page must reproduced and folded in order to obtain a mini booklet B5 (+/- 150 mm width x 210 mm height). The page must be folded in order to keep the good numbering when you turn the page of the I/B. Don't change the page numbering. Keep the languages integrity.
D
Front cover page (first page)

Fax +32 23599550
Generated by Unregistered Batch DOC TO PDF Converter 2011.3.804.1511, please register!
Copies of the I/B. Please reproduce them without any changes except under special instruction from Team International BELGIUM. The page must reproduced and folded in order to obtain a mini booklet B5 (+/- 150 mm width x 210 mm height). The page must be folded in order to keep the good numbering when you turn the page of the I/B. Don't change the page numbering. Keep the languages integrity.


GEBRAUCHSANLEITUNG
Generated by Unregistered Batch DOC TO PDF Converter 2011.3.804.1511, please register!
Copies of the I/B. Please reproduce them without any changes except under special instruction from Team International BELGIUM. The page must reproduced and folded in order to obtain a mini booklet B5 (+/- 150 mm width x 210 mm height). The page must be folded in order to keep the good numbering when you turn the page of the I/B. Don't change the page numbering. Keep the languages integrity.
Please read these instructions carefully before using the appliance.
Before using your appliance, check that your mains voltage corresponds to that stated on the rating plate of the appliance.
- Never leave the appliance unsupervised when under tension. Keep out of reach of children or incompetent persons.
Check the cord for damages regularly. Never use the appliance if cord or appliance show any signs of damage.
Only use the appliance for domestic purposes and in the way indicated in these instructions.
Never immerse the appliance in water or any other liquid for any reason whatsoever. Never place it into the dishwasher.
Never use the appliance near hot surfaces.
Should the cord be damaged, it must be replaced by a competent qualified electrician (^*)
Unplug the appliance from the power supply before each intervention on the appliance for example the cleaning or the blades handling.
All repairs should be made by a competent qualified electrician (9).
Never use the appliance outside and always place it in a dry environment.
Never use accessories which are not recommended by the producer. They could constitute a danger to the user and risk to damage the appliance.
Never move and do not hang your appliance by the power cord. Make sure the cord cannot get caught in any way. Do not wind the cord around the appliance and do not bend it. Do not place the cord on the cutting edge of the blades even if you have switched off the appliance in order not to damage it.
Always unplug the appliance when not in use even for a short while.
Only use this appliance for cooking applications. It is only designed to cut row or cooked boned meat or possibly bread. Never cut frozen aliments or anything else.
As this appliance is not a professional one, it cannot function continuously. Then it is necessary to make temporary stops. Check the section « Important information » in the instruction manual.
The blade of this appliance is extremely sharp, always be very careful when cleaning the appliance.
It is absolutely necessary to keep this appliance clean at all times as it comes into direct contact with food. Furthermore, as the blades are self sharpening they have to be cleaned after each use.
Make sure the appliance is unplugged before inserting the blades or removing and cleaning them.
Never touch the blade when the appliance is under tension or in use. Furthermore, never try to stop its movement in any way whatsoever.
(*) Competent qualified electrician : after sales department of the producer or importer or any person who is qualified, approved and competent to perform this kind of repairs in order to avoid all danger. In any case you should return the appliance to this electrician.
IMPORTANT INFORMATION
This appliance is not for professional use. You should follow the requested breaks. Failure to follow this instruction carefully may result in damage to the motor. Please refer to the rating label for the maximum continuous usage time (KB xx min where xx is the maximum usage time). The breaks should last at least 10 minutes.

Fax +32 23599550
Generated by Unregistered Batch DOC TO PDF Converter 2011.3.804.1511, please register!
Copies of the I/B. Please reproduce them without any changes except under special instruction from Team International BELGIUM. The page must reproduced and folded in order to obtain a mini booklet B5 (+/- 150 mm width x 210 mm height). The page must be folded in order to keep the good numbering when you turn the page of the I/B. Don't change the page numbering. Keep the languages integrity.
UK STYLE PLUG WIRING INSTRUCTIONS (IN THE UK ONLY)
This product must only be used from a 13 amp power socket. If a BS1363 approved 13 amp plug is used, it should be fitted with a 13 amp fuse. The wires on the power cord are colour coded: blue = neutral, brown = live, green or green & yellow = earth.
The blue wire must be connected to the terminal marked N or coloured in black.
The brown wire must be connected to the terminal marked L or coloured in red.
The green (& yellow) wire must be connected to the terminal marked E or coloured in green (& yellow).
USE
Caution: your appliance has to be unplugged from the power supply when attaching the blades.
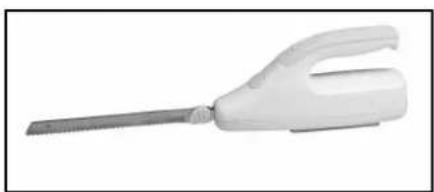
- Remove the blades from the protecting covering (cf. Fig. 1). Hold on to the blades with the thumb and forefinger in such a way that the cutting edges face downwards; then press the backends of the blades into the openings provided for that purpose until they lock into place (cf. Fig. 2). Then pull on them to check if they are blocked. They must not go out of the appliance.
- Plug in your appliance, hold the handle firmly and press the on/off switch with your thumb (cf. Fig. 3). Your appliance works only if you keep pressing the on/off switch. If you release the pressure, it stops.
It is recommended to hold the food with an utensil but if you use your hand, please be extremely cautious not to get cut. - Place the knife horizontally or lightly inclined following your needs above the aliment to cut then press lightly. You only have to keep pressing the blades because their movement will cut the aliment automatically. Do not use your knife for cutting frozen food or bones. It is not meant for this purpose. When it is difficult to bone the meat completely, a leg for example, cut the meat around the bone with your appliance and finish the operation with a kitchen knife.
- When you have finished using your electric knife, pull out the plug. To remove the blades, press the eject button by removing them from their housing (cf. Fig. 4). To avoid getting hurt, do this operation by holding the blades by both plastic pieces near the blades housing.
CLEANING
Attention: you have to be very cautious when handling the blades, because they are extremely sharp.
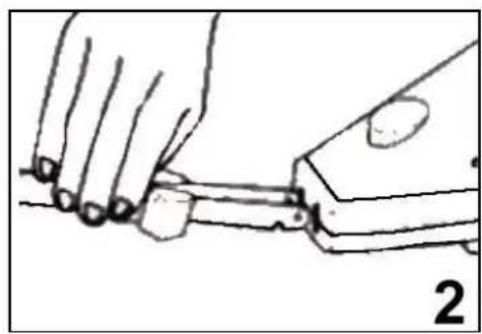
If you want to clean the individual blades, do so by pushing the blades along the groove upwards until they can be removed from the holding pin (cf. Fig. 5).
- To mount, reverse the process.
The blades need no special maintenance.
- Sharpening is not necessary as the blades are self-sharpening due to the permanent friction of the blades during use.
After cleaning and once the blades are dry place them in the protective covering and store away.
In order to clean the appliance itself use a damp cloth and dry afterwards.
- Never hold it under running water nor immerse in water or any other liquid.

MODE D'EMPLOI
POUR VOTRE SECURITE
Generated by Unregistered Batch DOC TO PDF Converter 2011.3.804.1511, please register!
Copies of the I/B. Please reproduce them without any changes except under special instruction from Team International BELGIUM. The page must reproduced and folded in order to obtain a mini booklet B5 (+ / - 150mm width x 210mm height). The page must be folded in order to keep the good numbering when you turn the page of the I/B. Don't change the page numbering. Keep the languages integrity.
Generated by Unregistered Batch DOC TO PDF Converter 2011.3.804.1511, please register!
Copies of the I/B. Please reproduce them without any changes except under special instruction from Team International BELGIUM. The page must reproduced and folded in order to obtain a mini booklet B5 (+/- 150 mm width x 210 mm height). The page must be folded in order to keep the good numbering when you turn the page of the I/B. Don't change the page numbering. Keep the languages integrity.
TEAM EM 9
| Deutsch | 4 |
| English | 6 |
| Français | 8 |
| Nederlands | 10 |
| Espanol | 12 |
| Portugues | 14 |
| Italiano | 16 |


Brand : TEAM
Model : EM 9
Category : Knife