HTC 2228D - Television XORO - Free user manual and instructions
Find the device manual for free HTC 2228D XORO in PDF.


| Product type | LCD TV with built-in DVD player |
| Brand | Xoro |
| Model | HTC 2228D |
| Screen size | 54.8 cm (21.6 inches) |
| Resolution | 1366 x 768 pixels |
| Aspect ratio | 16:9 |
| Brightness | 350 cd/m² |
| Contrast ratio | 800:1 |
| Response time | 5 ms |
| Viewing angle | 170° |
| TV systems | PAL BG/DK/I, SECAM BG/DK/L/L' |
| Audio | NICAM/A2, speakers 2x3 W |
| Connections | HDMI, Y Pb Pr, SCART, VGA, USB, SD/MMC/MS card reader, headphone |
| Tuner | DTT (DVB-T) and analog |
| DVD player | Slot-in, compatible with DVD, CD, MPEG-4 |
| Recording functions | USB recording, Time Shift, EPG scheduling |
| Power supply | AC 220-240 V, 50/60 Hz |
| Power consumption | 60 W max |
| Dimensions (W x D x H) | 531 x 200 x 406 mm |
| Weight | 5.5 kg |
| Package contents | TV, remote control, batteries, user manual, warranty card |
| Safety | Child lock, parental control, password |
| Warranty | 2 years (depending on country) |
Frequently Asked Questions - HTC 2228D XORO
User questions about HTC 2228D XORO
0 question about this device. Answer the ones you know or ask your own.
Ask a new question about this device
Download the instructions for your Television in PDF format for free! Find your manual HTC 2228D - XORO and take your electronic device back in hand. On this page are published all the documents necessary for the use of your device. HTC 2228D by XORO.
USER MANUAL HTC 2228D XORO
FREE TO CHOOSE INNOVATIONS

LCD TV with DVD, DVB, HDMI, U3β, Card Reader, PVR Ready and Time-shift HTC 2228D
U.S. Patens Nos. 4,631,603; 4,577,216; 4,819,098; 4,907,093; 5,315,448 and 6,516,132
"This product incorporates copyright protection technology that is protected by U.S. patents and other intellectual property rights. Use of this copyright protection technology must be authorized by Macrovision, and is intended for home and other limited viewing uses only unless otherwise authorized by Macrovision. Reverse engineering or disassembly is prohibited."
Dolby
Manufactured under license from Dolby Laboratories. "Dolby" and the double-D symbol are trademarks of Dolby Laboratories. Confidential Unpublished works. 1992-1997 Dolby Laboratories, Inc. All rights reserved.
DVD DVD Player (intern)
VGA VGA Anschluss
HDMI HDMI Video/Audio-Eingang
Zeitzzone (Time Zone)
Compatibility of Discs, USB and Card Reader 9
Recycling 9
In the box 10
Features 10
Mounting the Stand 11
Quick Start Guide 12
Connectors
Rear connection panel 13
Right Side. 13
Front Side 14
The Remote Control
Insert Battery 15
Operation range 15
Buttons 16
Connection
Power. 18
Antenna 18
SCART 18
HDMI 18
YUV 19
USB for Recording 19
CVBS 19
VGA 20
DVD-Player, USB & Card Reader 20
Headphone 20
First Time Installation 21
Sources 22
DVB-T Mode
Getting into DVB-T mode 23
Important buttons and there functions 23
Videotext 23
EPG 26
Analog TV Tuner
Getting into analog TV mode 27
Important buttons and there functions 27
Videotext 27
Contents
Recorder
Preparation of the USB Storage 28
Check PVR File System 28
Format 29
Time-Shift Size 29
Recording a program 30
Recording in Stand-By mode 30
Schedule Recording by EPG 30
Time-Shift Function 31
Playback of recorded program 32
LCD Settings
General 33
Channel Setting 34
Picture Setting 38
Sound Setting 40
Time Setting 41
Options 43
Lock Setting 44
Troubleshooting 45
DVD Player / USB / Card Reader
Getting into DVD mode 47
Getting into USB or Card Reader 47
Important buttons and there functions 47
Data memories with Music-, JPEG or Video files 51
System Setup. 52
Troubleshooting DVD / USB / Card Reader 55
Specifications 56
User Manual
- All the safety and operating instructions should be read before the product is operated.
- Retain Instructions - The safety and operating instructions should be retained for future reference.
- All warnings on the product and in the operating instructions should be adhered to.
- All operating and use instructions should be followed.
Laser
This Digital Video Disc Player employs a Laser System of the class 1.
- Make sure the device is shut down prior to opening player lid.
- Do not open the appliance. Do not attempt to dismantle the appliance.
- In order to avoid any danger: Have service work only carried out by the manufacturer or an authorized service workshop.
- Visible laser radiation when open and interlocks defeated.
- Use of controls or adjustments or performance of procedures other than those specified herein may result in hazardous radiation exposure.
Operation
- Receiving analogue or digital TV broadcast.
- Recording of DVB-T broadcast on USB media.
- Playback of recorded broadcast fro USB media.
- Playing of Video DVD, Video CD or Audio-CD from the integrated DVD-Player. USB and card reader are part of the internal DVD-Player.
- Connecting external devices by HDMI, video components (YUV), SCART, VIDEO or VGA.
- No other operation are allowed.
Power Supply
- Never touch the plug with wet hands.
- If you want to pull the plug out of the plug socket, always pull directly on the plug. Never pull on the cable as it could tear.
- Make sure that the power cable is not bent, caught or run over and that it does not come into contact with heat sources.
- Make sure that the power cable is not wound around the device while in operation.
- Never place the machine on the power cable while it is being operated.
- Only use extension cables that are designed for the power consumption level of the machine.
- Keep the appliance away from rain and any moisture.
- Only operate the machine if the electrical voltage stated on the type plate beneath the machine agrees with the voltage on your plug socket. The wrong voltage can destroy the machine.
- Do not stand vases etc. on the appliance.
- Water could seep into the appliance.
- Do not open the appliance.
- Pull out the mains plug if the appliance is not to be used over a longer period of time.
- Take care that nobody can trip over the power supply cable.
Antenna
The device can be connected to an antenna.
- Unplug the power cord cable from the mains outlet before connecting or disconnecting the DVB-T to/from the antenna, otherwise both might be damaged.
- If an outside antenna or cable system is connected to the product, be sure the antenna or cable system is grounded so as to provide some protection against voltage surges and built-up static charges.
- Pull out the antenna connection if the appliance is not to be used over a longer period of time.
USB
Due to the legal requirements of CE-conformity, the customer is asked to only connect USB-Sticks to the USB port.
Safety Information
Operation and Position
- During playback, the disc rotates very fast. Do not open or do not move the player during playback. Otherwise the disc can be damaged.
- Do not connect accessories on the player which are not defined by the manufacture.
- Do not place this product on an unstable cart, stand, tripod, bracket, or table. The product may fall, causing serious injury to a child or adult, and serious damage to the product. Use only with a cart, stand, tripod, bracket, or table recommended by the manufacturer, or sold with the product.
- Any mounting of the product should follow the manufacturer's instructions, and should use a mounting accessory recommended by the manufacturer.
- A product and cart combination should be moved with care. Quick stops, excessive force, and uneven surfaces may cause the product and cart combination to overturn.
- The internal player or a connected DVD-Player is able to show a still image on the TV screen or monitor over an unlimited period of time. This can cause damage to the screen. It is therefore advisable to activate the screen saver. Or switch the player off, if the device is not in use.
- Do not uses the device permanent in the 4:3 mode. This can cause damage to the screen.
- Do not increase the volume when the device is just playing very quiet sections. This cold damage the speaker if very loud passages starts all of a sudden after the quiet section.
- Place only CDs or DVDs into the Slot-In Loader. Do not insert 8 cm disc.
- Switch the device off by the Off/On switch if it is not going to used for a longer period of time.
- Disconnect the main plug during thunderstorms.
- Slots and openings in the cabinet are provided for ventilation and to ensure reliable operation of the product and to protect it from overheating, and these openings must not be blocked or covered.
- The openings should never be blocked by placing the product on a bed, sofa, rug, or other similar surface.
- This product should not be placed in a built-in installation such as a bookcase or rack unless proper ventilation is provided or the manufacturer's instructions have been adhered to.
- Protect the device against weather influences, moistures and high temperature.
- Never spill liquid of any kind on the product.
- Do not expose the device and the remote control to direct sunlight.
- If an outside antenna or cable system is connected to the product, be sure the antenna or cable system is grounded so as to provide some protection against voltage surges and built-up static charges.
Defect
- Servicing - Do not attempt to service this product yourself as opening or removing covers may expose you to dangerous voltage or other hazards. Refer all servicing to qualified service personnel.
- Damage Requiring Service - Unplug this product from the wall outlet and refer servicing to qualified service personnel under the following conditions:
a. When the power-supply cord or plug is damaged.
b. If liquid has been spilled, or objects have fallen into the product.
c. If the product has been exposed to rain or water.
d. If the product does not operate normally by following the operating instructions. Ad-
just only those controls that are covered by the operating instructions as an improper adjustment of other controls may result in damage and will often require extensive work by a qualified technician to restore the product to its normal operation.
e. If the product has been dropped or damaged in any way, and
- When the product exhibits a distinct change in performance this indicates a need for service.
- When replacement parts are required, be sure the service technician has used replacement parts specified by the manufacturer or have the same characteristics as the original part. Unauthorized substitutions may result in fire, electric shock, or other hazards.
- Please read in the section Troubleshooting our service address and phone number.
- Nicotine can be destroyed the electronically components and can pollute the LCD TFT panel.
Pixel error
The terms defined in the specifications of defective pixels (bright and dark pixels, line defects and differences in brightness) describe the maximum allowed amount and type of defects, which are excluded from the guarantee.
Macrovision
U.S. Patens Nos. 4,631,603; 4,577,216; 4,819,098; 4,907,093; 5,315,448 and 6,516,132
"This product incorporates copyright protection technology that is protected by U.S. patents and other intellectual property rights. Use of this copyright protection technology must be authorized by Macrovision, and is intended for home and other limited viewing uses only unless otherwise authorized by Macrovision. Reverse engineering or disassembly is prohibited."
Dolby
Manufactured under license from Dolby Laboratories. "Dolby" and the double-D symbol are trademarks of Dolby Laboratories. Confidential Unpublished works. 1992-1997 Dolby Laboratories, Inc. All rights reserved.
Disc Compatibility
- Depending on the conditions of the recording equipment or the CD-R/RW (or DVD -R, DVD +R, DVD -RW, DVD +RW) disc itself, some CD-R/RW (or DVD -R, DVD +R, DVD -RW, DVD +RW) discs cannot be played on the unit.
- Do not attach any seal or label to either side (the labelled side or the recorded side) of a disc.
- Do not use irregularly shaped CDs (e.g., Heart shaped or octagonal) since they may result in malfunctions.
- Some playback operations of DVDs and Video CDs may be intentionally programmed by software manufacturers. This unit plays DVDS and Video CDs according to disc content designed by the software manufacturer, therefore some playback features may not be available or other functions may be added.
Compatibility of the integrated USB port
- Due to legal requirements of CE-conformity, the customer is asked to only connect USB-Sticks to the USB port.
- The USB port (bundled with DVD-Player) can be supported up to 2 GB flash memory size. In order to the many different USB-Sticks and the build-in electronics components a support of all USB-Sticks can not guaranteed.
- Please format the USB-Sticks only with FAT 32 file system. NTFS file system is not supported and can not recognize by the USB port.
Compatibility of the integrated Card Reader
- Please uses only SD, MMC or MS card media.
- The card reader can be supported up to 2 GB memory size. In order to the many different card medias and the build-in electronics components a support of all SD, MMC or MS cards can not guaranteed.
- Do not use SDHC card medias.
- Do not use MS Pro or MS Duo card medias.
- Please format the cards only with FAT 32 file system. NTFS file system is not supported and can not recognize by the card reader.
Recycling of electronic devices
This product is designed and manufactured with high quality materials and components which can be recycled and reused.
This symbol means that electrical and electronic equipment, at their end-of-life, should be disposed of separately from your household waste.
Please, dispose of this equipment at your local community waste collection/recycling centre. In the European Union there are separate collection systems for used electrical and electronic product. Please, help us to conserve the environment we live in!
Recycling of paper and carton
The material recycling symbol on the carton and user manual denotes that they are recyclable. Dispose them not with the normal household waste.
Recycling of plastic parts
The material recycling symbol on the plastic parts denotes that they are recyclable. Dis- pose them not with the normal household waste.
Green Dot
Following accessories should be in the box:
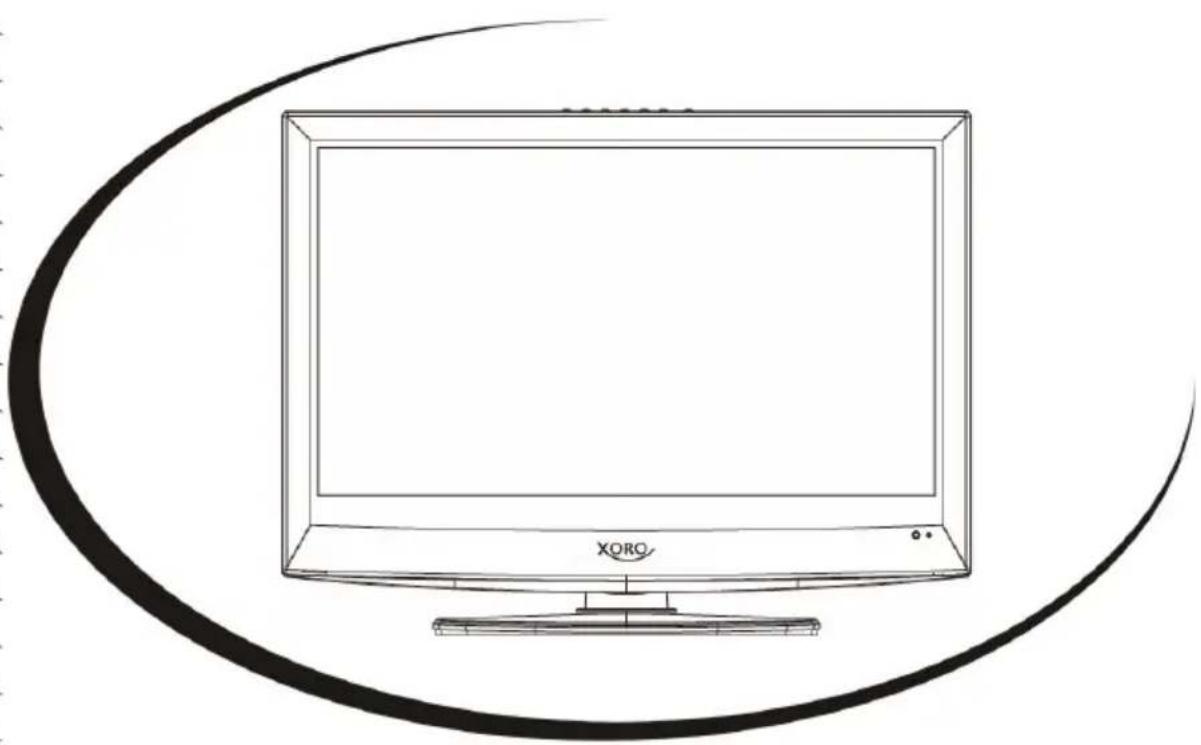
- HTC2228D LCD-TV
Remote Control with Battery - Manual
Warranty card
If any of the accessories are missing, then contact your dealer as soon as possible. Keep all the original packaging in case you need to return the set to the dealer.
Features
High quality display
1366 x 768 Pixel Resolution
- Many Connections: VGA, RF, Y Pb Pr with progressive scan, CVBS, SCART and HDMI
HDMI Supports up to 1080p input resolutions
- Stereo audio input
- Integrated analog TV Tuner with videotext
- Integrated digital terrestrial TV Tuner (DVB-T) with EPG and videotext
- PVR Ready function—records DVB-T Broadcast on USB storage
Time-Shift function
Automatic or manual channel search
- Auto-shutdown to save power when no signal input
DVD-Player inside with Slot-in technology
- Playback of Video-DVD, SVCD, VCD, Audio-CD, MPEG-4, MPEG-2, MPEG-1, MP3 and JPEG.
- Integrated USB port and Card Reader for SD, MMC and MS cards (US and Card Reader are part of the DVD-Player)
- Place the TV set on soft cloth or cushion with face down.
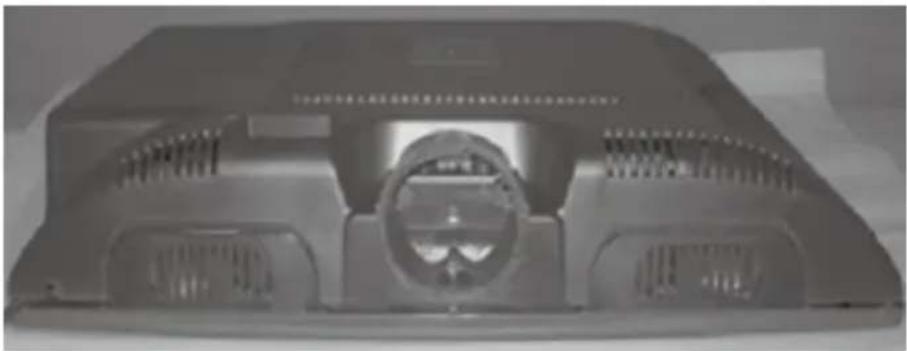
- Mount the stand in the support at the bottom of the TV set according to the angle illustrated
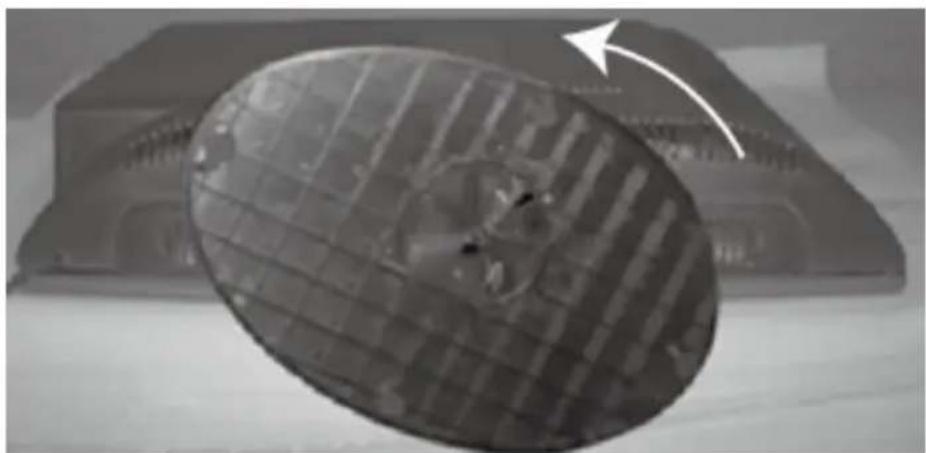
-
Screw the stand in the direction illustrated into the place (Note: It sounds click when screwing the stand, it's normal).
-
Screw the provided 1 bolt into the socket and fixed it.
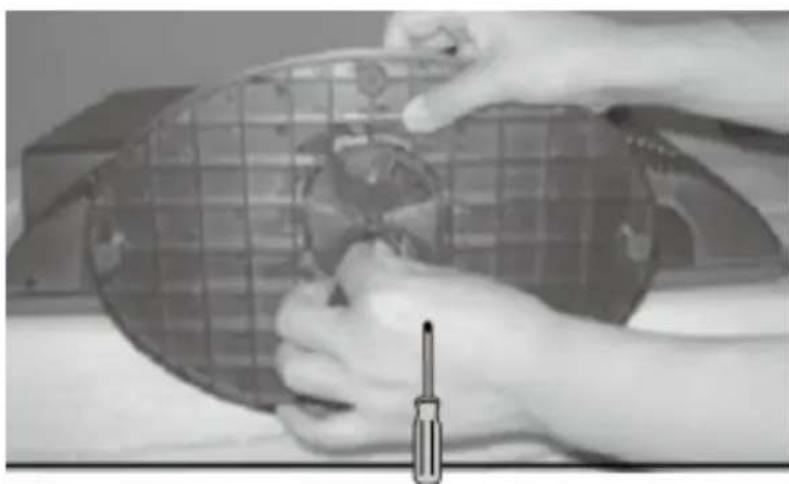
Note:
Be sure to store the screws in a safe place. Keep the screws away from small children.
- Mount the stand in order to the description on the previous page.
- Connect the aerial or input source to the appropriate input socket at the rear of the set.
- Switch the power on by pressing the POWER button on the front panel or the remote control. The LED will show a green light.
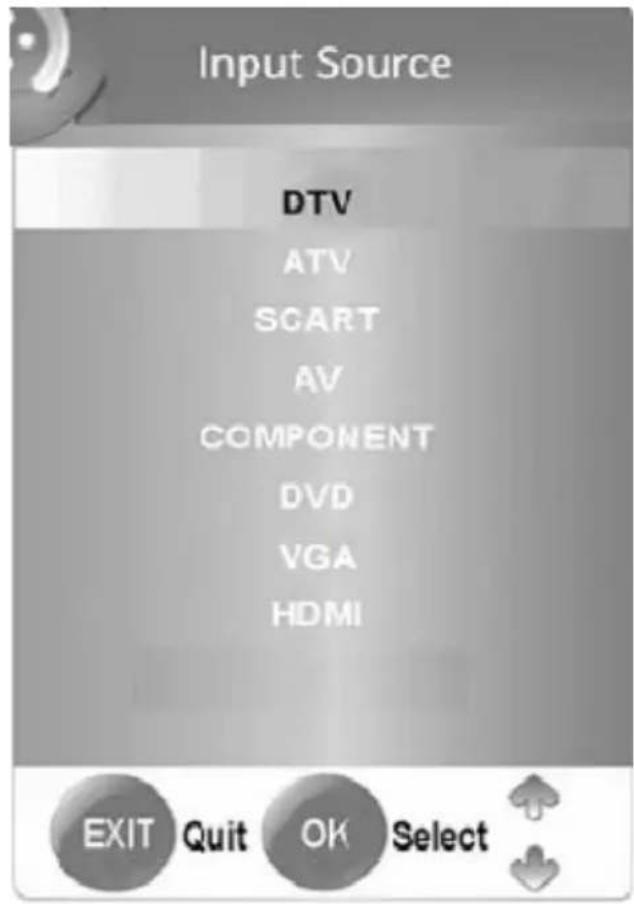
- Use the SOURCE button on the front panel or the remote control and a popup window with the sources appears on the screen. You can select following sources: DTV, ATV, SCART, AV, COMPONENT, DVD, VGA or HDMI. You can use the front panel control to adjust the volume or select a channel, as shown below, or you may use the remote control and confirm by OK button.
A. Analog TV tuner (for example: cable system)
After switched on and press the SOURCE button and choose "ATV" by pressing the navigation button UP/DOWN and confirm by the OK button. Now the HTC 2228D is in TV Mode. By the first using of the TV set, the systems starts automatically the menu for searching the TV channels (please refer page 21).
B. DVD-Player:
Switch on the unit and press the SOURCE button and choose "DVD" by pressing the navigation button UP/DOWN and confirm by the OK button. Now the HTC 2228D is in DVD Mode.
C. DVB-T mode:
Switch on the unit and press the SOURCE button and choose "DTV" by pressing the navigation button UP/DOWN and confirm by the OK button. Now the HTC 2228D is in DVB-T mode. By the first using of the TV set, the systems starts automatically the menu for searching the TV channels (please refer page 21).
- To switch the set off a short time, press the POWER button, the set will go into stand-by and the LED will show red. If you are not going to use the set for some time, switch the power off completely by unplugging the mains cable.
Rear Connection Panel

| Name | Function | Descr |
| AC ~ | AC power input | |
| HDMI | HDMI input | |
| USB | USB port for PVR function | |
| PC Audio In | Audio Input for VGA | |
| VGA | VGA signal of computer input | |
| SCART | Euro AV (Audio/Video) input | |
| CVBS | CVBS video input | |
| L & R | Audio signal input for YPbPr, CVBS and S-Video | |
| Y Pb Pr | Video components signal input | |
| HEADPHONE | Headphone | |
| RF | Connect to cable or air |
ption
Buttons on the top side
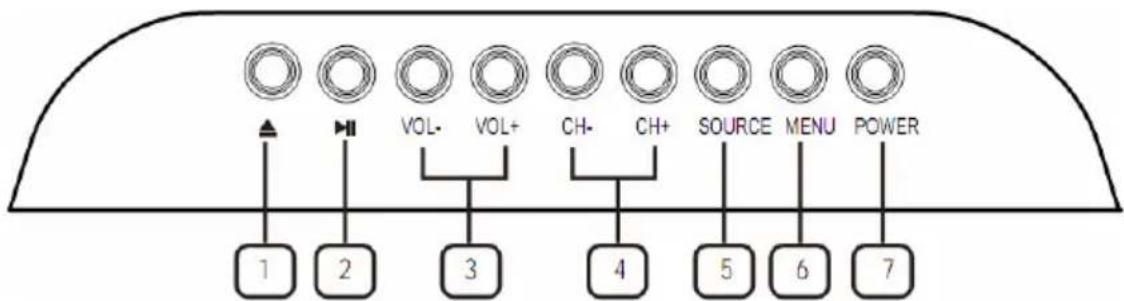
| No. | Button | Function |
| 1 | ▲ EJECT | Open/Close of DVD-Loade |
| 2 | PLAY/PAUSE Play and Pause button | |
| 3 | VOL+ / VOL- Change volume | |
| 4 | CH+ / CH- Change TV channel | |
| 5 | SOURCE | Select Source |
| 6 | MENU | LCD Settings |
| 7 | POWER On / Off button | |
Control Elements
Buttons on the right side
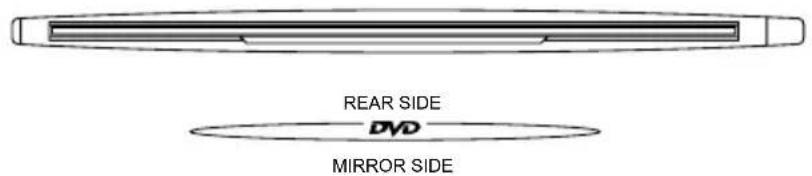
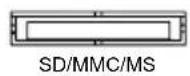
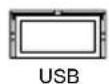
On the right side are the Slot-In DVD-Loader, the USB port and the Card Reader for SD, MMC and MS media card.
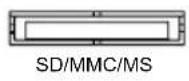
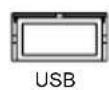
Notes:
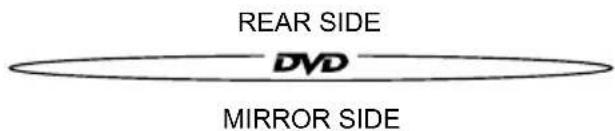
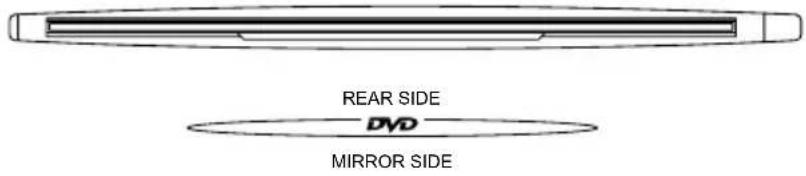
- The DVD player has a slot-in drive. Insert the disc correctly. The printed page always shows backward and the mirrored shows forward. Please also read the note on the drive shaft.
- Insert only 12cm disc. No other disc are allowed.
Front Side
LED
The LED shows the status of the device. RED indicates the Stand-By mode and GREEN indicates that the device is ON.
IR
Infrared receiver
Speaker
Right and left speaker
LCD Panel
LCD TFT Panel
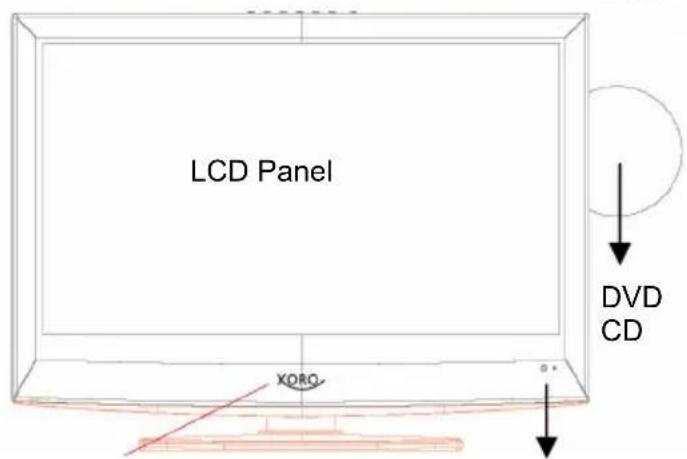
IR = IR Receiver
LED (Red = Stand-By / Green = On)
Insert battery into the remote control
Insert the batteries in the remote control:
- Open the cover.
- Insert the batteries. Make sure to match - and +.
- Close the cover
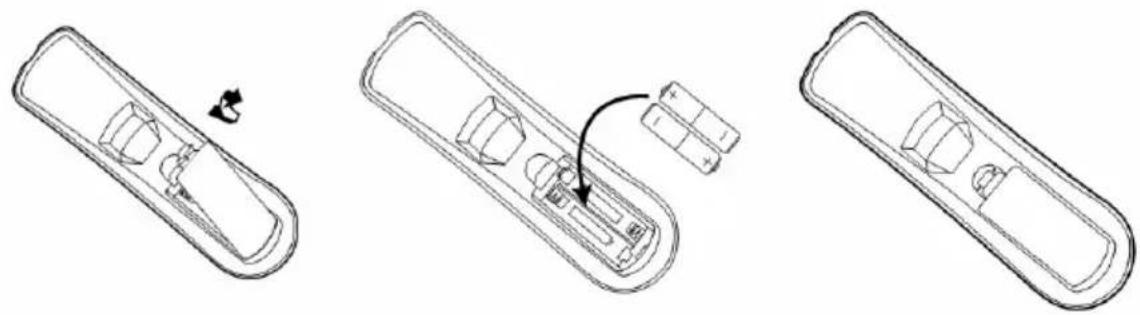
Notes on batteries:
Improper use may cause battery leakage and corrosion.
Please follow the instructions below:
- Do not insert the batteries in the wrong direction
- Do not use different types of batteries together
- If you do not use the remote control for a long time, remove the batteries
- If the remote control operates not correctly, replace the batteries
If battery leakage occurs, wipe the battery liquid from the battery compartment, then insert new batteries
Make sure that the used batteries are disposed properly according to you local regulations.
Operation range
Point the remote control at the IR:
- Within about 5m with angle about 30 grade in both direction.
Notes:
- Do not expose the IR of the device to a strong light source or direct sunlight.
- Direct the remote control at the infrared receiver (IR) of the player
- Do not drop the remote control.
- Do not spill water or put anything wet on it.
- Do not disassemble the remote control.
Remote Control
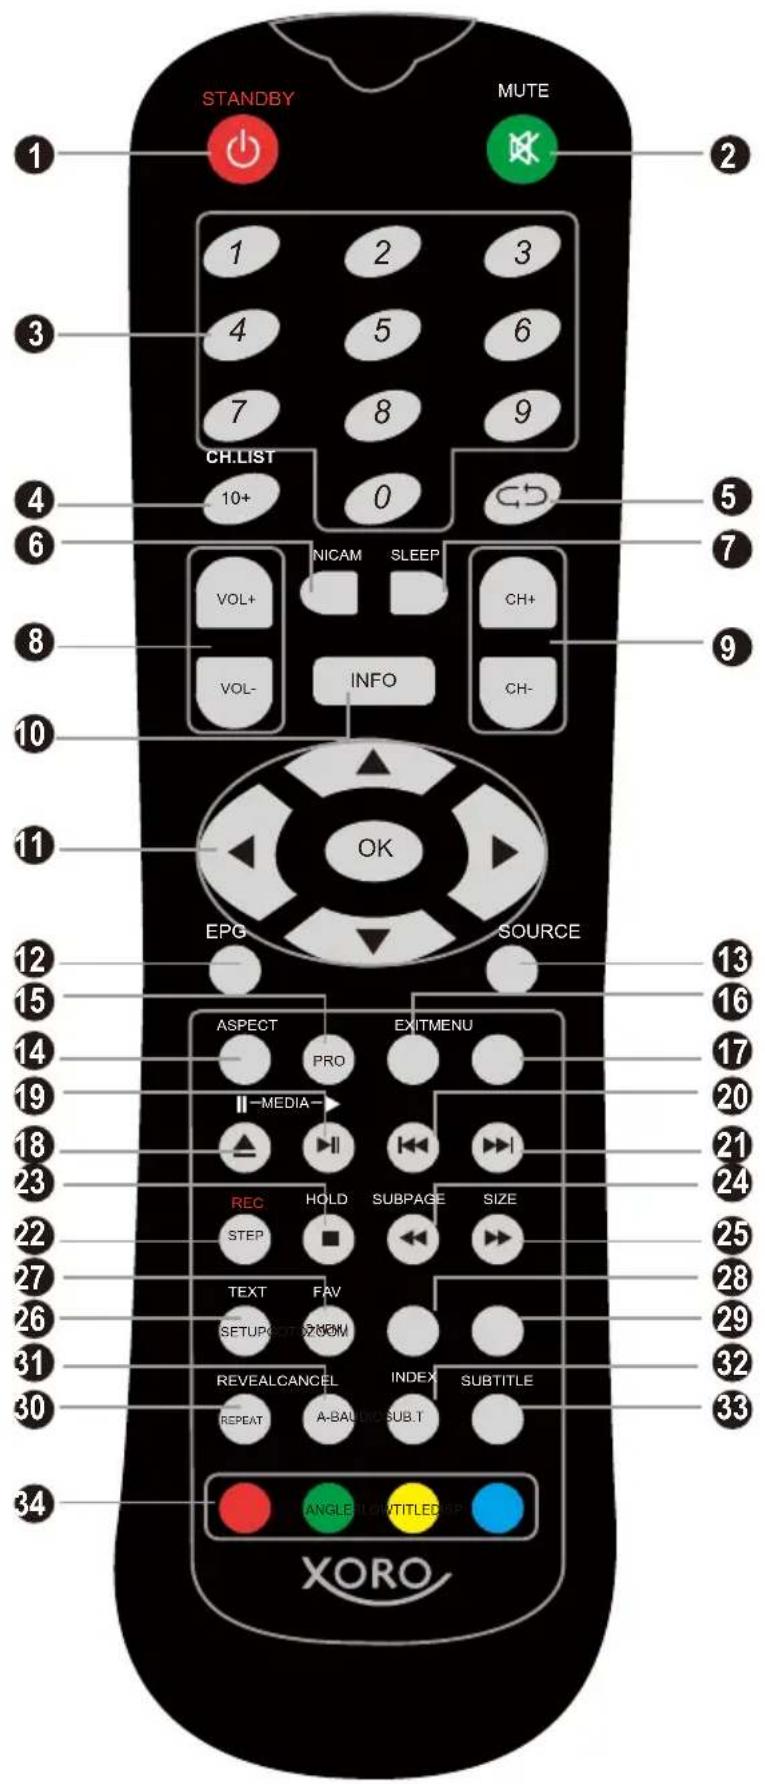
Buttons of the remote control:
ATV: Analogue TV Tuner
DTV: Digital TV Tuner
DVD: DVD Player
Rec: Recorder
- STAND-BY button
- MUTE button
- Numeric buttons (0..9)
- 10+ button and Channel list
- ATV + DTV: RECALL button
- ATV: NICAM/A2 button; DTV: Audio language button
- Sleep-timer button
- Volume buttons (VOL-/VOL+)
- ATV + DTV: Change Channel (CH-/ CH+)
- DTV: Information button
- Navigation cross (Up, Down, Left, Right) and OK button
- DTV: EPG button
- Source button
- Aspect ratio button (ASPECT)
15.DVD:Program button (PRO) - Exit button
- TV Setting button (MENU)
- DVD: Open/Close button; Rec: Pause button
- DVD: PLAY/PAUSE button; Rec: Play button
- DVD: Previous (I<<) track/chapter button
- DVD: Next ( ) track/chapter button
- DTV: REC button; DVD STEP button
- ATV + DTV: Holds Videotext pages; DVD: STOP button
- ATV + DTV: Videotext sub-page (SUBPAGE): DVD: Fast Rewind button (<<)
More button description on the row.
Buttons of the remote control:
ATV: Analogue TV Tuner
DVB-T: Digital TV Tuner
DVD: DVD Player
Rec: Recorder
- ATV + DTV: Size button for Videotext; DVD: Fast Forward ()
- ATV + DTV: Videotext page (TEXT); DVD: SETUP button
- ATV+ DTV: Favourite button (FAV); DVD: Video-DVD Menu button (D.MENU)
- DVD: Search button (GOTO)
29.DVD:ZOOM button - ATV + DTV: Videotext Reveal button; DVD: REPEAT button
- ATV + DTV: Videotext Hidden button (CANCEL); DVD: A-B segment playback button (A-B)
- ATV + DTV: Videotext Index Page (INDEX); Rec: Recorded list; DVD: Audio button
- DTV: Subtitle button (SUB-T); DVD: Subtitle button (SUBTITLE)
- ATV + DTV: Coloured button; DVD: RED = Information button (DISP); GREEN = Angle button (ANGLE); YELLOW = Slow Motion (SLOW); BLUE = Video-DVD Title button (TITLE)
Power connection
Connect the power cable with the wall mounted power outlet.
On the front side you can see a red LED light. The TV set is now in Stand-By mode. By pressing the POWER button on the remote control or on the top side of the device the red LED changes to a green light.
Antenna
The HTC TV set has an analogue and a digital TV Tuner inside. For receiving analogue TV signals please connect the antenna cable with the RF connector on the HTC TV set and with the VHF/UHF roof antenna or with a CATV tenna plug.
For receiving digital terrestrial TV signals please connect the HTC TV set with the RF plug and also with the roof antenna. If no roof antenna is available please use indoor aerial.
For activating the analogue TV Tuner, please switch with the SOURCE button and choose in the popup window "ATV" or "DTV" for digital terrestrial TV.
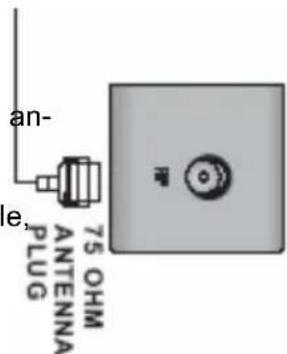
Note:
For getting the best DVB-T reception please uses the roof antenna. If not possible, than you can connect the HTC TV set with an active indoor aerial.
SCART Input
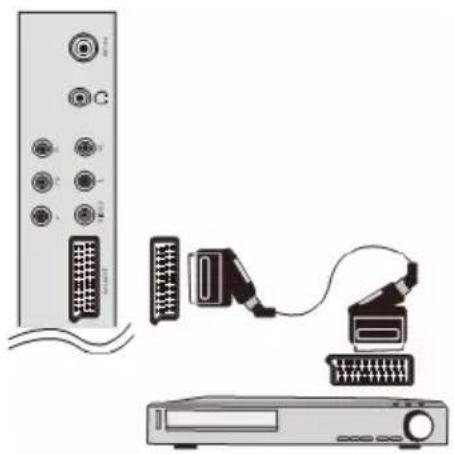
Audio- and Video signals from a VCR or a setup box can be transmitted by SCART. Please connect a SCART cable with the SCART input on the HTC TV set and with the SCART output on the VCR or setup box.
Press the SOURCE button and choose "SCART" in the popup window and the SCART interface is activated.
HDMI
If you want connect a multimedia device with HDMI like a game console „PS3“ or a Setup box with the HTC TV set, you can establish a HDMI connection. Please connect the HDMI cable on the HDMI interface on the HTC TV set and the HDMI output of the multimedia device.
You can also connect the TV set to you personal computer by HDMI cable. Here you can uses the Full-HD resolution (1366 x 768).
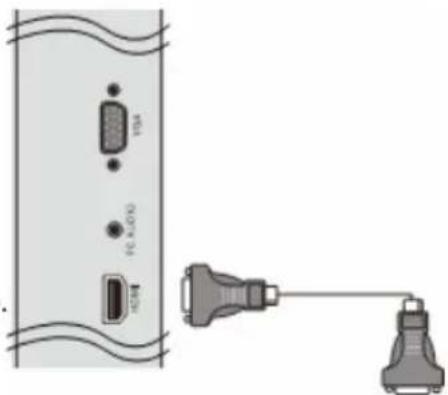
Please press the SOURCE button and choose "HDMI" in the popup window and the HDMI input is active.
Component Y Pb Pr Video- and Stereo Audio input
If you uses more than one multimedia terminals and the SCART, HDMI and S-Video connection are used, than you connect the next device by the audio/video component input (Y Pb Pr). Please connect the wire of an 3-pin component cable with the YPbPr input of the HTC TV set and the multimedia device. Please pay attention to the coloured coding of the cable, inputs jacks (LCD set) and the video output jacks (source):
- "Y" with the green wire or RCA plug
- "Pb" with the blue wire or RCA plug
- "Pr" with the red wire or RCA plug
With this kind of connection only video signals are transmitted. For listening sound on the TV you should establish also a
sound connection. Please connect the white and red wire of the 2-pin component cable with the AU-DIO OUT (source) and the RCA jack with the "L" and "R" of the "L R" plug of the HTC TV set.
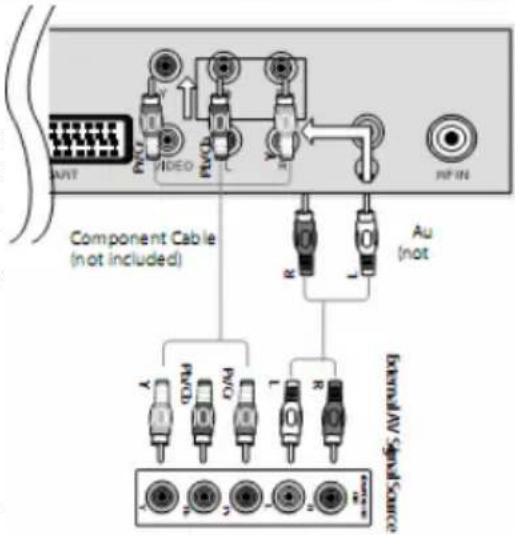
Please press the SOURCE button and choose ^ YUV^# in the popup window. The YUV input is active.
Video- and Stereo Audio input
If you uses more than one multimedia terminals and the SCART, HDMI and YUV connection are used, than you connect the next device by the CVBS. Please connect the CVBS cable with the CVBS input of the HTC TV set and with the CVBS output of the multimedia device. With this kind of connection only video signals are transmitted. For listening sound on the TV you should establish also a sound connection.
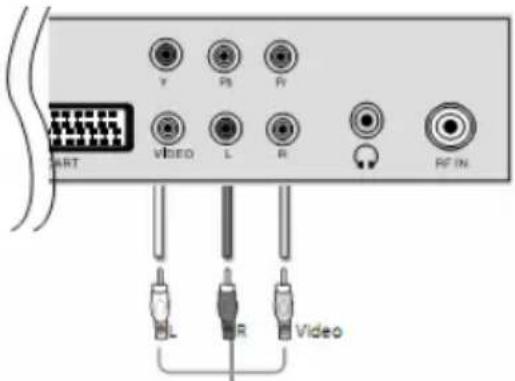
Please connect the white and red wire of the 2-pin component cable with the AUDIO OUT (source) and the RCA jacks "L" and "R" of the "L R" plug of the HTC TV set.
Please press the SOURCE button and choose ^ AV^ in the popup window. The CVBS input is active.
USB Port
This USB port has different functions:
- After connect of USB storages, you can record DVB-T broadcast.
- Playback of recorded DVB-T broadcast
- Time-Shift Function.
- Update of the system
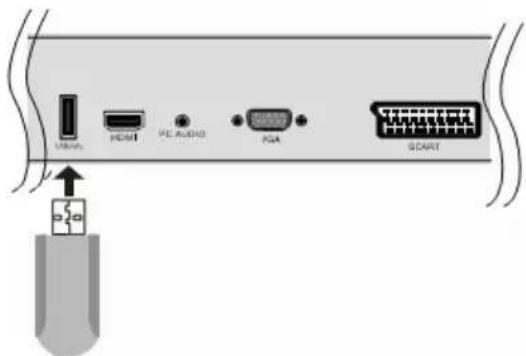
Note:
Due to the legal requirements of CE-conformity, the customer is asked to only connect USB-Sticks to the USB port.
VGA
You can use the HTC TV set as a PC monitor by using the VGA interface. Please connect a VGA cable with the VGA input of the HTC TV set and with the PC.
With this kind of connection only video signals are transmitted. For listening sound on the TV you should establish also a sound connection. Please connect the white and red wire of the 2-pin component cable with the AUDIO OUT (source) and the stereo jack with the "PC AUDIO" plug of the HTC TV set.
Please press the SOURCE button and choose "VGA" in the popup window. The VGA input is active.
Notes:
- Before you connect the HTC TV set with the PC, please change the graphic resolution of the PC to: 640 × 480 , 800 × 600 or 1024 × 768 .
- Please establish the connection and switch to PC-VGA input.
-
For displaying the best results, please uses the native resolution with HDMI connection of the TV LCD panel:
-
HTC 2228D -> 1366 x 768 Pixel (60Hz)

DVD-Player, USB Port and Card Reader
The Slot-In DVD-Player, USB port and the Card Reader are on the right side of the device. This USB port and the Card Reader are part of the DVD-Player and works only in DVD Mode.
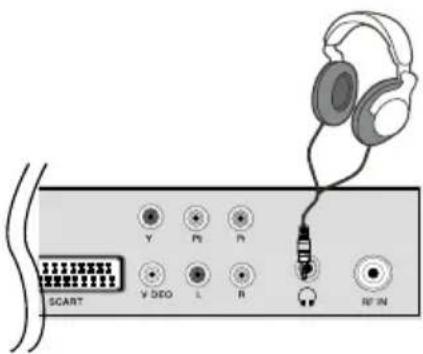
Headphone
You can connect a headphone to the TV set. Please uses a headphone with 3.5mm phone jack and plug them to the headphone port on the left side of the HTC 2228D.
First Time Installation
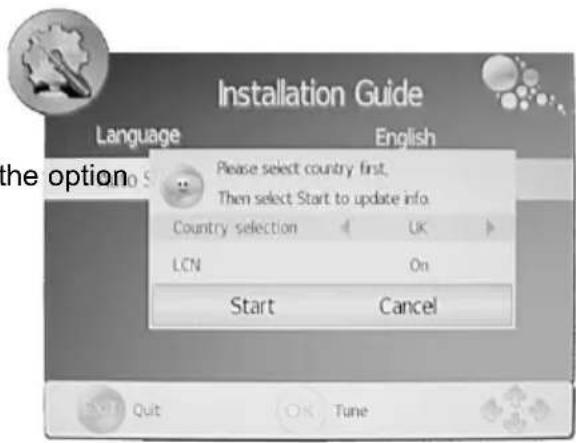
When you start the HTC 2228D TV set the first time and choose TV or DTV, than appears the installation guide on the screen. With this guide you can search analogue and digital TV channels. The search routine includes the frequencies of the analogue and digital broadcaster.
- Please select the OSD language. You can choose the pre-installed languages by pressing the or buttons. If you find your languages, please confirm the language by pressing the OK button.
- Press the button and navigate to "Auto Tuning". The search starts when you press the button.
- A new popup window appears on the screen. There you can see the option country selection. Please choose the suitable country by pressing the or buttons.
- If you had chosen the country, please press the button, so that the "Start" field will be marked with blue and is active. Press the OK button and the search starts immediately.
- A new window opens on the screen, where the status of the searching is documented. The values of the found TV broadcast stations of analogue, digital and Radio are listed.
- After finishing of the searching, all found TV broadcast station will be saved into the channel list.
- You can look at the TV channel list by pressing the CH.LIST button.
Note:
The complete searching needs a couple of minutes.
The single sources and inputs of the HTC2228D TV set can be choose by pressing the SOURCE button on the remote control or the TV/AV on the top side of the TV set. A popup window appears on the screen. The sources are:
DTV DVB-T TV Tuner
ATV Analogue TV Tuner
SCART SCART Video/Audio Input
AV CVBS Video Input
Component Video component input
DVD Internal DVD Player
VGA VGA port
HDMI HDMI Video/Audio input
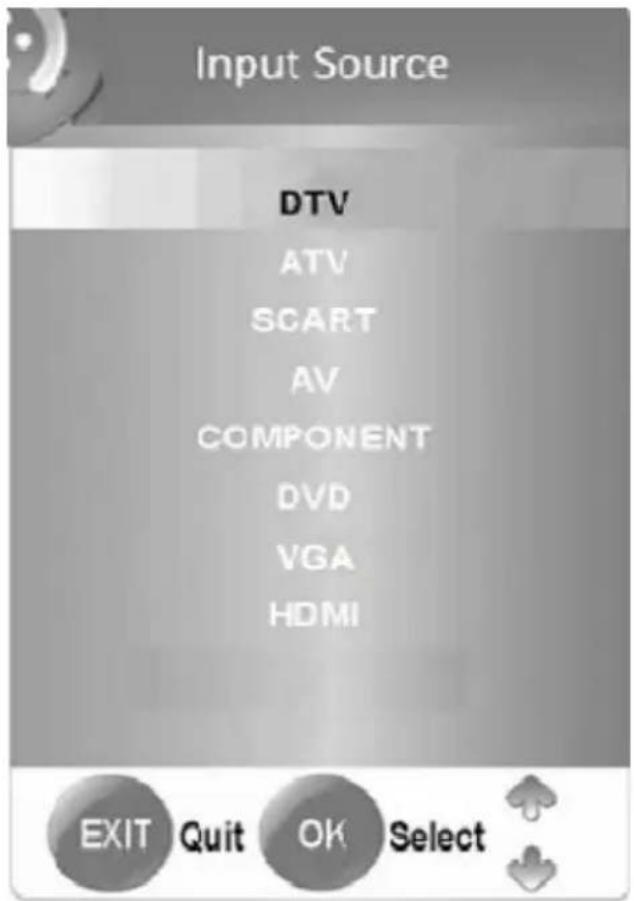
There you can choose the source by pressing the / button. Confirm the selected source with the OK button.
If you want to use the terrestrial digital TV (DVB-T), than you need to change the source into DTV. Press the SOURCE button and navigate to DTV with the / button. Confirm the selection DTV by pressing the OK button.
Important buttons and there functions
Channel List
Press the CH.LIST button on the remote control and you gets the provided and receives TV broadcast stations. By using the / buttons you can select the TV station, which you like. To disappear thee channel list, press the EXIT button.
Change TV channel
To change to TV channel you can press the CH- or CH+ button.
Select TV Channel
You have also quick access to the different TV channels by using the numeric buttons.
Last TV channel
Press the RECALL button to go back to the last TV channel.

Change the Volume
By pressing the VOL- or VOL+ buttons you can adjust the volume of the speaker.
EPG
Press EPG button to show the EPG information. For detailed information about the EPG please refer the section about EPG.
Favourite list
If you had defined some TV or Radio into a favourite list, than you have a quick access to the favourite list by pressing the FAV button.
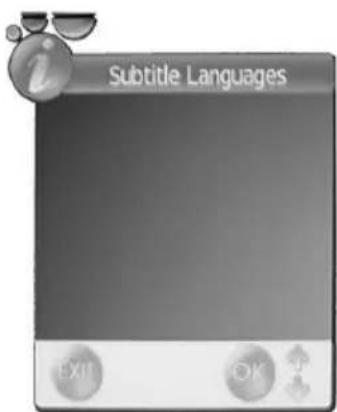
Subtitle
Press SUBTITLE button to turn on or off the subtitle on the screen. This function can be activated, if the service is provided by the TV channel and program. In case that subtitles are supported, than they will be listed into the popup window. You can choose the subtitle and start them with the OK button.
Note:
Subtitles are not supported in every country.
Important buttons and there functions
Tele-/Videotext
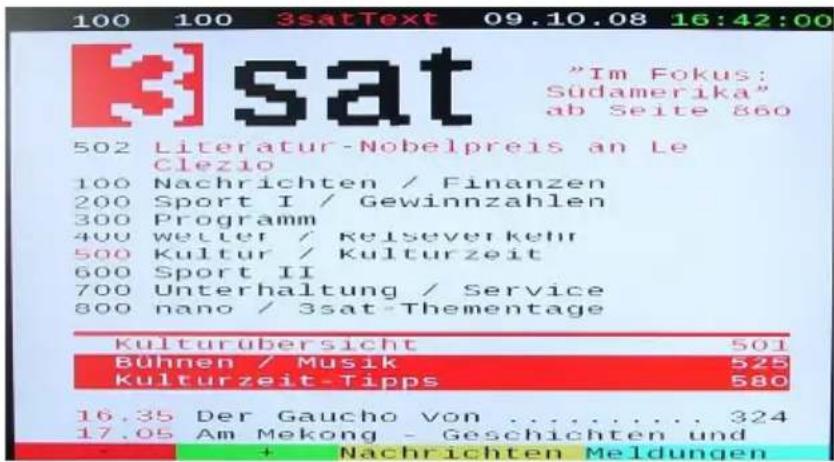
Press TEXT button to view the videotext information of the current TV program.
1. With the numeric buttons you can select special videotext pages.
2. On the bottom side of the videotext window you can find four colored fields (Red, Yellow, Green, Blue). The colored fields correspond with the colored buttons on the remote control. Press one of the colored button, the HTC TV set goes directly to this videotext page.
3. With the RED button you can choose to the previous videotext page.
4. With the GREEN button you can choose the next videotext page.
5. With the YELLOW button you can choose the pre-defined videotext page.
6. With the BLUE button you can choose the pre-defined videotext page.
7. The CANCEL button hidden the opened videotext window. Press again, than opens the window.
8. The INDEX button makes a quick access to the first videotext page (for example page 100).
9. With the SIZE button you can zoom in the videotext window on full screen size. Than you can see the first half videotext page. Press again the SIZE button and you can the sec ond part of the videotext page. By pressing the third time the SIZE button the videotext window changes to normal size and view.
10. To close the Videotext window please press the TEXT or EXIT button.
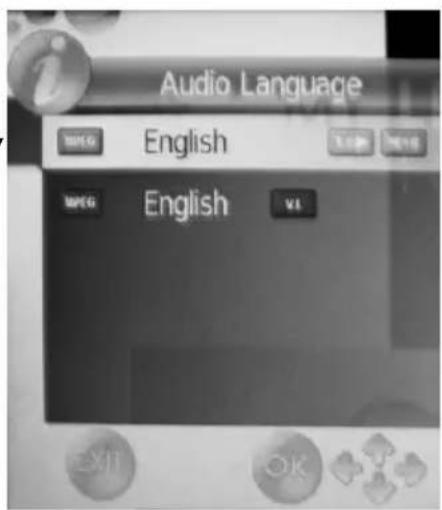
Language or another Audio
Press NICAM button to change the audio language or the audio track output. After pressing the NICAM button a popup window appears on the screen, where you can select the preferred audio language or sound mode by using the / buttons. Confirm the selection by pressing the OK button.
Note:
Some broadcaster supports different languages or sound modes.
Important buttons and there functions
Quick-Information
Press the OK button during the live picture and a popup window appears on the screen. The information in the window are TV program title, current date, current time, duration of the actual TV program, resolution of the transmission (for example 576i) and if videotext is available.
On the right side you can find an arrow sign. By pressing the button you gets information about the next TV program.

Information
Press the INFO button during the live picture and detailed information are appears on the screen.
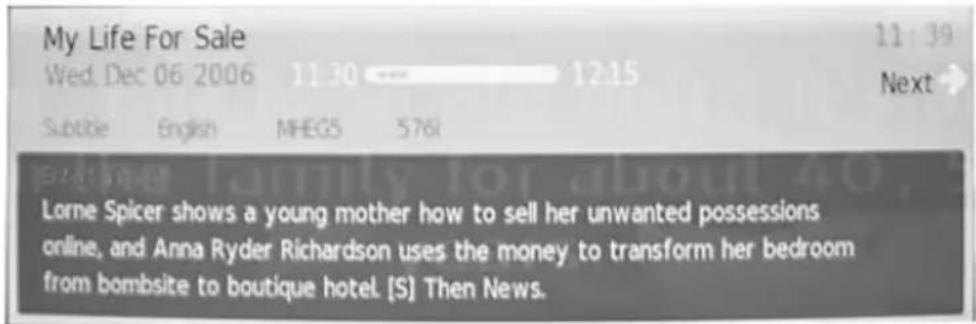
Beside the TV program title, time, date, duration time of the current program title, resolution of the broadcast and if videotext is available, you can see the detailed EPG information of the current TV program. With the / buttons you can browse all EPG information, if more than one page is available. By pressing the button you gets information about the next TV program and there EPG information.
EPG
The electronic program guide (EPG) can be activated by pressing the EPG button as well and the EPG window appears on the screen.
The EPG window is organized in three sections:
Top Current TV channel number (e.g. DTV 1) and TV broadcast station name
Date, duration time of the current TV program and the TV program title
Middle EPG overview by list
Bottom Buttons for navigation
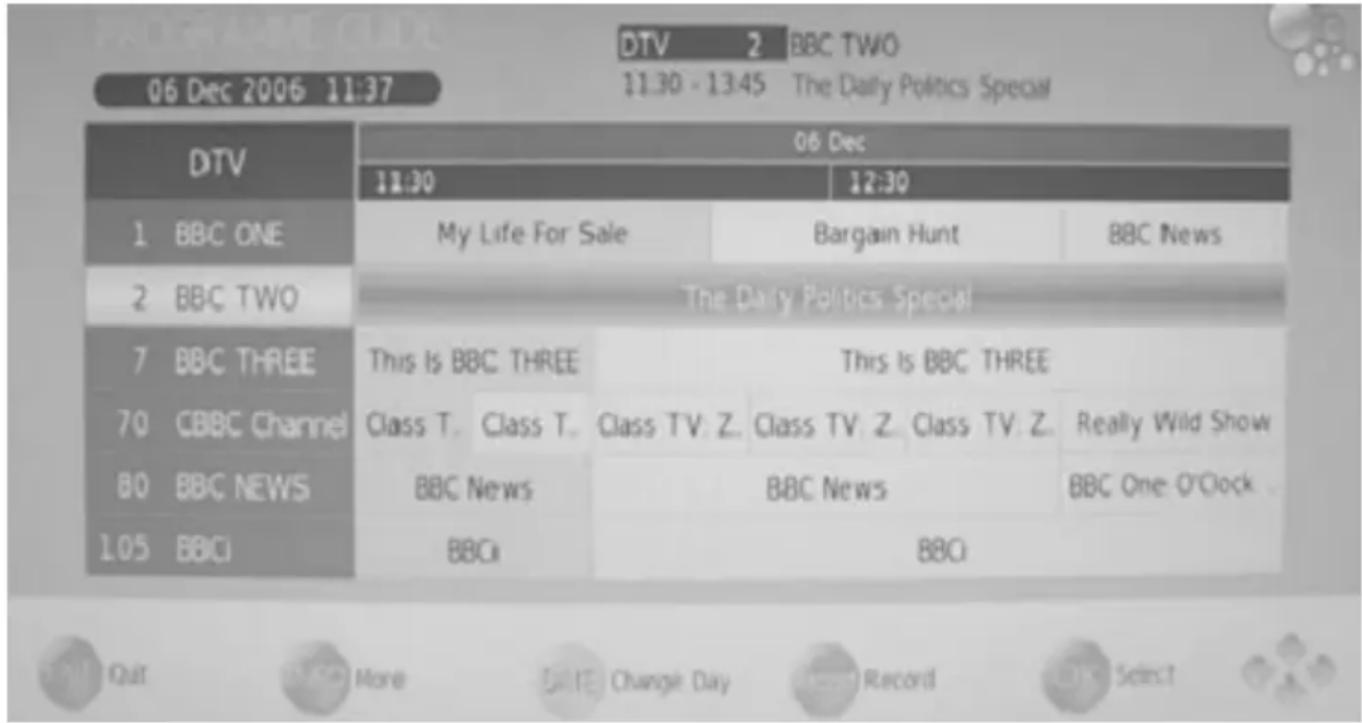
The active and current TV station and TV program is accentuate in blue. Inside of the TV station you can navigate with the or buttons to the previous or next TV program. With the / buttons you can change to the TV broadcast station. Following button help you for easier navigation:
EXIT Exit of the EPG window
INFO Access to detailed EPG information by each TV program
YELLOW Switches from daily mode to weekly mode
RECORD Press the REC button to program a DVB-T broadcast recording.
By the weekly mode the date bar changes from the bright blue into yellow. Now you can browse to the next date by using the or buttons.
Press again the YELLOW button and the displaying changes from the weekly mode into the daily mode.
Note:
The HTC 2228D set supports 7-days EPG preview.
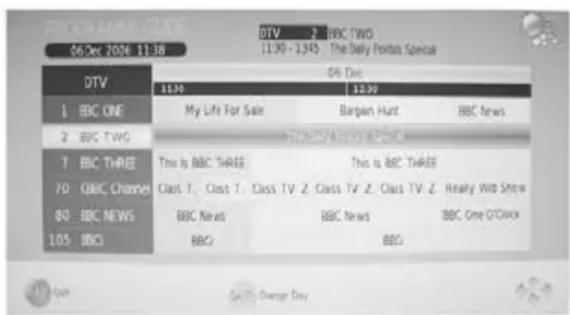
If you want to use the analogue TV Tuner (Cat TV), than you need to change the source into TV. Press the SOURCE button and navigate to TV with the / button. Confirm the selection ATV by pressing the OK button.
Channel List
Press the CH.LIST button on the remote control and you gets the provided and receives TV broadcast stations. By using the / buttons you can select the TV station, which you like. To disappear thee channel list, press the OK button.
Change TV channel
To change to TV channel you can press the CH- or CH+ button.
Select TV Channel
You have also quick access to the different TV channels by using the numeric buttons.
Last TV channel
Press the RECALL button to go back to the last TV channel.
Change the Volume
By pressing the VOL- or VOL+ buttons you can adjust the volume of the speaker.
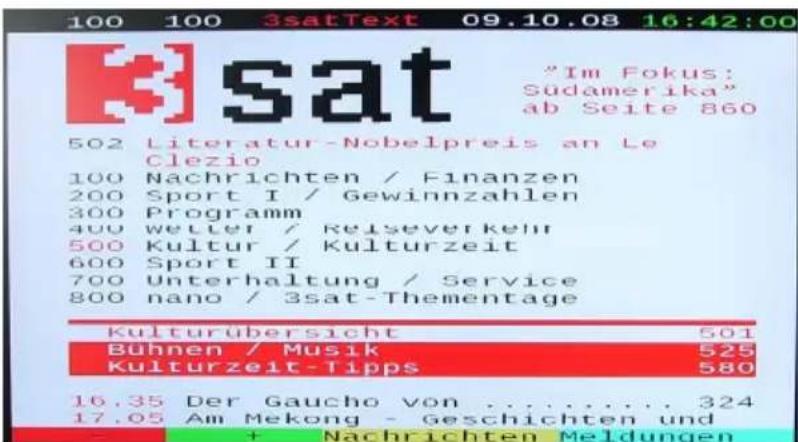
Tele-/ Videotext
Press TEXT button to view the videotext information of the current TV program.
- With the numeric buttons you can select special videotext pages.
- On the bottom side of the videotext window you can find four colored fields (Red, Yellow, Green, Blue). The colored fields correspond with the colored buttons on the remote control. Press one of the colored button, the HTC TV set goes directly to this videotext page.
- With the RED button you can choose to the previous videotext page.
- With the GREEN button you can choose the next videotext page.
- With the YELLOW button you can choose the pre-defined videotext page.
- With the BLUE button you can choose the pre-defined videotext page.
- The CANCEL button hidden the opened videotext window. Press again the button to re-open the Videotext window.
- The INDEX button makes a quick access to the first videotext page (for example page 100).
- With the SIZE button you can zoom in the videotext window on full screen size. Than you can see the first half videotext page. Press again the SIZE button and you can the second part of the videotext page. By pressing the third time the SIZE button the videotext window changes to normal size and view.
- To close the Videotext window please press the TEXT or EXIT button.
The recorder works only in DVB-T mode. You can record only DVB-T broadcast. Please pay attention to following rules:
- Connect USB storage to the USB port on the left side.
- Prepare the USB storage by the TV set before starting recording
- Do not disconnect the power during recording.
Preparation of USB Storage for Recording
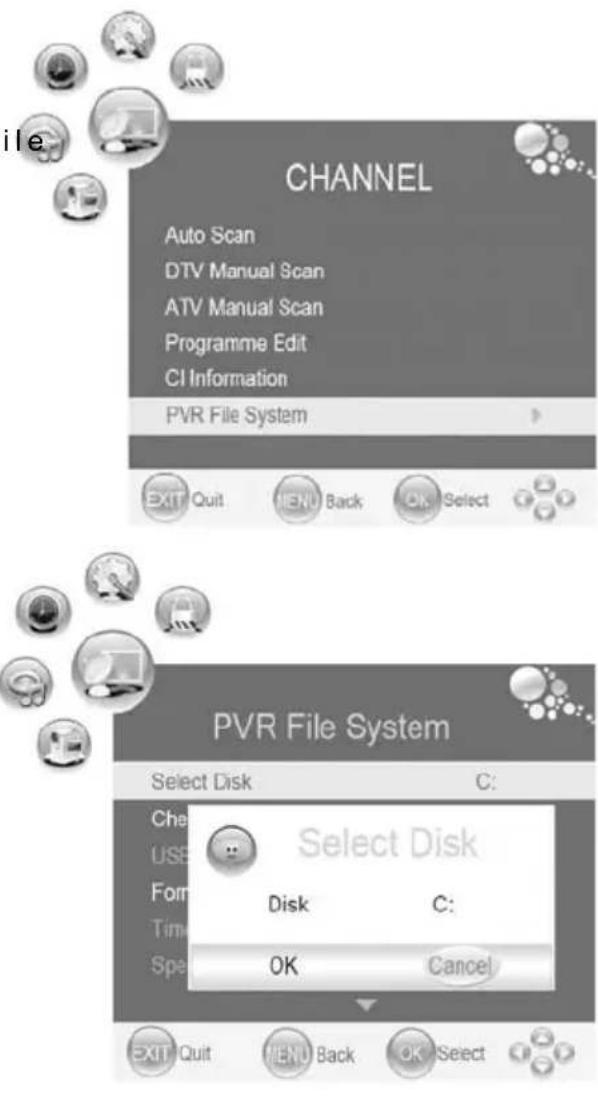
- Press the MENU button to select CHANNEL.
- Press the button to select PVR Fil System and press the or OK button to enter the sub-menu, as shown.
- Press the MENU button to return to the previous menu.
- Press the EXIT button to exit.
Select Disk
Select a disk to store the recorded file. Press the button to select Select Disk and press the or OK button to prompt a submenu, as shown.
- The item Disk is highlighted and press the button select desired disk. The available item varies depending on the external USB device connected to the unit.
Press the button to highlight OK and press the OK button to confirm.
Check PVR File System
Press the button to select Check PVR File System and press the or OK button to start to check the PVR File system.
After checking PVR file system, the item "USB Disk" will display "Pass" indicating the file system in the USB disk connected has been checked and ready to use.
If the USB disk does not have a PVR File System, then unit will prompt a message asking user to format
Format
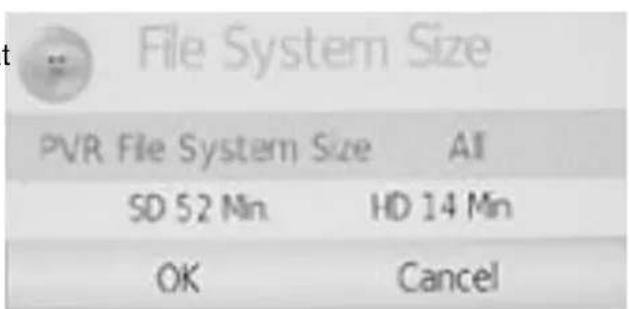
Press the button to select Format and press the or OK button to prompt a sub-menu which occurs only when the USB device is plugged in for the first time, as shown:
The item PVR File System Size is highlighted and press the button to choose
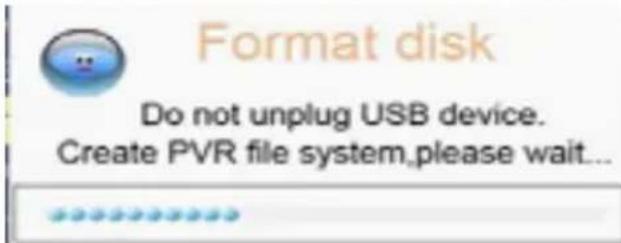
the capacity to be format. The available capacity varies depending on the external USB device connected to the unit.
Press the button to highlight OK and press the OK button to format the disk you selected.
During disk formatting, please do not unplug the USB device and wait for several minutes.
Notes:
- All data on the connected device will be lost if you confirm to format.
It is strongly recommended that the USB device is dedicated only for this unit. Various external data contain in the USB device might cause PVR file system corrupt and requires formatting.
Once USB device is formatted, unit will create a unique file system on it. Therefore, it is not advisable to connect USB device to a computer to export data.
We cannot guarantee compatibility (operation and/or bus power) with all USB mass storage devices and assumes no responsibility for any loss of data that may occur when connected to this unit. - With large amounts of data, it may take longer for the system to read the contents of a USB device. Unit may require longer time to format depending on the volume of the USB device.
- Some USB devices may not be properly recognized.
Even when they are in a supported format, some files may not play or display depending on the content. - Please make sure the USB device's file system is FAT32.
- USB device must be a high speed USB2.0 in order to operate properly.
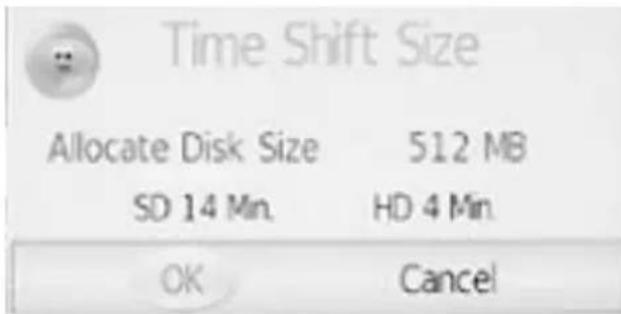
Time Shift Size
After the disk format is finished, the menu as shown on the right will appear.
- The item Time Shift Size is highlighted, press the button to choose a size to be allocated for time shift.
Press the button to highlight OK and press the OK button to confirm and return.
Speed, Remain Space
Once USB device is checked, this item will display the USB data transfer rate and the remaining space in it.
Max record time
Press the button to select Max record time and press the button select desired time as the max record time.
Recording program
After you setup the settings on the PVR File System menu, you can record a DTV program on the external USB device. Select the desired program then press the REC button on the remote control to start recording and the progress bar will be displayed. During recording, the progress bar will fade out in 10 seconds.

[00:00:02]
Recording
TF1
Press the REC button again, an REC icon will blink on the bottom right corner of the screen and it will fade out in 10 seconds. Recording stops when you press the STOP button and the recorded file is stored in the external USB device automatically. Press the PLAY button to start to play the file fresh recorded.
Recording in standby mode
This unit is able to do recording while in sleep mode.
- Start a recording, then press the power button.
While recording in standby mode, unit will not output any picture or sound. The power indicator will flash in green and red consecutively while there is a recording in standby mode.
Schedule Recording by EPG
Schedule record is a function which allows you to record future program. You can first set up a schedule record, then unit will record the program when the program is broadcast. It will stop recording when the program finish.
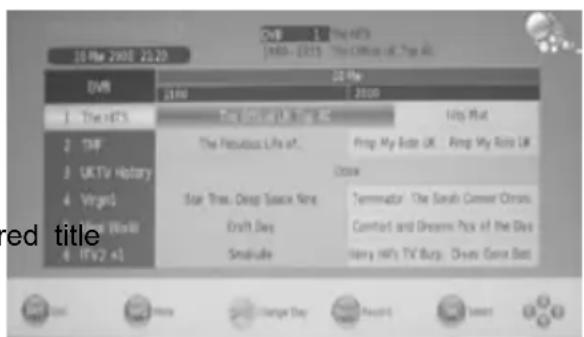
- Press the Program Guide
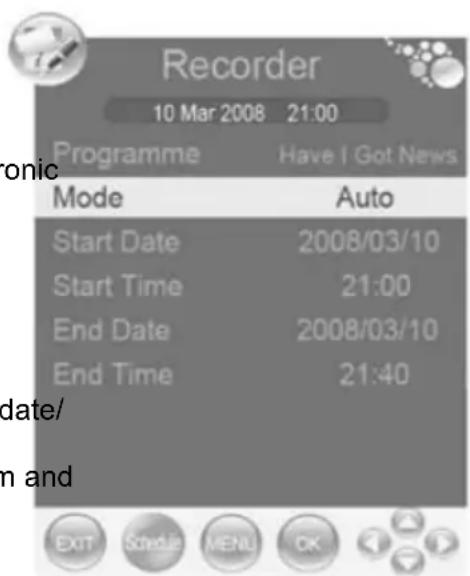
EPG button to display Electronic - Select your desired TV program and press the REC button to enter the Recorder menu.
- From here you can modify the start and end date time of your record schedule by using the direction button once.
- Use the direction button to select date/time to change.
- Use the button to select desired item and press the OK button to enter.
- After setting, press the OK button to confirm and the Recorded Schedule List will display. The scheduled program will be recorded automatically at the time you set. You can schedule more recordings and the scheduled programs will be listed in the Recorded Schedule List. While in Recorder menu, you can also press the green button to enter the Recorded Schedule List.
- Press the button to select desired title and press the red button to delete it.
- Press the EXIT button to exit.
Time Shift Function
This function allows you to pause and fast forward/rewind normal Live DTV viewing at any time without missing any of the live broadcast, provide that a USB storage device is connected.
During viewing a DTV program, press the PAUSE button on the remote control to pause live TV. A progress bar is displayed on the screen:
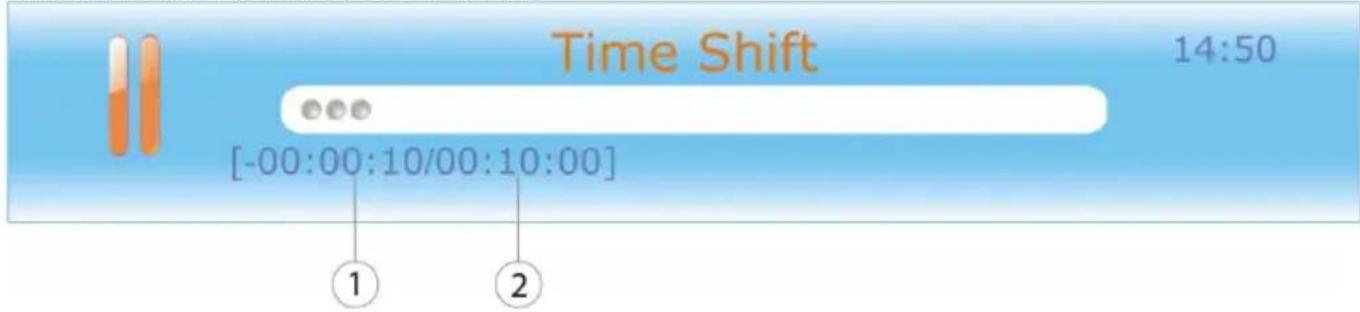
- Current time behind live TV.
- Total allowable time for time shifting. Varies depending on the time shift size.
- The progress bar will fade out in 10 seconds.
Press the PLAY (>||) button to continue playing the program from the point where it was paused. An progress bar is displayed on the screen.
The progress bar will fade out in 10 seconds.
Time shift function stops when the current save time becomes 00:00:00.

While in Time Shift mode, operations below can be use.
Press the >> or << button repeatedly to increases the fast forward/rewind speed.
Press the >> button to jump about 30 seconds forward.
Press the |<< button to jump about 30 seconds backward.
Press the STOP button to cancel the Time-Shift function.
Recorder
Playing recorded program
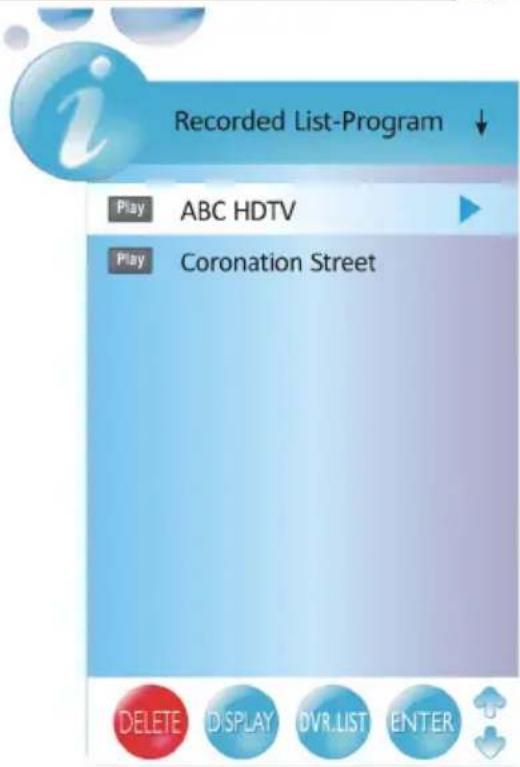
You can play the selected program in the recorded list.
- Press the INDEX button on the remote control to enter the Recorded List.
- Press the INDEX button repeatedly to list the files by named Program, Channel or Time.
- Press the button to select desired file and press the INFO or direction button to display the information of the file.
- Press the button to select desired file and press the OK button to playback selected file.
- While playing, you can see a playback progress bar as shown below.

LCD Settings
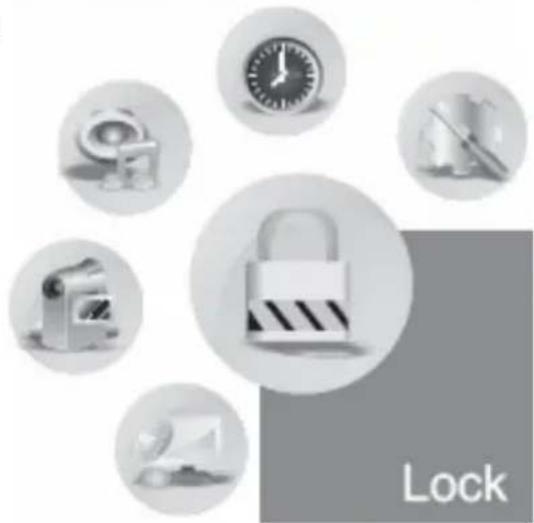
Press the MENU button and you gets access to the different LCD settings. The beside picture shows the different categories "Time", "Channel", "Lock", "Options", "Sound" and "Picture" which characterizes with symbols. The following description shows a list of each categories.

Time
Clock, Off Time, On Time, Sleep timer, Auto Sleep and Time Zone

Sound
Sound mode, Treble, Bass, Balance, Auto Volume, Surround Sound
Picture
Picture Mode, Contrast, Brightness, Color, Sharpness, Tint, Color Temperature, Aspect Ratio, Noise Reduction and PC Setup (only by VGA mode)
Channel
Auto Scan, DTV Manual Scan, ATV Manual Scan, Programme Edit and PVR File system.

Lock
Lock Channel, Change Password, Block Channel, Parental Guidance.

Options
Language, Audio language, Subtitle language, Country, Restore Setting.
After starting the LCD settings you can change the category by using the or buttons. You can enter in each category by pressing the button and this category is active.
Each option or setting can be change by or buttons.
To exit the active category please press repeatedly the button.
To leave the TV settings, press the EXIT or MENU button.
Channel setting
The channel settings include the options for Auto Search (Auto Scan), DTV manual Search, ATV manual Search and Programme Edit.
Auto search (Auto Scan)
With this setting you can search the TV broadcast station for analogue and digital TV programs.
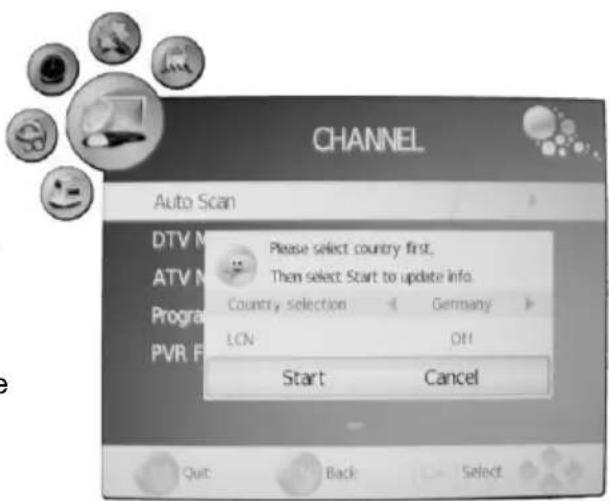
- Press the button and navigate to the option "Auto Scan". The search starts when you press the button.
- A new popup window appears on the screen. There you can see the option country selection. Please choose the suitable country by pressing the or buttons.
- If you had chosen the country, please press the button, so that the "Start" field will be marked with blue and is active. Press the OK button and the search starts immediately.
- A new window opens on the screen, where the status of the searching is documented. The values of the found TV broadcast stations of analogue, digital and Radio are listed.
- After finishing of the searching, all found TV broadcast station will be saved into the channel list. You can look at the TV channel list by pressing the CH.LIST button.
Note:
The complete searching needs a couple of minutes.
DTV Manual Search (DTV Manual Scan)
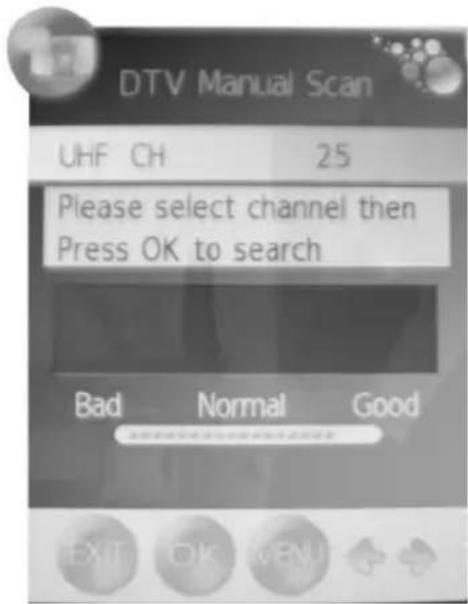
Press the button and navigate to the option "DTV manual Scan" The search starts when you press the button.
- You can change the channel by using or buttons. So you can define, on which channel shall be runs the search.
- Starts the searching by the OK button.
To leave the DTV manual tuning, press the EXIT or MENU button.
Channel setting
ATV Manual Search (ATV Manual Scan)
Press the button and navigate to the option "ATV manual Scan". The search starts when you press the button. The options are:
Storage To
- System (B/G for West Europe, I for UK, D/K for Eastern Europe and France, L or LL for part of France)
Current CH
Search
- Fine-Tune
- Skip
Frequency
- With the / buttons you can browse to each setting.
- With the or buttons you can choose the position in the channel list, where the found TV channel is stored.
- Go to "Search" and start them by the button.

ATV Manual Scan
Storage To
1
System
BG/DK/1
Current CH
1
Search
Fine-Tune
Skip
No
Frequency
471.25 MHz

SAVE
Fine Tune
By using the or buttons you can start the fine tuning of each TV channel, if the signal is too weak or distorted.
Skip
By using the or buttons you can activate the Skip function.
Yes - The channel is skipped by changing the TV channel with the CH- or CH+ button.
- No - The Skip function is deactivated.
Other buttons for navigation
With the RED button you can save the changes, if you for example has changes the Audio system.
To leave the ATV manual tuning, press the EXIT or MENU button.
Channel setting
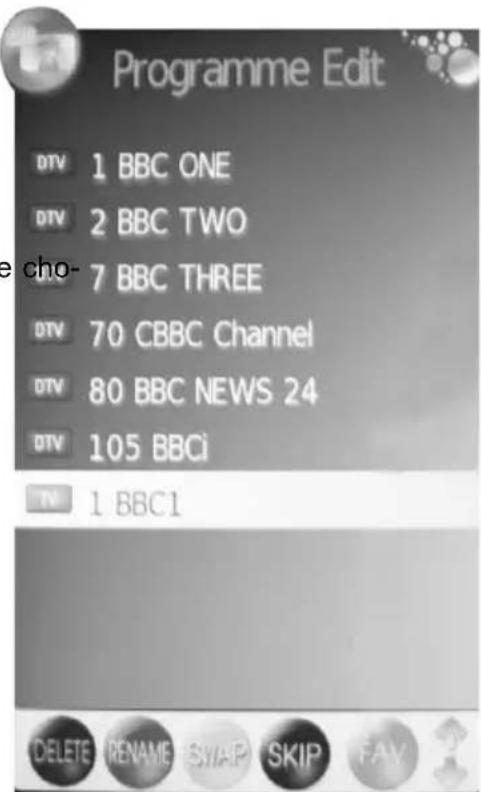
The option "Programme Edit" includes settings for Moving and sorting, Skip and define Favourites.
Move a TV channel
This option is responsible for sorting the TV channel, so that you can define your personal view of the TV channel list.
- With the / buttons you can choose the TV channel, which shall be edit.
- Press the YELLOW button and beside chosen TV channel you can see now an arrow symbol.
- Move the TV channel with the / buttons on the position which you like.
- Press the MENU button to confirm and save the moving.
- To leave the setting press the EXIT button.
Define TV Channels into Favourites
Here you can define your preferred TV channels into a favourite list. You can activate the list by pressing the FAV button.
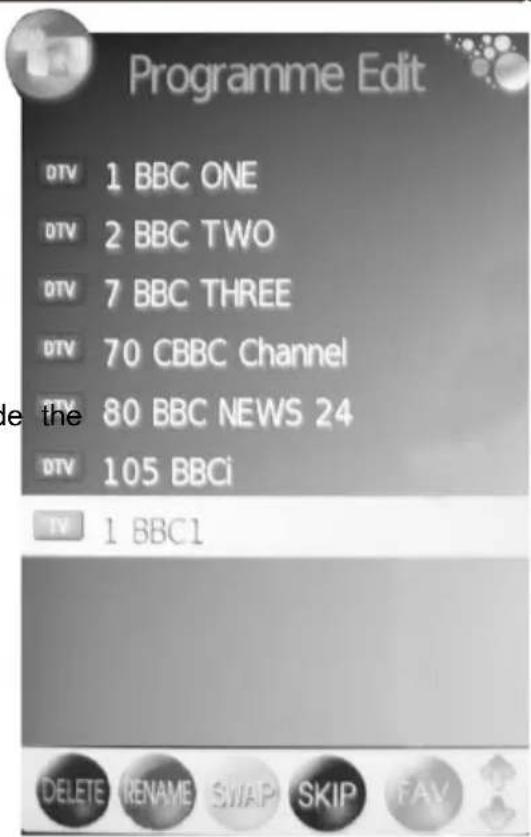
- With the / buttons you can choose the TV channel, which shall be edit.
- Press the FAV button and beside the chosen TV channel you can see now heart symbol.
- To leave the setting press the EXIT button.
Note:
If you want to delete a favourite TV channel from the favourite list, than browse the TV channel which is marked by a heart symbol and press the FAV button. The heart symbol is deleted and this TV channel can not seen anymore in the favourite list.
Skip a TV Channel
With this option you can define single TV channel which can not dial anymore by using the numeric buttons.
- With the / buttons you can choose the TV channel, which shall be skipped.
- Press the BLUE button and beside the chosen TV channel you can see now blue symbol.
- To leave the setting press the EXIT button.
Channel setting
Rename a TV Channel (only by analogue TV channel possible)
With this option you can rename single analogue TV channel and define a new label.
- With the / buttons you can choose the TV channel, which shall be skipped.
- Press the GREEN button and beside the sen TV channel you can see now green symbol.
- With the / buttons you can browse the letters on each place.
- With the or buttons you can go to the next position.
- Save the new label of the TV channel by pressing the MENU button.
- To leave the setting press the EXIT button.
Delete a TV Channel
With this option you can delete single TV channel from the TV list.
- With the / buttons you can choose the TV channel, which shall be skipped.
- Press the RED button and beside the chosen TV channel you can see now red symbol.
- Confirm the deleting by pressing again the RED button.
- To leave the setting press the EXIT button.
Note:
The selected TV channel is now deleted from the TV channel list.
LCD Settings
Picture setting
The picture settings include option for "Picture Mode", "Contrast", "Brightness", "Color", "Sharpness", "Tint", "Color Temperature", "Aspect Ratio", "Noise Reduction" and "Screen".
Picture Mode
With the or buttons you can choose the picture mode. The live picture changes to the preset settings.
The presets are:
Dynamic
Standard
Mild
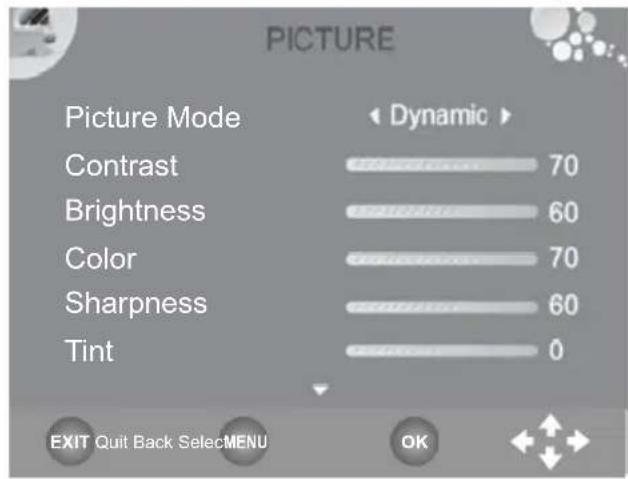
You can define you own settings if you uses the USER options.
Brightness
With the or buttons you can select the level of brightness. This option is only than active, when you use the USER option by the picture mode.
Contrast
With the or buttons you can select the level of contrast. This option is only than active, when you use the USER option by the picture mode.
Color
With the or buttons you can select the level of contrast. This option is only than active, when you use the USER option by the picture mode.
Sharpness
With the or buttons you can select the level of sharpness. This option is only than active, when you use the USER option by the picture mode.
Tint
With the or buttons you can select the level of hue. This option is only than active, when you uses the USER option by the picture mode.
Color Temperature
With the or buttons you can select the level of color temperature. The three preset options are:
Cool
Warm
Standard
You can define you own settings if you use the USER options. Than you can get access to the three colours "Red", "Green" and "Blue". Select the level of each colour by using the or buttons.
Noise Reduction
With the or buttons you can activate or deactivate the noise reduction. The option ON starts the noise reduction and OFF deactivate them.
Picture setting
Aspect Ratio
With the or buttons you can select the aspect ratio and changes the view on the screen. The options are:
16:9 - The picture is every time in full screen mode, independent from the supported aspect ratio.
4:3 - The picture view is 4:3 and shows on the left and right side a black bar, independent from the supported aspect ratio.
- Auto - The view is defined by the supported aspect ratio and the adjustment is automatically. By 16:9 is the picture in full screen and by 4:3 show the screen the black bars on the right and left side.
- Zoom 1 - This option can be used for an 4:3 aspect ratio. The picture is zoomed into full screen by keeping the aspect ratio. Parts of the picture will be cut-off (specially on the top or bottom side) and can not seen anymore.
- Zoom 2 - This option can be used for an 16:9 wide-screen or cinemascope picture. The picture is zoomed into full screen by keeping the aspect ratio. Parts of the picture will be cut-off (specially on the right and left side) and can not seen anymore.
By every source except the internal DVD-Player you can change the aspect ratio by pressing the ASPECT button on the remote control.
Note:
Do not uses the 4:3 aspect ratio every time, because you can damage the TFT LCD screen.
When you uses the VGA input, than you have several additional options for the adjustment of the picture. These options are behind the setting PC Setup.
Press the button to get access to the PC Setup options. The sub-options are:
Auto Adjust
Horizontal Position
Vertical Position
Size
Phase
Auto Adjust
You can uses the Auto adjust option to synchronizes
the picture from the PC VGA port in an optimal way. Press the button to synchronize the screen display.
Horizontal and Vertical Position
With these option you can adjust the VGA picture manually on the screen. Press the or buttons and the picture shifts to high and width.
Size
Press the or buttons to change the size of the VGA picture on the screen, until a stable image is obtained.
Phase
Use or buttons to adjust the phase of the ADC sampling clock relative to the H-sync signal, until a stable image is obtained.
Save the new settings by pressing the MENU button. To leave the setting press the EXIT button.
LCD Settings
Sound setting
The sound settings include options for "Sound Mode", "Treble", "Bass", "Balance", "Auto Volume" and "Surround Sound".
Sound Mode
With the or buttons you can select the sound mode. The preset options are:
Music
- Movie
Sports
Standard
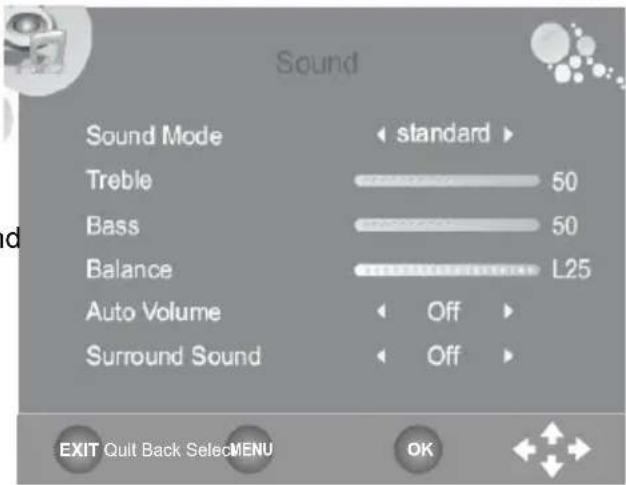
You can define you own settings if you uses the USER options. Than you have access to the settings of treble and bass.
Treble and Bass
With the or buttons you can select the level treble and bass. These option are only than active, when the USER option by sound mode is set.
Balance
With the or buttons you can select the balance.
Auto Volume
With this option you can activate an automatic damping of the volume, if very loud sound passage are happened. This mode is like a Night Mode. With the or buttons you can activate or deactivate the damping.
- ON - The damping is active
OFF - deactivate the damping
Surround Sound
This option activates the surround effects by the sound output. With the or buttons you can activate or deactivate the surround sound.
- Surround - The Surround Sound is active
OFF - deactivate the Surround Sound
Time setting
The Time settings include the options for "Clock", "Off Time", "On Time", "Sleep Timer", "Auto Sleep" and "Time Zone".
Clock
Choose the clock setting with the button and start to change the clock by pressing the OK button. An additional popup window appears on the screen.
With the / buttons you can choose every suboption. With the or buttons you can change the options. The sub-options are:
- Date
Month
Year - Hour
- Minute
If you had change some settings, please navigate to the button to "Close" and press the OK button for the saving the changes.
Off Time of the HTC 2228D
With this option you can program the TV set for automatically switch off. Start the option by pressing the button and a new popup window appears on the screen. There you can define each setting to program the off time. The settings are:
Repeat
Here you can define the cycle of the off time:
A. Once
B. Every Day
C. Monday-Friday
D. Monday-Saturday
E. Saturday-Sunday
F. Sunday
G. Off
- Hour
Define the clock in hour (e.g. 18 o'clock)
- Minute
Define the clock in minutes (e.g. 15 minutes)

TIME
| Clock | 19/Apr 04:43 |
| Off Time | Off |
| On Time | Off |
| Sleep Timer | Off |
| Auto Sleep | Off |
| Time Zone | London GMT |
EXIT Quit
MENBack
OKSelect

| Date | -- |
| Month | -- |
| Year | -- |
| Hour | -- |
| Minute | -- |
Close
| Repeat | Off |
| Hour | 00 |
| Minute | 00 |
Close
Time setting
On Time of the HTC TV set
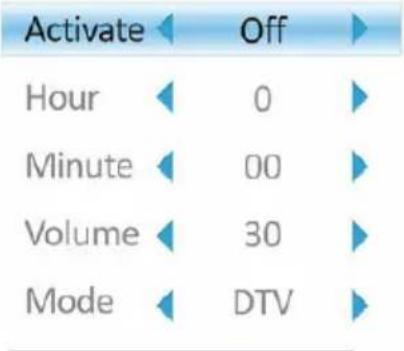
With this option you can program the TV set for automatically switch on. Start the option by pressing the button and a new popup window appears on the screen. There you can define each setting to program the on time. The settings are:
Activate
Here you can define the cycle of the on time:
A. Once
B. Every Day
C. Monday-Friday
D. Monday-Saturday
E. Saturday-Sunday
F. Sunday
G. Off
- Hour
Define the clock in hour (e.g. 18 o'clock)
- Minute
Define the clock in minutes (e.g. 15 minutes)
Volume
Here you can define the volume level by switch on the HTC TV set
Mode
Here you can define the Mode, in which the HTC TV set starts by On Time. You can choose DTV, ATV and Radio
For example, you define the settings to Monday-Friday, 8:05 o'clock, Volume 40 and DTV. Then the HTC TV set starts between Monday and Friday at 8:05 o'clock with the last active DTV channel by a volume of 40.
Sleep Timer
With the option you can program the Sleep Timer to switch off the HTC TV set. The preset steps are defined in minutes.
Note:
You can also start the Sleep Timer by pressing the SLEEP button on the remote control. By repeatedly pressing the SLEEP button you can change the preset minutes.
Auto Sleep
With this option you can program the HTC TV set for automatically switch off, when after several minutes no active signal provided by the source (HDMI, DVD, VGA, ect.)
Time Zone
With this option you can set the Time Zone. If you had chosen by the first time installation the country, than the Time Zone is defined already.
Close
LCD Settings
Option
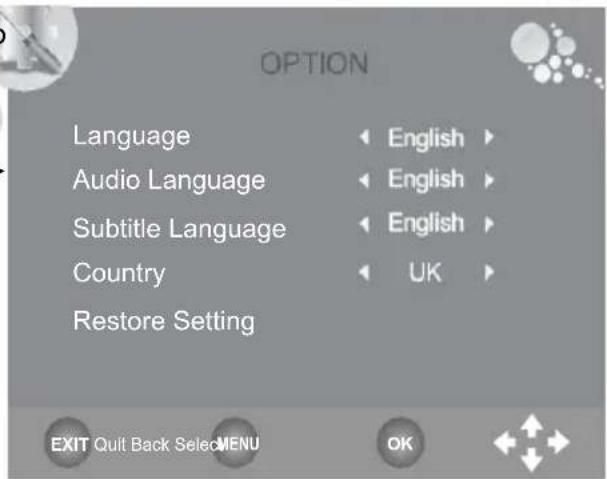
The Option Settings include the "Language", "Audio language", Subtitle language", "Country" and the "Restore Setting".
You can change each setting by using the or buttons.
Language
Here you can select the language for the OSD.
Audio language
This option is important in DVB-T mode and you can select the audio language. Some broadcast TV stations supports multi-lingual TV programs.
Subtitle language
This option is important in DVB-T mode and you can select the subtitle language. Some broadcast TV stations supports subtitles in TV programs.
Country
Here you can define the country. The country setting has influence by other options, like Time Zone or the searching of ATV and DTV channels.
Restore Setting
With this option you can load and reset the factory default settings. All personally settings are deleted.
LCD Settings
Lock setting
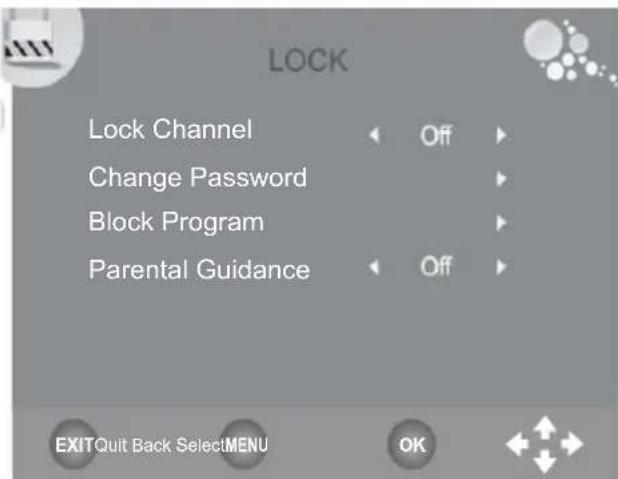
The LOCK settings include the option for "Lock Channel", "Change Password", "Block Program" and "Parental Guidance".
Before you can change the settings, you have to insert the preset password if you enter into the menu. The password is "0 0 0 0"
Lock Channel
With this option you can lock a channel.
Set Password
With this option you can change the preset password. Please insert the new password and confirm the new password again.
Block Program
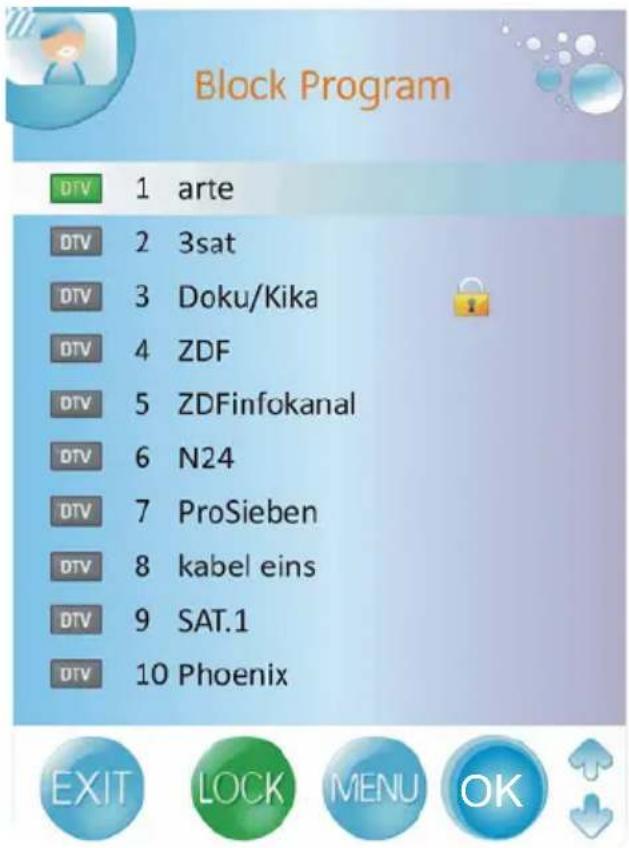
With this option you can block single TV channels. After starting the option the channel list appears on the screen. With the / buttons you can choose TV channel which you want to block. To block a channel please press the GREEN button on the remote control. On the chosen TV channel appears a lock symbol. Save the settings by pressing the MENU button.
The block TV channel can not choose anymore.
Parental Guidance
With this option you can define the level of the parental control. The parental control can be only than active when the TV broadcaster supports this function.
Check the following guide for the possible cause of a problem before contacting service.
Technical Support of Xoro/MAS:
| Problem Solution | |
| TV won't switch on | Check the mains cable is connected properly to both the mains supply and the mains adapterCheck the cable from the mains adapter is connected properly to the set.The electronic circuit may have reset.Pull the plug out, wait for 60 seconds, then plug back again. |
| No picture | Check the aerial or other input is connected properly Check that the correct input is selected, using the SOURCE button. Check the brightness and contrast settings in the Picture Setting. |
| No sound | Check that the VOLUME isn't turned down, or the MUTE button pressed. Check that the audio cables are connected to the correct inputs. |
| Picture has wrong colour | Check that the correct input is selected, using the SOURCE button. |
| The picture is unstable when used with a PC | Check the Picture Setting and adjust the view by Auto Adjust match the video output settings of the PC. |
| There are a few coloured spots on the screen | High resolution LCD screens often have a small number of faulty pixels. This is normal and within the bounds of our quality control checks. |
| Picture with wrong scaling | The LCD has the wrong aspect ratio. Please press the ASPECT button to switch the aspect ratio from 16:9 to 4:3. |
| No DVB-T reception | Switch the player into the DVB-T mode. No DVB-T reception in your region. Realign the antenna. Please pay attention to the direction of the antenna tower. Please use an active indoor aerial or a roof antenna. Retry the Auto Scan. |
| Picture freezes | Realign the antenna. Please pay attention to the direction of the antenna tower. Please use an active indoor aerial or a roof antenna. |
| Strong mosaics or artefacts | Realign the antenna. Please pay attention to the direction of the antenna tower. |
| No searching possible | Realign the antenna. Please pay attention to the direction of the antenna tower. Control the Country selection |
| No Audio or no second audio language | Press the NICAM button. Many TV broadcaster supports just only one language. |
| No subtitles | Press the SUB-T button. Many TV boradcaster does not support subtitles. |
Picture Quality
Die picture quality by DVB-T depends on the different areas and the different conditions. Some parameters are important for the picture quality, the bit rates, the resolution and the reception of the transmitted DVB-T signals.
Bit rate
The bit rates is fixed by the TV broadcaster and can be different between each TV program. Also the different TV broadcaster define the bit rate different to each others. If you see by watching DVB-T strong mosaics structures, artefacts or an un sharp picture, than you can try to increase the Signal strength and Signal quality by searching a better position of the indoor aerial. Maybe you can try also to change a passive indoor aerial to an active indoor aerial. But, if you can realizes optimal condition by receiving the DVB-T signals and you have anymore the artefacts or mosaics structures, than is the transmitted bit rates to low.
In Germany the values are very different by the bit rates:
ZDF 2700 until 4500 kbps
ARD 2000 until 4500 kbps
HR 1800 until 3500 kbps
Private TV Stations 1800 until 2700 kbps
If the bit rate is higher, than the picture quality is mostly better and the picture is more than less by artefacts or mosaic structures.
Resolution
The second influence by the picture quality is the transmitted resolution. If the resolution is higher than you can see a more sharper picture. For example:
ARD/ZDF 720x576 or 704x576 (that's PAL Full D1 resolution)
Other 544x576or 528x576
Receiving Condition
If you see by the information Signal strength and Signal quality some low values, you can try to find another antenna position to increase the reception quality. Visible indicators for a worst reception of the DVB-T signals is for example the a freeze picture or the message "No Signal".
The reception quality depends for example on the kind of the antenna. Three different kind of antenna are available, the passive and active indoor aerial and the roof antenna. Realign your indoor aerial in this way, that you get the best reception as possible. Helpfully it to know in which direction are the public antenna power and than you can adjust the antenna to this direction.
If a passive indoor aerial can not receive the DVB-T signal strong enough, please try an active indoor aerial. The best reception results are by the roof antenna possible.
Press the SOURCE button on the remote control and choose DVD for using the internal DVD Player.
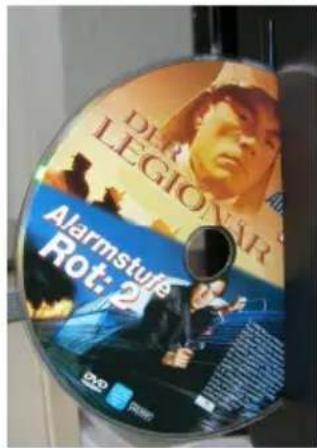
The DVD Slot-In loader opens and produces now some noise. The Slot-In loader is on the left side of the HTC 2228D. Place the disc with the printed side to the rear into the loader and push very slightly to the right side. You can see the silver side. The loader moves in the disc automatically and reads the disc information.
Notes:
- If the disc is inserts with the wrong side, than the loader tries to read the disc. This procedure needs more time than in a normal way. The loader can not read the disc content and displays the message "No disc" and moves out the disc.
- To be able to eject a CD or DVD it is necessary to enable the DVD mode. Otherwise the pressing of the OPEN/CLOSE button (▲) will be without function. Switch on the unit and press the SOURCE button and choose "DVD" in the source menu. Now the HTC 2228D is in DVD mode.
USB Port and Card Reader
Please connect the USB Stick or the Card media in order to the description by the USB Port and Card Reader on the right side of the device. Normally, the printed side of the memory shall be show to the rear side.
Start the USB Port or Card Reader by pressing the SETUP and go to the System Setting and choose by the option SOURCE the USB or CARD.
Note:
Due to the legal requirements of CE-conformity, the customer is asked to only connect USB-Sticks to the USB port.
SW/OWW/DS
Function
An On Screen Display (OSD) indicator will be displayed at the upper part TV screen when certain functions are executed, or when pressing the OSD button on the remote control. The OSD indicator is a user friendly interface designed to display the status of playback type. When a different disc is loaded (DVD, CD, Music ready); the OSD indicator bar will be different.
The OSD bar will appear automatically if it is activated by pressing the DISP button, Press the DISP
again and a new status bar will appear. Press DISP a third time and the OSD bar will disappear. When OSD indicator bar appears, press other button, the OSD indicator bar will disappear automatically.

TT1/2

(1)

- 实验原理

1/3

00:00:02
Function
By pressing the DISP button again the following picture is shown by Video -DVD:

- Active sound track
- Format of sound track DD 5.1 CH (channel)
- Subtitle (not included in this example) (OFF)
- More aspects (in this example there are no aspects activate at moment)
By MPEG-4 video files the information is a bit different than with a video DVD. Important information for a ISO Data disk with MPEG-4 files are:

- Disc Format (here CDROM)
- Number of tracks and which one is just played
- With or without sound
- Running time
Open/Close
To open and close the disc tray. Press OPEN/CLOSE button on the front panel or the remote.

Notes:
Player will not skip forward or backward during "WARNING" section of a DVD disc.
- Single chapter DVD or single track CD cannot skip
Play/Pause
Press PLAY button to play the disc. Press PLAY/PAUSE button again to pause (still picture). Press PLAY/PAUSE button to playback the content.
Stop
Press STOP button to stop in two modes:

- Press STOP button once. Stop memorizes the interrupt position and the OSD shows PRESTOP. Resume play by pressing PLAY button.
- Press STOP button twice completely stop disc. The OSD shows "STOP" and the PLAY button will resume disc.
Next Chapter, Track or File
Press this button skip advance DVD chapter or CD track.
Press this button skip backward DVD chapter or CD track.


Function
Fast Backward/Fast Forward
Press this button to fast backward through the disc. Repeatedly press the button.
Press this button to fast forward through the disc. Repeatedly press the button will increase the search speed.

Notes:
The changes in speed by fast backward or fast forward are from Normal x2 x4 x8 20 Normal
- The player is muted in fast forward or fast backward this mode.
- Player will not fast forward or fast backward during WARNING section of a DVD disc
DVD Menu
While playing a DVD, press the D.MENU button return to the DVD disc menu.
Numeric Buttons
Numerical key pad (Random Program access)
- To direct access a DVD chapter or a CD track, input the desired DVD chapter or CD track number using the numerical key pad.
- Input data for the DVD disc start menu or the player's setup menu.
Title
While playing a DVD, press the TITLE button return to the DVD disc title menu.
Audio Track
While playback a DVD disc, press AUDIO button repeatedly to select the desired audio sound track. A DVD disc may contains up to 8 selectable audio sound tracks.
Angle
While playback a DVD disc, press ANGLE button repeatedly to select the desired camera angle. A DVD disc may contain up to 9 selectable camera angles.
Zoom
Press the ZOOM button repeatedly TV Screen display:
ZOOM x2 -> ZOOM x3 -> ZOOM x4 -> ZOOM x1/2 -> ZOOM x1/3 -> ZOOM x1
ZOOM OFF
When playback the JPEG. Press the ZOOM button display the zoom x1/2, x1/3, x1/4, press direction button to rotate picture. While display the zoom x2, x3, x4, press direction button to move picture position.
Function
Repeat section A-B
To repeat playback a specific section of a disc.
Press the A-B button at the starting point of the desired section, "REPEAT A-" display on screen.
- Press the A-B button again, at the end of the desired section, "REPEAT A-B" display on screen. The desired section A to B until the function is cancelled.
- To cancel the function, Press the A-B button again return to normal play.
Note:
Some DVD discs do not allow A-B function
Repeat Mode
Press PEPEAT button repeatedly to select the repeat mode.
In DVD mode In CD mode
REP.CHAPTER Repeat chapter REP.1 Repeat track
REP. TITLE Repeat title REP. ALL Repeat disc
REP. OFF Repeat off REP. OFF Repeat off
Note:
Some DVD discs do not allow repeat function.
Subtitle
While play a DVD disc, press SUBT button repeatedly to select the desired subtitle, A DVD disc may contain up to 32 selectable subtitles.
Note:
DVD disc start menu may contains set up of angle, Subtitle and Audio soundtrack selection. You may do the selection in the disc start menu.
Program
Press PRO button to quit the program menu.
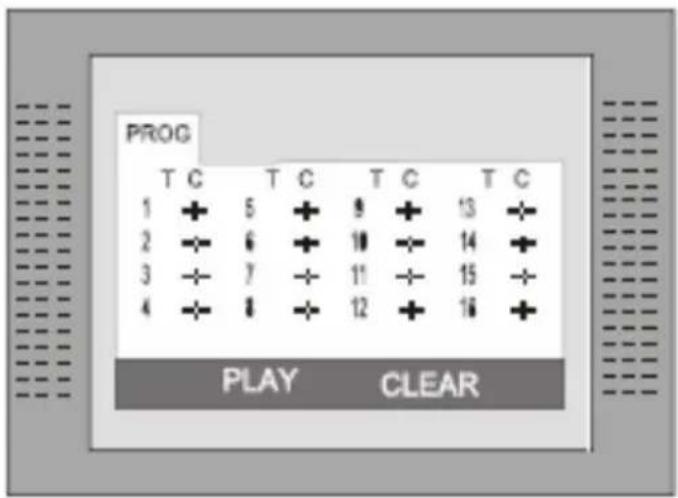
In DVD mode
When the program menu appears input the Title and Chapter Number
PLAY: Press PLAY button to start program play.
CLEAR: Navigate to the CLEAR button if you want to cancel the wrong information
you input. Press OK again to cancel all the tracks.
In CD mode
When the program menu appears, input the Track number, press OK, when the programming is completed.
Data memory with Music, JPEG or Video files
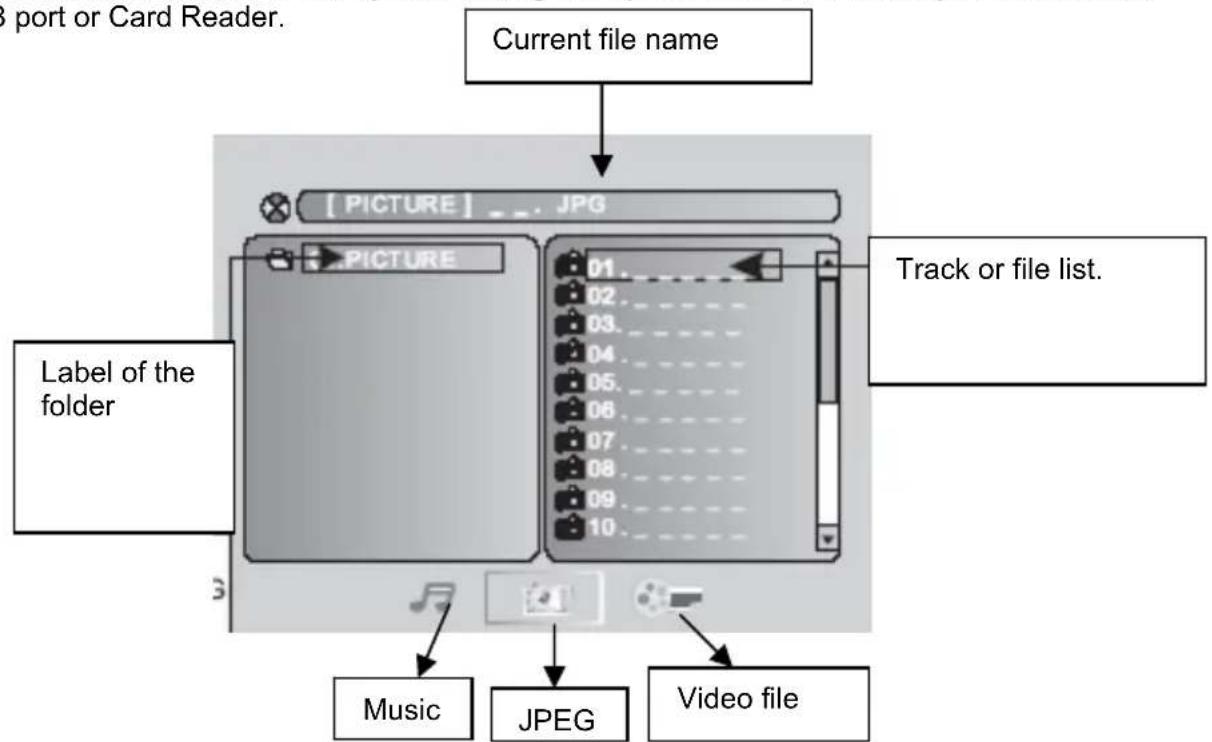
Insert the a disc or connect a USB-Stick or connect a card memory (SD, MMC or MS card) and the player will auto search the directories saved Video/Music/JPEG files. After searching, it will auto go to the first directory saved Music files (to the disc containing both Music and JPEG files. To the disc containing single type of files, it will go to the first directory) and play the first song in the directory (File name is highlighted). The screen displays as the picture below:
If the internal DVD-player does not read the USB-Stick or read the Card media, please press the SETUP button and choose in the system setting the option SOURCE. There you can activate
the USB port or Card Reader.
Notes:
- With the arrow key to the right you can change between the catalogue window, the Chops and Track window and to the file format. File formats are of the order: music (mark (note)), pictures (camera) and video (arrow).
- The DVD player starts with the playback of Music files.
Due to legal requirements of CE-conformity, the customer is asked to only connect USB-Sticks to the USB port. - When playing a JPEG picture on discs containing Music and JPEG files, press the Return button to return to JPEG list.
- You can press the Numeric buttons to select the file you want to play. For example, if you desire the 15^th track in current list, press the 10+ Button once, then press "5", the 15^th starts playback.
A folder or the root of a disc, USB-Stick or Card Media may not more than 400 files inside. Otherwise all files below them will be ignored. - When playing a disc with Music files, no video can be displayed at the same time.
- You can press the "PREVIEW" buttons to get helpful message.
- When playing JPEG picture, press the Program button to choose the picture transition mode. There are 17 transition modes available. Press Program repeatedly to activate the function and choose the desired switch mode.
- Do not insert more than 400 files in a folder or root directory of a disc or other kind of memories. Otherwise, the player can not recognize the files above 400.
DVD Player Setup
Press the SETUP button to enter the player's setup menu. Setup menu is a facility for the owner to adjust the detail setting of the player. For the detail of Setup menu see "SET UP MENU" of this instruction manual. Various features of the player can be adjusted in the SETUP menu.
- PressSETUP button SETUP menu appears.
- Press the UP/DOWN button to highlight the desired menu.
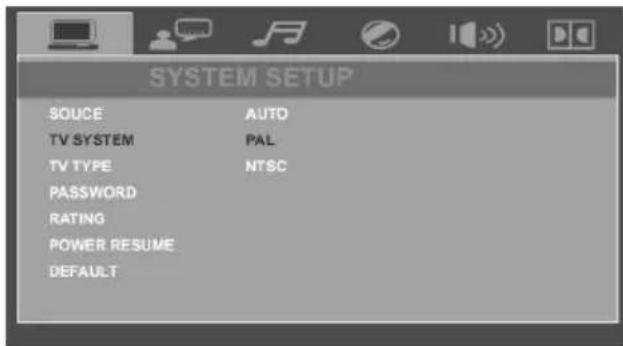
In STOP mode, press SETUP button Highlight SYSTEM SETUP. Press UP/DOWN button to select the subtitle. Press OK button, the screen displays submenu.
Press UP/DOWN button to highlight the desired time
- Press OK confirm your selected item.
System Setup
Source
With this option you can activate the DVD loader, USB port or Card Reader. Choose one of the source and confirm by pressing the OK button. If you uses the AUTO setting, the player starts every time the source which has insert a media.
TV System
There are NTSC / PAL / AUTO three modes, and choose one mode according your TV mode.
If the TV mode is not suitable as the DVD player screen will blink and become colorless.
The default setting: PAL
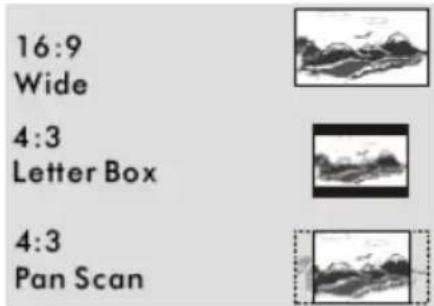
TV Type
- 4:3 Pan Scan: It is suit to the common size TV. When playing,
the picture will be cut . so that the TV screen is filled with the picture. - 4:3 Letter box: when the player connect to the commonly size TV, please select the type. The top and bottom of TV screen will display black frame.
- 16:9 Wide Screen: When the player connects to the wide screen TV.
The default setting: 4 : 3 Pan Scan.
Password
Move the cursor the PASSWORD item and press OK button to confirm and then input the secret code "0 0 0 0" (if it is the first use). After confirmation, you are required to input new secret code and then press OK button to confirm.
Warning:
Please remember the new secret code, otherwise you will not be able to change the parental control.
Please contact the agent or our company if you forget the secret code.
System setup
RATING
There are total eight levels of this control. Eight levels as follow:
- KID-SAFE
- G
- PG
- PG13
- PG-R
- R
- NC-17
- ADULT
The first level discs are open to people of average and eight level only suitable for the adult. If you want to change the Parental control setting, enter the user's age control item and then enter four digital secret code. The default secret code is 8357 (if you are using this player for the first time, just input this code). If the input code has been confirmed, the level setting up menu will appear. Move the cursor to choose the expected level and press OK button to confirm and store it.
Resume
This option starts the resume function.
Default
This is the factory default setting up. When choose "RESTORE", the previous setting up, by the user will be cancelled and the player will come to the factory setting up state.
Language Setup
In STOP mode, press SETUP button and Highlight LANGUAGE.
Press UP/DOWN button
- Press OK button, the screen displays submenu.
- Press UP/DOWN button to highlight the desired item in the LANGUAGE menu.
- Press OK to confirm your selected item.
- Press SETUP button SETUP to quit.
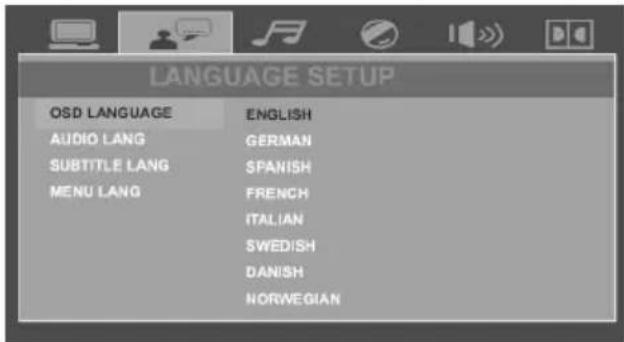
DVD Player Setup
Audio setup
The setting "KEY" adjust the bass audio output.
Positive values for decreasing the bass. Negative values for increasing the bass.
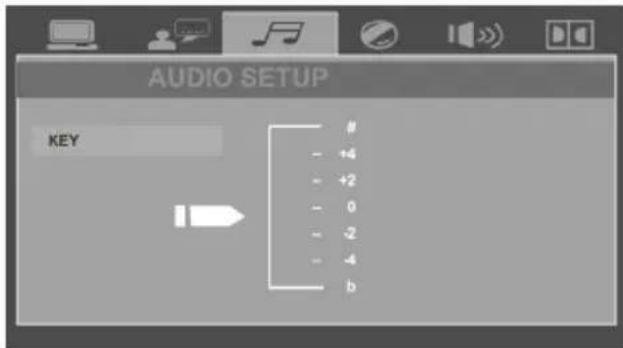
Speaker Setup
The Speaker Setup includes the options for "Down mix" and "Front".
Downmix
This options allows you to set the stereo analogue output of your DVD Player.
Lt/Rt
Select this option if your DVD Player is connected to a Dolby Pro Logic decoder.
Stereo
Select this option when output delivers sound from only the two front speakers.
VSS
This option produces a virtual 5.1 sound effect on the speakers.
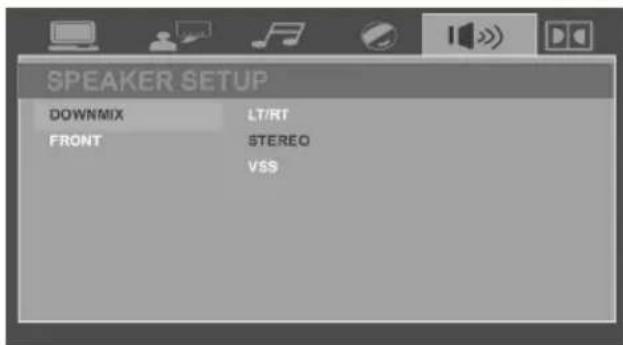
Front
Here you can set the size of the speaker.
Digital setup
The Digital Setup includes the options for the Dynamic Range and Dual Mono.
Dual Mono
The options here are Stereo, Mono L, Mono R and Miy Mono.
If you have Dolby digital output your amplifier/ decoder, you may select stereo, left, right and mixed sound accordingly.
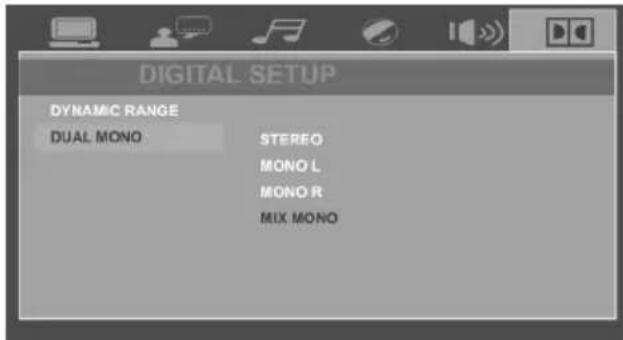
Dynamic Range
Here you can change the audio compression. If you choose the setting "FULL" than the audio gets the biggest limitation. A kind of "NIGHT MODE". By using the setting "OFF", the audio gets no compression.
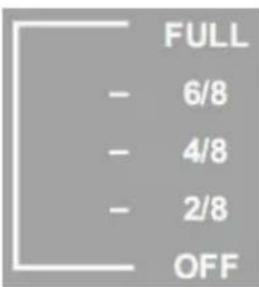
Our custom service will help you. Did you already read the Troubleshooting pages?
Technical custom service of Xoro/MAS:
Phone: +49 40 77 11 09 17
Internet: www.xoro.de/support.htm
| Symptom Check and Action | |
| Does not play | No disc, load a disc.Disc has been loaded upside down. Place the disc with the label side up.Disc's region code does not match to the player.Disc's rating level is higher than the player's rating level setting.Disc is not correct type for the player.Disc is damaged or power on for one or two hours.Moisture may be condensed inside the player. Remove the disc and leave the unit power on for one or two hours. |
| No Picture | Check the system connection is proper and secure.Check if the connection cables are damaged.Clean the disc. |
| Picture distorted | The disc is dirty or damaged. Clean the disc or try another disc. |
| Picture not full screen | Select the screen format from the player's SETUP MENU.See "SETUP MENU" of this manual.Select the screen format from DVD disc menu. |
| Problem message display on screen | Following message will display when there is a problem with the loaded disc" 1. "WRONG REGIONAL DISC": Disc's region code is not match to the player. 2. "WRONG PASSWORD": The player refuse to play a disc with rating level higher than the player's rating level setting. 3. "WRONG DISC": The player is equipped with automatic disc quality detection software. When the player detects a problem disc or a damaged disc, the player may keep playing the disc at lower quality or stop playing, depending on the damage level of the disc. |
| Cannot SKIP or SEARCH | Some discs are programmed that do not allow users to SKIP or GOTO a some sections, especially at the beginning WARNING section.Single Chapter disc cannot apply SKIP function. |
| No playback from USB | Activates the USB port (System Setup → Source → USB) Connect the USB-Stick Connect the USB Stick in order to the description. Label side to the rear. Content are not conform |
| No playback from Card Media | Activates the Card Reader (System Setup → Source → Card) Connect the Card Media Use only SD, MMC or MS cards Connect the Card Media in order to the description. Label side to the rear. Content are not conform |
| HTC | 2228D | ||
| Screen Size 54.8 cm (2) | 1.6 Inch) | ||
| Resolution | 1366 x768 | ||
| Aspect Ratio | 16:9 | ||
| Brightness | 350 2 cd/m | ||
| Contrast | 800:1 | ||
| Reaction Time | 5 ms | ||
| Viewing Angle | 170 ° | ||
| TV System PAL BG / DK | I oder SECAM BG / DK / L / L' | ||
| Stereo NICAM / A2 | |||
| Connectors | |||
| HDMI | Standard TMDS max. 1080p | ||
| Y Pb Pr | Y: 1 V p-p // Pb and Pr: 0,7 V p-p | ||
| SCART | RGB: 1,0 V p-p 75 Ohm | ||
| PC VGA | 640 x 480 b. 60 Hz / 800 x 600 b. 60 Hz / 1024 x 768 b. 60 Hz | ||
| Antenna | RF Antennenanschluss, 75 Ohm | ||
| Speaker | 2 x 3 Watt | ||
| Power Input | AC 220 - 240 V, 50/60 Hz | ||
| Consumption | Max. 60 Watt | ||
| Dim. (LxTxH) [mm] | 531 x 200 x 406 | ||
| Weight | 5,5 kg | ||
| Pixel Error | |||
| Bright Dot | ≤ 2 | ||
| Dark Dot | ≤ 3 | ||
| Bright + Dark Dots | ≤ 4 | ||
| Linie defects | No | ||
| Mura | No | ||
CONSIGNES DE SECURITE IMPORTANTES 3
Notes 8
Recyclage 9
CHARACTERISTIQUES 10
Modes repetition. 49
Angle 49
Sous-titres 49
Zoom 49
Programme 49
Recorded List-Program


ABC HDTV


Coronation Street

DISPLAY
DVR.LIST



Réglages LCD
Luminosite (Brightness)
Fuseau hora (Time Zone)
Langue audio (Audio Language)
Support technique Xoro/MAS:
Tel.: 0825 889441
- Internet: www.xoro.fr/Service.aspx
- Email: supportfrance@mas.de
- Enfants
- G
- PG
- PG13
- PG-R
- R
- NC-17
- Adultes


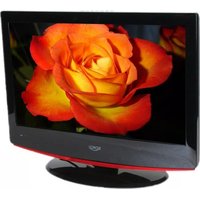
- Dolby
- Zeitzzone (Time Zone)
- Mounting the Stand 11
- Quick Start Guide 12
- Connectors
- The Remote Control
- Connection
- First Time Installation 21
- Sources 22
- DVB-T Mode
- Analog TV Tuner
- Contents
- Recorder
- LCD Settings
- DVD Player / USB / Card Reader
- User Manual
- Laser
- Operation
- Power Supply
- Antenna
- USB
- Safety Information
- Operation and Position
- Defect
- Pixel error
- Macrovision
- Disc Compatibility
- Compatibility of the integrated USB port
- Compatibility of the integrated Card Reader
- Recycling of electronic devices
- Recycling of paper and carton
- Recycling of plastic parts
- Green Dot
- Features
- Rear Connection Panel
- Buttons on the top side
- Control Elements
- Buttons on the right side
- Notes:
- Front Side
- LED
- IR
- Speaker
- LCD Panel
- Insert battery into the remote control
- Operation range
- Remote Control
- Buttons of the remote control:
- Power connection
- Note:
- SCART Input
- HDMI
- Component Y Pb Pr Video- and Stereo Audio input
- Video- and Stereo Audio input
- USB Port
- VGA
- DVD-Player, USB Port and Card Reader
- Headphone
- First Time Installation
- Important buttons and there functions
- Channel List
- Change TV channel
- Select TV Channel
- Last TV channel
- Change the Volume
- EPG
- Favourite list
- Subtitle
- Tele-/Videotext
- Language or another Audio
- Quick-Information
- Information
- Tele-/ Videotext
- Preparation of USB Storage for Recording
- Select Disk
- Check PVR File System
- Format
- Time Shift Size
- Speed, Remain Space
- Max record time
- Recording program
- Recording in standby mode
- Schedule Recording by EPG
- Time Shift Function
- Playing recorded program
- Channel setting
- Auto search (Auto Scan)
- DTV Manual Search (DTV Manual Scan)
- ATV Manual Search (ATV Manual Scan)
- ATV Manual Scan
- Storage To
- System
- Current CH
- Search
- Fine-Tune
- Skip
- Frequency
- Fine Tune
- Other buttons for navigation
- Move a TV channel
- Define TV Channels into Favourites
- Skip a TV Channel
- Delete a TV Channel
- Picture setting
- Picture Mode
- Brightness
- Contrast
- Color
- Sharpness
- Tint
- Color Temperature
- Noise Reduction
- Aspect Ratio
- Auto Adjust
- Horizontal and Vertical Position
- Size
- Phase
- Sound setting
- Sound Mode
- Treble and Bass
- Balance
- Auto Volume
- Surround Sound
- Time setting
- Clock
- Off Time of the HTC 2228D
- Repeat
- - Hour
- - Minute
- TIME
- Close
- On Time of the HTC TV set
- Activate
- Sleep Timer
- Auto Sleep
- Time Zone
- Option
- Language
- Audio language
- Subtitle language
- Country
- Restore Setting
- Lock setting
- Lock Channel
- Set Password
- Block Program
- Parental Guidance
- Picture Quality
- Bit rate
- Resolution
- Receiving Condition
- USB Port and Card Reader
- Function
- Open/Close
- Play/Pause
- Stop
- Next Chapter, Track or File
- Fast Backward/Fast Forward
- DVD Menu
- Numeric Buttons
- Title
- Audio Track
- Angle
- Zoom
- Repeat section A-B
- Repeat Mode
- Program
- In DVD mode
- In CD mode
- Data memory with Music, JPEG or Video files
- DVD Player Setup
- System Setup
- Source
- TV System
- TV Type
- Password
- Warning:
- RATING
- Resume
- Default
- Language Setup
- Audio setup
- Speaker Setup
- Downmix
- Lt/Rt
- Stereo
- VSS
- Front
- Digital setup
- Dual Mono
- Dynamic Range
- Réglages LCD
- Luminosite (Brightness)
- Fuseau hora (Time Zone)
- Langue audio (Audio Language)
Brand : XORO
Model : HTC 2228D
Category : Television