
DO7316M - Heating DOMO - Free user manual and instructions
Find the device manual for free DO7316M DOMO in PDF.
| Product Type | Wall-mounted electric radiator with towel rack |
| Brand | DOMO |
| Model | DO7316M |
| Dimensions (with towel rack) | 60 cm (width) x 80 cm (height) x 22 cm (depth) |
| Approximate weight | 8 kg |
| Power supply voltage | 230 V ~ 50 Hz |
| Maximum current | 13 A |
| Heating functions | Comfort, Eco, Frost protection |
| Thermostat | Adjustable (knob) |
| Integrated towel rack | Yes (2 arches, removable) |
| Installation | Wall mounting (kit included) |
| Recommended use | Indoor, living areas and bathroom (zone 3) |
| Safety distance (front) | 1 meter minimum |
| Protection | Automatic shut-off in case of overheating |
| Plug type | Earthed plug required |
| Cleaning | Vacuum cleaner and damp cloth (non-abrasive) |
| Warranty | 2 years |
Frequently Asked Questions - DO7316M DOMO
User questions about DO7316M DOMO
0 question about this device. Answer the ones you know or ask your own.
Ask a new question about this device
Download the instructions for your Heating in PDF format for free! Find your manual DO7316M - DOMO and take your electronic device back in hand. On this page are published all the documents necessary for the use of your device. DO7316M by DOMO.
USER MANUAL DO7316M DOMO
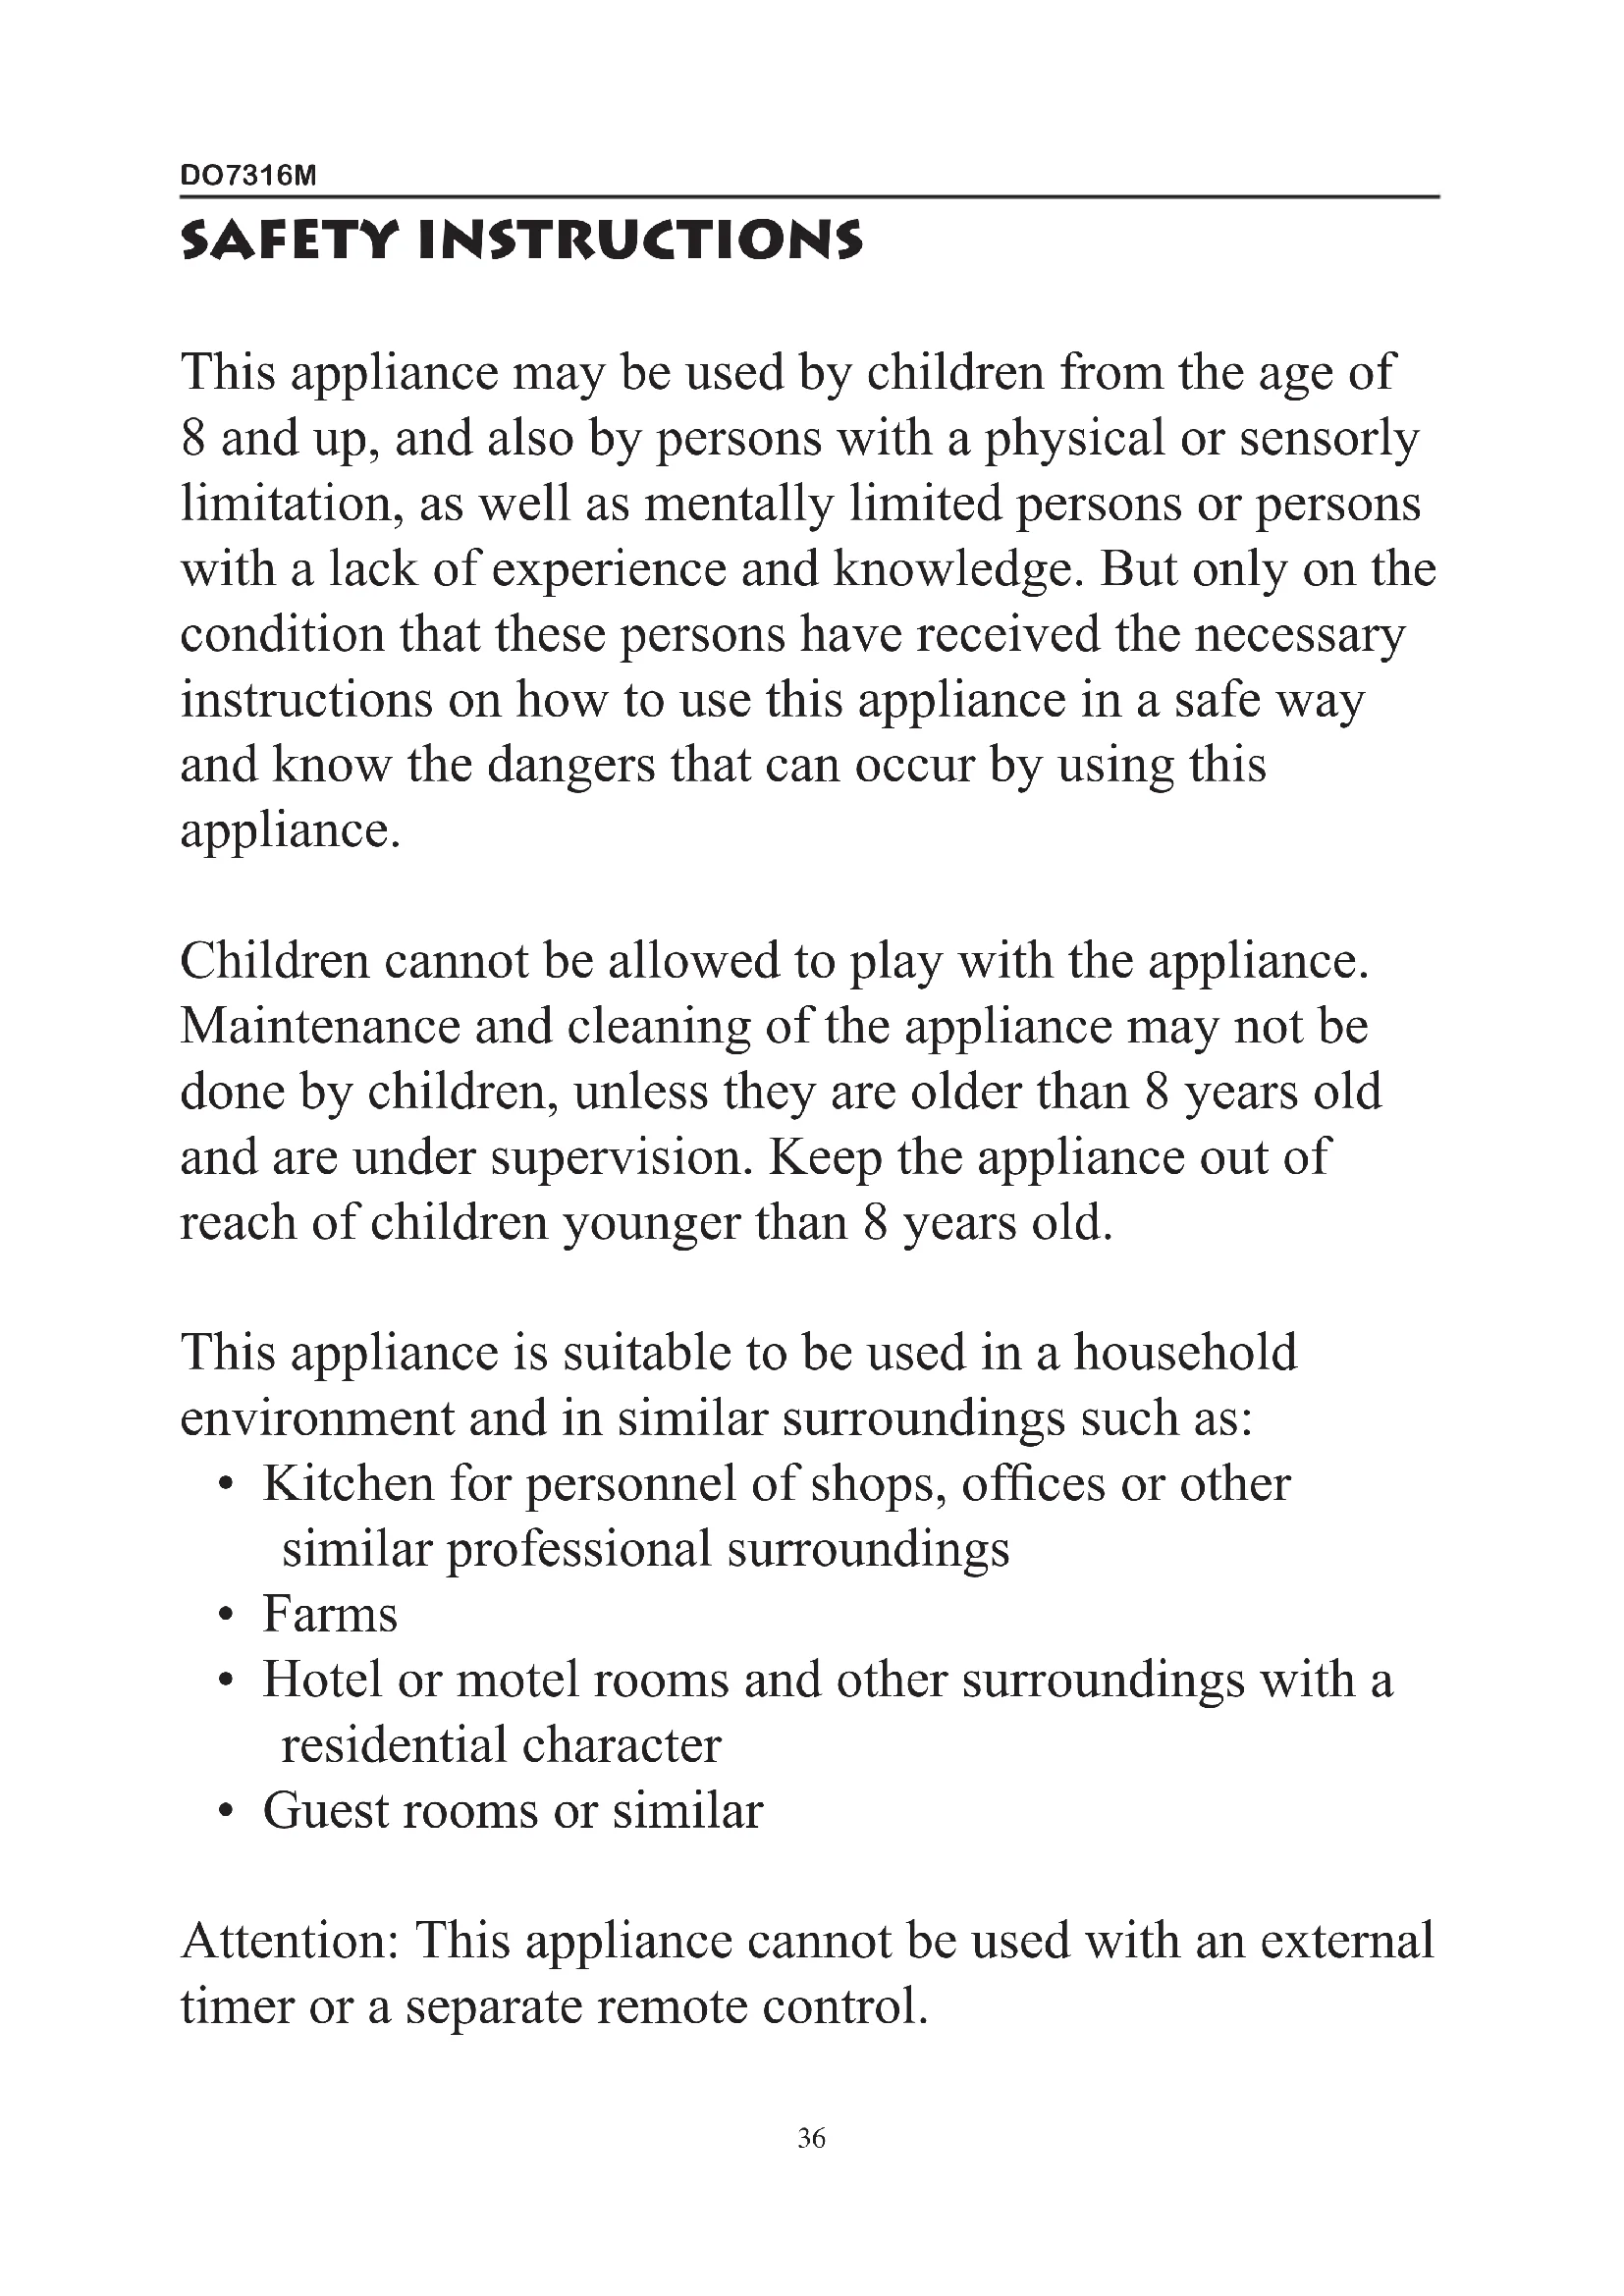
MICA HEATING WITH TOWEL RACK
RADIADOR DE MICA CON TOALLERO
MICA TOPENÍS VÉŠAKEM NA RUCNIKY
DO7316M
PRODUCT OF LINEA 200
GARANTIEVOORWAARDEN
CONDITIONS DE GARANTIE
This appliance has a two year warranty period. During this period the manufacturer is responsible for any failures that are the direct result of construction failure. When these failures occur the appliance will be repaired or replaced if necessary. The warranty will not be valid when the damage to the appliance is caused by wrong use, not following the instructions or repairs executed by a third party. The warranty will only be valid if the warranty application has been completed by the dealer at the time of purchase. All parts, which are subject to wear, are excluded from the warranty.
CONDICIONES DE GARANTÍA
RECYCLAGE-INFORMATIE
RECYCLING INFORMATIONEN
RECYCLING INFORMATION
This symbol on the product or on its packaging indicates that this product may not
be treated as household waste. Instead it must be brought to the applicable collection point for recycling of electrical and electronic equipment. By ensuring this product is disposed of correctly, you will help prevent potential negative consequences for the environment and human health, which could otherwise be caused by inappropriate waste handling of this product. For more detailed information about recycling of this product, please contact your local city office, your household waste disposal service or the shop where you purchased the product.
The packaging is recyclable. Please treat package ecologically.


If the supply cord is damaged, it must be replaced by the manufacturer, its service agent or a similarly qualified person in order to avoid a hazard.
TE CHECKEN VOOR REPARATIE
This appliance may be used by children from the age of 8 and up, and also by persons with a physical or sensorly limitation, as well as mentally limited persons or persons with a lack of experience and knowledge. But only on the condition that these persons have received the necessary instructions on how to use this appliance in a safe way and know the dangers that can occur by using this appliance.
Children cannot be allowed to play with the appliance. Maintenance and cleaning of the appliance may not be done by children, unless they are older than 8 years old and are under supervision. Keep the appliance out of reach of children younger than 8 years old.
This appliance is suitable to be used in a household environment and in similar surroundings such as:
- Kitchen for personnel of shops, offices or other similar professional surroundings
Farms - Hotel or motel rooms and other surroundings with a residential character
Guest rooms or similar
Attention: This appliance cannot be used with an external timer or a separate remote control.
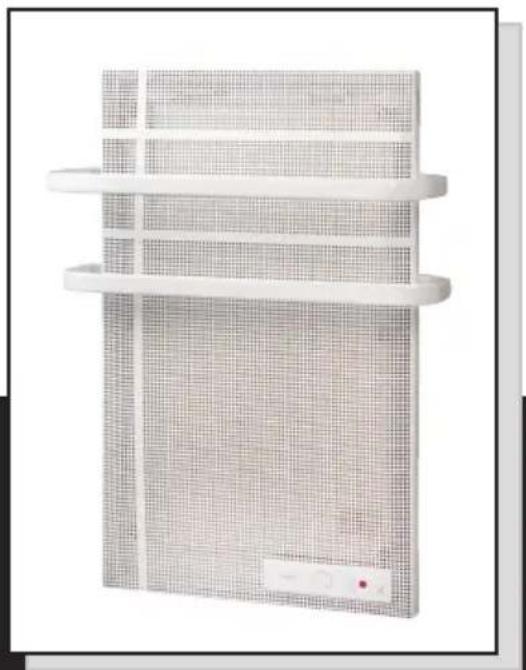
The appliance can become hot during use. Keep the power cord away from hot parts and don't cover the appliance.
READ ALL THESE INSTRUCTIONS BEFORE USING THIS APPLIANCE.
- Do not carry out any changes to the appliance.
- Do not use the heater outdoors.
- This heater is meant for use in bathrooms, laundry areas or similar locations indoors. Never put the heater in a place where it may fall into a bathtub or other water container.
- Do not use the heater in the immediate surroundings of a bathtub, shower or swimming pool.
- Do not put any combustible or chemical objects near the heater.
- The heater should not be placed right beneath a socket.
- This heater is not equipped with technology that can control the room temperature. Do not use this heater in small rooms where people are present that can not leave the room by themselves, unless they are under constant supervision.
- Do not cover the heater to avoid overheating and fire.
- Do not touch hot surfaces of the heater during use. You could burn yourself.
- Always use the handle at the back of the heater when moving the appliance
- Keep combustible materials like drapery at least 1 meter away from the front of the heater and keep them
away from the sides and back.
- Keep foreign objects away from the openings in the heater as this may cause electric shock, fire or damaging.
- Always unplug the heater when it is not in use.
- Only use well grounded sockets to plug in the appliance.
- Never use a damaged cord or plug. If the cord is damaged, it should be replaced by the manufacturer, the dealer or a qualified person to avoid a hazard.
- The use of an extension cord is not recommended, as this may cause overheating and fire. However, if it is still necessary to use an extension cord, then use a cord with a conductor wire that is at least 1mm in diameter and that rates no less than 13Amp .
- Do not run the cord under a carpet or do not cover the cord with rugs, runners or other similar materials. Put the cord away from the traffic area and in a place where people can not trip over it.
- Only use this heater as described in this manual. If the appliance is used for other ends, this may cause fire, electric shock or injuries.
- Repairs and maintenance should only be conducted by qualified persons or services.
- Plastic bags are not toys. Keep them away from infants and children as they contain a risk of suffocation and other dangers.
- If you are not around for several hours, consider lowering the temperature setting.
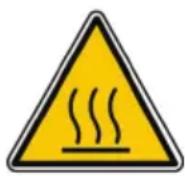
PARTS
Appliance
- Front grid
- Control panel
- Upper wall mounting bracket
- Upper bar of the towel rack
- Lower bar of the towel rack
- Lower wall mounting support
Dimensions: 60cm× 80cm× 22cm (with bars assembled)
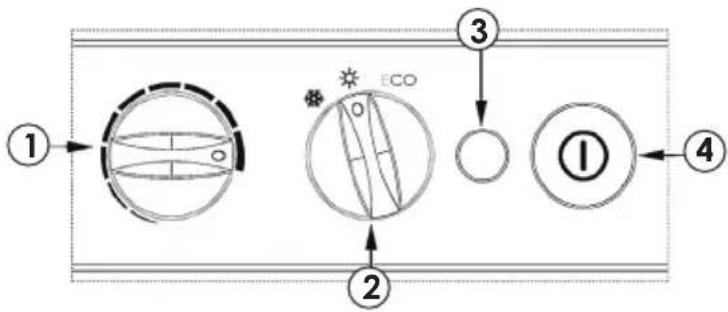
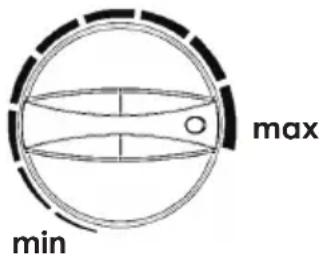
Control panel
- Thermostat control knob
- Function knob
- Light indicator on/off
- On/off button
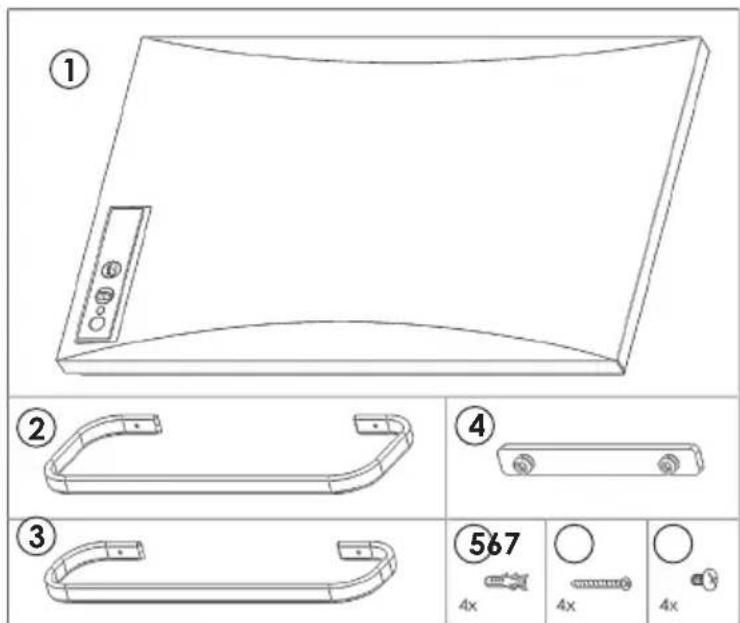
Installation kit
- Heater
- Upper towel rack
- Lower towel rack
- Upper wall mounting bracket
- Anchors (4x)
- Screw for wall mounting (4x)
- Screw for towel rack (4x)
INSTALLATION
-
Carefully remove all parts from the packaging and remove all the packaging materials from the parts (plastic bags, foam,...) Check for possible damaging of the appliance, that may have happened during transportation. If anything has been damaged or if a part is missing, contact your dealer. Keep the original box to store the heater when it is not being used.
-
Make sure that the appliance is switched off before plugging in the heater.
Caution: the socket has to be well grounded.
- Use the handle to move the heater.
Installation of the towel rack
Attach the two bars to the heater, using the 4 screws for the towel rack. (The appliance can also be used without the towel rack. In that case, skip this step.)

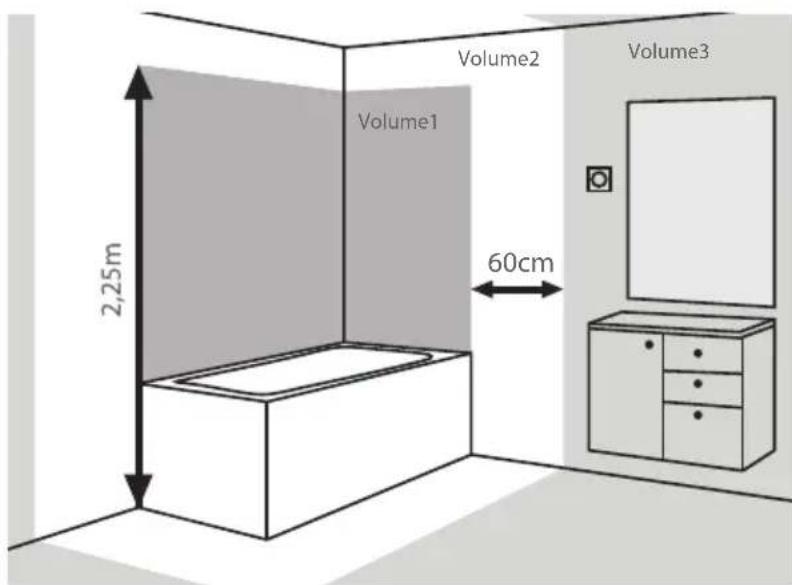
Wall mount
Caution: Keep the appliance at a minimum distance of 0,60m (volume 3) from bath tub or shower, as indicated in the drawing. A person who is in the bath tub or shower should not be able to touch the appliance, the power cord or the control knobs.
- Drill 2 holes in the wall according to the picture and the following dimensions: A=13.8cm and B=150cm.
- Use a hammer to fasten an anchor in each of the 2 holes and fix the upper wall mounting bracket to the wall using the screws for wall mounting to screw it into the 2 holes with anchors.
- Place the heater on the upper wall mounting bracket and draw the marks where the 2 screws for the lower wall mounting support need to be placed.
- Remove the heater from the wall and drill 2 holes on the marks that you just made. Use a hammer to fix an anchor in each of the 2 holes.
- Place the heater on the upper wall mounting bracket and fix the lower wall mounting support to the wall by using the screws for wall mounting.
USING THE HEATER
- Make sure that the on/off button is switched off.
- Put the plug into a suited socket (grounded, no less than 13AMP).
- Choose a function with the function knob:

Comfort: the heater will operate according to the set temperature.
Eco: the heater will automatically maintain a temperature that is 4^ below the set temperature, without changing the setting of the temperature knob. This way you can easily save energy.

Anti-frost: the heater will keep the temperature of the surroundings above the freezing point, to avoid pipe breakage.
- Switch on the heater with the on/off button and the light indicator will light up.
- Now adjust the thermostat to set the desired room temperature.
Turn the knob clockwise or counterclockwise to decrease or increase the temperature.
- When the room temperature reaches the set temperature, the appliance will stop heating up.
- The appliance will start operating again when the room temperature drops at least 3^ below the set temperature.
CLEANING
- Turn off the heater, unplug the appliance and let the heater cool down completely before cleaning it.
- Never immerse the cord, plug and heater in water or another liquid. Do not pour any water or other liquid over the heater.
- Use a vacuum cleaner to remove dust and lint from the metal grid of the heater.
- Wipe the heater with a dry cloth to remove dust and use a damp (not wet) cloth to remove stains.
- Do not use any detergents or abrasive cleaning products to clean the appliance as this may damage the finish.
STORAGE
Store the heater in a cool, dry place when it is not being used. Use the original packaging to store the appliance, to avoid dust and dirt from entering the heater.
CHECK THE HEATER BEFORE REPAIRING
Check the following things if the heater does not heat up or if the appliance does not work anymore:
- Check if the electrical supply at home or the main fuse is working.
- Check if the plug is plugged well into the socket.
- Check if the heater is switched on.
- Check if the room temperature is lower than the set temperature.
- Check if any objects are covering the heater.
If the appliance still does not work after checking these things, contact your dealer or service center. All repairs should be conducted by qualified persons or services. If there has been tampered with the appliance, this will invalidate the warranty. Repairs that have not been conducted properly or that have been done by non-qualified persons can have serious consequences for the user.
PRECAUCIONES IMPORTANTES


- GARANTIEVOORWAARDEN
- CONDITIONS DE GARANTIE
- CONDICIONES DE GARANTÍA
- RECYCLAGE-INFORMATIE
- RECYCLING INFORMATIONEN
- RECYCLING INFORMATION
- TE CHECKEN VOOR REPARATIE
- PARTS
- Appliance
- Control panel
- Installation kit
- INSTALLATION
- Installation of the towel rack
- Wall mount
- USING THE HEATER
- CLEANING
- STORAGE
- CHECK THE HEATER BEFORE REPAIRING
- PRECAUCIONES IMPORTANTES
Brand : DOMO
Model : DO7316M
Category : Heating