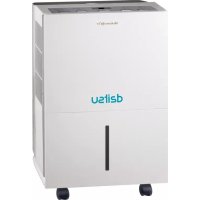
USER MANUAL ADDH 12 DAITSU
Indicator BUCKET FULL
Safety Precautions 14
Parts Name. 16
Operation Instructions
Operation Method 17
Drainage Option 20
Maintenance
Clean and Maintenance 21
Malfunction
Troubleshooting 22
Long term storage 23
Electric schematic diagram. 23
Specifications 24
(Graphics in this manual are only for reference. Please refer to actual products for specific details.)
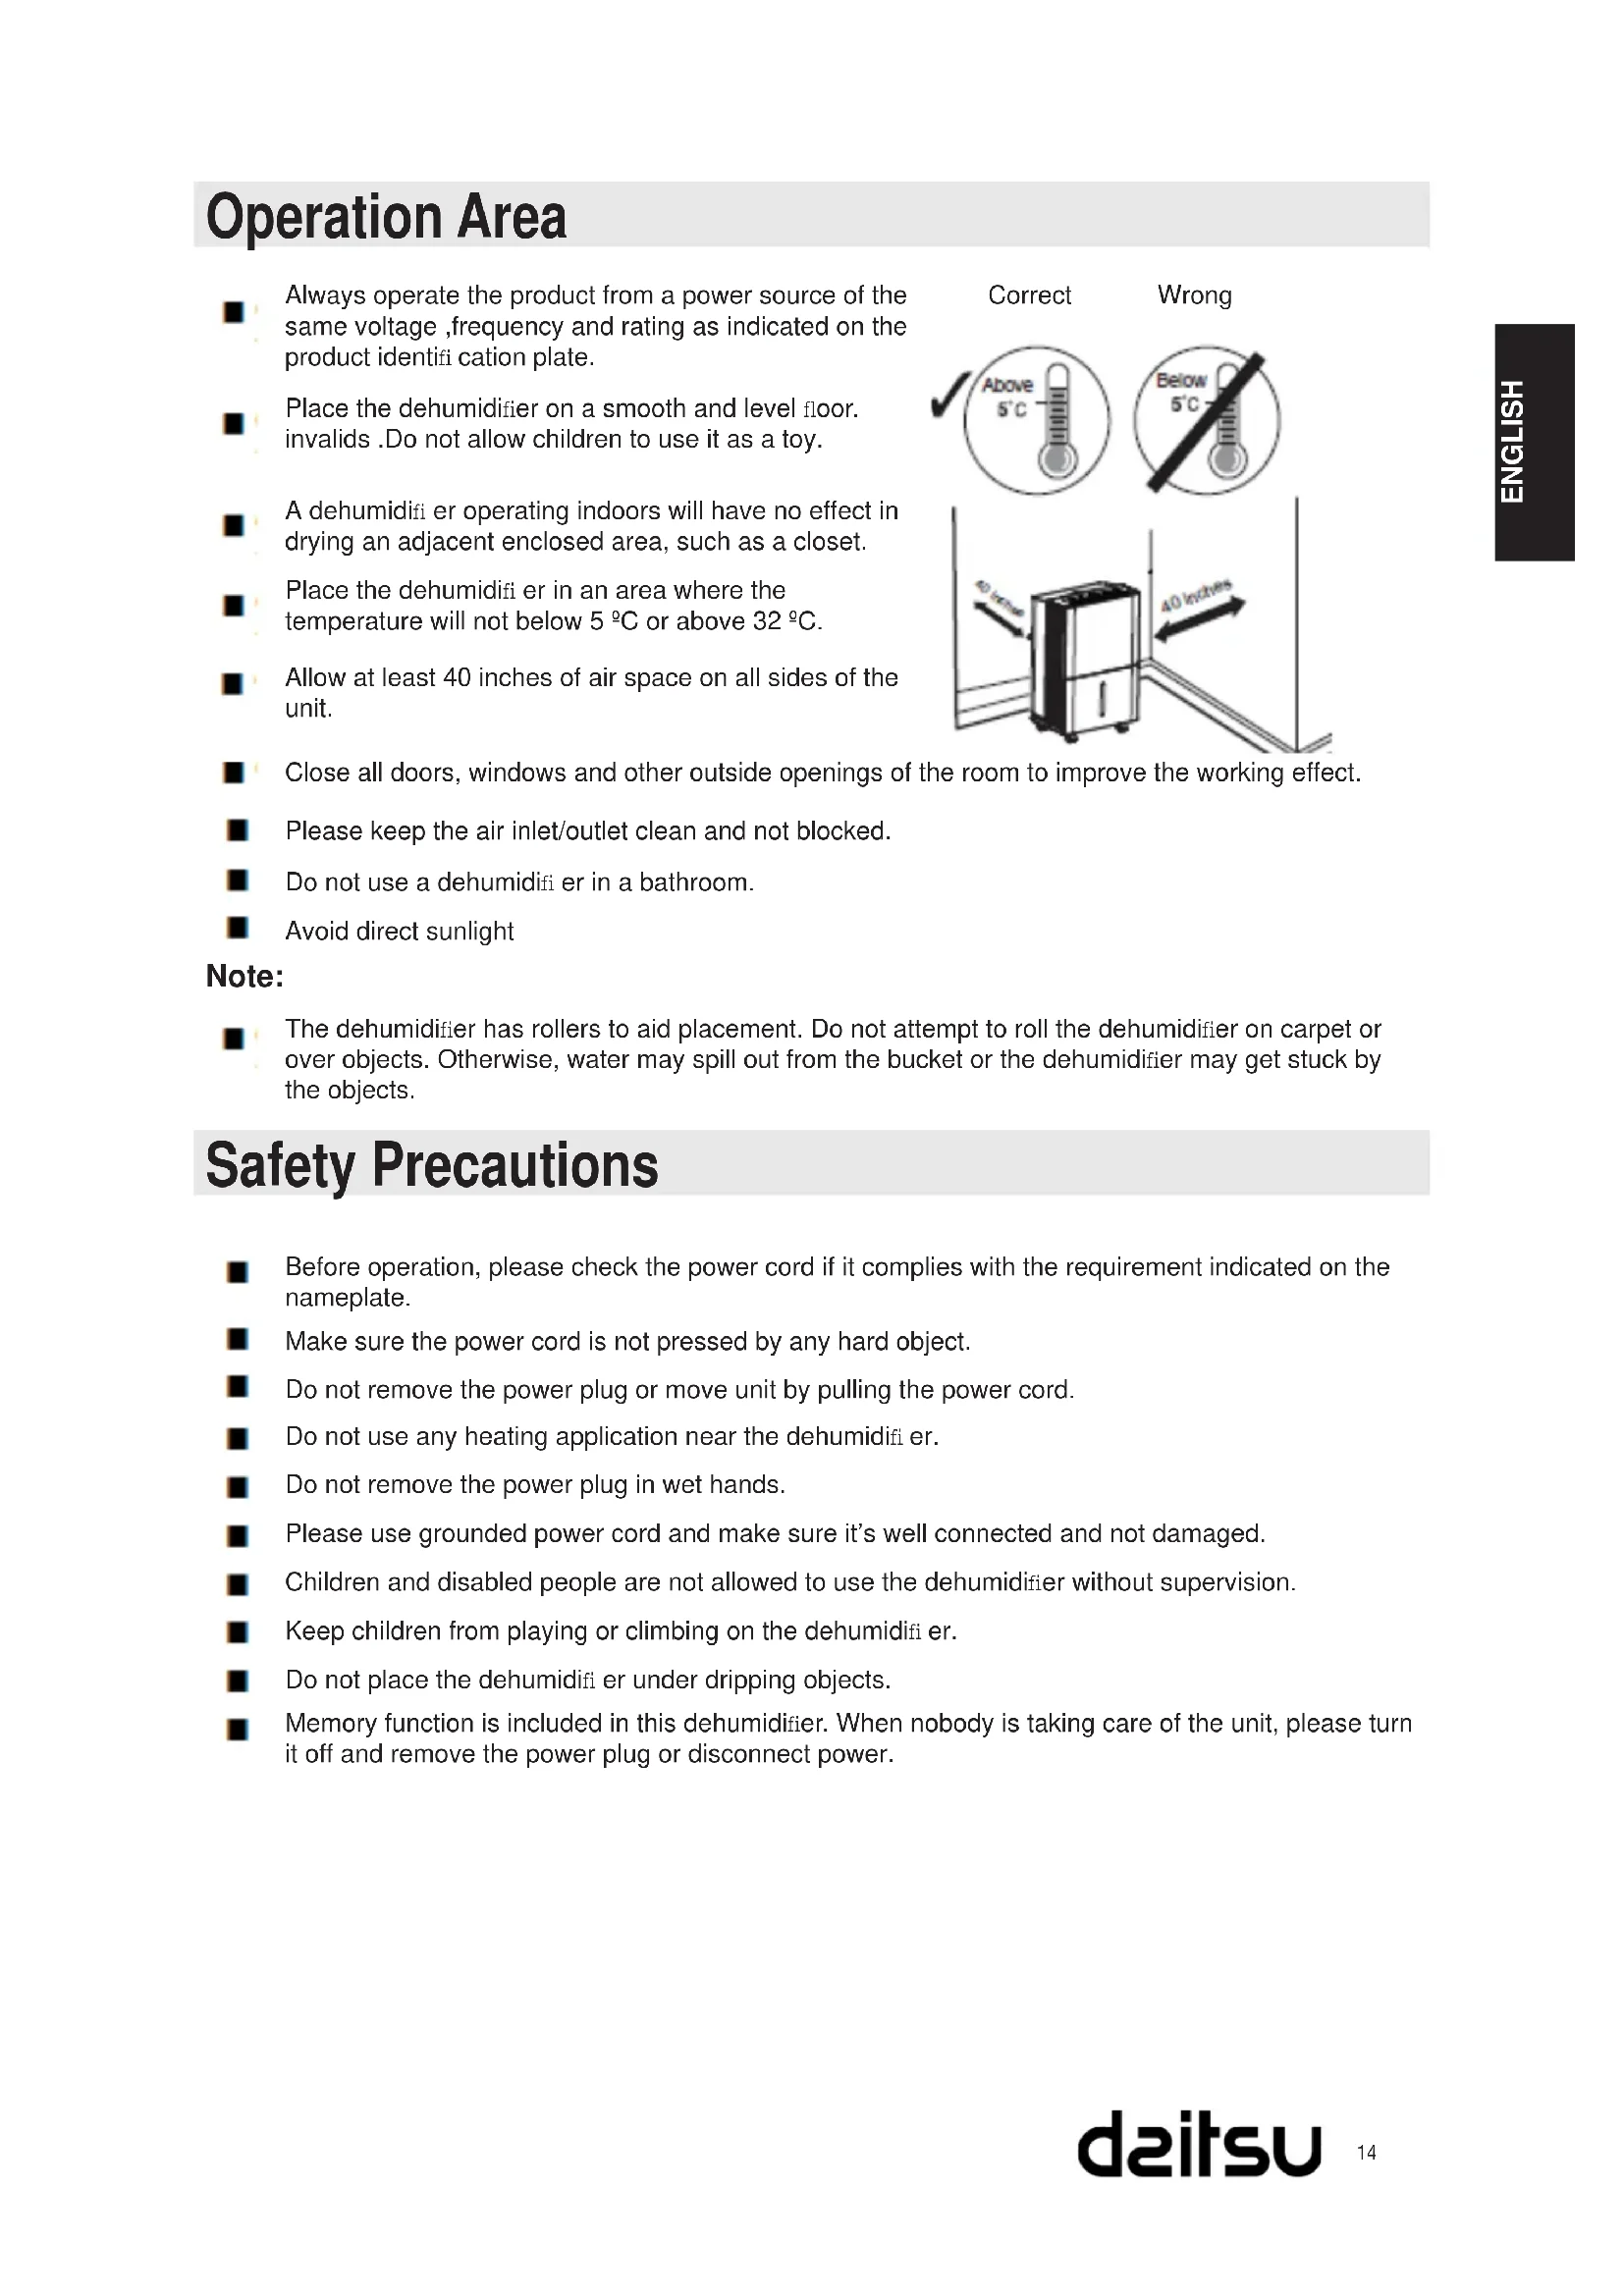
Operation Area
Always operate the product from a power source of the same voltage, frequency and rating as indicated on the product identifi cation plate.
Place the dehumidifier on a smooth and level floor. invalids.Do not allow children to use it as a toy.
A dehumidifi er operating indoors will have no effect in drying an adjacent enclosed area, such as a closet.
Place the dehumidifi er in an area where the temperature will not below 5^ or above 32^
Allow at least 40 inches of air space on all sides of the unit.
Close all doors, windows and other outside openings of the room to improve the working effect.
Please keep the air inlet/outlet clean and not blocked.
Do not use a dehumidifi er in a bathroom.
Avoid direct sunlight
Note:
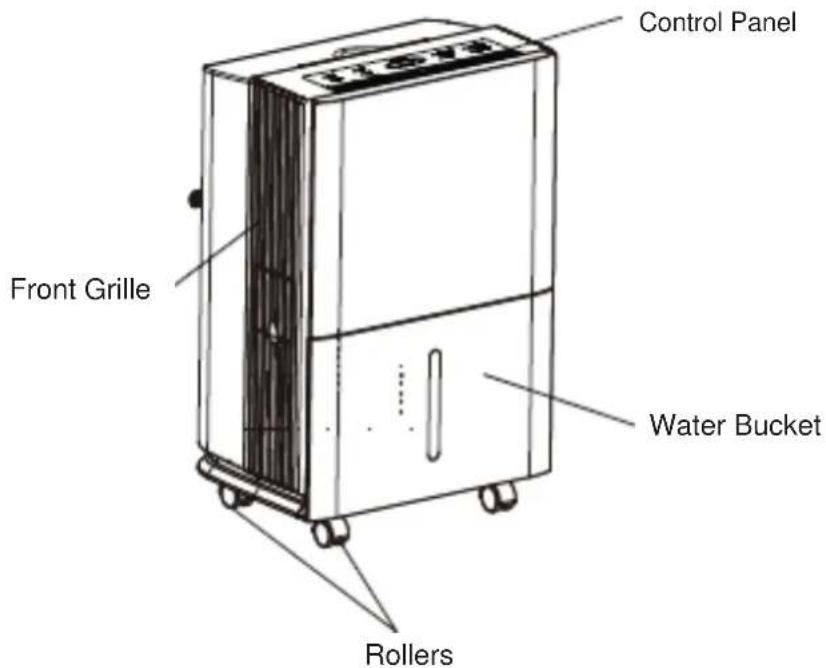
The dehumidifier has rollers to aid placement. Do not attempt to roll the dehumidifier on carpet or over objects. Otherwise, water may spill out from the bucket or the dehumidifier may get stuck by the objects.
Safety Precautions
Before operation, please check the power cord if it complies with the requirement indicated on the nameplate.
Make sure the power cord is not pressed by any hard object.
Do not remove the power plug or move unit by pulling the power cord.
Do not use any heating application near the dehumidifi er.
Do not remove the power plug in wet hands.
Please use grounded power cord and make sure it's well connected and not damaged.
Children and disabled people are not allowed to use the dehumidifier without supervision.
Keep children from playing or climbing on the dehumidifi er.
Do not place the dehumidifi er under dripping objects.
Memory function is included in this dehumidifier. When nobody is taking care of the unit, please turn it off and remove the power plug or disconnect power.
Safety Precautions
Do not repair or disassemble the unit by yourself.
Damaged power cord must be replaced by qualified technicians or manufacturer.
If abnormal condition occurs (e.g. burned smell), please disconnect power at once and then contact local dealer.
Dehumidifier can not be disposed of everywhere. It you want to get rid of this dehumidifier, please check with local handling disposal or information service center about what to do.
Parts Name
Front Side
Back Side
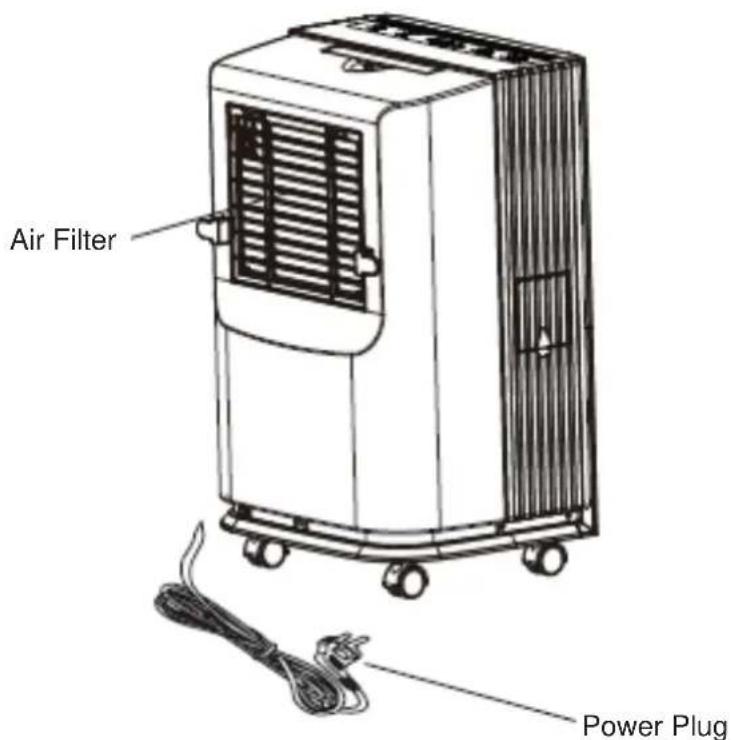
Accessories:
1.Drain Hose(5m): Adhered to the outside of unit before ex-factory.
2. Two drainage Joint and castors: Put them into accessories packing bag.
Note: Drain hose and drainage joint and castors will be needed for drain hose.
Please save them well.
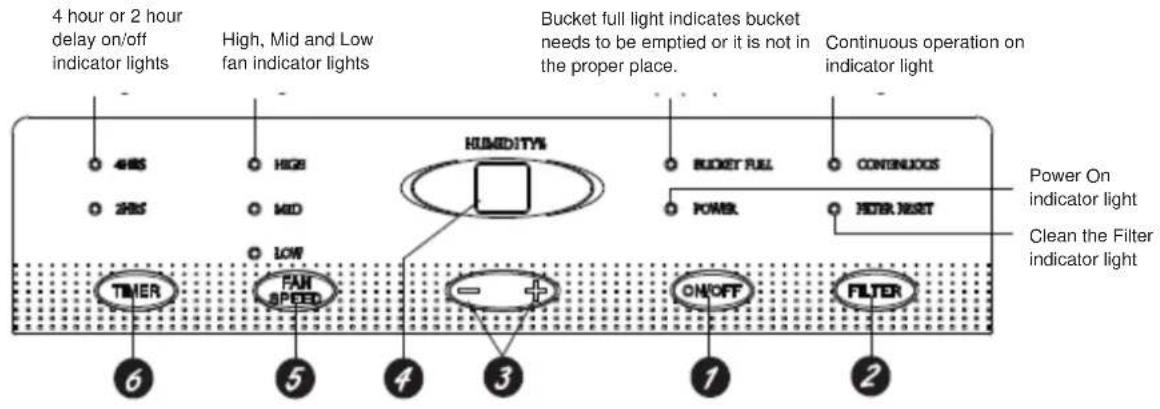
Operation Method
Notes:
Water bucket must be correctly installed for the dehumidifier to operate.
Do not remove the bucket while unit is in operation.
If you want to use drain hose to drain water away, please install the hose according to section "Drainage method".
Each time pressing the effective button on the control panel will give out a "beep" sound.
When power is connected, power indicator on the control panel will be on and dehumidifier gives out a "beep" sound simultaneously.
Operation Method
ON/OFF Pad
Press to turn the dehumidifi er on and off.
FILTER Pad
After 250 hours of operation, the Clean the Filter indicator light will glow to remind you to clean the filter. Remove the filter and clean it. Press to turn off the Clean the Filter light. See the Care and Cleaning section.
3 Humidity Set ControlPads
The humidity level can be set within a range of 80% RH (Relative Humidity) to 35% RH (Relative Humidity) in 5% reduce or at CO for continuous operation.
NOTE: If CO (Continuous) is selected, the dehumidifier will operate continuously at its maximum dehumidification settings if attached to a hose to drain or until the bucket is full.
For drier air, press the - pad and set to a lower percent value (%). For damper air, press the + pad and set to a higher percent value (%). When you first use the dehumidifier, set the humidity control to 45% or 50%.
Allow at least 24 hours for the dehumidifier to achieve the humidity level. If you still have damper air than desired, set the humidity level to a lower setting or select Continuousfor maximum dehumidification.
This unit has 3-min lag due to the device for protecting circuit. In order to prolong the compressor's working life, the compressor will not start until the unit has run for 3 minutes.
Display
4 Shows the set % humidity level while setting, then shows the actual (+ / - 5% accuracy) room % humidity level.
FAN SPEED Pad
Controls the fan speed. Press to select High or Mid or Low fan speed. Set the fan control to High for maximum moisture removal. When the humidity has been reduced and quiet operation is preferred, set the fan control to Mid or Low.
TIMER Pad
6 If unit is turned on and running in timer mode for 2hr or 4hr, can turn off the unit. When unit stand by and running in timer mode for 2hr or 4hr can turn on the unit.
Other Instructions
BUCKET FULL Light
1 Glows when the bucket is ready to be emptied,or when the bucket is removed or not replaced in the proper position.
Alarm
If the bucket is full or missing for more than three minutes, an alarm will soundfor about 10 seconds to remind you to empty and replace the bucket.
Auto Shut Off
The Water Level Control Switch shuts off the dehumidifier when the bucket is full, or when the bucket is removed or not replaced in the proper position.
Auto Defrost
When frost builds up on the evaporator coils, the compressor will cycle off and the fan will continue to run until the frost disappears.
Power Outage
In the case of a power outage or interruption, the unit will automatically restart, in the settings last used, after the power is restored.
Drainage Option
Option 1 Emptying Manually
- When the bucket is removed, the unit will shut off. Empty and replace the bucket.
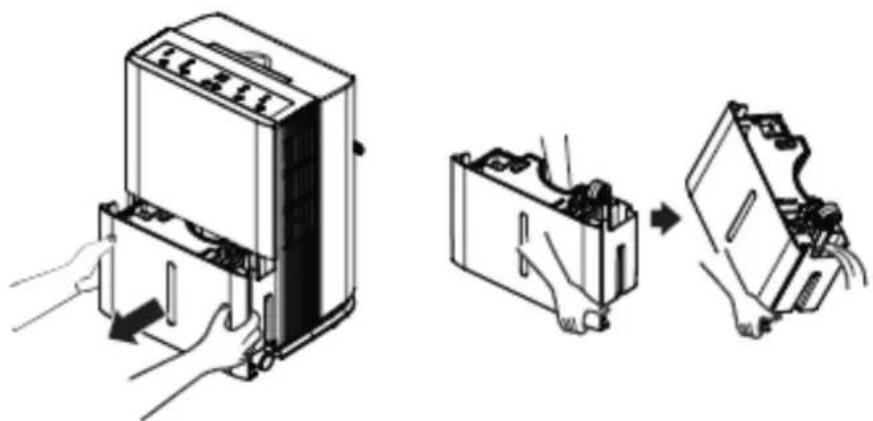
Important: Do not use the hose if using the water tank to collect water. When the hose is connected, water will be drained out through it onto floor instead of into the tank.
NOTES:
Do not remove the bucket while the unit is in operation or it has just stopped.
Otherwise it may cause some water to drip from the draining pan.
The bucket must be in place and securely seated for the dehumidifier to operate.
Please keep the drain rubber plug carefully. To prevent the water from flowing out of the water tank, make sure that the rubber plug has been firmly inserted into the drain joint before starting up the unit.
Option 2 Gravity Drain Hose
- Water will automaticallyflow into a floor drain by attaching a 14mm inner diameter hose (not included).
1) Open the drain cover on the side of the unit.
2) Pull out the rubber stopper on drainage joint.
3) Connect the hose to the drain tie-in. and lead it to the ooidrain.
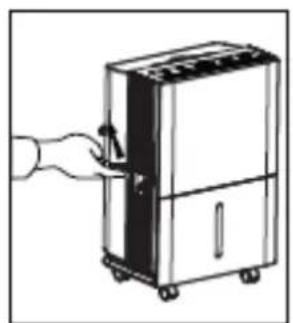
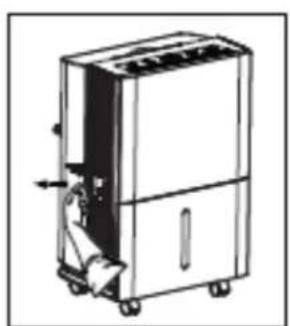
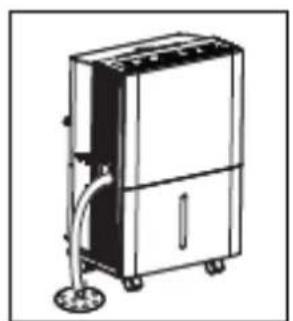
Water Level
- The dehumidifier will turn of automatically when the bucket is full, or when the bucket is removed or not placed in the proper position.
- The bucket must be replaced in the proper position for the dehumidifier to work. The light will be on and the dehumidifier will not run if the bucket is not in the proper position.
Clean and Maintenance
Warning
Before cleaning, turn off the dehumidifier and disconnect power. Otherwise it may lead to electric shock.
Do not wash the dehumidifier with water, or it may lead to electric shock.
Do not use volatile liquid(such as thinner or gasoline) to clean dehumidifier. Otherwise it will damage unit's appearance.
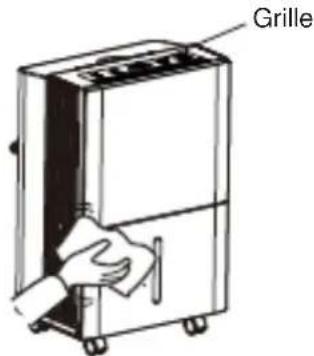
1. Grille and Case
To clean the case:
When there is dust on the case, use soft towel to dust it off; When the case is very dirty(greasy), use mild detergent to clean it.
To clean the grille: Use a dust catcher or brush.
2. Water Bucket
Every few weeks, clean the bucket to prevent growth of mold, mildew and bacteria. Use soft brush to clean the bucket and then rinse it.
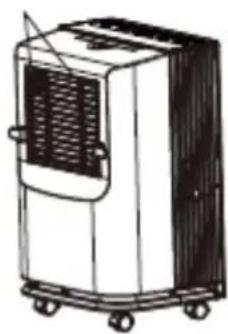
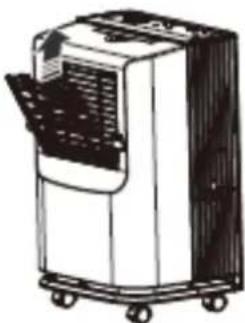
3. Air Filter
Dehumidifier will remind you to clean the air filter when it has been operating for 250 hours. If it is used in dusty places, clean the air filter more often.
To remove:
- Press both sides of air-in grille, pull it along the arrow direction and then pull the air-in grille upwards.
2.Pull the filter from the middle clasps, bend the filter to let it separate from upper clasps and then remove the filter.
To clean:
Clean the fi liter in warm, soapy water. Rinse it and let the fi liter dry before replacing it.
Buttons
Warning
Do not operate the dehumidifier without a filter. Otherwise the evaporator will catch dust and affect unit's performance.
Do not dry the air filter with fire or electric hair dryer. Otherwise the air filter may be unshaped or caught on fire.
| Problem Possible Causes What To Do | |
| Dehumidifi er does not start | The humidifi er is unplugged | ·Make sure the dehumidifier's plug is pushed completely into the outlet. |
| Dehumidifi er has reached its preset level or bucket is full. | ·The dehumidifi er automatically turns of when either condition occurs. Change to a lower setting or empty the bucket and replace properly. |
| Bucket is not in the proper position. | ·The bucket must be in place and securely seated for the dehumidifier to operate. |
| Power failure. | ·There is a protective time delay (up to 3 minutes) to prevent tripping of the compressor overload. For this reason, the unit may not start normal dehumidifying for 3 minutes after it is turned back on. |
| Dehumidifi erdoes not dry the air as it should | Did not allow enough time to remove the moisture. | ·When first installed, allow at least 24 hours to maintain the desired dryness. |
| Airflow is restricted. ·Make sure there are no curtains, blinds or furniture blocking the front or back of the dehumidifi er. See the Choosing a Location section. |
| Dirty filter. ·See the Care and Cleaning section. |
| The Humidity Control may not be set low enough. | ·For drier air, press the “-” pad and set to a lower percent value (%) or at CO (continuous) for maximum dehumidifi cation. |
| Doors and windows may not be closed tightly. | ·Check all doors, windows and other openings are securely closed. |
| Clothes dryer may be blowing moisture-laden air into the room. | ·Install the dehumidifi er away from the dryer. The dryer should be vented to the outside. |
| Room temperature is too low. | ·Moisture removal is best at higher room temperatures. Lower room temperatures will reduce the moisture removal rate. Models are designed to be operated at temperatures above 5°C. |
| Dehumidifi erruns too much | Area to be dehumidifi ed is too large. | ·The capacity of your dehumidifi er may not be adequate. |
| Doors and windows are open. | ·Close all doors and windows to the outside. |
| Frost appears on the coils | Dehumidifi er has been recently turned on, or room temperature is below 5°C. | ·This is normal. Frost will usually disappear within 60 minutes. See the Automatic Defrost section. |
| Controls cannot be set | The compressor will turn off and the fan will automatically continue to run for approximately 3 minutes at a fixed setting. | ·This is normal. Wait approximately 3 minutes and set the fan as desired. |
| Fan noise | There is sound created when wind passing the unit. That is the sound of wind. | ·This is normal. |
| Water on floor Hose | connection may be loose. | ·Check the hose connection. See the Removing Collected Water section. |
| Intend to use the bucket to collect water, but a hose is attached. | ·Disconnect the hose if using the bucket to collect water. See the Removing Collected Water section. |
Long term storage
When you do not use the unit for along period, we suggest you to take following steps to store the unit in a good condition:
Make sure there is no water left in the water tank and take off the draining hose
Take off the power cord and plug and warp them well.
Clean the unit and packed it well to keep it from dust.
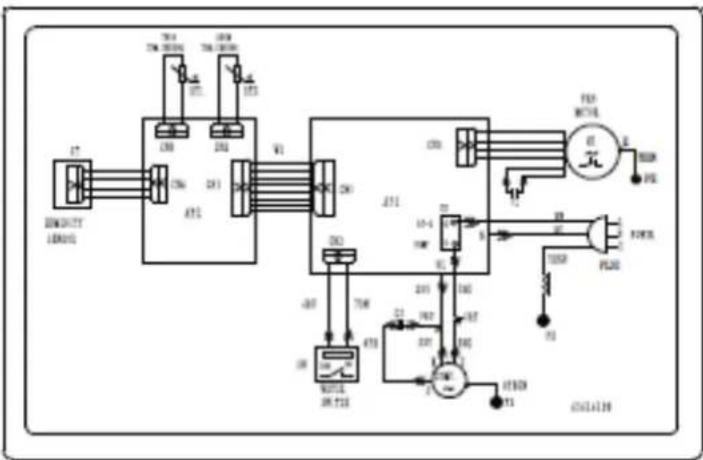
Electric schematic diagram
ADDH-10
ADDH-12
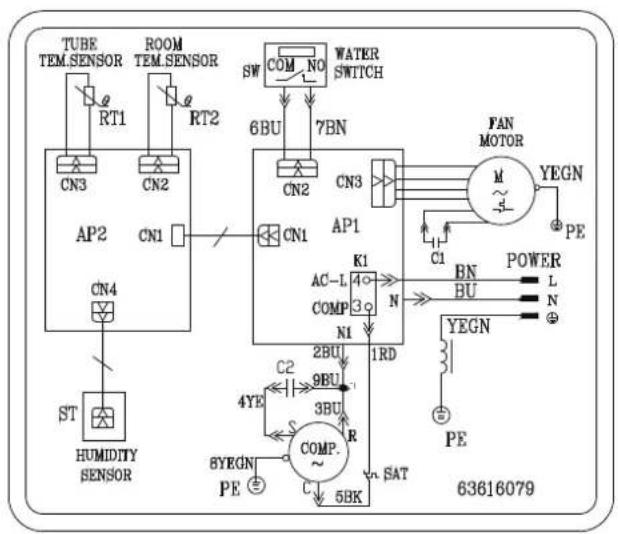
ADDH-20
Specifications
| Model ADDH-10 ADDH-12 | | |
| Rated Voltage 220-240 V~ |
| Rated Frequency 50Hz |
| Rated Power 330 W 330 W | | |
| Moisture Removal 10 L/DAY 12 L/DAY | | |
| Sound Power Level 53dB(A) 53dB(A) | | |
| Operating Temperature 5 °C- 35 °C |
| Weight | 12.5 kg | 12.5 kg |
| Tank capacity | 4,0 I (Automatic stop at about 3.6L) |
TABLES DES MATIÈRES
Mode d'emploi
Bouton ON/OFF (MARCHE/ARRÉT)