
HQC241 - Electric mower PHILIPS - Free user manual and instructions
Find the device manual for free HQC241 PHILIPS in PDF.
| Product type | Electric trimmer |
| Brand | Philips |
| Model | HQC241 |
| Power supply | Mains (check voltage before connecting) |
| Cutting heights with guide | 7 positions: 3 mm, 5 mm, 10 mm, 13 mm, 15 mm, 18 mm, 21 mm |
| Cutting height without guide | Above 21 mm (comb or finger technique) |
| Cutting unit | Replaceable (original Philips) |
| Cleaning | Cleaning brush provided; avoid abrasive products, alcohol or acetone |
| Storage temperature | 15°C to 35°C |
| Dimensions (approx.) | Approximately 15 cm (length) |
| Weight (approx.) | Approximately 200 g |
| Safety | Do not use when wet; unplug before cleaning |
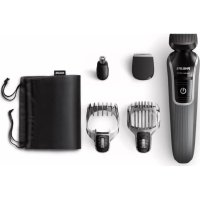
| Included accessories | Cutting guide, cleaning brush |
| Warranty | International (see leaflet) |
Frequently Asked Questions - HQC241 PHILIPS
User questions about HQC241 PHILIPS
0 question about this device. Answer the ones you know or ask your own.
Ask a new question about this device
Download the instructions for your Electric mower in PDF format for free! Find your manual HQC241 - PHILIPS and take your electronic device back in hand. On this page are published all the documents necessary for the use of your device. HQC241 by PHILIPS.
USER MANUAL HQC241 PHILIPS
- Check if the voltage indicated on the mains plug corresponds to the mains voltage in your home before you connect the appliance.
- Make sure that the appliance does not get wet.
- Store the appliance at a temperature between 15^ and 35^ .
Preparing for clipping
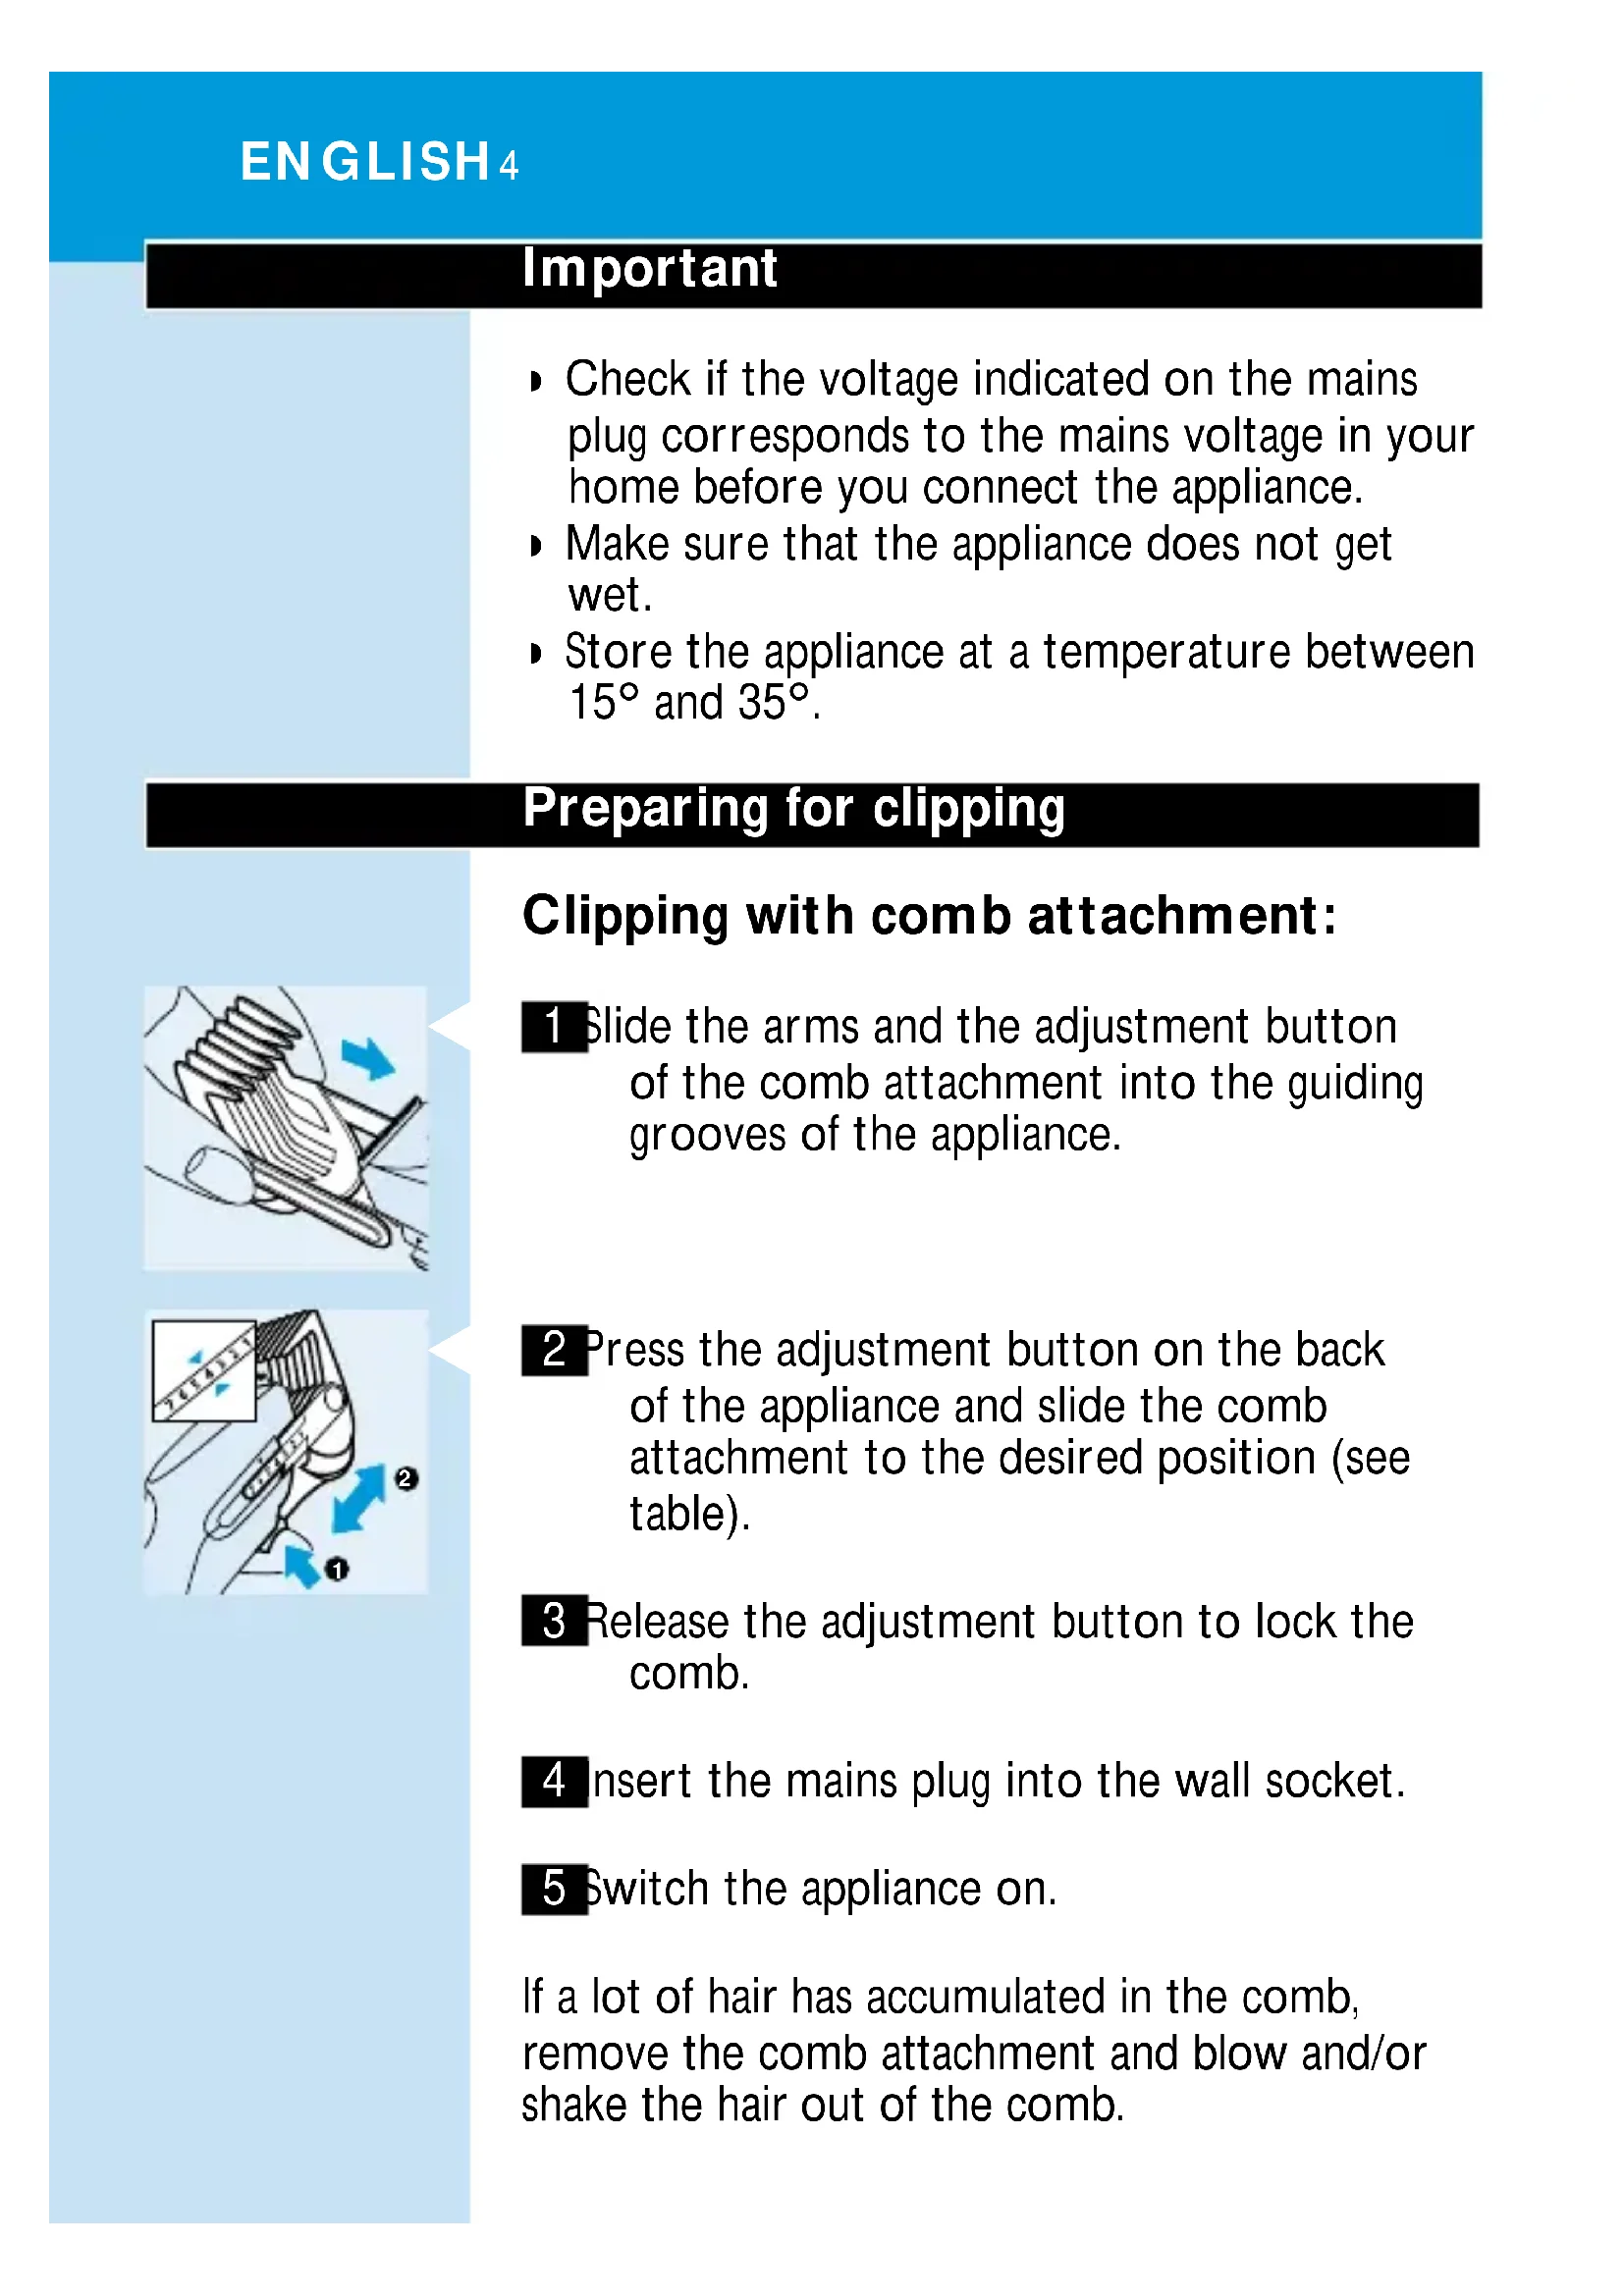
Clipping with comb attachment:
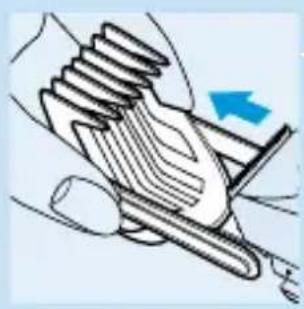
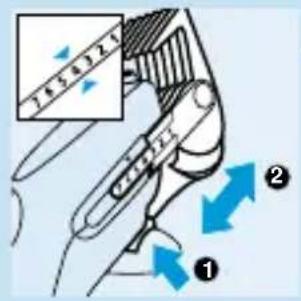
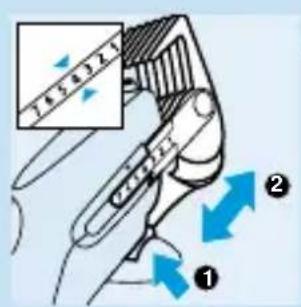
1 Slide the arms and the adjustment button of the comb attachment into the guiding grooves of the appliance.
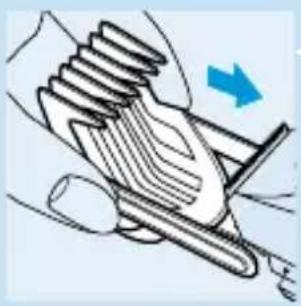
2 Press the adjustment button on the back of the appliance and slide the comb attachment to the desired position (see table).
3 Release the adjustment button to lock the comb.
4 insert the mains plug into the wall socket.
5 Switch the appliance on.
If a lot of hair has accumulated in the comb, remove the comb attachment and blow and/or shake the hair out of the comb.
Cutting length settings
comb setting hair length
14mm
27mm
3 10 mm
4 13 mm
515mm
618mm
721mm
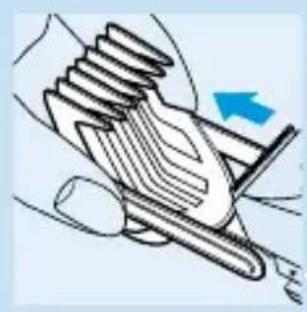
Clipping without comb attachment
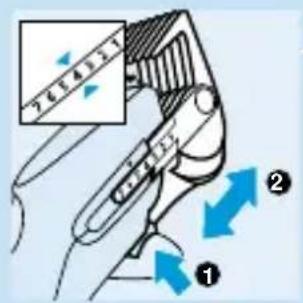
1 To remove the comb attachment,press the adjustment button on the back of the appliance and slide the comb attachment to its final position.
2 Pull the comb attachment off the appliance with your other hand while keeping the button pressed.
Clean the appliance every time you have used it.
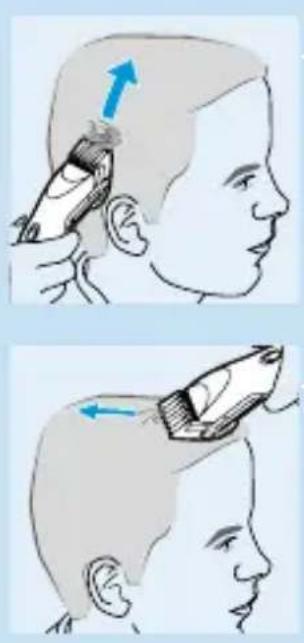
Clipping techniques
Always comb the hair in the direction of growth before clipping.

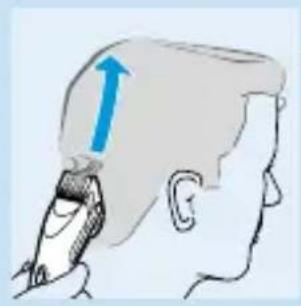
Clipping with comb attachment
The comb attachment can be used to obtain hair lengths up to 21 mm.
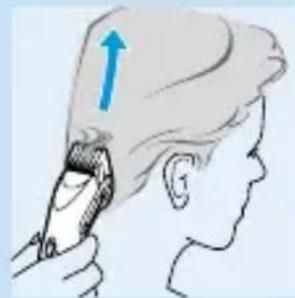
- Start at the setting for maximum hair length (i.e. position 7) to familiarise yourself with the clipper.
Always move against the direction of hair growth.
- Hold the clipper so that the flat side of the comb attachment is parallel to the head. Move it slowly through the hair and then away from the head, cutting only a small amount at a time.
- Change the length setting (see table) to obtain different lengths on different parts of the head.
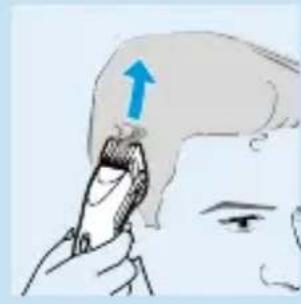
Cutting over styling comb or fingers
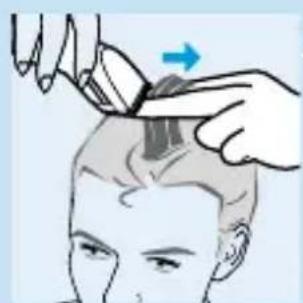
This technique can be used to obtain hair lengths over 21~mm .
- Remove the comb attachment.
-
Lift a small section of hair with a styling comb or grasp it between two fingers.
-
Lift the hair with the comb or fingers so that only the length that needs to be cut off sticks out.
- Trim the hair protruding from the comb or fingers.
- Continue this procedure working against the growth direction of the hair.
Comb frequently to remove cut hair and check for unevenly cut sections.
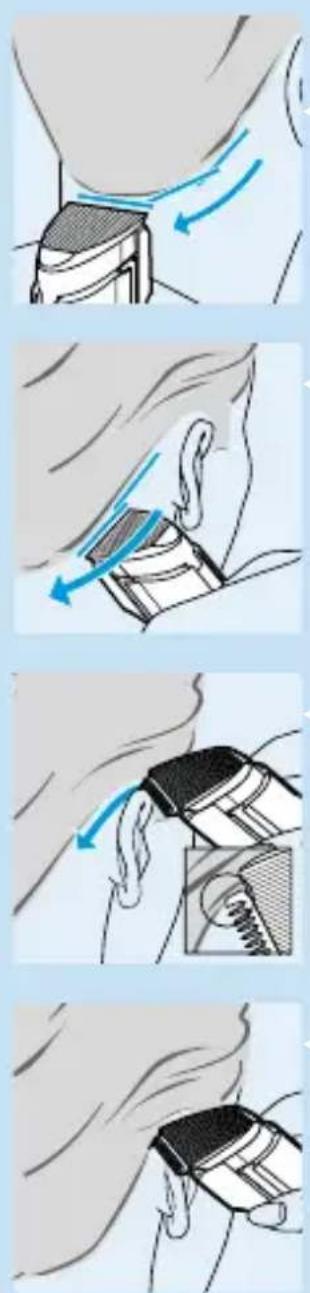
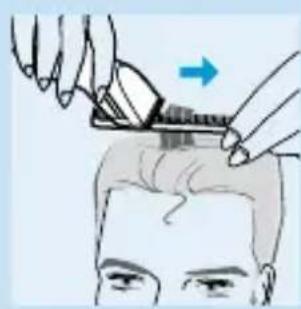
Outlining
- Remove the comb attachment.
- Hold the clipper with the cutter pointing downwards.
- Make overlapping strokes for clear outlining of the neck and sideburns.
- For cutting the hair around the ears, put one edge of the cutter on the skin. Make sure that the teeth are kept at a safe distance from the ears.
Shape the desired outline slowly and carefully.
Creating different haircuts
Crew cut
- Select the desired hair length for the neck area.
-
Clip the neck area using the "Clipping with comb attachment" technique.
-
Adjust the length setting to the desired hair length for the back and sides of the head.
- Clip the sides and back of the head leaving the hair on top of the head uncut.
-
For a flat top look, cut the hair on top of the head using the "Cutting over styling comb or fingers" technique.
-
Finish the haircut by outlining the neckline, sideburns and the area around the ears.
Short cut
- Select the desired hair length for the back and the sides of the head.
- Clip the back and the sides of the head using the "Clipping with comb attachment" technique.
- Leave the hair on top of the head uncut.
- Select the desired hair length for the top of the head.
- Clip the top of the head using the "Clipping with comb attachment" technique.
- Finish the haircut by outlining the neck, sideburns and area around the ears using the "Outlining" technique.
Cleaning
Do not use abrasives, scourers or liquids such as alcohol, petrol or acetone to clean the appliance.
1 Make sure the appliance is switched off and disconnected from the mains before you start cleaning it.
2 Remove the comb attachment.
3 Remove the cutting unit.
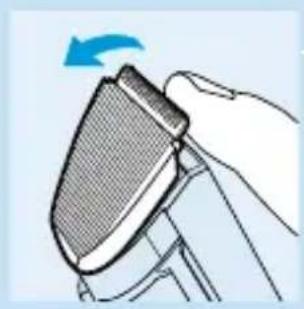
4 Clean the cutting unit and the inside of the appliance with the brush supplied.
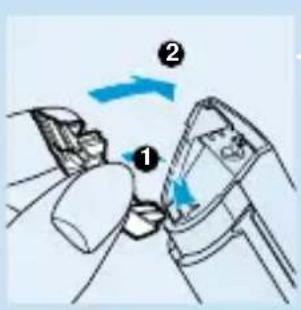
5 To reassemble the clipper, insert the hook of the cutting unit into the housing.
6 Push it back until you hear a click.
Replacement
A worn or damaged cutting unit should only be replaced with an original Philips cutting unit.
For telephone numbers of the Philips Helpdesk, see the worldwide guarantee leaflet.
Wichtig

Brand : PHILIPS
Model : HQC241
Category : Electric mower