
XC 95 MK - Cooker Ariston Thermo - Free user manual and instructions
Find the device manual for free XC 95 MK Ariston Thermo in PDF.

| Product type | Cooker |
| Brand | Ariston Thermo |
| Model | XC 95 MK |
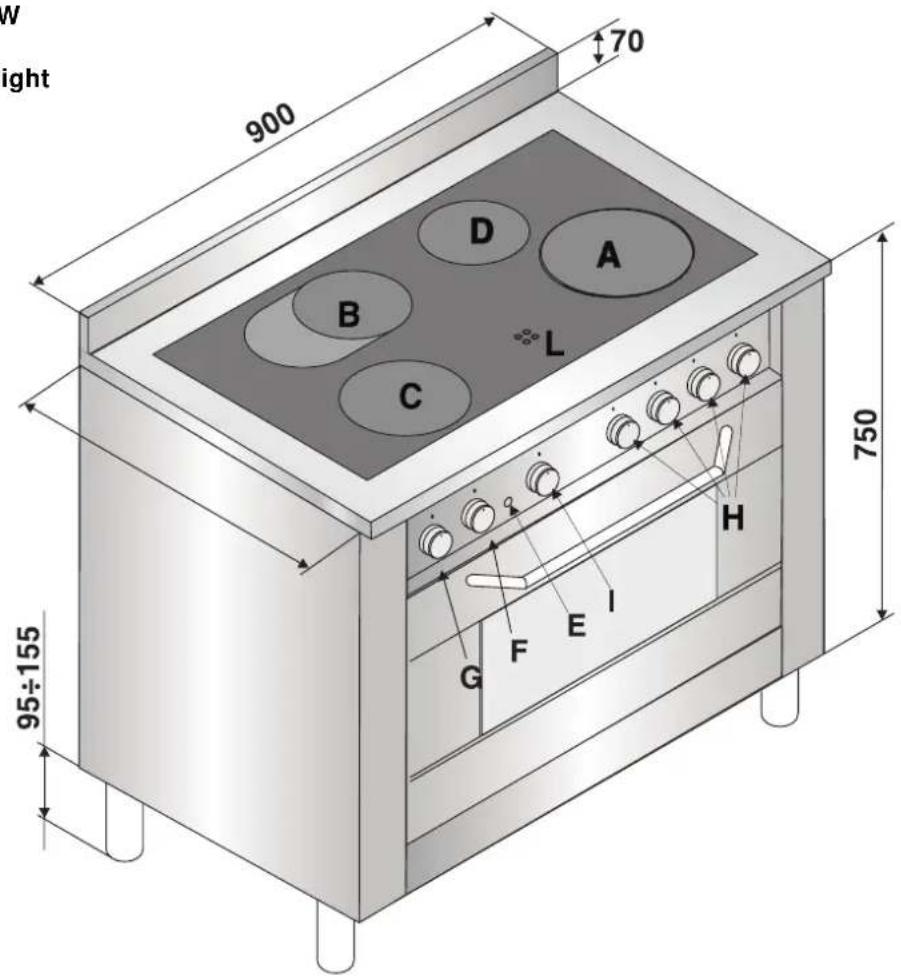
| Width | 900 mm |
| Depth | 750 mm |
| Height | 850 mm (adjustable) |
| Weight | Approximately 55 kg |
| Power supply | 230 V ~ 50-60 Hz |
| Maximum total power | 10800 W |
| Cooking type | Ceramic glass hob with radiant and halogen burners |
| Number of burners | 4 |
| Burner power | A: 2200 W, B: 1500/1000 W (expandable), C: 1800 W, D: 1200 W |
| Oven type | Electric multifunction |
| Oven cooking modes | 9 modes: static, grill, maxi-grill, fan-assisted, defrost, etc. |
| Grilling | Grill and maxi-grill with rotisserie possible |
| Timer | Programmable up to 60 minutes with audible signal |
| Oven lighting | Automatic, lamp 25 W (E14 socket, 300°C) |
| Cleaning of ceramic glass | Specific non-abrasive products, scraper |
| Safety | Residual heat indicator, mandatory grounding |
| Spare parts | Oven lamp, scraper, grills, drip tray, rotisserie |
| Compliance | CE (73/23/EEC, 89/336/EEC, 93/68/EEC) |
Frequently Asked Questions - XC 95 MK Ariston Thermo
User questions about XC 95 MK Ariston Thermo
0 question about this device. Answer the ones you know or ask your own.
Ask a new question about this device
Download the instructions for your Cooker in PDF format for free! Find your manual XC 95 MK - Ariston Thermo and take your electronic device back in hand. On this page are published all the documents necessary for the use of your device. XC 95 MK by Ariston Thermo.
USER MANUAL XC 95 MK Ariston Thermo
GB Cooker with Maxioven
Instructions for installation and use 8
natural_image
Illustration of a hand using a paintbrush to brush the surface of granular material (no text or symbols)fig.4 fig.5

natural_image
Illustration of three metallic containers crossed with a black X symbol, no text or labels presentnatural_image
Technical line drawing of a mechanical component with no visible text or symbolsfig.6
ISTRUZIONI PER L'INSTALLATORE
Congratulations on choosing an Ariston appliance, which you will find is dependable and easy to use. We recommend that you read this manual for best performance and to extend the life of your appliance. Thank you.
RECOMMENDATIONS
1 This appliance has been designed for private, non-professional use in normal dwellings.
2 Before using the appliance, carefully read the instructions contained in this manual, as they provide important information for ensuring safe installation, use and maintenance. Keep this booklet in a safe place for further reference when required.
3 After the packing has been removed, make sure the appliance has not been damaged during transport. If you have any doubts, do not use the appliance. Call a qualified technician for assistance. For safety purposes, keep all packing materials (plastic bags, polystyrene foam, tacks, etc.) away from children, as they are a potential source of injury.
4 The appliance must be installed by a qualified technician in accordance with the manufacturer's instructions. Improper installation due to a failure to follow these instructions can cause injury or damage to persons, animals or property. The manufacturer will not be held liable for such damages.
5 The appliance's electrical system is safe and secure only when it is correctly connected to an appropriately earthed system which complies with electrical safety regulations. Make sure this basic safety requirement has been complied with. If in doubt, have it checked by a qualified technician. The manufacturer will not be held liable for damages caused by the improper earthing of the appliance.
6 Before connecting the appliance, make sure the specifications on the rating plate correspond to those of your power supply.
7 Make sure that the current of the electrical system and the outlets are sufficient for the maximum rated output indicated on the rating plate. If in doubt, contact a qualified technician for assistance.
8 A multipolar switch, with a contact break of 3 mm or more, must be fitted for installation.
9 This appliance must only be used for the purpose for which it was designed.
10 All other uses (for heating for example) are considered improper and, therefore, dangerous.
11 The manufacturer will not be held liable for damages arising from improper, incorrect, or unreasonable use.
12 When using electrical appliances, the following basic rules must be observed:
- never touch the appliance when your hands or feet are wet.
- never use the appliance if you are barefoot.
- use extensions, if necessary, with extreme caution.
- never pull the supply cord, or the appliance itself, to disconnect the plug from the electrical socket.
- never leave the appliance exposed to the weather (rain, sun, etc.)
- never let children or persons unfamiliar with the appliance
use it without appropriate supervision.
13 Before doing any cleaning or maintenance work on the appliance, disconnect it from the supply mains, either by removing the plug from the socket, or by turning off the power at the mains.
14 If the glass surface of the cooktop cracks or breaks, disconnect the appliance immediately from the power supply. For repairs contact only authorised service centres for assistance and make sure only original spare parts are used. Failure to do so could impair the safety of the appliance.
15 If you decide not to use the appliance any longer, make it unserviceable by unplugging the appliance from the mains and cutting the supply cord. Make any potentially dangerous parts safe, this precaution is particularly important for protecting children who might play with, or in, unused or abandoned appliances.
16 The top made of ceramic glass is resistant to sudden temperature changes and shocks. However, if it is struck with pointed utensils or objects such as cutting knives, it may crack or break. If this occurs, disconnect the appliance immediately from the power supply and contact an authorised service centre.
17 Keep in mind that the cooking area remains hot for at least a half an hour after the appliance has been turned off. Make sure that you do not inadvertently place containers or objects on the cooking area while it is still hot.
18 Do not turn the heating elements on if there are plastic objects or aluminium foil on the cooktop.
19 Do not get too close to the cooking areas when they are hot.
20 When using small electrical appliances near the cooktop, make sure that the supply chord does not come into contact with those parts of the appliances which are hot.
21 Make sure that the handles on pots and pans are turned inward to prevent bumping them accidentally.
22 Never leave a cooking element on unless cookware is placed on the element because the cookware will become very hot in a short period of time and this may damage the heating elements.
23 Instructions for using the appliance the first time. The glue used to seal the glass may leave grease residues. We recommend that these residues be removed with a non-abrasive cleaning product before the appliance is used. During the first few hours of use, you may detect the odour of rubber. However, this will disappear quickly.
24 Do not gaze fixedly at the halogen heating elements when they are in operation: they produce a strong light which could be bothersome to the eyes.
CLOSE-UP VIEW
A Combined halogen element 2200 W
B Radiating element 1500 W + 1000 W
C Combined halogen element 1800 W
D Radiating element 1200 W
E Electric oven operation indicator light
F Electric oven thermostat knob (temperature selection)
G Oven selector knob (cooking function selection)
H Heated elements control knobs
G Pull out cutlery holder
I Minute minder
L Fitting for extractor flue
HOW TO USE YOUR APPLIANCE
Description of the heating elements
The heating elements are circular in shape and turn red in colour only 20-30 seconds after they have been turned on.
Combined halogen and electrical heating elements. The cooktop utilises heating elements which are made up of two halogen lamps and a circular heating element. This combination provides ideal heat distribution across the entire surface of the cooking area keeping the advantages of the halogen lamps.
The main characteristic of halogen lamps is that they produce an instantaneous emission of a large quantity of light and heat, which means:
- a rapid source of heat similar to that provided by gas burners;
- an equally rapid elimination of the heat source.
Halogen lamps are extremely easy to use and their operation is analogous to that of other heating elements. Please refer to the table 1.
Table 1
| Setting Automatic plate | |
| 0 Off | |
| 1 For melting butter, chocolate | |
| 2 | For heating liquids |
| 3 | |
| 4 | For creams and sauces |
| 5 | |
| 6 | For cooking at boiling temperature |
| 7 | |
| 8 | For roasts |
| 9 | |
| 10 | For big boiled dishes |
| 11 | |
| 12 | For frying |
The control knobs
Each cooking area is equipped with a control knob "I" to regulate the temperature at any time from a minimum of 1 to a maximum of 12. The table 1 provides information on the settings indicated on the knobs and the corresponding, recommended uses.
The control knob of plate "B" normally only activates the round part of the plate (1500W). To activate the full oval plate (2500 W), turn knob "B" to beyond position 12 onto the symbol a click indicates that the whole oval plate has been switched on. The same knob may now be used to set the required temperature up to 12.
Residual heat indicator light (L)
This light indicates that the temperature of one or more cooking areas is above 60^ C, even thought the elements have been turned off. Some models come equipped with four such indicator lights, one for each of the four cooking areas.
Instructions on how to use the ceramic glass cooktop
To obtain the best results with the ceramic glass cooktop, several fundamental rules should be followed while cooking or preparing food.
- Use cookware with a flat bottom to make certain that the pot sets properly on the cooking area.
- Use cookware with a diameter large enough to completely cover the cooking plate in order to utilise all of the heat produced by the heating element.
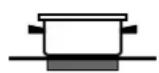
- Make sure that the bottom of the cookware is always clean and dry to provide good contact between the cooking surface and the cookware. This will also increase the life of the cooktops and cookware.
- Do not use cookware which has been used with gas burners. The concentrated heat produced by gas burners can deform the bottom of the cookware. As a result, it is impossible to obtain the results desired when this type of cookware is used on a ceramic glass cooktop.
- Never leave a heating on element unless cookware is placed on the element because the cookware will become very hot in a short period of time and this may damage the heating elements.
- Keep in mind that the cooking area remains hot for at least a half an hour after the appliance has been turned off. Make sure that you do not inadvertently place containers or objects on the cooking area while it is still hot.
- Do not turn the heating elements on if there are plastic objects or aluminium foil on the cooktop.
- Do not get too close to the cooking areas when they are hot.
-
The ceramic glass used to make the cooktop is very durable. However, should it crack, do not use the cooktop and disconnect it from the power supply.
-
Instructions for using the appliance the first time: The glue used for the seals may leave grease residues on the glass during storage. We recommend that these residues be removed with a non-abrasive cleaning product before the appliance is used. During the first few hours of use, you may detect the odour of rubber. However, this will disappear quickly.
- The top made of ceramic glass is resistant to sudden temperature changes and shocks. However, if it is struck with pointed utensils or objects such as cutting knives, it may crack or break. If this occurs, disconnect the appliance immediately from the power supply and contact an authorised service centre.
MULTI-FUNCTION OVEN
The oven offers nine combinations of heating elements; so the most suitable combination may therefore be chosen for each dish, with convincing results. By turning the selector
knob "G" marked with the symbol □, different cooking modes are obtained, as shown in the following table:
| Symbol | Function | Power |
 | - | |
| [206D] | 1) Top + Bottom heating elements | 2350 W |
| [04HY] | 2) Bottom heating element | 1300 W |
| [506B] | 3) Top heating element | 1050 W |
 | 4) Grill heating element | 2000 W |
 | 5) Maxigrill (Top + Grill heating elements) | 3050 W |
 | 6) Maxigrill (Top + Grill heating elements) + fan | 3100 W |
 | 7) Bottom heating element + Fan | 1300 W |
 | 8) Rear round heating element + Fan | 2850 W |
 | 9) Fast defrosting | 50 W |
After having selected the heat source, put the thermostat knob "F" (marked with the symbol) onto the temperature required.
- For traditional cooking (roasts, biscuits, etc.) in conventional mode use the □mode (hot above + below).
Only put the food to be cooked into the oven when it has reached the selected temperature and preferably use just one shelf for cooking.
To provide heat only to the bottom or the top part of the dishes, turn the selector to the position (hot below) or (hot below + fan) or (hot above);
- With this (fan assisted)mode heat is transmitted to the food through pre-heated air made to circulate inside the oven by a fan. The oven heats up very quickly so the food to be cooked may be put into the oven as soon as it is switched on. Cooking is also possible simultaneously on two shelves.
- The "fast defrosting" function ✿ uses no heating elements, just the oven light and the fan.
- Grill operation: a high heat output is used for grilling, so that the surface of the food is immediately browned; this is particularly indicated for meats which should remain tender on the inside.
To grill, turn the selector knob "G" to one of these positions:
(grill), , ( + fan)
During grilling, do not set the thermostat knob to above 200°C and keep the oven door closed.
Oven light
The oven light comes on automatically when the selector knob is turned to any of its positions.
Indicator light "E"
(figure a on page 2) It indicates that the oven is heating up. When the light goes out, the required temperature has been reached inside the oven.
When the light alternately comes on and goes out, it means that the thermostat is working properly to maintain the oven temperature.
Minute minder "I"
This is a buzzer timer situated on the control panel and is suitable for timing up to a max. of 60 minutes.
Turn the knob with the symbol until the pointer is aligned with the required time. When the set time has elapsed, a buzzer sounds (it does not turn the oven off).
It is advisable to turn the knob to 60 and then back to the time required, even if this is less than 60 minutes.
See pages 12 for the cooking times and temperatures required for different foods.
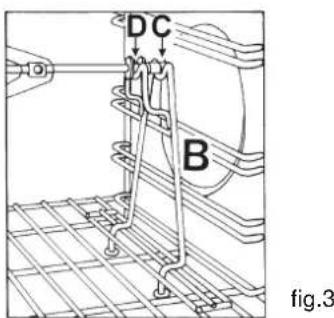
Spit - Rotisserie
Insert the meat to be cooked along the length of the spit rod, securing it with the special adjustable forks (fig. 2).
Introduce the supports "A" and "B" (fig. 3) into the holes in the drip tray "E", rest the rod groove on the seat "C" and insert the oven rack into the lowest guide of the oven; now insert the spit rod into the relative hole, moving the groove forward into seat "D". Start the rotisserie by turning the selector knob to one of the following positions:
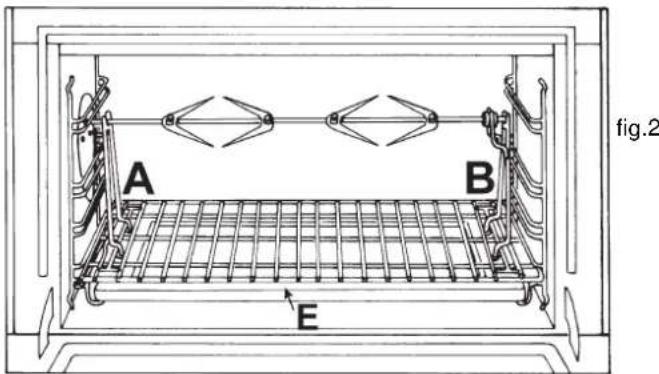
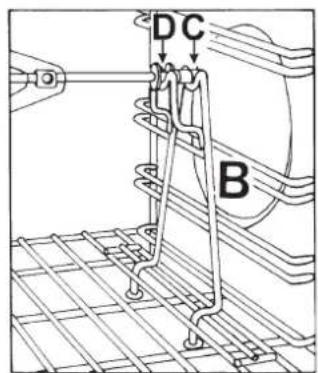
fig.3
fig.1
COOKING TIPS
Cooking times may vary according to the nature of the foods, their homogeneity and their volume. When cooking a certain food for the first time, it is advisable to choose the lowest values in the cooking time range given in the table and then increase them if necessary.
CONVENTIONAL oven cooking
| hsidfoepyT °C | erutarepmeT emitgnikCo)setunim( hsidfoepyT °C | erutarepmeTgnikCo)sruclmit | |||
| Pastries and cakes | Meat | ||||
| diprF | 130 | 07-06 | Turkey (4-8 kg) | 160 | 3-412 |
| seugmeM | 130 | 04-03 | Goose (4-5 kg) | 160 | 4-412 |
| ekamp | 150 | 03-02 | Duck (2-4 kg) | 170 | 112-212 |
| ekaclean | 160 | 05-04 | Capon ( 212-3 kg) | 170 | 2-212 |
| ekacdaM | 160 | 05-04 | Braised beef ( 1-112 kg) | 160 | 3-312 |
| ekatalooh | 170 | 04-03 | Leg of lamb | 160 | 1-112 |
| facteraF | 170 | 05-04 | Roast hare (2 kg) | 160 | 1-112 |
| Bu | 200 | 02-51 | Roast pheasant | 160 | 1-112 |
| Flaky pastry biscuits | 200 | 02-51 | Chicken ( 1-112 kg) | 170 | |
| Mille feuilles | 200 | 02-51 | |||
| ytsaptsurd200 | 02-51 | Fish | 200 | 15-25minutes | |
GRILLING
| Type of dish | Cooking time (minutes) | Position of shelf |
| Chops (0.5 kg) | 60 | 3^rd guide rail |
| Saussages | 15 | 2^nd guide rail |
| Grilled chicken (1 kg) | 60 | 1^st guide rail |
| Veal on the spit (0.6 kg) | 60 | - |
| Chicken on the spit (1 kg) | 60 | - |
FAN ASSISTED cooking
| Type of dish | Guide rail no. from bottom | Quantity kg | Temperature °C | Time (minutes) |
| Cakes* With beaten mix, in mould* With beaten mix, without mouldShort pastry, flan baseShort pastry with wet fillingShort pastry with dry filling* With natural leavened mixSmall cakes | 1-31-3-41-3-41-31-3-41-31-3 | 110.51.5110.5 | 175175175175175175160 | 60503070455030 |
| MeatRoast under the grillVealBeefEnglish roast beefPorkChickenRoasts on a trayVealBeefPorkChickenTurkey slicesDuckCasserolesBeef casseroleVeal casserole | 222222 | 1111-1.5 | 180180220180200 | 6070507070 |
| 1-31-31-31-31-3 | 111-1.51.51-1.5 | 160160160180180180 | 80909090120120 | |
| 11 | 11 | 175175 | 120110 | |
| FishFillets, steaks, cod, hake, soleMackerel, turbot, salmonOysters | 1-31.31-3 | 11 | 180180180 | 304520 |
| TimbalesBaked pasta dishVegetable pudding* Sweet and savoury soufflés* Pizzas and savoury rollsToasted sandwiches | 1-31-31-31-31-3-41-3-4 | 220.750.50.5 | 185185180200190 | 6050503015 |
| DefrostingReady-to-eat mealsMeatMeatMeat | 1-31-31-31-3 | 10.50.751 | 200505050 | 455070110 |
Notes:
1) Cooking times do not include oven pre-heating, except for those marked with an asterisk.
2) The indication given in the table for the guide rails is the one that should preferably be used in the event of cooking on more than one level.
3) The indicated times refer to cooking on one shelf only; for cooking on more than one level, increase the time by 5 ÷ 10 minutes.
4) For roast beef, veal, pork and turkey, on the bone or rolled, increase the times by 20 minutes.
LOOKING AFTER YOUR COOKER
To ensure long life of the appliance, it is essential to carry out a thorough general clean frequently, taking into account that:
- The appliance should be disconnected from the mains supply before starting to clean.
- Avoid cleaning appliance parts when they are still warm.
- All enamelled, chromium plated and glass parts should be washed with warm water without using abrasive powders or corrosive substances that could ruin them.
- We recommend cleaning the inside of the oven each time you have finished cooking, using hot water and a detergent, and then rinsing and drying it thoroughly.
- The steel parts and especially the areas with the screen-printed symbols should not be cleaned with diluents or abrasive detergents. It is advisable to use only a damp cloth with warm water and a liquid dish washing detergent (rub with the cloth in the direction of the steel satin finish). In the case of stubborn dirt you can use methylated spirits. Stainless steel can be stained if it remains in contact for a long time with water with a high lime content or with strong detergents (containing phosphorus).
• After cleaning, the surface may be treated to restore the shine: only use specific products for stainless steel. - Do not leave acid liquids (vinegar, lemon juice, strong detergents, etc.) on enamelled or painted parts.
Warning: never use steel wool pads, muriatic acid or similar products for cleaning as they will scratch or dull the surface.
| Specific products for cleaning pyroceram | Where to buy them |
| Scraper and blades plus spare blades | D.I.Y. and Hardware stores |
| Stahl-FixSWISSCLEANERWK TOPOther products for pyroceram | Household goodsD.I.Y.Hardware storesSupermarkets |
natural_image
Illustration of a hand using a tool to brush or brush over scattered debris (no text or symbols)fig.4 fig.5
natural_image
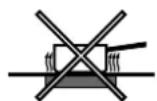
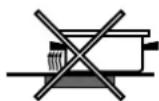
Illustration of three metallic cylindrical objects crossed by a black X mark, with a grid base and book nearby (no text or symbols)Cleaning the pyroceram hob
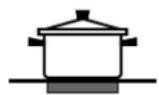
Before you start cooking, clean the hob surface with a soft, damp cloth in order remove any dust or left overs of previously cooked food. The hob surface should be cleaned regularly with warm water and a mild detergent.
Specific products for cleaning pyroceramic hobs should be used periodically.
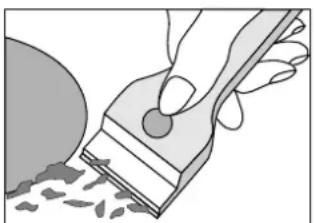
Before starting, remove food scraps and grease splashes with a scraper like (not provided).
Clean the hob while it is still warm; use a suitable product for cleaning and kitchen paper, rub with a damp cloth and dry. Sheets of tin foil, objects in plastic or synthetic material that have accidentally liquefied, likewise sugar or sugary drinks should be scraped off immediately from the hot cooking area.
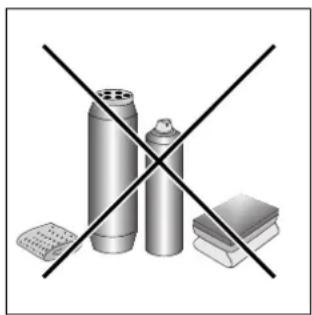
Specific cleaning products form a transparent, surface layer that repels dirt. This also protects the surface from damage caused by very sugary food. Under no circumstances use abrasive sponges or products; also avoid using chemically strong detergents like oven cleaning sprays and stain removers.
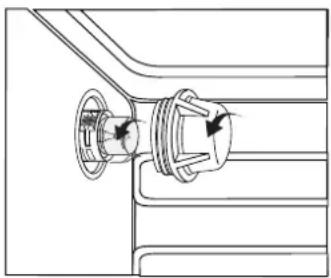
Changing the oven bulb
- Unscrew the glass protective cover from inside the oven (fig.6);
- Unscrew the bulb and replace with an identical one suitable for high temperatures (300°C) and with the following characteristics:
Voltage 230 V, Input 25 W, Coupling E 14. - Refit the glass protective cover.
natural_image
Technical line drawing of a mechanical component with no visible text or symbolsfig.6
INSTRUCTIONS FOR INSTALLATION
The following instructions are provided for qualified installers so that they may accomplish installation, adjustment and technical maintenance operations correctly and in compliance with current regulations and standards.
Important: the appliance should be disconnected from the mains electricity supply before any adjustment, maintenance, etc. is carried out. Maximum caution should be used whenever it is necessary to keep the appliance connected to the electricity supply.
The cooker has the following technical specifications:
Class: 1
Cooker size given in figure on page 2.

For trouble-free operation of appliances installed in units, the minimum distances shown in fig.7 should be observed. Adjacent surfaces and the wall at the rear should also be able to withstand a temperature of 65 °C. The cooker is fitted with 4 height adjustable screw-in feet to level the cooker if necessary. It is essential that the cooker stand on a flat surface. Any deformation caused by bad positioning risks modifying the appliance's characteristics and performance.
Electrical connection
THE APPLIANCE MUST BE EARTHED
The cooktop is designed to work with alternating current at the supply voltage and frequency indicated on the rating plate (situated under the hob or at the end of the instruction booklet). Make sure that the local supply voltage corresponds to the voltage indicated on the rating plate.
The electrical cooktop is not supplied with a power supply chord because the type of chord used depends on the type of electrical connection (see the following connection diagram).
Use a rubber cable of the type H05RR-F.
Open the terminal box following the instructions illustrated in the diagram below:
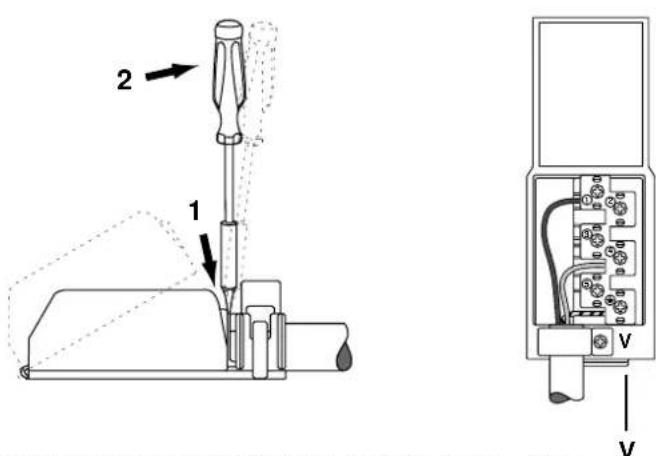
To connect the supply chord, proceed as follows:
- Loosen the screws on the wire clamp "V", as well as the screws for the contacts.
- Insert the wires beneath the contact screws, as shown in the diagram, and tighten them.
- Fasten the chord with the appropriate wire clamp and close the cover.
| Electrical Connection | Power supply voltage | Fuse | Section |
| 230V-1+N~50Hz | 32A* | 4 mm ^2 | |
| 400V-3+N~50Hz | 25A | 2,5 mm ^2 | |
| 400V-2+N~50Hz | 16A* | 1,5 mm ^2 | |
| 230V-2~50Hz | 32A* | 4 mm ^2 | |
| 230V-3~50Hz | 25A | 2,5 mm ^2 | |
| 230V-2+2N~50Hz | 25A* | 2,5 mm ^2 |
Connecting the supply cable to the mains
Fasten the appropriate standard plug for the load indicated the rating plate to the chord. If the appliance must be directly connected to the mains, a multipolar switch must be installed between the appliance and the mains. The multipolar switch must have a minimum of 3 mm of space between the contacts, be sized to the load, and comply with current regulations (the switch must not be able to disconnect the earth conductor). The supply cord must be positioned so that no part of it reaches a temperature of 50 °C higher than room temperature. Before making the connection, make sure that:
- the limiter valve and the residential wiring can support the appliance load (see rating plate);
• the mains system is properly earthed in compliance with current regulations and provisions; - there is easy access to the socket or the multipolar switch after the appliance is installed.
Attention: If the cooktop is installed above a built-in oven, the electrical connection for the cooktop must be independent of that for the oven, both for safety reasons and to facilitate the removal of the oven for maintenance, repair, etc.
TECHNICAL SPECIFICATIONS
Supply voltage and frequency 230V\~ 50-60 Hz
Maximum electrical input: 10800W
This appliance conforms with the following European Economic Community directives:

- 73/23/EEC of 19/02/73 (Low Voltage) and subsequent modifications;
- 89/336/EEC of 03/05/89 (Electromagnetic Compatibility) and subsequent modifications;
- 93/68/EEC of 22/07/93 and subsequent modifications.
natural_image
Illustration of a hand using a paintbrush to brush the surface of granular material (no text or symbols)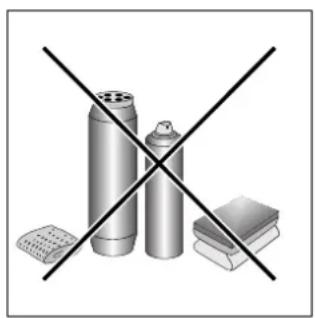
natural_image
Crossed black-and-white diagram of industrial equipment including cylindrical tanks and a base (no text or symbols)fig.4 fig.5
natural_image
Technical line drawing of a mechanical component with no visible text or symbolsfig.6
INSTRUCTIONS POUR L'INSTALLATION
natural_image
Illustration of a hand using a paintbrush to brush the surface, with no visible text or symbols.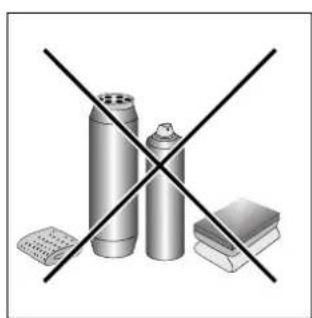
natural_image
Illustration of three cylindrical containers crossed by a black 'X' line, with no visible text or symbols.natural_image
Technical diagram of a mechanical component with directional arrows, labeled Abb .6 (no text or symbols on the diagram itself)
- ISTRUZIONI PER L'INSTALLATORE
- RECOMMENDATIONS
- CLOSE-UP VIEW
- HOW TO USE YOUR APPLIANCE
- Description of the heating elements
- The control knobs
- Residual heat indicator light (L)
- Instructions on how to use the ceramic glass cooktop
- MULTI-FUNCTION OVEN
- Oven light
- Indicator light "E"
- Minute minder "I"
- Spit - Rotisserie
- COOKING TIPS
- Notes:
- LOOKING AFTER YOUR COOKER
- Cleaning the pyroceram hob
- Changing the oven bulb
- INSTRUCTIONS FOR INSTALLATION
- Class: 1
- Electrical connection
- THE APPLIANCE MUST BE EARTHED
- Connecting the supply cable to the mains
- TECHNICAL SPECIFICATIONS
- This appliance conforms with the following European Economic Community directives:
- INSTRUCTIONS POUR L'INSTALLATION
Brand : Ariston Thermo
Model : XC 95 MK
Category : Cooker