
TX 518 V - Fridge AMANA - Free user manual and instructions
Find the device manual for free TX 518 V AMANA in PDF.
| Product Type | Refrigerator with freezer compartment |
| Brand | Amana |
| Model | TX 518 V |
| Power supply | 230 V, 50 Hz, 10 A, dedicated circuit with ground |
| Weight | 363 kg |
| Required clearance (top) | 25 mm |
| Required clearance (sides) | 5 mm |
| Temperature adjustment | Separate thermostats for fresh food and freezer compartments, from 1 (least cold) to 7 (coldest) |
| Anti-condensation setting | On/Off to reduce external condensation |
| Door reversal | Possible (detailed procedure in the manual) |
| Refrigerated compartment | With or without thermostat depending on model |
| Fresh vegetable bins | With low/high adjustment possible |
| Tempered glass shelves | Removable, handle carefully to avoid breakage |
| Interior lighting | Bulb for household appliances (replacement possible) |
| Recommended cleaning | Warm water + baking soda (4 tablespoons per liter) |
| Condenser maintenance | Clean every 3 months with vacuum cleaner |
| Door gasket maintenance | Clean every 3 months, apply petroleum jelly |
| Warranty (1st year) | Free replacement part (shipping not included) |
| Warranty (2nd to 5th year) | Free compressor (shipping not included) |
| Serial number | On the rating plate (upper left corner of fresh food compartment) |
Frequently Asked Questions - TX 518 V AMANA
User questions about TX 518 V AMANA
0 question about this device. Answer the ones you know or ask your own.
Ask a new question about this device
Download the instructions for your Fridge in PDF format for free! Find your manual TX 518 V - AMANA and take your electronic device back in hand. On this page are published all the documents necessary for the use of your device. TX 518 V by AMANA.
USER MANUAL TX 518 V AMANA
International Top Freezer Refrigerator Use and Care Manual
Contents
Electrical Requirements 2
Model Identification 2
Installation Information
Introduction 3
Installation Requirements 3
Removing Wooden Base 3
Removing Handles 3
Removing Doors 3
Reversing Doors 4
Leveling Refrigerator 4
Features 5
Setting Controls
Fresh Food and freezer* 6
Exterior Moisture 6
Care and Cleaning 7
Vacation Tips 8
Normal Operating Sounds 8
Before Calling For Service
Warranty
8
9
*Fresh Food refers to refrigerator.
Electrical Requirements
Refrigerator must be earthed and connected to a separate 230 volt, 50hz 10A circuit.
Model Identification
Locate product information on the nameplate, found in upper left corner of Fresh Food section. Record the following information:
Model Number:
Manufacturing Number:
Serial or S/N Number:
Date of purchase:
Dealer's name and address:
Keep a copy of sales receipt for future reference.
Introduction
A qualified engineer must connect refrigerator in accordance with these installation instructions.
Measure door opening and depth and width of refrigerator. Remove handles or doors as required. Engineer must follow local electrical company connection regulations.
Service to or replacement of power cord must be performed by a qualified servicer.

Recognize this symbol as a safety precaution.
Installation Requirements
- Install on an earthed outlet with a separate 230 volt, 50 hertz., 10A circuit.
- Protect soft flooring with cardboard or rugs.
- Install on a floor which supports up to 363 kilograms.
- Provide 25 millimeter clearance on top and 5 millimeter on sides of refrigerator.
Removing Wooden Base

CAUTION
To avoid personal injury or property damage, two people must remove wooden base.
- Tape doors on top right and left corners to prevent doors from opening unexpectedly.
- Slide appliance cart under side of refrigerator opposite hinges.
- Wrap refrigerator with blanket or pad. Thread strap around refrigerator. Put foam shipping pads, located in shipping carton, under strap. Tighten strap securely.
- Lower appliance cart to floor with appliance cart handles on bottom.
- Remove top two bolts from skid.
- Return refrigerator and appliance cart to an upright position. Remove strap.
- Slide appliance cart under opposite side of refrigerator.
- Repeat steps 3-5.
- Remove wooden base.
- Return refrigerator and appliance cart to an upright position and remove appliance cart.
Important
Do not leave refrigerator on its side longer than necessary to remove bolts.
Removing Handles

CAUTION
To avoid personal injury or property damage, hold handles securely while removing.
- Remove door handle screw caps by lifting ends.
- Remove door handles by removing screws.
- Replace door handles by reversing steps 1-2.
Removing Doors

CAUTION
To avoid personal injury or property damage, two people must remove and rehang doors.
- Tape doors shut to prevent doors from opening unexpectedly.
- Remove top hinge cover by lifting back and sliding forward.
- Remove top hinge by removing screws.
- Remove tape from freezer door.
- Remove freezer door by lifting while opening.
- Remove center hinge pin.
- Remove tape from Fresh Food door.
- Remove Fresh Food door by lifting while opening.
- Remove center hinge bracket by removing screws.
- Remove toe grille by pulling forward.
- Remove bottom hinge cover by prying cover away from hinge bracket.
- Remove bottom hinge by removing screws.
- Rehang doors by reversing steps 1-12.
Reversing Doors
- Complete steps 1-2 in "Removing Handles" section and steps 1-12 in "Removing Doors" section.
- Remove cover on handle nameplate by lifting end. Bend tabs behind nameplate up and remove nameplate. Rotate nameplate one half turn. Replace nameplate and cover.
- Remove plastic plugs from side of doors. Insert in opposite side.
- Place door handles on Fresh Food and freezer doors. Fresh Food handle becomes freezer handle and freezer handle becomes Fresh Food handle. Insert screws and tighten.
- Replace door handle screw caps by snapping in.
- Remove door stops from side of doors by removing screws. Replace door stops on opposite side.
- Place bottom hinge and spacer(s) on opposite side of refrigerator cabinet. Insert screws and tighten.
Important:
Spacer ring(s) can be moved to properly adjust doors.
- Move bottom hinge pin to opposite hex hole. Place spacer ring(s) on hinge pin.
- Remove plastic plugs from side of refrigerator cabinet. Insert in opposite side.
- Turn over center hinge bracket and spacer(s). Place bracket and spacer(s) on opposite side of refrigerator cabinet. Insert screws and tighten.
- Rehang Fresh Food door by positioning bottom socket onto bottom hinge pin.
- Tape Fresh Food door on top right and left corners.
- Place center hinge pin and spacer ring(s) on center hinge bracket. Pin must fit through bracket and into Fresh Food door socket.
- Rehang freezer door by positioning bottom socket onto center hinge pin.
- Tape freezer door shut on top right and left corners.
- Remove plastic plugs from top of refrigerator cabinet. Insert in opposite side.
- Place top hinge and spacer(s) on opposite side of refrigerator cabinet. Insert screws and tighten.
- Replace top hinge cover by snapping on.
- Replace bottom hinge cover by snapping on.
- Replace toe grille by inserting clips in holes and snapping in. Top of toe grille is indicated on back of toe grille.
Leveling Refrigerator
- Remove toe grille by pulling forward.
- Remove bottom hinge cover by prying cover away from hinge bracket.
- Turn leveling screw clockwise to raise refrigerator or counterclockwise to lower refrigerator.
- Open and close both doors completely.
Important:
If refrigerator cannot be level due to flooring, use shims under roller(s) to level refrigerator.
- Turn leveling screws clockwise equally on both side until front of refrigerator is 6.4 millimeters higher than back.
- Turn stabilizing leg until firmly in place againstfloor.
- Replace bottom hinge cover by snapping on.
- Replace toe grille by inserting clips in holes and snapping in. Top of toe grille is indicated on back of toe grille.
Fresh Food Section (Refrigerator)
-
Temp-Assure ™Thermostatic Control
2.Shelves -
Models feature wire, glass or Spillsaver™ shelves.
-
Models feature slide out or stationary shelves.
-
Deli System
-
Models feature a controlled or noncontrolled deli system.
-
Garden Fresh Crispers
-
Models feature controlled or noncontrolled crispers.
-
Utility Rack
-
Covered Utility Bucket
-
Dairy Center
Models feature a moveable or fixed dairy center.
- Snaccess Bin
-
Door Buckets
-
Door Shelves
-
Retainer Bar
- Adjustable Divider
- Adjustable Bottle Divider
Freezer Section
-
Shelves
-
Models feature wire or glass shelves.
-
Ice Service Rack
- Reversible Rack
- Door Buckets
- Door Shelves
- Retainer Bar
- Tall Package Retainer
Features vary from model to model.
Fresh Food Shelves

CAUTION
To avoid personal injury or property damage, handle tempered glass shelves carefully. Shelves may break suddenly if nicked, scratched or exposed to sudden temperature change.
- Remove shelves by lifting front and releasing hooks from metal track.
- Replace shelves by inserting hooks into metal track and lowering front.
Deli System
Locate control, if applicable, on front trim to adjust amount of air circulating between drawer and sleeve.
- Remove drawer and sleeve, if applicable, by lifting and pulling out. Refer to "Fresh Food Shelves" for instructions on removing and replacing shelf. Use only top three slots.
- Replace sleeve, if applicable, then drawer by sliding in.
When moving controlled deli system left or right, move control, located on center back wall of refrigerator, to same side.
Chiller Fresh Position
Garden Fresh Crispers
Locate control, if applicable, on front trim to adjust to either high or low settings.
Remove garden fresh crispers and shelf by observing the following steps:
- Open left garden fresh crisperr.
For doors hinged on left, open right garden fresh crisper. - Remove shelf by gently pushing up from underneath and tilting one end up.
- Remove left* garden fresh crisper by lifting front while supporting underneath.
- For doors hinged on left, remove garden fresh crisper on right.
- Remove support post at recess in bottom center of Fresh Food section.
- Remove other garden fresh crisper by sliding crisper to opposite wall. Follow step 3.
- Replace garden fresh crispers and shelf by reversing steps 1-5.
Dairy Center
- Remove dairy center by opening door, pushing tabs toward center and pulling out.
- Replace dairy center by sliding in until tabs lock in place.
Door Buckets
- Remove door buckets by pushing tabs toward center and pulling out.
- Replace door buckets by sliding in until tabs lock into place.
Door Shelves
- Remove door shelves by lifting and pulling out.
- Replace door shelves by reversing step 1.
Freezer Shelves
Refer to "Fresh Food Shelves" for instructions on removing and replacing half width shelves.
- Remove full width shelf by tilting one end up and pulling forward.
- Replace full width shelf by reversing step 1.
This refrigerator operates most efficiently in normal household temperatures of 12^ to 43^ .
Fresh Food or Freezer Controls
Locate Fresh Food and freezer controls at center divider between Fresh Food and freezer sections. When freezer control is set to off, neither Fresh Food nor freezer sections will cool. Initially, set both controls to 4. Wait 24 hours for Fresh Food and freezer sections to reach desired temperatures. After 24 hours, adjust controls as desired. 1 is warmest setting and 7 is coldest.
Set temperatures precisely using a household thermometer that includes temperatures between - 20.5^ to 10^ .
Put thermometer snugly between frozen packages in freezer section. Wait 5-8 hours. If freezer temperature is not -18^ to -17^ , adjust control, one number at a time. Check again after 5-8 hours.
Put thermometer in a glass of water in middle of Fresh Food section. Wait 5-8 hours. If Fresh Food temperature is not 3^ to 4^ , adjust control, one number at a time. Check again after 5-8 hours.
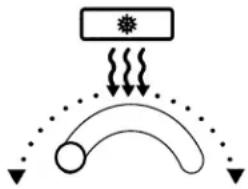
Exterior Moisture Control
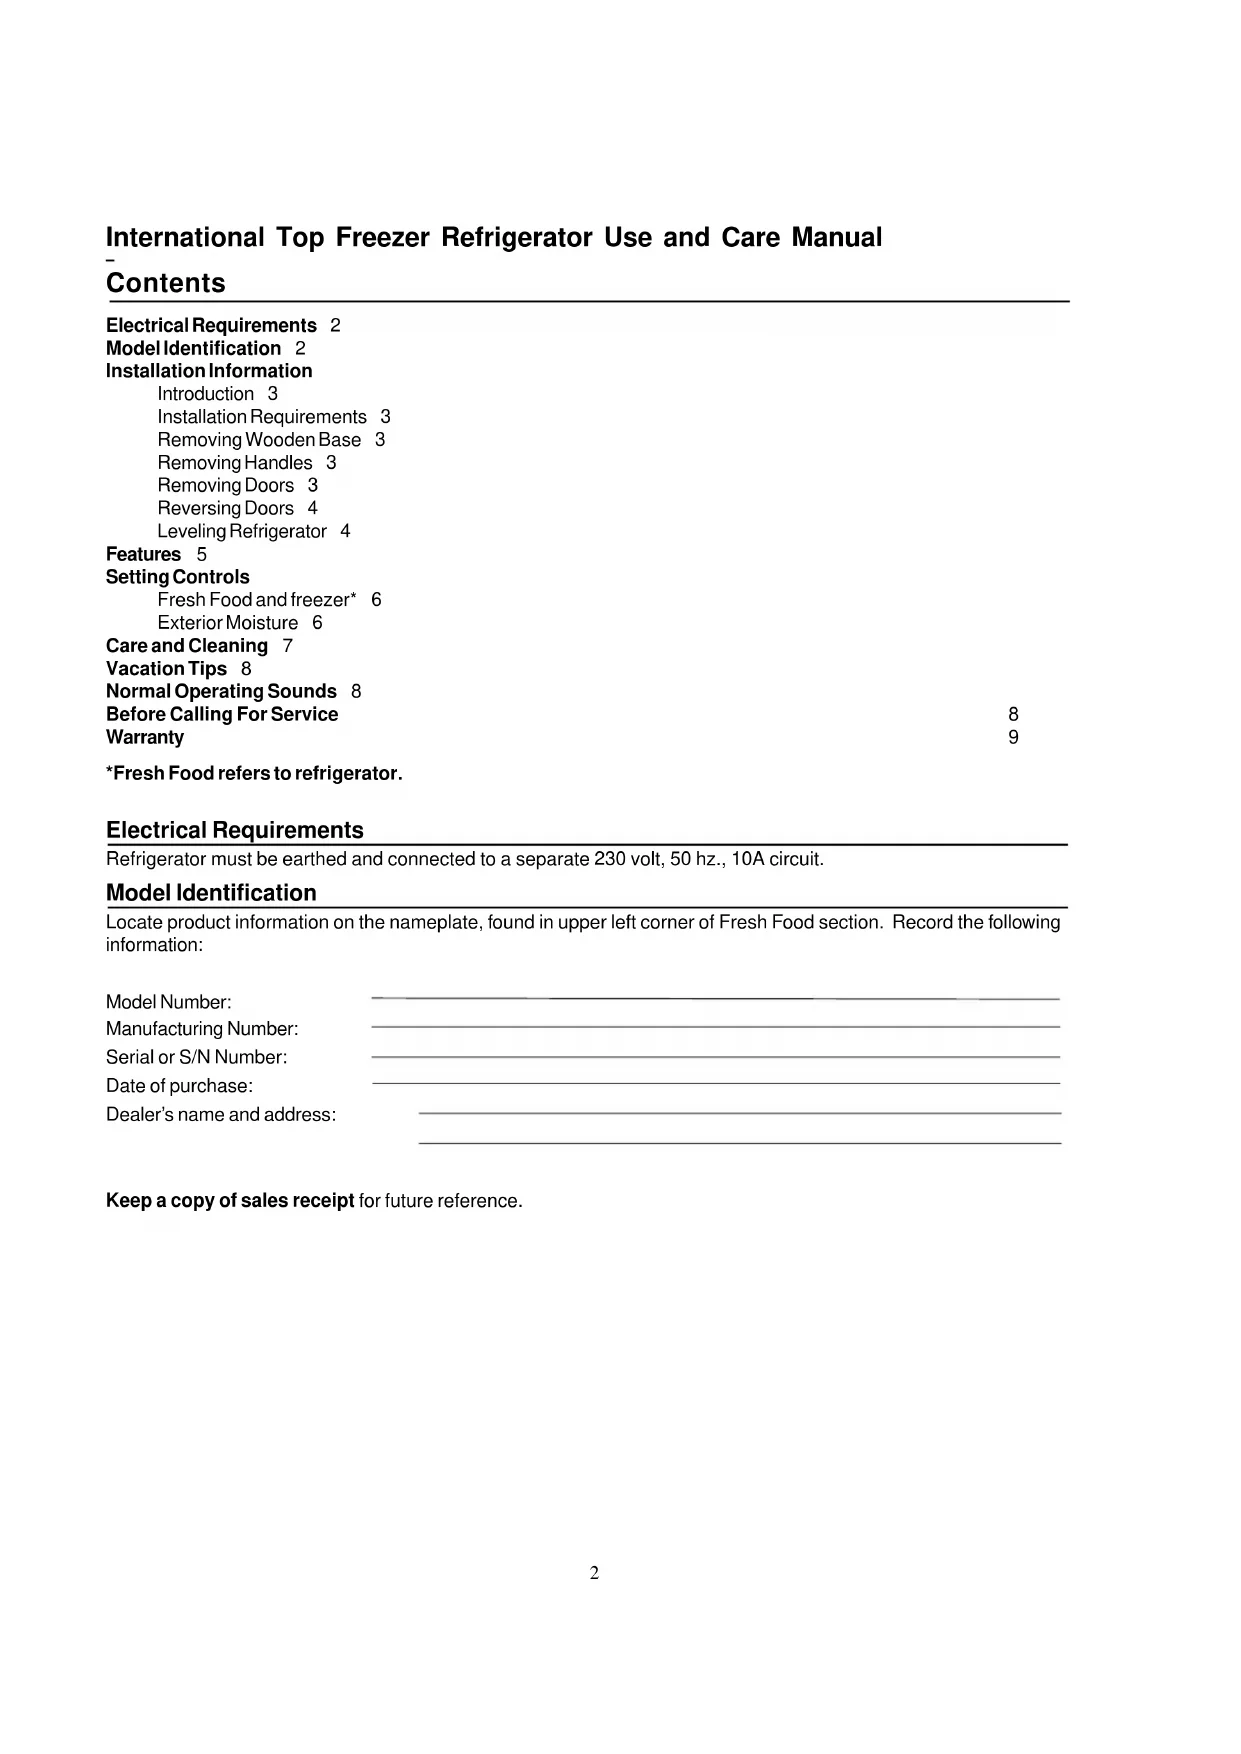
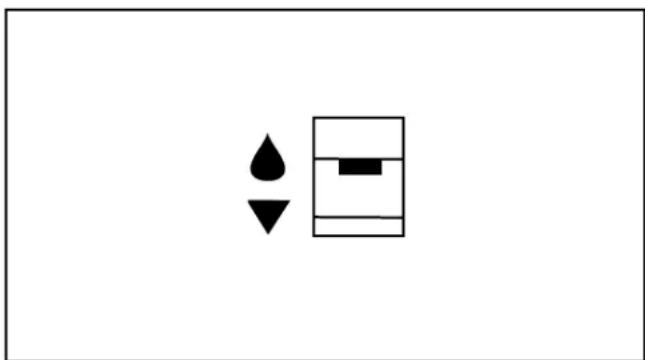
In humid conditions, refrigerators form condensation around doors. Humidity is subjective depending on location of refrigerator. Set control to on if refrigerator is in a humid area. Set control to off if refrigerator is in a less humid area. Setting can be adjusted as conditions change. Special heaters in refrigerator cabinet minimize condensation.
Important
High quality steel is used in this refrigerator. However, constant exposure to moisture may cause refrigerator cabinet to rust. Set control to on anytime condensation forms on refrigerator cabinet.
Care and Cleaning

WARNING
To avoid electrical shock which can cause severe personal injury or death, disconnect power to refrigerator before cleaning. After cleaning, reconnect power.

CAUTION
To avoid personal injury or property damage, read and follow all cleaning product manufacturer's directions.
General
- Wash surfaces with four tablespoons baking soda diluted in one quart warm water as needed. Rinse and dry surfaces thoroughly.
-
Do not use the following items:
-
abrasive cleaners such as ammonia, chlorine bleach, etc.
- solvents
metal scouring pads
These items can scratch, crack and discolor surfaces.
Glass Shelves

CAUTION
To avoid personal injury or property damage, handle tempered glass shelves carefully. Shelves may break suddenly if nicked, scratched or exposed to sudden temperature change.
Remove glass shelf and place on a towel. Allow shelf to adjust to room temperature before cleaning.
Light Bulbs

WARNING
To avoid electrical shock which can cause severe personal injury or death, disconnect power to refrigerator before replacing light bulb. After replacing light bulb, reconnect power.

CAUTION
To avoid personal injury or property damage, observe the following:
- Allow bulb to cool.
- Wear gloves when replacing light bulb.
Remove light bulb cover. Replace light bulb with same size and type of appliance bulb.
Door Gaskets
- Clean door gaskets every three months or according to "General" cleaning instructions.
- Rinse and dry gaskets thoroughly.
- Apply a light film of petroleum jelly to keep door gaskets pliable.
Condenser Coil
Clean condenser coil every three months. Accumulated dust and lint may cause the following:
- reduced cooling performance
- increased energy usage
-
premature part failure
-
Remove toe grille by pulling forward.
- Clean coil with a vacuum cleaner hose nozzle.
- Install toe grille by positioning top and snapping in bottom. Top is indicated on back of toe grille.
- Pull refrigerator away from wall. Run a vacuum brush across condenser fan outlet grille on back of refrigerator.
Vacation Tips
For short vacations, remove perishable foods. If an ice maker is installed, move ice maker arm to off position.
For long vacations, do the following:
- Remove food from refrigerator.
- Unplug refrigerator.
- Clean refrigerator.
- Clean door gaskets.
- Prop doors open, so air can circulate inside.
- Turn off water supply to refrigerator if an ice maker is installed and move ice maker arm to off position.

CAUTION
To avoid property damage, turn off water supply to refrigerator and move ice maker arm to off position before leaving on vacation.
Normal Operating Sounds
This new refrigerator may be replacing a differently designed, less efficient or smaller refrigerator. Today's refrigerators have new features and are more energy efficient. As a result, certain sounds may be unfamiliar. These sounds are normal and will soon become familiar. These sounds also indicate refrigerator is operating and performing as designed.
Before Calling For Service
Refrigerator does not operate.
- Confirm freezer control is on.
- Confirm electrical power cord is plugged in.
- Check fuse or circuit breaker. Plug in another item at that wall outlet.
- Wait 40 minutes to see if refrigerator restarts. If freezer control is on and lights work but two fans and compressor are not operating, refrigerator may be in defrost cycle.
Refrigerator still won't operate.
- Unplug refrigerator. Transfer food to another unit or place dry ice in freezer section to preserve food until refrigerator can be serviced.
Food temperature appears too warm.
See above sections.
- Allow adequate time for food to reach Fresh Food or freezer temperature if a large supply of food was recently added.
- Clean condenser coil.
- Adjust Fresh Food and/or freezer control.
Controlled deli system is too warm.
- Slide control to a colder setting.
- Adjust freezer control to a colder setting.
Food temperature is too cold.
- Clean condenser coil.
- Adjust Fresh Food control.
- Allow several hours for temperature to adjust.
Refrigerator runs too frequently.
It may be normal to maintain an even temperature.
- Doors may have been opened frequently or for an extended period of time.
- Clean condenser coil.
- Adjust freezer control.
- Check gasket for proper seal.
Water droplets form on inside of refrigerator.
- This is normal during periods of high humidity or if doors have been opened frequently.
Water droplets form on outside of refrigerator.
- Check door gaskets for proper seal.
- Turn exterior moisture control switch on.
Garden fresh crispers or controlled deli system does not close freely.
- Check for a package which may prevent drawers from closing properly.
- Confirm drawers are in proper position.
- Clean drawer channels with warm, soapy water. Rinse and dry thoroughly.
- Apply a thin layer of petroleum jelly to drawer channels.
- Confirm refrigerator is level.
Refrigerator has an odor.
- Clean inside of Fresh Food and freezer sections.
- Cover all foods tightly and use freezer wrap.
Refrigerator makes unfamiliar sounds or seems too loud.
- See "Normal Operating Sounds" section. These may be normal.
Limited One Year Warranty Limited Five Year Warranty on Compressor
First Year
Amana will provide a free replacement part, f.o.b. Amana, Iowa, U.S.A., for any part which is defective due to workmanship or materials.
Second through Fifth Years
Amana will provide a free replacement part, f.o.b. Amana, Iowa, U.S.A., for any compressor which is defective due to workmanship or materials.
Warranty Limitations
- Begins at date of original purchase.
Service must be performed by an authorized Amanatechnician.
Warranty Is Void If
- Serial plate is defaced.
- Product is used on a commercial, rental or leased basis.
- Product has defect or damage due to product accident, alteration, connection to an improper electrical supply, fire, flood, lightning, shipping and handling, or other conditions beyond the control of Amana.
- Product is improperly installed or used.
Owner's Responsibilities
- Provide proof of purchase (sales receipt).
- Provide normal care and maintenance. Replace owner replaceable items where directions appear in Owner's Manual.
Make product reasonably accessible for service. - Pay premium service costs for service outside technician's normal business hours.
- Pay for service calls related to product installation or usage.
In no event shall Amana be liable for incidental or consequential damages including food loss*.
Any questions regarding the above or to locate an authorized servicer, contact appliance supplier or:
International Division
Amana
2800 220th Trail
PO Box 8901
Amana, IA 52204-0001
USA
Telephone 1-319-622-5511
Facsimilie 1-319-622-2180
International Division
Amana
2800 220th Trail
PO Box 8901
Amana, IA 52204-0001
USA
Telefon: 13196225511
Fax: 1 31 96 22 2180
Chiller Fresh Position
International Division
Amana
2800 220th Trail
PO Box 8901
Amana, IA 52204-0001
USA
Telefon: + 1-319-622-5511
Telefax: +1-319-622-2180
International Division
Amana
2800 220th Trail
PO Box 8901
Amana, Iowa 52204-0001
E.U.
Telephone: +1-319-622-5511
International Division
Amana
2800 220th Trail
PO Box 8901
Amana, IA 52204-0001
EE.UU.
DIT SYMBOL DUIDT VEILIGHEIDSVOORSCHRIFTEN AAN
International Division
Amana
2800 220th Trail
P.O.Box 8901
Amana, Iowa 52204-0001
U.S.A.
Tel: +1-319-622-5511
Fax: +1-319-622-2180
Termostater for Fresh Food eller fryser
Rengjørkondensatorsloyfen.
- Juster termostaten for Fresh Food- og/eller fryser.
Temperaturen i den regulerbare ferskvareskuffen er for hoy.
- Skyy regulatoren til en kaldere innstilling.
- Juster fryser-termostaten til en kaldere innstilling.
Temperaturen pa maten er for lav.
Rengjørkondensatorsloyfen
- Juster Fresh Food-termostaten.
- Det kan ta flere timer for temperature er justert.
International Division
Amana
2800 220th Trail
PO Box 8901
Amana, IA 52204-0001
USA
Telefon:1-319-622-5511
Telefaks:1-319-622-2180
International Division
Amana
2800 220th Trail
PO Box 8901
Amana, IA 52204-0001
USA
Telefono +1-319-622-5511
Facsimile +1-319-622-2180
Apaipson Tng Eulvng Bao

Hp0ooXn
ria va anopuyete tpauaiauoh uikn cnla'
npnei va unapxouv duo atoua yta nvy aepoeon
tng Eunnu ng baons
International Division
Amana
2800 220th Trail
PO Box 8901
Amana' IA 52204'0001
U'SA
TNa:319-622-5511
Φa5:319-622-2180
Manual de manutenção e uso do frigorífico de congelador superior internacional
Sumário
Requisitos de energia electrica 81
Identificacao do Modelo 81
Removendo as macanetas 82
Removendo as portas 82
Invertendo as portas 83
Removendo as maçanetas

CUIDADO
Invertendo as portas

Chiller Fresh Position
International Division
Amana
2800 220th Trail
PO Box 8901
Amana, IA 52204-0001
EUA
Telephone: (1-319) 622-5511
Fax: (1-319) 622-2180
International Division
Amana
2800 220th Trail
PO Box 8901
Amana, Iowa 52204-0001
USA
puh.: + 1-319-622-5511
faksi: + 1-319-622-2180
Installationskrav 99
Ta bort trabasen 99
Taborthandtagen99
Tabortdorrarna 99
Att vanda dorrarna 100
Maten forefaller for varm.
International Division
Amana
2800 220th Trail
PO Box 8901
Amana, IA 52204-0001
USA
Tel:+1-319-622-5511
Fax: +1-319-622-2180
International Top Freezer Refrigerator Kullanim ve Bakim Elkitabi
icindekiler
Elektrique jlgili Sartlar 106
Model Tanimjamasi 106
Montaj Bilgileri
GirS 107
Montajicin Gerekenier 107
BU GjVENLjK UYARI SJMGESjNE DjKKAT EDjN
Montaj igin Gerekenler
International Division
Amana
2800 220th Trail
PO Box 8901
Amana IA52204-0001
ABD
Telefon: 1-319-622-5511
Faks: 1-319-622-2180
15^ : v1a2 - 2ab2 - b1a_2 - 1
它恰好 x = 1 或 3x + 4y + 1 = 0
11
| x - 1| = | x + 3| - 3
| x - 2| = 1x · ( r1^2 + r2^2 + r_3^2)
…VAA
17
11
08LZ-229-6L-1
L99-229-618-Laouadai
VSN
1000-0022G A1 eueae
L068 xog Od
11040220082
eunw
O
iR 1500000000000000000000000000000000000000000
51.1140 51.1140 1140
15 15
1000 24.5 20.00016 18.00016 16.00016
11111111111111111111111
·1:1mnpn1n
11
11
1
15 > 7 : 10
180
F eueuw 15 1K
1
S APQ = S AOB + S_ QPQ
1 1
11
-
m
S木弟形 COBD = S COD + S BDO - S BOC
eueuvv 1nnn (qo) 0 nneueuvi 11
11
Gn 1111111111111111
eueuany 1n n (q) 0r eueuy 1
1
m
16 20
F
1
1
15.1 ① ( n + 1) ( n^2 + n) = 2^n + 2
1
1 1
111 111
1500 - 1 = 1700
1
2 1
1111111111111111
1
egy
111 111 111 111 111 111 111 111 111 111 111 111 1
1
in 1nir
111 111 111 111 111


11
S木弟形 COBD = S COD + S BDO = S BOC +
1
1 1
3. 1
A
15 12
175
x^2y^2 + 5y^2 = 1 y = - 32
11 11
1
7
1
180^ 同时, AD = AQ, PAQ = 60^ PQO 为等腰三角形
1
151
四四四 11
1
题明,第(1)问角
15 000000000000000000000000000
S_ OBC = 12 · OB · BC = 12 × 5 × 5
111
10^2 - 20^2 = 4
117 2
1
1 1
nnp nno 0000000000000000000000000000
11n 11n n n n n n n n n n n n n n n n n n n n n n n n n n n n n n n n n n n n n n n n n n n n n n n n n n n n n n n n n n nn
n 1000000000000000000000000000000000000000000000000000000000000000
115°
1g,cP 1s00sPgSg()
$$ \therefore \quad m n = n + 1, m ^ {2} = n + 2 $$
$$ 0 \cdot \quad \text {T} ^ {\prime} = (\frac {1}{2}) \text {N} ^ {2} = 1 = 1, \text {R} ^ {2} = 1, \text {T} ^ {2} = 1, $$
$$ \pi_ {1} = \pi_ {2} = \dots = \pi_ {n} = 0. $$
$$ \mathrm {i m} ^ {\prime \prime} \mathrm {i n} ^ {\prime \prime} \mathrm {m e n} ^ {\prime \prime}. $$
$$ 5 ^ {c} = 1 1 7 7 7 7 7 3. $$
$$ 1 1 \mathrm {r e s} (S) \mathrm {r e s} (R) \mathrm {s e c} \mathrm {m e m} \mathrm {p r o p} 2 \mathrm {i n c} $$
$$ \pi^ {2} \cos 1 1 \pi^ {2} \cos 1 1 \pi^ {2} $$
$$ \because 1 1 \sqrt {7} + 1 1 \sqrt {7} = 1 $$
$$ 1 9 3 \mathrm {m i n} = 2 0 0 0 0 0 0 0 0 0 0 0 0 0 0 0 0 0 0 0 0 0 0 0 0 0 0 0 0 0 0 0 0 0 $$
$$ \text {F} \text {F} \text {F} \text {F} \text {F} \text {F} \text {F} \text {F} \text {F} \text {F} \text {F} \text {F} \text {F} \text {F} \text {F} \text {F} \text {F} \text {F} \text {F} \text {F} \text {F} $$
$$ 1 1 ^ {r} - 1 $$
$$ \because \text {r e n e s t i d} _ {n} \text {R} (\text {s a m p l i n}) _ {u, n} $$
$$ 1 5 1 5 1 5 1 5 $$
$$ 1 5 5 6 5 2 $$
$$ \text {a n s s} \text {d w e} \perp_ {\text {n}} $$
$$ r ^ {c} = \frac {1}{2} r ^ {c} $$
$$ 1 8 \pi \cos \angle C = (\frac {1}{2} \cos \angle C) $$
$$ \pi r ^ {2} \div r ^ {5} $$
$$ \left| \dot {1} \dot {1} ^ {\prime} \right| ^ {1} \left| \dot {1} \dot {1} ^ {\prime} \right| ^ {2} \dot {1} ^ {\prime} \dot {1} ^ {\prime} \left| \dot {1} ^ {\prime} \right| ^ {3} \left| \dot {1} ^ {\prime} \right| ^ {4} $$
$$ 1 ^ {n} 1 1 7 7 7 7 7 7 7 7 7 7 7 7 7 7 7 7 7 7 7 7 7 7 7 7 7 7 7 7 7 7 7 7 7 7 7 7 7 7 7 7 7 7 7 7 7 7 7 $$
$$ \therefore \frac {1}{2} x - 1 > 3 - \frac {3}{2} x $$
$$ \therefore \quad 1 0 \pi \leq \sin 1 5 ^ {\circ} \leq 1 5 ^ {\circ} \leq 1 5 ^ {\circ} \leq \cos 1 5 ^ {\circ} \leq 1 5 ^ {\circ} $$
$$ \vert \vert \overrightarrow {m} \vert \vert \overrightarrow {n} \vert \vert \overrightarrow {p} \vert \vert \overrightarrow {q} \vert \vert \overrightarrow {r} \vert $$
$$ 1 1 \left(\frac {1}{2}\right) ^ {2} \cdot \left(\frac {1}{2}\right) ^ {3} \cdot \left(\frac {1}{2}\right) ^ {4} \cdot \left(\frac {1}{2}\right) ^ {5} \cdot \left(\frac {1}{2}\right) ^ {6} \cdot \left(\frac {1}{2}\right) ^ {7} \cdot \left(\frac {1}{2}\right) ^ {8} \cdot \left(\frac {1}{2}\right) ^ {9} \cdot \left(\frac {1}{2}\right) ^ {1 0} $$
$$ \cos \theta = \frac {1}{2} \cos \theta_ {1} \cos \theta_ {2} \dots \cos \theta_ {n} $$
$$ \because \mathrm {I} 1 \mathrm {I} 1 \mathrm {I} 1 \mathrm {I} 1 \mathrm {I} 1 \mathrm {I} 1 \mathrm {I} 1 \mathrm {I} 1 \mathrm {I} 1 \mathrm {I} 1 \mathrm {I} 1 \mathrm {I} 1 \mathrm {I} 1 \mathrm {I} 1 \mathrm {I} 1 \dots $$
$$ 1 \dot {1} \dot {1} \dot {1} ^ {c c c c} 0 _ {1} \dot {1} \dot {1} \dot {1} ^ {c c c c} $$
$$ 1 1 \sqrt {2} ^ {2} = 1 8 7 0 ^ {5} - 6 \times 1 2 9 + 1 1 \sqrt {2} \times 1 2 9 = 1 8 7 0 \times 1 2 9 $$
$$ 1 1 1 1 1 1 1 1 1 1 1 1 1 1 1 1 1 1 1 1 1 1 1 1 1 1 1 1 1 1 1 1 1 1 1 1 1 1 1 1 1 1 1 1 1 1 1 1 1 1 1 $$
$$ 1 1 0 0 0 0 0 0 0 0 0 0 $$
$$ \left(\frac {1}{2} - \frac {1}{2}\right) \frac {1}{2} = \frac {1}{2} $$
$$ 6 5 \div 3 = 1 7 5 $$
$$ \therefore \quad 1 0 5 5 5 5 5 5 5 5 5 5 5 5 5 5 5 5 5 5 5 5 5 5 5 5 5 5 5 5 5 5 5 5 5 5 5 5 5 5 5 5 5 5 5 5 5 5 5 $$
$$ 1 7 7 7 \div x = \square \dots $$
$$ \because \quad 1 1 ^ {\circ} = \frac {1}{2} \pi \frac {1}{2} \pi \frac {1}{2} \pi \frac {1}{2} \pi \frac {1}{2} \pi \frac {1}{2} \pi \frac {1}{2} \pi \frac {1}{2} $$
$$ \frac {1}{2} \frac {1}{2} \frac {1}{2} \frac {1}{2} $$
$$ \left[ \begin{array}{l l l l l l l l} \frac {1}{2} & \frac {1}{2} & \frac {1}{2} & \frac {1}{2} & \frac {1}{2} & \frac {1}{2} & \frac {1}{2} & \frac {1}{2} \ \frac {1}{2} & \frac {1}{2} & \frac {1}{2} & \frac {1}{2} & \frac {1}{2} & \frac {1}{2} & \frac {1}{2} & \frac {1}{2} \ \frac {1}{2} & \frac {1}{2} & \frac {1}{2} & \frac {1}{2} & \frac 3 0 0 0 0 0 0 0 0 0 0 0 0 0 0 0 0 0 0 0 0 0 0 0 0 0 0 0 0 0 0 0 0 0 0 0 0 0 0 0 0 0 0 0 0 0 0 0 0 0 0 8 \end{array} \right] $$
$$ \left. \right.\left. \right.\left. \right.\left. \right.\left. \right.\left.\left.\left.\left.\left.\left.\left.\left.\left.\left.\left.\left.\left.\left.\left.\left.\left.\left.\left.\left.\left.\left.\left.\left.\left.\left.\left.\left.\left.\right.\right.\right.\right.\right.\right.\right.\right.\right.\right.\right.\right.\right.\right.\right.\right.\right.\right.\right.\right.\right.\right.\right.\right.\right.\right.\right.\right.\right. $$
$$ 1 5 \frac {1}{2} + 1 5 \frac {1}{2} + 1 5 \frac {1}{2} + 1 5 \frac {1}{2} + 1 5 \frac {1}{2} + 1 5 \frac {1}{2} + 1 5 \frac {1}{2} + 1 5 \frac {1}{2} + 1 5 \frac {1}{2} + 1 5 $$

中
()
| V | 15.552.500.000.000.000.000.000.000.000.000.000.000.000.000.000.000.000.000.000.000.000.000.000.000.000.000.000. |
| A | 15.552.500.000.000.000.000.000.000.000.000.000.000.000.000.000.000.000.000.000.000.000.000.000.000 |
| L | 15.552.500.000.000.000.000.000.000.000.000.000.000.000.000.000.000.000.000.000.000.000.000.000.000. 15.552.500.000.000.000.000.000.000.000.000.000.000.000.000.000.000.000.000.000.000.000.000.000.000. |
| O | 15.552.500.000.000.000.000.000.000.000.000.000.000.000.000.000.000.000.000.000.000.000.000.000.000 15.552.500.000.000.000.000.000.000.000.000.000.000.000.000.000.000.000.000.000.000.000.000.000.000. 15.552.500.000.000.000.000.000.000.000.000.000.000.000.000.000.000.000. 15.552.500.000.000.000.000.000.000. 15.552.500.000.000.000.000.000.000.000. 15.552.500.000.000.000.000.000.000. 15.552.500.000.000.000.000. 15.552.500.000.000.000.000. 15.552.500.000.000.000. 15.552.500.000.000. 15.552.500.000.000. 15.552.500.000.000. 15.552.500.000. 15.552.500.000. 15.552.500.000. 15.552.500.000. 15.552.500.000. 15.552.500.000. 15.552.500. 15.552.500. 15.552.500. 15.552.500. 15.552.500. 15.552.500. 15.552.500. 15.552.500. 15.552.500. |
1111 1111 1111
11 1111 1111 1111
6 6 6 6 6 6 6 6 6 6 6 6 6 6 6 6 6 6 6 6 6 6 6 6 6 6 6 6 6 6 6 6 6 6 6 6 6 6 6 6 6 6 6 6 6 6 6 6 6 6 6

111
1560
1545 1545 1545 1545 1545 1545 1545 1545 1545 1545 1545 1545 1545 1545 1545 1545 1545 1545 1545 1545 1545

11
1
1
1
1
1
6
V
A
2
0
3
4
5

#

- International Top Freezer Refrigerator Use and Care Manual
- Contents
- Electrical Requirements
- Model Identification
- Introduction
- Installation Requirements
- Removing Wooden Base
- CAUTION
- Important
- Removing Handles
- Removing Doors
- Reversing Doors
- Important:
- Leveling Refrigerator
- Fresh Food Section (Refrigerator)
- Freezer Section
- Fresh Food Shelves
- Deli System
- Garden Fresh Crispers
- Dairy Center
- Door Buckets
- Door Shelves
- Freezer Shelves
- Fresh Food or Freezer Controls
- Exterior Moisture Control
- Care and Cleaning
- WARNING
- General
- Glass Shelves
- Light Bulbs
- Door Gaskets
- Condenser Coil
- Vacation Tips
- Normal Operating Sounds
- Before Calling For Service
- Refrigerator does not operate.
- Limited One Year Warranty Limited Five Year Warranty on Compressor
- First Year
- Second through Fifth Years
- Warranty Limitations
- Warranty Is Void If
- Owner's Responsibilities
- In no event shall Amana be liable for incidental or consequential damages including food loss*.
- DIT SYMBOL DUIDT VEILIGHEIDSVOORSCHRIFTEN AAN
- Termostater for Fresh Food eller fryser
- Apaipson Tng Eulvng Bao
- Hp0ooXn
- Manual de manutenção e uso do frigorífico de congelador superior internacional
- Sumário
- Removendo as maçanetas
- CUIDADO
- Invertendo as portas
- icindekiler
- Montaj igin Gerekenler
- 11
- > 7 : 10
- F eueuw 15 1K
- m
- 1
- - 202 = 4
- 111
- #
Brand : AMANA
Model : TX 518 V
Category : Fridge