MX4135 - Food Processor TRISTAR - Free user manual and instructions
Find the device manual for free MX4135 TRISTAR in PDF.
User questions about MX4135 TRISTAR
0 question about this device. Answer the ones you know or ask your own.
Ask a new question about this device
Download the instructions for your Food Processor in PDF format for free! Find your manual MX4135 - TRISTAR and take your electronic device back in hand. On this page are published all the documents necessary for the use of your device. MX4135 by TRISTAR.
USER MANUAL MX4135 TRISTAR
natural_image
Modern kitchen appliance setup with a hand mixer, orange juice, and fruit basket (no visible text or symbols)MX - 4135
natural_image
Line drawings of kitchen utensils including a spatula, blender, condenser, and oven (no text or labels)Model: MX-4135
natural_image
Line drawing of a laboratory apparatus with a funnel and base (no text or symbols)text_image
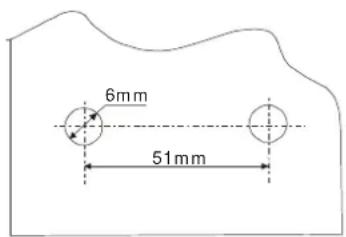
Fig.4 6mm 51mmFig. 5
*****
Modèle: MX-4135
natural_image
Line drawing of a mechanical device with a handle and base (no text or symbols)Abb. 4
text_image
6mm 51mmAbb. 5
*****
IMPORTANT SAFEGUARDS
Before using the electrical appliance, the following basic precautions should always be followed including the following:
Read all instructions.
Before using check that the voltage of wall outlet corresponds to the one shown on the rating plate.
Do not operate any appliance with a damaged cord or plug or after the appliance malfunctions, or is dropped or damaged in any manner. Check the cord and plug regularly for possible damages. Return appliance to the nearest authorized service facility for examination, repair or electrical or mechanical adjustment.
If the supply cord is damaged it must be replaced by the manufacturer or a authorized service agent or a qualified technician in order to avoid a hazard.
Unplug from outlet when not in use, before putting on or taking off parts, and before cleaning.
Do not let cord hang over edge of table or hot surface.
Do not immerse upper part of blender into water as this would give rise to electric shock.
Close supervision is necessary when your appliance is being used near children or infirm persons.
Avoid contacting moving parts.
Keep hands and utensils out of container while blending to reduce the risk of severe injury to persons or damage to the blender. A scraper may be used but must be used only when the blender is not running.
The appliance cannot be used for chopping ice or blending hard and dry substance, otherwise the blade could be blunted.
To reduce the risk of injury, never place cutting blade on base without first putting bowl properly in place.
Be sure chopper lid is securely locked in place before operating appliance.
The use of accessory not recommended by the manufacturer may cause injuries to persons.
Do not operate the appliance for other than its intended use.
Do not use outdoors.
Save these instructions.
HOUSEHOLD USE ONLY
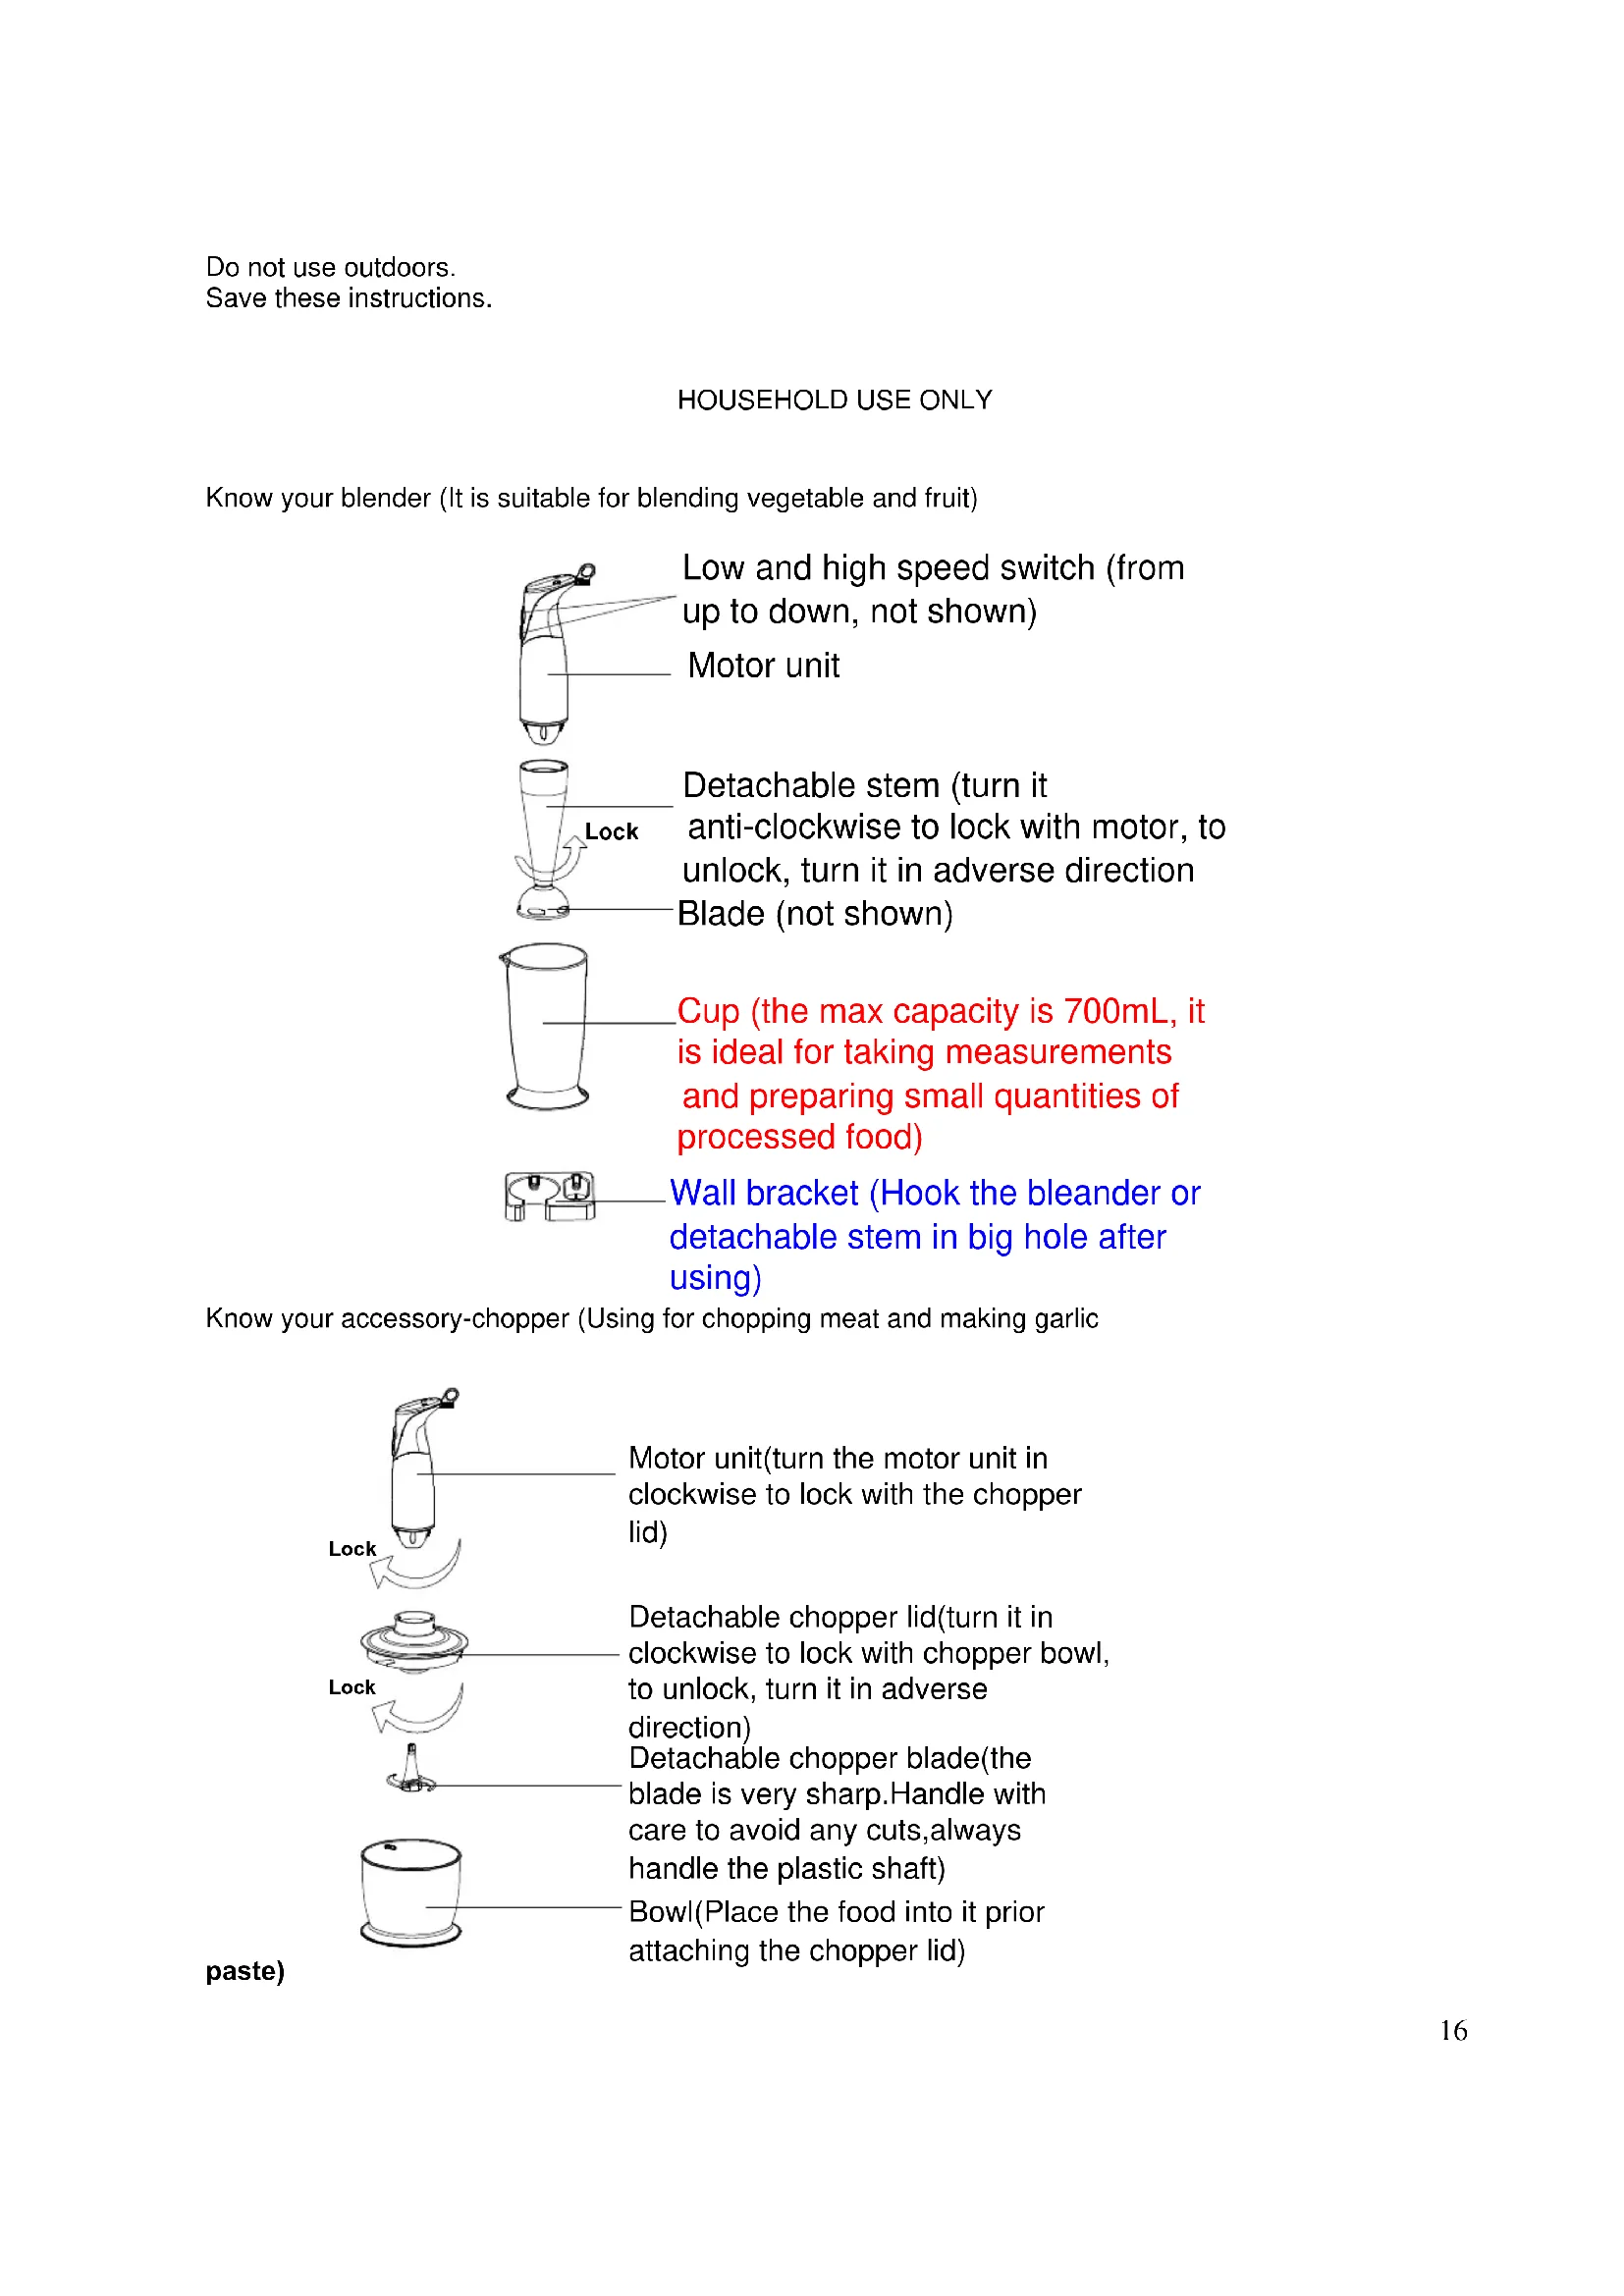
Know your blender (It is suitable for blending vegetable and fruit)
Low and high speed switch (from up to down, not shown)
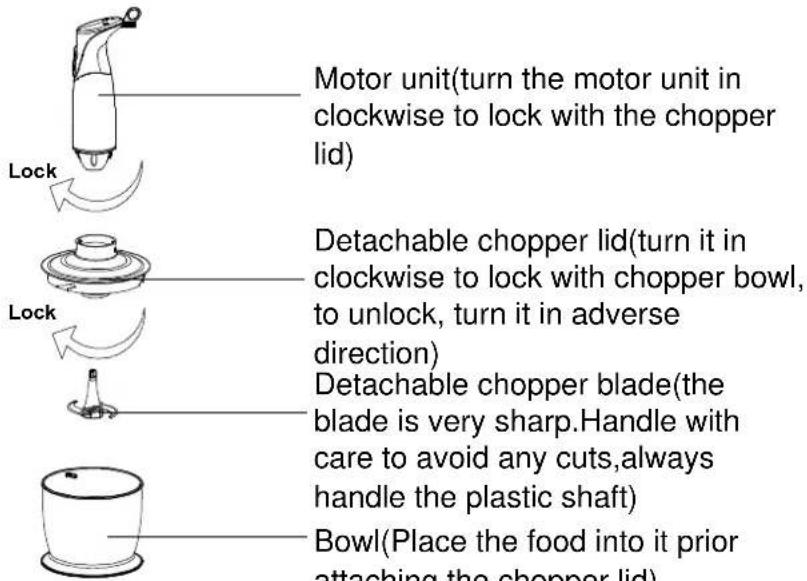
Motor unit
Detachable stem (turn it anti-clockwise to lock with motor, to unlock, turn it in adverse direction Blade (not shown)
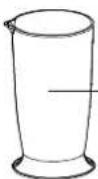
Cup (the max capacity is 700mL, it is ideal for taking measurements and preparing small quantities of processed food)
Wall bracket (Hook the bleander or detachable stem in big hole after using)
Know your accessory-chopper (Using for chopping meat and making garlic
text_image
Motor unit(turn the motor unit in clockwise to lock with the chopper lid) Detachable chopper lid(turn it in clockwise to lock with chopper bowl, to unlock, turn it in adverse direction) Detachable chopper blade(the blade is very sharp.Handle with care to avoid any cuts,always handle the plastic shaft) Bowl(Place the food into it prior attaching the chopper lid)paste)
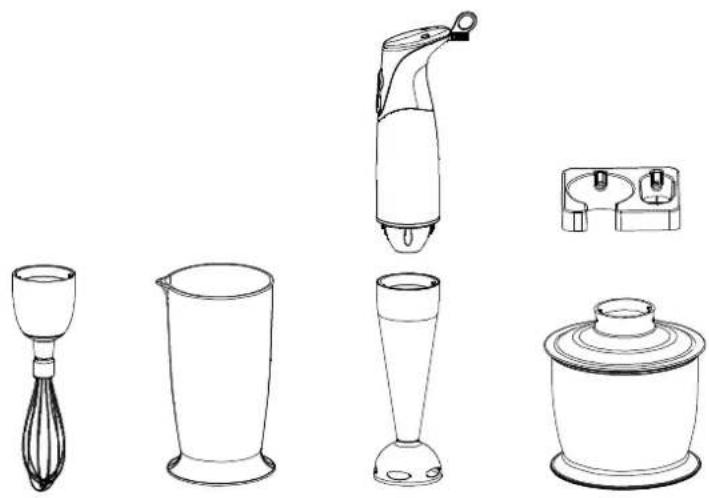
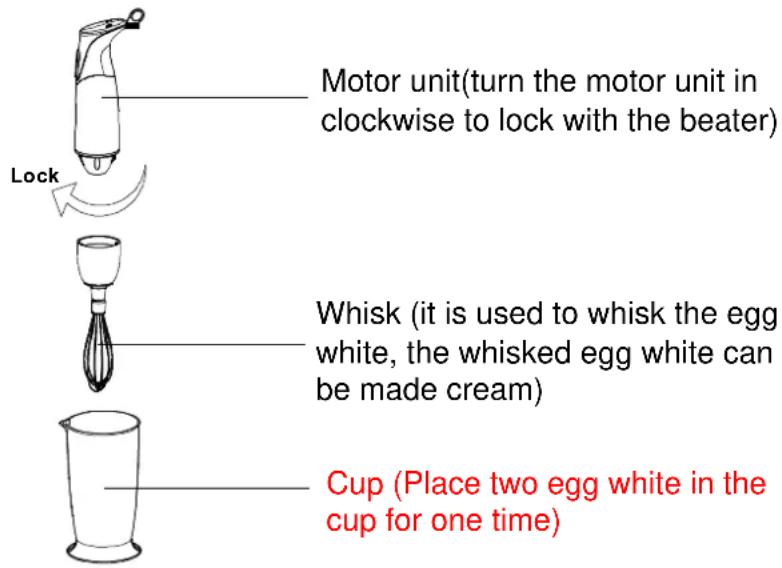
Know your accessory-beater (for mixing egg white)
flowchart
graph TD
    A["Motor unit (turn the motor unit in clockwise to lock with the beater)"] --> B["Lock"]
    B --> C["Whisk (it is used to whisk the egg white, the whisked egg white can be made cream)"]
    C --> D["Cup (Place two egg white in the cup for one time)"]
Using your blender
Before the first use, clean the blender according to the section of "quick cleaning".
The time running unit without load can't exceed 15s. Max operation duration under high speed per time cannot exceed 1 minute, and 1 minute rest time must be maintained at two consecutive cycles.
Important: Blades are very sharp, handle with care. Ensure that the hand-held blender is unplugged from the power outlet before assembling or removing attachments.
Instruction for blender
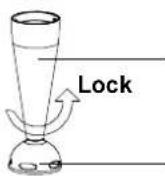
To assemble the detachable shaft with the motor unit, turn the shaft anti-clockwise direction until tightened. To disassemble, just turn in the adverse direction.
- Simply plug the hand-held blender to power outlet.
o Lower the hand-held blender into food and depress the switch at the top of the motor unit.
- To stop the hand-held blender by releasing the switch at the top of the motor unit.
Instruction for chopper
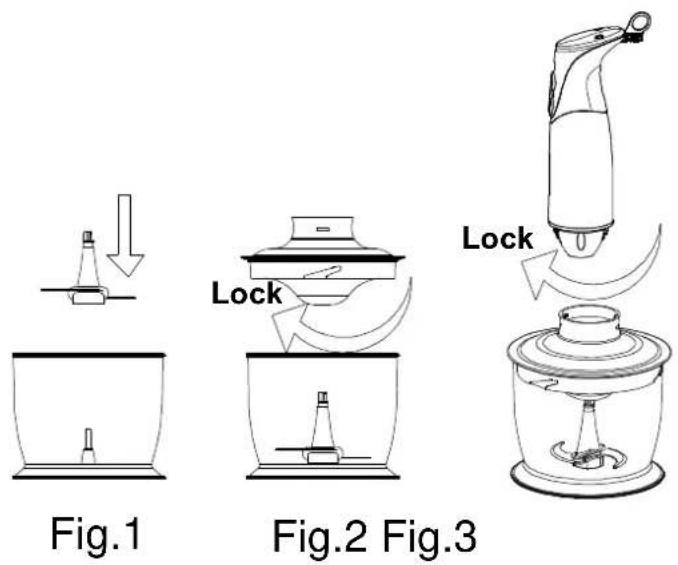
- Place the chopper bowl on a clean, level surface.
- Assemble the stainless steel blade into the chopper bowl, as shown in Fig.1.
- Place food into the chopper bowl.
- Note: remove the bone of the meat, cut small piece, then place the meat into bowl, the max quantity of meat can 't exceed 200g in every blending.
- Attach the Lid onto the chopper bowl and turn it in clockwise direction until it locks into position. (see Fig.2) To detach the lid, turn in adverse direction.
- Insert the top part of the chopper into the hole of the chopper lid, and turn in clockwise direction to lock. (See Fig.3)
- Plug the appliance to power outlet and depress the switch to begin operation.
- To stop the appliance release the switch at the top of the motor unit.
Caution:
-To reduce the risk of injury, never place cutting blade on base without first putting bowl properly in place.
-Be sure chopper lid is securely locked in place before operating appliance.
Instruction for egg white beater
To assemble the egg white beater with the motor unit, turn the whisk anti-clockwise direction until tightened. To disassemble, just turn in the adverse direction.
- Simply plug the hand-held blender to power outlet.
◆ Place egg white into the cup, generally, put two egg white is enough.
♦ Lower the hand-held blender into food and depress the switch at the top of the motor unit.
◆ To stop the hand-held blender release the switch at the top of the motor unit.
CLEANING AND MAINTENANCE
- Unplug the appliance and remove the detachable stem.
- Note: Do not immerse the detachable stem of the blender in water because overtime the lubrication on the bearings may wash away. . Wash the detachable stem under running water, without the use of abrasive cleaner or detergents. After finishing cleaning the detachable stem, place it upright so that any water which may have got in, can drain out. The stem is dishwashing safe component.
- Wash the cup, chopping bowl, beater and blade in warm soapy water. The bowl and the beater are not recommend to place in dishwashing machine as the plastic component deteriorate through prolonged use of dishwasher cleaning.
- Wipe the motor unit with a damp cloth. Never immerse it in water for cleaning as electric shock may occur.
- Dry thoroughly.
- Caution: Blades are very sharp, handle with care.
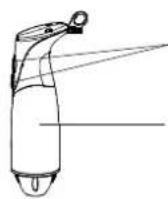
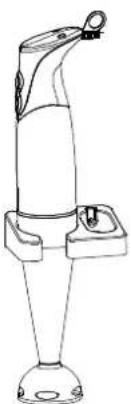
- Reassemble the blender stem to motor unit then place it upright in wall bracket (see Fig.4) or hang it up for saving space.
Quick cleaning
Between processing tasks, hold the hand-held blender in the cup half filled with water and turn on for a few seconds.
Fixing wall bracket
You can fix the wall bracket as following:
natural_image
Line drawing of a laboratory apparatus with a funnel and base (no text or symbols)Fig.4
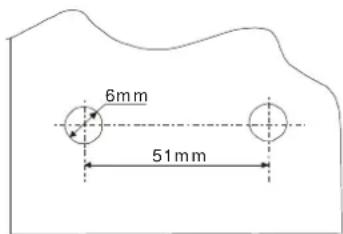
1) Drill two same holes in wall and strictly follow the dimension as indicated in the fig.5.
2) Knock two plastic tubes in them with hammer.
3) Secure the bracket on wall with another two screws.
*****
text_image
6mm 51mmFig. 5
Modello: MX-4135
natural_image
Line drawing of a handheld device with a handle and base (no text or symbols)Fig.4
natural_image
Simple line drawing of a mechanical device with a curved arrow indicating motion (no text or symbols)natural_image
Diagram showing a rotating mechanical component with an arrow indicating rotational motion (no text or symbols)natural_image
Simple line drawing of a cylindrical container with a lid and a horizontal line extending from its side (no text or symbols)natural_image
Line drawing of a mechanical device with a handle and base (no text or symbols)Fig.4
natural_image
Simple line drawing of a cylindrical container with a lid and a horizontal line extending from its side (no text or symbols)natural_image
Line drawing of a mechanical device with a handle and base (no text or symbols)Fig.4
text_image
Fig.1 Blob Lock Fig.2 Fig.3natural_image
Line drawing of a mechanical device with a handle and base (no text or symbols)Fig.4
natural_image
Simple line drawing of a lamp and a container with a downward arrow (no text or symbols)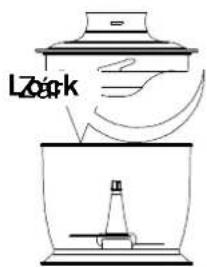
text_image
LZark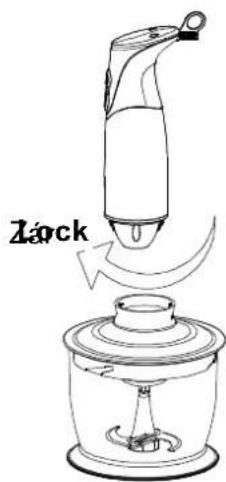
text_image
Zlock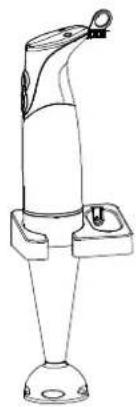
natural_image
Line drawing of a mechanical device with a handle and base (no text or symbols)Fig.4
Fig.1 1. ábra g.2 Fig.ábra 3. ábra
Guidelines for protection of the environment

This appliance should not be put into the domestic garbage at the end of its useful life, but must be disposed of at a central point for recycling of electric and electronic domestic appliances. This symbol on appliance, instruction manual and packaging puts your attention to this important issue. The materials used in this appliance can be recycled. By recycling used domestic appliances you contribute an important push to the protection of our environment. Ask your local authorities for information regarding the point of recollection..