Opal - Coffee machine Schaerer - Free user manual and instructions
Find the device manual for free Opal Schaerer in PDF.


User questions about Opal Schaerer
0 question about this device. Answer the ones you know or ask your own.
Ask a new question about this device
Download the instructions for your Coffee machine in PDF format for free! Find your manual Opal - Schaerer and take your electronic device back in hand. On this page are published all the documents necessary for the use of your device. Opal by Schaerer.
USER MANUAL Opal Schaerer
User instruction (UK)
| 1 | - |
| 25 | -4 |
| 49 | -7 |
Lieber Kunde
Copyright by M. Schaerer AG, CH-3302 Moosseedorf
Chere cliente, cher client,
Copyright by M. Schaerer AG, CH-3302 Moosseedorf
Children rarely understand the potential hazards associated with electrical appliances. For that reason, you should never leave children unsupervised where electrical equipment is present.
With your new coffee maker, you have acquired a fully automatic espresso maker fabricated to Swiss quality standards and supplied directly from a specialist manufacturer.
You can choose between two versions: the model with water tank and the model for connection to the water supply.
Before putting the appliance into operation you must read and understand these instructions. You should keep these instructions in a safe place so that they are quickly at hand should you need further information. We wish you much enjoyment using your new coffee maker.
Published by: M. Schaerer AG
CH-3302 Moosseedorf
Version: Version 04 / August 2002
Designed and edited by: M. Schaerer AG, CH-3302 Moosseedorf
Copyright by M. Schaerer AG, CH-3302 Moosseedorf
All rights reserved, including translation into other languages. This manual may not be copied, photocopied or distributed, in whole or in part, by any means, nor transmitted electronically, without the publisher's written consent.
All the information, technical data and illustrations in this instruction manual are based on the latest data available at the time of going to press. M. Schaerer AG reserves the right to undertake modifications at any time without further notice.
Inhaltsverzeichnis:
Legend. 51
User instructions 52+53
Explanation of LED signal lamps 53
1.0 Important safety information 54
2.0 General information 55
3.0 Putting your appliance into operation and using it for the first time 56
4.0 Making coffee with coffee beans 57
5.0 Making coffee with ground coffee (e.g.decaffeinated coffee) 58
6.0 Obtaining hot water 58
7.0 Obtaining steam 59
8.0 Programming 60
9.0 Special programming functions 62
10.0Grinderratings 64
11.0 Preheating cups 64
12.0 Care and cleaning 64
13.0 Descaling programme (cycle indicated by flashing signal lamp
14.0 Possible malfunctions, their causes and remedies 69
15.0 Servicing and maintenance work 70
16.0 Service Request (A Lamplights up) 70
17.0 Useful tips about coffee 70
18.0 Connection to water supply 71
19.0 Technical data 71
20.0 CE Declaration of Conformity 71
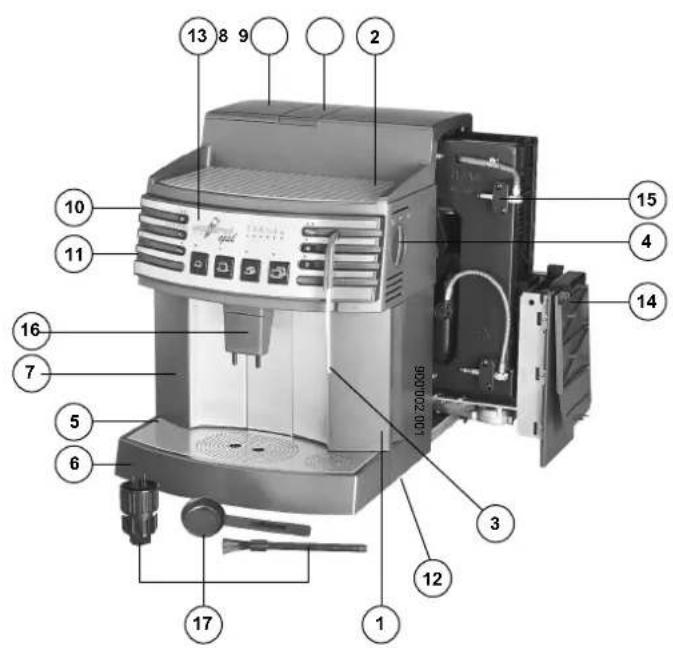
Legend
1 Detachable water tank (only for model with water tank)
2 Cup shelf
3 Swivelling steam and hot water nozzle
4 Hot water / steam dial
5 Cup tray
6 Removable drip tray with overflow indicator
7 Removable coffee grounds container
8 Storage container for coffee beans, with lid
9 Funnel with lid, for ground coffee
10 Grinding fineness setting & Grinding fineness indicator
11 Mains power switch 0-1
12 Integral turntable
13 Control panel
14 Two-section service hatch
15 Brewing unit with drawer for coffee grounds
16 Detachable adjustable coffee spout
17 Accessories: measuring spoon, special multifunction tool and cleaning brush
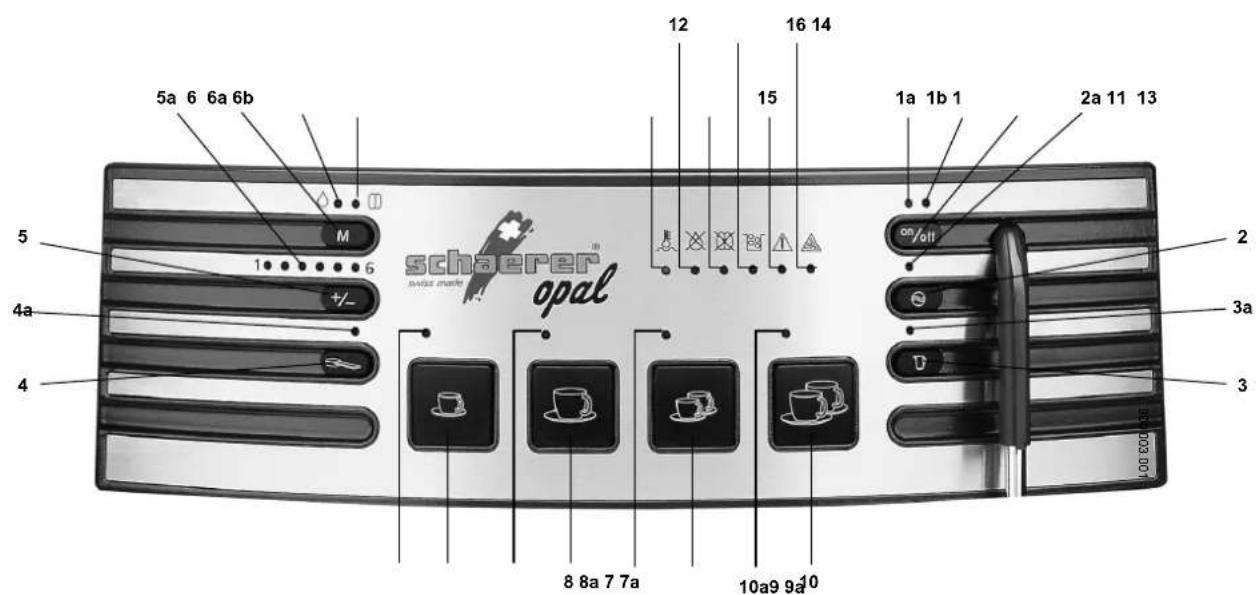
Control panel
Control panel
1 On/Off button
1a Ready mode indicator (green)
1b Stand-by mode indicator
2 Cleaning/rinse & descending button
2a Cleaning/rinse & descaling indicator
3 Coffee pot selection button
3a Coffee pot selected indicator
4 Ground coffee select button
4a Ground coffee select indicator
5 +- button for setting quantities
5a 1-6 programmed setting indicator
6 Programming button
6a Water quantity programming selected indicator
6b Coffee quantity programming selected indicator
7 Single cup espresso selection button
7a Single cup espresso selected indicator
8 Single cup regular coffee selection button
8a Single cup regular coffee selected indicator
9 Two cups espresso selection button
9a Two cups espresso selected indicator
10 Two cups regular coffee selection button
10a Two cups regular coffee selected indicator
11 Temperature indicator (green)
12 Water low indicator (red)
13 Coffee beans low indicator (red)
14 Grounds container full indicator (red)
15 Brewer malfunction indicator (red)
16 Descaling indicator (red)
Explanation of LED signal lamps
1-6 This indicates the values you have set on a scale of 1 to 6 for the required coffee quantity, temperature, standby and status 5a
This signal lamp remains lit when you are programming the water quantity 6a
This signal lamp remains lit when you are programming the coffee quantity 6b
This lamp indicates that the correct operating temperature has been reached 11
This lamp flashes when the level in the water tank falls too low or if the tank has been removed 12
This lamp remains lit when the pump stops drawing water. If this happens, you need to remove the air from the system e 12. See section 14.0 Possible malfunctions no. 4 for guidance on how to do this.
This lamp remains lit when the coffee beans container is empty. It goes out automatically as soon as the container is refilled and coffee is selected 13
This lamp flashes if you take the lid off the coffee beans container or do not replace it correctly 13
+ 1 This lamp also remains lit if the grinding unit is jammed 13 + 5a . For guidance on clearing the blockage, see section 12.3.
This lamp remains lit when the coffee grounds container is full and extinguishes automatically when the container is emptied and replaced 14
This lamp flashes when the coffee grounds container is not in position
This lamp flashes if the brewing unit is inserted incorrectly or the service hatch is not closed correctly 15
This lamp remains lit whenever a serious fault arises. If this happens, request assistance from an authorised specialist 15 + 5a
This lamp flashes to indicate that you need to run the regular cleaning cycle (after every 250 cups of coffee) 2a
This lamp remains lit during the cleaning and rinse cycles 2a
This icon indicates the need for descending. It goes out as soon as the descending programme is finished 16
Standby mode indicator - this lights up red when the appliance is switched from Ready to Standby mode by means of the mode selector switch. The appliance requires very little power in Standby mode 1a
Lights up whenever a fault arises. If this happens, request assistance from an authorised specialist 12 + 15 . See section 14.0 Possible.
1.0 Important safety information
Children rarely understand the potential hazards associated with electrical appliances. For that reason, you should never leave children unsupervised where electrical equipment is present.
Do not attempt to operate this electrical appliance until you have been shown how to use it safely or have studied the accompanying instructions for use.
Never use an electrical appliance with a damaged power supply cable. If you need to use an extension cable, this must also be in a proper condition for use and must be attached in such a way as to prevent anyone from accidentally tripping over it. Keep children and pets away.
In the event of damage or failure, this appliance should only be opened and repaired by an authorised service engineer. This requirement also applies if the power supply cable is faulty.
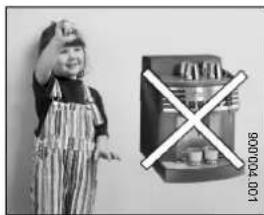

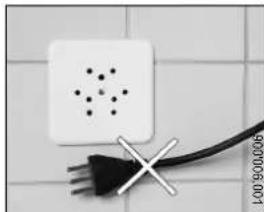
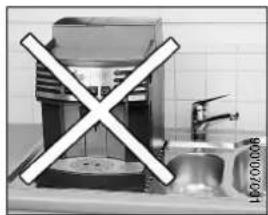
Do not immerse this appliance in water or operate it when your hands are wet.
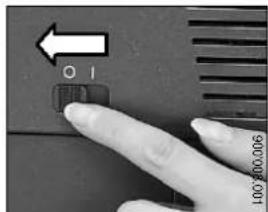
Do not leave this appliance switched on unattended. On safety and energy-saving grounds, we recommend you switch off the appliance at the mains power switch overnight or when you go away. If you only plan to be absent for a short period, you can switch the coffee maker to Standby mode by pressing the mode selector switch.
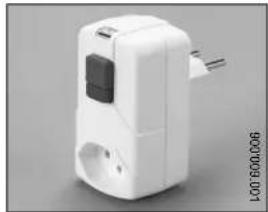
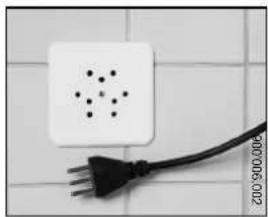
Only plug this appliance into an earthed socket. For your safety, we recommend you use a main circuit fuse (obtainable from specialist electrical shops).
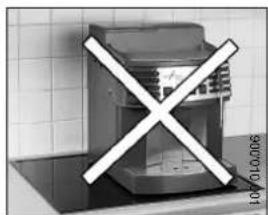
Place the coffee maker on a stable, level surface. Avoid hot or warm surfaces. Choose a position beyond the reach of children and pets.
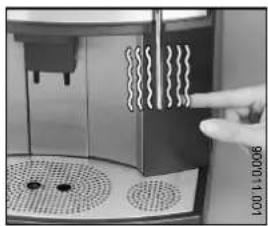
The steam and the steam / hot water nozzle are very hot while steam is turned on. Do not touch the steam / hot water nozzle during or shortly after use. Risk of scalding!
Always disconnect the mains power by removing the plug before cleaning the appliance by hand. Never let the power cable come into contact with hot parts of the appliance.
Never expose this appliance to adverse outdoor weather conditions such as rain, snow, frost, etc.
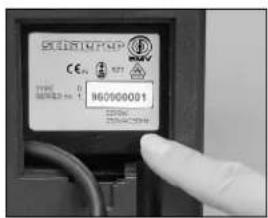
When you first unpack the coffee maker, please check that the mains voltage is the same as the appliance voltage stated on the manufacturer's type plate.

2.0 General information
Do not operate the appliance with no water in it.
This appliance has been designed for making coffee and generating hot water and steam. It should not be used for any other purpose.
Failure to comply can invalidate your warranty cover!
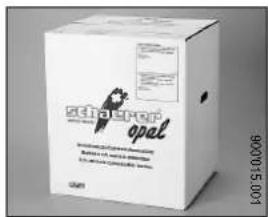
We use especially robust packaging to allow us to send out our appliances through the post. It is therefore important to keep the original packaging in case you need to return the appliance to us.
Your coffee maker needs to be protected against frost. You should therefore not leave the appliance in your car overnight in winter, since exposure to temperatures below freezing can cause damage.

3.0 Putting your appliance into operation and using it for the first time
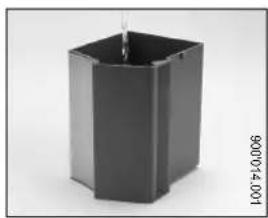
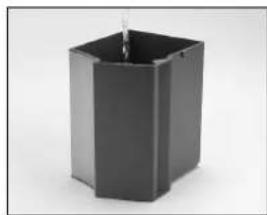
3.1 Fill the water tank with cold water, taking care not to fill it above 1cm below the rim (2.4 litres max.), position the tank in the front of the appliance and press firmly to ensure the valve on the back of the tank opens (only for model with water tank).
Warning: Only fill the coffee maker with cold fresh water. Never use mineral water, milk or other liquids.
3.2 Pull out the required length of power cable at the back (any surplus can be stuffed into the cable store at the back of the coffee maker), and connect the appliance to an earthed socket. Remount the cover of the cable store.
3.3 Check that the hot water / steam dial is set to the Steam position This ensures that the automatic de-aerate function of the appliance can remove any air from the system.
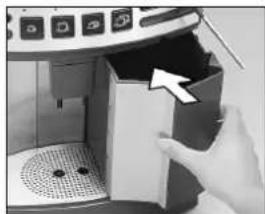
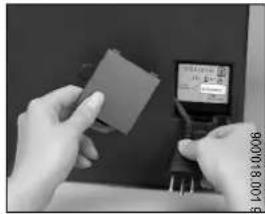
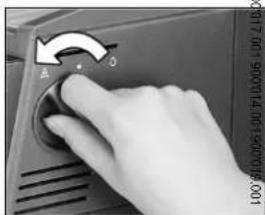
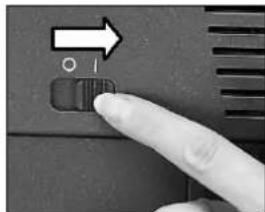
3.4 Switch the appliance on at the 0-1 mains power switch. The appliance is now connected to power but still in Standby mode.
3.5 Now press the mode selector switch.
The [READY MODE] indicator (1a) lights up. At the same time, the water pump starts up and fills the system with water, automatically forcing out all the air.
3.6 As soon as this de-aeration process is completed (the water pump cuts out), close the hot water / steam dial again. The appliance now heats up.
Note: This automatic de-aerate will only function when the hot water / steam dial is set to the Steam position. If this is not the case, it is essential to turn the dial to this position now.
3.7 Pour coffee beans into the beans container (up to a maximum of 320 g). Close the lid of the beans container firmly.
Note: If the lamp flashes, this means the lid is not properly closed. An interlock will prevent the appliance from supplying coffee.
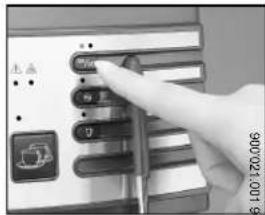
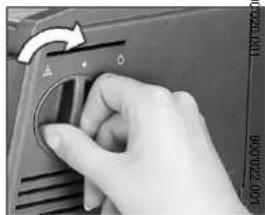
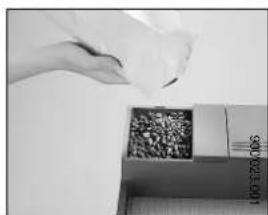
3.8 Operational readiness. The coffee maker is not ready to operate until the temperature indicator is lit up green.
Note: When the appliance is switched on, it automatically runs a rinse cycle to flush out the brewing unit. The coffee maker cannot dispense coffee while the rinse cycle is running (indicated by the red lamp (2a)). Whenever the appliance is switched off, an automatic rinse cycle is performed. The indicator (1b) flashes green. The appliance is then automatically switched to Standby mode. The indicator (10) flashes red.
3.9 Now press selection button (8) and the appliance will dispense its first coffee. The first coffee supplied when the coffee maker is initially put into service should not be drunk as it only serves to fill the coffee grinder feed channel with coffee.
Warning:
Model with water tank: Never operate the coffee maker when the water tank is empty. It is advisable on hygienic grounds to use the hot water / steam nozzle to rinse out the system before using it when it has not been used for a lengthy period (such as over the holidays).
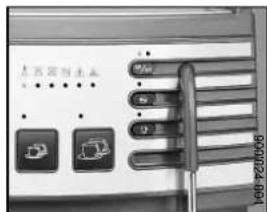
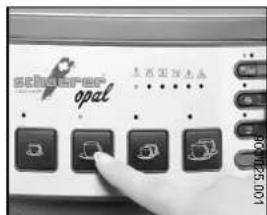
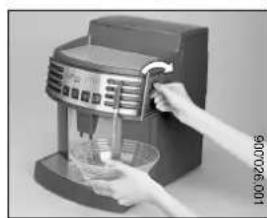
To flush out the system, place a large basin or similar container beneath the hot water outlet and turn the dial to hot water. Run off about 2 dl of water and close the valve again.
You should also perform this routine if the water tank has been incorrectly replaced (only for model with water tank), causing the indicator to light up.
4.0 Making coffee with coffee beans
These instructions assume the coffee maker is in the Ready state, the tank is filled with water (only model with water tank), the coffee beans container with coffee beans, and the [TEMPERATURE] indicator is lit up green. The version with water connection automatically fills the boiler with water.
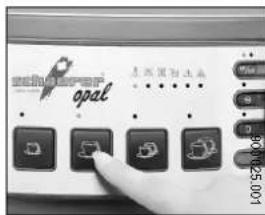
4.1 Place either 1 or 2 cups on the cup tray under the coffee dispensing spout and press the relevant selection button. The appliance comes equipped with an automatic prebrewing function. This first moistens the ground coffee and suspends output temporarily while the brewing process proper takes place.
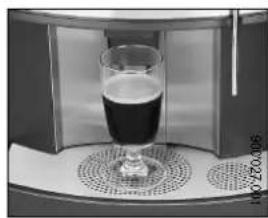
Note: You can interrupt coffee dispensing at any time by briefly pressing the relevant selection button. You can use very large-format cups or even coffee glasses with the appliance. Simply push the coffee spout backwards to make more space. (But do not forget to return the spout to its normal position after use.)
5.0 Making coffee with ground coffee (e.g.decaffeinated coffee)
Remove the lid of the ground coffee filling funnel and spoon in a maximum of 1 or 2 level measuring spoons of ground coffee to make 1 or 2 cups. (Only use the measuring spoon supplied with your coffee maker.)
5.1 Now press the ground coffee button (4). The red indicator (4a) will light up.
5.2 After placing either 1 or 2 cups under the coffee spout as required, now also press the relevant selection button. Your coffee will now be automatically dispensed.
Note: If about 2 minutes pass after the ground coffee button is pressed and no further selection is made, the red signal lamp for ground coffee will go out. If this happens and you still want your coffee, repress the ground coffee button, followed by the relevant selection button.
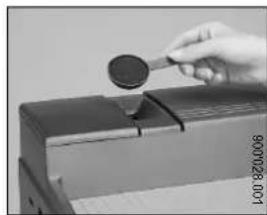
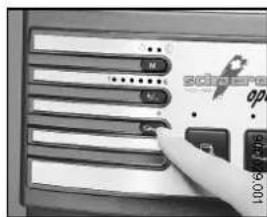
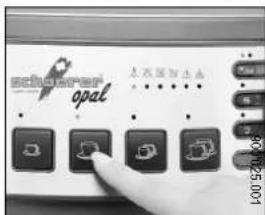
Important: Do not use water-soluble freeze-dried ground coffee. Never spoon more than maximum 1 or 2 level measuring spoonfuls of ground coffee into the filling funnel. The filling funnel is not designed to hold a permanent supply. The coffee you put into the coffee maker must be used immediately.
6.0 Obtaining hot water
Your coffee maker can supply hot water for tea, clear soup, etc. These instructions assume that the appliance is in the Ready state as described in section 3.0, i.e. the tank is filled with water (only for model with water tank) and the temperature indicator is lit up green.
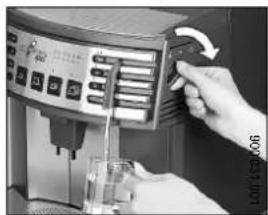
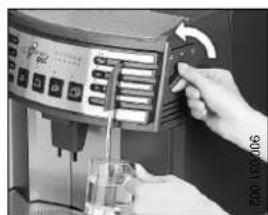
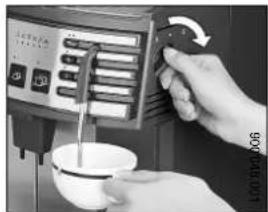
6.1 Place a glass or cup directly beneath the hot water / steam nozzle and turn the dial to the right to the hot water symbol. The appliance will then automatically supply hot water from the nozzle.
6.2 When you have taken sufficient hot water, turn the dial back to its closed position.
Note: Please do not turn the dial beyond its central position as you will otherwise activate steam output..

7.0 Obtaining steam
Your coffee maker can also supply steam for heating milk, cappuccino or other liquids. These instructions assume that the appliance is in the Ready state as described in section 3.0, i.e. the tank is filled with water (only for model with water tank) and the temperature monitor is lit up green.
Note: This appliance can supply you with steam at the same time as dispensing coffee. This is possible thanks to an integrated separate heating system for steam*.
*) Only for 230 V models. Other voltage variants might be different with regard to technical functions.
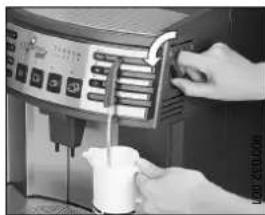
7.1 Turn the dial slowly to the left (towards you) to the steam symbol Some condensation will be released and you should wait a moment to allow this to drain away into the drip tray. Then swing the steam nozzle forward and immerse it in the liquid you wish to heat. Gradually turn the dial further and heat the liquid thoroughly by rotating the jug with the liquid up and down.
7.2 When you have drawn off sufficient steam, gradually close the dial again and finally return the steam nozzle to its rest position over the drip tray.
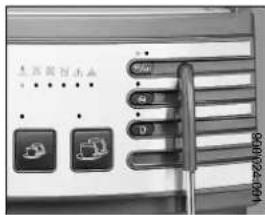
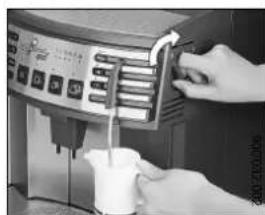
Note: We recommend cleaning any residue from the steam nozzle immediately after using it, by quickly drawing off about 1/2 dl from hot water. This eliminates any risk of the steam nozzle getting blocked.
Important: The steam nozzle gets extremely hot whenever steam or hot water is drawn off. You should therefore avoid direct contact with your skin. Otherwise there is a risk of scalding.
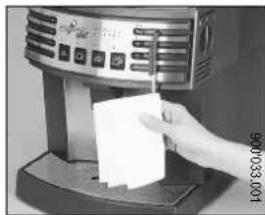
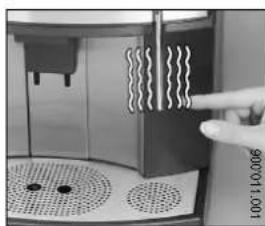
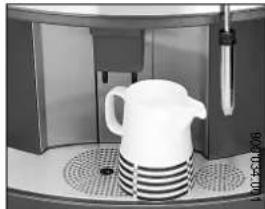
7.3 Special cappuccino steam nozzle option
Enjoy the benefits of this specially designed steam nozzle extension. You simply slide it over the steam pipe from below. The procedure for obtaining steam is then exactly the same as in section 7.1. This special purpose nozzle will heat your drink in next to no time and is ideal for making cappuccino coffee. Immediately after use, pull the steam nozzle off the steam pipe and clean it using hot water.
8.0 Programming
We preset your coffee maker before it leaves our factory to give ideal results. However, you have the opportunity to configure your coffee maker to suit your individual requirements and preferences.
8.2 To predefine coffee quantities
and assign them to the selection buttons 3, 7, 8, 9 and 10, follow the procedure described here. The strength of the coffee supplied by the machine is determined by the grinding quantity, which is itself determined by grinding time. You can define any coffee quantity for every selection button.
8.1 To predefine water quantities
and assign them to the selection buttons 3,7,8,9 and 10, follow these steps:
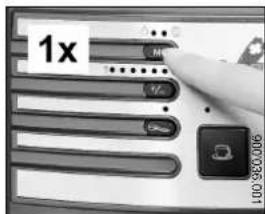
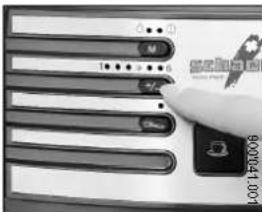
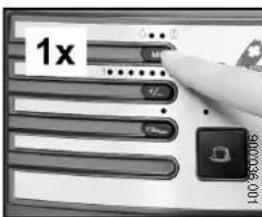
a) Press the Programming button M once. The signal lamp 6a will light up.
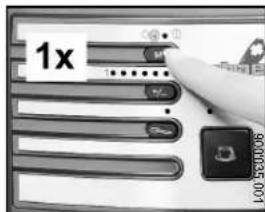
b) Place either 1 or 2 cups under the coffee delivery spout and press the required selection button (3, 7, 8, 9 or 10).
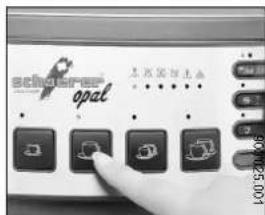
c) When the quantity you require has flowed into the cup, press the Programming button again. The water quantity you have defined is saved and will be output each time you select the product button until you change the programming.
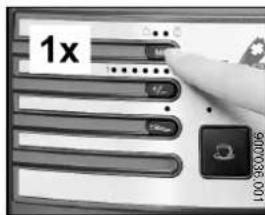
Follow these steps:
a) Press the Programming button M twice. This will illuminate the signal lamp 6b.
b) Press the required selection button (3,7,8,9 or 10).
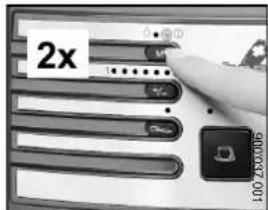
Grinding quant. Grinding quant. Value 1 (min) approx.6 gr approx.9 gr 6(max) approx.12 gr approx. 16 gr
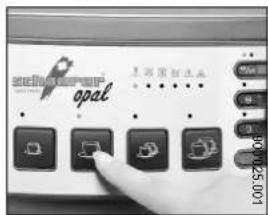
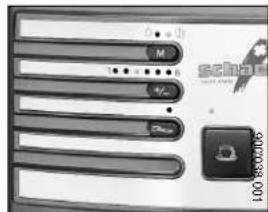
d) Press the + button to adjust the quantity of coffee beans to be ground to your requirements.
e) Press the Programming button to save your quantity setting. This quantity of coffee will be used automatically for this product selection until you change the programming.
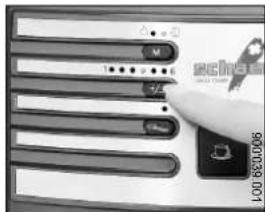
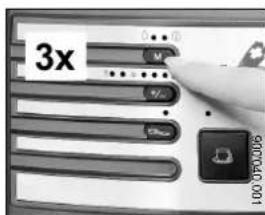
b) You can now press the button to set the temperature you require. Remember that 6 represents the maximum temperature setting and 1 the minimum temperature.
c) Press the Programming button to save your temperature setting. This temperature value will be stored and used automatically until you change the programming.
8.3 Programming the temperature (1-6 scale)
Your coffee maker is factory preset to deliver products at a mid-range temperature. To change this setting, follow these steps:
a) Press the Programming button three times. The Programming display shows the current temperature setting on a scale from 1 - 6.
9.0 Special programming functions 9.1 Pre-brewing function
Your coffee maker leaves our factory with the pre-brewing function activated to ensure you get the absolute best aroma from your ground coffee. However, you have the option of disabling this function for any selection button.
a) Switch the coffee maker to Standby mode. The signal lamp 1b will light up red.
b) Press and hold down the relevant selection button (3, 7, 8, 9, 10) and then press the mode selector switch to return the machine to Readymode. Repeat this procedure to reactivate the pre-brewing function.
9.2 Rinse function
Whenever your coffee maker is switched on from cold, it runs a rinse cycle to flush the system through.
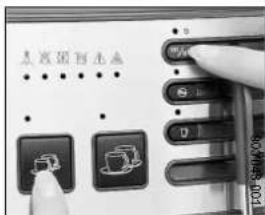
9.3 Programming the standby timer If your coffee maker is not used for one to five hours, it will automatically switch to Standby mode. The signal lamp 1b lights up to indicate this status. You can change this time setting to suit your preferences or deactivate automatic Standby mode altogether.
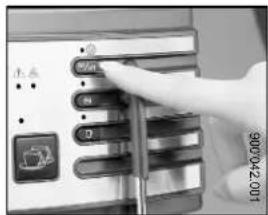
a) Switch the coffee maker to Standby mode. The signal lamp 1b will light up red.
b) Press and hold down the Programming button M together with the ground coffee button and then simultaneously press the mode selector switch to return the machine to Ready mode.
c) The Programming display window shows the current time setting on a scale from 1 to 6. Press the + button to adjust the setting as follows: 1 = 1h / 2 = 2h / 3 = 3h / 4 = 4h / 5 = 5h6 = automatic Standby mode deactivated
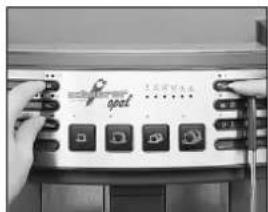
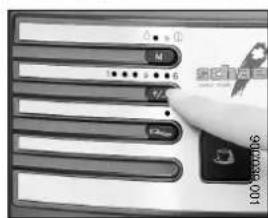
d) Press the Programming button No save your Standby time setting. This timer value will be stored and used automatically until you change the programming.
Note: On safety and energy-saving grounds, we recommend you switch your coffee maker off at the mains power switch over night and when you go away. For shorter absences, you can switch the machine to Standby by pressing the mode selector switch.
9.4 Status display
a) Press the Programming button in Standby mode to display the following active functions:
- if the selection button displays light up, this indicates that the pre-brewing function is activated;
If the cleaning / rinse icon lights up, this indicates that the rinsing function is activated;
The Programming display shows the time delay before the coffee machine automatically switches to Standby mode.
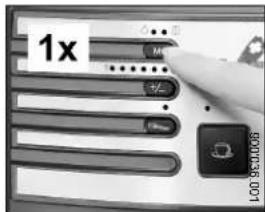
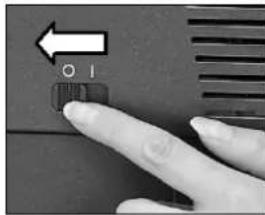
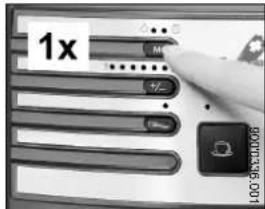
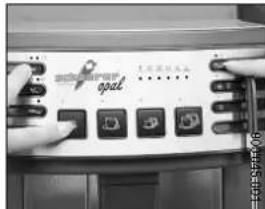
9.5 Standard values / factory settings Before your coffee machine leaves our factory, we programme it with standard settings which ensure optimum performance under normal circumstances. If you adjust these parameters to suit your individual preferences, you can revert to these default values at any time.
a) Switch the coffee maker to Standby mode. The signal lamp (1b) will light up.
b) Press and hold down the Programming button M and the espresso selection button (7) while simultaneously switching the machine to Ready mode at the selector switch This restores all of the factory default settings.
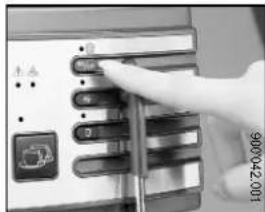
10.0Grinder settings
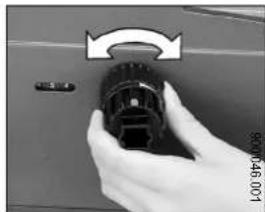
Your coffee maker leaves our factory preset to the optimum values for most types of coffee beans. However, you also have the option to adjust the grinding settings to suit your personal preferences.
Note: The grinding fineness may only be adjusted when the grinder is running.
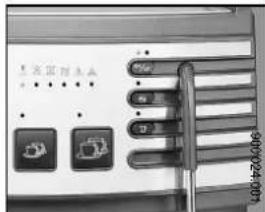
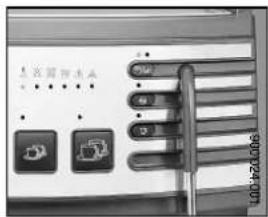
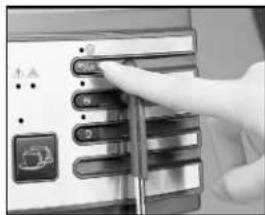
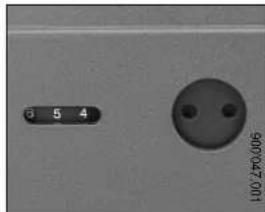
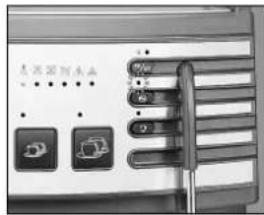
Use the special multifunctional tool (enclosed with the appliance) to move the fineness setting to the required position. The display shows the current value:
Grinder setting 1 = fine / turn clockwise
Grinder setting 6 = coarse / turn counterclockwise
Factory default setting 3 - 4 = medium fineness
If the coffee is ground more finely, the brewing time increases (the coffee becomes stronger) as does the amount of froth.
11.0 Preheating cups
Aside from your choice of coffee blend and the quality of your water supply, the correct cup temperature is a major factor in ensuring you receive an excellent cup of coffee.
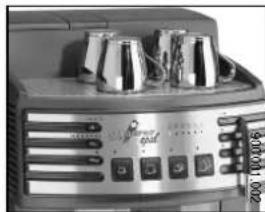
11.1 Store your clean cups on the cup preheating stand to keep them warm. They are heated by indirect radiation from the appliance heating system.
11.2 An alternative method to quickly preheat cups when necessary, is to rinse them out with hot water drawn from the hot water / steam nozzle. The coffee maker needs to be in Ready mode. We especially recommend this method for small coffee quantities (e.g. espresso).
12.0 Care and cleaning
As well as extending the life of your appliance, always keeping your coffee maker in a clean and proper condition will directly reward you through the resulting excellence of the coffee you will enjoy.
The appliance has a built-in automatic rinse programme as well as a compulsory regular cleaning programme, which combined with the additional option of thoroughly cleaning the brewing unit by hand guarantees that you can keep your coffee maker in an optimally clean condition.
Note: If you are going to be away for a lengthy period such as on holiday, we recommend that you run the rinse programme before you switch off the appliance.
12.1 Daily and weekly care
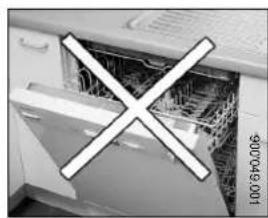
The fresh water tank (1) (for the model with tank), drip tray (6), cup tray (5) and grounds container (7) must be cleaned at regular intervals (see page 27). Use hot water with, if necessary, a non-abrasive cleaning agent.
Never put parts of your coffee maker into the dishwasher!
12.2 Cleaning the coffee s
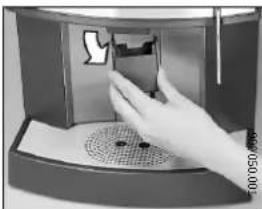
The coffee outlet is removable to permit cleaning (squeeze it together lightly). Use hot water and, if necessary, a non-abrasive cleaning agent. For normal use, we recommend cleaning this component at monthly intervals.
12.3 Cleaning the grinder
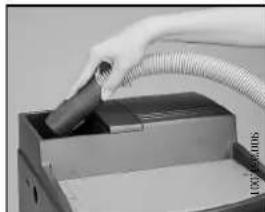
The grinder is normally self-cleaning. It is sufficient to occasionally use the supplied brush to remove build-ups and residues from the container.
Note: Under no circumstances should you ever pour water into the beans container as this would damage the grinding discs.
Tiny stones occasionally get mixed up with even the finest blends of coffee beans. To prevent them damaging the blades, the appliance has an integral electronic stone detection function which cuts out the motor to prevent damage to the grinder. If this happens, the indicators light up.
Follow these steps to clear the blockage:
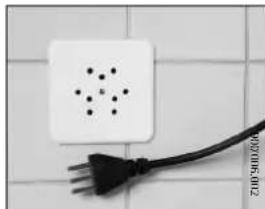
- Unplug the appliance at the mains socket.
- Remove the remaining beans from the beans container.
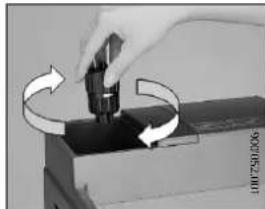
- Using the special multifunctional tool, grasp the square end of the grinding discs spindle and slowly turn the discs in a clockwise direction until the stone or foreign body is released and can be removed. It is a good idea to use a vacuum cleaner for removing foreign bodies.
12.4 Cleaning the brewing unit
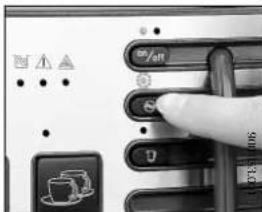
a) Rinsing the brewing unit. This component is automatically rinsed whenever the appliance is switched on. Additionally, you can rinse / clean thebrewing unit at any time by pressing the claning button The rinsing process lasts approx. 1 minute and is indicated by the cleaning indicator (2a). As soon as this signal lamp goes out, the coffee maker is ready for use again.
b) Cleaning the brewing unit by hand. The brewing unit should be cleaned manually at least once or twice every month or at the latest when the cleaning programme icon starts to flash (which it does after every 250 cups of coffee). Follow this procedure:
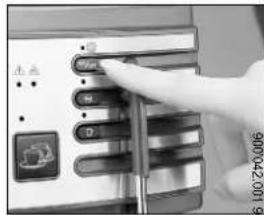
1. Press the switch to switch the appliance to Standby mode.
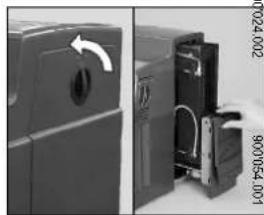
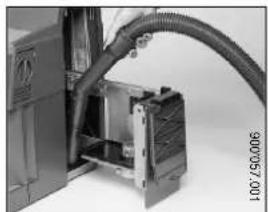
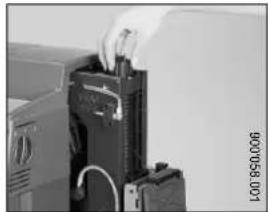
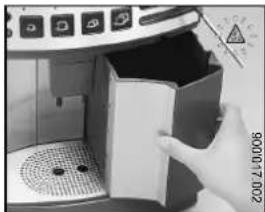
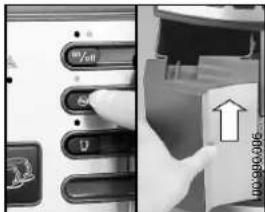
2. Open the service access hatch (14) on the side of the coffee maker and press the handle (marked Press) to release and remove the brewing unit.
3. Now remove the brewing unit by drawing it out slanted backwards. The powder residues drawer (15) can now be removed for cleaning.
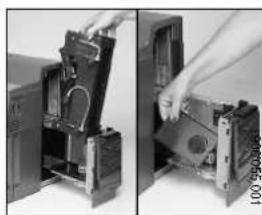
- Then turn the screw thread on the brewing unit head with the special multifunction adjustment tool right up to the stop. Both sieves are now accessible. Use the brush included with your coffee maker to clean all residues from the brewing unit; if nec-essary, rinse the unit with warm water and then let it dry completely.
- If any coffee remains are left in the service compartment, these are best removed with the aid of a vacuum cleaner.
Note: If the brewing unit cannot be correctly reinserted after cleaning, the screw thread has to be adjusted by using the special multifunction adjustment tool.
6. After cleaning, replace the coffee residues drawer followed by the brewing unit (in its normal position), and close the service access hatch.
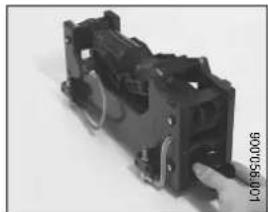
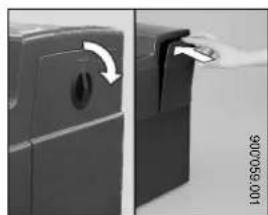
Important: If the Acon starts to flash when you switch the coffee maker on again, this means either that the brewing unit is not correctly positioned or that the hatch is not properly closed.
12.5 Cleaning programme (cycle indicated by flashing signal lamp (2a))
After 250 cups of coffee, the monitor lamp (2a) flashes to indicate that cleaning is necessary. Although you can continue to order coffees, it is advisable to run the cleaning cycle promptly.
At this point, carry out the manual cleaning of the brewing unit as described in section 12.4b.
Before starting the cleaning programme, please fill the water tank (only model with water tank). Also empty the drip tray. Then place a large container beneath the coffee spout (which you can incidentally remove or retract for cleaning).
Now proceed as follows:
- Drop both halves of the cleaning tablet (yellow and white) into the ground coffee filling funnel.
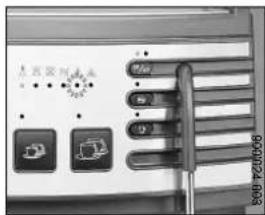
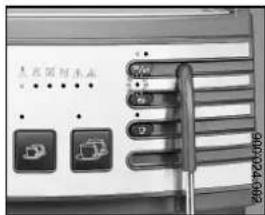
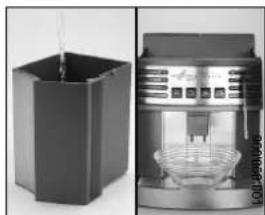
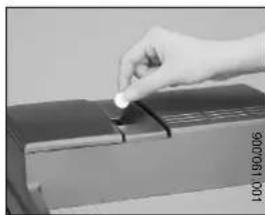
- Now hold the cleaning button pressed for at least 4 seconds until the cleaning cycle starts.
The process is fully automatic and is indicated by signal lamp (2a) which remains permanently lit.
Do not interrupt the cleaning cycle once it is running!
Once the cleaning process is completed (this takes around 5 minutes), your coffee maker is ready for use again. Lamp (2a) goes out to indicate the end of the cycle.
Important: If the Water Low icon starts to flash during the cleaning process, please refill the water tank to allow the cycle to finish.
Under no circumstances should you switch the appliance off while the cleaning programme is running!
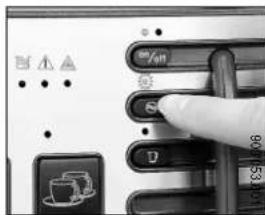
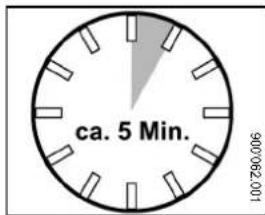
13.0 Descaling programme (cycle indicated by flashing signal lamp
After 1325 cups of coffee (if not before), th indicator flashes to indicate that descending is necessary. Although you can continue to order coffees, it is advisable to run the timescale treatment cycle promptly.
Note: The removal of limescale is an inevitable task even if you use a water filter. If your local water supply is exceptionally hard, you may need to run the descending programme before this output total is reached. Your coffee maker has an in-built automatic descending programme which makes the control of limescale considerably easier. This programme lasts approximately 40 minutes.
Warning: Only descale the coffee maker with water connection after consulting the appropriate technical service centre or receiving instructions!
Proceed as follows:
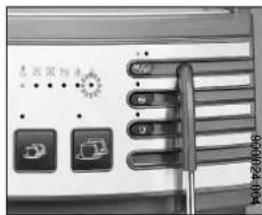
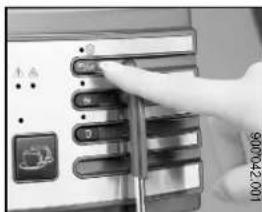
- Press the switch to switch the appliance to Standby mode. The signal lamp 1b will light up
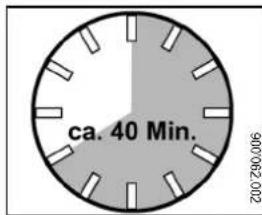
- Remove the coffee grounds container.
- Now add the descending agent (Durgol) to the water tank in the ratio of 1:2 (0.75 litres of descending agent to 1.5 litres of water). It is crucial that you read the dosing and safety instructions and the warnings on the cleaning agent container.
- Place a large container under the hot water / steam nozzle and open the valve by turning the dial to the steam symbol!
Allow the residual steam to escape while holding the dial in this position. - Now hold the cleaning button pressed for at least 5 seconds until the descending cycle starts. The process is fully automatic and is indicated by signal lamp (2a) which remains permanently lit. Do not interrupt the descending cycle once it is running!
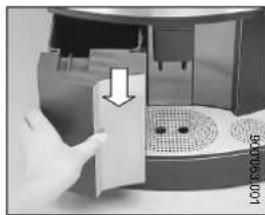
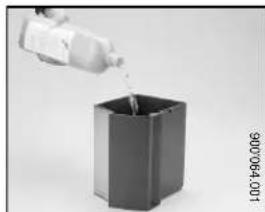
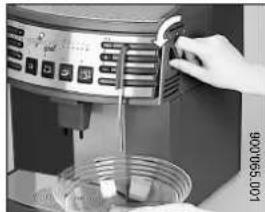
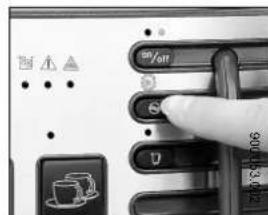
- When the cleaning indicator (2a) and themonitor lamp both begin to blink simultaneously, rinse out the water tank thoroughly, fill it with fresh water and put it back in position Fill the water tank with cold water, taking care not to fill it above 1-3 cm below the rim.
- Now press the cleaning button (2) again, and the entire system will be flushed with fresh water. (If the red control lamp (2a) is still illuminated but the water tank is already empty, fill approximately 1 litre of water into the water tank and replace it.). Once the signal lamp (2a) and descaling icon (16) are no longer lit up, turn the hot water / steam dial to centre position and replace the grounds container. The appliance is now free of limescale and ready to dispense coffee.
Important: Regular descending will protect your coffee maker from expensive repairs. Any damage to the appliance resulting from omission of this treatment, failure to follow the correct procedure or from noncompliance with these instructions is excluded from warranty cover. The use of vinegar for descending purposes is expressly prohibited as this would damage the coffee maker
14.0 Possible malfunctions, their causes and remedies
Please read the following information carefully before you send your coffee maker back for repair. This will often solve the problem and save you a lot of time and trouble.

-
Appliance does not respond when the switch is pressed
-
The 0-1 mains power switch is not switched on.
-
The power cable is not properly connected or you have a defective fuse.
-
The indicator flashes
-
The brewing unit is not correctly inserted or the service access hatch is not properly closed - check these.
The indicator and a number light up on the programming display.
- A malfunction has occurred which must be repaired by an authorised specialist.
-
Flashing or permanently lit signal lamps or icons
-
Please refer to the section explaining the meaning of these messages.
-
The pump emits a loud noise and / or the indicator lights up
-
The water tank is incorrectly positioned and there is air in the system. Reposition the water tank correctly and purge the system of air by turning the hot water / steam dial to the hot water position until water flows out steadily. Then return the dial to centre position and the icon will go out when you press a coffee selection button.
Note: It is normal for the water pump to start up occasionally when the appliance is operating. It constantly refills the system automatically.
-
The coffee obtained has no froth
-
You are using an unsuitable coffee blend or the coffee is stale.
- The quantity of coffee you have set to be ground is too small.
- The cups are too cold, use the preheating function.
- You did not wait for the appliance to reach its correct operating temperature.
6. Swivelling steam and hot water nozzle is blocked
- The outlet is blocked. Please clean with a thin needle.
7. You cannot remove or replace the brewing unit
- The brewing unit is not in home position. Close the service access hatch and switch the coffee maker on.
- Use the special multifunctional tool to reset the brewing unit as you replace it. You have probably moved one of the unit's elements.
8. The appliance does not respond when you press any button-although it is switched on
- The appliance has been switched on from cold and has not yet reached its operating temperature.
- The automatic rinse programme is currently running, the cleaning indicator (2a) is lit up.
- A signal lamp or icon is lit up. See the explanations section and remedy as necessary.
If checking these points fails to solve the problem, please contact an authorised service specialist.
15.0 Servicing and maintenance work
Regular cleaning and descending as per our recommendations is essential for the correct performance of your appliance. Nevertheless, you should be aware that even the best cared-for espresso maker will suffer natural wear and tear if used intensively over a long period.
16.0 Service Request (A Lamplights up)
Lamplights up service request:
The machine service has to be carried out. Contact a customer service authorised by the manufacturer.
- The service request can only be reset by a service technician.
- Coffee machine is not blocked, beverages can still be served.
Attention:
The manufacturer accepts no liability, if the service has not been carried out within a month.
17.0 Useful tips about coffee
A good cup of coffee does not depend on the coffee maker alone. The local water, the coffee variety, how the beans are ground, the temperature - all are important factors.
The following tips will help you get good results every time:
- Always use fresh, dark-roast coffee.
- Fresh coffee is always best stored in cool conditions. It is also suitable for deep-freezing and can be used straight from the freezer.
- If your coffee comes out of the appliance too quickly or too slowly, this is generally due to selecting an incorrect grinding fineness.
Coffee comes out too quickly: set the grinding fineness to a lower number, e.g. pos. 2.
Coffee comes out too slowly: set the grinding fineness to a higher number, e.g. pos. 5.
We recommend the factory default setting, which is 3 or 4.
- Warning: Remember you may only adjust grinding settings when the grinder is running.
- Coffee tastes best from preheated cups. Follow our recommendations from section 11.0.
18.0 Connection to water supply
Please refer to the relevant pipework diagram accompanying the appliance.
19.0 Technical data
Voltage/wattage: 230V (50 / 60Hz) / 2200W
110 V (50/60 Hz) / 1200 W
120 V (50/60 Hz) / 1200 W
130 V (50/60 Hz) / 1200 W
200 V (50/60 Hz) / 2200 W
230 V (50/60 Hz) / 2200 W
240 V (50/60 Hz) / 2200 W
Maximum permissible voltage fluctuation: +5% /
-10%
Water tank capacity 2.4 litres
Dimensions (WxHxD): 310 x 415 x 395 mm including turntable
Cable length: 1.1m
Weight: 15.7 kg
Safety test certificates awarded: SEV and international certificates
Power connection: Connect the appliance to the mains observing local regulations.
20.0 CE Declaration of Conformity

These products comply with the requirements of the EU Directives.
73/23/EEC Electrical equipment designed for use within certain voltage limits
89/336/EEC Electromagnetic Compatibility
Information on the declaration of conformity can be obtained from the manufacturer:
See last page of these instructions.
SCHAERER OPAL