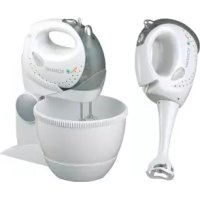
CB 336 - Hand blender BOMANN - Free user manual and instructions
Find the device manual for free CB 336 BOMANN in PDF.


| Product type | Immersion blender |
| Brand | Bomann |
| Model | CB 336 |
| Power supply | 230 V, 50 Hz |
| Power consumption | 250 W |
| Protection class | II |
| Net weight | 1,9 kg |
| Number of speeds | 6 + Turbo |
| Maximum operating time (speeds 1-5) | 5 minutes |
| Maximum operating time (Turbo) | 1 minute |
| Maximum liquid capacity | 1 liter |
| Maximum thick dough capacity | 500 g |
| Maximum cake batter capacity | 750 g |
| Included accessories | Blending arm, mixer whisk, dough hook, mixing bowl, turntable, mixer stand |
| Bowl material | Plastic (estimated) |
| Care and cleaning | Clean with a damp cloth, do not immerse. Removable parts washable by hand. |
| Safety | Unplug before cleaning, do not use with wet hands, do not leave unattended. |
Frequently Asked Questions - CB 336 BOMANN
User questions about CB 336 BOMANN
0 question about this device. Answer the ones you know or ask your own.
Ask a new question about this device
Download the instructions for your Hand blender in PDF format for free! Find your manual CB 336 - BOMANN and take your electronic device back in hand. On this page are published all the documents necessary for the use of your device. CB 336 by BOMANN.
USER MANUAL CB 336 BOMANN
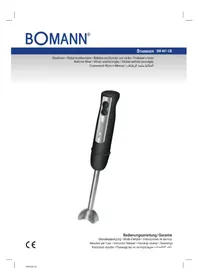
HANDMIXER-SET CB 336
Handmixer-Set • Set Mixeur • Equipo batidora • Batdeira de mão • Set frullatore a mano Håndmiksersett • Hand mixer set • Mikser ręczny - komplet • Ruční mixér • Kézi mixerkészlet Rучной миксер с принадлежностями
natural_image
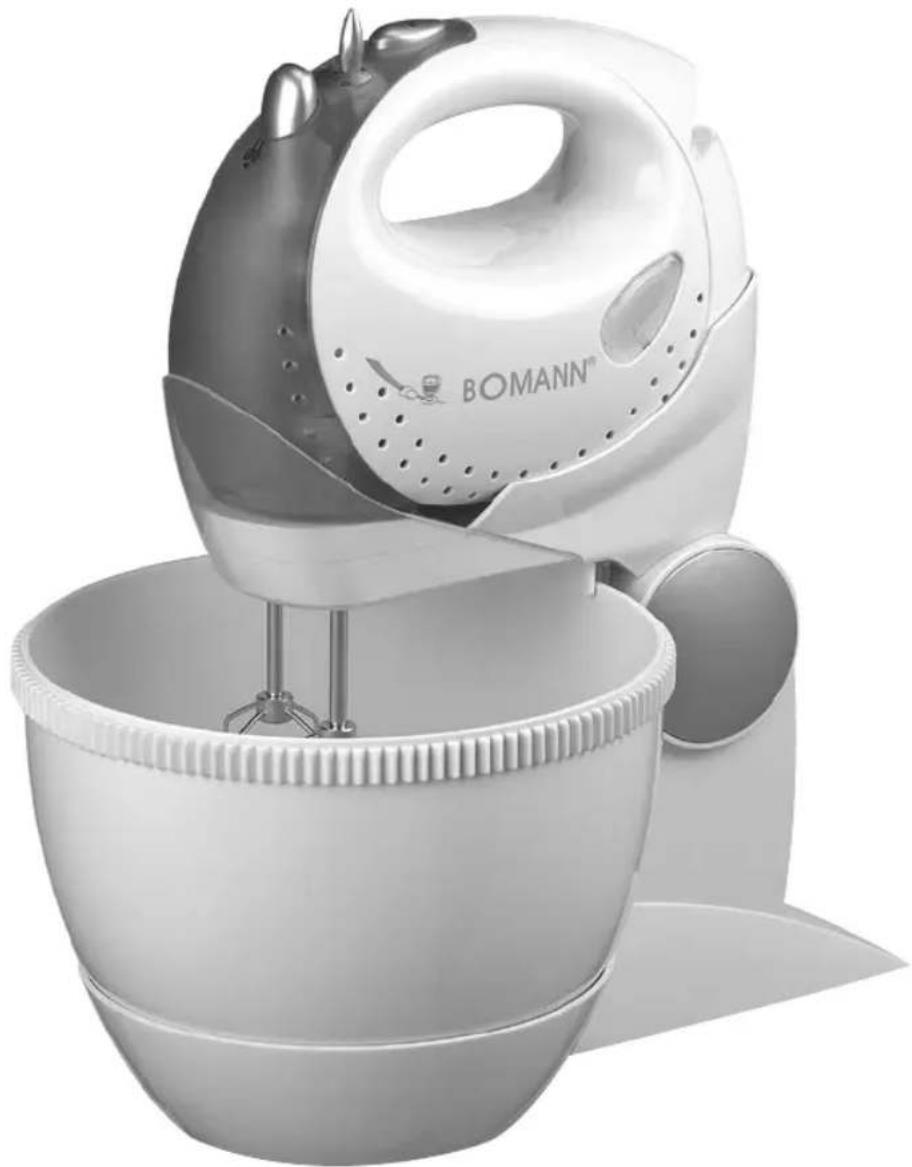
White BOMANN® blender with a hand mixer in a bowl (no visible text or symbols on the device itself)Overview of the Components ...... Page 3
Instruction Manual Page 26
Technical Data.... Page 28
JEZYK POLSKI
Spis treści
D-47906 Kempen/Germany
General Safety Instructions
Read the operating instructions carefully before putting the appliance into operation and keep the instructions including the warranty, the receipt and, if possible, the box with the internal packing. If you give this device to other people, please also pass on the operating instructions.
- The appliance is designed exclusively for private use and for the envisaged purpose. This appliance is not fit for commercial use. Do not use it outdoors. Keep it away from sources of heat, direct sunlight, humidity (never dip it into any liquid) and sharp edges. Do not use the appliance with wet hands. If the appliance is humid or wet, unplug it immediately.
- When cleaning or putting it away, switch off the appliance and always pull out the plug from the socket (pull the plug itself, not the lead) if the appliance is not being used and remove the attached accessories.
- Do not operate the machine without supervision. If you leave the room you should always turn the device off. Remove the plug from the socket.
- Check the appliance and the cable for damage on a regular basis. Do not use the appliance if it is damaged.
- Do not try to repair the appliance on your own. Always contact an authorized technician. To avoid the exposure to danger, always have a faulty cable be replaced only by the manufacturer, by our customer service or by a qualified person and with a cable of the same type.
- Use only original spare parts.
- Pay careful attention to the following "Special Safety Instructions".
Children and Frail Individuals
- In order to ensure your children's safety, please keep all packaging (plastic bags, boxes, polystyrene etc.) out of their reach.

WARNING!
Caution! Do not allow small children to play with the foil as there is a danger of suffocation!
- In order to protect children or frail individuals from the hazards of electrical equipment, please ensure that this device is only used under supervision. This device is not a toy. Do not allow small children to play with it.
Symbols in these Instructions for Use
Important information for your safety is specially marked. It is essential to comply with these instructions in order to avoid accidents and prevent damage to the machine:

WARNING:
This warns you of dangers to your health and indicates possible injury risks.

CAUTION:
This refers to possible hazards to the machine or other objects.

NOTE: This highlights tips and information.
Special Safety Instructions for this Machine
- Do not touch any moving parts of the machine and always wait for it to stop.
- During operation, objects such as spoons, dough scrapers or your hands must never touch the rotating whisks or dough hooks! Caution - risk of injury!
- Before changing the attachments, the appliance must be disconnected from the mains!
- Please use only the accessories recommended by the manufacturer. Other accessories may result in fire, electric shock and/or personal injury.
- In order to avoid splashing, always insert the rods fully into the food being mixed before you switch the mixer on.
- Only mix or whisk food with this machine.
- Do not operate the mixer for more than 5 minutes! Then let it cool down for approximately 10 minutes before using it again!
- The device is only designed for small quantities! You should therefore only fill the maximum quantities stated in the table into a container!
- Do not insert the appliance plug without installing the necessary attachments.
- Do not carry or lift the appliance during use. Always switch it off fi rst and pull out the plug. Carry the appliance always with both hands!
Overview of the Components
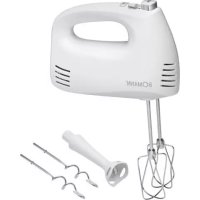
| 1 | Handmixer | ||
| 2 | Button for the releasing of the kneader hooks | ||
| 3 | Speed regulator (6 speeds) | ||
| 4 | TURBO | button | |
| 5 | Mobile upper part | ||
| 6 | Clip for unlocking the upper section | ||
| 7 | Revolving plate for mixer bowl | ||
| 8 | Mixer | bowl | |
| 9 | Blender | ||
| 10 | Kneider | hooks | |
| 11 | Mixer stand | ||
| 12 | Clip for releasing the mixer | ||
Unpacking the appliance
- Remove the appliance from the box and all the enclosed accessories.
- Do not through the packaging away, but keep it together with the inner packing and the warranty documents for the whole life of the warranty.
- Place the appliance on smooth, level and stable work surface.
- Do not insert the appliance plug without installing the necessary attachments.
- In order to remove any contamination from the production line please clean the mixing bowl (8) and other accessories before initial use in a soapy water solution.
• Dry well all the parts after washing.
Instructions for Use
Always choose a utensil and a speed according to the following table:
| Product/Type of Preparation | Max. Quantity | Utensil Level | Max Operating Time | |
| Heavy dough (e.g. yeast dough) | 500 g | kneader hook | 1 - 4 3 min. | |
| Cake mixture, Dressings, Desserts | 750 g beater 2 - 5 | 5 min. | ||
| Sponge mixture, wafer mixture, Cream | 750 g beater 2 - 5 | 5 min. | ||
| Liquids, shakes up to 1 l | blender 5 or turbo 1 min. | |||
- With heavy mixtures, do not operate the machine for more than 3 minutes, and then allow it to cool down for a further 10 minutes.
- Depending on the consistency of the mixture it is necessary to remove the mixture from the edge of the mixing bowl and place it back on the kneading attachments. The device must be turned off.
Releasing the kneading hook / beater
- In order to release the kneading hook/whisk (10) turn the power level selector switch to „0“ and ensure that the mixer has been disconnected from the mains.
- Press the button (2) to release the kneading hook/whisk. Remove the device by turning it slightly.
i NOTE:
The hooks can only be removed if the speed switch (3) is in the „0“ position.
Turbo operation
This is for switching to maximum speed for a short time. Press at short intervals for pulsed mode operation.

CAUTION:
Do not use this function for more than one minute!
How to use the Blender
- Turn the power level selector switch (3) to „0“ and ensure that the mixer (1) has been disconnected from the mains.
- On the back of the mixer push the cover of the installation aperture upwards.
- Place the fast mixing rod on the installation aperture in such a way that the two arrows are pointing one above the other. To lock the rod in place, turn it through approximately 90^ in a clockwise direction.
- Insert the mains plug into a properly installed 230 V/50 Hz safety power socket.
- Place the fast mixing rod into a high-walled, partly-filled vessel.

CAUTION:
Do not operate the fast mixing rod when the vessel is empty, i.e. when there is no food in the vessel to be mixed.
- Select a speed using the power level selector switch (3). Move the fast mixing rod slightly up and down.
- When you would like to stop mixing, turn the power level selector switch to „0“ and unplug the device from the mains.
How to use the Kneader hooks/beater
- Turn the power level selector switch (3) to „0“ and ensure that the mixer (1) has been disconnected from the mains.
- Press the end of the kneader hooks/beater (10) into the corresponding mixer openings until the hooks click into place. While pressing, turn slightly in order to facilitate the whole operation.
i NOTE:
Please note that the kneading hook with the curved washer on the shaft can only be inserted on the left-hand side of the mixer when viewed from the bottom.
-
Insert the mains plug into a properly installed 230V/50 Hz safety power socket.
-
The handmixer (1) can be used at various speeds set with the speed regulator (3).
How to use the Mixer stand
Please select a flat non-slip surface for the mixer stand.
- Place the hand mixer (1) on the upper section (5) of the mixer stand (11). Please check whether the clip (12) of the upper section is locked in place on the back of the mixer.
- Mount the hooks as described above in the section "How to use the Kneader hooks/beater".
- In order to place the mixing bowl (8) underneath, pull the clip (6) to unlock the upper section of the mixer stand (5) and fold the mixer upwards.
- Place the mixer bowl filled with the desired ingredients onto the revolving plate (7). Now fold the mixer down again.
- Insert the mains plug into a properly installed 230V/50 Hz safety power socket.
- The handmixer (1) can be used at various speeds set with the speed regulator (3).
- The revolving plate turns automatically!
- When you would like to stop mixing, turn the power level selector switch to „0“ and unplug the device from the mains.
- When you have finished pull the clip (6) again to unlock the upper section of the mixer stand (5) and fold the mixer upwards.
- Now the mixer bowl can be removed. Remove the hooks as described above in the section "Releasing the kneading hook / beater".
- In order to separate the mixer from the upper section (5) of the mixer stand, pull the mixer upwards.
Cleaning
- Before cleaning the equipment, always remove the mains plug from the socket.
- Only a damp cloth should be used for cleaning the outside of the machine.
-
Under no circumstances should the device be immersed in water for cleaning.
-
Never use abrasive detergents!
- Removable parts that have come into contact with dough (kneading attachments and mixing bowl) can be cleaned by hand.
Noise development
The sound pressure level in the ear of an operator (LpA) was measured according to DIN EN ISO 3744.
Sound pressure level detected: 77 dB(A) (no limit)
Technical Data
Model: CB 336
Power supply: 230 V, 50 Hz
Power consumption: 250 W
Protection class: II
Short operation time:
Level 1-5: 5 min.
Turbo operation: 1 min.
Net weight: 1,9 kg
This device has been tested according to all relevant current CE guidelines, such as electromagnetic compatibility and low voltage directives, and has been constructed in accordance with the latest safety regulations.
Subject to technical changes without prior notice!
Meaning of the "Dustbin" Symbol
Protect our environment: do not dispose of electrical equipment in the domestic waste.
Please return any electrical equipment that you will no longer use to the collection points provided for their disposal.
This helps avoid the potential effects of incorrect disposal on the environment and human health.
This will contribute to the recycling and other forms of reutilisation of electrical and electronic equipment.
Information concerning where the equipment can be disposed of can be obtained from your local authority.
- JEZYK POLSKI
- Spis treści
- General Safety Instructions
- Children and Frail Individuals
- WARNING!
- Symbols in these Instructions for Use
- WARNING:
- CAUTION:
- Special Safety Instructions for this Machine
- Unpacking the appliance
- Instructions for Use
- Releasing the kneading hook / beater
- i NOTE:
- Turbo operation
- How to use the Blender
- How to use the Kneader hooks/beater
- How to use the Mixer stand
- Cleaning
- Noise development
- Technical Data
- Meaning of the "Dustbin" Symbol
Brand : BOMANN
Model : CB 336
Category : Hand blender