
SPD4002CC - DVD Recorder PHILIPS - Free user manual and instructions
Find the device manual for free SPD4002CC PHILIPS in PDF.
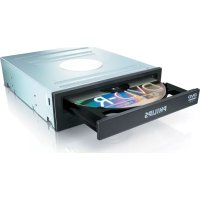
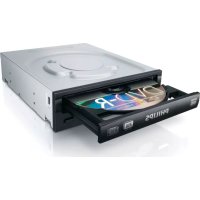
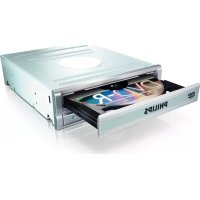
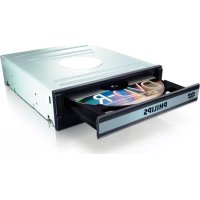
| Product type | External USB DVD recorder |
| Brand | Philips |
| Model | SPD4002CC |
| Interface | USB 2.0 |
| Supported disc formats | DVD+R/RW, DVD-R/RW, CD-R/RW |
| Main functions | Video, audio, data burning; disc copying |
| Included software | Nero 7 Essentials |
| System compatibility | Windows (98SE, XP, Vista, 7, 8, 10) |
| Power supply | USB bus power (self-powered) |
| Dimensions (approx.) | 150 x 130 x 20 mm |
| Weight (approx.) | 0.2 kg |
| Care and cleaning | Clean with a soft, dry cloth; avoid liquids |
| Safety instructions | Do not expose to moisture; keep plastic bags away from children |
| Disposal | Comply with WEEE directive; do not dispose with household waste |
| General information | Support: www.philips.com/support |
Frequently Asked Questions - SPD4002CC PHILIPS
User questions about SPD4002CC PHILIPS
0 question about this device. Answer the ones you know or ask your own.
Ask a new question about this device
Download the instructions for your DVD Recorder in PDF format for free! Find your manual SPD4002CC - PHILIPS and take your electronic device back in hand. On this page are published all the documents necessary for the use of your device. SPD4002CC by PHILIPS.
USER MANUAL SPD4002CC PHILIPS
How to... for External Slimline ReWriters using Nero 7
UK Install Guide
D Installationsanleitung
F Guide d'installation
Guidad INSTALLAZIONE
NL Installatiegids
E Guia de instalacion
PT Guia de Instalação
TR Kurulum Kilavuzu
PL Instrukcja montazu
Installationsguide
PHILIPS
UK
Contents
How to connect your external USB ReWriter? 5
How to disconnect your external USB ReWriter? 11
Up to date? 13
How to make a video disc? 17
How to make an audio or data disc? 25
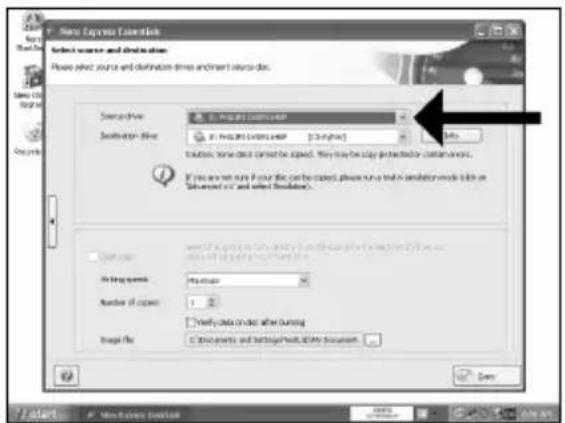
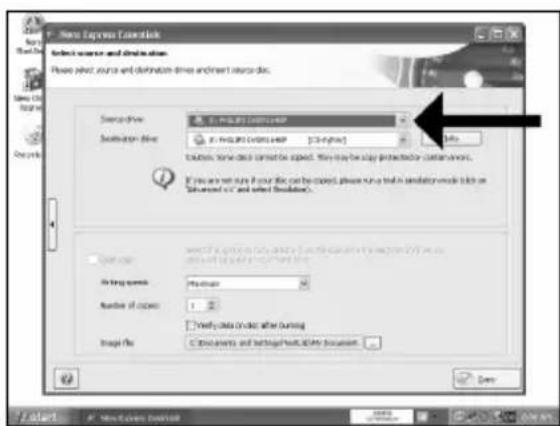
How to copy a disc? 29
More info or help needed? 32
D
Inhalt
AnschlieBen des externen USB ReWriter? 5
Trennen des externen USB ReWriter? 11
How to connect your external USB ReWriter?
UK This can be found in the box: A: Your new drive. D: Power supply B: This manual. E: HiSpeed USB Cable. C: The Nero software disc.
UK The drivers will be installed automatically. This may take some seconds.
The pickups shown are operating system dependent.
UK Choose "Nero 7 Essentials" and follow the instructions on the screen.
When finished, continue with the next chapter.
UK For Windows 98 Second Edition only.
1.Insert the Nero disc in a CD or DVD device of your computer. If you do not have a CD-ROM on your computer, please refer to the Frequently Asked Questions on www.philips.com/storageupdates.
2. When the Nero screen (as in step 11) is shown, connect your external rewriter to the computer (as in step 7).
3. The "Add New Hardware Wizard" will pop up.
4. Click "Next" in "The wizard searches for new drivers....".
5. Choose "Search for the best drivers...".
6. Choose "Specify a location"
7. Browse to the directory "Philips drivers" on the Nero disc and click "Next".
8. The drivers will be installed.
D Nur fur Windows 98 Second Edition:
Solo per Windows 98 Second Edition:
How to disconnect your external USB ReWriter?
Trennen des externen USB ReWriter?
To disconnect, click the "Safely Remove Hardware" icon.
UK Click on "Safely remove USB Mass Storage Device".
How to make a video disc?
Be responsible Respect copyrights
1
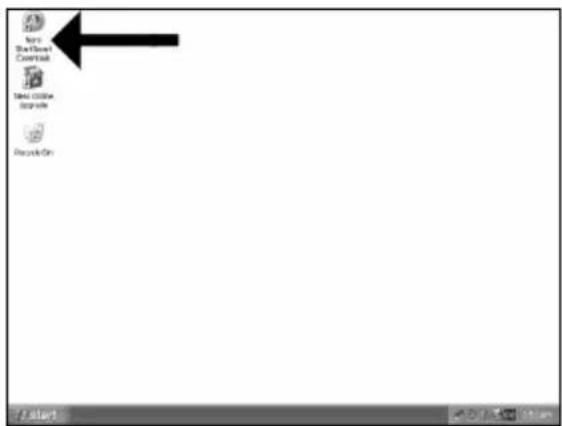
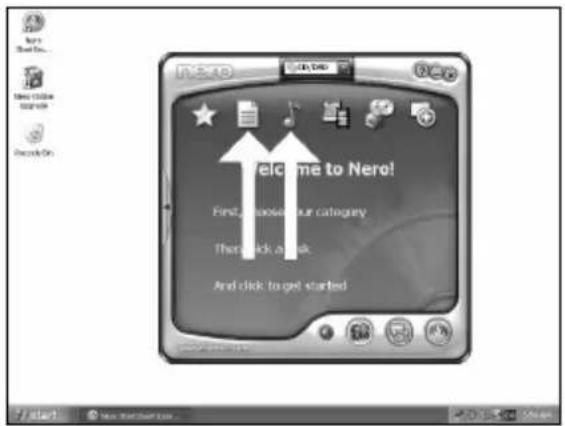
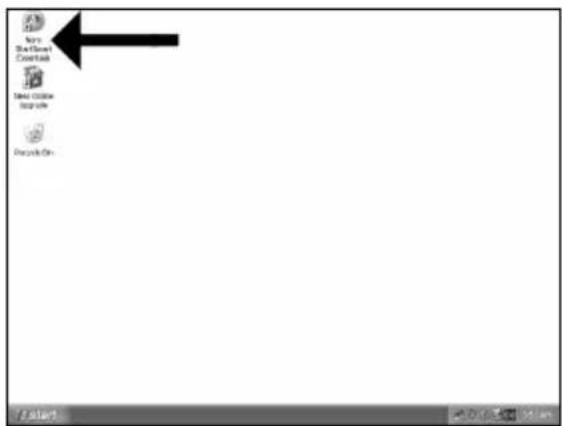
UK Start "Nero StartSmart Essentials".
D Starten Sie "Nero StartSmart Essentials".
F Lancez 'Nero StartSmart Essentials'.
Aviare "Nero StartSmart Essentials".
NL Start "Nero StartSmart Essentials".

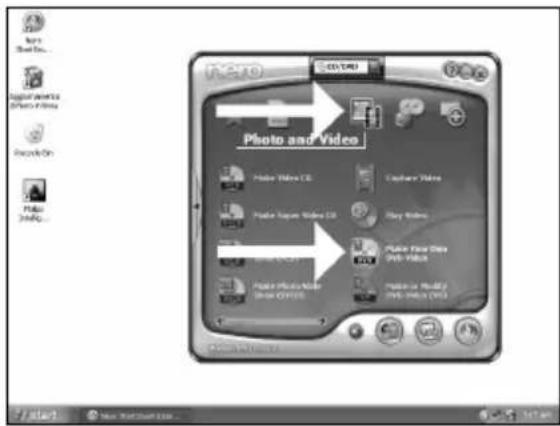
UK Choose "Photo and Video" and "Make your own DVD-Video".
D Wahlen Sie "Foto und Video" und "Eigenes DVD-Video erstehen".
F Choisissez 'Photo et Video' et 'Crerer vous propre DVD-Video'.
Selectionare "Foto e video" e "Create il proprio DVD-Video".
Kies "Foto en video" en "Maak uw eigien DVD-Video".
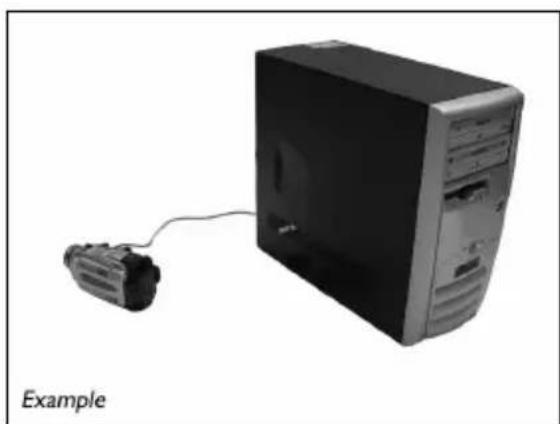
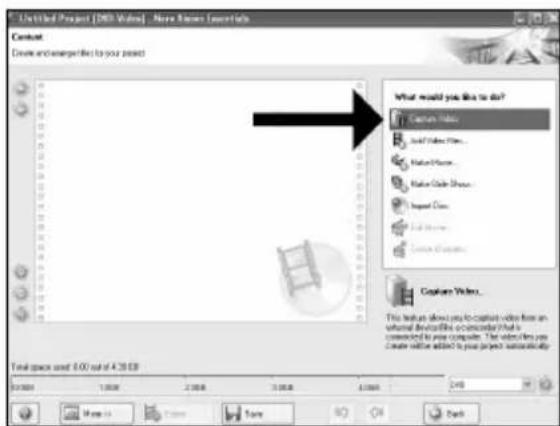
UK If you want to capture video from a camera, connect it to your PC. Otherwise go to step 8.
SchlieBen Sie Ihr PC an, wenn Sie Video von einer Kamera aufnehmen möchten. Ansonsten fahren Sie mit Schritt 8 fort.
Si you souhaitez capturer de la video a partir d'uneamera, raccordez-la a l'ordinateur. Sinon, allez à l'etape 8.
Se si desidera catturare il video da una camera, collegarla al PC. Altrimenti passare al punto 8
NL Als u video wilt laden vanaf een camera, moet u hem op uw PC aansluiten. Ga anders verder met stap 8

UK Choose "Capture video"
D Wahlen Sie "Capture video"
F Choisissez 'Capture video'
- Selezionare "Cattura video"
NL Kies "Capture video"
5
UK Select the capture device and press the record button.
Wahlen Sie das Aufnahmegerät und drücken Sie die Aufnahmetaste.
F Sélectionnez le périhérique de capture et appuyez sur le bouton d'enregistrement.
1 Selezionare il dispositivo di cattura e premere il pulsante Registra.
NL Selecteer het apparaat waar u video vanaf wilt laden en druk op de opnameknop.
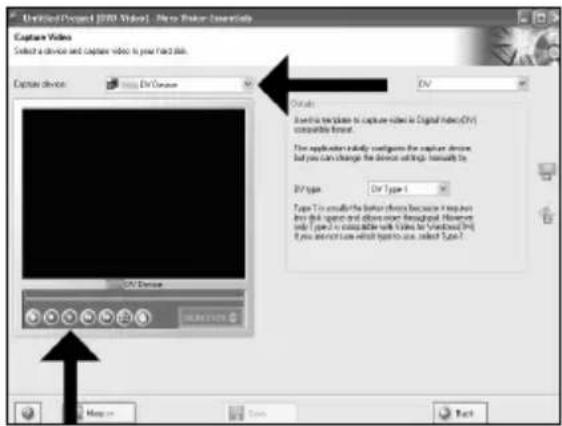
6
UK During capturing, you will see the progress here.
D Wahlend der Aufnahme sehen Sie hier den Fortschritt.
F Pendant la capture, l'avancement s'affiche ici.
Durante il processo di cattura, qui sare possibile visualizzare l'avanzamento.
NL Tijdens het laden ziet u hier de voortgang.
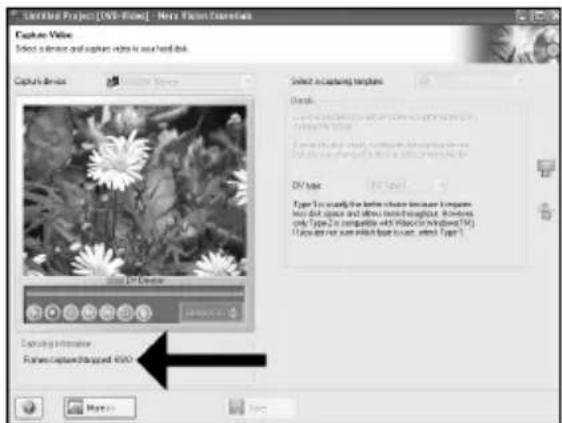
7
Choose "Burn to", choose your recorder and choose "Burn".
NeroVision Express is transcoding and burning your disc.
Congratulations, your disc has been written successfully. You may exit the application now.
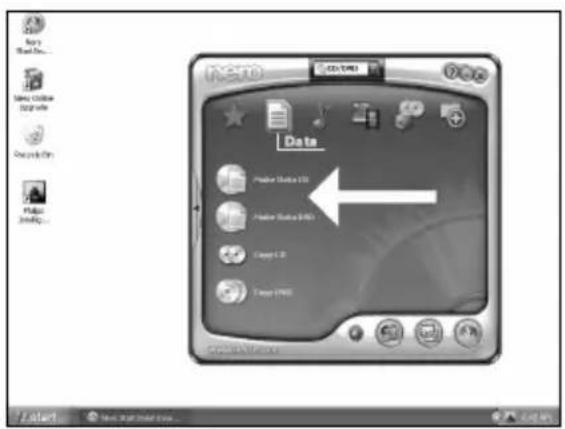
How to make an audio or data disc?
Be responsible Respect copyrights
1 UK Start "Nero StartSmart".
Be responsible Respect copyrights
1
UK Start "Nero StartSmart Essentials".
D Starten Sie "Nero StartSmart Essentials".
F Lancez 'Nero StartSmart Essentials'.
Aviare "Nero StartSmart Essentials".
NL Start "Nero StartSmart Essentials".

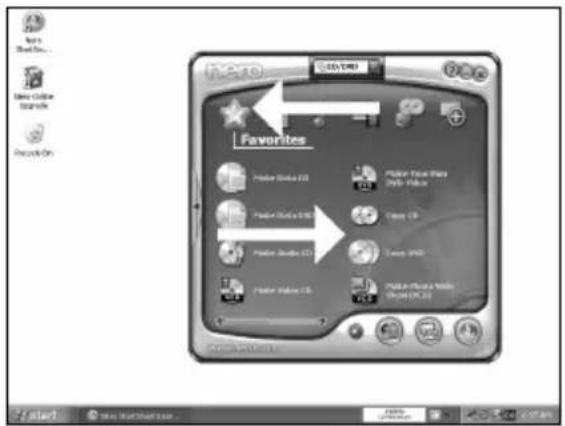
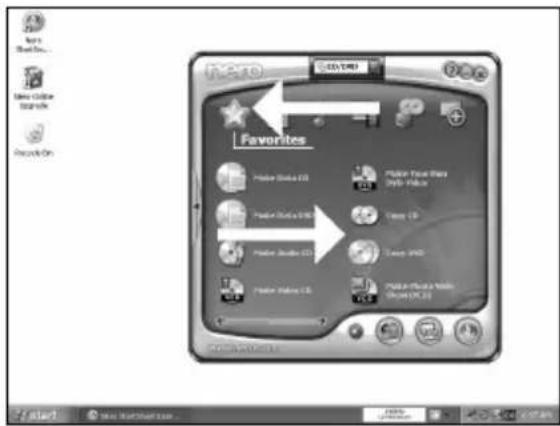
UK Choose, "Favorites" and "Copy CD" or "Copy DVD".
2
D Wahlen Sie "Favoriten" und "CD kopieren" oder "DVD kopieren".
F Choisissez 'Favoris' et 'Copier CD' ou 'Copier DVD'.
Selectionare "Preferiti" e "Copia CD" o "Copia DVD".
NL Kies ,Favorieten" en "CD Kopieren" of DVD Kopieren".
More info or help needed?
Visit www.philips.com/storageupdates

Troubleshooting
Philips optical disc drives are manufactured with utmost care. In case of problems, it often appears that the drive itself is not defective. You can simply solve most of these problems by using the support tools offered by Philips.
When you're experiencing problems:
Please check the information in the "How to..." manual
2 Check the Philips support websites www.philips.com/storageupdates and www.philips.com/support for interactive support, troubleshooting, and the newest software updates.
3 Should you encounter any more difficulties during installation or use, please contact Philips Customer Care via the e-mail address or telephone numbers that can be found at www.philips.com/contact.
Prior to claiming a drive for warranty, you must request a return reference number at www.philips.com/support or contact Philips Customer Care.
Additional warranty information is available in the "Philips Warranty" folder on the Nero software disc

"The making of unauthorised copies of copy-protected material, including computer programmes, files, broadcasts and sound recordings, may be an infringement of copyrights and constitute a criminal offence. This equipment should not be used for such purposes."
WEEE mark: Disposal of your old product
Your product is designed and manufactured with high quality materials and components, which can be recycled and reused. Please inform yourself about the local separate collection system for electrical and electronic products, including those marked by following symbol. Please act according to your local rules and do not dispose of your old products with your normal household waste.
WARNING
Plastic bags can be dangerous.
To avoid danger of suffocation, keep this bag away from babies and small children.
Gaaar www.philips.com/storageupdates

Probleemoplossing
A: Nowy naped. D: Kabel zerosijacy
sv Endast for Windows 98 Second Edition:
Be responsible Respect copyrights
1
E Inicie "Nero StartSmart Essentials".
PT Inicie o "Nero StartSmart Essentials".
TR "Nero StartSmart Essentials" i baslat.
PL Uruchom program "Nero StartSmart Essentials".
SV Starta "Nero StartSmart Essentials".

E Elija "Foto y video" y "Crear DV de video propio"
PT SeLECTION "Foto e video" e "Crie seu propre DVD de video"
TR "Fotografia ve Video"ve "Keni DVDVideo'nu Yarat'yu sec
PL Kliknij "Foto i video" i "Twórz wąsne DVD-Video"
SV Välj "Foto och video" och "Gör din egen DVD-video"

Siquiryerecapturvideodesueda cama, conectelaasuPC.De lo contrario,vaya al paso 8
PT Se desejar capturar video de unaamera, conecte-a ao seu PC. Caso contrario, va para a etapa 8.
TR Kameradan video yakalamak istiyorsaniz, bunu PC'nize baglayin. Aksi halde 8.adima gadin
PL Ješli chcesz przechwycic video z kamery, podlacz je do komputera. W przyciwnym razie przyzejź do krok 8.
Sv Om du vill hamta video fran en kamera ansluter du den till datom. I annat fall gár du till steg 8
E Elija "Capture video"
PT Selezione "Capture video".
TR "Capture video"yu seç
PL Kliknj "Capture video"
SV Valj "Capture video"
5
Be responsible Respect copyrights
1
E Inicie "Nero StartSmart".
PT Inicie o "Nero StartSmart".
TR "Nero StartSmart" i baslatn.
PL Uruchom program „Nero StartSmart".
SV Starta "Nero StartSmart".

E Elija "Dates" o "Audio".
PT Selezione "Dados" ou "Audio".
TR „Veri" veya "Ses'yu seksin.
PL Kliknij „Dane" lub „Audio".
SV Valj "Data" eller "Audio".
Be responsible Respect copyrights
1
E Inicia "Nero StartSmart Essentials".
PT Inicie o "Nero StartSmart Essentials".
TR "Nero StartSmart Essentials" baslatn.
PL Uruchom program „Nero StartSmart Essentials".
SV Starta "Nero StartSmart Essentials".
E Elija "Favoritos" y "Copiar CD" o "Copiar DVD".
PT Selecione "Favoritos" e "Copiar CD" ou "Copiar DVD".
TR „Sik Kullanilanlar" ve "CD Kopyala" veya "DVD Kopyala"yi seksin.
PL Kliknj „Ulubione" i „Kopiuj CD" lub „Kopiuj DVD".
SV Valj "Favoriter" och "Kopiera CD" aller "Kopiera DVD".
Be responsible Respect copyrights
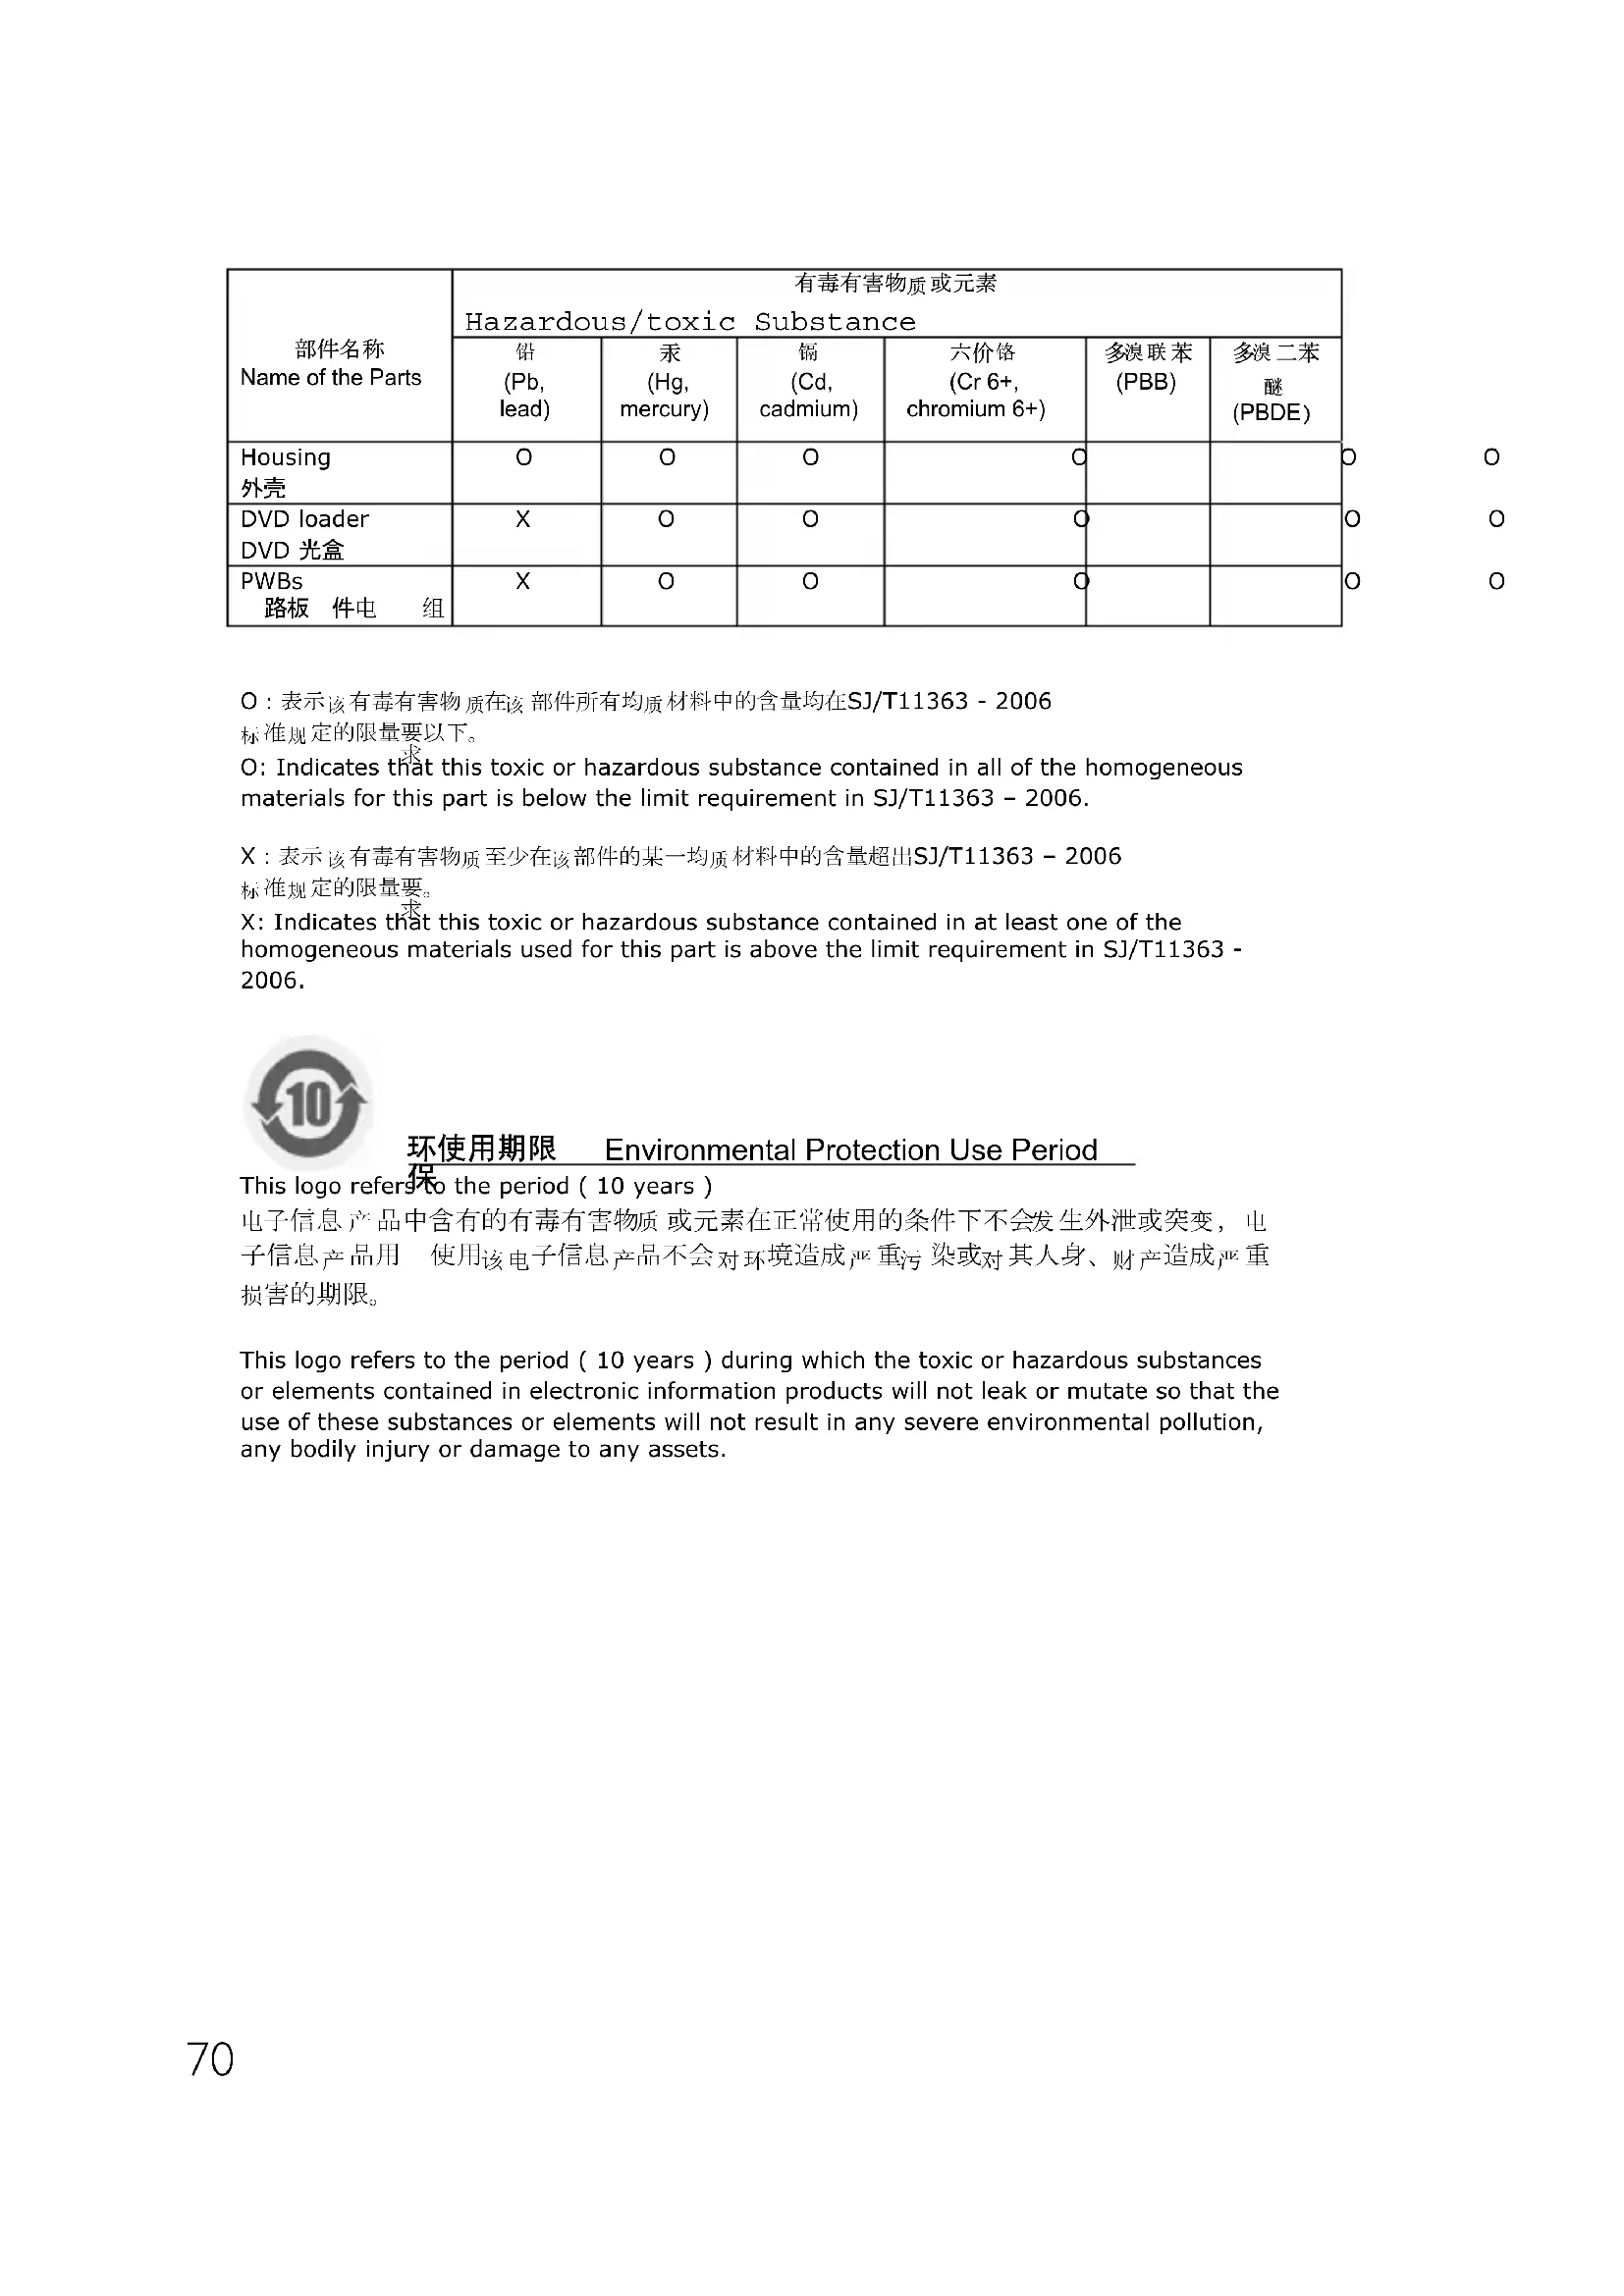
O: Indicates that this toxic or hazardous substance contained in all of the homogeneous materials for this part is below the limit requirement in SJ/T11363 - 2006.
X: Indicates that this toxic or hazardous substance contained in at least one of the homogeneous materials used for this part is above the limit requirement in SJ/T11363 - 2006.

环使用期限 Environmental Protection Use Period
This logo refers to the period (10 years)
This logo refers to the period ( 10 years ) during which the toxic or hazardous substances or elements contained in electronic information products will not leak or mutate so that the use of these substances or elements will not result in any severe environmental pollution, any bodily injury or damage to any assets.
Safety Precautions
USA/Canada: This player is for use only with IBM compatible UL listed Personal Computers or Macintosh UL listed workstations, weighing less than 18kg .
LASER SAFETY
This unit employs a laser. Do not remove the cover or attempt to service this device when connected due to the possibility of eye damage.
LASER-SICHERHEIT
USE OF CONTROLS OR ADJUSTMENTS OR PERFORMANCE OF PROCEDURES OTHER THAN THOSE SPECIFIED HEREIN MAY RESULT IN HAZARDOUS LASER RADIATION EXPOSURE.
WARNING
Output power (measured above the objective lens)
Read: 1,4 mW - 2,5 mW
Write: 90 mW (CD) - 27 mW (DVD)
Beam divergence 60 degree
FCC Compliance
The statement required by 15.105 is as follows:
This equipment has been tested and found to comply with the limits for a Class B digital device, pursuant to Part 15 of the FCC Rules. These limits are designed to provide reasonable protection against harmful interference in a residential installation. This equipment generates, uses and can radiate radio frequency energy and, if not installed and used in accordance with the instructions, may cause harmful interference to radio communications.
However, there is no guarantee that interference will not occur in a particular installation. If this equipment does cause harmful interference to radio or television reception, which can be determined by turning the equipment off and on, the user is encouraged to try to correct the interference by one or more of the following measures:
Reorient or relocate the receiving antenna.
- Increase the separation between the equipment and receiver.
- Connect the equipment into an outlet on a circuit different from that to which the receiver is connected.
- Consult the dealer or an experienced radio/TV technician for help.
Warning: Changes or modifications made to this equipment not expressly approved by Philips may void the FCC authorization to operate this equipment.
Additional information available on our website
www.philips.com/storageupdates
www.philips.com/storage
Specifications subject to change without notice.
All dimensions shown are approximate.
All rights reserved.
Reproduction, copying, usage, modifying, hiring, renting,
public performance, transmission and/or broadcasting in whole or part is prohibited without the written consent of Philips Electronics N.V.

- How to... for External Slimline ReWriters using Nero 7
- UK
- Contents
- D
- Inhalt
- How to connect your external USB ReWriter?
- UK For Windows 98 Second Edition only.
- D Nur fur Windows 98 Second Edition:
- Solo per Windows 98 Second Edition:
- How to disconnect your external USB ReWriter?
- How to make a video disc?
- 5
- 6
- 7
- How to make an audio or data disc?
- More info or help needed?
- Troubleshooting
- WEEE mark: Disposal of your old product
- WARNING
- Probleemoplossing
- 环使用期限 Environmental Protection Use Period
- Safety Precautions
- LASER SAFETY
- LASER-SICHERHEIT
- FCC Compliance
Brand : PHILIPS
Model : SPD4002CC
Category : DVD Recorder