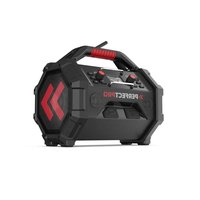
Workman - Radio PerfectPro - Free user manual and instructions
Find the device manual for free Workman PerfectPro in PDF.
User questions about Workman PerfectPro
0 question about this device. Answer the ones you know or ask your own.
Ask a new question about this device
Download the instructions for your Radio in PDF format for free! Find your manual Workman - PerfectPro and take your electronic device back in hand. On this page are published all the documents necessary for the use of your device. Workman by PerfectPro.
USER MANUAL Workman PerfectPro
IMPORTANT SAFETY INSTRUCTIONS 2
CONTROLS 3
POWER SUPPLY 5
Battery operation 5
AC operation 5
SETTING THE CLOCK 6
Recall Stations from Preset Memories 7
FM stereo / mono 8
RDS station service 8
IMPORTANT SAFETY INSTRUCTIONS
- Read these instructions.
- Keep these instructions.
- Heed all warnings.
- Follow all instructions.
- Do not use this apparatus near water.
- Clean only with dry cloth.
- Do not block any ventilation openings. Install in accordance with the instructions.
- Do not install near any heat sources such as radiators, heat registers, stoves or other apparatus (including amplifiers) that produce heat.
- Do not defect the safety purpose of the polarized or grounding - type plug. A polarized plug has two blades with one wider than the other. A grounding type plug has two blades and a third grounding prong. The wide blade or the third prong are provided for your safety. If the provided plug does not fit into your outlet, consult an electrician for replacement of the obsolete outlet.
- Protect the power cord from being walked on or pinched particularly at plug, convenience receptacles, and the point where they exit from the apparatus.
- Only use attachments/accessories specified by the manufacturer.
- Use only with the cart, stand, tripod, bracket, or table specified by the manufacturer, or sold with the apparatus. When a cart is used, use caution when moving the cart/ apparatus combination to avoid injury from tip-over.
- Unplug this apparatus during lightning storms or when unused for long periods of time.
- Refer all servicing to qualified service personnel. Servicing is required the apparatus has been damaged in any, such as power-supply cord or plug is damaged, liquid has been spilled or objects have fallen into the apparatus, the apparatus has been exposed to rain or moisture, does not operate normally, or has been dropped.
- To reduce the risk of fire or electric shock, do not expose this appliance to rain or moisture.
- Do not remove the cover; there are no user-serviceable parts inside.
- Apparatus shall not be exposed to dripping or splashing. No objects filled with liquids and no naked flame sources shall be placed on the apparatus
- For outdoors use, to avoid electric shock, use battery only during a raining day or the weather is wet.
- The power plug should be close to the apparatus, and easy to be approached that during emergency, to disconnect the power from the apparatus, just unplug the
power plug from the AC power slot. - The type plate is located on the bottom of the device.

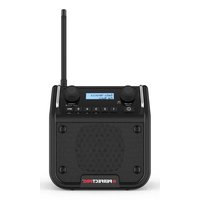
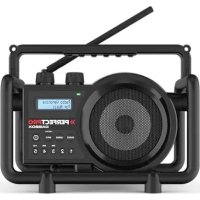
Front View
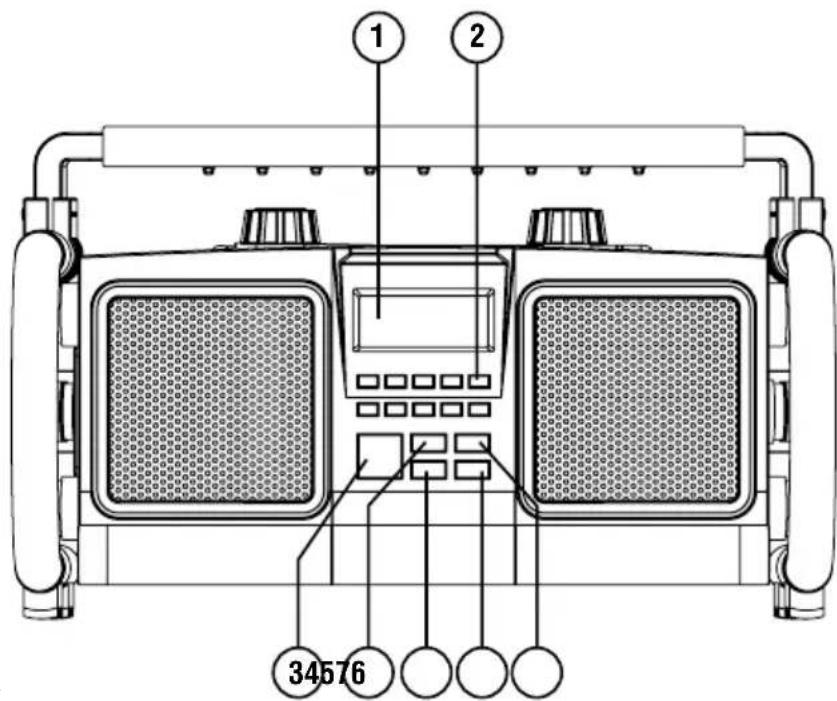
- LCD display
- Preset buttons
- Power On/Off
- Audio source button
- Loudness button
- Info button
- Mono/Stereo button
Top View
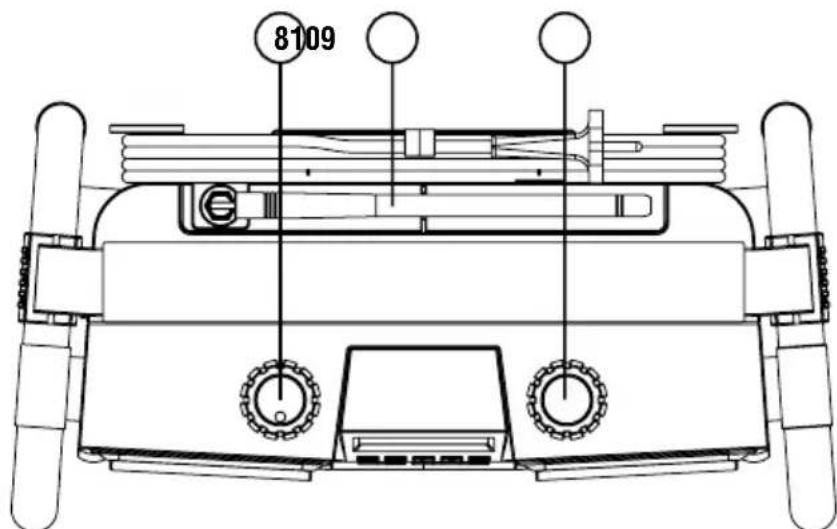
- Volume control
- Rubber FM antenna
- Tuning control / Seek station
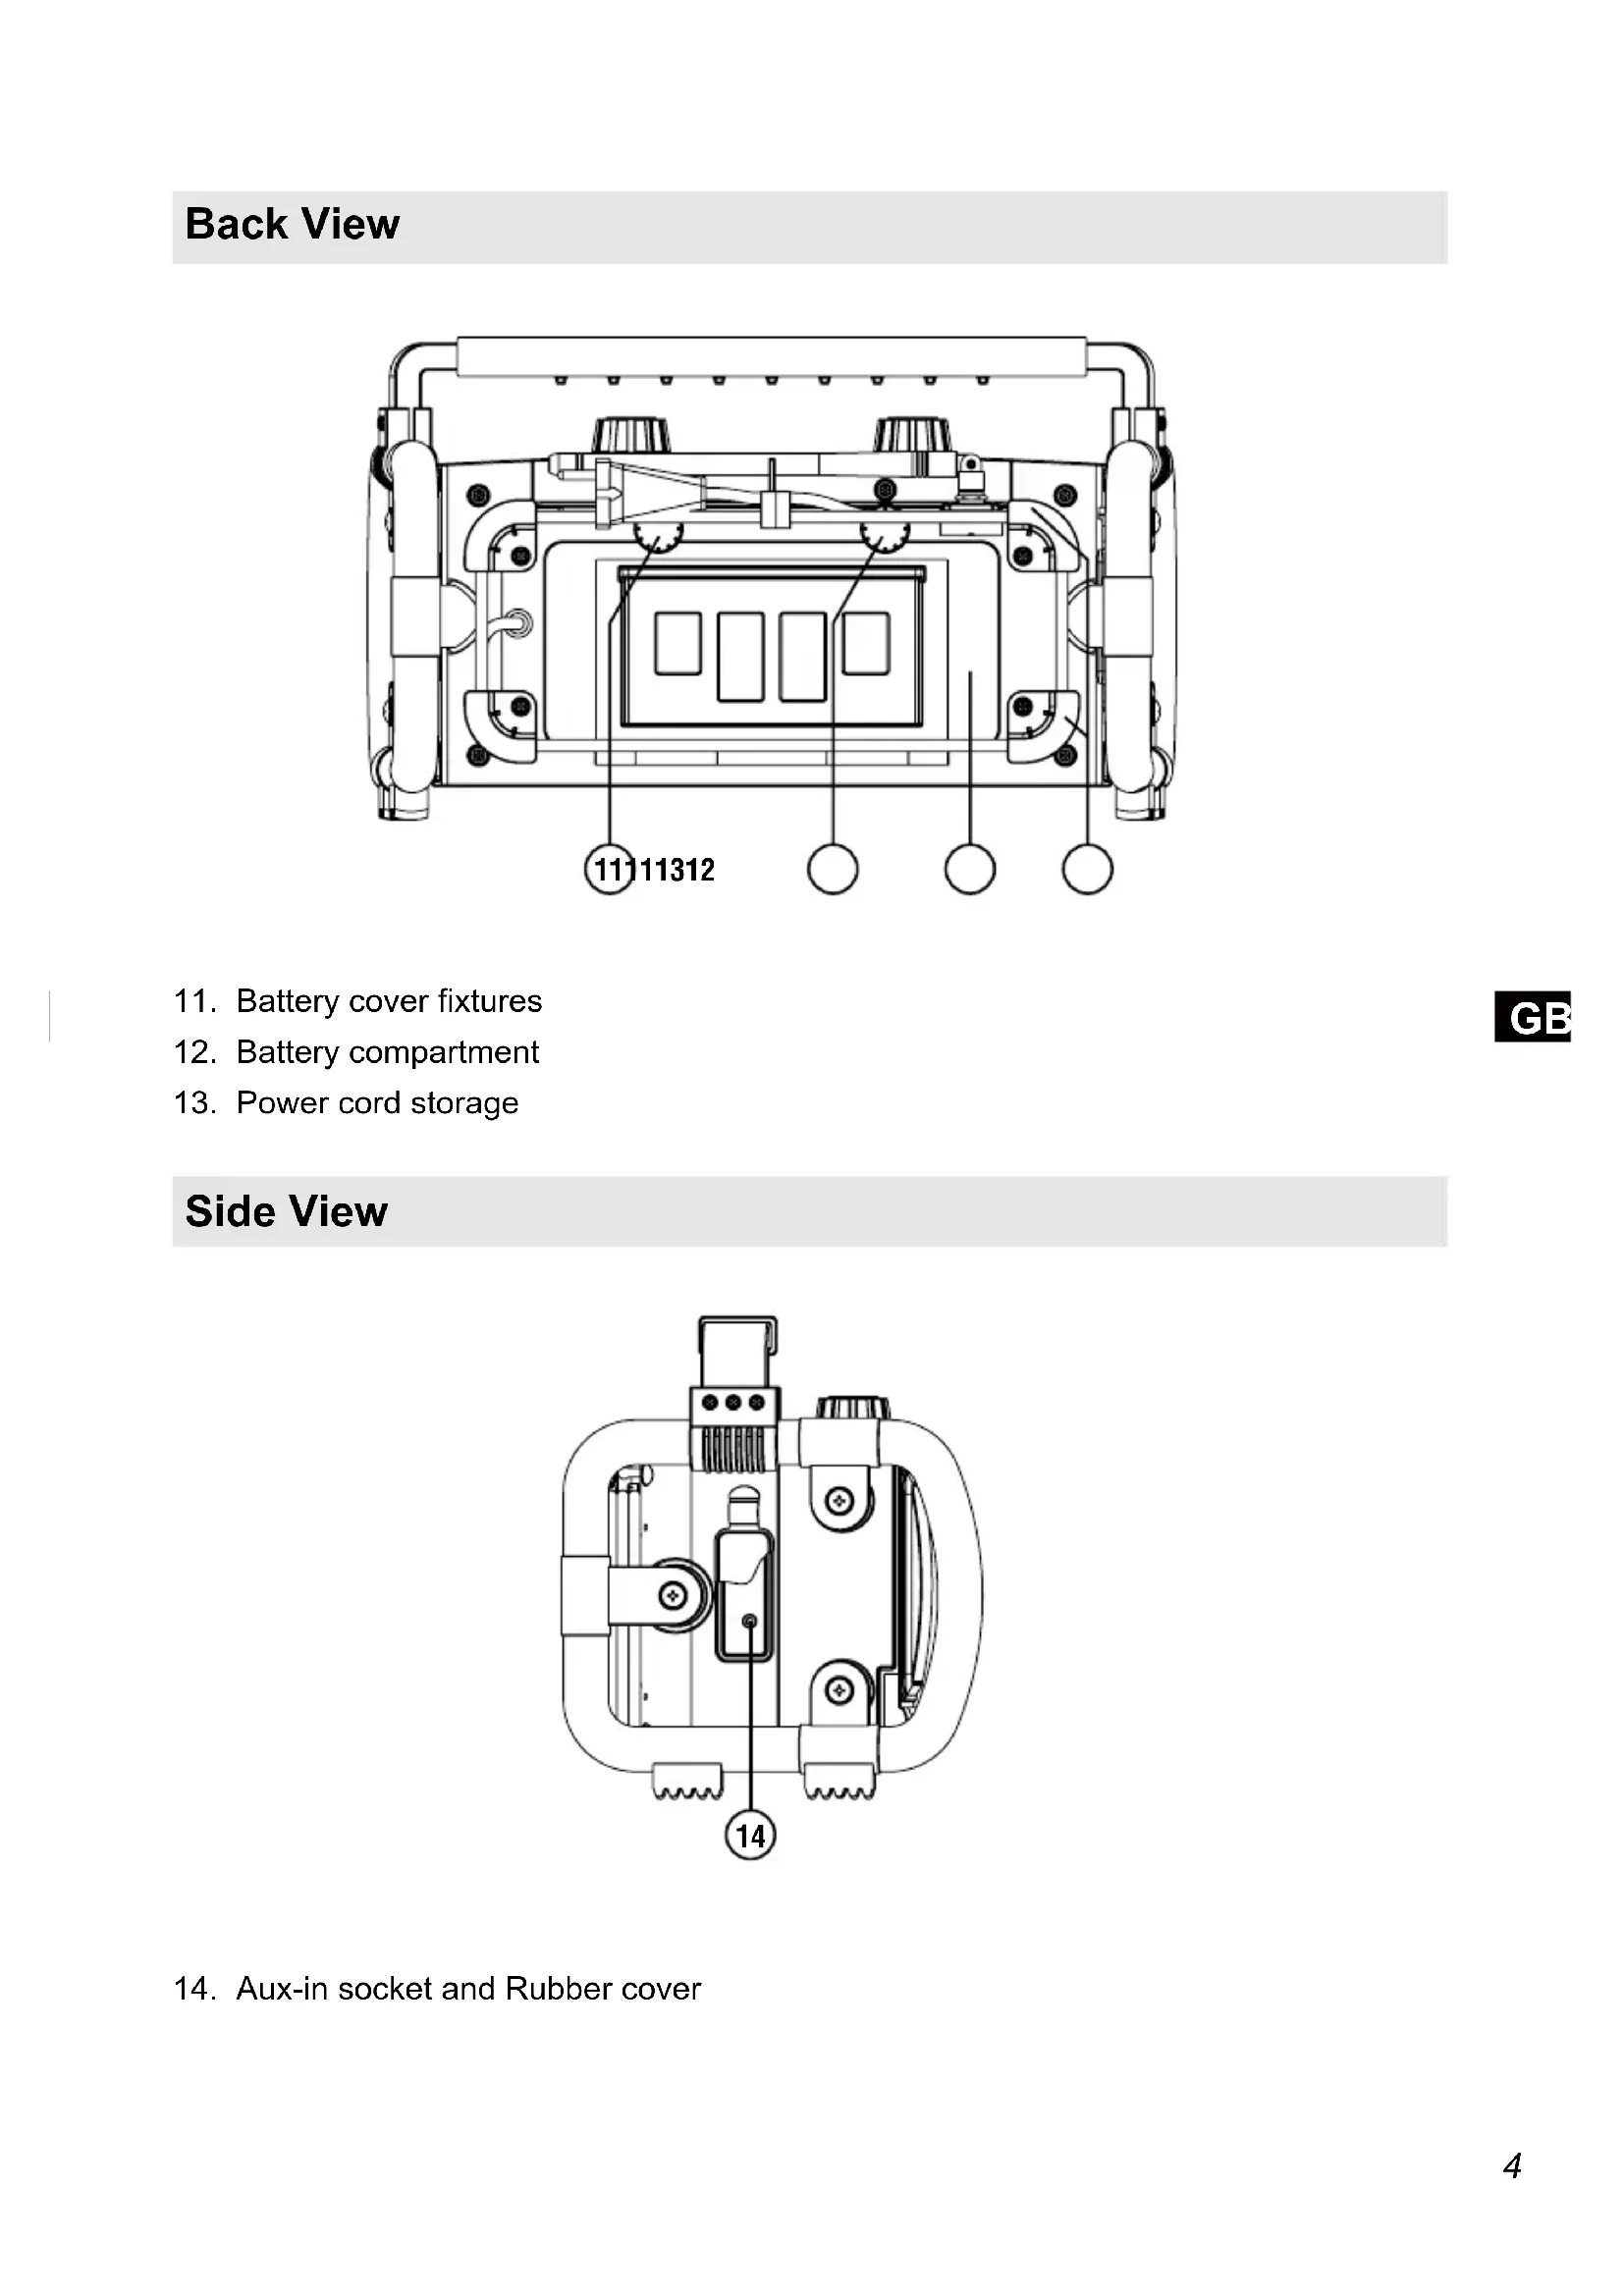
Back View
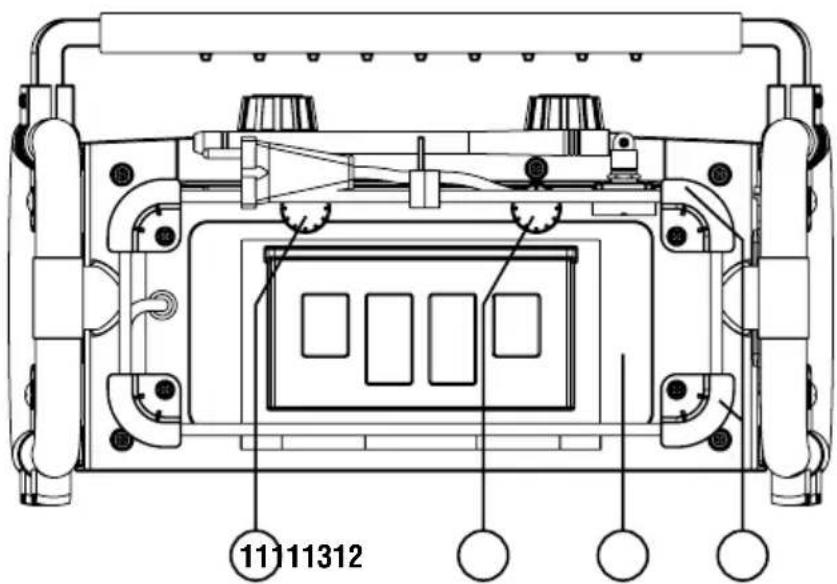
- Battery cover fixtures
- Battery compartment
- Power cord storage
Side View
- Aux-in socket and Rubber cover
POWER SUPPLY
Battery operation
- To open the battery compartment, first turn the battery cover fixtures anti-clockwise to loosen and pull down the battery cover.
- Insert 6 x D size (UM-1) battery with the correct polarity into the compartment. Close the battery cover and fasten the fixtures by turning clockwise.
- If the unit is not to be used for any extended period of time, it is recommended that the batteries are removed from the radio.
The approximate power level of the batteries is displayed in the LCD display of the radio. When the power level is very low the indication "Battery Low!" appears and the battery symbol flashes on the display. The batteries should then be replaced soon to continue normal operation of the radio.
Back up battery
Back up battery is to back up the preset stations and the clock.
It is necessary to insert back up battery (2 x AA size / UM-3) for memory back up even if you use AC power supply only. Without the back up battery, time and preset station will get lost if you remove the AC power cord from AC socket or during power failure.
Warning:
Danger of explosion if battery is incorrectly replaced. Replace only with the same or equivalent type.
Do not expose the batteries to excessive heat such as sunshine, fire or the like.
Batteries should not be disposed of by incineration and with household waste.
Disposable batteries should be taken to a suitable recycling centre if possible.
AC operation
Before plugging the AC power cord into the AC socket, be sure the voltage is correct. If you have batteries in the radio and using the AC power supply, the batteries will automatically be disconnect.
AC power cord storage is designed to store the cord when the radio is not in use.
Note: In order to disconnect the unit from the mains completely, the AC plug should be removed from the mains socket completely.
SETTING THE CLOCK
The clock can only be set when the radio is in standby mode. If no buttons are pressed for 5 seconds, the radio will exit the clock setup and the setting is cancelled.
- Press and hold the Tuning Control knob for 12 seconds until the hour digits flash on the display.
- Rotate the Tuning Control knob to set the hour.
- Press the Tuning Control knob, the minute digits flash.
- Rotate the Tuning Control knob to set the minute.
- Press the Tuning Control knob to confirm, the day flashes on the display.
- Rotate the Tuning Control knob to set the current day.
- Press the Tuning Control knob to confirm, the month flash.
- Rotate the Tuning Control knob to set the current month.
- Press the Tuning Control knob to confirm, the year will then flash on the display.
- Rotate the Tuning Control knob to set the current year.
- Press the Tuning Control knob to confirm, "SYNCLOCK ON" flashes.
- Rotary the Tuning Control knob to select "SYNCLOCK ON" or "SYNCLOCK OFF".
- Press the Tuning Control knob to confirm and finish the clock setting.
RDS time synchronisation
If "SYNCLOCK ON" is selected, the symbol "L" will show on the display. Some RDS stations transmit a time signal. If reception is good you have selected the "SYNCLOCK ON" option during the time setting, the time will be automatically updated ("L" flashes on the display). Time synchronisation can take several minutes. The automatic time setting is always activated when the radio is switched from standby to FM broadcasting and receives a RDS station.
OPERATING THE RADIO
Manual Tuning
- Press the Power On/Off button to turn on the radio.
- Select the FM waveband by pressing the Source button.
- Rotate the Tuning Control knob too reach the required FM station. The radio will change the frequency in steps of 50kHz .
- Rotate the Volume Control knob to get the required sound level.
- Rotate the rubber antenna to get the best reception.
- To turn off the radio, press the Power On/Off button.
Seek Station
- Press the Power On/Off button to turn on the radio.
- Select the FM waveband by pressing the Source button.
- Press the Tuning Control knob to start the seek function.
- The radio will seek and stop automatically when it finds a station of sufficient signal strength.
- To find other stations, press the Tuning Control knob again.
- To seek station in an opposite direction, rotate the Tuning Control knob clockwise (to scan from low frequency to high frequency) or rotate anti-clockwise (to scan from high frequency to low frequency), and press the Tuning Control knob.
- When the waveband end is reached, the radio will recommence tuning from the opposite waveband end.
Memory Preset Stations
There are 10 memory preset in this radio.
- Press the Power On/Off button to turn on the radio.
- Select the FM waveband by pressing the Source button.
- Tune to the required station.
- Press and hold the required Preset button until the radio beeps and shows for example "Preset 1 stored".
- Repeat step 3 and 4 for the remaining presets.
- Stations stored in the preset memories can be over-written by following the above procedure.
Recall Stations from Preset Memories
- Press the Power On/Off button to turn on the radio.
- Select the FM waveband by pressing the Source button.
- Briefly press the required Preset button, the display will show the preset number and station frequency.
OPERATING THE RADIO
FM stereo / mono
- If a station being received is weak, some hiss may be audible. To reduce the hiss, press the Mono/Stereo button to switch to mono mode, the display will show "MONO".
- To return to stereo mode, press the Mono/Stereo button and the display shows "AUTO STEREO", the radio will switch to stereo mode if the reception is good.
- "MN" and "ST" will show on the top line of the LCD display to indicate the mono or stereo reception.
RDS station service
RDS (Radio Data System) is an information system which inaudible digital information is transmitted in addition to the normal FM radio programme. When the radio is receiving a RDS station and the reception strength is sufficient, the station name will appear in the display. It may take some time before the RDS information is available.
GB
Calling up RDS information
- When you are listening to a FM station with RDS system, repeatedly press the Info button to cycle through the information. This will only function if the reception level is sufficient and clear.
a. Program service (PS) Displays the name of the radio station being listened to.
b. Program type (PTY) Displays the type of station being listened to, e.g. Pop, Classic, News, etc.
c. Radio text (RT) Displays the message about the station being listened to as ticker text.
d. Date and Time Displays the current time and date.
e. Signal strength level (SGLV) Displays the station signal strength level being received.
A 3.5mm stereo Aux In socket is provided on the side behind the rubber cover, for connecting an external audio device such as MP3 player or CD player.
- Connect a stereo or mono audio source to the Aux In socket.
- Press the Source button to select AUX input. Display will show "AUX IN".
- Play the external player.
- Adjust the volume of both the radio and the player for comfortable listening.
Note: Make sure the rubber cover is closed well after use to prevent moist and dirt from entering the radio.
TECHNICAL SPECIFICATIONS
Power Supply:
Mains operation
AC 230V, 50Hz ~ only
Batteries operation
6 x 1.5V (Type IEC LR20 / UM-1 / D size)
Frequency Coverage: FM 87.5 - 108MHz
Speaker:
Size 2 x 04 inch
Impedance 16 ohms
Output power 2 × 5W
Aux In socket 03.5 mm
Environmental note:

This product has been made from high-quality parts and materials which can be reused and recycled.
Therefore, do not throw the product away with normal household waste at the end of its life. Take it to a collection point for recycling electrical and electronic device. This is indicated by this symbol on the product, in the operating manual and on the packaging.
Please find out about collection points operated by your local authority. Help
protect the environmental by recycling used products.
CONTENU
Service de station RDS
RDS tidssynkronising
Om Du har valt "SYNCLOCK ON" (SYNCLOCK TILL), visas symbolen " L i displayen
RDS stationsservice 8
BEDIENING VAN DE RADIO - AUX IN 9