USER MANUAL DR750LW2CH BlackVue
Manufacturer | Pittasoft Co.,Ltd./ Korea
Address | (Gasan-dong, BYC HIGHCITY), A-7th floor, 131, Gasan digital 1-ro, Geumcheon-qu, Seoul,
153-718, Republic of Korea
Sales Headquater | Tel: +82-2-6947-4670 (#3) | Fax: +82-2-6947-4699
e-mail: sales@pittasoft.com
PITTASOFT
www.blackvue.com
EN/FR/DE/SC
BLACKVUE LCD
Quick Guide
PITTASOFT
ENGLISH
BLACKVUE LCD
DR750LW-2CH
For more detail, download the manual from the BlackVue homepage (www.blackvue.com).

Table of Contents
Getting Started
5 Name of Each Part
Install the BlackVue
8 Insert & Remove the microSD Card
4 Package Components
7 Checking Installation Position
9
Installation
BlackVue Viewer and App
11 BlackVue App
11 BlackVue Viewer

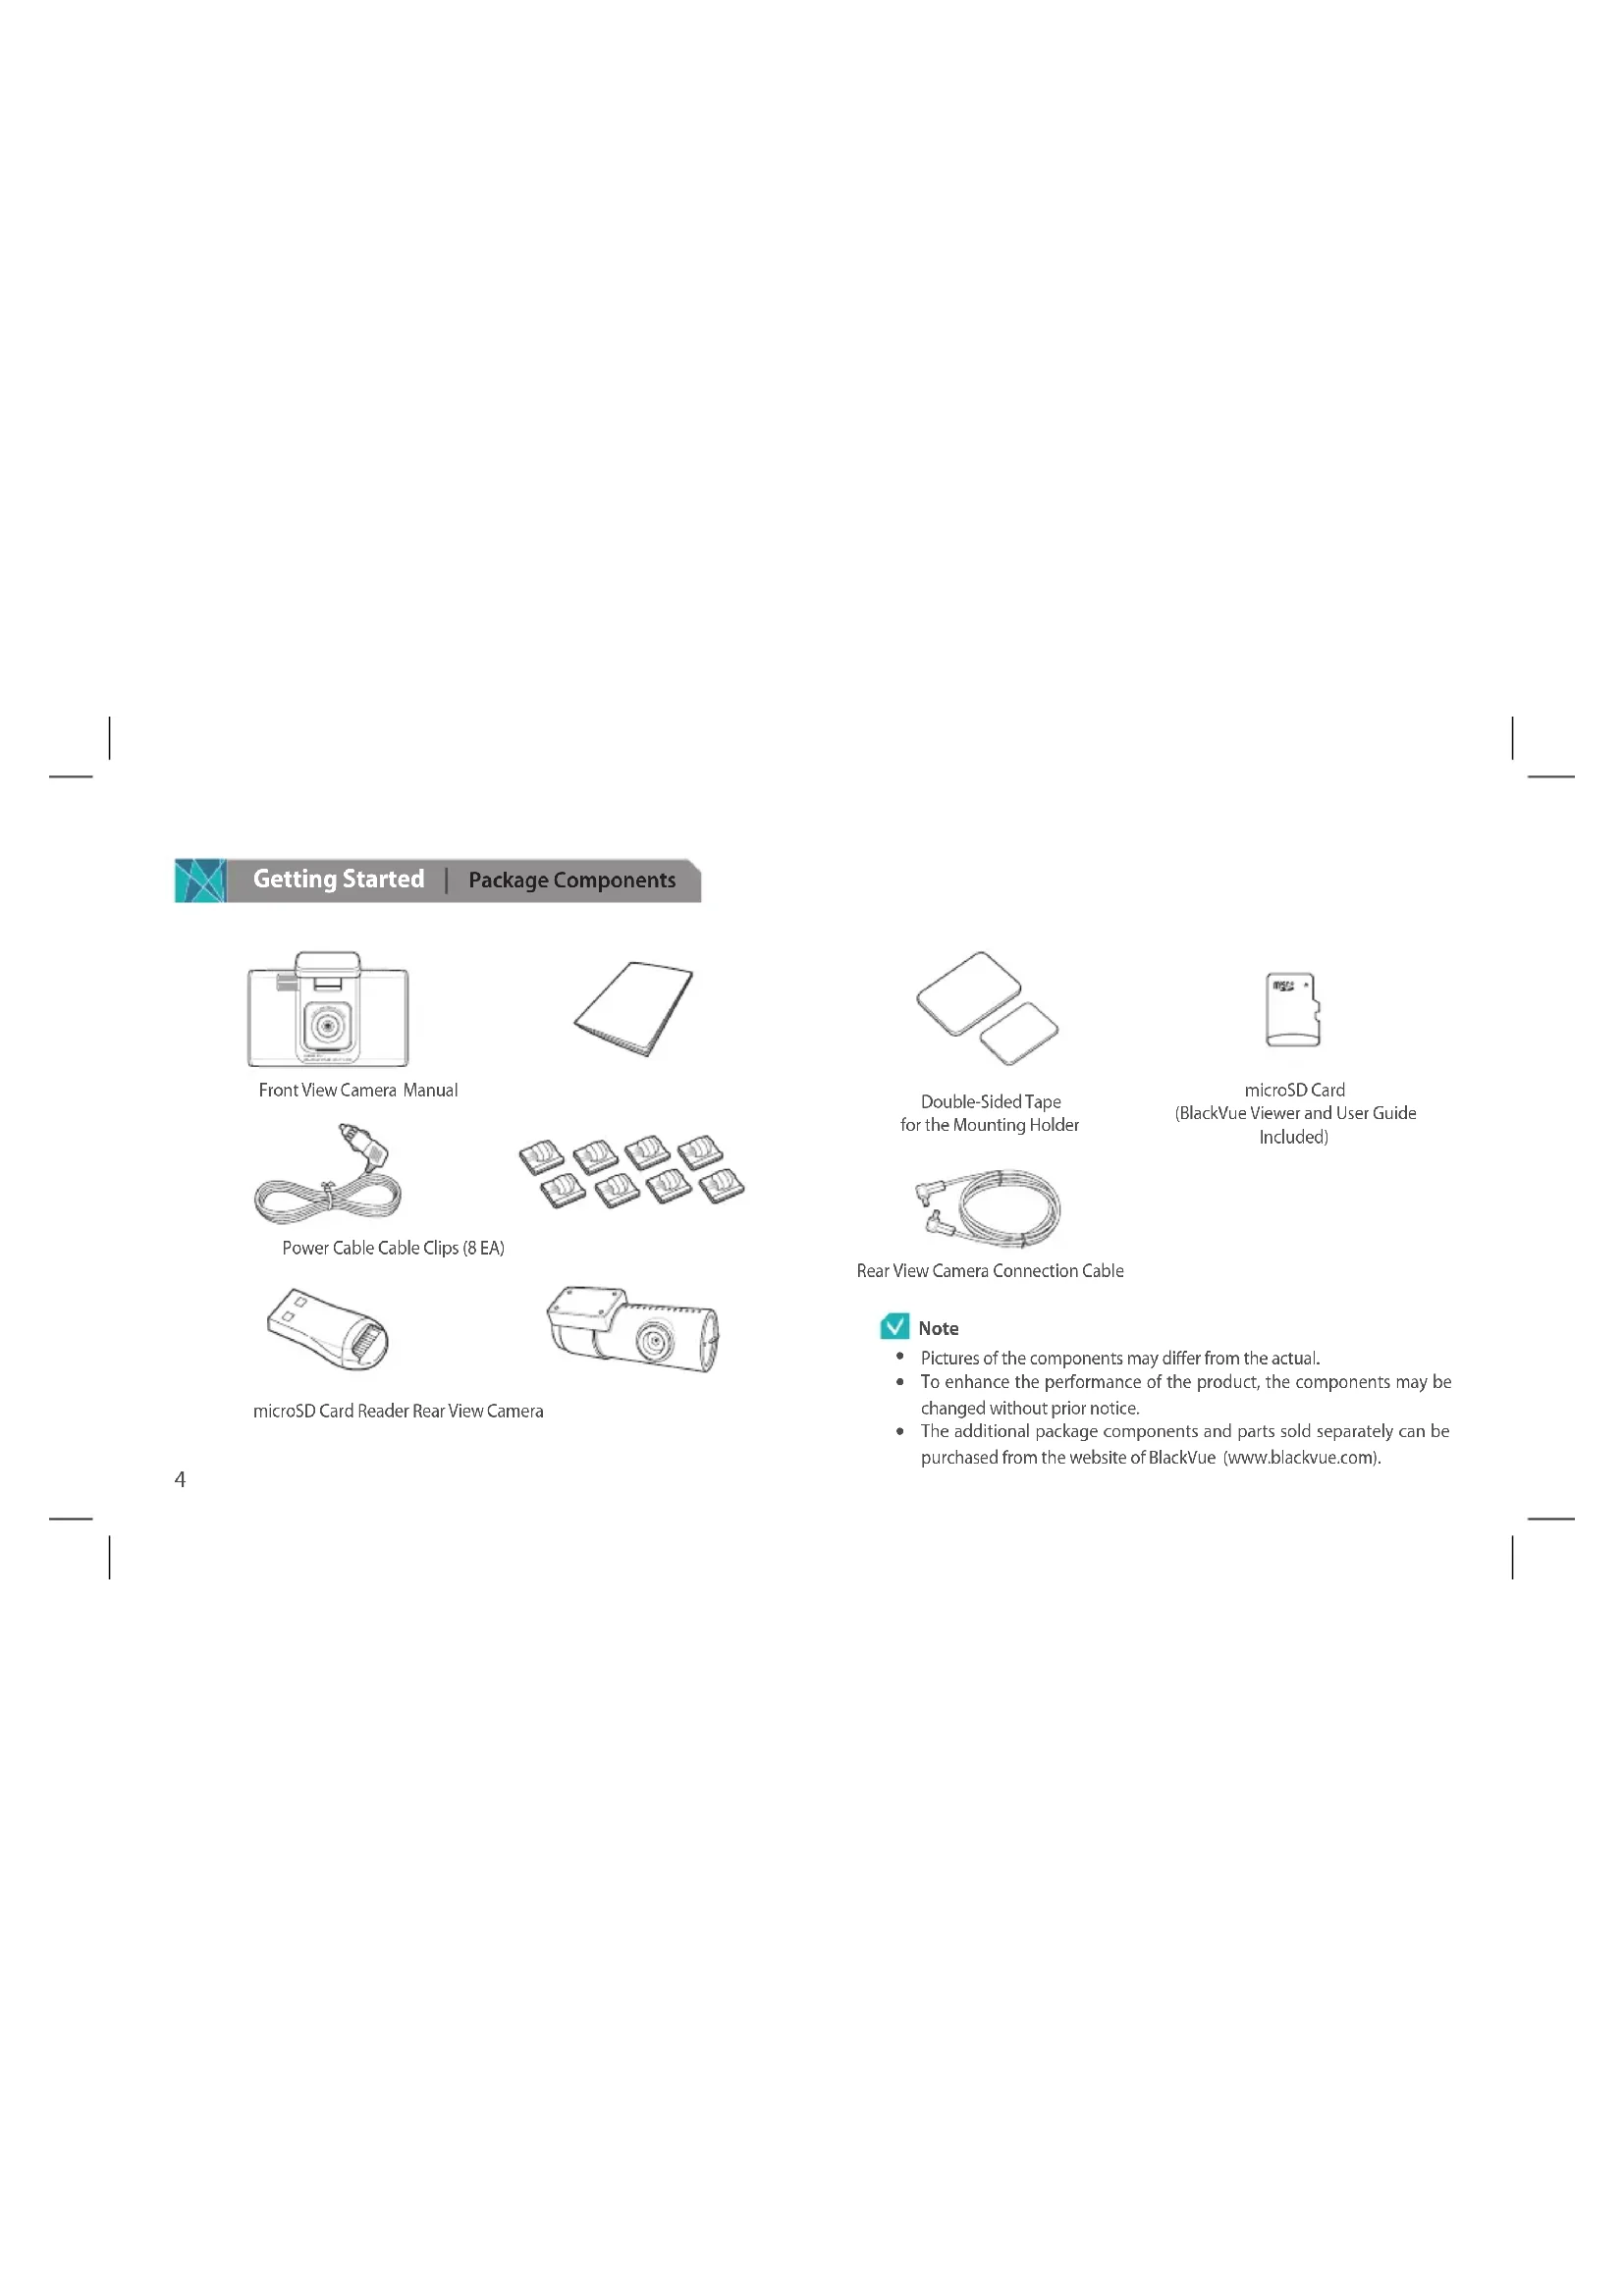
Getting Started Package Components
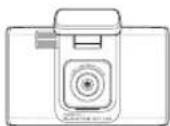
Front View Camera Manual
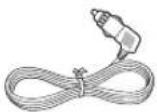
Power Cable Cable Clips (8 EA)

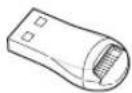
microSD Card Reader Rear View Camera
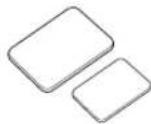
Double-Sided Tape for the Mounting Holder

microSD Card (BlackVue Viewer and User Guide Included)
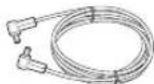
Rear View Camera Connection Cable

Note
Pictures of the components may differ from the actual.
To enhance the performance of the product, the components may be changed without prior notice.
The additional package components and parts sold separately can be purchased from the website of BlackVue (www.blackvue.com).
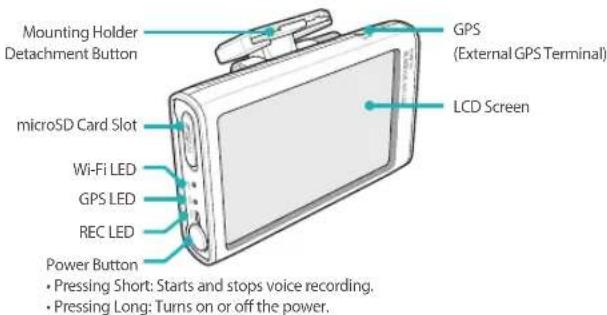
Name of Each Part

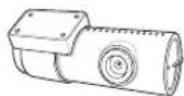
Front View Camera
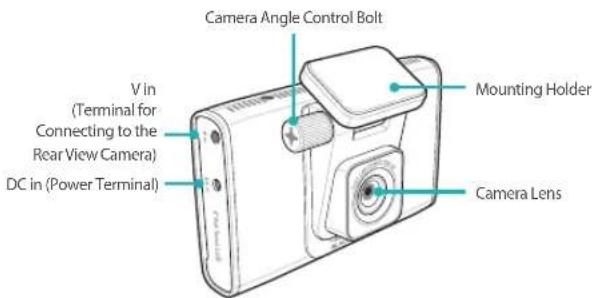

Note
The external GPS is sold separately.
- 'Hancom Inc.' owns the copyright of the 'HANDotum / HANDotumB / HANDotumExt' font used in DR750LW-2CH firmware.

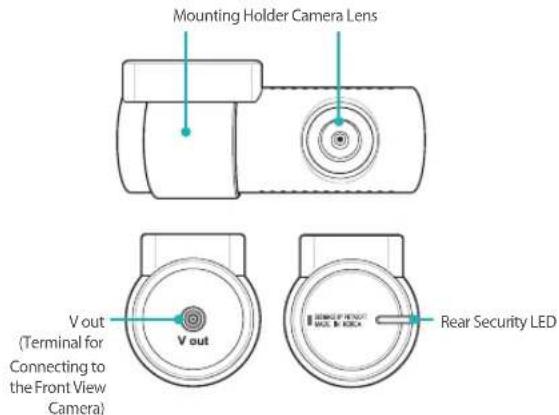
Rear View Camera

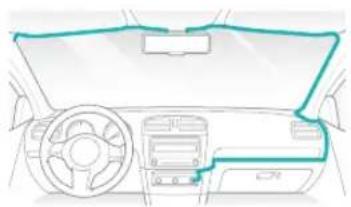
Install the BlackVue | Checking Installation Position
It is recommended to install the front view camera next to the room mirror. Clean any foreign substances and moisture from the place where the product will be installed with a dry cloth
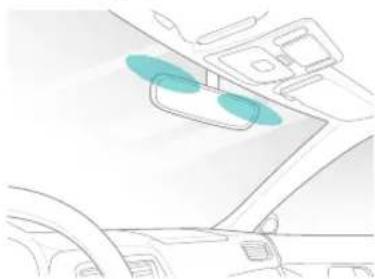
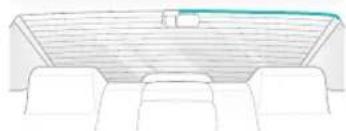
2 It is recommended to install the rear view camera at the higher part of the back window.


Note
- Do not install the product where it can interfere with the driver's vision.
It is recommended to install the product at the spot specified.
Insert & Remove the microSD Card
Insert the microSD card into the microSD card slot, of the front view camera, in the direction as shown in the figure below:
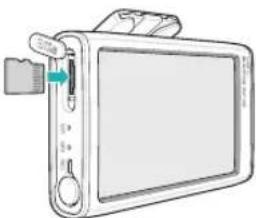
2 In order to detach the microSD card, gently push the center of the microSD card with your thumb and pull out the card. Make sure that the microSD card does not spring out when detaching the card.

Caution
- Do not remove the microSD card while it is saving or reading data. This may cause data damaged or malfunction.
- Copy important data to other storage medias. Pittasoft Co., Ltd. is not accountable for data loss resulting from carelessness.

Note
- Insert or remove the microSD card only when the product is turned off.
- MicroSD cards are consumables. Replace them with new ones after prolonged use.
Installation
1 In a bright and safe place, stop the vehicle engine and pull out the vehicle key.
2 Attach the front view camera on the vehicle windshield glass with double-sided tape.

3 Attach the lens of the rear view camera on the vehicle's back window with double-sided tape, so that the lens can also be placed at the center of the vehicle.
4 Connect the V in terminal of the front view camera to the V out terminal of the rear view camera by using the cable for connecting to the rear view camera.
Use the power cable to connect the DC in of the front camera to car's power socket.

Note
- It is necessary to use Power Magic (the Battery Discharge Prevention Device) to record video while the car is parked.
To use BlackVue with other equipment that uses a power cable, purchase and use a dual power outlet adaptor.
6 Organize the cables, using the cable clip, to prevent the driver's vision from being interrupted.
7 Start-up of the vehicle, then check if the product is properly operating.
8 Adjust the camera angle to view the LCD screen. Slightly unfasten the camera angle control bolt to adjust the angle; then fasten the bolt. Even if the prop is detached, the camera angle can be maintained. Thus, the camera can be installed at the same lens angle as before.
Caution
- Do not remove the microSD card while it is saving or reading data. This may cause data damaged or malfunction.
Note
After a test drive, check if the video has been properly recorded.
The recorded video is saved in MP4 format.
PLEASE CONNECT REAR CAMERA FIRST BEFORE CONNECT THE POWER CORD ON FRONT CAMERA.

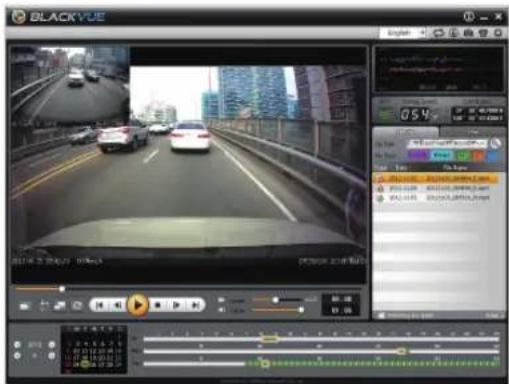
BlackVue Viewer and App | BlackVue Viewer
The BlackVue Viewer allows you to play the videos, manage the recorded files, and configure the settings. The BlackVue Viewer and Manual are provided with a microSD card.
BlackVue App
The BlackVue is easily used by inserting a microSD card into a smartphone or a tablet PC or by connecting BlackVue to a Wi-Fi connection. You can download the BlackVue App at the Play Store(Android), the App Store(iOS) or Windows store. The initial password is blackvue, but the you can change it.
- Recorded video playback (VOD) & real-time live view function
Firmware Upgrade
- BlackVue Configuration
Sharing videos on YouTube
Video File Management
THIS DEVICE COMPLIES WITH PART 15 OF THE FCC RULES.
Operation is subject to the following two conditions:
(1) This device may not cause harmful interference, and
(2) This device must accept any interference received, including interference that may cause undesired operation.
CAUTION : Changes or modifications not expressly approved by the party responsible for compliance could void the user's authority to operate the equipment.
Note: This equipment has been tested and found to comply with the limits for a Class B digital device, pursuant to part 15 of the FCC Rules. These limits are designed to provide reasonable protection against harmful interference in a residential installation. This equipment generates, uses and can radiate radio frequency energy and, if not installed and used in accordance with the instructions, may cause harmful interference to radio communications. However, there is no guarantee that interference will not occur in a particular installation. If this equipment does cause harmful interference to radio or television reception, which can be determined by turning the equipment off and on, the user is encouraged to try to correct the interference by one or more of the following measures:
Reorient or relocate the receiving antenna.
- Increase the separation between the equipment and receiver.
- Connect the equipment into an outlet on a circuit different from that to which the receiver is connected.
- Consult the dealer or an experienced radio/TV technician for help.
Modifications not expressly approved by the manufacturer could void the user's authority to operate the equipment under FCC rules.
FCCID:YCK-DR750LW-2CH
Product Warranty
This product is warranted for 1 year from the purchase date. (Accessories Such as Batteries and microSD Cards: Six Months)
Pittasoft Co., Ltd. warrants its products under the Standard on Consumer Dispute Settlement (Announced by the Korea Fair Trade Commission). It is as follows: If a service is requested, Pittasoft or its designated subcontractor will provide the service.
| Product Name (Model Name) Serial No. | | |
| Purchase Date Reseller | | |
| Customer Information Address / Phone Number | | |
| Consumer Damage Type | Warranty |
| Within the Warranty Term After the Warranty Term |
| Performance/Functional Issues or Problems Under Normal Use Conditions | Serious Repair Required Within 10 Days After Purchase | Product Exchange/Refund at Purchase Price | N/A |
| Serious Repair Required Within One Month After Purchase | Product Exchange |
| Serious Repair Required Within One Month After Exchange | Product Exchange/Refund at Purchase Price |
| Exchange Disabled Refund at Purchase Price | |
| Consumer Damage Type | Warranty |
| Within the Warranty Term | After the Warranty Term |
| Performance/Functional Issues or Problems Under Normal Use Conditions | Repair Enabled | Defects Free Repair | | Paid Repair/Paid Exchange/Free Repair After the Term of Free Warranty |
| Failure Resulting From the Same Defect (Third Time) After Repair | Product Exchange/Refund at Purchase Price |
| Failure (Fifth Time) After the Repair of Failures in Different Parts |
| Repair Disabled | Loss of a Product Whose Repair was Requested | Refund of the Amount Calculated by Adding 10% to the Fixed Depreciation Amount (Maximum: Purchase Price) |
| When repair cannot be conducted due to a lack of spare parts within the component retention period |
| When repair cannot be completed with spare parts | Product Exchange/Refund After Fixed Depreciation |
| 1) Malfunction Resulting From Customer Faults - Malfunction and damage to the product due to your mishandling (e.g. dropping, impact, damage, and forced operation) or misuse - Malfunction and damage to the product conducted after you or a third party, not the after-sales service engineer of Pittasoft repairs alters the product - Malfunction and damage to the product caused by parts, consumables, or products sold separately, not specified by Pittasoft 2) Other Cases - Malfunction due to natural disaster (e.g. fire, submersion, and earthquake) - When consumable parts expire lifespan - Malfunction due to an external cause | Paid Repair Paid Repair | |
This warranty is effective only in the country where you purchased this product.
Product exchange or refund is possible only at the seller where you purchased the product.
MEMO
FRANÇAIS
BLACKVUE LCD
DR750LW-2CH