1KB1P9X - Basket BARAZZA - Free user manual and instructions
Find the device manual for free 1KB1P9X BARAZZA in PDF.

| Brand | Barazza |
| Model | 1KB1P9X |
| Product type | Extractor / recirculation hood |
| Installation type | Extracting (external evacuation) or recirculating (recycling with optional charcoal filters) |
| Controls | Soft touch with LED display (depending on version: rectangular buttons, round buttons, or mechanical keys) |
| Number of speeds | 4 (including an automatic intensive speed returning to 2nd after 10 min) |
| Timer function | Yes (automatic stop after 10 or 15 min depending on version) |
| Automatic filter management | Yes (visual and audible alert for cleaning grease filters and replacing charcoal filters) |
| Lighting | Integrated lamp(s) – replace with lamps of same specifications |
| Grease filters | Washable (by hand or in dishwasher) – recommended interval: 50-100 hours of use |
| Charcoal filters | Optional – disposable (replace every 200-300 h) or regenerable |
| Remote control | Optional (programming included) |
| Additional functions | Secondary lighting, interval function (automatic operation 10 min/h), micro-switch for opening/closing |
| Temperature sensor | Yes (automatic activation at 40°C, adjusts speed) |
| Minimum installation distance | Between 700 and 800 mm from the cooking surface |
| Electrical supply | See rating plate inside the hood (after removing grease filters) |
| Material | Stainless steel (probably) |
| Safety | Automatic shutdown after prolonged use, flame protection, prohibited use by unsupervised children |
| Spare parts | Grease filters, charcoal filters, lamps, remote control |
| Repairability | Repairs limited to a qualified professional |
| Standards | CE and WEEE marking (directive 2002/96/EC) |
Frequently Asked Questions - 1KB1P9X BARAZZA
User questions about 1KB1P9X BARAZZA
0 question about this device. Answer the ones you know or ask your own.
Ask a new question about this device
Download the instructions for your Basket in PDF format for free! Find your manual 1KB1P9X - BARAZZA and take your electronic device back in hand. On this page are published all the documents necessary for the use of your device. 1KB1P9X by BARAZZA.
USER MANUAL 1KB1P9X BARAZZA
natural_image
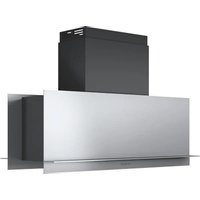
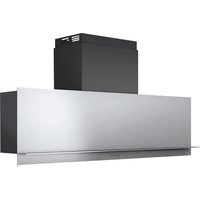
3D rendering of a gray industrial kitchen or oven unit with ventilation grilles and ventilation duct (no text or symbols visible)B ONE
EN WARNING! The hood is equipped with standard fixing material. The person who is mounting the hood should make sure that the fixing elements are right and suitable for the walls and ceilings he finds. The manufacturer declines any responsibility for damages caused by incorrect mounting.
natural_image
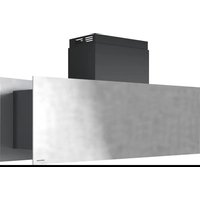
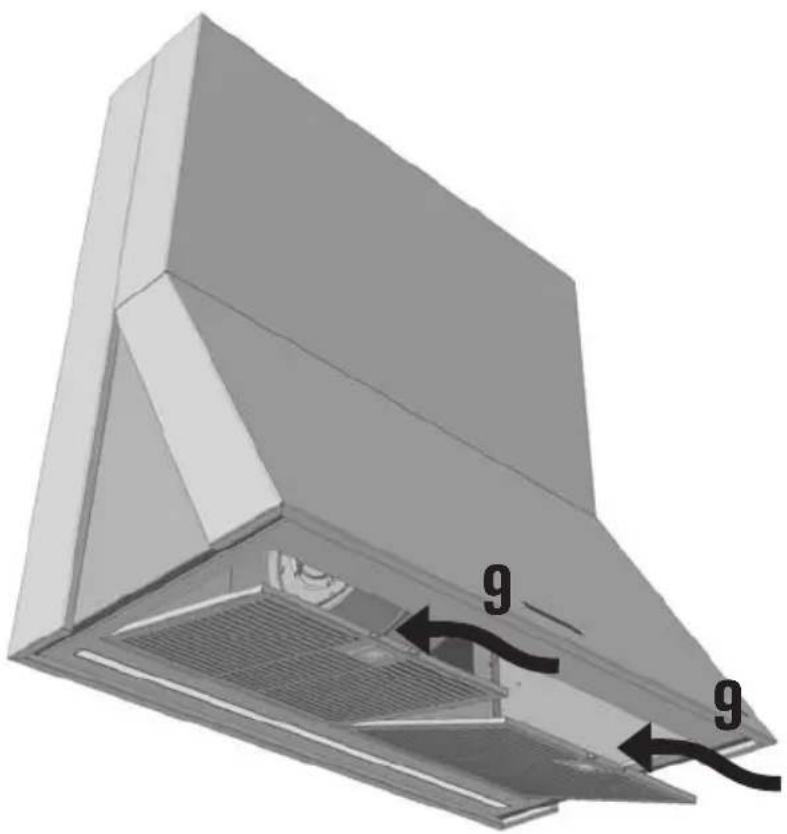
3D diagram of a kitchen fan with airflow arrows indicating circulation (no text or symbols)M6
text_image
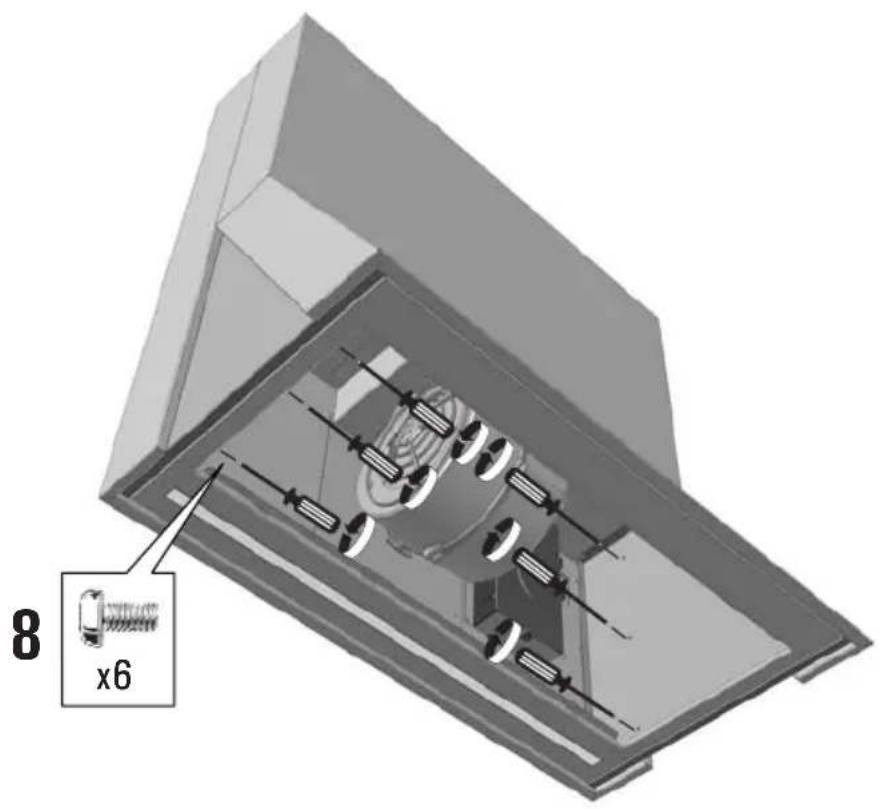
8 x6M7
natural_image
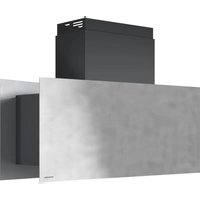
3D diagram of a kitchen fan with ventilation duct and ventilation slots, showing no text or symbolsM8
text_image
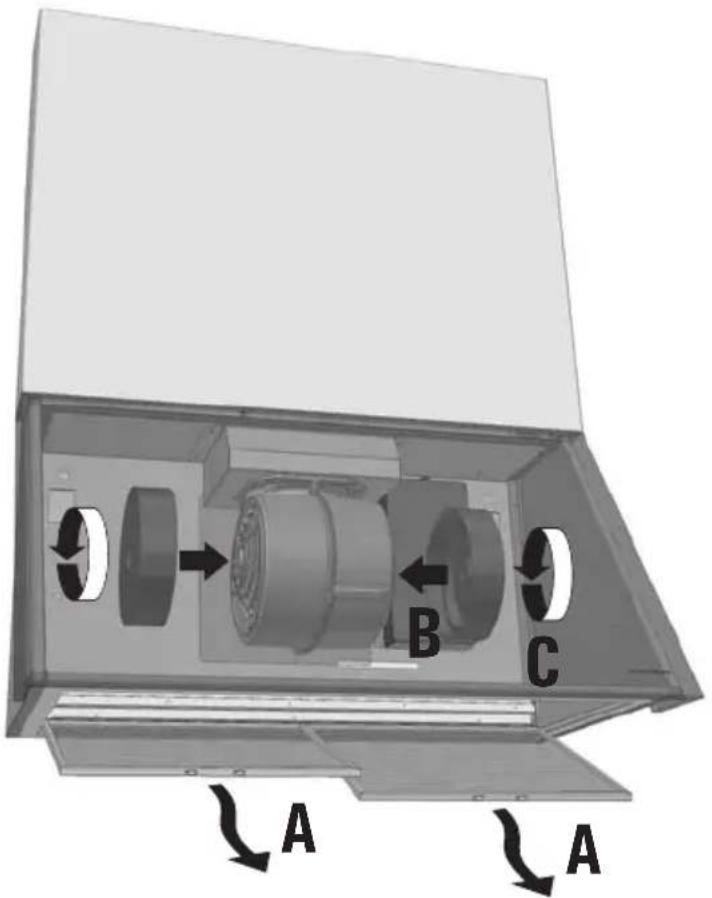
A B C A AC2
IT CAPPA ASPIRANTE
Manuale d'uso e
manutenzione
EN COOKER HOOD
Use and maintenance
manual
FR HOTTE ASPIRANTE
Manuel d'emploi et
d'entretien
DE DUNSTABZUGSHAUBE
text_image
Control panel with icons for alarm, circle, minus sign, plus, and directional arrow symbolsCOMANDO SOFT TOUCH CON DISPLAY E TASTI
text_image
0 T - + P 8COMANDO SOFT TOUCH CON TASTI RETRO ILLUMINATI
text_image
Seven circular icons with symbols: O, O, I, II, III, S, and a gray bar, arranged horizontally.COMANDO SOFT TOUCH CON LED E TASTI SU ACCIAIO

text_image
Electrical hazard symbol icons including lightbulb, warning sign, triangle, plus sign, and turbineCOMANDO CON PULSANTI MECCANICI
text_image
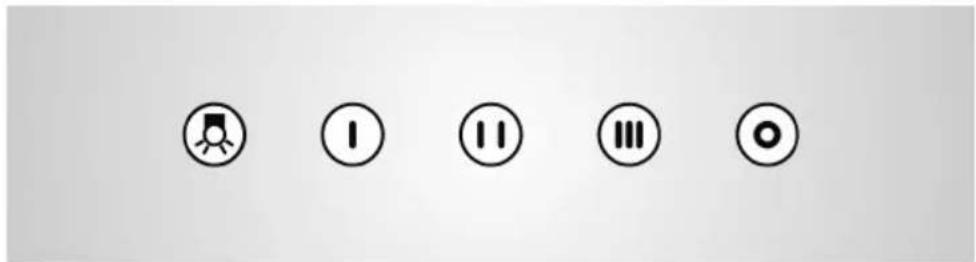
Five circular icons with symbols: battery, switch, double, three vertical bars, and one circle, arranged horizontally.COMANDO SOFT TOUCH CON DISPLAY E TASTI RETTANGOLARI
text_image
Diagram showing a device control panel with four symbols: positive, neutral, open circle, and downward triangle.natural_image
Symbol of a trash bin crossed out by two diagonal lines (no text or labels)
INSTRUCTIONS FOR USE and PRECAUTIONS
!
Before the fist use pay attention to what has been written in the attached manual.
The accessible parts of the hoods can become hot if the hob is working.
■ The hood is not intended for the use of children or people with reduced physical, mental or sensorial capacities, unless they have been instructed on purpose from the person responsible for their security. The children must be supervised to guarantee that they do not play with the hood.
■ Not to cook "flambé" dishes, avoid flames directly underneath the hood.
If you use a gas hob, do not use all the burners at the same time and at the highest termical load for a long period (max 15 minutes), otherwise you have the risk of getting burned if you touch the surface of the casing, or the risk of damages to the cooker hood. In case of use at the same time of 3 or more burners, the cooker hood must work at the highest speed.
■ To avoid leaving on any hot plates which generate strong free flames underneath the hood.
■ To avoid any strong flames being issued from under saucepans at the sides; when frying, not to allow oil to splash or overheat in the pan, as this is a fire risk.
■ Before any cleaning or maintenance operation, disconnect the hood from the main supply, by means of the main switch or the bipolar switch or by removing the plug.
If other gas equipment or equipment which consumes oxygen from the environment is used, ventilation must be sufficient. For safe ventilation, maximum depression in the room should not exceed 4 Pa (0,04 mbar) and there must be a hole on the outside facing wall (suitably positioned and dimensioned).
■ Never use the hood without the grease filters.
- Keep the grease filters clean, taking into account the recommended cleaning suggestions.
■ Replace the carbon filters (if the hood is used as a filtering hood), as indicated.
■ Turn on the hood motor before you start cooking.
■ Turn off the hood motor about 10 minutes after you have finished cooking.
■ Do not use the hood to suction gas, fumes, vapours or other substances different from the normal fumes in the kitchen.
GENERAL
A SUCTION HOOD extracts air, fumes and vapours from the inside environment and then expels them outside. It is not necessary to use carbon filters for purifying.
A FILTERING HOOD extracts air, fumes and vapours from the inside environment, purifies them by means of carbon filters and then emits the purified air into the same environment. In this case the use of carbon filters is absolutely necessary.
Carbon filters are available separately and can be purchased as optional accessories (see OPTIONAL ACCESSORIES).
BEFORE MOUNTING
The instruction manual apply to several versions of the appliance. Accordingly you may find descriptions of individual features that do not apply to your specific appliance.
Before mounting the hood it is necessary to pay attention to the minimum installation distances between the lower part of the hood and the upper part of the hob as shown in the specific mounting pictures. Where it is possible to reach, we advice a distance between 700 and 800 mm.
If the user decides to install the hood at lower distances than the ones shown, the manufacturer declines any responsabilità for eventual damages caused by the hood due to strong heat or damages to property or persons caused directly or indirectly by any type of malfunctioning break down or possible fire.
Arrange for a socket outlet or standard connection to the electric mains; if the hood is used as a suction hood, it is necessary to make a hole towards the outside (i.e in the open air) for the scavenging of the fumes.
It is absolutely forbidden for the user to connect the air discharge of the hood, when used a suction hood, to boiler chimneys, gas, fume or vapour scavenging chimneys or any other duct, even only ventilation ducts, which have been used or will be used for other devices. Moreover it is not permitted to connect the scavenging pipe for fumes in other adjacent rooms or wellholes, or pipes for fire-fighting devices. In any case it is necessary to respect all norms concerning scavenging of the air. Any user who does not adhere to these instructions is risking his own life and the lives of others. In this case, the manufacturer declines any responsibility.
If the hood is used as a suction hood, it is necessary for qualified personnel to make a hole for ventilation on the outside wall. If the cooker is gas, it is not advisable to use the hood at the same time are fireplaces, furnaces, gas or other fuel stoves, or water heaters which burn up oxygen from the environment in order to function, and in any case depression in the cooker area must be below 4 Pa (0,04 mbar) and the room must be sufficiently aired.
If in doubt, national and international standards precisely indicate the rules for the state of art installation of gas systems and for environment air change, to avoid the possibility of incomplete combustions with the risk of poisonous fumes being emitted.
If the hood is to be used as a filtering hood, it is necessary to purchase carbon filters (see OPTIONAL ACCESSORIES).
MOUNTING INSTRUCTIONS
Mount the cooker hood as shown in the pictures of the M series if the hood is used for suction use, or C series if the hood is used for filtering use.
The hood is equipped with standard fixing material. The person who is mounting the hood should make sure that the fixing elements are right and suitable for the walls and ceilings he finds. The manufacturer declines any responsibility for damages caused by incorrect mounting.
The cooker hood is heavy and in order to move it 2 persons are needed.
The packaging material is dangerous for children. Never allow the children to play with the packaging material.
During the installation of the cooker hood, always wear protective handgloves to prevent injuries.
DISMANTLING AND REPOSITIONING OF THE GREASE FILTERS
■ Switch the light off and wait until the bulbs are completely cooled down.
■ Follow the steps as shown in the pictures.
■ To dismantle the grease filter, press the handles, overturn the filters and remove them.
■ To remount the grease filters, put the rear part of the grease filter into its seat, press the handle, insert the front part of the filter and release the handles.
FITTING AND REMOVAL OF EVENTUAL CARBON FILTERS
If you want to use the hood as filtering it is necessary to mount the carbon filters as it is shown in the pictures of the C series. The carbon filters are OPTIONAL and they have to be bought in a separate way.
There are carbon filters that need replacement after use and carbon filters that can be regenerated. In case of use of carbon filters which can be regenerated follow the instructions enclosed to the filters.
GENERAL WARNING
The pipe must be heat, flame and corrosionproof. The manufacturer strongly advises against the use of reducers or pipes with different diameter to the hood outlet pipe, and pipes made of flexible aluminium because performance is diminished and noise level increased.
The end part of the pipe, on the outside of the hole on the wall, must be of such a shape to avoid rain, gusts of wind or other foreign bodies getting into the pipe. Should there be any doubt, contact anyone specialising in the installation of gas or ventilation system.
ELECTRICAL CONNECTION
WARNING
The electrical connection can only be carried out by qualified professional personnel, using standard material and state of the art installation methods. The manufacturer declines any responsibility for installations carried out by unskilled persons and for installations which are not in conformity with the standard norms concerning electrical safety (both concerning methods and materials).
ELECTRICAL TECHNICAL DATA
The electrical technical data are visible inside the hood after the removal of the grease filters.
CONNECTION TO THE POWER SUPPLY
The flexible feed cable supplied is already connected internally and emerges from the hood near the air outlet duct.
It is possible to effect two types of electric installation:
■ fixed installation;
■ installation by means of plug on a socket.
BEFORE ELECTRICAL INSTALLATION
Before connection you must:
■ check that the electrical data indicated are in conformity with the main voltage and frequency values of the building where the hood is to be installed;
■ check that the building is fitted with electric safety systems to protect against short circuits and electric shock systems, according to the laws in force;
■ install an electric socket (or connection point) with a bipolar switch, which has contacts with an opening of at least 3 mms;
■ if it is wished to install the hood with a plug, it is necessary that you have access to the plug;
■ always turn off the main voltage supply by means of the bipolar switch before connecting and switch on again only when connections have been completed, tested and are safe.
⚠️ If the light of the lamps is weak when the hood is in stand by, then invert the phase of the plug/socket.
PRECAUTIONS TO BE TAKEN IF REPAIRS ARE TO BE CARRIED OUT
Repairs, including the replacement of the feed cable if necessary, are to be carried out only by qualified personnel, using standard methods, instruments and materials. Any repairs carried out by others could prove to be dangerous and could be a fire risk.
FUNCTION AND USE
KIND OF CONTROLS
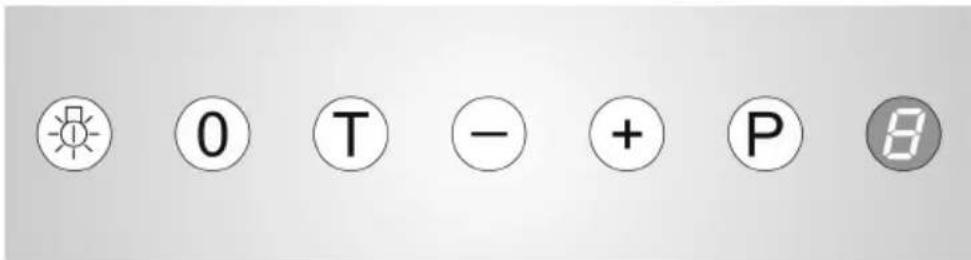
SOFT TOUCH CONTROL WITH DISPLAY AND RECTANGULAR PUSH BUTTONS
text_image
Image showing a row of icons including a bird, circle, minus sign, plus sign, and directional arrow with exclamation mark.SOFT TOUCH CONTROL WITH DISPLAY AND PUSH BUTTON
text_image
0 T - + P 8SOFT TOUCH CONTROLS WITH LIGHT BEHIND
text_image
Seven circular icons with symbols: lightbulb, O, I, II, III, swirl, and a gray rectangle on a white background.SOFT TOUCH CONTROL WITH LEDS AND PUSH BUTTONS ON S/STEEL
text_image
Electrical warning symbols including light bulb, current, triangle, plus sign, and diode with corresponding iconsMECHANICAL CONTROLS
text_image
Five circular icons with corresponding symbols: play button, I, two, three, and oneSOFT TOUCH CONTROL WITH DISPLAY AND RECTANGULAR PUSH BUTTONS
 | |
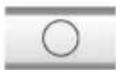
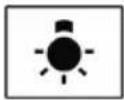
 | It switches the lights on and off. |
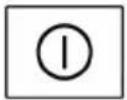
 | It switches the motor off. |
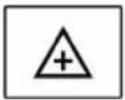
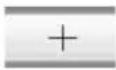 | It increases the speed of the motor.The highest speed of the motor is shown with P and after 10 minutes the second speed comes automatically. |
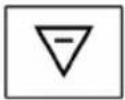
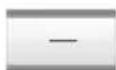 | It reduces the speed of the motor. |
 | TIMER. It activates the hood at speed 1 for 10 minutes after which the motor stops in automatic way. With timer in function the display is showing a flashing led point. |
AUTOMATIC CONTROL OF GREASE FILTERS AND CARBON FILTERS
The electronic controls with display and rectangular push buttons allow automatic control of the grease filter and of the carbon filter (only when the hood is used in filtering version) so that the user does not have to remember when maintenance was last carried out.
When the grease filters must be cleaned, there is ( \overline{\overline{\overline{\overline{\overline{\overline{\overline{\overline{\overline{\overline{\overline{\overline{\overline{\overline{\overline{\overline{\overline{\overline{\overline{\overline{\overline{\overline{\overline{\overline{\overline{\overline{\overline{\overline{\overline{\overline{\overline{\overline{\overline{\overline{\vee}}}}}}}}}}}}}}}}}}}}}}}}}}}}}}}}}}}}}}}}}}}}}}}}}}}}}}}}}}}}}}}}}}}}}}}}}}}}}}}}}}}}}}}}}}}}}}}}}}}}}}}}}}}}}}}}}}}}}}}}}}}}}}}}}}}}}}}}}}}}}}}}}}}}}}}}}}}}}}}}}}}}}}}}}}}}}}}}}}}}}}}}}}}}}}}}}}}}}}}}})
When the carbon filters must be replaced, there is the letter flashing in the display and an acoustic signal is issued.
TO PUT THE GREASE AND/OR CARBON FILTER CONTROL BACK TO ZERO.
After filter maintenance has been carried out you have to:
■ Stop the motor (stop position);
- Press twice in succession the ○ push button, to confirm that reset has been made the ≡ symbol is appearing in the display and a "beep" is issued.
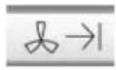
SETTING SUCTION/FILTERING FUNCTION. ○ + ∞→
The hood is delivered standard as a suction hood (saturation indicator = ).
If you wish to use the hood as filtering (saturation indicator and ) please do the following:
■ Press at the same time for ca 5 seconds the push buttons + 又→ , in the display you will have the symbol followed by an acoustic signal.
To reset the hood just for suction use, repeat the above, in the display you will have the symbol appearing.
Additional Functions: SECONDARY LIGHT.
If you keep on pressing the light Push button 📁 for more than 1 second you activate/or disactivate the secondary lights.
Additional Functions: INTERVAL FUNCTION. ○ + + ; + , + , ...; ○ + +
The motor is switched on automatically 10 minutes each hour at the speed flashing in the display.
How to activate:
■ Press at the same time the push buttons ☐ and , then release them: the display will show 1;
■ If you press the push button +, the display will show the following numbers for the speeds of the motor 2→3→1→2 ...;
■ Press at the same time the push buttons ☐ and to confirm the speeds at which the interval function will be activated.
Deactivate: you can deactivate pressing any push button but not the light push button.
Additional Functions: MICROSWITCH for hoods with movable front parts or drawers.
This switch is making the switching on/off operation easier. If you open or close a door or if you pull out a drawer according to the kind of cooker hood (which is always an advised operation if the fires are on) the motor is starting at the second speed; all functions of the controls are allowed.
Additional Functions: SENSOR.
In order to increase the conformt of the end user this hood is equipped with a sensor which after reaching 40^ is setting the speed in automatic way according to the intensity of the fires. If you activate the AUTOMATIC FUNCTION the display will show the letter altering it with the speed set. With the flashing letter it is not possible to switch the motor off, but it is possible to change the speed; anyway after 10 minutes the AUTOMATIC FUNCTION will be restored. The motor is switching on in automatic way when the 40^ are reached and it switches off automatically when the temperature goes under that limit. If the motor is switched on in a manual way it has to be switched off in a manual way only and if the temperature is under 40^ ( letter not flashing).
It is forbidden to leave the fires on if not covered by pans or covered with emty pans.
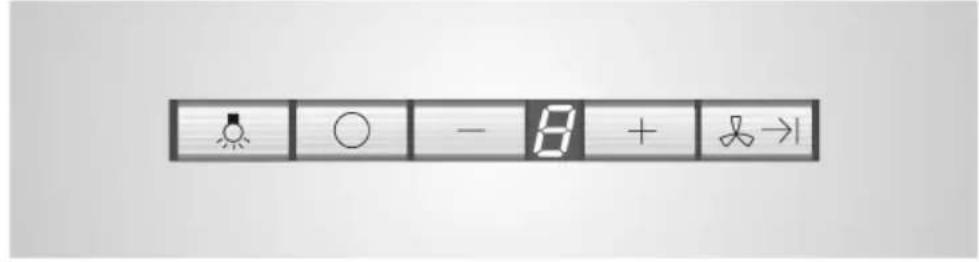
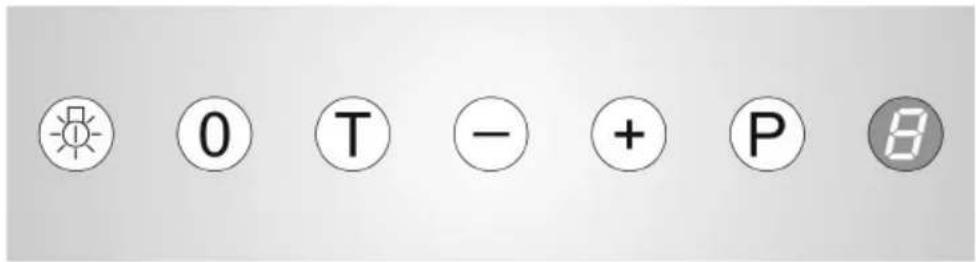
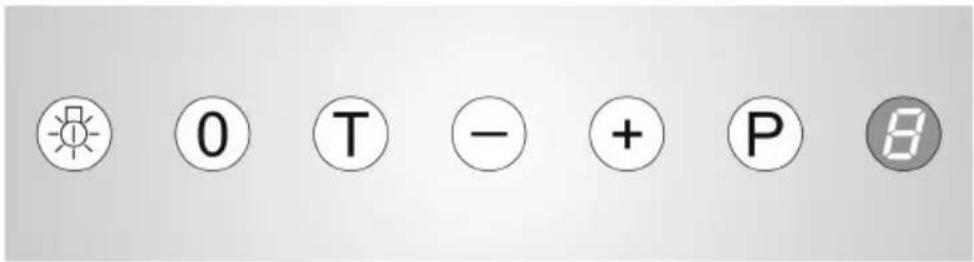
SOFT TOUCH CONTROL WITH DISPLAY AND PUSH BUTTONS
| 0 T - + P | |
 | To switch the lights on or off. |
 | Turn the motor off. |
 | Increases the speed of the motor. |
 | Reduces the speed of the motor. |
 | It sets the highest speed of the motor which is shown by a P and after 5 minutes the second speed is automatically set. |
 | TIMER: if you press this push button when the hood is working at the first, second or third speed, the motor is automatically stopped after 15 minutes. During the period of the timer the display will show the speed in a fix way and the led point is flashing. Ex. [IMAGE] |
 | Display in Stand-by: the motor of the hood is off. |
 | Flashing Display: the grease filters must be cleaned. |
 | Flashing Display: the carbon filters must be replaced or regenerated. |
AUTOMATIC CONTROL OF GREASE AND CARBON FILTERS
The electronic controls with display allow automatic control of the grease filters and the carbon filters (only when the hood is used in the filtering version), so that the user does not have to remember when maintenance was last carried out.
When the metallic grease filters have to be cleaned, the letter F on the display will flash.
When the carbon filters have to be replaced or regenerated, the letter on the display will flash.
It is possible to consult the electronic system concerning how clean the grease filters are and how worn the carbon filters are, as follows: stop the motor and...
...to find out how clean the fat filters are, press the ① and ② buttons at the same time. On the display, a number between 0 and 9 will appear, the smaller the number, the dirtier the filter is.
...to find out how worn the carbon filters are, press the buttons ① and ②. On the display, a number between 0 and 9 will appear, the smaller the number, the more worn the filter is.
TO PUT THE GREASE AND/OR CARBON FILTER CONTROL BACK TO ZERO. ①+⑦
After making maintenance to filters you have to:
■ stop the motor (stop position);
■ push the push-buttons ① and ④ at the same time for a few seconds. This symbol appears and a "bip" is issued.
SETTING THE SUCTION/FILTERING USE OF THE HOOD. Ⓞ+T; Ⓡ0
The hood is delivered standard for suction use (only with flashing letter). If you wish to use it in the filtering version (F and E flashing) proceed as follows:
■ press the buttons ⚙️ and Ⓣ for about 5 seconds, the following symbol will appear on the display followed by a 0.
■ at each pressure of the Ⓤ, it is possible to change the value shown from the 0 (suction function), to 1 (filtering function) and vice versa.
■ press the ① button to confirm the choice effected in the previous point.
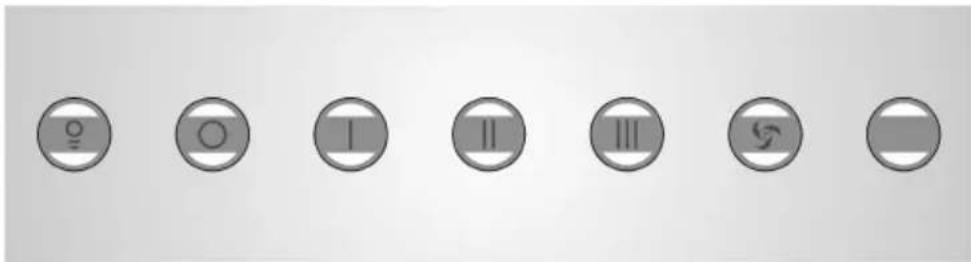
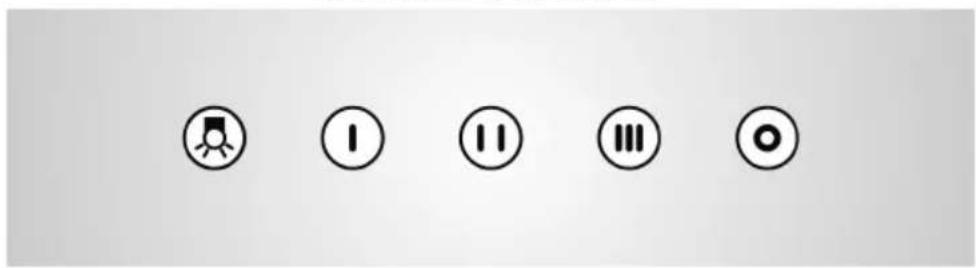
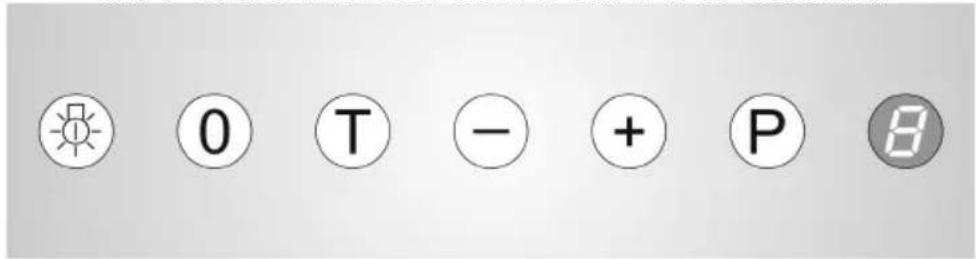
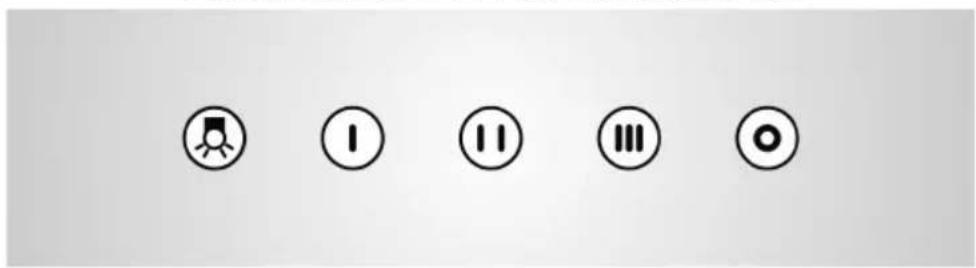
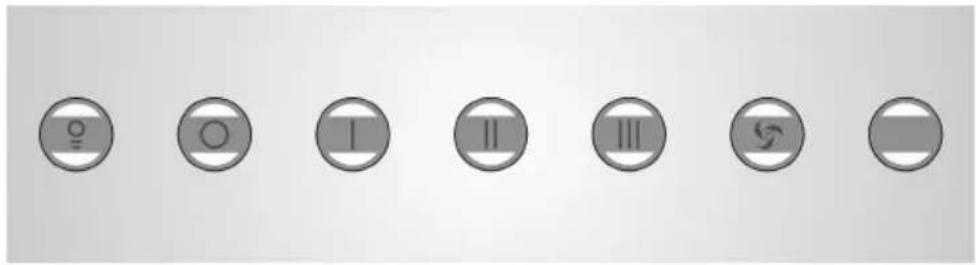
SOFT TOUCH CONTROLS WITH LIGHT BEHIND
 |  |  |  |  |  |  | |
 | To switch the lights on or off. | ||||||
 | Turn the motor off. | ||||||
 | It sets the speed no. 1 and the led of the push button is switched on, if the first speed is already on, the led of the push button will flash and the motor stops automatically after 10 minutes. | ||||||
 | It sets the speed no. 2 and the led of the push button is switched on, if the second speed is already on, the led of the push button will flash and the motor stops automatically after 10 minutes. | ||||||
 | It sets the speed no. 3 and the led of the push button is switched on, if the third is already on, the led of the push button will flash and the motor stops automatically after 10 minutes. | ||||||
 | It sets the highest speed of the motor and the led of the push button will flash and after 10 minutes automatically the hood goes back to the second speed. | ||||||
AUTOMATIC CONTROL OF GREASE AND CARBON FILTERS
The electronic controls with light on the back allow automatic control of the grease filters, so that the user does not have to remember when maintenance was last carried out.
When the metallic grease filters have to be cleaned, an acoustic signal is issued; if you stop the motor the acoustic signal is stopped, but the light of the ⏻ button is flashing.
If the hood is used for filtering use the carbon filters must be replaced or regenerated each 2 cleaning cycles of the grease filters.
HOW TO PUT BACK TO ZERO THE GREASE FILTER COUNTER.
After you have cleaned the grease filters you have to:
■ stop the motor;
■ press twiche the push button Ⓞ. To confirm that the reset has been done an acoustic signal is issued and the led of the push button stops flashing.
Additional Functions: SECONDARY LIGHTS.
If you press the light push button ⚙ in a longer way than 1 second you activate/deactivate the secondary lights.
Additiona Functions: INTERVAL FUNCTION. + / :
The motor is switched on automatically 10 minutes each hour at the speed flashing shown on the display.
How to activate:
■ press at the same time the push buttons and 1/2/3 ; the led corresponding to the chosen speed will be switched on.
■ press the push button Ⓞ to confirm the speed at which the interval function will be activated.
How to deactivate: press any push button with the exception of the light push button.
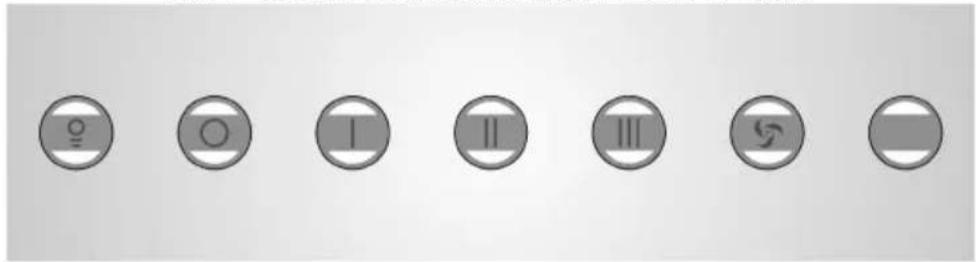
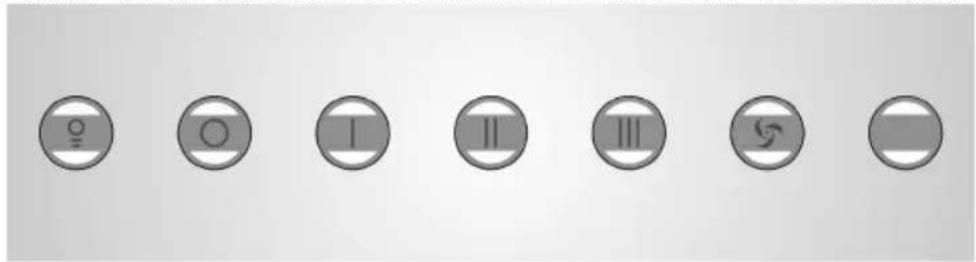
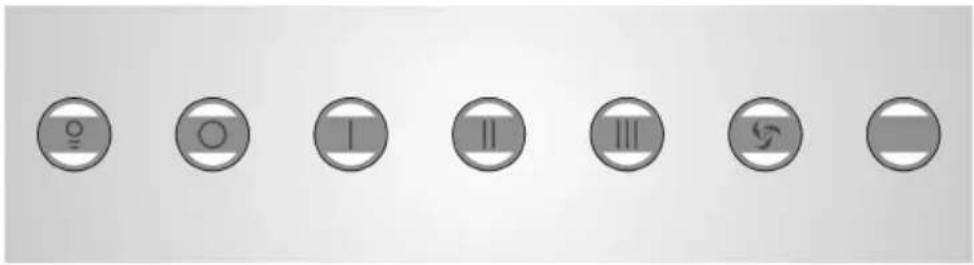
SOFT TOUCH CONTROLS WITH LEDS AND PUSH BUTTONS ON S/STEEL
| ☐ | ☐ | ☐ | ☐ | ☐ | ☐ | |
 |  |  |  |  | ||
| To activate the functions connected to these push buttons, it is necessary to apply a little pressure just lightly and for a short time. If pressure is too lengthy on the push buttons the connected functions are not activated. | ||||||
| Switch the lights on and off. | ||||||
| Turn the motor off. | ||||||
| Increases the motor speed. | ||||||
| Reduces the motor speed. | ||||||
| TIMER: if pressed when the hood is already functioning with 1st, 2nd, 3rd or 4th speed, the led point connected with the selected speed, starts to flash for 10 minutes, after which motor automatically stops. | ||||||
| ☐ | ■ | ■ | ☐ | ☐ | ☐ | |
| ☐ | ■ | ■ | ■ | ☐ | ☐ | |
| ☐ | ■ | ■ | ■ | ☐ | ☐ | |
| ☐ Highest speed of the motor. After ☐ 10 minutes the second speed is automatically set. | ||||||
AUTOMATIC CONTROL OF GREASE AND CARBON FILTER
the electronic controls with led points allow automatic control of the grease filters and carbon filters (only in case the hood is used in filtering version) so that the user does not have to remember when maintenance was last carried out.


When the grease filters require cleaning, an acoustic
signal is issued for some seconds and the led point above the 📁 push button keeps on on flashing.

☐ When the carbon filters need replacing, an acoustic
signal is issued for some seconds and the led point above the ☐ push button keeps on flashing.
TO PUT THE GREASE AND CARBON FILTERS CONTROL BACK TO ZERO. 🚗 + 🚗 and/or 🚗 + 🚗
To put the grease filter counter back to zero you must:
■ Stop the motor;
■ Press the 📁 push button twice in succession, until you hear the acoustic signal.
To confirm reset the led point stops flashing.
To put the carbon filter counter back to zero you must:
■ Stop the motor;
■ Press the push button twice in succession, until you hear the acoustic signal.
To confirm reset the led point stops flashing.
CHANGING OVER FROM SUCTION VERSION TO FILTERING VERSION. 🎨 + 🎨
The hood is delivered standard for suction.
If you wish to use the hood in filtering version do as follows:
■ disconnect hood from electricity and then reconnect this to electricity;
■ The led point of the push button will flash approximately for 10 seconds; during this time press the push buttons for 3 times. Three acoustic signal are issued to point out the new setting.
During the suction/filtering setting phase no function can be activated.
If the hood is used for suction use when connected to the plug you have the led on the LIGHT push button 🙏. Is flashing for 10 seconds.
If the hood is used for filtering use, when connected to the plug the led above the TIMER push button ☑ is flashing for 10 seconds.
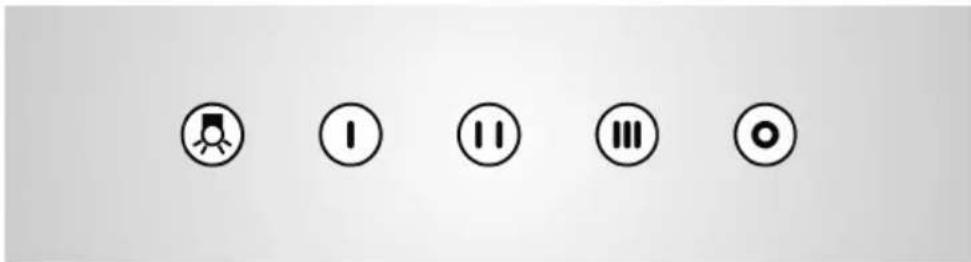
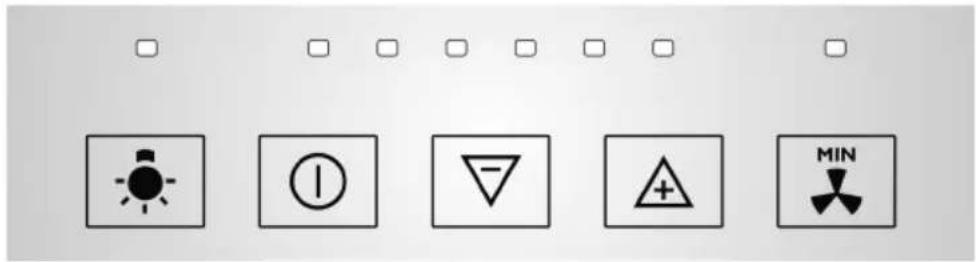
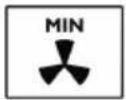
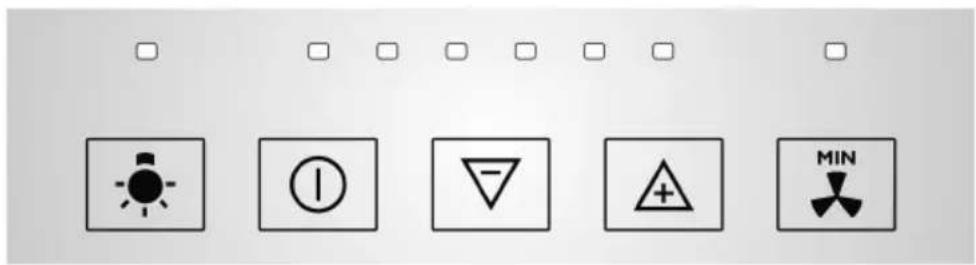
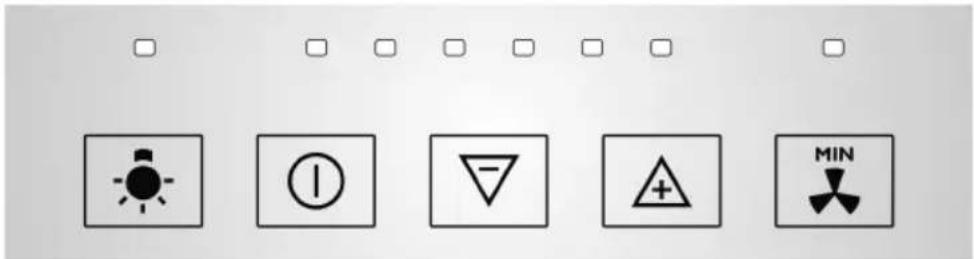
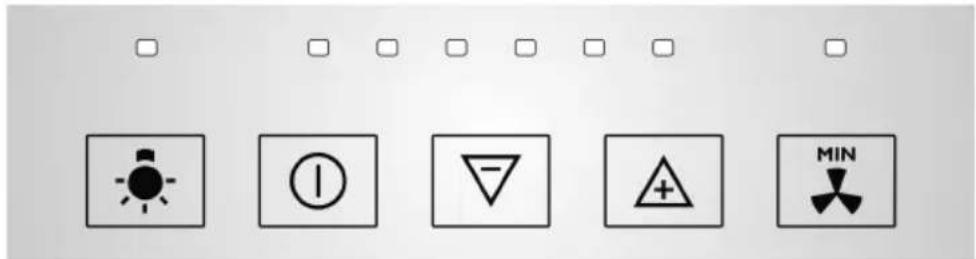
CONTROLS WITH MECHANICAL PUSH BUTTONS
 |  |  |  |  | |
 | Switch the lights on and off. | ||||
 | Turn the motor off. | ||||
 | It sets the motor at the lowest speed. | ||||
 | It sets the motor at the medium speed. | ||||
 | It sets the motor at the highest speed. | ||||
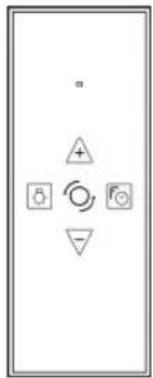
Additional Functions: REMOTE CONTROL.
The remote control is set up by the manufacturer. If the remote control is not controlling motor or light nearby the cooker hood, please do the following.
Set up of the remote control.
Keep pressing the ⚠ button of the remote control and then connect the cooker hood, to confirm that the remote control has been recognized a long beep is issued. If you do not hear the acoustic signal within 30 seconds, please repeat the steps as described.
text_image
Diagram showing a control panel with four symbols: plus, decrease, refresh, and stop. | Switch the lights on and off. |
 | Turn the motor off. |
 | Increases the motor speed. |
 | Reduces the motor speed. |
 | It activated the TIMER function of the control. |
Interval Function by remote control. Ⓞ; +, +;
- Keep pressing the Ⓞ: push button. The display will show 1;
- Keep pressing the + push button, the display will show the following for the speeds of the motor 2→3→1→2 ...;
■ Press the ⏻ push button to confirm the speed of the motor for the interval function.
When you are in the setting phase, if the interval function shown is not confirmed within some seconds, then you get out of the setting mode for the interval function.
By pressing any push button, light excluded, the interval function is excluded.
The remote control has a battery. When the battery is exhausted you need to:
■ loosen the 2 screws on the rear part and remove the cover;
■ take the battery out and replace it with one with the same characteristics;
■ close the cover again and tighten the screws.
Follow National norms for waste disposal of exhausted batteries.
MAINTENANCE
GREASE FILTERS
The metallic grease filters are positioned on the bottom of the hood and are used to contain any grease which is normally emitted in cooking fumes, thereby impeding the deterioration of the motor. They can be washed either by hand or in the dish washer.
For washing by hand, use hot water and soap; this can be done by hand brushing vigorously several times and then rinsing under the tap.
After washing, the grease filters should be dried and re-fitted correctly.
It is possible that after washing the filter will have slight change in the colour.
⚠️ ⚠️ It is advised to wash the grease filters after circa 50-100 hours of use of the cooking top.
If the grease filters are very dirty, the motor can only take in a small quantity of air, and performance is reduced;
The grease which accumulates on dirty filters is easily inflammable and can cause fires, if they are not removed by periodic washes.
The manufacturer declines any responsibility for fires caused by poor maintenance of the grease filters.
CARBON FILTERS
The carbon filters at the suction outlet of the motor, are used to retain the odours of the kitchen fumes. It is not necessary to use carbon filters.
The use of carbon filters is necessary if you use the hood as filtering.
There are 2 kinds of carbon filters, carbon filters that can be regenerated and carbon filters that cannot be regenerated.
Carbon filters that can be regenerated:
Please follow and read the instructions given with the carbon filters that can be regenerated as far as mounting and re generation are concerned.
Carbon filters that cannot be regenerated:
⚠️ we advise to replace the carbon filters after circa 200-300 hours of use of the cooking top. The carbon filters that cannot be regenerated cannot be either washed nor regenerated but need to be replaced when expired.
Carbon Filters do not guarantee the interchange of oxygen in the air.
To ensure correct ventilation and air interchange in the kitchen, national and international regulations exist, which should be respected.
The manufacturer denies any responsibility for fires caused by failure to replace the carbon filters.
REPLACEMENT OF LAMPS
Always replace the lamps with lamps which have the same electrical characteristics (see TECHNICAL DATA). Before replacing the lamps, make sure that they are cold and that power has been completely turned off.
Please follow the sequenze as shown in L series pictures.
Reconnect to electricity.
⚠️ If te lights are not working, check that the lamps are correctly fit.
CLEANING
To preserve the hood in good condition, clean this periodically following the advice given as follows.
⚠️ Make sure that power has been completely turned off.
The detergent solution recommended is a combination of WATER and NEUTRAL LIQUID SOAP. It is of vital importance that the liquid soap should not contain any grains which could scratch the surface.
The solution should be applied first onto a soft cloth which is then rubbed over the shell. It is important to follow the pattern of the satin finish with the cloth.
It is absolutely forbidden to pour liquids directly onto the hood.
The cloth used should not have any buttons, zips, fasteners or anything else which could scratch the surface.
The use harsh abrasive or granular products, petrol, spirits or similar products which could damage the surface of the material, is severely forbidden.
The manufacturer will not be responsible for any damages either functional or to the appearance of the hood, caused by cleaning operations carried out using unsuitable products or unsuitable methods.
ACCESSORIES
The following optional accessories are available and are sold separately:
■ ONE USE CARBON FILTERS;
■ CARBON FILTERS THAT CAN BE REGENERATED;
■ FILTERING KIT;
■ CHECK VALVE.
IF YOU ENCOUNTER A PROBLEM
Disconnect the hood from the mains electricity supply and keep it disconnected for ca 1 minute, then reconnect.
If the behaviour of the hood seems strange, read the procedure for resetting carbon and grease filters concerning the kind of control in your hood. (see FUNCTION AND USE).
This appliance is marked according to the European directive 2002/96/EC on Waste Electrical and Electronic Equipment (WEEE). This norm is the frame of a European-wide validity of return and recycling of Waste Electrical and Electronic Equipment.
The symbol on the product or on its packaging indicates that this product may not be treated as household waste. Instead it shall be handed over to the applicable collection point for the recycling of electrical and electronic equipment. By ensuring this product is disposed of correctly, you will help prevent potential negative
natural_image
Symbol of a trash bin crossed with two crossed lines, no text or numbers presentconsequences for the environment and human health, which could otherwise be caused by inappropriate waste handling of this product, please contact your local city office, your household waste disposal service or the shop where you purchased the product.
MODE D'EMPLOI ET INSTRUCTIONS IMPORTANTES
!
text_image
Control panel with icons for weather, humidity, temperature, and directional indicatorsSOFT TOUCH CONTROLES AVEC DISPLAY ET BOUTONS
text_image
0 T - + P 8SOFT TOUCH CONTROLES AVEC LUMIERE DERRIERE LES BOUTONS
text_image
Seven circular icons with symbols: male gender, female gender, I, II, III, female symbol, and a cross symbol.SOFT TOUCH CONTROLES AVEC LEDS ET TOUCHES SUR ACIER
text_image
Electrical warning symbols including light bulb, current, triangle, plus sign, and diode with corresponding iconsCONTROLES AVEC TOUCHES MECHANIQUES
text_image
Five circular icons representing status indicators: menu, I, two, three, and one.SOFT TOUCH CONTROLES AVEC DISPLAY ET BOUTONS RECTANGULAIRES
REPLACEMENT DES LAMPES
natural_image
Symbol of a trash bin crossed with no text or numbers, representing environmental restriction (no text present)text_image
Interface control panel with icons for weather, circle, minus sign, plus sign, and directional arrowtext_image
0 T - + P 8SOFT TOUCH BEDIENUNG MIT HINTEN BELEUCHTETEN TASTEN

text_image
Seven circular icons with symbols: lightbulb, O, I, II, III, swirl, and a gray bar on a plain background.text_image
Electrical warning symbols including light bulb, current, triangle, plus sign, and minimum symboltext_image
Five circular icons with corresponding symbols: play button, I, II, III, and o, arranged horizontally.text_image
Diagram showing four symbols: a plus, a triangle with a plus sign, a small circle with a rotation arrow, and a triangular symbol with a circle labeled 'Fo'.natural_image
Simple line drawing of a trash bin with two crossed lines indicating no waste or restriction (no text or symbols)
text_image
Control panel with icons for alarm, circle, minus sign, plus, and directional arrow symbolsMANDO SOFT TOUCH CON DISPLAY Y TECLAS
text_image
0 T - + P BMANDO SOFT TOUCH CON TECLAS CON RETROILUMINACIÓN
text_image
Image showing seven circular icons with symbols: O, O, I, II, III, S, and a horizontal bar, arranged horizontally.MANDO SOFT TOUCH CON LED Y CON TECLAS EN ACERO INOX
text_image
Electrical hazard symbol icons including lightbulb, warning sign, triangle, plus sign, and turbinetext_image
Five circular icons with symbols: a play button, a folder, a pause, a double, and a double arrow, arranged horizontally.MANDO SOFT TOUCH CON DISPLAY Y TECLAS RECTANGULARES
text_image
Diagram showing a device control panel with four symbols: positive, warning, alarm, and function icons.


natural_image
Symbol of a trash bin crossed out by two diagonal lines (no text or labels)
text_image
Control panel with icons for lightbulb, circle, minus sign, plus, and directional arrow symbolstext_image
Image showing seven circular icons with symbols: male gender, female gender, male gender, female gender, male gender, female gender, male gender, and a cross symbol.text_image
Electrical hazard symbol icons including warning, current, voltage, warning sign, and minimum hazard symboltext_image
Five circular icons representing function keys: menu, I, II, III, and o, arranged horizontally.text_image
Diagram showing four circular symbols with directional arrows and a plus sign, likely representing a control or logic mechanism.natural_image
Symbol of a trash bin crossed out by two diagonal lines (no text or labels)
text_image
Control panel with icons for alarm, circle, minus sign, plus sign, and directional arrowSOFTTOUCH COMMANDO MET DISPLAY EN TOETSEN

text_image
0 T - + P 8SOFTTOUCH COMMANDO MET TOETSEN MET ACHTERGRONDVERLICHTING
text_image
Seven circular icons with symbols: O, I, II, III, S, and a horizontal bar, arranged horizontally.SOFTTOUCH COMMANDO MET LED'S EN TOETSEN OP STAAL
text_image
Electrical warning symbols including light bulb, current, triangle, plus sign, and minimum symbolCOMMANDO MET MECHANISCHE DRUKKNOPPEN
text_image
Five circular icons with corresponding symbols: play button, I, two vertical bars, three circles, and one circle.SOFTTOUCH COMMANDO MET DISPLAY EN RECHTHOEKIGE TOETSEN