KM 30 - Coffee machine Petra Electric - Free user manual and instructions
Find the device manual for free KM 30 Petra Electric in PDF.


User questions about KM 30 Petra Electric
0 question about this device. Answer the ones you know or ask your own.
Ask a new question about this device
Download the instructions for your Coffee machine in PDF format for free! Find your manual KM 30 - Petra Electric and take your electronic device back in hand. On this page are published all the documents necessary for the use of your device. KM 30 by Petra Electric.
USER MANUAL KM 30 Petra Electric
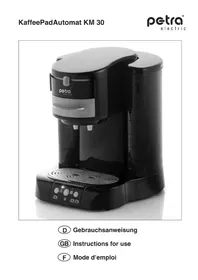
We would like to congratulate you on your purchase of the automatic coffee pad appliance. You have purchased a modern appliance with which you will be pleased to prepare fresh, aromatic coffee.
The automatic coffee pad appliance may only be used for its intended purpose in compliance with this operating manual. Please read the operating manual carefully prior to use; it provides instructions for the use, cleaning and care of the appliance. We will not assume any liability for potential damages in the event of non-compliance. Store these operating instructions carefully and give it and the appliance to any potential second owner. Please also observe the warranty information at the end of the operating instructions.
The appliance is not intended for commercial use.
The warning triangle identifies all instructions important for safety. Please always follow these; otherwise you may be injured or the appliance could be damaged.
11 The numbers point to the illustrations.
(3) The numbers in parenthesis point to single parts mentioned in the illustrations.
The original packaging is specifically designed to guarantee safe transportation in a service event. Please keep the packaging therefore at least for the duration of the warranty period.
Safety information
Only connect the appliance to a shockproof socket that has been installed according to regulations. The voltage must correspond with the information on the model tag on the bottom of the appliance.
Do not jam the supply line and protect it from sharp edges, moisture, heat or oil.
Do not connect the appliance, if the supply line is damaged. It must then be immediately replaced by our central customer service or a similarly qualified person. Incorrect repairs may result in considerable hazards for the user.
Do not start the appliance and immediately pull the plug, if it is damaged or leaking or if a defect is suspected after a fall or a similar occurrence. In these cases, have the appliance repaired.
Do not place the automatic coffee pad appliance on hot surfaces, such as stove tops or such or near an open gas flame; the housing may melt. Water-sensitive surfaces are unsuitable as setup surface, since these can be damaged by water spray.
This appliance is not intended to be used by persons (including children) with restricted physical, sensory or mental abilities or who lack experience and/or knowledge thereof, unless they are supervised by a person responsible for their safety or have received instructions on how to use the appliance.
Please verify that children do not have an opportunity to play with the appliance.
Pull the power plug, if you are not using the appliance for an extended period.
Risk of scalding due to hot water. When operating this appliance, please observe the information of these operating instructions.
Risk of frost! After ventilating this appliance, i.e. filling it with water, it may only be operated and stored in frost-free areas. The appliance could otherwise be damaged. Frost damages are not covered by the warranty.
Designation of the displays
| ▲ | Red flashing light | Fill water in the water tank |
| ▲ | Red continuous light | The appliance is ventilated, rinses or heats. |
| ▲ | Green flashing light | The cup programming mode is active, refer to “change cup quantity” |
| ▲ | Green continuous light | The appliance is ready for brewing |
| ▲ | Yellow continuous light | The decalcification program is running, refer to “decalcification program” |
| ▲ | Red-green flashing light | Empty the receiving container (only in the decalcification pro- gram) |
Start-up
Set up the appliance on a solid surface that is not susceptible to water.
The appliance may not be operated in locations that are higher than 1,500m above sea level.
2 You can insert the length of the supply line (2) that is not required in the bottom (1) of the appliance.
Preparation
We recommend cleaning the water tank (3), the pad cassette (7) and the coffee outlet (8) with dishwash
ing liquid prior to the first use and then rinsing with clear water.
3 You can grasp the water tank (3) at its handle when the lid is open (4), tilt it slightly back and then lift it out. It is inserted in reverse order.
7 Push the rocking lever (5) toward the right into the starting position 6 when removing the pad cassette (7).
The coffee outlet (8) can be adjusted in height by a thread. You can grasp it on the two outlet nozzles and adjust it in height or unscrew it downward.
Turn the coffee outlet (8), then the filter insert will fall out. It provides the best quality of the crema. After cleaning, it must be reinserted again as illustrated in Fig. 8
When assembling the coffee outlet (8) begin at the thread and screw it to the desired height as illustrated in Fig. 9 The two outlet nozzles must always be located above the two openings of the grate (9).
Options Anti-chlorine filter ACF 30
You may obtain the anti-chlorine filter ACF 30 (with 3 filter cartridges) where you bought the appliance or you can order it directly from petra-electric.
5 The anti-chlorine filter (15) provides an authentic coffee flavor. It filters chlorine and other contaminants from the water.
4 Place the filter cartridge (16) that was previously rinsed under running water from the top into the ring (17). Then place the filter holder (18) on and snap in by turning.
5 In order to snap the finished assembled filter (15) in the outlet of the water tank (3), press it down to the stop.
The efficiency of the filter is reduced with an increased use period. It should therefore be replaced after 3 months (approx. 700 cups) at a daily average use of 8 cups of coffee.
4 Set the time of the next filter replacement on the replacement display (19).
Ventilation (only required for a new appliance)
The heating system must be ventilated prior to the first startup of the new automatic coffee pad appliance:
- Insert the water tank (4) filled up to the max mark into the appliance and close the lid (4).
Only fill cold fresh water into the water tank (3).
never carbonated water or other liquids, such as milk, etc.
- Place a possibly high collecting container with a maximum height of 10cm and a content of at least 650~ml or two large cups of coffee under the coffee outlet (8).
3.7 Push the empty pad cartridge (7) into the brewing chamber (6) and 10 move the rocking lever (5) above the symbol
Note: If the pad cassette (7) is not located in the brewing chamber (6), the rocking lever cannot be pushed into the area.
-
Press the ON/OFF button 12). The display (10) is illuminated in red and the pump begins to work after a few seconds. After the heating system is filled, water still runs into the collecting container until the appliance shuts off automatically after approx. 60 seconds.
-
Empty the collecting container and again press the ON/OFF button 2). The pump switches off after approx. 60 seconds and the water is heated until the display changes to green.
Important information: It is urgently required that both rinsing processes (4 and 5) are completed until the pump automatically shuts off (approx. 60 seconds) for a successful startup. If you have switched it off manually, because your too small collecting container ran over, you must start the process again by pressing the ON/OFF button ①
- Prior to brewing the first coffee, you should rinse the appliance again, as described in the following section. Then you can be sure that the last residue that can affect the coffee flavor is eliminated.
Caution! The water is now hot!
Rinse
If the appliance has not been used for several days, you should start a rinsing process to replace the water in the heating system:
-
Place a possibly high collecting container with a maximum height of 10cm and a content of at least 650~ml or two large cups of coffee under the coffee outlet (8).
-
7Push the empty pad cartridge (7) into the brewing chamber (6) and 10 move the rocking lever (5) above the symbol
-
12 Briefly press the two starter buttons (11 and 12) at the same time. The pump starts and the display (10) is illuminated in red.
-
Push the rocking lever (5) to the right to the starting position after the pump switches off. The display changes to green after approx. 90 seconds; the appliance is ready for brewing.
Brewing coffee


Verify that the water tank (3) is filled properly. The filling quantity at the max mark is sufficient for approx.12 cups of 125ml each.
6 Push the rocking lever (5) toward the right to the starting position and 11 press the ON/OFF button ① (12). The display ② illuminated in red; heating is started. You can already prepare brewing during this time:
Brewing with coffee soft pads
All conventional coffee soft pads with an outer diameter of 7cm can be used (coffee quantity of approximately 7 g).
The more careful you insert the pads, the better the coffee will be. It is important to distribute the coffee powder evenly in the pad up to the edge, so that water cannot flow past the pad.
13 14 Tap the pad lightly with your finger tips so that a small indentation develops in its center. Never insert damaged pads, loose coffee powder or instant coffee into the pad cassette; it could plug up. The rocker lever (5) then can no longer be pushed to the right to remove the pad cassette (7). If this should occur, despite observing the information, please proceed as described at the end of this user manual in section "Help in case of malfunctions."
One Cup
Place the coffee cup in the center of the grate (9). Place the pad cartridge (7) so that the number "1" is visible on the handle from above. Insert a coffee pad in the recess as described above.
Two Cups
Place two coffee cups under the outlet nozzle of the coffee outlet (8).
14 Place the pad cartridge (7) so that the number "2" is visible on the handle from above. Two pads can now be fitted. The first must be pressed into the recess; the edge of the paper will point upward. Place the second pad over this as described above.
The paper edge of the upper pad must lie flat in the recess and may not project outward and may also not be folded inward.
Use care when inserting the pad cartridge (7) so that the pad does not shift, otherwise the brewing chamber will not seal (6).
10 Tightly lock the brewing chamber (6) by pushing the rocking lever (5) as far to the left as possible in the area of 6 This is important for the best coffee quality.
Wait until the display signals brewing readiness (green).
15 16 depending on the fact, if you have prepared one or two cups, press the appropriate start button or you can interrupt the preparation at any time by pressing the relevant start button again.
The coffee powder is initially only moistened in appliances with a "pre-brewing function" (option). Brewing is only continued after a short pause, in which the coffee powder can expand. An especially strong aroma can be achieved by this method.
Push the rocking lever (5) toward the right into the starting position before removing the coffee. Post-dripping on the coffee outlet (8) will thereby be reduced.
You should remove any used pads from the brewing chamber soon (6) due to hygienic reasons. They are bio-degradable.
Hints for the best coffee:
Prior to consumption, stir the coffee; you will achieve an even coffee strength in the cup.
Carefully close the pad package to prevent aroma losses. The best storage area is the refrigerator.
Fill fresh water in daily. The water tank should be rinsed briefly beforehand.
If the appliance has not been used for several days, proceed as described in section "Rinsing".
Option
Powder cartridge PK 30
You may obtain powder cartridge PK 30 and the paper filter where you bought the appliance or you can order these directly from petra-electric.
You can also enjoy your favorite brand of coffee freshly ground with crema. For this, use the powder cartridge (21/22) as described in the following:
18 Place a sheet of filter paper into the container (21). It retains suspended solids, which refines the taste of the coffee. However, you can also work with
out paper filters.
19 Fill in coffee or espresso powder. The powder cartridge contains 5.5 to 7.5g depending on the coffee quality. This is sufficient for one cup of coffee.
20 Press the powder lightly and scrape off at the filling edge. If too much is filled in, the brewing chamber cannot be closed.
21 Press the lid (22) open and remove any powder residue adhering to the exterior.
Remove any powder residue adhering to the exterior thoroughly; they can plug up the pad cassette (7). The rocking lever (5) then can no longer move to the right to remove the pad cassette (7). If this should occur, despite observing the instructions, please proceed as described at the end of this user manual in section "Help in case of malfunctions."
22 Place the powder cartridge into the pad cartridge in the compartment for 2 pads and 10 lock the brewing chamber (6)
15 When the display signals the readiness for brewing (green), press on the start button
23 Empty the powder cartridge after brewing. The filter paper is also bio-degradable as is the coffee powder.
24 25 Rinse the powder and pad cartridge after every brewing cycle.
Routinely check that the center opening of the pad cartridge is free (7).
Change coffee quantity
The quantity of coffee powder is optimally adjusted to one cup in one pad or in the powder cartridge. You can vary the filling quantity per cup according to your personal desires and therefore change the strength of the coffee.
The automatic coffee pad appliance offers the comfortable option to individually program the desired coffee quantity for every starting button or
-
Insert the pad as described above, press the rocking lever (5) in the area as far left as possible and wait until the brewing readiness is displayed in green.
-
Hold the start button to be programmed (3 to 4 seconds) until the display flashes green. During brewing, the programming mode is active. Watch how the cup fills up. Press the start button again when the desired quantity is reached. The brewing stops and the brewing period (active period of the pump) is programmed. Each new brewing cycle with this start button now always
occurs at the same brewing period. The prepared coffee quantity will only vary slightly depending on the coffee quality.
Information concerning the programming mode:
The programming mode is active for a maximum of 30 seconds or 60 seconds during brewing. If you do not press the start button before brewing ends automatically, the maximum possible filling quantity will be programmed.
Restore the standard filling quantity
In order to restore the filling quantity to the delivery state, proceed as follows:
-
Switch the appliance off,
-
Hold the start button 3 to 4 seconds) until both displays and briefly flash.
Shut-off
The appliance can be switched off at any time by pressing the ON/OFF button ①. If it remains switched on, it is automatically shut off after 60 minutes of the previous use. The power consumption is less than 0.5 Watts during off-mode.
Filling level display
The fresh water content is constantly monitored by a movable floating capsule in the water tank (3). The display flashes red when underrunning the required minimum filling quantity. The operation is continued as soon as you replace the filled water tank (3).
Decalcification
The appliance must be routinely decalcified as all hot water appliances. In order to accomplish this, use the special decalcifier durgol® swiss espresso®; it can be obtained from select dealers. If you wait too long with the decalcification, damages cannot be ruled out.
The following details are guidelines. If you decalcify earlier, when the crema of the coffee is no longer optimal, when the coffee quantity is reduced noticeably at the same setting or when the outlet (8) drips during heating.
| Hardness range | Hardness Decalcification intervals |
| 1 soft 0 - 7° dH 1500 to 2000 cups | |
| 2 medium > 7 - 14° dH 1000 to 1300 cups | |
| 3 hard > 14 - 21° dH 600 to 800 cups | |
| 4 very hard > 21° dH 400 to 500 cups | |
| 1° dH corresponds with approximately 0.18 mmol/l Ca and Mg ions | |
You can obtain information concerning the hardness range in your residential area from the responsible water plant or the community administration.
5 The anti-chlorine filter (15, option) must be removed from the water reservoir (3).
A warranty compensation does not exist for damages that occur due to non-compliance.
Please be careful when carefully handling the decalcifying agent that damages are not caused on furniture or clothing.
Decalcification program
Your automatic coffee pad appliance has its own automatic decalcification program. It lasts approximately 15 to 20 minutes is interrupted twice, so that you can refill the water.
Note: Once the automatic decalcification program is started, it cannot be interrupted by pressing a button. This serves as safety for all users. This will prevent that coffee can be accidentally brewed as long as the decalcifier has not been completely rinsed out. You can pull the power plug, if necessary. In this case, you should rinse twice as described in the section "rinse".
- Place a possibly high collecting container with a content of at least 650ml or two large cups of coffee under the coffee outlet (8).
- 7 Push the empty pad cartridge (7) into the brewing chamber (6) and 10 move the rocking lever (5) above the symbol
- Fill one portion (125 ml) of durgol® swiss espresso® into the empty water reservoir (3) and place it in the appliance.
- Switch the appliance on by pressing the ON/OFF button ①The display ②flashes red. Carefully only fill in enough water until it is continuously illuminated.
- Press both start buttons and (3 to 4 seconds) until the display (14) is continuously illuminated in yellow. You now can release the buttons; the decalcification program has started.
- The display flashes red after approximately 10 minutes. Empty the collecting container and place it again under the coffee outlet (8). Fill the previously rinsed water tank (3) up to the max mark with fresh water.
- Press any start button or , to continue with the first rinse.
- The display flashes red-green after approximately 3 minutes. Empty the collecting container and place it again under the coffee outlet (8).
- Press any start button or to continue with the second rinse.
- The decalcification program is completed after another approximately 3 minutes and the appliance switches automatically off.
- Place the pad cartridge (7) and the coffee outlet (8) with the filter insert into the dishwasher after decalcification.
Troubleshooting
The following hints will assist you in eliminating problems. If this is unsuccessful, send the appliance to our customer service for repair. Observe the warranty information.
| Problem | Remedy |
| Flashing red light despite a filled water tank | ⇒ Check, if the floating module is movable in the water tank (3) . Remove any foreign objects or decalcify it. |
| The rocking lever is jammed far before the icon | ⇒ Check to determine, if the pad is properly located in the pad cassette (7). ⇒ The lower pad must be pressed tightly into the recess when using 2 pads. ⇒ Tap the pad so that a small recess develops in its center. |
| The coffee intensity is insufficient | ⇒ The more careful the pads are inserted, the better the coffee will turn out. Please observe the information in section “coffee soft pads”. ⇒When using the powder cartridge (21, 22), press the coffee powder only lightly. |
| Left and right cups fill unevenly been used for some time, it will improve its response. Check if the appliance is located on a horizontal surface. |
| The coffee quantity is reduced Set the rocking lever (5) in area to the left as far as possible. Routinely check that the center opening of the pad cassette (7) is unobstructed to prevent clogging. The appliance must be decalcified regularly. |
| No coffee emerges and If the center opening of the pad cassette (7) is clogged, the rocking lever (5) cannot be moved to the right after brewing to remove the pad cassette (7). and let the appliance cool for an hour. If the blockage is not removed by this action, there is a possibility of emergency opening: You need a paperclip and bend it straight. Please verify that the wire end does not have any burrs, so that the seal in the appliance is not damaged. Caution! Coffee will splatter out of the appliance and could still be hot! Grasp the wire with a paper towel. You will find a small opening on both sides of the housing directly next to the handle of the pad cassette (7). Guide the wire horizontally into the best accessible opening and press it lightly inside. The pressure will suddenly escape after approx. 3 cm and some coffee will escape. The rocking lever (5) can then be moved again. Remove the pad cassette and thoroughly clean it. In the future, check each time prior to brewing if The center opening of the pad cassette (7) is open, The pads are undamaged and The powder cartridge is free of any powder residue. |
| The quality of the crema is insufficient for some time. The best crema quality will only develop after the appliance has been in use Routinely decalcify and clean the filter insert). Observe the information in section "Cleaning and Care". The two filters in the filter insert may not be pushed together. However, if this has occurred, it must be replaced. |
| The outlet drips for a long time post-dripping. Always set the rocking lever (5) to after brewing, this prevents lengthy |
| The appliance switches off during heating above sea level. The appliance may not be operated in locations, which are more than 1,500 m level. |
| The decalcification program does not start button earlier. It is important that both buttons are pressed simultaneously. If you press one the decalcification program will not start. Try it again and only release the buttons shortly after the pump starts. |
| Water escapes on the handle of the pad cartridge Check if the pad is properly located in the pad cartridge (7). If the paper edge projects over the edge of the depression, the seal will no longer seal during brewing. |
| Water is located under the appliance Only fill the water tank (3) up to the max mark. Never let the appliance stand over an extended period without the water tank (3). |
Cleaning and service
Pull the power plug prior to cleaning. Never immerse the appliance in water
Routinely check that the center opening of the pad cartridge is free (7). Pulp fibers of paper towels can plug it up during cleaning.
Clean the water tank (3) in dishwater and then rinse well with clear water. The pad cartridge (7), coffee outlet (8), grate (9), drip pan and powder cartridge (21/22) can now be placed into the dishwasher.
Carefully treat the filter insert from the coffee outlet (8) without a brush. It is best to routinely place into a decalcifying solution and then place it into the dishwasher.
Caution: In order to obtain an equally good quality of the crema, the two filters located on top of each other may not be pressed together.
Wipe the outside of the appliance carefully with only a damp cloth. Do not use caustic or abrasive cleaning agents; these would damage the surface.

The appliance corresponds with European guidelines 2006/95/EWG and 89/336/EWG.
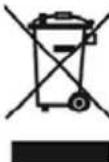
This product may not be disposed of in normal household waste at the end of its service life, but must be delivered to a collecting point for recycling electrical and electronic appliances.
The materials are reusable in accordance with their identification. You are making an important contribution to protect our environment by recycling; reusing the material or other forms of recycling used appliances. Please request the responsible disposal point from your community administration.
(Subject to modifications)
For UK use only
This product is supplied with a 13 A plug conforming to BS 1363 fitted to the mains lead. If the plug is unsuitable for your socket outlets or needs to be replaced, please note the following. If the plug is a non-rewireable one, cut it from the mains lead and immediately dispose of it. Never insert it into a socket outlet as there is a very great risk of an electric shock.
The replacement of the plug at the mains lead has to be done according to the following instructions:
Warning - This appliance must be earthed Important: The wires in this mains lead are colored in accordance with the following code:
green/yellow Earth blue Neutral brown Live
As the colors of the wires in the mains lead of this appliance may not correspond with the colored markings identifying the terminals in your plug, proceed as follows:
-
the wire which is colored green and yellow must be connected to the terminal which is marked with the letter E or by the earth symbol, or colored green or green and yellow,
-
the wire which is colored blue must be connected to the terminal which is marked the letter N or colored black.
-
the wire which is colored brown must be connected to the terminal which is marked with the letter L or colored red.
If a 13 A (BS 1363) plug is used it must be fitted with a 13 A fuse conforming to BS 1362 and be ASTA approved. If any other type of plug is used, the appliance must be protected by a 10 A fuse either in the plug or adapter or at the distribution board. If in doubt - consult a qualified electrician.
Never use the plug without closing the fuse cover.
Special decalcifier durgol® swiss espresso®
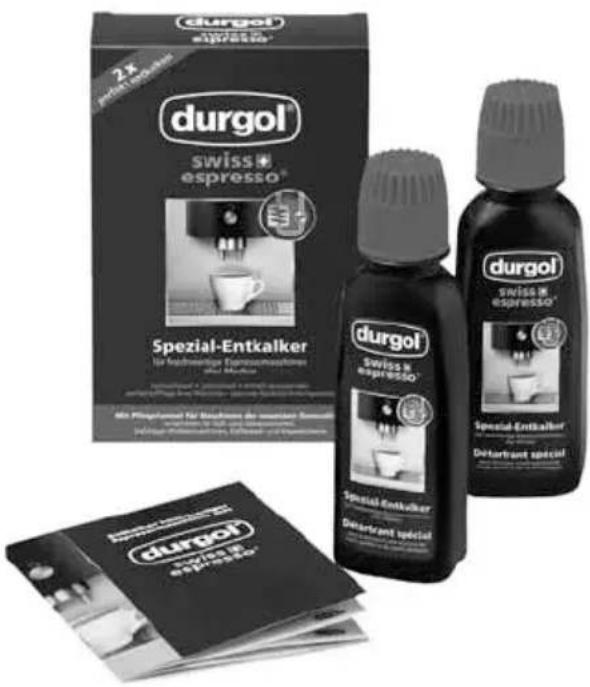
durgol® swiss espresso® is very effective, easy and safe to use and guarantees an effortless and quick decalcification within an additional soaking period. A routine use assures the best quality of your coffee and extends the service life of your automatic coffee pad system due to a special safety formula. durgol® swiss espresso® does not leave any residue. If your machine is rinsed after decalcification, as described in the operating instructions, you will be able to again brew coffee without hesitation.
Please observe the extensive information for the decalcification with durgol® swiss espresso® as well as the warning instructions that may be found in the brochure enclosed with the decalcifier.
You may obtain durgol® swiss espresso® where you bought the appliance; directly from a select dealer or you can order it directly from petra-electric. A package contains two portions of 125 ml each. A dose is coordinated.