KM 58 - Coffee machine Petra Electric - Free user manual and instructions
Find the device manual for free KM 58 Petra Electric in PDF.
User questions about KM 58 Petra Electric
0 question about this device. Answer the ones you know or ask your own.
Ask a new question about this device
Download the instructions for your Coffee machine in PDF format for free! Find your manual KM 58 - Petra Electric and take your electronic device back in hand. On this page are published all the documents necessary for the use of your device. KM 58 by Petra Electric.
USER MANUAL KM 58 Petra Electric
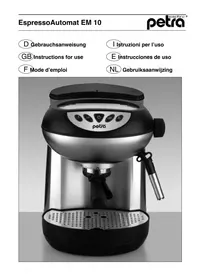
natural_image
Black and white photo of a Petra coffee maker with clear glass lid and handle (no visible text or symbols on the device itself)D Gebrauchsanweisung
GB Instructions for use
F Mode d'emploi
I Istruzioni per l'uso
E Instrucciones de Manejo
NL Gebruiksaanwijzing

Gebrauchsanweisung
Vor dem Benutzen
Instructions for use
Before use
Carefully study the instructions for use. They contain important information as to use, security, maintenance. Keep it carefully and hand it over to further users.
Use the appliance only according to these instructions. Pay attention to the safety instructions.
Safety instructions
- Only connect the appliance to alternating current - with a rated voltage according to the rating plate - to a correctly installed earthed socket. Cord and plug must be dry.
- Do not pull the power cord over sharp edges, do not let it hang down and protect it from heat and oil.
- Only use an extension cord of good quality.
- Do not disconnect the appliance by pulling at the cord or with wet hands.
- Do not carry the appliance hanging at the cord.
- Do not place the coffemaker or thermal jug on hot surfaces i.e. on hot plates or near hot gas flames, the casing might melt.
- Do not place the coffeemaker onto delicate surfaces as water could damage them.
- Do not switch on the appliance without water. Fill the water bowl with cold water only up to the upper water level indication. Do not fill in water as long as the coffeemaker is switched on or if it is still hot. Let the coffeemaker cool down for approx. 5 minutes.
- Caution:
Scalding danger due to escaping steam! Do not swivel the filter during the brewing operation and do not open the lid.
• The thermos jug must not be used for keeping warm milk products and baby food since the bacteria could multiply uncontrollably.
- This appliance is not meant to be used by persons (including children) with reduced physical, sensorial or mental capacities or in absence of the necessary experience and/or knowledge - unless they are supervised by a person responsible for their safety and from whom they get instructions on how to use the appliance.
- Keep out of reach from children.
- Do not put the appliance into operation resp. pull out plug in case:
- the appliance of power cord are damaged
- the appliance is not water-tight
- there is a doubt for damage, after the appliance has fallen down.
In these cases give it to an After Sales Service.
- Disconnect the appliance if it is not used for longer time.
- Descaling of the appliance is necessary in regular intervals.
- Do not immerse the appliance in water.
- No liability is assumed for damages resulting from misuse, wrong use or improper repair. Guarantee is excluded with regard to the above mentioned cases.
• The appliance is not intended for commercial use.
• In case the cord of this appliance is damaged, it has to be replaced by an authorised service agent of the manufacturer or a person having similar qualifications. Substantial dangers for the user can appear from inappropriate repairs.
Information for the Thermal Carafe
The thermal carafe contains 10 cups of coffee at 125 ml each.
It is designed as serving carafe and keeps the contents warm at maximum fill. The warming period can be essentially reduced in case of partial filling and residual quantities. It is best, if the carafe is rinsed with hot water prior to preparation.
The closure of the brewing lid is not 100% leak-proof, so that it can be easily opened after the coffee has cooled. Only lightly twist the cover for closing.
Use the filled carafe only vertically, do not bump hard and do not tilt. When pouring, turn the lid counterclockwise until the marking is above the pouring spout.
The double-walled insulating glass insert is mouth blown. Streaks or bubbles, which can appear like cracks, cannot be prevented. They do not inhibit its usability.
High temperature differences must be avoided, otherwise the insulating glass insert could shatter. Do not use any hard objects for stirring or cleaning. Do not place any tea filters

into the thermal carafe or fill with ice cubes.
If the glass is damaged, a risk of imploding the insert exists due to the vacuum. This could also occur at a later time without connecting the cause of the damage. Therefore never drink directly from the thermal carafe, do not reach into the carafe and do not use any hard brushes and such!
Always close the carafe with a lid and do not leave unattended near children!
Damages on the insulating glass insert are exempt from the warranty. Liability is not assumed for subsequent damages that occur due to careless handling.
Replace insulating glass insert
You may obtain a replacement for the insulating glass insert where you bought the appliance or you can order it directly from petra-electric. Please state the precise model description. You will find it on the bottom of the appliance. Please wear safety glasses and safety gloves when replacing the insulating glass insert and make sure that no other person is in the vicinity.
Unscrew the bottom of the thermal carafe by turning it counterclockwise and remove the glass insert. Place the rubber seal on the edge of the new insulation glass insert, and then push the insert into the housing and screw onto the bottom by turning clockwise. The dowel of the glass
flask is extremely sensitive, it may not be damaged.
Putting into operation
Before first use or when the appliance has not worked for some time, make 2 operations without coffee powder and with max. water filling, then rinse filter and jug with hot water.
Preparing coffee
Pour cold water into the water container. The number of cups which are to brew can be seen on the water level indicator. The water level indication shows the number of brewed cups with 125 ml of coffee each.
Swivel the filter holder to the front and insert the paper filter 1 x 4 folded along the embossed line. Make sure that the filter is within the filter holder by exerting light pressure. Fill in the necessary quantity of coffee.
Use approximately 5 - 7 grams of medium fine ground coffee per cup and according to personal preference. Put the thermal jug with the closed brewing lid under the filter. Connect plug with a safety socket and switch on.
The operation lamp shows the start of the brewing process. After completing the process, switch off the appliance and remove the carafe. The Drip stop prevents that the coffee continues to drip. Before making new coffee, the appliance has to cool down for some minutes.
Soluble coffee can be used in the filter without paper.
Prepare tea by hanging the tea bags into jug. The jug must be used with the empty filter.
Cleaning and maintenance
Disconnect the appliance from the socket and let the coffee maker cool down. Never immerse the appliance in water. Use a damp cloth with washing-up liquid and rub dry afterwards.
Filter can be cleaned under running water or in a dish washer.
The jug is to be cleared only with warm water in the inside after each use. Never put it in a dish washer.
In case after some time there should be a film inside the thermal jug you can use a pill suitable for cleaning dentures to get it off. Fill in water plus the pill, and leave it some hours. Then rinse it several times. Do not use abrasive or scouring agents.
Descaling
Like other hot water appliances the coffee maker has to be descaled periodically. A considerable longer brewing time and a higher noise level are an indication that the appliance needs to be descaled. The following indications are guidelines which refer to a daily use in the household.
| Hardness Hardness degree intervals | Descaling | |
| 1 water with 0-7° low descale a year calcium content | dH twice | |
| 2 water with >7-14° medium descale a year calcium content | DH four times a year | |
| 3 water with >14-21° high descale weeks calcium content | dH every 6 weeks | |
| 4 water with >21° very high descale calcium content | dH monthly |
1^ dH corresponds to aprox. 0.18 mmol/l Ca and MG Ions
You can ask for the degree of hardness in your residential area at the responsible waterworks or the local administration.
Use a standard descaling agent according to the application instructions.
Use a paper filter and put the jug in the coffee maker. Pour some descaling agent, diluted according to the application instructions up to the maximum number of cups. If during the brewing process the appliance is switched off several times for some minutes, the descaling agent can work best.
Repeat this process with a new descaling agent each until the disturbing noise is removed.
Never pour hot descaling solution into the water container.

Attention: After descaling it is necessary to operate the appliance 2-3 times with a full container of water as done before the first use. Damages caused by the non-observance of these instructions are not covered by the guarantee.
For UK use only
-
This product is supplied with a 13 A plug conforming to BS 1363 fitted to the mains lead. If the plug is unsuitable for your socket outlets or needs to be replaced, please note the following. If the plug is a non-rewireable one, cut it from the mains lead and immediately dispose of it. Never insert it into a socket outlet as there is a very great risk of an electric shock.
-
The replacement of the plug at the mains lead has to be done according to the following instructions:
Warning - This appliance must be earthed
Important: The wires in this mains lead are coloured in accordance with the following code:
green / yellow: Earth blue: Neutral
brown: Live
As the colours of the wires in the mains lead of this appliance may not correspond with the coloured markings identifying the terminals in your plug, proceed as follows:
the wire which is coloured green and yellow must be connected to the terminal which is marked with the letter E or by the earth
symbol for coloured green or green and yellow,
- the wire which is coloured blue must be connected to the terminal which is marked with the letter N or coloured black,
- the wire which is coloured brown must be connected to the terminal which is marked with the letter L or coloured red.
- If a 13 A (BS 1363) plug is used it must be fitted with a 13 A fuse conforming to BS 1362 and be ASTA approved. If any other type of plug is used, the appliance must be protected by a 10 A fuse either in the plug or adapter or at the distribution board. If in doubt - consult a qualified electrician.
- Never use the plug without closing the fuse cover.
CE The appliance complies with the European directives 2006/95/EC and 89/336/EEC.
At the end of its lifetime this product must not be disposed of through the normal domestic waste, but it should be handed to an assembly point for the
recycling of electrical and electronical appliances. You can inquire about details at the local administration.
Subject to technical changes.