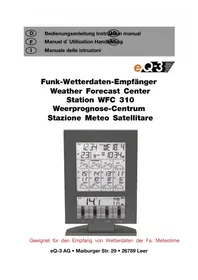
WFC310 - Weather Station HAMA - Free user manual and instructions
Find the device manual for free WFC310 HAMA in PDF.



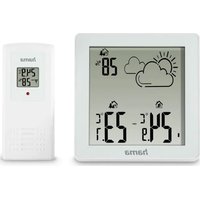
| Product Type | Weather station with forecasts and wireless outdoor sensor |
| Brand | Hama |
| Model | WFC310 |
| Category | Weather Station |
| Station power supply | 3 LR6/Mignon/AA batteries |
| Sensor power supply | 2 LR03/Micro/AAA batteries |
| Indoor temperature | 0 °C to 50 °C, accuracy ±1 °C, resolution 0.1 °C |
| Outdoor temperature | -39.9 °C to 59.9 °C, accuracy ±1 °C, resolution 0.1 °C |
| Weather data update | Every 24 hours |
| Time reception | DCF77 (Germany) and HBG (Switzerland) |
| Weather forecasts | Up to 4 days (60 regions) or 2 days (30 regions) |
| Alarm | Alarm with snooze function (5 minutes) |
| Reception test | Built-in, duration 1 minute |
| Region selection | 90 predefined weather regions |
| Display | Indicators for weather reception, time signal, alarm |
| Included accessories | Outdoor sensor, wall mount, screws and wall plugs |
| Sensor dimensions | 32 mm x 17 mm x 92 mm |
| Maintenance and cleaning | Wipe with a soft dry cloth. Do not use solvents. |
| Safety | Do not open or modify the device. Keep out of reach of children. For household use only. |
| General information | Manual available in multiple languages. Battery and WEEE recycling mandatory. |
Frequently Asked Questions - WFC310 HAMA
User questions about WFC310 HAMA
0 question about this device. Answer the ones you know or ask your own.
Ask a new question about this device
Download the instructions for your Weather Station in PDF format for free! Find your manual WFC310 - HAMA and take your electronic device back in hand. On this page are published all the documents necessary for the use of your device. WFC310 by HAMA.
USER MANUAL WFC310 HAMA
Weather Forecast Center
Station WFC 310
Weerprognose-Centrum
natural_image
Simple line drawing of a vertical ladder structure with horizontal bars (no text or symbols)natural_image
Pure technical diagram showing a ruler and a vertical bar with an arrow, no text or symbols presentnatural_image
Symbol of a trash bin crossed with a diagonal line and a horizontal bar below (no text or numbers present)9. Technische Daten
Innentemperatur:
Bereich 0 bis 50 °C
Weather Forecast Center WFC 310
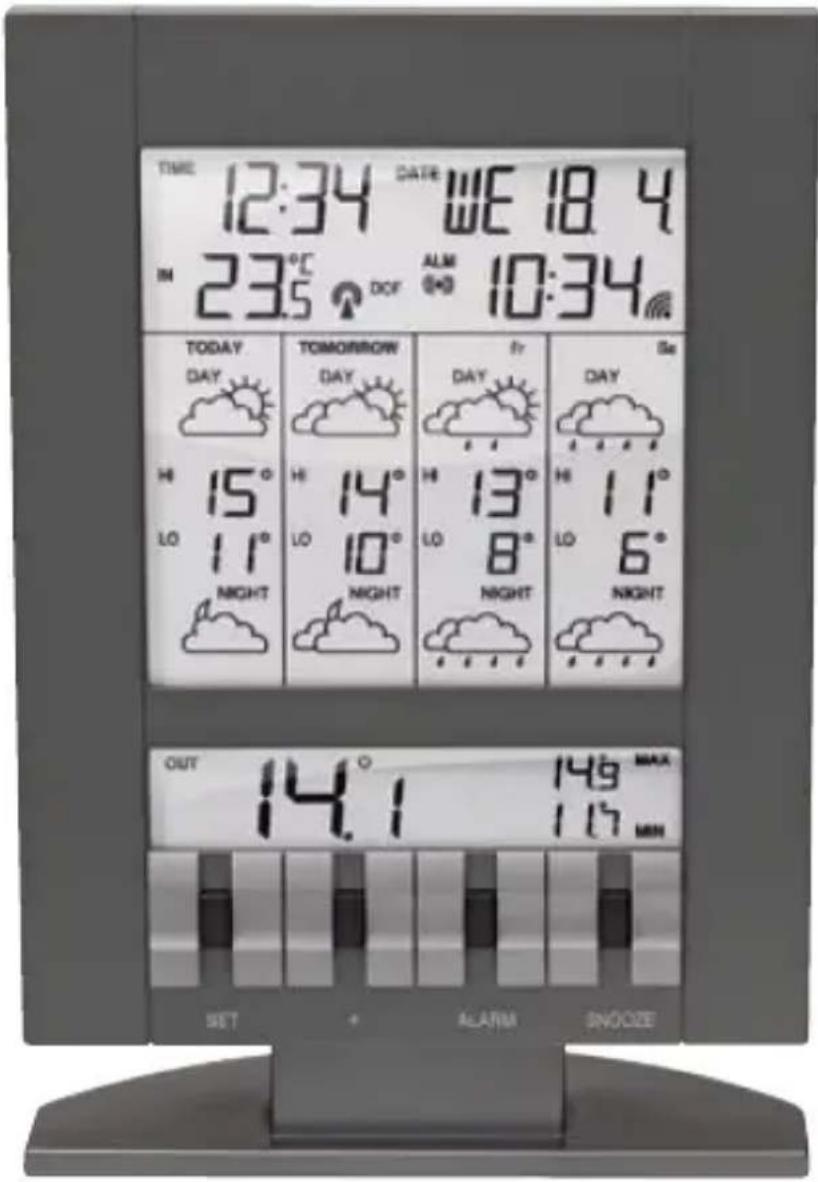
Instruction manual
1. Introduction
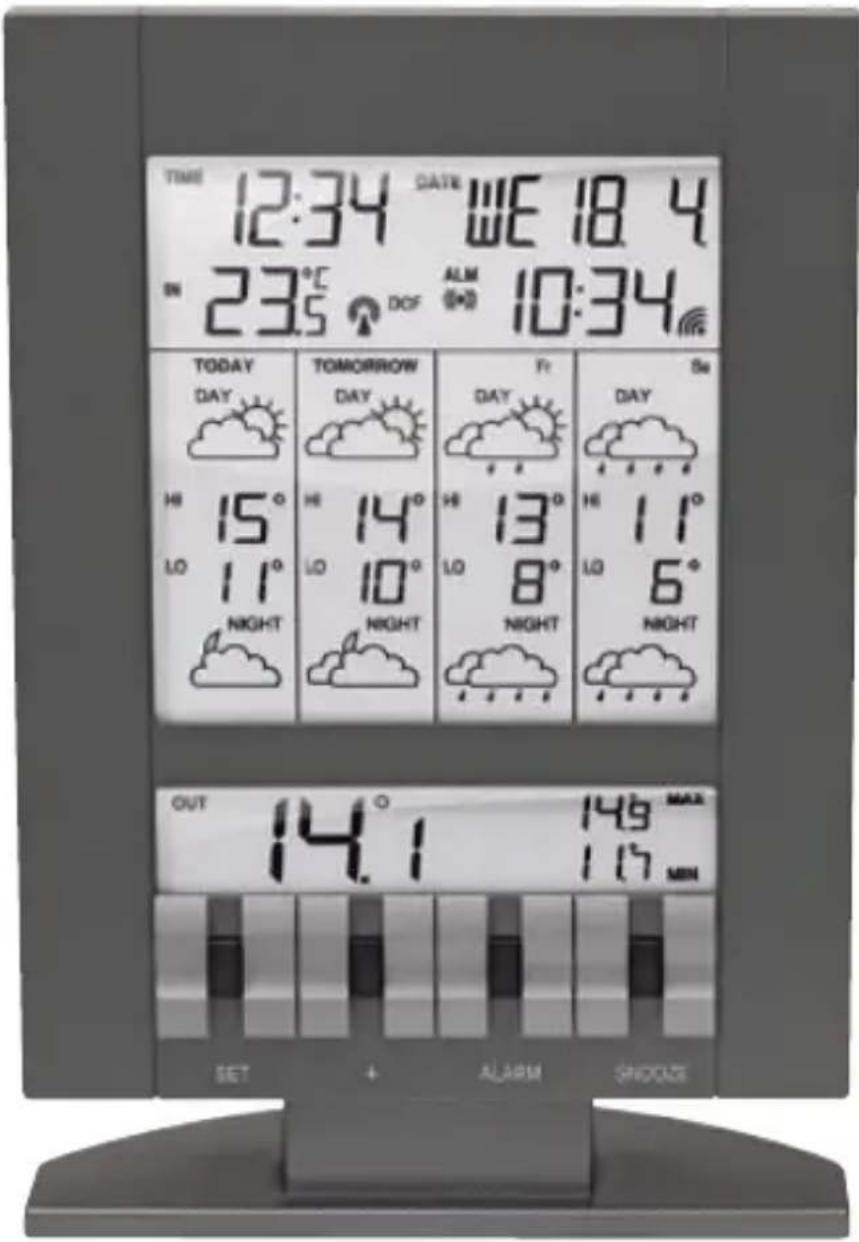
The WFC 310 provides a professional weather forecast for the current and the next three days. The weather forecasts are made by professional meteorologists and are sent out with the radio-time signal generator DCF77 in Germany and HBG in Switzerland and can be received in almost all of Europe. The reception area for the radio-time signal generator is divided into a total of 90 meteorological regions (60 regions with 4 day forecast, 30 regions with 2 day forecast). The desired region for the local or holiday location is simply selected and the respectively current weather forecast is shown on the display. This gives you a quick overview of the weather situation for the following days at any time. Updating the weather data is done every day.
You will also be able to consult the local outside temperature, thanks to the transmitter which you will install in a place of your choice.
Please read the operating instructions carefully and completely before using for the first time, to prevent function errors and incorrect operation. Keep the instructions handy for consulting.
2. Display
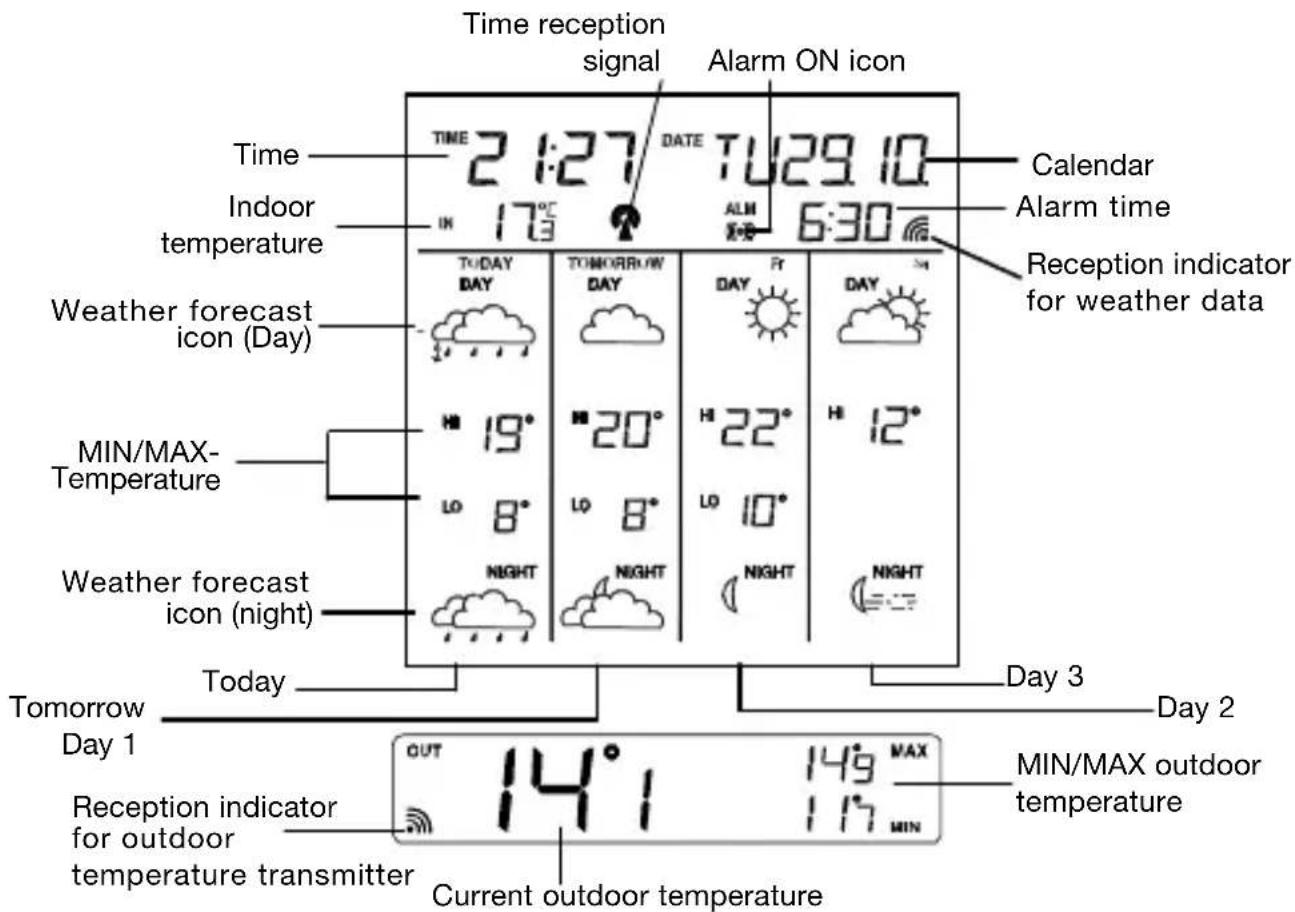
Reception indicator for weather data
- Symbol on → Weather data completely received
- Symbol flashing → Weather data incomplete
Reception indicator for radio-time signal generator
- Symbol flashing → Initial reception of date and time
- Symbol on Time and date are current
- Symbol off → Time and date have not be updated
Alarm symbol
- Symbol on → Alarm function switched on
- Symbol off → Alarm function switched off
- Symbol flashing → Alarm active or temporarily switched off (Snooze)
3. Choosing the installation location
Similar to a mobile telephone network or radio/TV reception, the reception of the radio-time receiver may not be perfect in all locations. Just a couple of notes to make sure that your device works with no problems.
The location of the weather station is very important. This is the reason for the new test function that allows the quality of reception to be checked in the surrounding area and to position the device in a location that has the best possible conditions.
- Switch on all potential sources of interference (e.g. television) in the area that you want to install the station during the test!
- Position the device in the location, oriented as you prefer, but at least one meter from the possible source of interference.
- Activate test mode as described.
- Monitor the reception display on the weather station. If you have found a location that has good reception, you can leave the device there and it will retrieve data automatically from the transmitter.
Note!
- The time and date appear within a few minutes. Local outside temperature will appear just after the set up (see page 18)
- The transfer of larger quantities of data for the forecast take much longer: In order to receive all data, the station requires 24 hours after start-up.
4. Possible sources of interference
Interferences as with a radio transmitter can occur and could be caused by the following influences:
- In buildings with a lot of concrete, metal parts and electrical systems, reception problems can occur (e.g. Mall).
- Electrical devices such as television, computer, house-hold devices, etc. or transformers, land lines, radio transmitters and railways are possible direct sources of interference.
-
Atmospheric influences and geographical features (mountains, etc.) can affect the propagation of the radio waves.
-
The distance from the transmitter does also influence the reception. Areas such as Southern Italy or Northern Scandinavia are also critical areas because of the great distances from the transmitter.
- In all regions, so-called “dead spots” can occur making reception impossible.
- Weak batteries in the device decrease the quality of reception.
5. Commissioning and configuration
Inserting batteries/Changing batteries
- Open the transmitter's batteries compartment and insert 2 batteries (LR03/Micro/AAA) respecting polarities.
- Open the battery compartment at the rear of the weather station and insert the three batteries (LR6/ Mignon/ AA), ensuring proper polarity, into the battery compartment. When disposing of dead batteries, see note on the disposal information.
Note!
All internal data is deleted when you change the batteries. The configuration parameters (weather region, time zone and contrast) must be entered again (see the following chapter). Receiving all weather data requires a period of at least 24 hours.
Calling up the configuration menu
- Press the
Exiting the configuration menu
- Press the
Setting the weather region
- After calling up the configuration menu, the setting mode is active for the weather region. The text “loc” is shown on the display. The currently defined region is shown directly to the right. Use the <+> button to select the desired region now (see Appendix).
Note!
For regions 60 – 89, the forecast is limited to 2 days. Both fields for the following days (the far right on the display) and the fields for the MIN-temperature (LO) remain empty.
The data is synchronized again after changing the region. The reception of the new weather data requires at least 24 hours.
Setting the time zone
- From the start of the configuration, press the
Note!
The time received from the radio-time signal generator DCF or HBG is Central European Time (CET, CEST).
Setting the time zone is therefore only required for other time zones (e.g. in Portugal or Great Britain).
Contrast setting
- From the start of the configuration, press the
- Pressing the
Reception test
- Press the <+> button for at least 3 seconds to activate the test for the reception of weather data. The text “test” is shown on the display. The reception indicator for the weather data shows the quality of reception. The reception is good if the indicator is shown, otherwise a new location must be found for installing the weather station.
- The reception test is either ended after approx. 1 minute automatically or by actuating the <+> button.
6. Operations
Alarm function
- Press the
button for at least three seconds to set the alarm time. The text “ALM” and the hours display flash. Use the <+> button for the hour setting. By pressing the button again, the minute setting is activated. The minute display flashes. Use the <+> button for the minutes setting. Press the button again to end the setting mode for the alarm time. - Use the
button to activate or deactivate the alarm. When the alarm is active, the alarm symbol) "((s shown on the display. - The alarm signal can be interrupted with the
button. Use the button to stop the alarm signal for five minutes. During this time, the alarm signal 🔊 (“flashes.”)
Outdoor temperatur
- MIN/MAX can be resetted by pressing the SNOOZE key during 3 seconds.
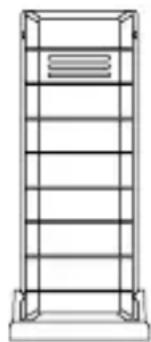
Positioning the temperature transmitter:
natural_image
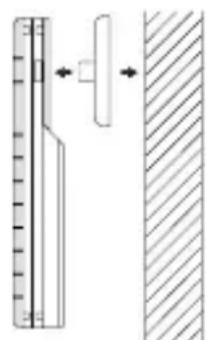
Simple line drawing of a vertical metal shelf with horizontal shelves and a small rectangular top (no text or symbols)The transmitter is supplied with a holder that may be attached to a wall with the two screws supplied. The transmitter can also be position on a flat surface by securing the stand to the bottom to the transmitter.
To wall mount: Mount at a sheltered place. Avoid direct rain and sunshine.
- Secure the bracket onto a desired wall using the screws and plastic anchors.
- Clip the remote temperature sensor onto the bracket.
Note!
Before permanently fixing the transmitter wall base, place all units in the desired locations to check that the outdoor temperature reading is receivable. In event that the signal is not received, relocate the transmitter or move it slightly as this may help the signal reception.
natural_image
Diagram showing a ruler measuring a surface with an arrow indicating direction (no text or symbols present)Show current weather region
Press the
7. Intended usage, exclusion of warranty, and safety information
- This weather station is intended for private usage as an indicator for future weather. The forecasts of this device are to be used as orientation values and do not represent absolute, precise forecasts.
- The manufacturer or distributor of this weather station assumes no responsibility for incorrect values or any results that may occur because of these values.
- The weather station is not intended for medical purposes or for the information to the public.
- The manufacturer or distributor has no influence on the transferred weather data or forecasts.
- The capabilities of the weather station depend on the operational functionality of the transmission media, which the manufacturer or distributor has no influence on. Failures in the transmission media cannot be ruled out.
- This device is not a toy and contains breakable and small parts. Install the device out of the reach of children.
- Improper handling or unauthorized opening of the device voids the guarantee.
- These instructions are not to be reproduced in whole or in part without the written authorization from the manufacturer.
8. Disposal information
Do not dispose off the device as part of household garbage!
Electronic devices are to be disposed of in accordance with the guidelines concerning electrical and electronic devices via the
local collecting point for old electronic devices!
Observe battery regulations
According to the regulations pertaining to batteries,
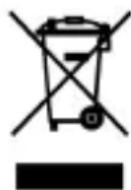
you are required to send used or defective batteries back to us or to hand them in to the respective local business or battery collection point.
Batteries do not belong in the household waste!
9. Technical specifications
Indoor temperature:
Range: 0 to 50°C
Accuracy: ±1^
Resolution: 0,1°C
Outdoor temperature:
Range: -39,9 °C to 59,9 °C
Accuracy: ±1^
Resolution: 0,1°C
Weather data updating:...... Every 24 hours
Power consumption:
Station: 3 x Battery LR6/Mignon/AA
Transmitter:....2 x Battery LR03/Micro/AAA
Dimensions (L x W x H) :
Station: 122 mm x 30 mm x 179 mm
Transmitter: 32 mm x 17 mm x 92 mm
Station WFC 310
natural_image
Simple line drawing of a vertical shelf or rack structure with horizontal bars (no text or symbols)natural_image
Pure mechanical diagram showing a vertical rod and a side view with hatched pattern (no text or symbols)Note!
9. Specifications techniques
Station: 3 x Piles LR6/Mignon/AA
Dimensions (L x W x H):
Station: 122 mm x 30 mm x 179 mm
- Symbol aan → Weerdata completely received
- Symbol knippert → Weerdata incomplete
natural_image
Simple line drawing of a vertical shelf or rack structure with horizontal bars (no text or symbols)natural_image
Diagram showing a ruler measuring a surface with an arrow indicating direction, alongside a cross-section of a hatched material (no text or symbols present)natural_image
Simple line drawing of a vertical metal shelf with horizontal shelves (no text or symbols)natural_image
Diagram showing a ruler measuring a surface with an arrow indicating direction (no text or symbols present)Nota
The following is an overview of all weather regions. More information can be found under www.meteotime.com



- Weather Forecast Center
- Station WFC 310
- Weerprognose-Centrum
- Technische Daten
- Weather Forecast Center WFC 310
- Introduction
- Display
- Reception indicator for weather data
- Reception indicator for radio-time signal generator
- Alarm symbol
- Choosing the installation location
- Note!
- Possible sources of interference
- Commissioning and configuration
- Inserting batteries/Changing batteries
- Calling up the configuration menu
- Exiting the configuration menu
- Setting the weather region
- Setting the time zone
- Contrast setting
- Reception test
- Operations
- Alarm function
- Outdoor temperatur
- Positioning the temperature transmitter:
- Show current weather region
- Intended usage, exclusion of warranty, and safety information
- Disposal information
- Do not dispose off the device as part of household garbage!
- Observe battery regulations
- Technical specifications
- Specifications techniques
- Nota
Brand : HAMA
Model : WFC310
Category : Weather Station