
Multyradio 1 - Hi-fi system TECHNISAT - Free user manual and instructions
Find the device manual for free Multyradio 1 TECHNISAT in PDF.

| Product type | Hi-fi system |
| Brand | TechniSat |
| Model | Multyradio 1 |
| Dimensions (W x D x H) | 450 x 140 x 210 mm |
| Weight | 2 400 g (without power supply) |
| Weight with power supply | 3 500 g |
| Power supply | 9 V DC via included mains adapter |
| Maximum power consumption | 28.3 W (46.9 VA) |
| Standby consumption | 9.3 W (16 VA) |
| Display | LCD 128 x 64 pixels, blue background, white text |
| Reception | DRM, DAB (Band III and L), FM (RDS), AM (LW, MW, SW) |
| Amplification | 2 x 5 W (RMS) at 8 ohms |
| Connections | 3.5 mm headphone jack, 3.5 mm external input, external antenna |
| Memory card support | SD/MMC |
| Main functions | DAB/DRM recording, MP3 playback, alarm, timer, AFS, EPG |
| Menu languages | German, English |
| Safety | Do not open, avoid moisture, unplug during storms |
| Maintenance | Clean with a soft, dry cloth |
| Repairability | Repair by authorized technician only |
Frequently Asked Questions - Multyradio 1 TECHNISAT
User questions about Multyradio 1 TECHNISAT
0 question about this device. Answer the ones you know or ask your own.
Ask a new question about this device
Download the instructions for your Hi-fi system in PDF format for free! Find your manual Multyradio 1 - TECHNISAT and take your electronic device back in hand. On this page are published all the documents necessary for the use of your device. Multyradio 1 by TECHNISAT.
USER MANUAL Multyradio 1 TECHNISAT
Operation instructions
1 Contents
1 Contents 2
2 Illustrations. 4
3 Please read first 6
Note on disposal. 6
Safety remarks 6
Operational breaks. 6
4 Connection 7
5 Going into operation. 9
6 Settings. 9
6.1Clock/date 10
6.2 Radio 11
6.3 Display 11
6.4 Extended Settings 12
6.4.1 Card formatting 12
6.4.2 Works Settings 12
6.4.3 Language Selection 12
6.4.4 Antenna Switch-over 13
6.4.5 Firmware Update. 13
7 Operation 14
7.1 Switching on/off 14
7.2 Selecting radio station 14
7.2.1 Preset Stations 14
7.3 Changing Volume. 15
7.4AFS 15
7.5 Recording. 15
7.6 Playing back MP3 files. 16
7.7 Sleep Timer 17
7.8 Auto-Recording 18
7.9 Alarm 19
8 Station Search 21
8.1 Manual Search 21
8.2 Search-Run 22
8.3 Delete Station List 23
8.4 EPG 23
8.5 Info 23
11 Technical Terms. 24
12 Technical data 25
13 Error search assistance 28
Your appliance bears the CE symbol and fulfils all required EU norms.
We are not liable for alterations and printing errors. Status 05/08
TechniSat and MultiRadio 1 are registered trademarks of
Mobile prices as well as the prices of other providers can vary.
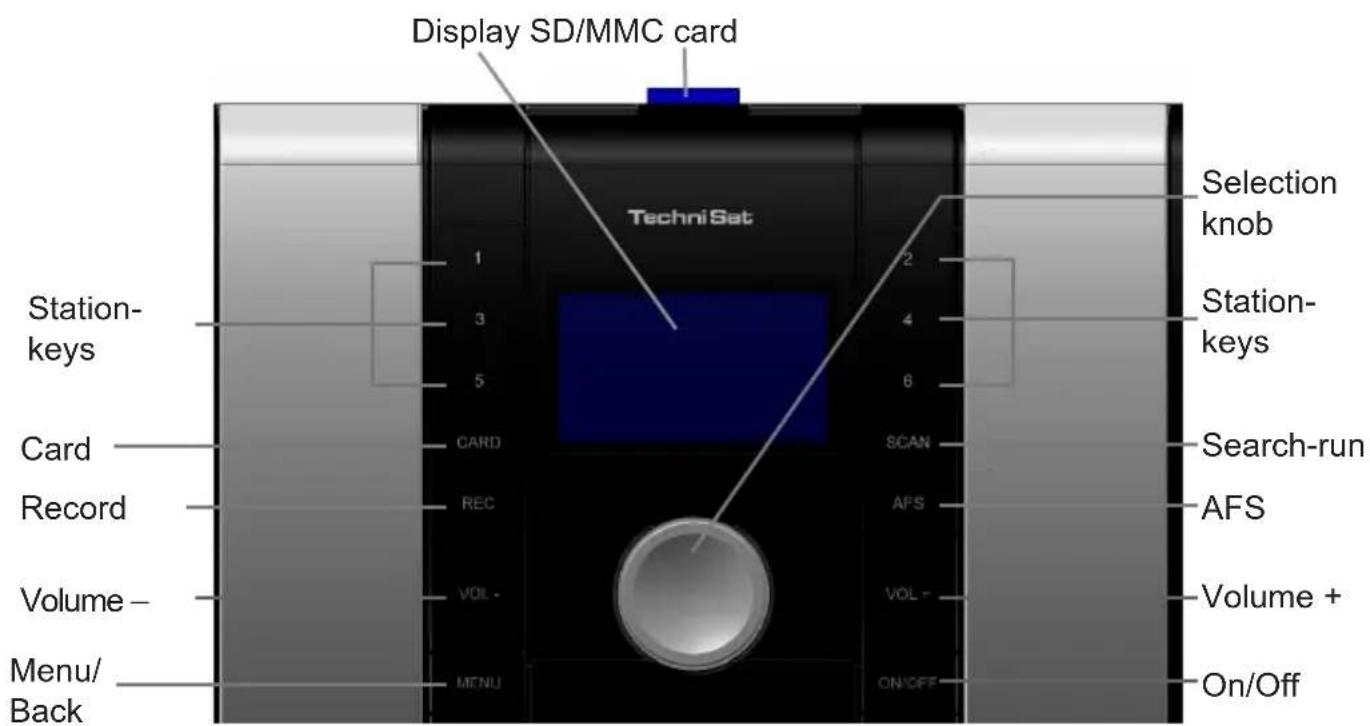
2 Illustrations

3 Please read first
Before you start to operate the appliance first of all check that all parts have been delivered. Included in the delivery are:
1 MultyRadio 1, 1 mains adapter,
1 Operation Instructions, 1 guarantee card.
Note on disposal
The packaging of your appliance consists entirely of recyclable materials. Please sort these appropriately into the separated refuse system.
At the end of its useful life this product is not to be disposed of as normal household waste but must instead be taken to a collection point for the recycling of electrical and electronic appliances. This will be indicated also by the symbol on the product, the Operation Instructions or the packaging.
The basic materials are reusable as per their marking.
You will be making an important contribution to the protection of our environment by means of the recycling, the material exploitation or other forms of exploitation of old appliances.
Please ask your local municipal authorities as to the whereabouts of the appropriate disposal unit.
Please be careful not to let the empty batteries of the remote control stray into domestic refuse instead of being correctly disposed of (return to the dealer's, special waste disposal).
Safety remarks
For your own protection you should carefully read through the safety precaution notes before putting your new appliance into operation.
The manufacturer assumes no liability for damage occurrences which arise via incorrect handling and non-compliance with the safety precautions.
In order to ensure adequate ventilation place the appliance on a smooth, even surface and do not set any objects down on the lid of the appliance.
Do not stand any burning object, e.g. lit candles, on the appliance.
Do not expose the appliance to dripping or sprayed water and do not place any objects filled with liquids, e.g. vases, on top of it.
The appliance is only to be operated in temperate surroundings.
Never open up the appliance! You risk the danger of an electric shock. Any intervention which may be necessary should be undertaken by trained personnel.
In any of the following instances you should disconnect the appliance from the mains and seek assistance from an expert:
the electric cable and/or the mains plug is damaged
the appliance has been exposed to moisture and/or liquid has penetrated into the appliance
in cases of substantial functional errors
in the case of serious external damage
Operational breaks
The appliance should be disconnected from the mains during a thunder storm or during longer operational breaks (e.g. vacations).
4 Connection
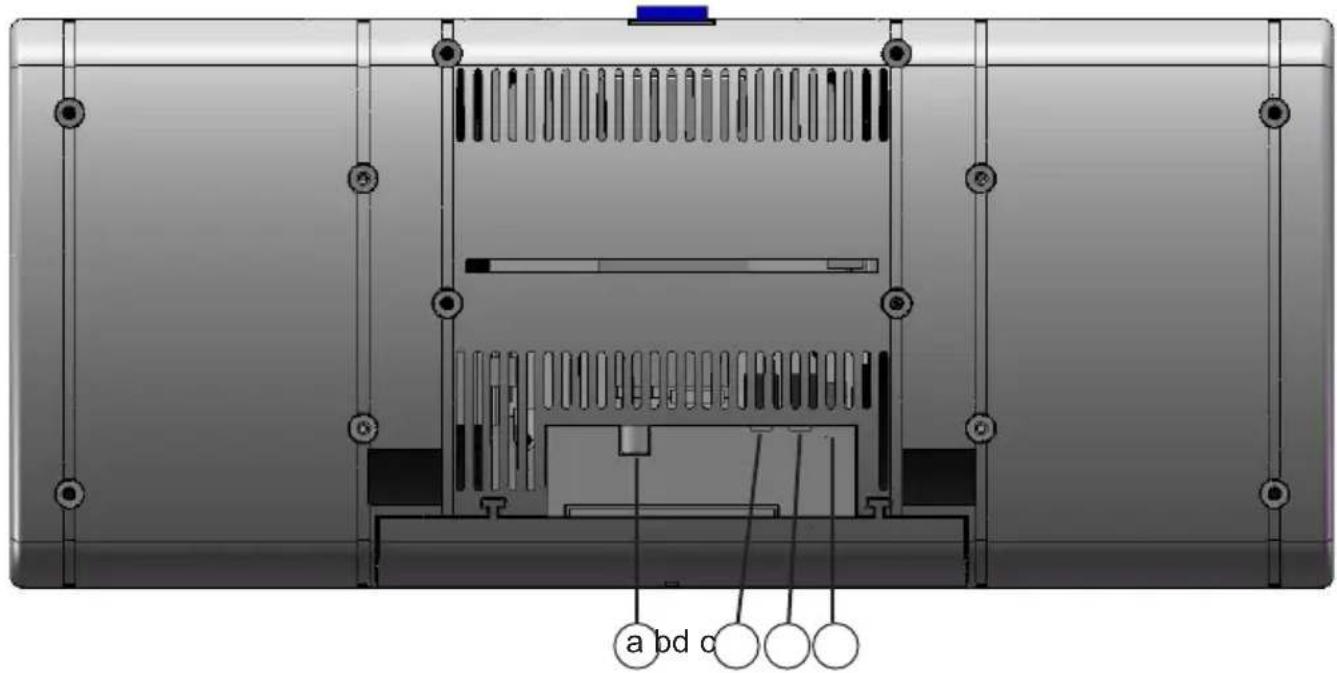
a. Connect the supplied dipole antenna or an external antenna to the antenna input of the external antenna.
b. Connect the mains adapter to the DC connector.
optional:
c. Connect headphones to the headphone connector.
d. Connect an external playback appliance to the external input.
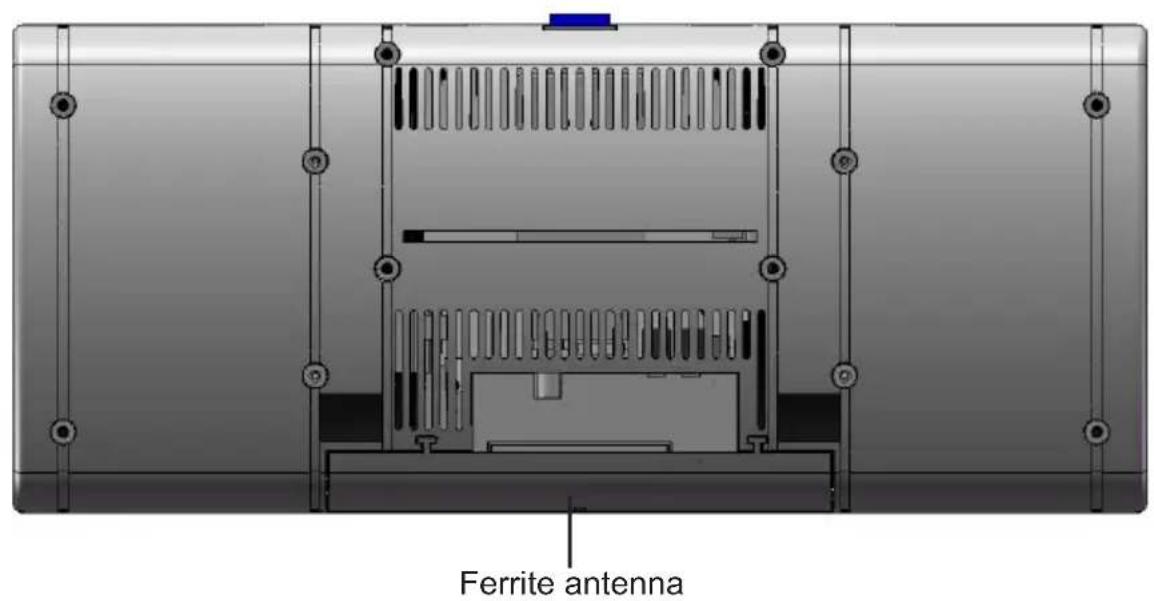
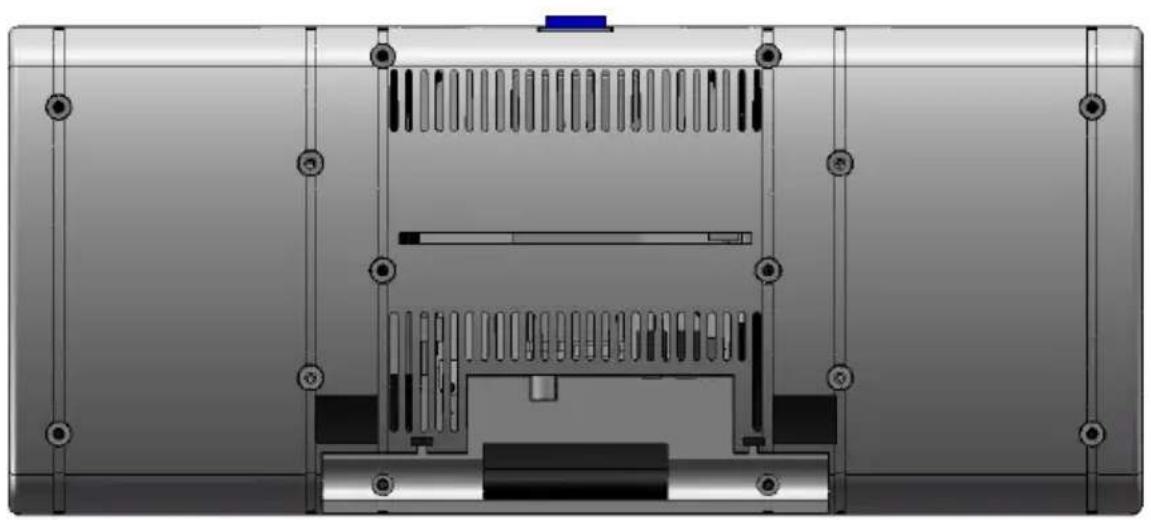
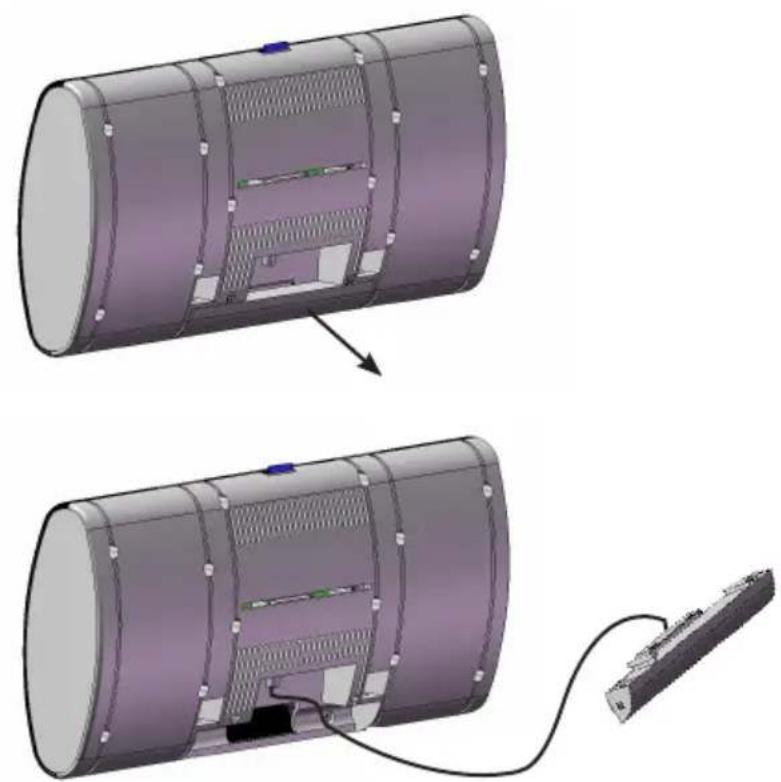
In order to improve the reception of MW, LW or DRM stations it might be necessary to take the ferrite antenna out of its fixing and to align this to the appropriate location. To do this proceed as follows:

Tip the appliance slightly forwards, out of the fixing.

Now carefully lift the appliance upwards out of the fixing.

Now pull the casing of the ferrite antenna out of the fixing and position the ferrite antenna such that you achieve the best possible reception.
5 Going into operation
After you have connected the appliance as described in Connection Chapter
press the key marked On/Off to turn it on.
When the appliance is put into operation for the first time, after switching on an immediate station search automatically begins and all receivable stations will be saved in the station list.
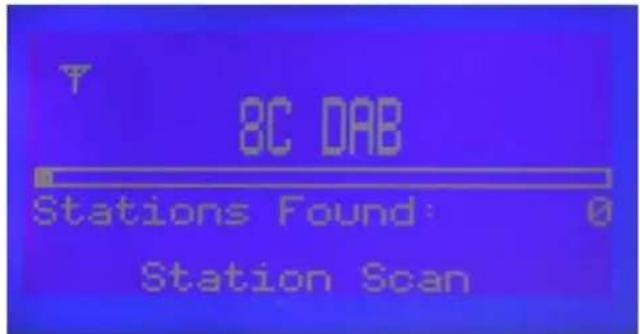
After the station search is finished the first station on the station list will be played.
Please note that:
After making connection with the network it may well be that the volume will have to be adjusted as described in point 7.3.
6 Settings
To be able to use your appliance to best advantage you will have to adjust it to suit your own individual application wishes.
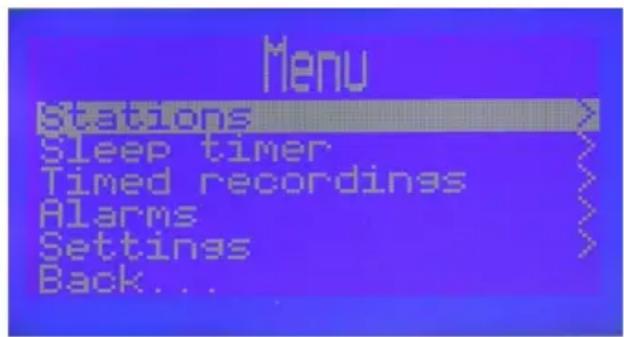
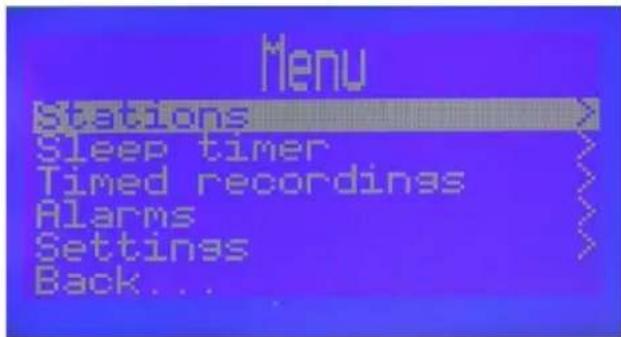
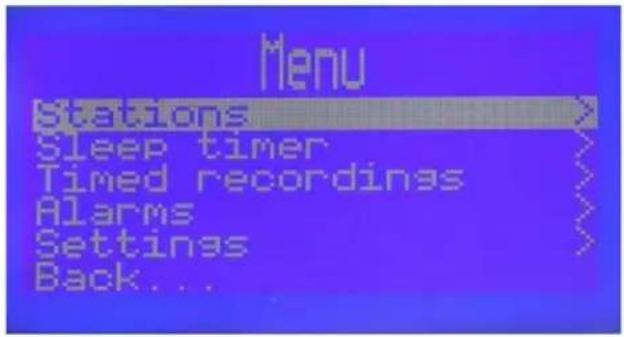
Press the key marked menu to open the main menu.
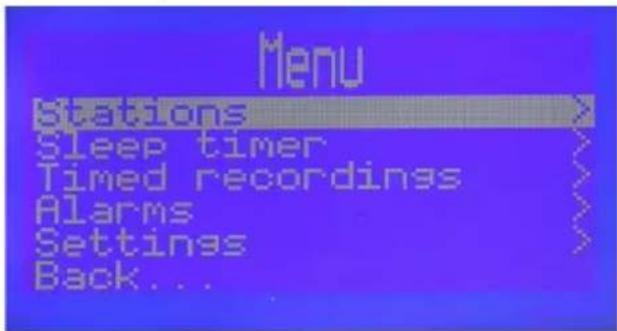
By turning the selection knob mark the line Settings and confirm by pressing on the selection knob.
On the menu Settings will appear.
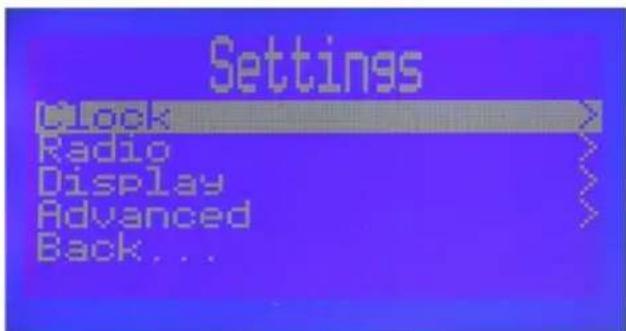
Now turn the selection knob to mark the appropriate menu point and then select this by pressing the selection knob.
6.1 Clock/Date
Under this menu point you can select whether the appliance's clock/date shall be automatically extracted from the dataflow of the station or whether you wish to set the hour and the date manually.
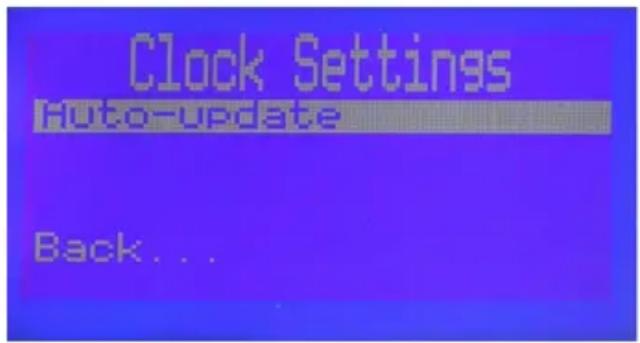
The appliance is pre-set in such a way that the hour and the date can be automatically read in. If you want to change the setting to manual then do as follows:
Press the selection knob and then manually put in the setting by turning the selection knob.
Confirm this by pressing on the selection knob. The following menu will appear.
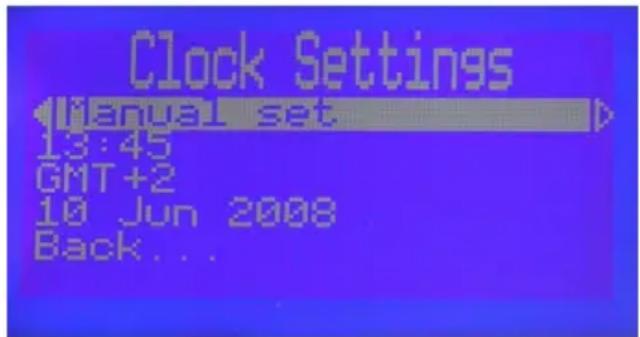
Now, by turning the selection knob mark the line for the setting of the hour and then press the selection knob.
Now, by turning the selection knob put in the correct hour and accept this by pressing on the selection knob.
Now by turning the selection knob mark the line for the setting of GMT-Offset and then press the selection knob.
Now, by turning the selection knob set the correct GMT-Offset and accept it by pressing the selection knob.
Now, by turning the selection knob set the line for the date and subsequently press the selection knob.
Now, by turning the selection knob put in the correct date and accept this by pressing the selection knob.
Now, by turning the selection knob mark the line Back and confirm this by pressing the selection knob, in order to go back to Settings on the menu. or
Press once on the key marked Menu/Back.
6.2 Radio
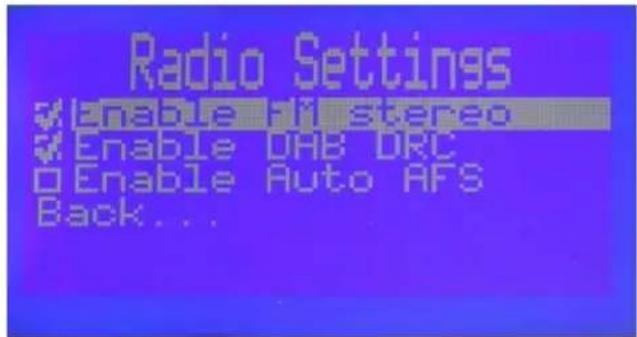

Now, by turning the selection knob select the appropriate menu entry and activate the function by pressing the selection knob. A tick will appear next to the menu entry.
Now, by turning the selection knob mark the line Back and confirm this by pressing the selection knob, in order to return to settings on the menu.
or
Press once on the key marked Menu/Back.
Activate FM Stereo
When this function is activated (marked by a tick) then the FM stations will be reproduced in stereo, otherwise the station will be reproduced in mono.
Activate DAB DRC
When this function is activated the dynamic area control transmitted with the DAB signal is switched on.
Activate Auto AFS
When this function is activated the automatic frequency control of the appliance is switched on. Via this function the appliance automatically searches for alternative frequencies to the stations as set.
6.3 Display
Under this menu point you can set the contrast of the display.
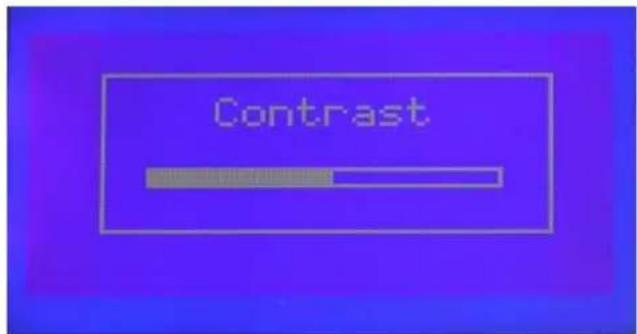
Set the desired contrast level by turning the selection knob.
Now, by turning the selection knob mark the line Back and confirm this by pressing the selection knob, in order to return to settings on the menu.
or
Press once on the key marked Menu/Back.
6.4 Extended Settings
Under this menu point further settings can be made.
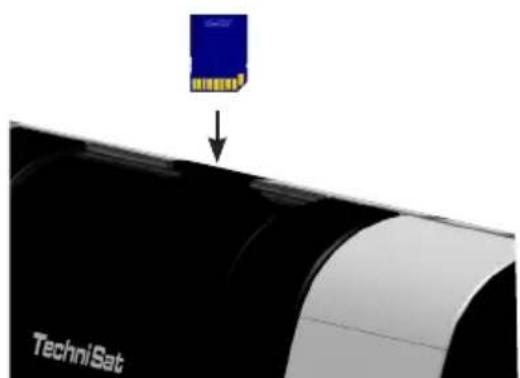
6.4.1 Card formatting
In this menu you can format the inserted SD/MMC card.

In order to format the SD/MMC card when it is in the card-reader turn the selection knob and mark the line Confirm and press the selection knob.
Please note that:
In so doing all of the data on the card are deleted.
6.4.2 Works Settings
If you call up this function the manufacturer's settings will be activated. Personal settings will be overridden.
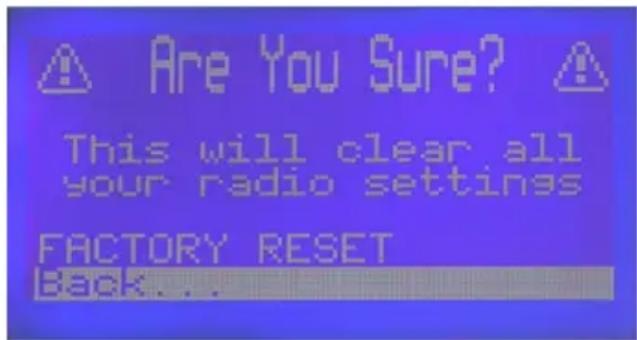
To call up the manufacturer's settings mark, by turning the selection knob mark the line Confirm and press the selection knob.
6.4.3 Language Selection
In this menu you set the language in which the menu will be administered. German and English are the languages available.

In order to select a language mark it by turning the selection knob and confirm by pressing the selection knob.
6.4.4 Antenna Switch-over
In this menu you can select whether the internal ferrite antenna is used in the long and medium wave range or whether an external antenna is used which is connected to External Antenna.
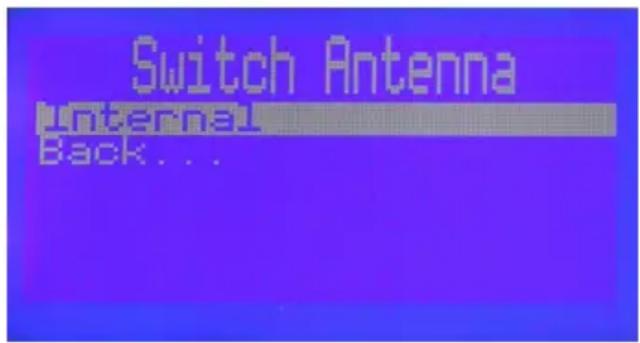
In order to change the antenna switching mark the line Internal (External) by turning the selection knob and confirm by pressing the selection knob.
Change the setting by turning the selection knob and confirm the selection by pressing the selection knob.
6.4.5 Firmware Update
In this menu you can start a Firmware-Update. In order to do this a SD/MMC card with firmware must be inserted in the card-reader of the appliance.
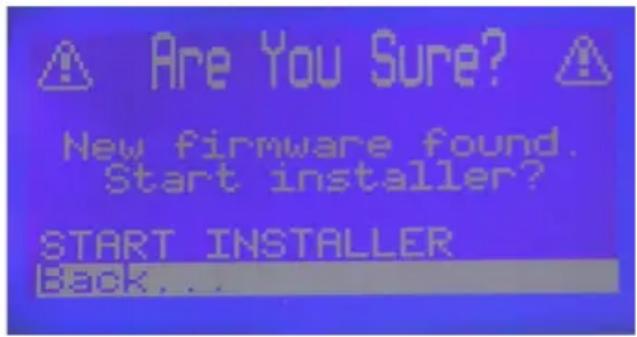
In order to start the Firmware-Update mark, by turning the selection knob, the line INSTALLER START and then press the selection knob.
Please note the following remarks in the display.
7 Operation
7.1 Switching on/off
Turn the appliance On/Off by pressing the on/off switch.
Now the station last entered will be played.
By pressing again on the same key you will turn the appliance off again.
Now the appliance is on standby.
7.2 Selecting radio station
By turning the selection knob the appliance's station list will be called up. Here the stations will be listed in alphabetical order.
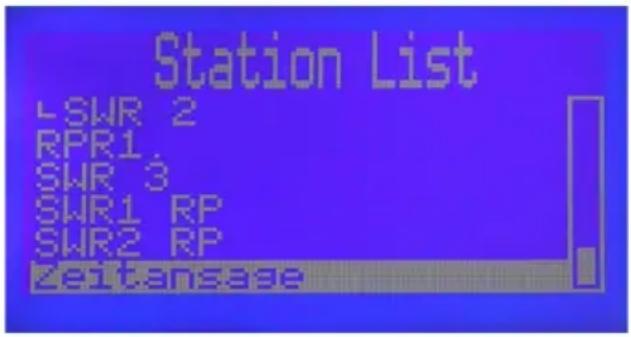
Now, by turning the selection knob select the desired station. To do this the marker is moved in a clockwork direction by turning the selection knob which will move up the list, or by turning anticlockwise the marker will move further down the list.
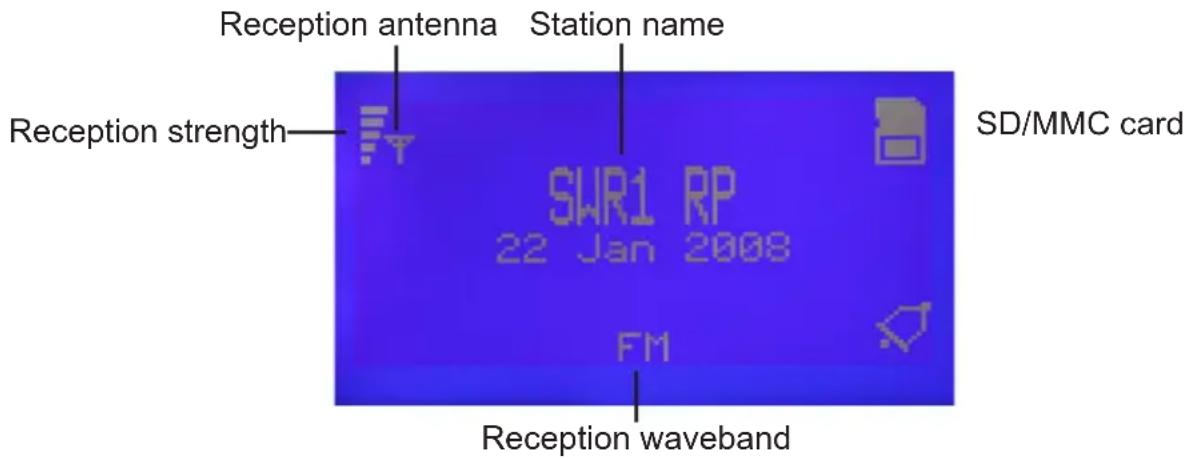
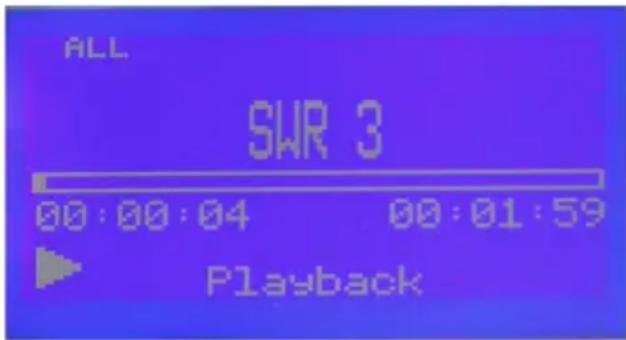
When the desired station has been marked in this way use the selection knob to set it. This station will be shown in the display with the additional information as listed below.
7.2.1 Preset Stations
So as to make it easier for you to set your favorite stations you can store these under station keys (number keys 1 to 6). Subsequently you can call up these stations by pressing the appropriate station key.
Set a station, as described above, which you want to ascribe to a station key.
Then hold the station key to which you want to ascribe the station in a pressed position until the following message is shown.
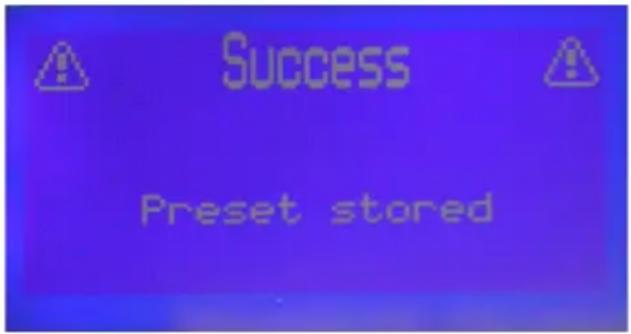
The station is now stored on this station key and can subsequently be selected by pressing this station key.
Station keys which are already occupied by a station can be over-written in the manner mentioned above.
7.3 Changing Volume
You can regulate the volume of your appliance making it louder with the assistance of the key marked Volume + and quieter by using the key marked Volume -.
7.4 AFS
With the MultiRadio 1 some stations can be received in a variety of reception modes (DRM, DAB, AM, FM). To the extent that it is available for the station set, you can use the AFS function to assist you in selecting the reception mode.
In order to set an alternative reception mode for a station press the AFS key – if necessary several times.
7.5 Recording
Digitally transmitted broadcasts can be recorded on an SD/MMC card inserted in the card-reader.
Set the station as described above.
In order to start the recording press the key marked Record. The fact that the recording is in progress will be signaled by a flashing dot on the display.
In order to finish the recording press again on the key marked Record.
The following message will appear.
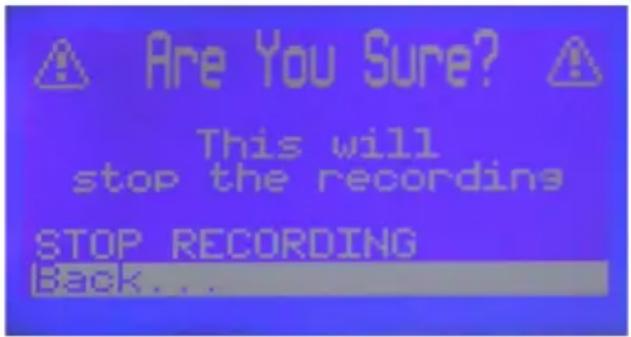
Use the selection knob to mark the line Recording being stopped and confirm by pressing the selection knob.
Now the recording will be stopped and the file will be saved on the inserted SD/MMC card.
7.6 Playing back MP3 files
To play back MP3 files or programs recorded on the inserted SD/MMC card proceed as follows:
Press the key marked Card.
The playback list of the inserted SD/MMC card will appear.
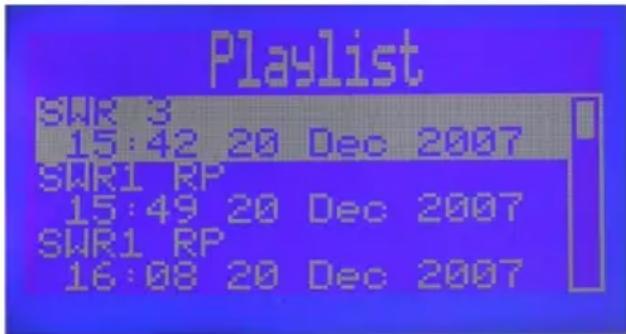
Now, by turning the selection knob select the file which you want to play back.
By pressing the selection knob the playback of the selected file will be begun.
Pause
By pressing the selection knob during playback the playback-pause will be activated.
By pressing again the playback will be resumed.
Winding forwards/backwards
In order to find a particular place on a file you can wind forwards or backwards.
To wind forwards during playback of a file turn the selection knob in a clockwise direction until the place you want is reached.
In order to wind back during playback of a file turn the selection knob in an anticlockwise direction.
Repeat mode
Various different repeat modes can be set for playback operation.
During playback press the key mark Scan (repeatedly if necessary) in order to set various repeat modes.
The mode set will be shown in the top left-hand corner of the display.
Single The current file will be repeated.
Single (loop) The current file will be played repeatedly.
All of the files in existence on the SD/MMC card will be played back.
All (loop) All of the files in existence on the SD/MMC card will be replayed repeatedly.
Random All of the files in existence on the SD/MMC card will be played back in a random sequence.
Random (loop) All of the files in existence on the SD/MMC card will be repeatedly played back in a random sequence.
Deleting files
Open the playback list as described above.
Mark the file which you want to have deleted from the SD/MMC card.
Press the AFS key.
A question appears: "Are you sure you want to delete this file?"
To actually delete the file from the SD/MMC card mark the line Delete file, and then confirm by pressing the selection knob.
7.7 Sleep Timer
Press the key marked Menu to open the main menu.
Now, by turning the selection knob mark the line Sleep-Timer and confirm by pressing the selection knob.
The Sleep-Timer Menu appears.

Now turn the selection knob and mark the line Off.
Now press the selection knob in order, then, by turning the selection knob to set the switch-off time in 5-minute phases.

Accept the switch-off time set by pressing the selection knob.
To go back to the main menu mark the line Back and press the selection knob. or
Press the key marked menu.
After the expiry of the time set the appliance will automatically switch into the standby mode.
7.8 Auto-Recording
You have the possibility of using timers to program the recording of digital programs. The appliance then records these on the SD/MMC card at the times entered.
Press the key marked menu to open the main menu.
Mark the line Auto-Record by turning the selection knob out and then confirm by pressing the selection knob. The Auto-Record menu will appear.

By turning the selection knob mark the line Record 1 of 12.
Now press the selection knob, in order, by turning the selection knob, to select one of the 12 timer slots.
Now mark the line Switched off and then press the selection knob.
Now, by turning the selection knob set the repeat mode of the timer. You can choose between the repeat modes once, every day, once per week, weekdays and just weekends.
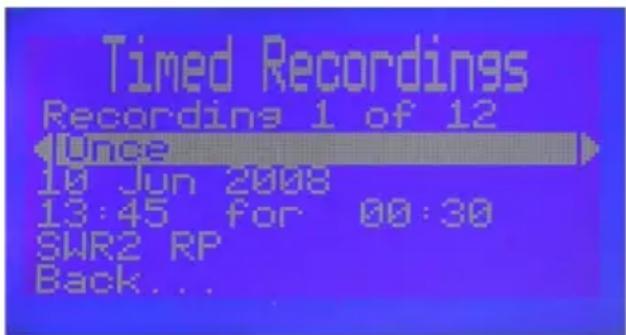
Accept the setting by pressing the selection knob.
In the same way mark the 3rd line and enter here the Date on which the recording shall be made.
Now in the 4th line first enter the hour, then the minutes when the recording shall be made and finally the duration of the recording.
Now, by turning the selection knob mark the 5th line and then press the selection knob to get to the selection of the station which you want to record.
Now, by turning the selection knob mark the desired station and accept it by pressing the selection knob.
Now, by double-pressing on the key marked Menu you can return to normal operation.
A programmed recording will be indicated by a circular symbol in the display.
7.9 Alarm
By setting an alarm the appliance will be turned on at the desired time.
Press the key marked menu to open the main menu.
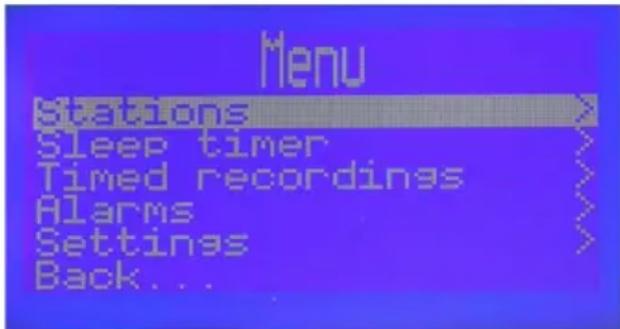
Now, by turning the selection knob mark the line Alarm and confirm by pressing the selection knob.
The Alarm menu will appear.
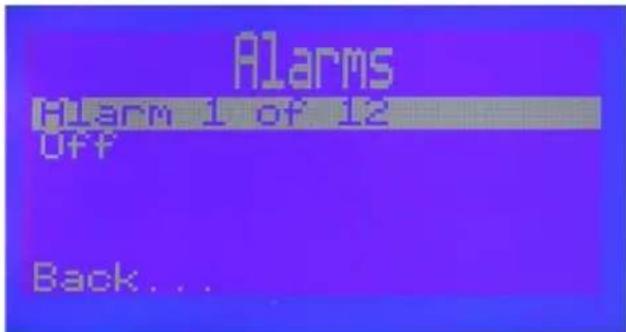
Now, by turning the selection knob mark the line alarm 1 of 12.
Now press the selection knob, to select one of the 12 alarm times by turning the selection knob.
Now mark the line Switched off and then press the selection knob.
Now, by turning the selection knob set the repeat mode of the timer. You can choose between the repeat modes once, every day, once per week, weekdays and just weekends.
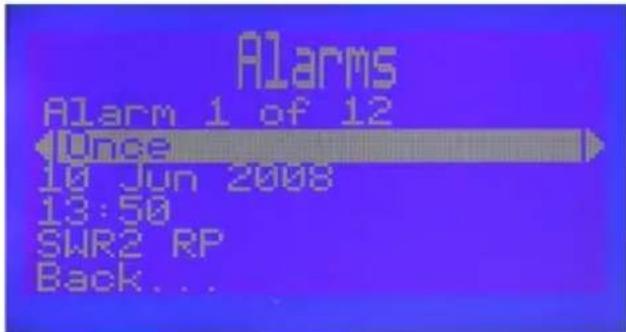
Accept the setting by pressing the selection knob.
Now in the same way mark the 3rd line and set the Date on which the alarm should go off.
Now enter in the 4th line the hour and then the minute on which the alarm should go off.
Now, by turning the selection knob mark the 5th line and press the selection knob to get to the station selection with which you wish to be woken up.
Now, by turning the selection knob mark the desired station or the desired file on the SD/MMC card and accept by pressing the selection knob.
If you don't want to be woken by a radio station then set the buzzer.
Now, by double-pressing on the key marked Menu you can return to normal operation.
A programmed alarm is shown in the display by a bell symbol.
If the appliance was turned on by an alarm then you turn it off by pressing the selection knob.
8 Station Search
Press the key marked menu to open the main menu.
Now, by turning the selection knob mark the line called Station and confirm by pressing the selection knob. The Station menu will appear.
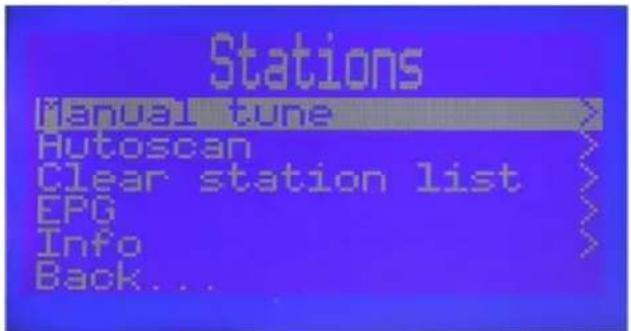
8.1 Manual Search
Now, by turning the selection knob mark the line called Manual Search and confirm by pressing the selection knob.
The Manual Search menu will appear.
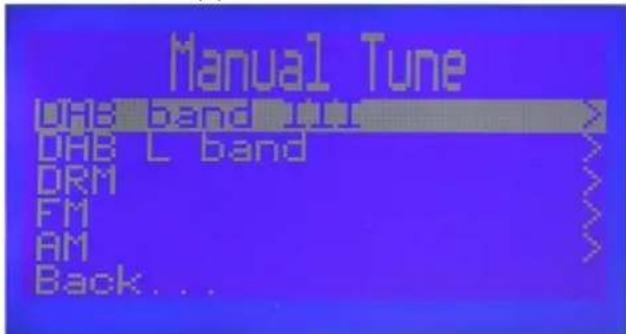
Now, by turning the selection knob select the reception waveband which you want to manually search and then press the key marked selection knob.
Now, by turning the selection knob you can manually set the desired reception frequency.
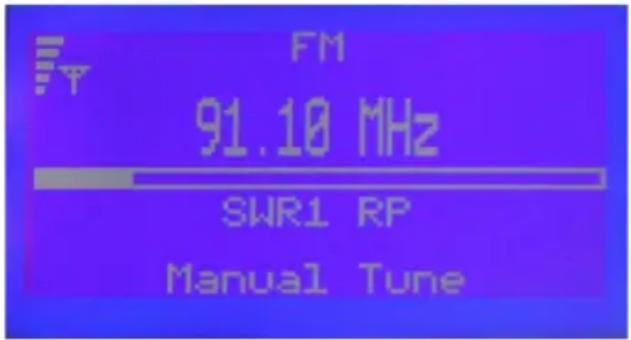
Now by pressing the selection knob the frequency set will be accepted. Afterwards the appliance will once again be in normal operation.
8.2 Search-Run
In this menu you can conduct an automatic search.
Now, by turning the selection knob mark the line called Search-Run and confirm by pressing the selection knob. The Search-Run menu will appear.
Now, by turning the selection knob mark the Search-Run method which you want to carry out and confirm by pressing the selection knob.
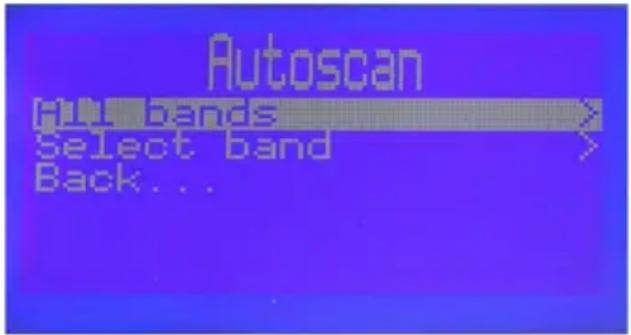
All wavebands
If you have chosen this search-run method then a search-run is started in which all reception wavebands will be searched for stations. The stations found are automatically saved in the station list.
Selecting waveband
A selection window will appear for the selection of the waveband to be searched for.
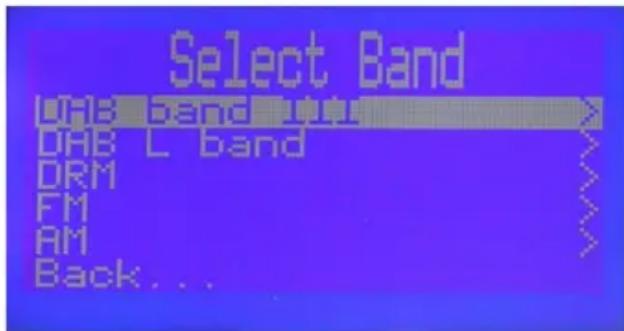
Now use the selection knob to mark the reception waveband which is to be searched for.
By pressing the selection knob the search-run will be started and the stations found will be automatically saved in the station list.
8.3 Delete Station List
If you want to delete the entire station list,
Now, by turning the selection knob mark the line called Delete Station List and confirm by pressing the selection knob.
A sub-menu will appear with the following query.
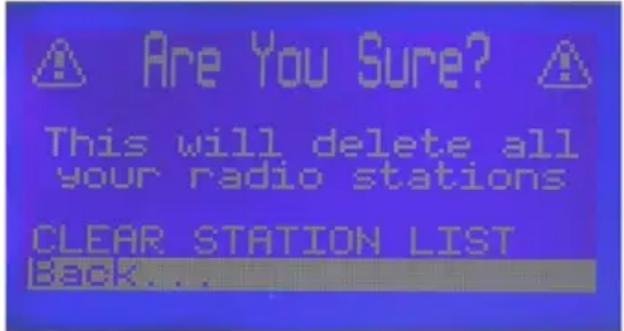
In order to delete the Station List mark the line called Confirm by turning the selection knob and irrevocably delete this by pressing the selection knob.
8.4 EPG
Now, by turning the selection knob mark the line called EPG (Electronic Program Guide) and confirm by pressing the selection knob.
As soon as this has been sent the EPG data of the station set will appear.
8.5 Info
Now, by turning the selection knob mark the line called Info and confirm by pressing the selection knob.
As soon as this has been sent the information broadcast by the station set will appear.
11 Technical Terms
Band width
In the daily jargon of digital technology this is the quantity of data which can be transferred by a certain medium in a certain period of time.
Example - the internet connection provides a band width of 4 megabits per second.
Example - the audio file has a band width of 128 kilobits per second.
Bit (binary digit)
Measurement unit for data quantities. Whereby 1 bit is the smallest imaginable data quantity which, for example, can be portrayed as a binary digit. Larger data quantities are always whole-number multiples of 1 bit.
Bit rate
The band width which is required for the transport of contents.
Byte
A group of 8 bits. In order to avoid the usage of very large figure levels groups are defined in bytes.
A procedure and/or program which codes and decodes data or signals. It is used for the compilation of digital data with audio, image and video contents. It consists of two parts - the coder and a decoder.
Firmware
Firmware is software which mostly contains elementary functions for the control of the appliance, input and output routines, occasionally also more comprehensive functions for work tasks with memory, CPU and other components.
Hardware
Physical components such as the casing and the nuts and bolts of appliances.
MP3
A popular codec for audio files. It is most frequently used for domestic applications.
Software
Application which runs on an appliance of a PC. Software can be frequently updated in order to extend functionality.
12 Technical data
Main performance features
- DRM reception
- DAB Band III reception
- DAB L-Band reception
- VHF reception (with RDS)
- AM reception
- Analogue audio outputs (stereo)
- MMC/SD-card-backup
Real-time clock with power-cut backup - A databank with itemization of the stations in alphabetical sequence, regardless of the type of transmission
- DAB/DRM broadcasts can be recorded on MMC/SD card and played back from an MMC/ SD card
- DAB-EPG-backup
- Alternative frequency function (manual or automatic) within a reception waveband as well as across wavebands
- Alarm function
Hardware features
Display LCD screen 128× 64 pixels
Headphones 3.5 mm stereo jack socket
External input 3.5 mm stereo jack socket
Internal amplifier 2 × 5 W (Sinus) at 8 ohms
DC input 9 V DC
Antenna Integrated ferrite rod aerial (is recommended for the following band frequencies):
150-289 kHz (LW)
525-1720 kHz (MW)
Coaxial dipole antenna for VHF and SW
(additional possibility for connection of an external antenna)
Further features
DAB
Modes Decodes all DAB modes (I, II, III, IV with auto-recognition).
Audio: Decodes all DAB modes (mono, dual mono, stereo and joint stereo).
24 and 48kHz MPEG decoding with improved DAB error correction.
Service linking: Other DAB ensemble services, frequency information
Service Linking cross-waveband
Extended features: Multiple channel decoding
MP2 recording and playback from SD/MMC card
DRM
Modes A,B,C,D
SDC Coding QAM-4 and QAM-16
MSC Coding QAM-16 and QAM-64
Spectral Occupancies 0 (4.5 kHz), 1 (5 kHz), 2 (9 kHz), 3 (10 kHz), 4 (18 kHz), 5 (20 kHz)
Interleaving Long (2 s) and short (400 ms)
Protection level 0 to 3 (equal and unequal error protection)
AFS Frequency information items are taken from current service
Text messages Decodes text messages for current service from MSC (Main service channel)
File format
MP3 MPEG audio layer-3 (.mp3)
WMA Windows Media Audio
Display
LCD Display blue background/white text color
128 × 64 pixels
Power input
Operation 46.9 VA (28.3 W) at maximum volume
Standby 16 VA (9.3 W)
Dimensions
Width 450 mm
Depth 140 mm (with foot)
Height 210 mm (with foot)
Weight
2,400 g (without power supply unit)
3,500 g (with power supply unit)
Language menu
German and English
| Parameters Operation | Min Typical Max | Unit | |||
| Input impedance | VHF and L-band antenna input | 50 (nominal) Ohm | |||
| AM | |||||
| Frequency field LW 153 280 | kHz | ||||
| Frequency field MW 525 170 | 5 kHz | ||||
| Frequency field SW 2.3 27 MHz | Hz | ||||
| Major signal stability 300 mV | |||||
| THD | 2 | % | |||
| FM (with RDS) | |||||
| Frequency field | 87.5 | 108 MHz | |||
| Sensitivity | (S+N)/N=26d | 2 | μV | ||
| Borderline sensitivity | 1.2 μV | ||||
| Major signal stability 500 mV | |||||
| (S+N)/N | S/N 62 | dB | |||
| THD | Deflection 22.5kHz | 0.3 % | |||
| DAB band III | |||||
| Frequency field | 174 240 MHz | ||||
| Neighbor channel suitability | Measurement as per EN50248 | 35 40 | dB | ||
| Frequency pattern | 16 | kHz | |||
| DAB L-band | |||||
| Frequency field | 1452 | 1492 | MHz | ||
| DRM | |||||
| Frequency field | 0.1485 | 27 MHz | |||
| Sensitivity | 8 | dBμV | |||
| Dynamic field | 76 | dB | |||
13 Error search assistance
| Error Possible | cause Remedy | |
| No display indication, no sound | No mains voltage Check power cable and plugs | er cable and plugs |
| No sound Volume set too low | Increase volume as | described in Point 7.3 |
| No or bad reception Position/ | location of antenna not ideal | Alter position/location of antenna until ideal position is found |
| No reception of programs which previously had good reception | Program no longer being transmitted | none |
| Recording not possible An are | alogue station is set on the appliance | Recording only possible from digital stations |
TechniSat
F
MultyRadio 1
Mode d'emploi
- Contents
- Contents 2
- Illustrations. 4
- Please read first 6
- Connection 7
- Going into operation. 9
- Settings. 9
- Operation 14
- Station Search 21
- Technical Terms. 24
- Technical data 25
- Error search assistance 28
- Illustrations
- Please read first
- Note on disposal
- Safety remarks
- Operational breaks
- Connection
- Going into operation
- Please note that:
- Settings
- Clock/Date
- Radio
- Activate FM Stereo
- Activate DAB DRC
- Activate Auto AFS
- Display
- Extended Settings
- Card formatting
- Works Settings
- Language Selection
- Antenna Switch-over
- Firmware Update
- Operation
- Switching on/off
- Selecting radio station
- Preset Stations
- Changing Volume
- AFS
- Recording
- Playing back MP3 files
- Pause
- Winding forwards/backwards
- Repeat mode
- Deleting files
- Sleep Timer
- Auto-Recording
- Alarm
- Station Search
- Manual Search
- Search-Run
- All wavebands
- Selecting waveband
- Delete Station List
- EPG
- Info
- Technical Terms
- Band width
- Bit (binary digit)
- Bit rate
- Byte
- Firmware
- Hardware
- MP3
- Software
- Technical data
- Main performance features
- Hardware features
- Further features
- DAB
- DRM
- File format
- Display
- Power input
- Dimensions
- Weight
- Language menu
- Error search assistance
- TechniSat
- MultyRadio 1
Brand : TECHNISAT
Model : Multyradio 1
Category : Hi-fi system