
62789 - Hi-fi system HAMA - Free user manual and instructions
Find the device manual for free 62789 HAMA in PDF.

| Product Type | Wireless Internet Radio |
| Brand | Hama |
| Model | 62789 |
| Dimensions (approx.) | 150 x 100 x 80 mm |
| Weight (approx.) | 500 g |
| Power Supply | Mains adapter 230 V / 7.5 V DC |
| Network Connectivity | WiFi IEEE 802.11 b/g, Ethernet RJ-45 |
| Supported Audio Formats | MP3, WMA, Real Audio, AAC MPEG4 |
| Audio Outputs | Stereo RCA output, 3.5 mm headphone output |
| Main Functions | Internet radio, alarm, sleep, playback from UPnP/shared folders |
| Remote Control | Yes, included |
| Care and Cleaning | Wipe with a dry cloth; do not use abrasive products |
| Safety | Use only the supplied mains adapter; protect from moisture and heat |
| Spare Parts and Repairability | Contact Hama after-sales service; no user-serviceable parts |
| General Information | Use in Germany, Austria, Switzerland, France, etc.; R&TTE certification |
Frequently Asked Questions - 62789 HAMA
User questions about 62789 HAMA
0 question about this device. Answer the ones you know or ask your own.
Ask a new question about this device
Download the instructions for your Hi-fi system in PDF format for free! Find your manual 62789 - HAMA and take your electronic device back in hand. On this page are published all the documents necessary for the use of your device. 62789 by HAMA.
USER MANUAL 62789 HAMA
All listed brands are trademarks of the corresponding companies. Errors and omissions are accepted, and subject to technical changes. Our general terms of delivery and payment are applied.
hama®
NETWORK ENTERTAINMENT
WLAN Internet Tuner
00062789
AU, WAV, AIFF, ASX, RAM, M3U, RPM, PLS
Initialising network
Stations< Configure>
Wireless Internet Radio Installation and User Manual
Contents:
- Package Contents
- Operating Notes
- Getting Started
3.1 Connections
3.2 Specifi cations
3.3 Remote control
3.4 Network
- Configuration
4.1 Connection
4.2 Language settings
4.3 Establishing a connection
4.3.1 Wireless LAN
4.3.2 Ethernet/wired network
4.4 Time settings
4.5 Firmware update
4.6 Factory settings
4.7 Signal strength (WiFi)
- Operation
5.1 Set stations
5.2 Set volume
5.3 Quick start buttons
5.4 Add new stations
5.5 Add favourites
5.6 Play music library from PC
5.6.1 Play music from shared folder on hard drive
5.6.2 Play music from UPnP media servers
- Safety Notes
- Contact and Support Information
1. Package Contents
Hama Wireless Internet Radio
Remote control
- 230 V power supply unit
- Installation and user manual
2. Operating Notes
If you wish to receive radio stations from the Internet, you must connect the radio to your home network.
We recommend using a permanent connection to the Internet (i.e. fl at rate tariff instead of a time or volume-based tariff) as data is constantly transferred when the device receives and plays an internet station.
3. Getting Started
3.1 Connections
Back:

1) RJ-45 network socket
2) Stereo output
3) ±7.5 V power connection
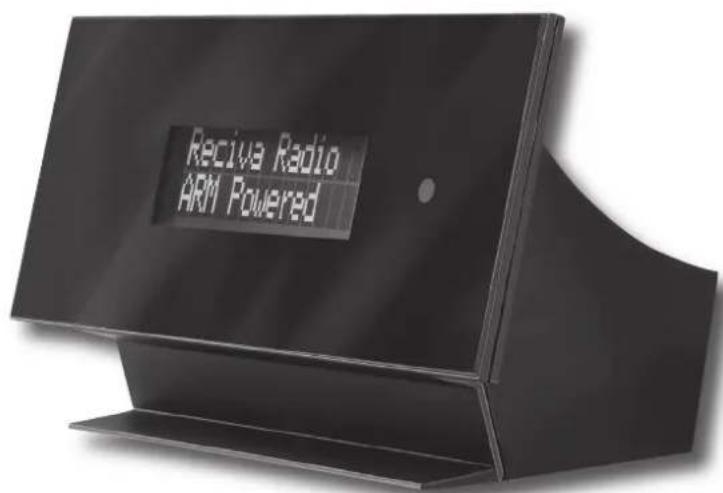
Front:
1
2
1) Display 2) IR receiver for remote control
3.2 Specifications
Connections:
RJ-45 network connection
WLAN
Line-out output
Power connection
Audio/play list formats:
MP3.WMA.Real Audio.ACC MPEG4 (iTUNES)
AU, WAV, AIFF, ASX, RAM, M3U, RPM, PLS
Streaming protocols:
RTSP, MMS, http
WLAN standard:
IEEE 802.11b+g

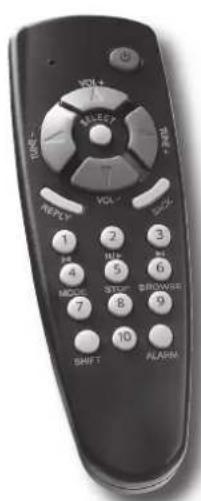
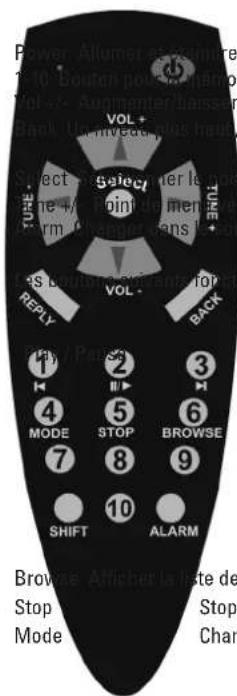
3.3 Remote control
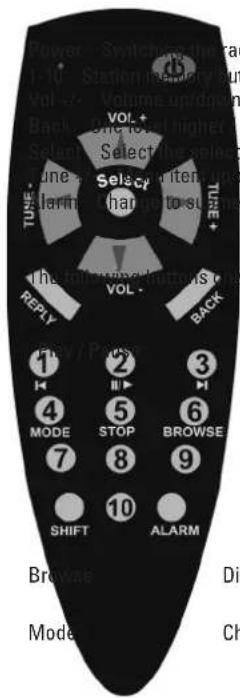
Button
radio on and off button
I erase signs in text mod
ted menu item
down
nu "alarm function"
function in MP3/UPNP mode:

Br
W
12/14
12/12
Displaying the playback list Stop Change playback mode
Function
Title forward
Title backward
Stop playback
3.4 Network
There are two different ways in which you can connect your Hama Wireless Internet Radio to the Internet.
Option 1:
Wireless, connection to an existing Wireless LAN network (IEEE802.11g/b) using a broadband Internet connection independent of data volume and time.
Option 2:
Ethernet/RJ-45, connection to an existing wired Ethernet network using a broadband Internet connection independent of data volume and time.
4. Confuguration
4.1 Connection
a) Connect the enclosed power supply unit to a socket and the power connection on the back of the device.
b) The display will light up after a few seconds.
c) The wireless internet tuner has a stereo RCA output to connect the tuner to your existing stereo system.
Note: The settings made to the Internet Radio remain the same even after the power supply is disconnected. You can disconnect the Internet Radio from the mains supply at any time. Reconfi guration is not necessary.
4.2 Language setting
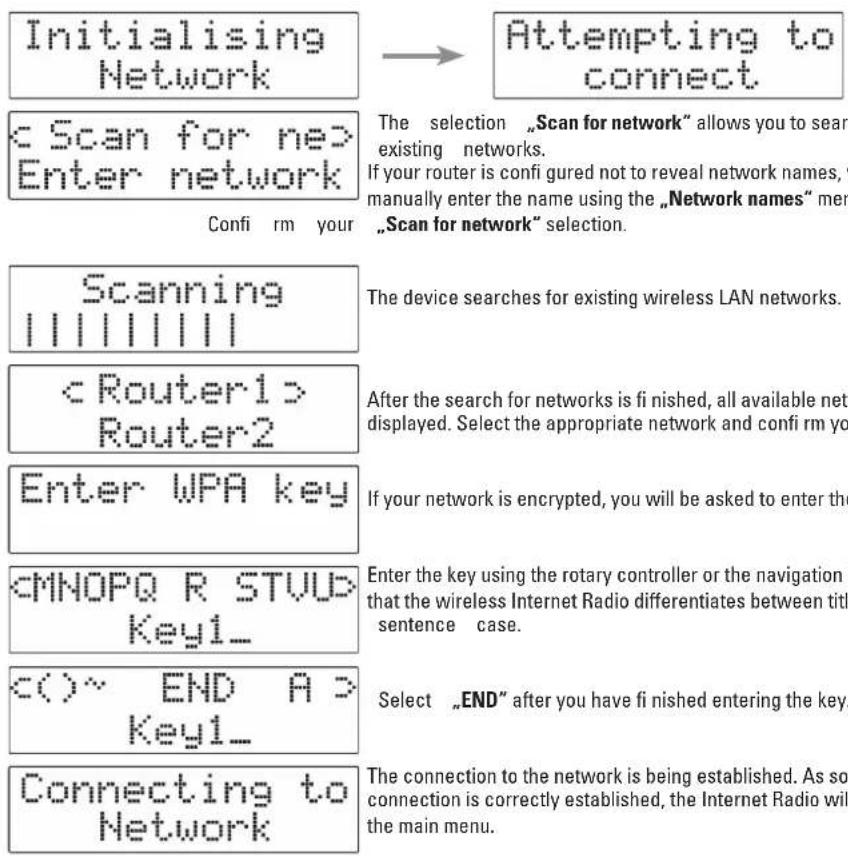
After you have successfully connected the Internet Radio, it switches on and tries to establish a connection. We recommend that you set the language settings before configuring the connection.
Initialising network
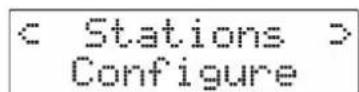
Cancel the connection attempt by repeatedly pressing "Back". The main menu appears in the display.
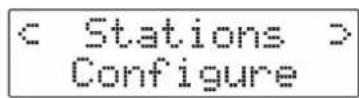
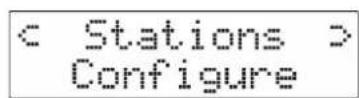
Stations < Configure >
Select „Configure" by using the navigation buttons on the remote control. Confir my choice by pressing „Select".
Language Factory Reset
Select the „Language" menu item and confirm your selection.
Deutsch Dansk
Select the required language. After the device is automatically reset, you can establish a connection to the network.
4.3 Establishing a connection
4.3.1 Wireless LAN
4.3.2 Ethernet/wired network
Connect the Internet Radio to the existing network using a network cable. After you switch on your Internet Radio, the connection is automatically established. It is important that there is an active DHCP server in your network. If this is not the case, you can manually enter the appropriate IP address using the rotary controller or navigation buttons. The IP address must be in the same address range as that of your router.
4.4 Time settings
This section describes how to set the time settings on your Wireless Internet Radio. The time is shown in the display when the device is off. In addition, your Wireless Internet Radio also has an alarm function, which can also be set through this menu item.
< Stations > Configure
Select the „Configuration" menu item from the main menu.
< Clock > Sleep Timer
You will get to the menu item "clock" by using the navigation buttons (Tune + ,; Volt + ,)
Set Time > Set Alarm
"Select „Set Time“ to set the time, or „Set Alarm“ to activate the alarm function.
Set Time 06:00
Set Alarm 15.30
Use the rotary controller to set the time in these menu items. Confirm your selection by pressing "Select".
4.5 Firmware update
Due to constant further development and improvement of operating software, it is necessary to regularly update the device software (firmware update). To check whether an update is available, take the following steps:
Go to "Configuration" from the main menu.
Uparade Fw automatically installed. If there is no update available, the Internet Radio will automatically switch back to the Confi guration menu.
Then
select
4.6 Factory settings
This menu item will reset your Wireless Internet Radio back to the factory settings.
Note: All of the settings you have made will be lost.
If you want to reset the device to the factory settings, proceed as follows: Main menu Confi guration Factory settings

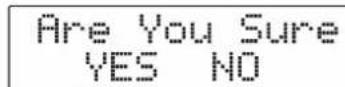
Click "YES" to confirm your selection. After an automatic restart, the device will then default to the original factory settings.
4.7 Signal strength (WiFi strength)
As with any other Wireless LAN device, your Wireless Internet Radio can also display the signal strengths of the current Wireless LAN connection.
If you wish the strength to be displayed, go to:
Main menu Confi guration WiFi strength

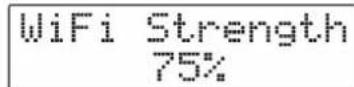
The signal strength of the current connection will be displayed as a percentage.
5. Operation
5.1 Set stations
After you have successfully configured your Internet Radio, you can receive Internet radio stations from all around the world. The station list gives you two basic sort options:
a) Sort according to location (country of the respective station)
b) Sort according to genre (music type, news, etc.)
Select Main menu and Stations to get to the station list.
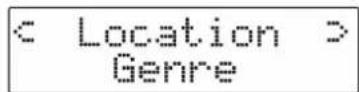
Then select the suitable sort option for displaying the station list.
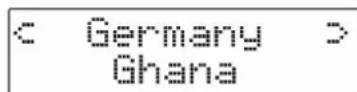
If you select Location, a Country list opens that shows the countries in which Internet radio stations are available. Select your desired country.
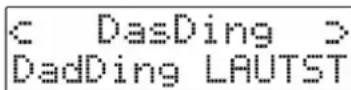
The station list will load. You can select an individual station. If you wish to make a selection, confirm your choice by pressing "Select".
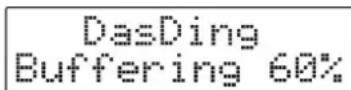

The connection to the radio station is established and the stream buffered. When the radio station begins to play, the name of the station, bit rate, and stream format appear in the display.
5.2 Set volume
You can adjust the volume using the volume buttons on the remote control.

5.3 Quick start buttons
The station buttons on the remote allow you to save your favourite radio stations for quick start.
Station buttons 1-10:
Select the radio station in the same way as usual. Press the desired station button shortly thereafter.

The station button was assigned.
5.4 Add new stations
The station lists that you can play on your Wireless Internet Radio are made available and maintained by the RECIVA Internet Radio portal.
It can happen that a station which you would like to listen to does not appear in the station list. You can enter this station into the station list after logging in (free of charge) to the RECIVA portal at www RECiva.com. After RECIVA runs a check, the station will be incorporated into the station list and will be available on the following day, after you reload the station list.
Your Wireless Internet Radio downloads the new station list every time after it is restarted or connects to a new network.
5.5 Add favourites
After you log in (free of charge) to the RECIVA portal at www RECiva.com, you can also create an individual favourite list for your Internet Radio.
For this, you need is the serial number and product key of your device. Then you must enter them in the RECIVA portal.
You can obtain the product key for your device as follows: Hauptmenu Konfi guration Register
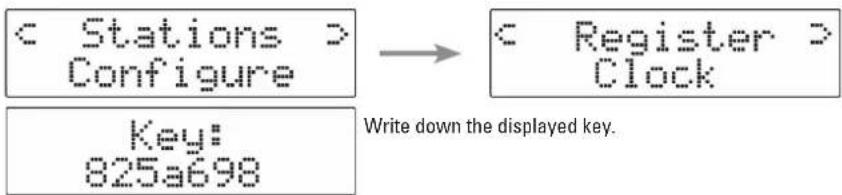
You can obtain the serial number of your device as follows: Hauptmenu Konfi guration Version Seriennummer

After you select Version, use the rotary controller to scroll through the various, displayed version numbers from hardware and software until „Serial number" appears in the display. Write down the displayed serial number.
You can find your favourites under "Transmitter" -> "My favourites" -> "My transmitters".
5.6 Play music library from PC
5.6.1 Play music from shared folder on hard drive
Requirements for playback of audio collections from shared folders on a PC:
- The PC or notebook is in the same network as the Internet Radio.
- File and print sharing on the PC is activated
The audio files are not protected by digital rights management (DRM). - At least one folder on the PC must be shared.
- The firewall installed on the PC allows folder sharing.
< Configure > Media Player
In the main menu, select the "Media Player" menu item.
Windows Shares UPNP Servers
Select "Releases".
Select "Search for PCs".
Finding Pcs
The device searches for computers in the network.
PC1 > Laptop1
Select the required PC.
Finding Folders
The device searches for sharing on the selected PC.
Shared Music
Select the folder, album, and track to begin playback.

5.6.2 Play music from UPnP media servers
In the main menu, select „Media Player".

Select "UPNP Server".
PC1:USER
Select the desired media server, and then the media server can be used.
6. Safety notes:
- Use only the enclosed power supply unit to connect the device.
- Protect the device from moisture, extreme temperatures, and direct sunlight. Keep the unit away from heating devices.
- Do not try to open the device; integrated components may not be serviced by the user.
7. Contact and Support Information
If products are defective:
Please contact your dealer or Hama Product Consulting if you have any product claims.
Internet/WorldWideWeb:
Product support, new drivers or product information can be found at www.hama.com
Support Hotline - Hama Product Consulting:
Tel. +49 (0) 9091 / 502-115 Fax +49 (0) 9091 / 502-272
This product may only be used in Germany, Austria, Switzerland, France, Italy, Portugal, England, Belgium, Spain, Holland, Denmark, Hungary, Poland, Sweden, Luxembourg, Ireland, Greece, the Czech Republic, Slovakia and Finland.
See www.hama.com for the declaration of conformity with R&TTE Directive 99/5/EC.

AU, WAV, AIFF, ASX, RAM, M3U, RPM, PLS
Protocoles de flux :
RTSP, MMS, http
Standard WiFi:
IEEE 802.11b+g
3.3 Telecommande
Bouton
e la radio
Initialising network
Stations< Configure>
Menu principal -> Configuration -> Puisance WiFi

7. Contact et support technique
Note on environmental protection:
After the implementation of the European Directive 2002/95/EU and 2006/86/EU in the national legal system, the following applies: Electric and electronic devices as well as batteries must not be disposed of with household waste. Consumers are obliged by law to return electrical and electronic devices as well as batteries at the end of their service lives to the public collecting points set up for this purpose or point of sale. Details to this are deli nad by the national law of the respective country. This symbol on the product, the instruction manual or the package indicates that a product is subject to these regulations. By recycling, reusing the materials or other forms of utilising old devices/Batteries, you are making an important contribution to protecting our environment.

- WLAN Internet Tuner
- Wireless Internet Radio Installation and User Manual
- Contents:
- Package Contents
- Operating Notes
- Getting Started
- Connections
- Specifications
- Connections:
- Audio/play list formats:
- Streaming protocols:
- WLAN standard:
- Network
- Option 1:
- Option 2:
- Confuguration
- Connection
- Language setting
- Establishing a connection
- Wireless LAN
- Ethernet/wired network
- Time settings
- Firmware update
- Factory settings
- Signal strength (WiFi strength)
- Operation
- Set stations
- Set volume
- Quick start buttons
- Station buttons 1-10:
- Add new stations
- Add favourites
- Play music library from PC
- Play music from shared folder on hard drive
- Play music from UPnP media servers
- Safety notes:
- Contact and Support Information
- Protocoles de flux :
- Standard WiFi:
- Bouton
- Contact et support technique
- Note on environmental protection:
Brand : HAMA
Model : 62789
Category : Hi-fi system