
WorkCentre 7425 - Printer XEROX - Free user manual and instructions
Find the device manual for free WorkCentre 7425 XEROX in PDF.
| Product type | Color laser multifunction printer |
| Brand | Xerox |
| Model | WorkCentre 7425 |
| Main functions | Print, copy, fax, scan to email, booklet creation |
| Paper support (standard trays) | 2 trays, sizes A5 to A3 (11 x 17 inches), weight 60-256 g/m² |
| Paper support (manual tray) | Tray 5, custom sizes up to SRA3 (12 x 19 inches) |
| Control panel | Touch screen, alphanumeric keypad, dedicated buttons (Services, Machine Status, etc.) |
| Special functions | Energy saver, Auditron (accounting), job interrupt, cover pages |
| Maintenance | Replacing toner cartridges (front cover, tab) |
| Compliance | ENERGY STAR |
| Scan options | Color, duplex, document types (text, photo) |
| Fax | Scan to fax, address book, dial pause |
| Scan to email, file options (PDF, TIFF, etc.), subject, read receipt | |
| Booklet | Creating booklets from one-sided or two-sided documents, landscape orientation required |
| Toner cartridges | Recyclable, remove by tab then insert new one after shaking |
Frequently Asked Questions - WorkCentre 7425 XEROX
User questions about WorkCentre 7425 XEROX
0 question about this device. Answer the ones you know or ask your own.
Ask a new question about this device
Download the instructions for your Printer in PDF format for free! Find your manual WorkCentre 7425 - XEROX and take your electronic device back in hand. On this page are published all the documents necessary for the use of your device. WorkCentre 7425 by XEROX.
USER MANUAL WorkCentre 7425 XEROX
WorkCentre 7425/7428/7435
Quick Use Guide
Copyright © 2009 Xerox Corporation. All Rights Reserved. Unpublished rights reserved under the copyright laws of the United States. Contents of this publication may not be reproduced in any form without permission of Xerox Corporation.
Copyright protection claimed includes all forms of matters of copyrightable materials and information now allowed by statutory or judicial law or hereinafter granted, including without limitation, material generated from the software programs which are displayed on the screen such as styles, templates, icons, screen displays, looks, etc.
Xerox®, CentreWare®, WorkCentre®, PrintingScout®, and Walk-Up® are trademarks of Xerox Corporation in the United States and/or other countries.
As an ENERGY STAR® partner, Xerox Corporation has determined that this product meets the ENERGY STAR guidelines for energy efficiency. The ENERGY STAR name and logo are registered U.S. marks.

Contents
Control Panel. 2
Paper Tray Settings 4
Booklet Creation. 5
Send a Fax. 7
Scan to Email 9
Auditron Setup 11
Banner Sheets 13
BillingMeters 14
Replacing Toner Cartridges. 16
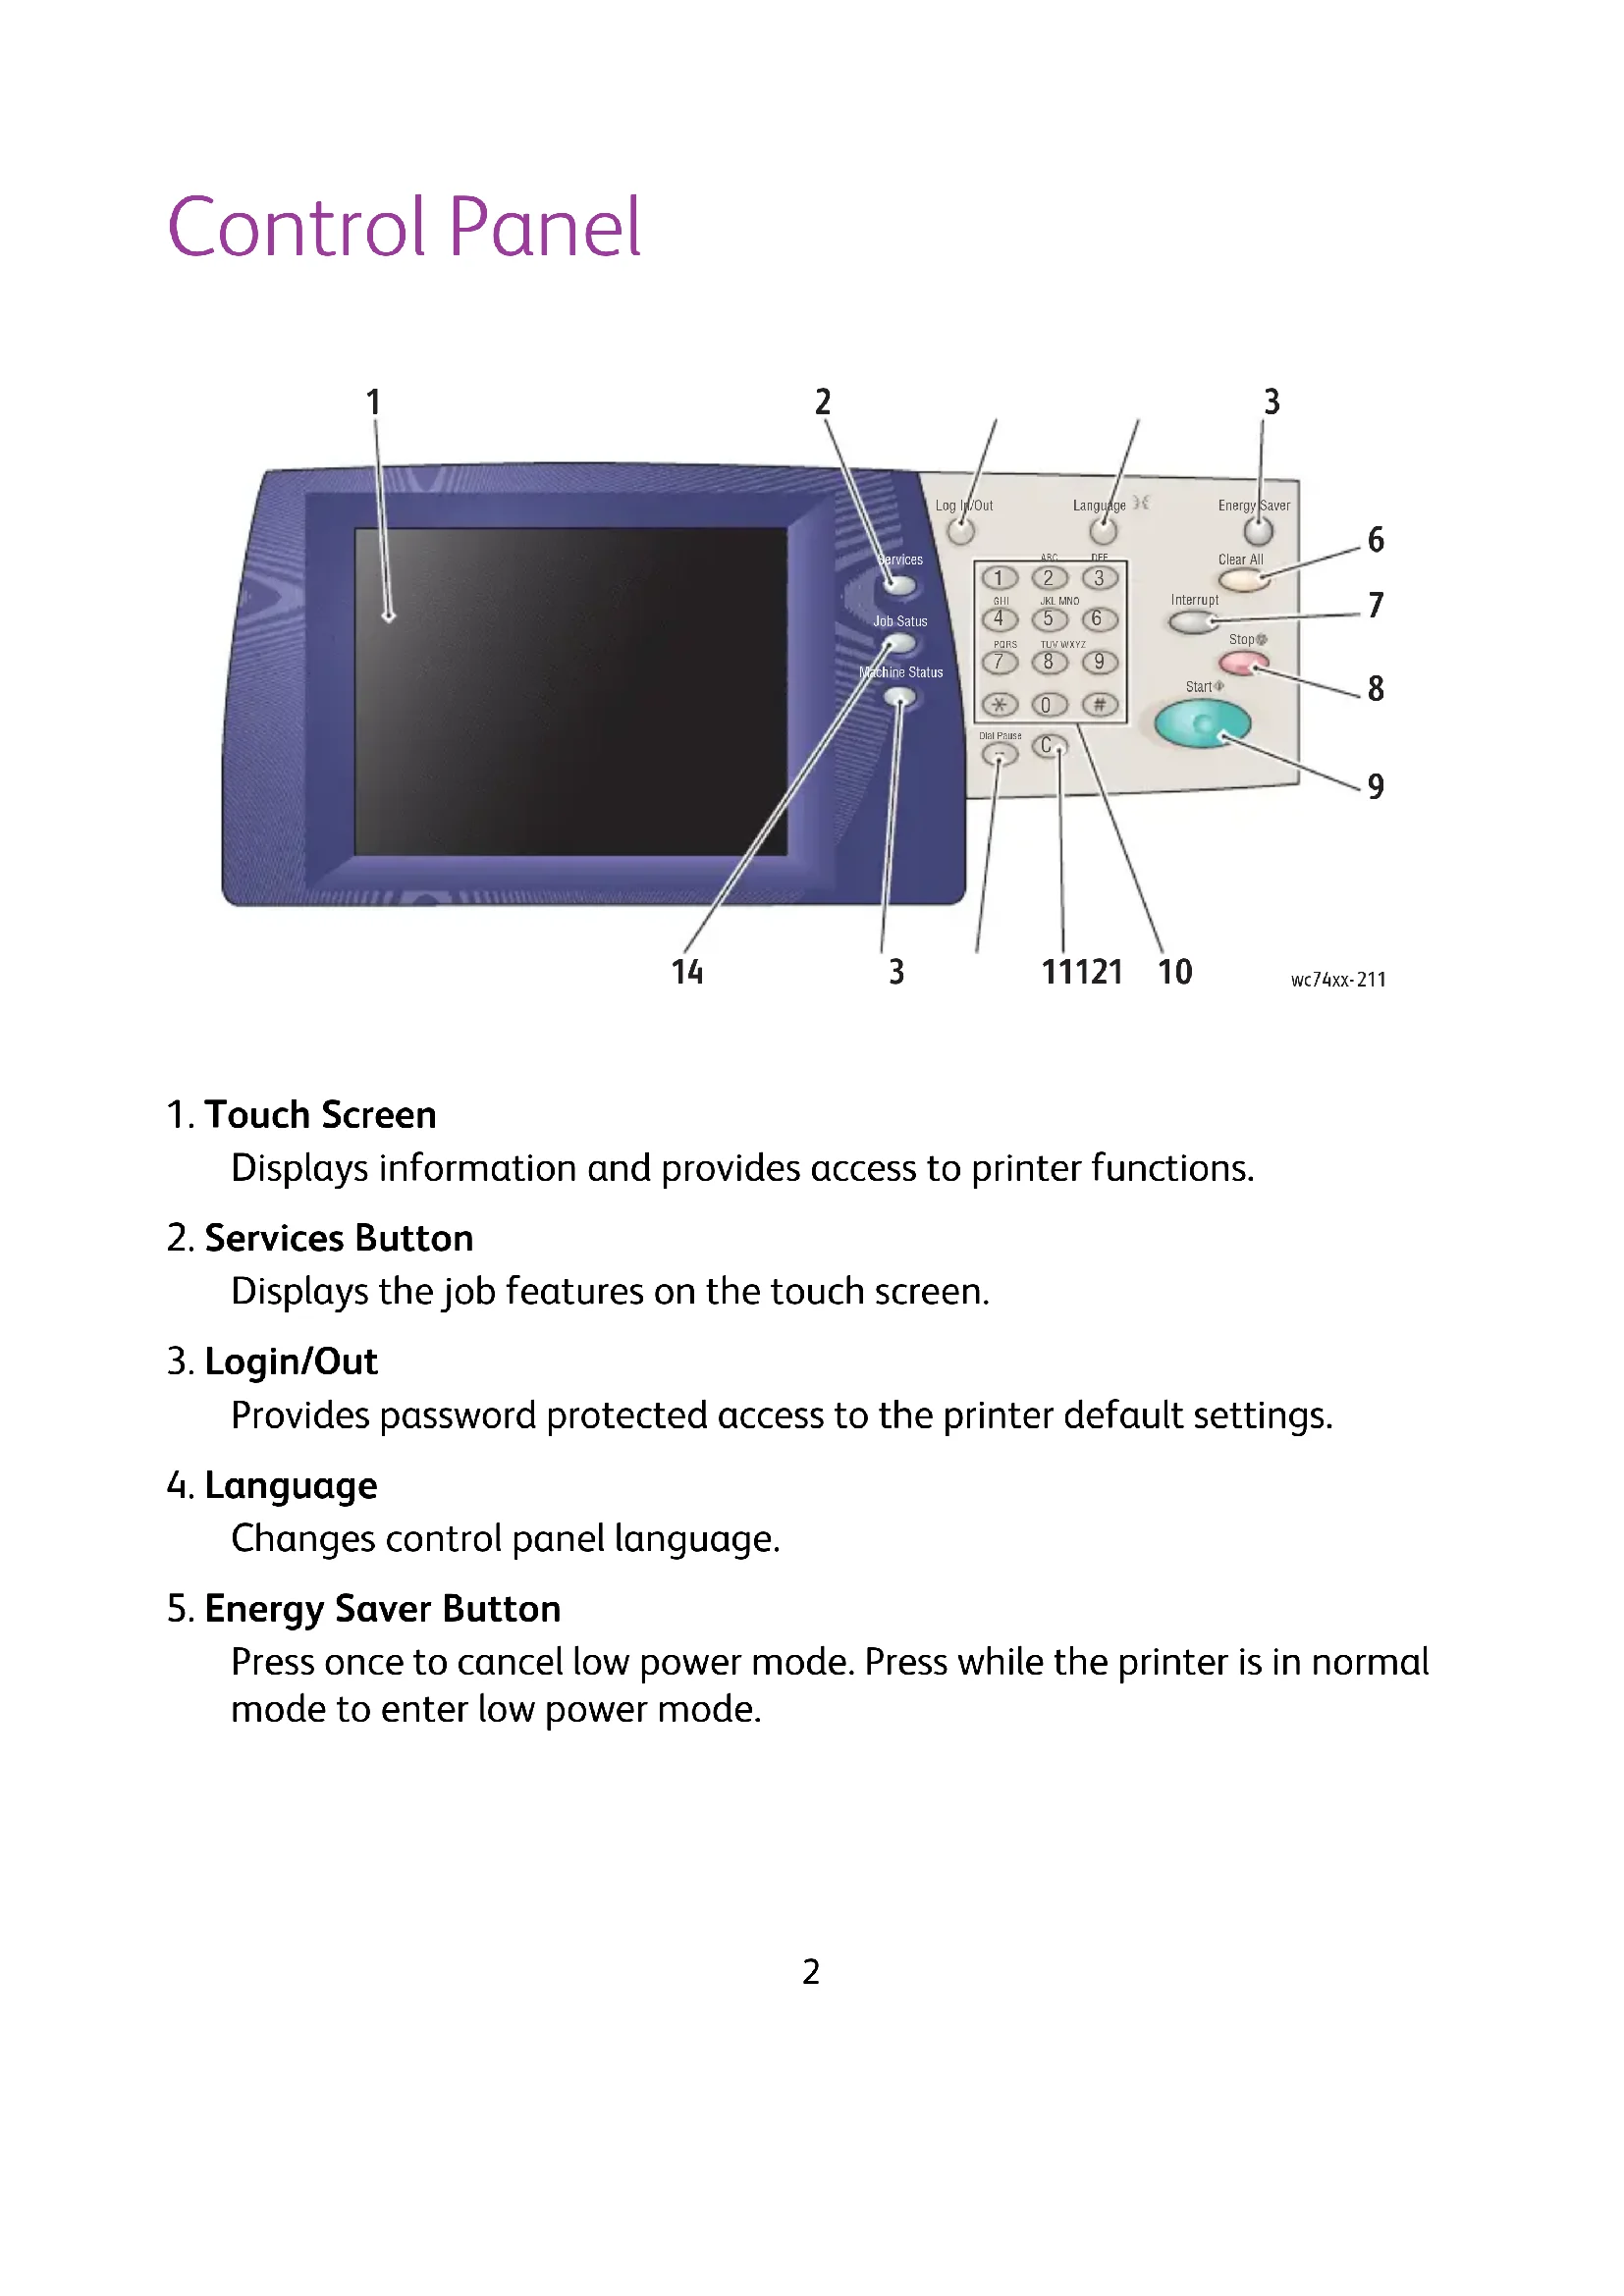
Control Panel
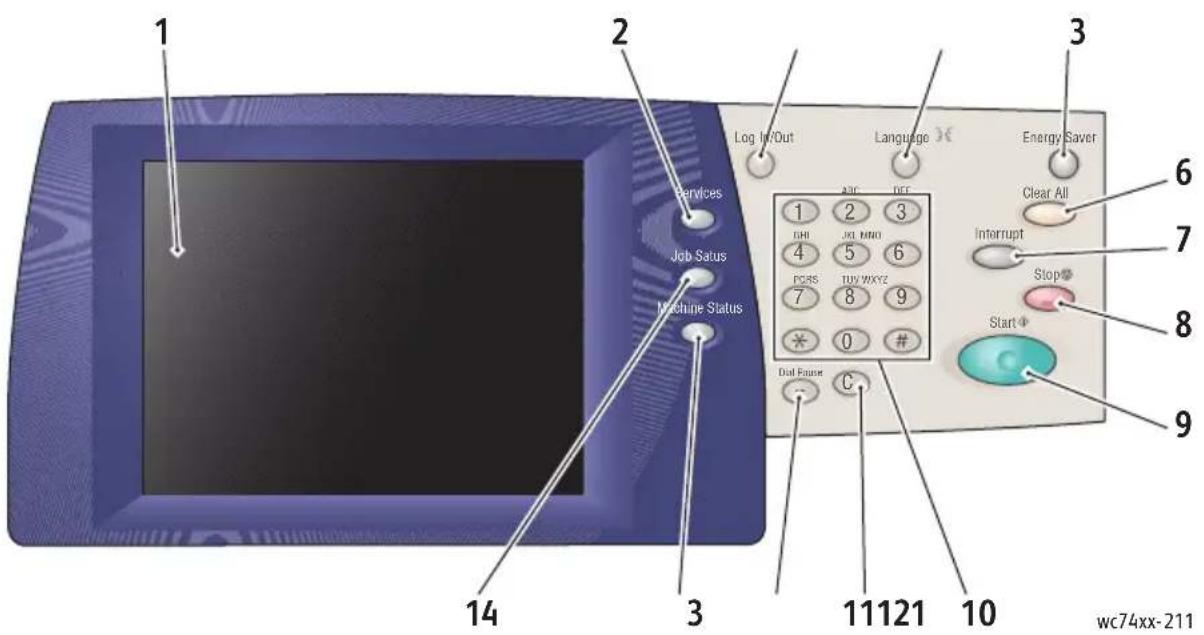
1. Touch Screen
Displays information and provides access to printer functions.
2. Services Button
Displays the job features on the touch screen.
3. Login/Out
Provides password protected access to the printer default settings.
4. Language
Changes control panel language.
5. Energy Saver Button
Press once to cancel low power mode. Press while the printer is in normal mode to enter low power mode.
6. Clear All
If pressed once, resets the default settings and displays the first screen for the current selection. If pressed twice, resets all the features to their default settings.
7. Interrupt
Temporarily stops the current copy job to allow a priority job to be run.
8. Stop
Temporarily stops the current job. Follow the touch screen message to cancel or resume your job.
9. Start
Starts the job.
10. Alphanumeric Keypad
11.C
Deletes numeric values or the last digit entered.
12. Dial Pause
Enters a pause in a telephone number when transmitting a fax.
13. Machine Status Button
Displays the current status of the printer on the touch screen.
14. Job Status Button
Displays job progress information on the touch screen.
Paper Tray Settings
There are two standard paper trays and numerous optional trays supporting a variety of paper types and sizes. Both standard trays support paper weights from 60-256 gsm. Tray 1 supports standard paper sizes from A5 to A3/11"x17". Tray 5 (Bypass) supports custom paper sizes and standard sizes up to SRA3/12"x19".
When you open a paper tray, the printer assumes that you are loading more paper. The printer touch screen displays the paper confirmation window. You can change paper settings if you are loading different paper than what was previously in the tray. To change paper size or type, touch Change Settings. Touch Confirm if you are loading more of the same paper.
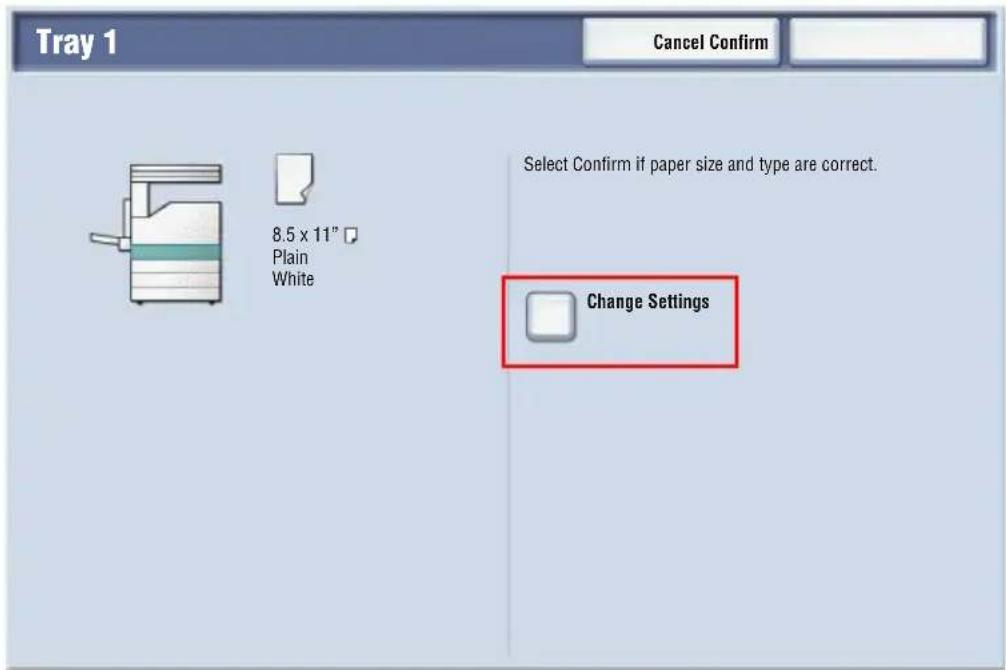
Note: Before loading paper in a tray, fan the edges of the paper. This reduces the possibility of paper jams.
Booklet Creation
Copies can be printed in the form of a booklet. The original page images are reduced in size to print two different images per side of each copied page. You can then fold and staple the pages to create the booklet. Booklets can be made from 1 or 2 sided originals.
While it is possible to create a booklet by copying your originals using the document glass, copying originals using the document feeder is much easier.
- On the printer touch screen, touch Copy.
- Choose a tray with paper loaded in landscape orientation.
- Touch the Output Format tab, then touch Booklet Creation.

4. Touch On.
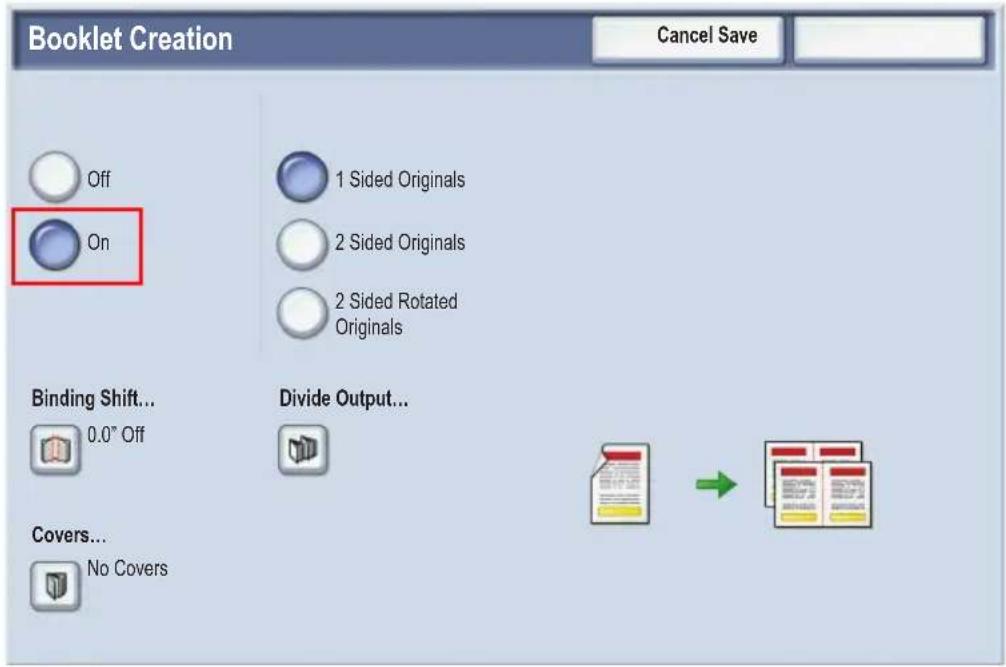
- Touch 1 Sided Originals, 2 Sided Originals or 2 Sided Rotated Originals.
- After all settings have been made, touch Save. The printer will scan all originals before copying begins.
There are two things to remember when making booklets:
- Always choose a tray with paper loaded in landscape orientation before moving to the booklet screens.
- Always load your originals with the long edge to the left of the document feeder.
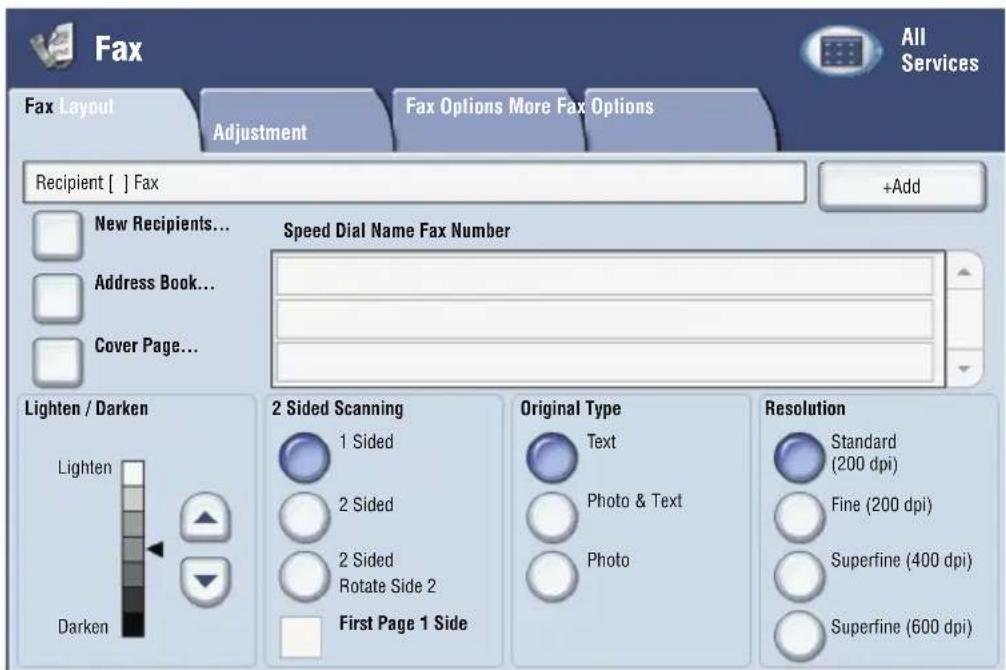
Send a Fax
-
Load your document.
-
Document Glass: Place the first page of the document facedown on the document glass with the top of the page toward the back-left corner of the document glass.
-
Document Feeder: Remove any staples and paper clips from pages and insert them faceup in the document feeder with the left edge of the page entering the document feeder first.
-
On the printer control panel, press the Services button.
- Touch the Fax icon. Enter the user name and password if required.
-
Enter either:
-
A fax number (phone number) using the key pad.
-
Touch Address Book, then touch a previously stored fax number in the address book.
-
Touch Add.
-
Repeat Steps 4 and 5 to add more recipients.
-
If desired, choose fax options.
-
Press the green Start button.
-
If multiple addresses are selected, Reconfirm Recipients by touching Yes or No.
- If scanning from the document glass, choose the Original Size, then press the green Start button again.
The printer scans the pages and transmits the document when all pages have been scanned.
- To fax multiple documents, during scanning touch Next Original, then load the next document to be faxed.
a. Press the green Start button or touch Start on the touch screen.
b. If scanning from the document glass, choose the Original Size, then press the green Start button again.
c. After the last page is scanned, touch Last Original to send the fax.
Note: To insert pauses in a fax number, enter the fax number using the numeric keypad, then press the Dial Pause button to insert a pause in the fax number where required.
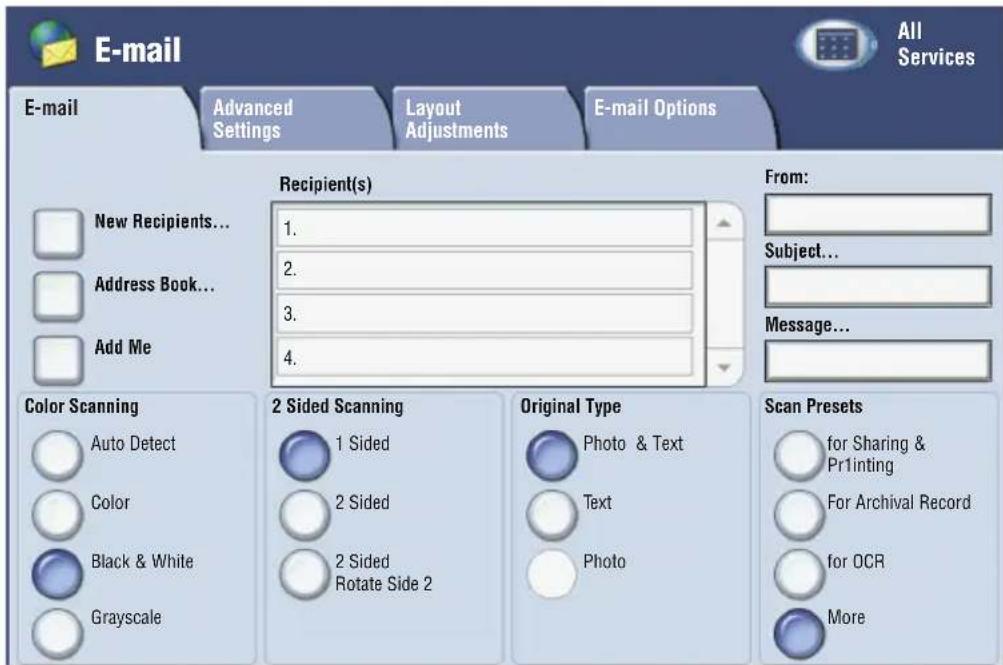
Scan to Email
Original documents can be scanned and sent as attachments to email.
-
On the printer control panel, press the Services button.
-
Touch the E-Mail icon.
-
Specify the recipient using one of these methods:
-
Touch New Recipient: enter the full email address using the touch screen keyboard.
-
Touch Address Book. touch the arrow to choose the desired address book. Enter the name or part of the name of the recipient, depending on how the address book is set up, then touch Search.
-
Touch Add to add the recipient to the list.
- Repeat Steps 3-4 to add additional recipients to the list. When all recipients have been added to the list, touch Close.
-
A default subject is provided for the email. To change the subject, touch Subject, then enter the new subject using the touch screen keyboard. When finished, touch Save.
-
Place the document original in the document feeder or on the document glass, then press the green Start button.
- If desired, use the four groups at the bottom of the control panel, Color Scanning, 2 Sided Scanning, Original Type and Scan Presets, to select the desired options for the scan.
Setting Email Options
You can override the template settings and change the following email settings:
File N a m e
File Form
Reply To
- Read Receipt
To change the File Name, or Reply To email options:
- On the printer control panel, touch the Services button.
- Touch the E-Mail icon, then touch the E-mail Options tab.
- Touch File Name, or Reply To, then delete or modify the default text using the touch screen keyboard, then touch Save.
To change the file format:
- On the printer control panel, press the Services button.
- Touch the E-Mail icon, then touch the E-mail Options tab.
- Touch File Format, then touch the desired file type, then touch Save.
To request a read receipt:
- On the printer control panel, press the Services button.
- Touch the E-Mail icon, then touch the E-mail Options tab.
- Touch Read Receipts, then touch On.
Auditron Setup
Auditron is used to track billing and control access to printer features for each user. Auditron Mode controls access to copy, scan, fax or print. After Auditron Mode is enabled, the user will be required press the Log In/Log Out button and then enter their User ID information in order to use the printer.
To use Auditron, it is recommended that you first set up user accounts. You can create up to 1000 user accounts. The Auditron user account names and IDs must be unique from other user account names and IDs.
User accounts must specify User ID, User Name, Feature Access and Account Limit.
Note: Enabling Auditron requires the system administrator password.
-
Press the Log In/Log Out button and enter the system administrator log in information, then press the Machine Status button.
-
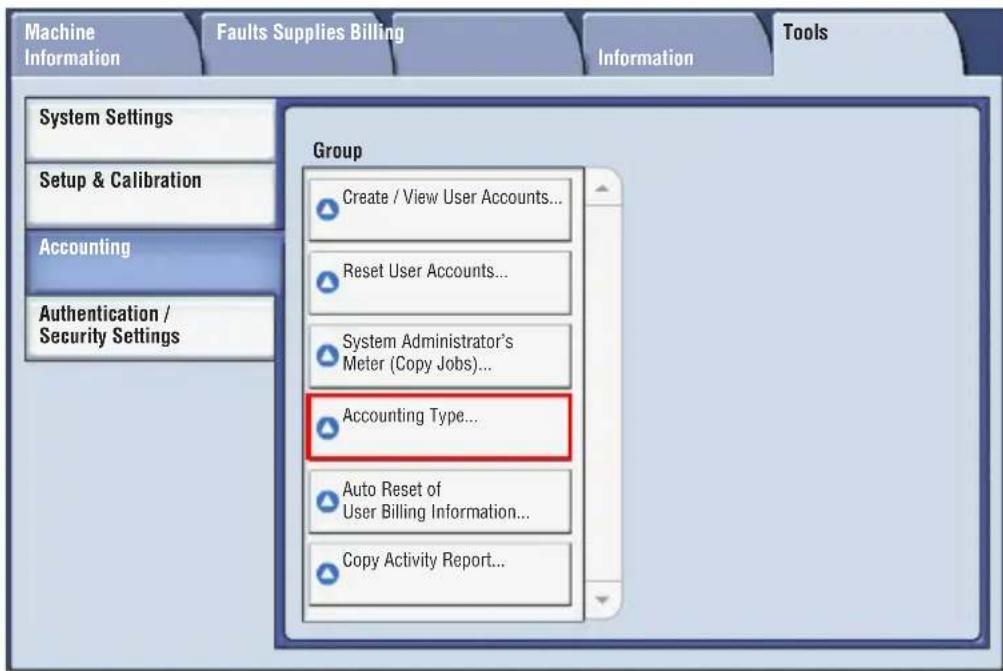
On the printer touch screen, touch the Tools tab. On the next screen, touch Accounting, then Accounting Type.
- On the next screen, touch Local Accounting, then touch Save.
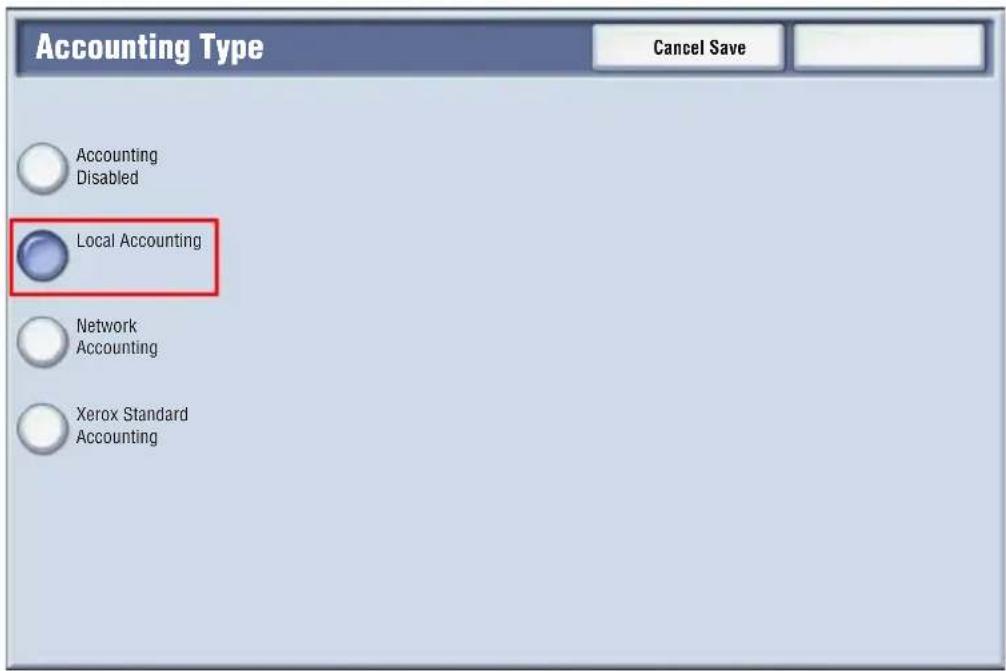
- Press the Log In/Log Out button. On the Reboot Machine screen, touch Reboot Now. The printer will reboot.

Auditron Mode is now enabled.
Banner Sheets
A banner sheet is an information page that prints with each job. It includes user name, date and time, and job name.
- From the application, click File, then Print, then choose the printer.
- Click Properties, then click the Advanced tab.
- In the Advanced Properties list, click the plus sign next to Paper/Output.
- In Banner Sheet, click the drop down arrow and choose Enabled.
- Click OK, then click OK again.
- Click Print.
Banner sheets will print with every print job.
Billing Meters
The billing meters screen displays printer usage and billing information.
- On the printer control panel, press the Machine Status button.
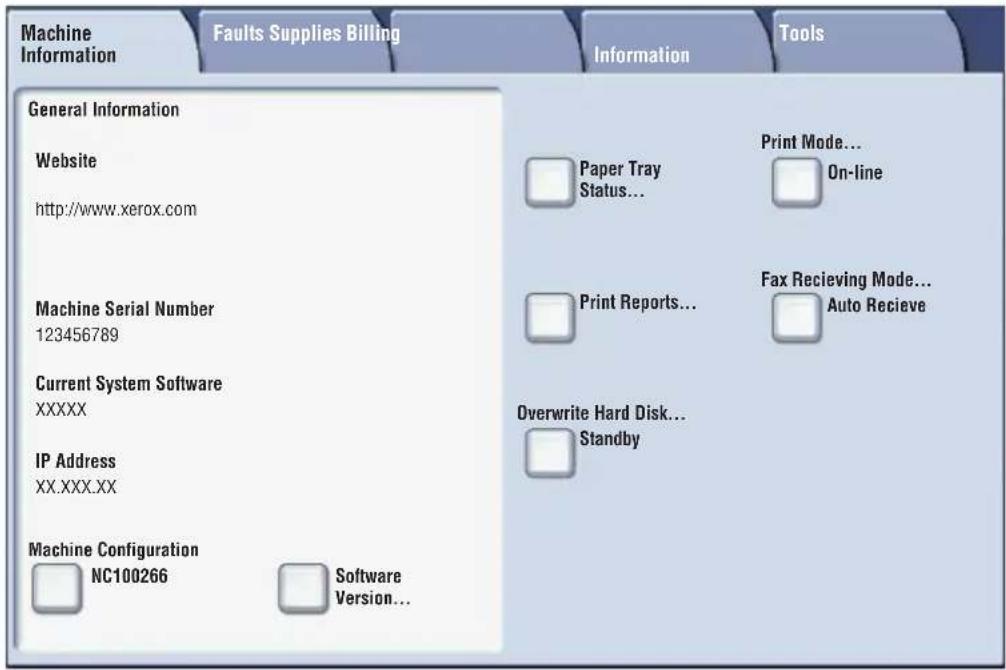
- On the printer touch screen, touch the Billing Information tab. The Billing Meters are displayed on the left of the screen.
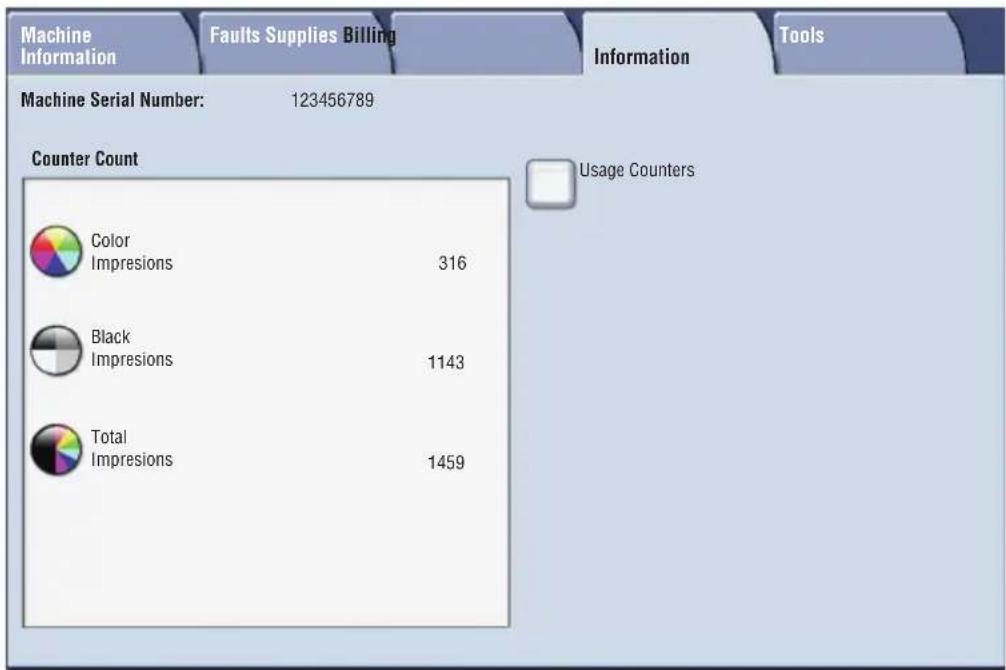
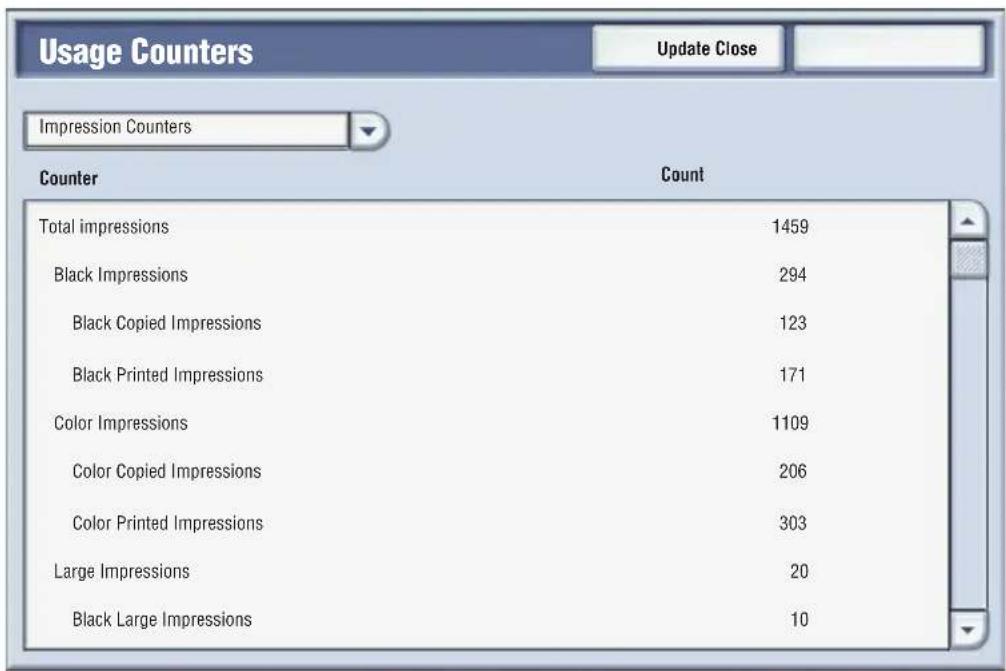
- For more detailed information, touch Usage Counters.
Replacing Toner Cartridges
The printer will display a message on the touch screen when a toner cartridge needs to be replaced.
Caution: Do not perform this procedure when the printer is copying or printing.
- Open the printer front cover.
- Place your fingers under the lip of the toner cartridge and pull the toner cartridge straight out of the printer.
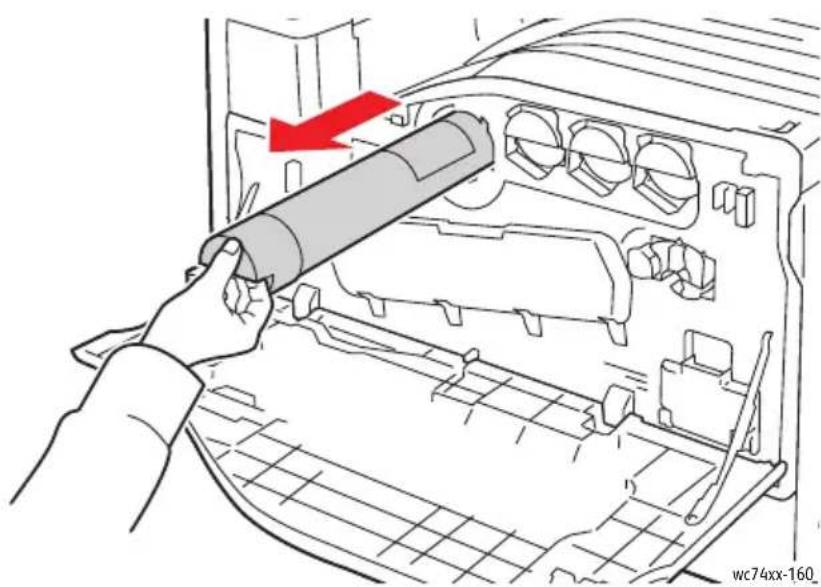
Dispose of or recycle the used toner cartridge in accordance with local law.
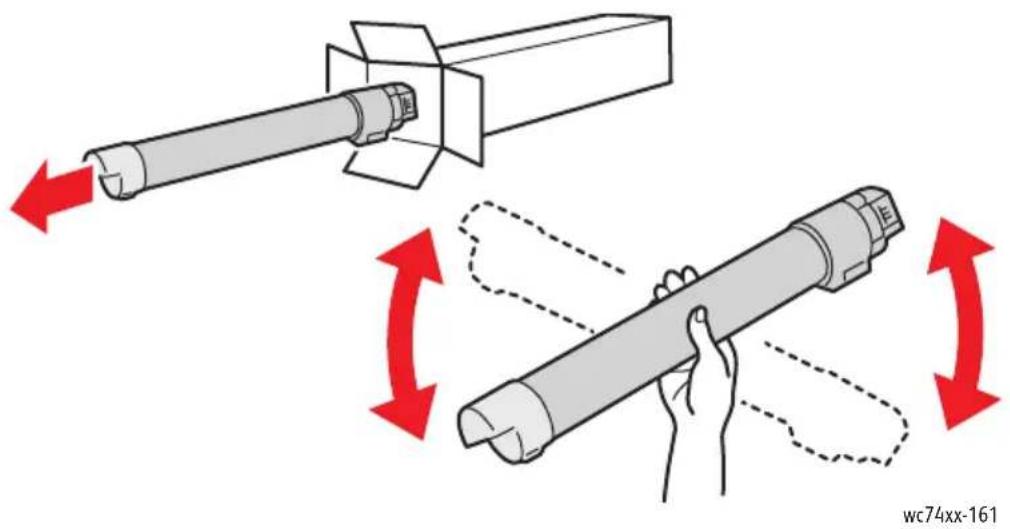
- Remove the new toner cartridge from the packaging. Tilt the cartridge up and down, then left and right several times.
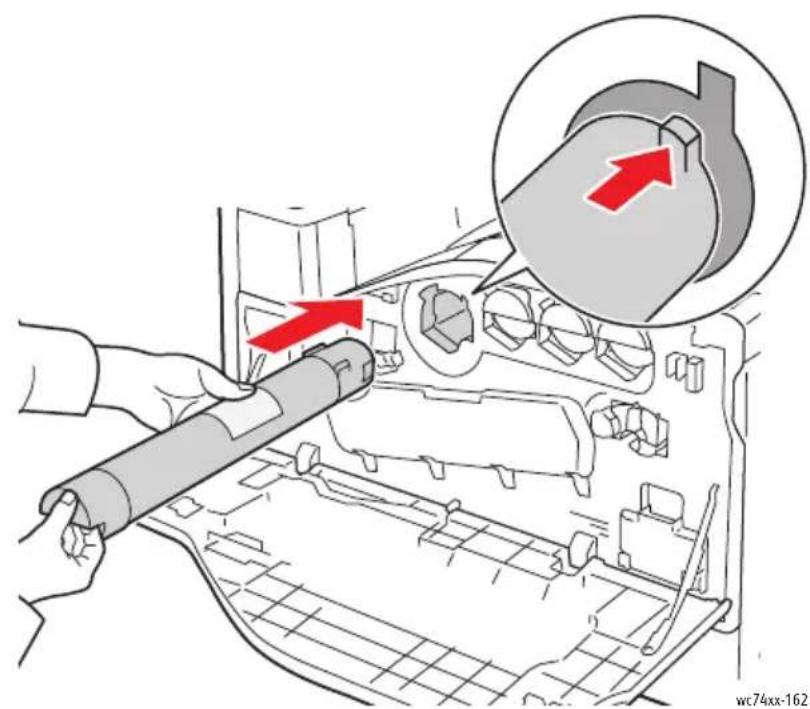
- Hold the new toner cartridge with the arrow facing up, then push the cartridge into the printer slowly until it stops.
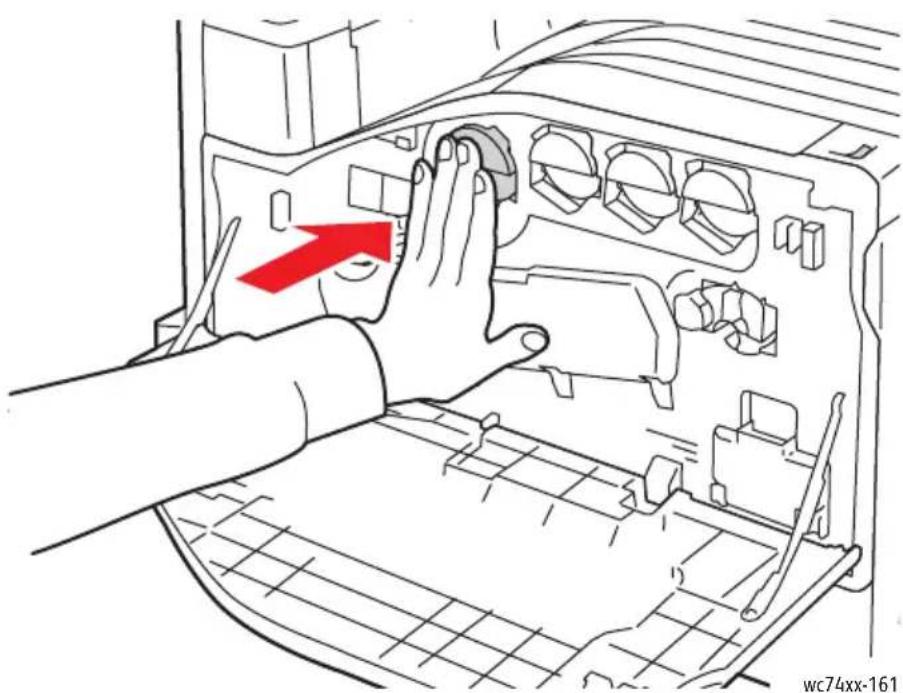
- Push gently on the toner cartridge to ensure it is seated.
- Close the printer front cover.