13710280 - Alarm clock radio Hema - Free user manual and instructions
Find the device manual for free 13710280 Hema in PDF.
| Product type | Electric digital alarm clock radio |
| Brand | Hema |
| Model | 13710280 |
| Power supply | Mains 230 V / 50 Hz (adapter included) |
| Backup battery | 1 x CR2032 (included) |
| Radio bands | AM and FM |
| Automatic search | Yes (PLL) |
| Presets | 20 (10 AM + 10 FM) |
| Number of alarms | 2 independent |
| Alarm signal | Beep or radio (AM/FM) |
| Snooze function | Yes, every 9 minutes (max 6 times) |
| Sleep timer | 10 to 90 minutes |
| Display | 24h digital, adjustable brightness |
| Safety | Moisture protection, do not open, repair by HEMA only |
| Maintenance | Clean with a dry cloth |
| Warranty | 2 years |
| Repairability | At HEMA store |
Frequently Asked Questions - 13710280 Hema
User questions about 13710280 Hema
0 question about this device. Answer the ones you know or ask your own.
Ask a new question about this device
Download the instructions for your Alarm clock radio in PDF format for free! Find your manual 13710280 - Hema and take your electronic device back in hand. On this page are published all the documents necessary for the use of your device. 13710280 by Hema.
USER MANUAL 13710280 Hema
Instructions for use Electrical digital radio alarm clock
Gebruiksaanwijizing Elektrische digitale wekkerradio
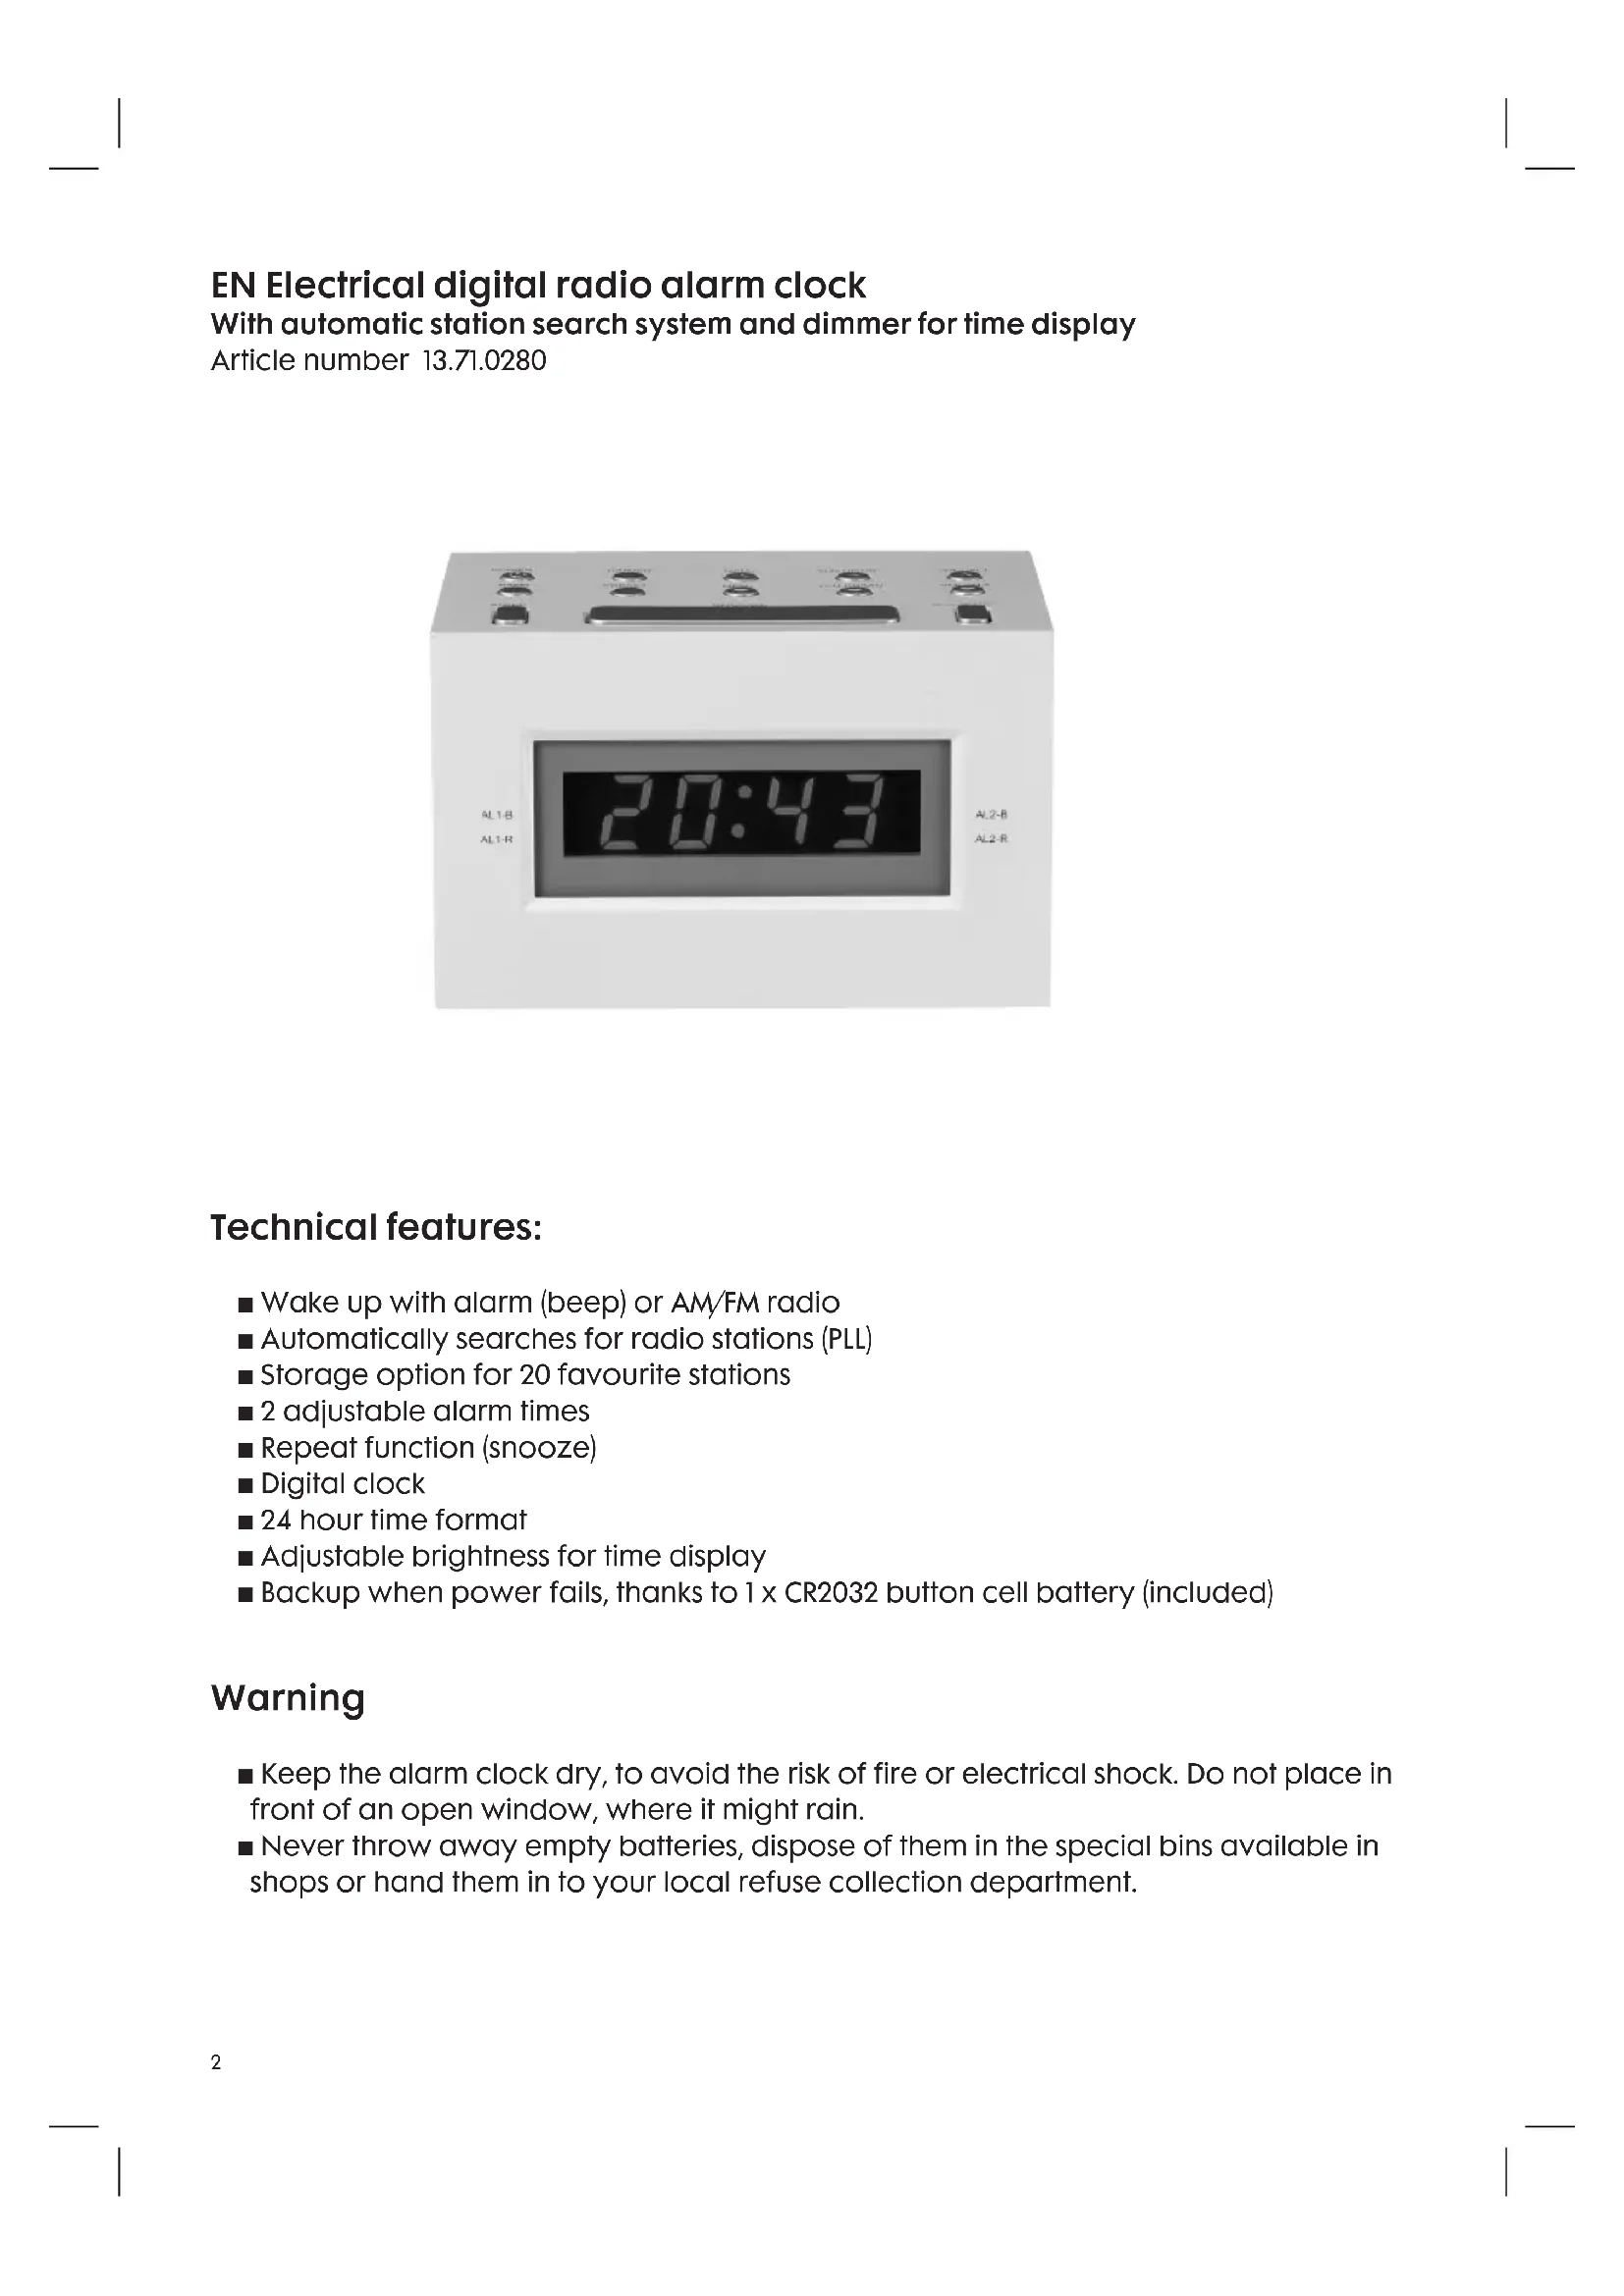
EN Electrical digital radio alarm clock
With automatic station search system and dimmer for time display
Article number 13.71.0280
Technical features:
■ Wake up with alarm (beep) or AM/FM radio
Automatically searches for radio stations (PLL)
Storage option for 20 favourite stations
2 adjustable alarm times
Repeat function (snoopze)
Digital clock
24 hour time format
Adjustable brightness for time display
■ Backup when power fails, thanks to 1 x CR2032 button cell battery (included)
Warning
- Keep the alarm clock dry, to avoid the risk of fire or electrical shock. Do not place in front of an open window, where it might rain.
- Never throw away empty batteries, dispose of them in the special bins available in shops or hand them in to your local refuse collection department.
Description of components and function keys

Top:
Number Name Function
- POWER Switches the radio on and off.
- DIMMER Dims the brightness of the time display.
- MEM+ Skips to the following pre-set radio station.
- TUN UP/HR Radio: searches for the following radio station/ Alarm clock: sets hours for (alarm) time.
- VOL+/AL1 Radio: turns up the volume/ Alarm clock: sets AL1 alarm time.
- BAND Switches between AM and FM.
- PRESET Radio: sets a station/Alarm clock: sets the time.
- MEM- Skips to the previous pre-set radio station.
- TUN DN/MIN Radio: searches for the previous radio station/ Alarm: sets minutes for (alarm) time.
- VOL/AL2 Radio: turns down the volume/ Alarm clock: sets AL2 alarm time.
- SLEEP Sets how long the radio stays on before you fall asleep (between 10 and 90 minutes).
- ALARM OFF Switches off alarm after it sounds.
- SNOOZE Repeats alarm after 9 minutes.
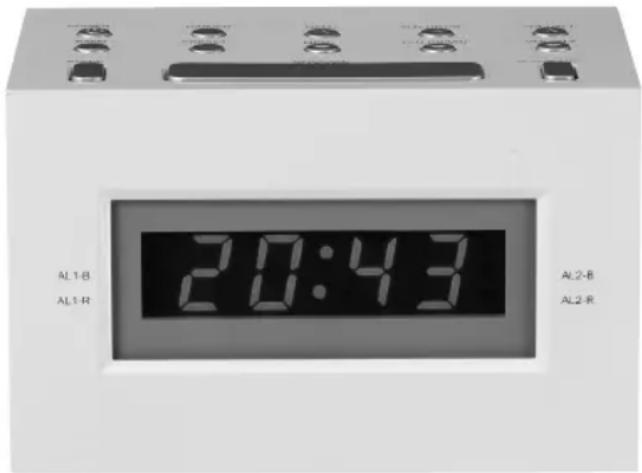
Display:
Number Name The lamp is lit if:
- AL1-B ALARM 1 (beep) is activated.
- ALI-R ALARM 1 (radio) is activated.
- AL2-B ALARM 2 (beep) is activated.
- AL2-R ALARM 2 (radio) is activated.
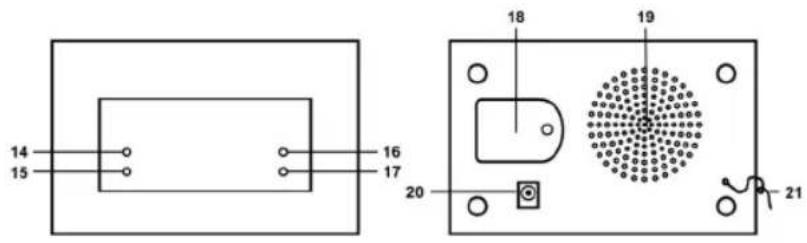
Rear:
Number Function
- Battery compartment for CR2032 button cell battery (included).
- Speaker
- Input for adapter plug
- FM aerial for better FM reception
Using the radio alarm clock
Connect the radio alarm clock by plugging the end of the adapter lead into the clock (see 20) and the adapter plug into the mains socket. When using abroad, take care that the voltage and frequency are the same as those stated on the adapter (230V / 50Hz)
Setting the time
Set the time by pressing the PRESET (7) button. Make sure the radio is switched off when doing so (1). The time display will now flash. Use TUN UP/HR (4) to set the hours, and TUN DN/MIN (9) to set the minutes. When you have finished setting the time, press PRESET again to confirm.
Setting the alarm clock
Two individual alarm times can be set.
Press VOL+/AL1 (5). Make sure the radio is switched off when doing so (1). The alarm time will now flash. Use TUN UP/HR (4) to set the hours, and TUN DN/MIN (9) to set the minutes. When you have finished setting the time, press VOL+/AL1 again to confirm.
You will now be automatically woken up by the alarm beeping. An indicator will light up for AL1-B (14). If you would prefer to be woken by the radio, press VOL+/AL1 once again. The set alarm time will flash. Press VOL+/AL1 again to select the radio alarm. After a few seconds, the alarm time will automatically return to the time display. An indicator will now be lit for AL1-R (15). The second alarm time can be set in the same way. To do so, press VOL+/AL2 (10).
Switching the alarm on and off
If you have set an alarm time, one of the indicators at the top of the display will be lit. If this is not the case, use VOL+/AL1 (5) or VOL-/AL2 (10) to switch on the alarm. The alarm is switched off in the same manner. Once the alarm sounds, you can switch it off by pressing ALARM OFF (12). The alarm will sound again at the same time the next day.
Snoopze function
When the alarm goes off, the SNOOZE button (13) can be pressed to activate the repeat function. The alarm will be repeated at 9 minute intervals. This can be repeated 6 times.
Searching for radio stations
The radio automatically searches for stations, saving you the effort of having to do so manually.
First switch on the radio using the POWER button (1). Press and hold the TUN UP/HR button (4) for approximately one second; the radio will search for the following station with a strong enough signal.
Once you have found a station you like, it can be set using the PRESET button (7). Use MEM+ (3) and MEM- (8) to number your pre-set stations. You can set 10 AM stations and 10 FM stations in this way.
Listening to the radio
If you want to listen to the radio, switch it on using the POWER button (1). Use the BAND button (6) to switch between AM and FM wave bands. Change stations by pressing TUN UP/HR (next) and TUN DN/MIN (previous). Switch between pre-set stations by pressing MEM+ (next) and MEM- (previous).
Falling asleep with the radio on
You can also set how long the radio stays on when going to sleep. The radio can stay on from 10 to 90 minutes.
First switch on the radio using the POWER button (I). Now press the SLEEP button (II). The display shows that the radio will stay on for 90 minutes. This time can be shortened by intervals of 10 minutes by pressing the SLEEP button again. Keep pressing SLEEP until the display shows the number of minutes that the radio should remain on.
Fitting backup battery
The battery compartment can be found at the back of the alarm clock. For extra child safety, you need a small Phillips screwdriver to open this compartment. Click the battery (1 x CR2032 button cell) into the compartment. Make sure the correct side (+) faces up. If the power fails, the battery will keep the alarm clock running on time. The display will be switched off however. When the power is restored, the display will automatically show the right time.

In accordance with the waste guidelines for electrical and electronic equipment, this product must be disposed of separately. If you wish to dispose of this product in the future, do NOT discard it with the household waste, but hand it in at your local refuse collection depot.
Quality
Safety and quality is very important to HEMA. We have our own laboratory, which assesses all equipment in terms of electrical safety and ease of use, before it is included in our range. HEMA also monitors the product quality in collaboration with the manufacturer.
Security
This HEMA article may be fitted with a plastic anti-theft strip. You will find the strip on the bottom of the product. This strip does not influence the quality or the operation of the product and can be removed without a problem.
Faults and repairs
If this device needs to be repaired, you can hand it in at a HEMA branch after packing the product securely.
Do not try to repair this product yourself.
For repairs that fall within the warranty period, you will need to show a proof of purchase and the warranty document.
Regularly check the power cord for damage. If there is any damage to the cord set, please return the item to a HEMA branch for repair. Do not try to replace it yourself.
For safety reasons we recommend that you do not carry out any repairs to an electrical device yourself.
Warranty conditions
We guarantee the quality.
HEMA B.V. fully guarantees the product named on the warranty receipt, against all defects caused by material and manufacturing errors.
For all domestic electrical appliances, the warranty period is 2 years from the date of purchase.
The warranty on this article is invalidated if:
a. the defect occurs through incorrect or improper use, neglect, connection to the wrong power voltage, or if dropped or knocked;
b. you have attempted to repair the article yourself, or have had it repaired by a repair service other than HEMA during the warranty period.
If you wish to make a claim under the warranty terms: You will need to hand in the article at one of our branches together the warranty receipt. Under normal circumstances the article will be repaired free of charge within 14 workdays.
Extra certainty for the right choice
If, after purchasing the article, you are dissatisfied (because it is not exactly what you expected or you already have this article), you can return the article within 30 days of purchase, on condition that it is undamaged and in the original packaging.
Remember that you must always bring your sales receipt.
You can either exchange the article or request a refund.
The warranty conditions apply in all countries where there are HEMA branches.
1 November 2010
Hema BV
PO Box 37110
1030 AC Amsterdam
Netherlands
These warranty conditions apply without prejudice to the customer's statutory rights or any other claims by the customer.