
UR1000 - Alarm Clock Soundmaster - Free user manual and instructions
Find the device manual for free UR1000 Soundmaster in PDF.
| Product type | Clock radio |
| Brand | Soundmaster |
| Model | UR1000 |
| Power supply | 5 V DC, 500 mA AC adapter (included); CR2032 backup battery (not included) |
| FM radio frequency | 87.5 – 108 MHz |
| Display | Projection LED, adjustable 180° rotation |
| Alarm | Dual adjustable alarm; choice of tone, radio, or nature sound; gradual light over 20 minutes |
| Time projection | Distance 1–3 m, manual focus, adjustable brightness |
| Remote-controlled outlet | 230 V AC, max. 150 W (incandescent) / 60 W (halogen); wireless 433 MHz, range ~10 m |
| Radio memory | Up to 10 FM presets |
| Sleep function | 10 to 90 minutes |
| Auxiliary input | 3.5 mm AUX jack (cable not included) |
| Brightness adjustment | Levels 1 to 20 |
| Cleaning | Soft cloth and mild detergent; do not use solvents |
| Safety | Indoor use; do not expose to water; do not block ventilation |
| Included items | AC adapter, wireless remote control |
Frequently Asked Questions - UR1000 Soundmaster
User questions about UR1000 Soundmaster
0 question about this device. Answer the ones you know or ask your own.
Ask a new question about this device
Download the instructions for your Alarm Clock in PDF format for free! Find your manual UR1000 - Soundmaster and take your electronic device back in hand. On this page are published all the documents necessary for the use of your device. UR1000 by Soundmaster.
USER MANUAL UR1000 Soundmaster
soundmaster® highline
soundmaster® highline
DEUTSCH 1 - 13
ENGLISH 14
FRANÇAIS 21
NEDERLANDS 29 - 36
ESPANÔL 37
1 DEUTSCH
Einführung
natural_image
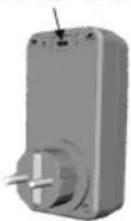
Black and white digital alarm device with 'CH3' display and wireless signal icons (no text or symbols on device body)AC/DC Adaptor connection
The clock radio unit can be powered by an external AC-DC adaptor, required the output DC 5V 500mA (included)
POWER CONNECTION
Plug the AC/DC adaptor to a household outlet AC source, connect the adaptor's DC output plug to the DC-in jack of the clock unit. This unit is equipped with a battery back up system, it requires a 3V CR2032 flat lithium battery (not included). Insert the battery in the battery compartment, making certain that the positive and negative (+ and -) battery terminals are attached to the corresponding terminals on the plate in the battery compartment. If an AC power failure occurs, the clock automatically switches to the battery power supply, the clock and timer memory continue running. When the AC power resumes, the clock switches back to AC again.
GETTING STARTED
Press the reset button locates on the back of unit after AC plug in.
- The unit will display full segment for 2 seconds, then it will enter the normal mode.
Setting Clock Time / Wireless Transmitter Channel
1) With the OFF mode, press and hold the time set / memory button ; "24 Hr" will blink.
2) Press the Tune + or Tune - button to set the unit to the "12 Hr" mode or "24 Hr" mode.
3) Press the time set / memory button and the hours will blink.
4) Press the Tune + or Tune – to set the current hour, then press the time set / memory button again the minute digits will blink.
5) Press the time set / memory button and the channel 1 will blink.
6) Press the Tune + or Tune - to set the channel 1 / channel 2 / channel 3.
7) When done and you press time set / memory button once again and the display time will blink to indicate the current time is set.
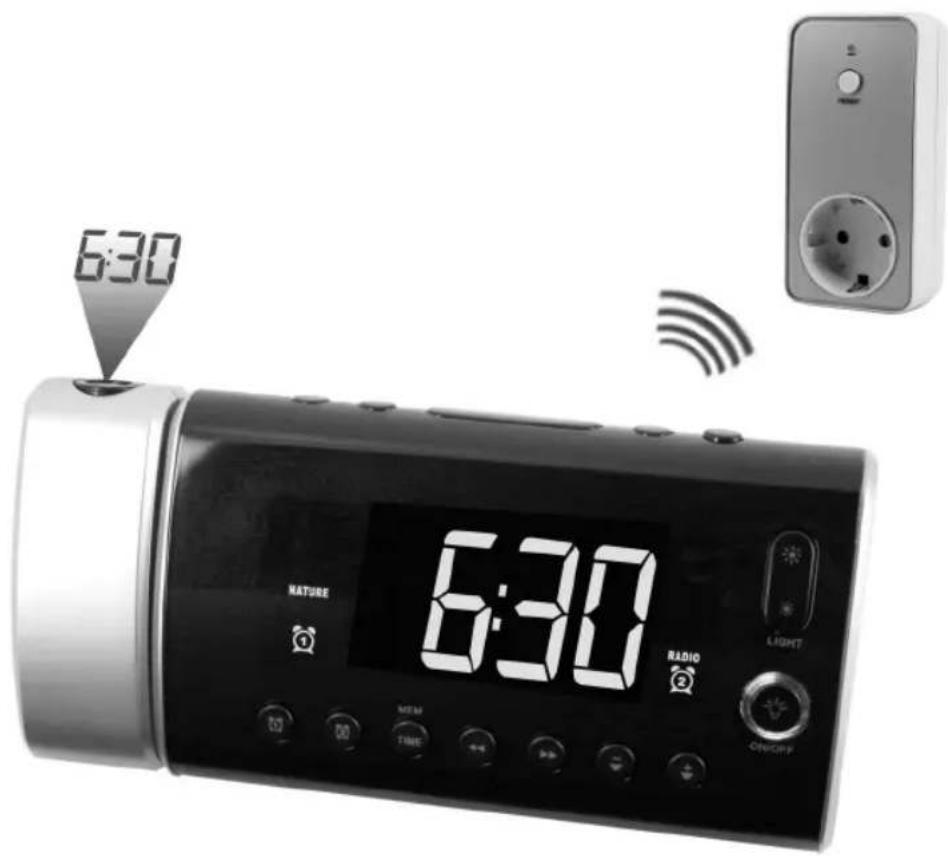
Setting Alarm Time
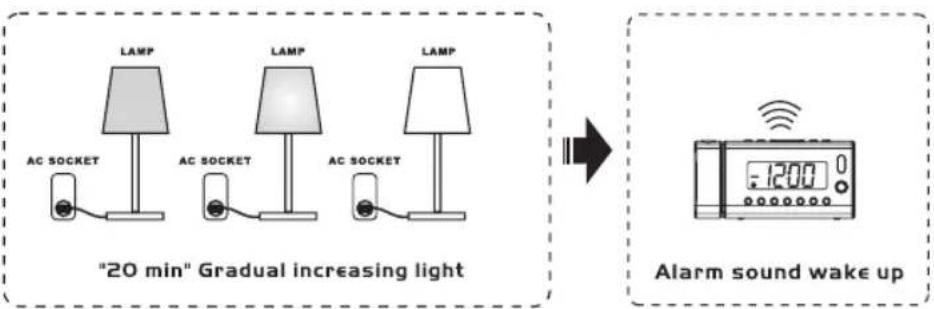
When you set the alarm, you choose the light intensity level, the type of sound and the sound level. The alarm is set when the light ring round the ALARM button burns. The light intensity slowly increases to the chosen level during the last 20 minutes before the set alarm time.
*** For example, if you set the alarm time on 8:30 am, the light will slowly increase to max level 20 started from 8:10 am. ***
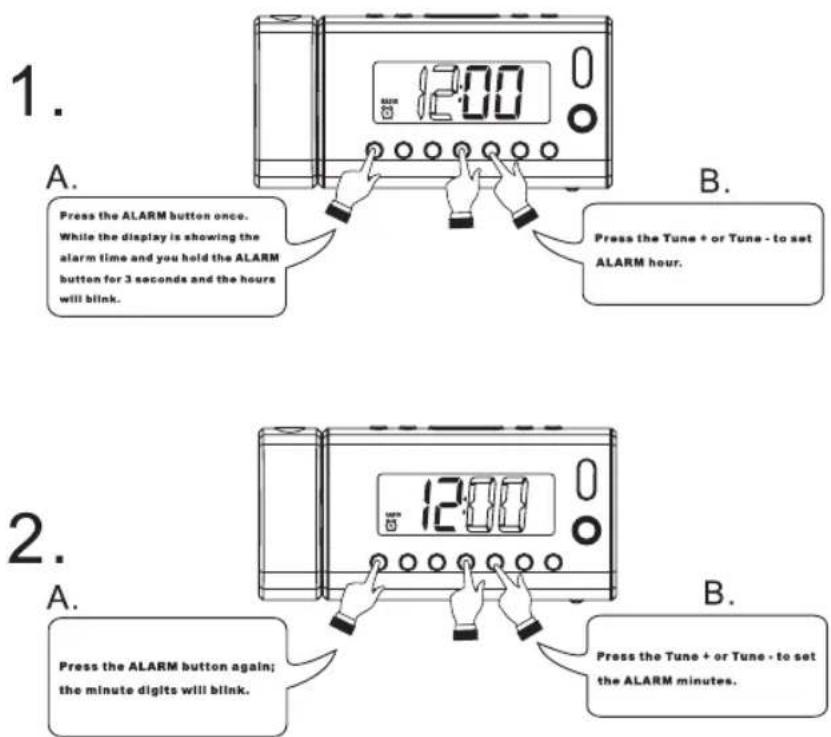
1) To preview the alarm time, press the ALARM button once.
2) While the display is showing the alarm time and hold the ALARM button for 3 seconds and the hours will blink.
3) Press the Tune + or Tune - to set the alarm hour.
4) Press the ALARM button again; the minute digits will blink. Press the Tune + or Tune - to set the alarm minutes.
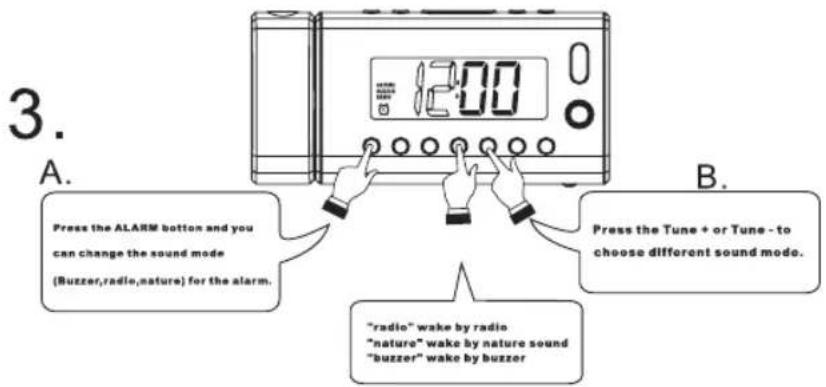
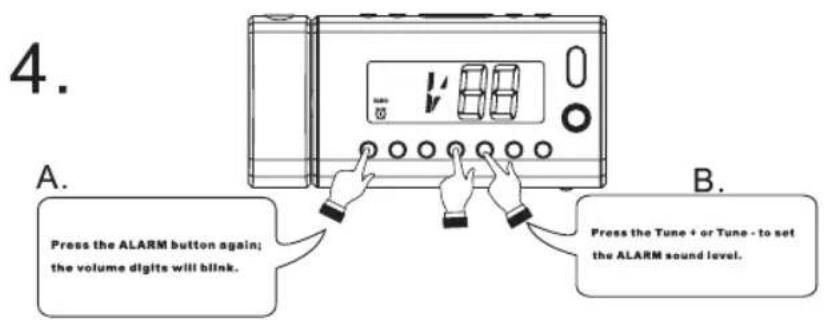
5) Press the ALARM button and you can change the sound mode (Buzzer, Radio, and Nature) for the alarm.
6) Press the Tune + or Tune - to choose different sound mode.
7) Press the ALARM button again; the volume digits will blink, press the Tune + or Tune – to set the alarm sound level.
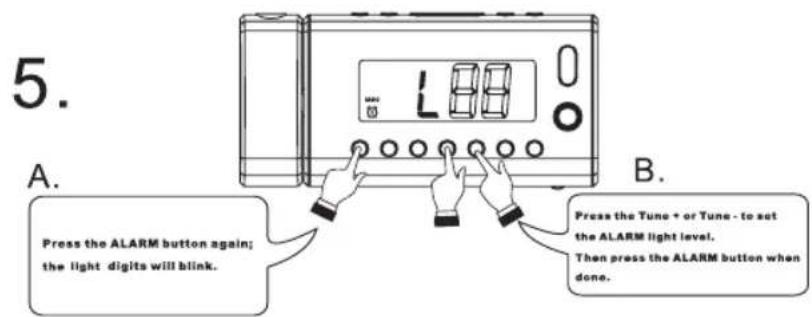
8) Press the Alarm button again; the light digits will blink, press the Tune + or Tune - to set the alarm light level.
9) Press the ALARM button when done.
Snooze and deactivate alarm
To delay the alarm, press SNOOZE, it will come on again in approx. 9 minutes. You may repeat this cycle several times during the alarm cycle.
16 ENGLISH
To stop the alarm, press ALARM button or ON/OFF button.
To stop the alarm from coming on the following day, hold the ALARM button to turn it off. The alarm icon 📋 or 🌐 will disappear to indicate the alarm is disalarmed.
Setting the light intensity level
- Use the light adjustment button 3 & 4 to set the light intensity level.
- The light intensity level between 1 to 20 for alarm function.
Listening to Radio
1) Press the ON/OFF button to turn the unit on.
2) Press the FUNCTION button to select the Radio Mode.
3) Use the Tune + or Tune - button to select the desired FM station. If you press and hold the Tune + or Tune - button for one second, then release, the unit will automatically scan to the next broadcasting station.
4) Press the ON/OFF button to turn the radio OFF.
To set / recall the radio presets
The unit can preset 10 stations totally for FM.
1) Press the ON/OFF button to turn the unit on.
2) Press the FUNCTION button to select the Radio Mode.
3) Use the Tune + or Tune - button to select the desired FM station.
4) Press the Clock set / memory button; 'M01' will blink in the display.
5) Press the Clock set / memory button again to set the preset.
6) Repeat steps 2 through 4 to set more presets.
When 'M01-M10' is blinking, press the Tune + or Tune - Button to select the preset number.
When recalling preset stations, press memory Up to select the preset number.
Sleep operation
When listening to radio, press Snooze / Sleep button to enter sleep mode. You can just adjust the sleep timer from 90 mins to 10 mins by pressing the Snooze / Sleep button. The unit will automatically turn off after the selected time.
AUX IN
The AUX IN jack can be used to playback alternate audio signal sources on the unit speakers.
This AUX IN jack requires a 3.5 mm audio cable for input signal.
Note: The 3.5 mm audio cable is not included.
RESET
- The reset button is located on the back of unit. Use a ballpoint pen to press it whenever you change the batteries, or unit is not performing as expected. This will return all settings to default value, and you will lose any stored data (alarm and clock settings).
PROJECTION UNIT
- Focus setting: Adjust the projection clock brightness / focus by turning the brightness / focus adjustment wheel until the projected time is clearly shown on the ceiling or wall.
- To flip projected image by 180° flip button.
- To deactivate projection, press PROJECTION ON/OFF button
Note: Projects time image on the ceiling or wall of a darkened room. Maximum projection distance is 3-9 feet.
17 ENGLISH
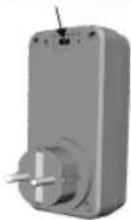
AC SOCKET WITH WIRELESS REMOTE CONTROL

Description: Only control lighting
Working frequency: 433MHz
Effective distance: About 35 feet (open space)
Power control output: AC 230V Max. 150W
Power source: AC 230V\~50Hz
Remark: If Energy saving bulb are used, only HALOGEN type
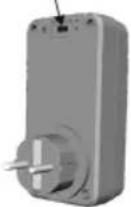
Remark: Press the reset button locates on the back of unit after plug in.
18 ENGLISH
19 ENGLISH
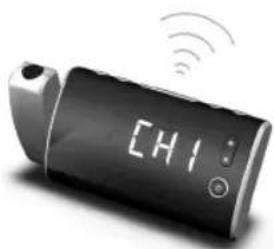
natural_image
Digital handheld device with 'CH1' display and wireless signal icons (no readable text or symbols beyond the display)Set the channel selector switch to the channel-1
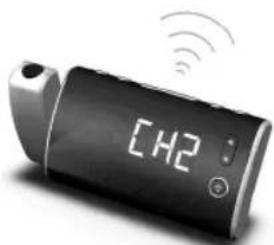
natural_image
Digital handheld device with 'CH2' display and wireless signal icons (no readable text or symbols)Set the channel selector switch to the channel-2
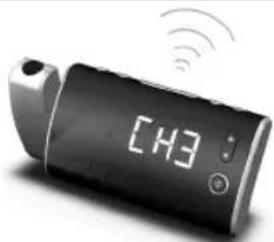
natural_image
Digital handheld device with 'CH3' display and wireless signal icons (no readable text or symbols beyond the display)Set the channel selector switch to the channel-3
SPECIFICATIONS
Frequency range: 87.5 – 108 MHz
Battery backup: 3V (CR2032 fl at lithium battery x 1)
Power supply
Power adaptor: Input AC 100 - 240V \~ 50/60 Hz 0.32A
Output DC 5V 500mA
20 ENGLISH
WARNING
- Indoor used only.
- The remote switch unit should not be connect after each other.
- The type of disconnection of the remote switch: electronic disconnection.
- Use the provided adaptor with the Radio only.
- Using only the accessories or parts provided by the manufacturer or its authorized agent.
- The AC socket of the Remote Control Switch (UR1000) is only for connection to lamp of 7. Incandescent lamp (230VAC max 150W) or Halogen Energy Saving Lamp (230VAC max 60W). Connection to other loads may cause hazard.
- No naked flame sources, such as lighted candles, should be placed on the apparatus.
- Do not place the product in closed bookcases or racks without proper ventilation.
- The mains plug is used as the disconnect device, the disconnect device shall remain readily operable.
- The ventilation should not be impeded by covering the ventilation openings with items, such as newspapers, table-cloths, curtains, etc.
- It shall not be exposed to dripping or splashing and that no objects filled with liquids, such as vases, shall be placed on the apparatus.
- Do not connect FM antenna to outside antenna.
- The unit should not be exposed to direct sunlight, very high or low temperature, moisture, vibrations or placed in dusty environment.
- Do not use abrasive, benzene, thinner or other solvents to clean the surface of the unit. To clean, wipe it will mild non-abrasive detergent solution and clean soft cloth.
- Never attempt to insert wires, pins or other such objects into the vents or opening of the unit.
- Batteries shall not be exposed to excessive heat such as sunshine, fire or the like.
- The LED projection clock is classified as "Exempt Group" in according to EN62471.
- Attention should be drawn to the environmental aspects of battery disposal.
- Do not dispose this product into usual household garbage at the end of its lifecycle; hand it over to a collection center for recycling the electrical and electronic appliances. By recycling, some of the materials can be reused. You are making an important contribution to protect our environment. Please inquire your community administration for the authorized disposal center.
CAUTION
Danger of explosion if battery is incorrectly replaced Replace only with the same or equivalent type
21 FRANÇAIS
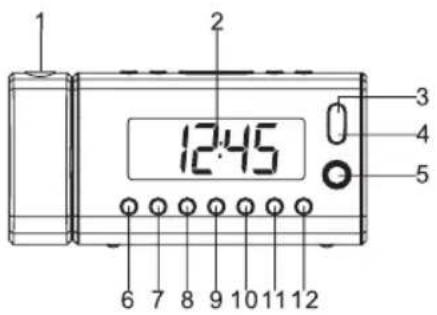

- DISPOSITIF DE PROJECTION
- ÉCRAN
- POUR AUGMENTER L'INTENSITÉ DE LA LUMIÈRE
- POUR DIMINUER L'INTENSITÉ DE LA LUMIÈRE
- LUMIÈRE ALLUMÉE / ÉTEINTE
- RÉGLAGE / ACTIVATION ALARME 1
- RÉGLAGE / ACTIVATION ALARME 2
- RÉGLAGE HORLOGE / MÉMOIRE / CANAL DE l'EMETTEUR SANS FIL
- << / RÉGLAGE -
-
/ RÉGLAGE +
- BAISSER LE VOLUME
- MONTER LE VOLUME
- MARCHE / ARRÊT
- FONCTION
- RAPPEL D'ALARME/VEILLE/VARIATEUR
- SÉLECTEUR DE SONS NATURELS
- MÉMOIRE
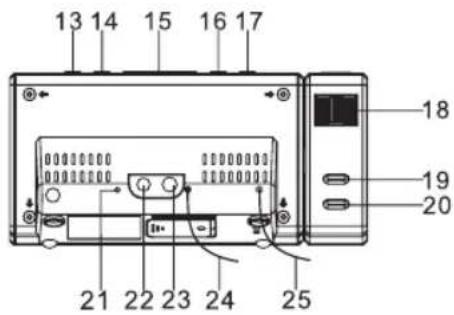
- RÉGLAGE DE LA MISE AU POINT DE LA PROJECTION
- BOUTON D ROTATION À 180° DE L'HEURE PROJETÉE
- ACTIVATION/DÉSACTIVATION DE LA PROJECTION
- BOUTON DE RÉINITIALISATION
- PRISE D'ENTRÉE CC
- PRISE D'ENTRÉE AUX
- ANTENNE FM
- ANTENNE
- COMPARTIMENT À PILE (ARRIÈRE DE L'APPAREIL)
- ÉTIQUETTE (ARRIÈRE DE L'APPAREIL)
22 FRANÇAIS
natural_image
Digital handheld device with 'CH1' display and wireless signal icons (no readable text or symbols beyond the display)natural_image
Digital H2 phone with wireless signal icon (no text or symbols on device body)natural_image
Digital handheld device with 'CH3' display and wireless signal icons (no readable text or symbols beyond the display)natural_image
Digital handheld device with 'CH1' display and wireless signal icons (no readable text or symbols beyond the display)natural_image
Digital H2 phone with wireless signal icon (no text or symbols on device body)natural_image
Digital handheld device with 'CH3' display and wireless signal icons (no readable text or symbols beyond the display)soundmaster® highline
Wörlein GmbH
Gewerbestrasse 12
D 90556 Cadolzburg
GERMANY
Tel.: +49 9103 / 71 67 - 0
Fax.: +49 9103 / 71 67 - 12
Email: info@woerlein.com


- soundmaster® highline
- DEUTSCH 1 - 13
- DEUTSCH
- Einführung
- AC/DC Adaptor connection
- POWER CONNECTION
- GETTING STARTED
- Setting Clock Time / Wireless Transmitter Channel
- Setting Alarm Time
- Snooze and deactivate alarm
- ENGLISH
- Setting the light intensity level
- Listening to Radio
- To set / recall the radio presets
- Sleep operation
- AUX IN
- RESET
- PROJECTION UNIT
- ENGLISH
- ENGLISH
- ENGLISH
- SPECIFICATIONS
- ENGLISH
- WARNING
- CAUTION
- FRANÇAIS
- FRANÇAIS
Brand : Soundmaster
Model : UR1000
Category : Alarm Clock