SCD5350BL - Radio Soundmaster - Free user manual and instructions
Find the device manual for free SCD5350BL Soundmaster in PDF.
| Product type | Clock radio with CD, cassette player and microphone |
| Brand | Soundmaster |
| Model | SCD5350BL |
| Mains power supply | AC 230-240V, 50Hz |
| Batteries | 8 x 1.5V type UM-2/C (LR14) |
| Power consumption | 15 Watts |
| Radio bands | FM (stereo) 87.5-108 MHz |
| CD player | CD, CD-R, CD-RW |
| CD functions | Play, pause, stop, track skip, programming (20 tracks), repeat |
| Cassette player | Playback and recording |
| Microphone | Built-in microphone jack |
| Recording | From radio, CD or microphone to cassette |
| Antenna | FM telescopic antenna |
| Display | Liquid crystal display |
| Cleaning | Dry cloth only, no detergents |
| Safety | Class 1 laser, electrical shock protection |
| Standby mode | Automatic standby after 1 minute of inactivity |
Frequently Asked Questions - SCD5350BL Soundmaster
User questions about SCD5350BL Soundmaster
0 question about this device. Answer the ones you know or ask your own.
Ask a new question about this device
Download the instructions for your Radio in PDF format for free! Find your manual SCD5350BL - Soundmaster and take your electronic device back in hand. On this page are published all the documents necessary for the use of your device. SCD5350BL by Soundmaster.
USER MANUAL SCD5350BL Soundmaster
natural_image
Black and white photo of a vintage portable radio with speaker grille and control buttons (no visible text or symbols on device body)DEUTSCH
ENGLISH
FRANÇAIS
NEDERLANDS
ESPAÑOL
PORTUGUÊS
NORSK
SVENSK
SUOMI
Hersteller
CLASS 1 LASER PRODUCT KLASS 1 LASER APPARAT LUOKEN 1 LAISERLAITE KLASSE 1 LASER PRODUKT
text_image
Diagram of a mobile phone with numbered parts and a separate microphone labeled 16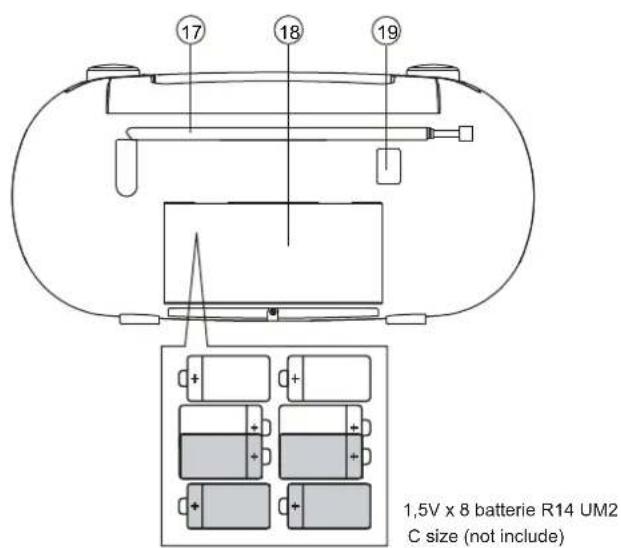
text_image
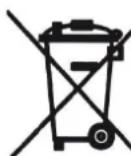
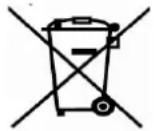
1,5V x 8 batterie R14 UM2 C size (not include)Do not dispose of this product with the normal household waste at the end of its life cycle. Return it to a collection point for the recycling of electrical and electronic devices. This is indicated by the symbol on the product, user manual or packaging.
The materials are reusable according to their markings. By reusing, recycling or other forms of utilization of old devices you make an important contribution to the protection of our environment.
Please contact your local authorities for details about collection points.
text_image
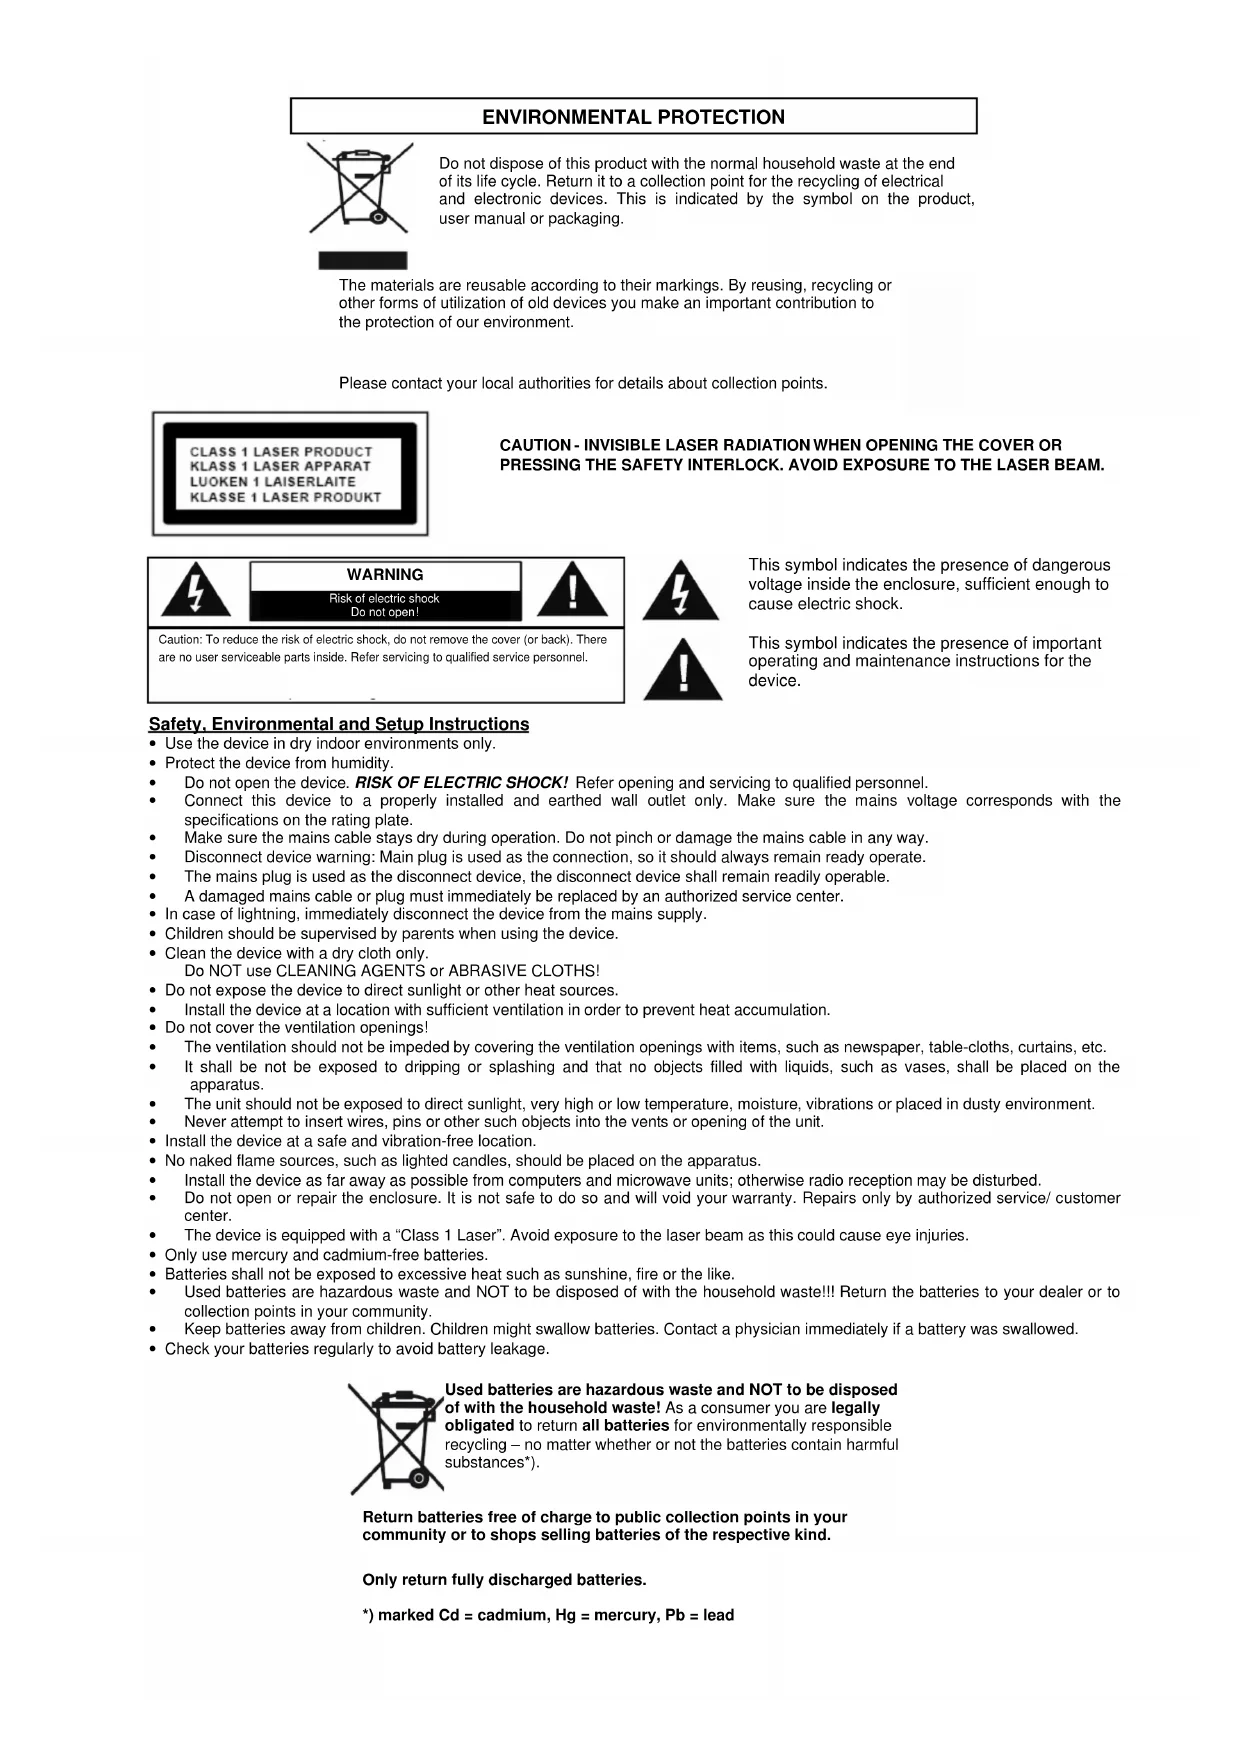
CLASS 1 LASER PRODUCT KLASS 1 LASER APPARAT LUOKEN 1 LAISERLAITE KLASSE 1 LASER PRODUKTCAUTION - INVISIBLE LASER RADIATION WHEN OPENING THE COVER OR PRESSING THE SAFETY INTERLOCK. AVOID EXPOSURE TO THE LASER BEAM.
Caution: To reduce the risk of electric shock, do not remove the cover (or back). There are no user serviceable parts inside. Refer servicing to qualified service personnel.
WARNING
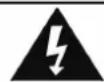
Risk of electric shock Do not open!


This symbol indicates the presence of dangerous voltage inside the enclosure, sufficient enough to cause electric shock.

This symbol indicates the presence of important operating and maintenance instructions for the device.
Safety, Environmental and Setup Instructions
- Use the device in dry indoor environments only.
- Protect the device from humidity.
• Do not open the device. RISK OF ELECTRIC SHOCK! Refer opening and servicing to qualified personnel. - Connect this device to a properly installed and earthed wall outlet only. Make sure the mains voltage corresponds with the specifications on the rating plate.
• Make sure the mains cable stays dry during operation. Do not pinch or damage the mains cable in any way. - Disconnect device warning: Main plug is used as the connection, so it should always remain ready operate.
• The mains plug is used as the disconnect device, the disconnect device shall remain readily operable.
• A damaged mains cable or plug must immediately be replaced by an authorized service center. - In case of lightning, immediately disconnect the device from the mains supply.
• Children should be supervised by parents when using the device. - Clean the device with a dry cloth only.
Do NOT use CLEANING AGENTS or ABRASIVE CLOTHS!
- Do not expose the device to direct sunlight or other heat sources.
• Install the device at a location with sufficient ventilation in order to prevent heat accumulation. - Do not cover the ventilation openings!
• The ventilation should not be impeded by covering the ventilation openings with items, such as newspaper, table-cloths, curtains, etc. - It shall be not be exposed to dripping or splashing and that no objects filled with liquids, such as vases, shall be placed on the apparatus.
• The unit should not be exposed to direct sunlight, very high or low temperature, moisture, vibrations or placed in dusty environment.
• Never attempt to insert wires, pins or other such objects into the vents or opening of the unit.
• Install the device at a safe and vibration-free location. - No naked flame sources, such as lighted candles, should be placed on the apparatus.
• Install the device as far away as possible from computers and microwave units; otherwise radio reception may be disturbed. - Do not open or repair the enclosure. It is not safe to do so and will void your warranty. Repairs only by authorized service/ customer center.
- The device is equipped with a "Class 1 Laser". Avoid exposure to the laser beam as this could cause eye injuries.
- Only use mercury and cadmium-free batteries.
- Batteries shall not be exposed to excessive heat such as sunshine, fire or the like.
- Used batteries are hazardous waste and NOT to be disposed of with the household waste!!! Return the batteries to your dealer or to collection points in your community.
- Keep batteries away from children. Children might swallow batteries. Contact a physician immediately if a battery was swallowed.
- Check your batteries regularly to avoid battery leakage.
Used batteries are hazardous waste and NOT to be disposed of with the household waste! As a consumer you are legally obligated to return all batteries for environmentally responsible recycling – no matter whether or not the batteries contain harmful substances ^* .
Return batteries free of charge to public collection points in your community or to shops selling batteries of the respective kind.
Only return fully discharged batteries.
*) marked Cd = cadmium, Hg = mercury, Pb = lead
ATTENTION!!!! ESSENTIAL READING – IMPORTANT!
SWITCH ON THE DEVICE
This device was developed with the newest energy saving technique which was published by European directive law. This device has an built-in automatic which puts the device into a special „standby“ mode.
This mode disables the function switch for Tape / CD / Radio.
For reactivating you have to press the "PLAY"-button and the device switches to "Active" – mode afterwards.
This „standby“ – mode was given when there isn’t any usage of the device for about 15 minutes.
That means that device change generally into „standby“ – mode over night. So you have to reactivate the device on the next day by pressing the “PLAY”-button. This reactivation has to be done for radio-, tape- and CD-function.

text_image
PRESS THIS BUTTON FOR RE-ACTIVATING THE DEVICE STOP PLAY/ PAUSE FM ST-more information here: www.woerlein.com/en/
ENGLISH
text_image
Diagram of a portable radio with numbered parts and a separate microphone illustration
text_image
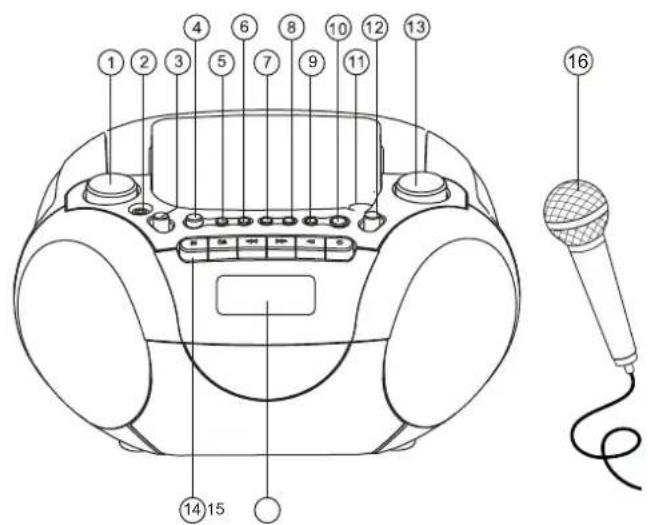
1,5V x 8 batterie R14 UM2 C size (not include)- Volume
- 0 LFR phone jack
- Function selector
- %6
- CD Program
- CD Repeat
- CD SKIP backwards |<<
- CD SKIP forward >>|
- CD STOP
-
CD PLAY/Pause ▶ ||
-
CD compartment
- Switch FM/FM-ST
- Tuning control
- Cassette recorder keys
- LCD display
- Microphone
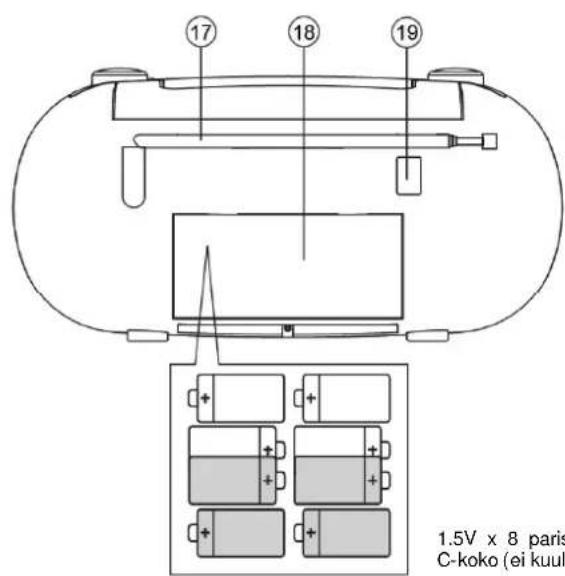
- FM telescopic antenna
- Battery compartment
- AC mains
Power Supply
Check if the power voltage, as shown on the type plate located on the bottom of the set, corresponds to your local AC power supply.
Connect the power cord to the AC MAINS inlet and the wall outlet. The power supply is QRZ□FRQQHFHG□DQG□HDG□IRU□XVH□
Batteries (not incl.)
Open the battery compartment and insert 8x 1,5V UM-2/C Batteries with the correct polarity as indicated by the + and - symbols inside the compartment.
Do not mix battery types: e.g. alkaline with carbon zing. Only use batteries of the same type for the set. When inserting new batteries, do not try to mix old batteries with the new ones. Remove the batteries if the set is not to be used for a long time.
Economic Saving power mode
If the unit is idle for 1 minutes, it will automatically switch to Saving power mode. Press the >/II PLAY/PAUSE button to resume.
Volume
Adjust the sound with the Volume switch
Microphone
- Slide the FUNCTION selector to (CDMIC, TAPE(OFF), RADIO) position. Note: In TAPE(OFF) mode, the mic function operate with playing tape.
- Insert the microphone plugs into Mic jack, and then the microphones can be connecting.
- Rotate the VOLUME button to adjust sound
ENGLISH
Radio
- Slide the FUNCTION selector to RADIO
- Slide the BAND selector to FM STEREO; FM
- Rotate the TUNING control to find the desired stations
- For FM: ____ pull out the telescopic antenna. Incline and turn the antenna. Reduce its length if the signal is too strong (very close to a transmitter)
Cassette
- Select Tape source
- Press STOP EJECT to open the cassette door
- Insert a recorded cassette and close the cassette door
- Press PLAY to start playback
- To interrupt playback, press PAUSE. To resume, press the key again
- By pressing |<< or >>| on the set, fast winding of the tape is possible in both directions#
- To Stop the tape, press STOP EJECT
Recording from the radio
- Tune to the desired radio station (see TUNING TO RADIO STATIONS)
- Press STOP EJECT to open the cassette door
- Insert a suitable cassette into the cassette deck and close the cassette door.
- Press RECORD to start recording
- For brief interruptions, press PAUSE. To resume recording, press PAUSE again.
- To Stop recording, press STOP EJECT
Maintenance
To ensure quality recording and playback of the tape deck, clean record- and audio head after approx. 50 hours of operation, or on average once a month. Use a cotton bud slightly moistened with alcohol or a special head cleaning fluid to clean the deck. Note: Before clean the parts must be sure that no power supply is available.
CD Player
- Adjust the source selector to CD
- To open the CD door, press the CD door at the edge marked open
- Insert a CD, CD-R/RW with the printed side facing up and press the CD door gently close
- Press PLAY/PAUSE on the set to start playback.
- To pause playback press PLAY/PAUSE, to resume press PLAY/PAUSE again.
- To stop CD playback, press STOP
Recording from CD
- Press STOP/EFECT button to open the door, insert a cassette and close it.
- Press RECORD button and CD PLAY/PAUSE button to start the recording
- To stop the recording, press STOP/EJECT
CD Repeat
Press 1 x repeat button: Current track will be repeat
Press 2 x repeat button: Complete CD will be repeat
Press 3 x repeat button: Will be in normal playback mode
CD Program (max. 20 Title)
- In the STOP mode, press |<< or >>| for your desired track
- When your chosen track number appears, press PROG once to store the track. The display shows prog and prog briefly followed by your selected track number
- Repeat steps 1 to 2 to select and store all desired tracks in this way
- To play your program, press PLAY
- Erasing a program: Press STOP button twice
Specifications
FM Frequency: 87.5 – 108 MHz
Power consumption: 15 Watt
AC Power Supply: AC 230V\~240V, 50Hz
DC Power Supply: 8 x 1.5V Type UM-2/C
Copyright by Woerlein GmbH, 90556 Cadolzburg, www.woerlein.com
PROTECTION DE L'ENVIRONNEMENT
text_image
Diagram of a portable radio with numbered components and a separate microphone illustration.
text_image
1,5V x 8 batterie R14 UM2 C size (not include)Piles (non fournies)
text_image
Diagram of a portable radio with numbered components and a separate microphone illustration.
text_image
1.5V x 8 batterie R14 UM2 C size (not include)Press 1 x repeat button: Current track will be repeat
Press 2 x repeat button: Complete CD will be repeat
Press 3 x repeat button: Will be in normal playback mode
text_image
Diagram of a portable radio with numbered components and a separate microphone illustration.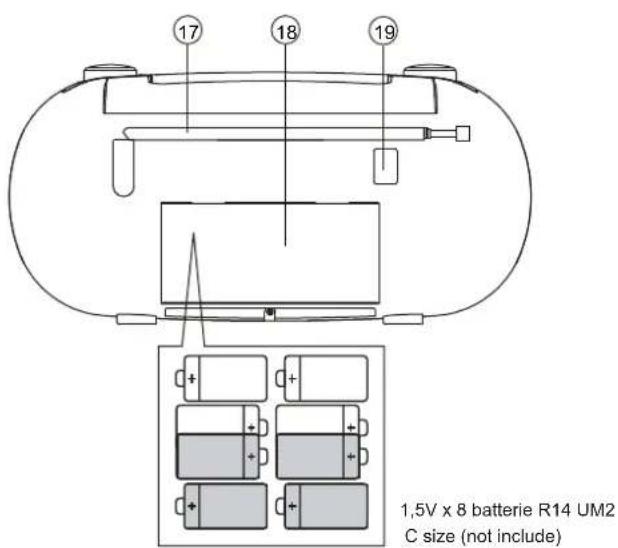
text_image
1.5V x 8 batterie R14 UM2 C size (not include)text_image
CLASS 1 LASER PRODUCT KLASS 1 LASER APPARAT LUOKEN 1 LAISERLAITE KLASSE 1 LASER PRODUKTCUIDADO – RADIAÇÃO LASER INVISÍVEL QUANDO ABRIR A TAMPA OU PREMIR O FECHO DE SEGURANÇA. EVITE EXPOSIÇÃO AO FEIXE LASER.
AVISO
text_image
Technical diagram of a portable radio with numbered parts and a separate microphone labeled 16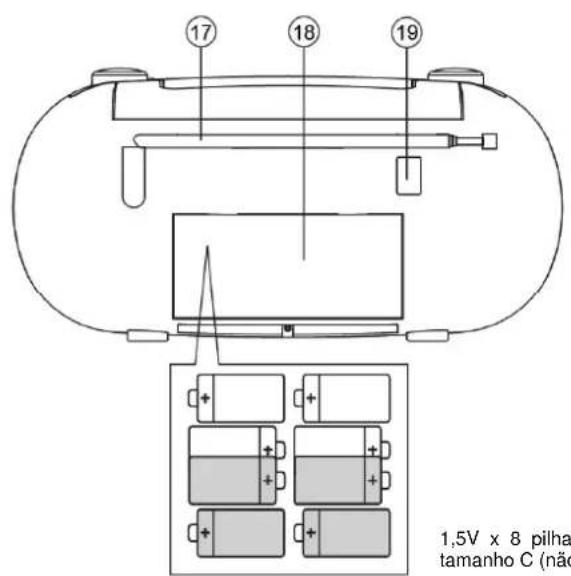
text_image
17 18 19 1,5V x 8 pilha tamanho C (nátext_image
CLASS 1 LASER PRODUCT KLASS 1 LASER APPARAT LUOKEN 1 LAISERLAITE KLASSE 1 LASER PRODUKTFORSIKTIG! DET OPPSTÄR USYNLIG LASERSTRÅLING NÄR DEKSLET ÅPNES ELLER SIKKERHETSFORRIGLINGEN TRYKKES. UNNGÅ EKSPONERING FOR LASERSTRÅLEN.
ADVARSEL
text_image
Technical diagram of a portable radio with numbered parts and a separate microphone illustration.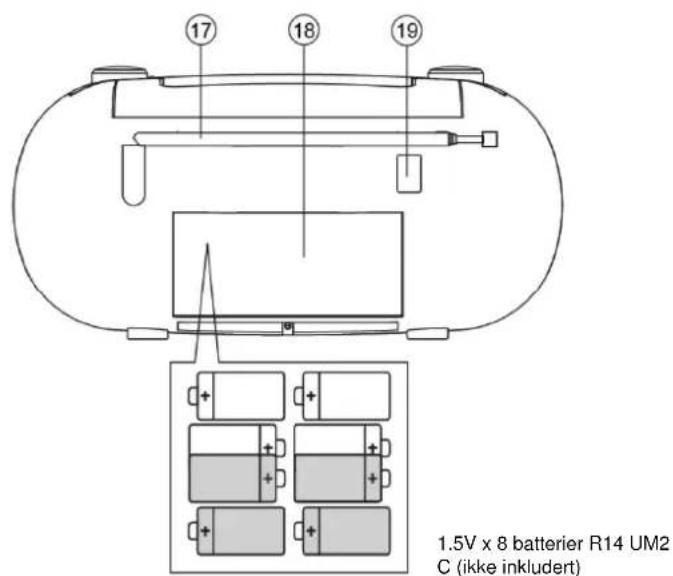
text_image
1.5V x 8 batterier R14 UM2 C (ikke inkludert)- Volum
- Mikrofonkontakt
- Funksjonsvelger
- DBBS
- CD Program
- CD Gjenta
- CD SKIP bakover |<<
- CD SKIP forever |<<
- CD STOPP
-
CD PLAY/Pause ▶ ||
-
CD-skuff
- Båndbryter AM/FM/FM-ST
- Tuningkontroll
- Kassettspiller-taster
- LCD-display
- Mikrofon
- FM-teleskopantenne
- Batterirom
- Nettstrøm
Strømtilførsel
text_image
CLASS 1 LASER PRODUCT KLASS 1 LASER APPARAT LUOKEN 1 LAISERLAITE KLASSE 1 LASER PRODUKTVARNING - OSYNLIG LASERSTRÅLNING NÄR DU ÖPPNAR LOCKET ELLER TRYCKER PÅ SÄKERHETSSPÄRREN. UNDVIK EXPONERING FÖR LASERSTRÅLEN.
WARNING
*) markerade Cd = kadmium, Hg = kvicksilver, Pb = bly
SVENSKA

text_image
Technical diagram of a portable radio with numbered parts and a separate microphone labeled 16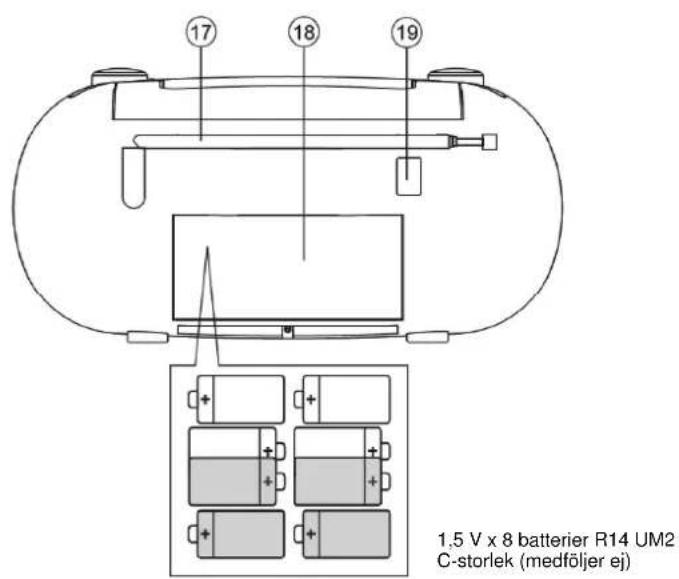
text_image
CLASS 1 LASER PRODUCT KLASS 1 LASER APPARAT LUOKEN 1 LAISERLAITE KLASSE 1 LASER PRODUKTVAROITUS - LAITE LÄHETTÄÄ NÄKYMÄTÖNTÄ LASERSÄTEILYÄ, KUN KANSI AVATAAN JA TURVALUKITUS ON OHITETTU. VÄLTÄ ALTISTUSTA LASERSÄTEELLE.
VAROITUS
text_image
Technical diagram of a portable radio with numbered parts and a separate microphone labeled 16