
SCHT37R - Home Theater System PANASONIC - Free user manual and instructions
Find the device manual for free SCHT37R PANASONIC in PDF.
| Brand | Panasonic |
| Model | SCHT37R |
| Product type | Home theater system with DVD recorder |
| Speaker configuration | 5.1 channels (front L/R, center, surround L/R, subwoofer) |
| Receiver | SA-HT07 |
| Subwoofer | SB-WA07, amplified |
| DVD recorder | DMR-E85H or DMR-E55 (80 GB hard drive or not) |
| Playback formats | DVD-Video, Audio CD, CD-R/RW, DVD-R/RW |
| Recording formats | Hard disk (DMR-E85H) or DVD-RAM, DVD-R |
| Power supply | Mains 220-240 V, 50/60 Hz |
| Power consumption | Approximately 150 W (receiver + recorder) |
| Video connections | Outputs: VIDEO IN RCA, SCART, COMPONENT VIDEO |
| Audio connections | Optical input/output, analog audio |
| Built-in radio | FM/AM with supplied antennas |
| Supplied accessories | Remote control, cables (optical, audio/video, speakers, antennas), power cords |
| Maintenance | Clean with a dry, soft cloth. Do not use solvents. |
| Safety | Unplug during storms or prolonged non-use. Do not block ventilation slots. |
| Repairability | Spare parts available through Panasonic after-sales service |
Frequently Asked Questions - SCHT37R PANASONIC
User questions about SCHT37R PANASONIC
0 question about this device. Answer the ones you know or ask your own.
Ask a new question about this device
Download the instructions for your Home Theater System in PDF format for free! Find your manual SCHT37R - PANASONIC and take your electronic device back in hand. On this page are published all the documents necessary for the use of your device. SCHT37R by PANASONIC.
USER MANUAL SCHT37R PANASONIC
Model No. SC-HT37R SC-HT25R
SC-HT37R
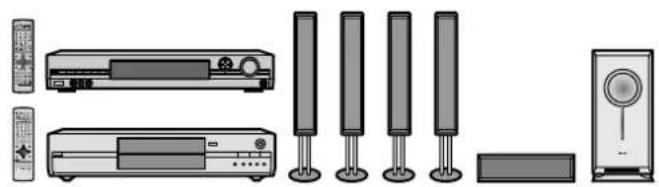
natural_image
Product line drawing of a multi-unit electronic device setup including front panel, screen, and speaker (no text or symbols)SC-HT25R

natural_image
Line drawing of various household electronic devices including TV, audio, and speaker (no text or labels)SC-HT37R is used in the illustrations unless otherwise mentioned.
Refer to the operating instructions for operation and other details regarding each component.
For the United Kingdom and Republic of Ireland
Sales and Support Information
Customer Care Centre
● For UK customers: 08705 357357
● For Republic of Ireland customers: 01 289 8333
- Visit our website for product information
• E-mail: customer.care@panasonic.co.uk
Direct Sales at Panasonic UK
- Order accessory and consumable items for your product with ease and confidence by phoning our Customer Care Centre Monday-Friday 9:00am-5:30pm. (Excluding public holidays)
- Or go on line through our Internet Accessory ordering application at www.panasonic.co.uk
- Most major credit and debit cards accepted.
- All enquiries transactions and distribution facilities are provided directly by Panasonic UK Ltd.
- It couldn't be simpler!
- Also available through our Internet is direct shopping for a wide range of finished products, take a browse on our website for further details.
SC-HT37R only
Speaker assembly (→ page 4 to 5, SC-HT07/SC-HT05 Operating Instructions)
Step 1
| Model No. | SC-HT37R | SC-HT25R |
| Receiver | SA-HT07 | SA-HT05 |
| Front speakers | SB-FS927 | SB-PF725 |
| Surround speakers | SB-PS725 | |
| Center speaker | SB-PC927 | SB-PC725 |
| Subwoofer | SB-WA07 | SB-WA05 |
| DVD recorder | DMR-E85H | DMR-E55 |
Placement
SC-HT37R
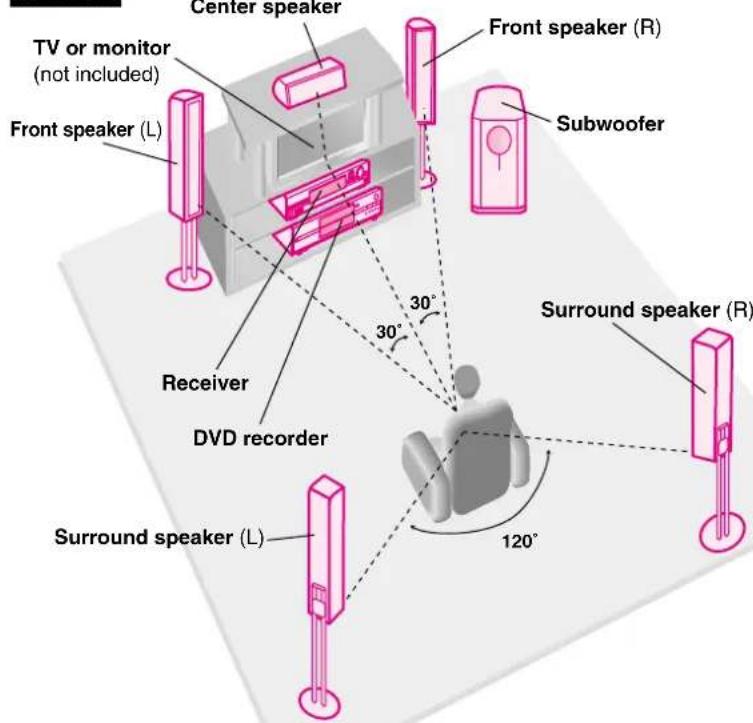
Set the speakers up on an even surface to prevent them from falling.
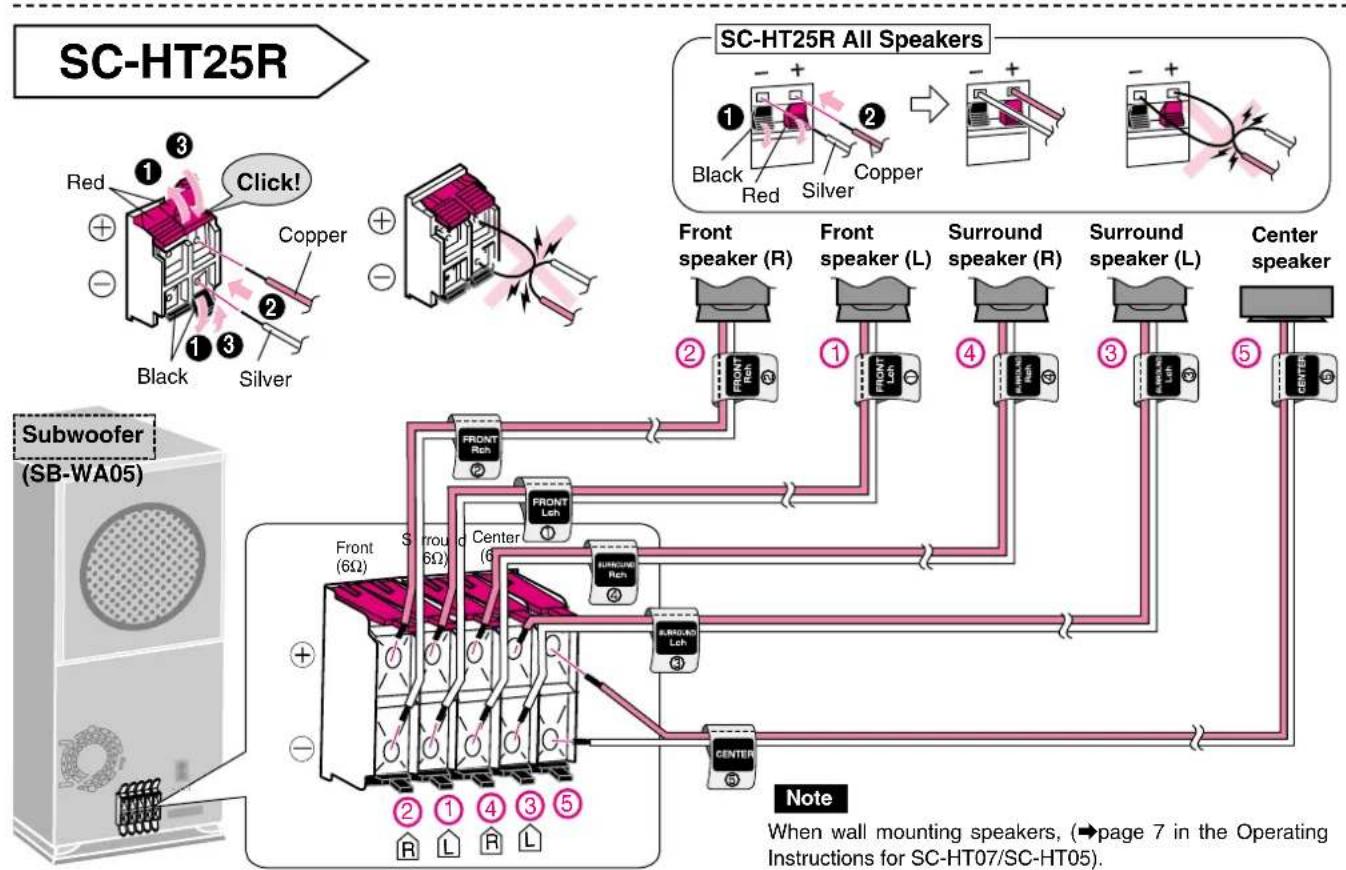
SC-HT25R
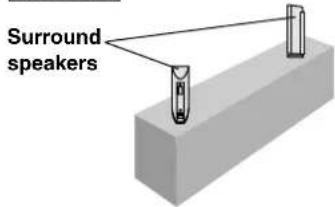
Place on a shelf or rack.
The front, center, and surround speakers should be placed at approximately the same distance from the seating area.
The angles in the diagram are approximate.

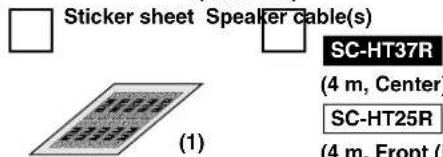
Make sure you have all the indicated components before assembly setup, and connection.
Step 2
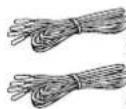
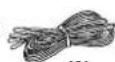
(Receiver)
(4 m, Front (L)
(1)
(3)
er)
SC-HT25R
(10 m,
Surround
(L) (R))
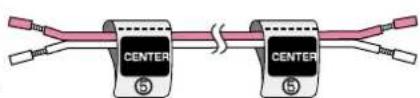
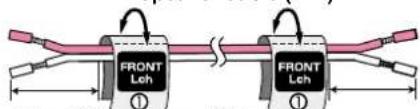
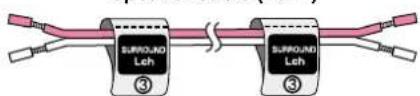
Attach the stickers to the speaker cables
Attach stickers to both ends of all speaker cables to simplify connections.
SC-HT37R Front and surround speakers (The length of cables are same.)
①to ④⑤
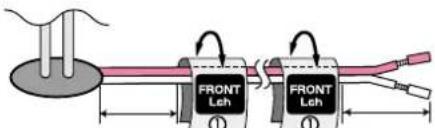
About 10 cm About 10 cm
SC-HT25R
Use the long speaker cables for the surround speakers.
①, ②, ⑤
Speaker cable (4 m)
About 10 cm About 10 cm
③, ④
Speaker cable (10 m)
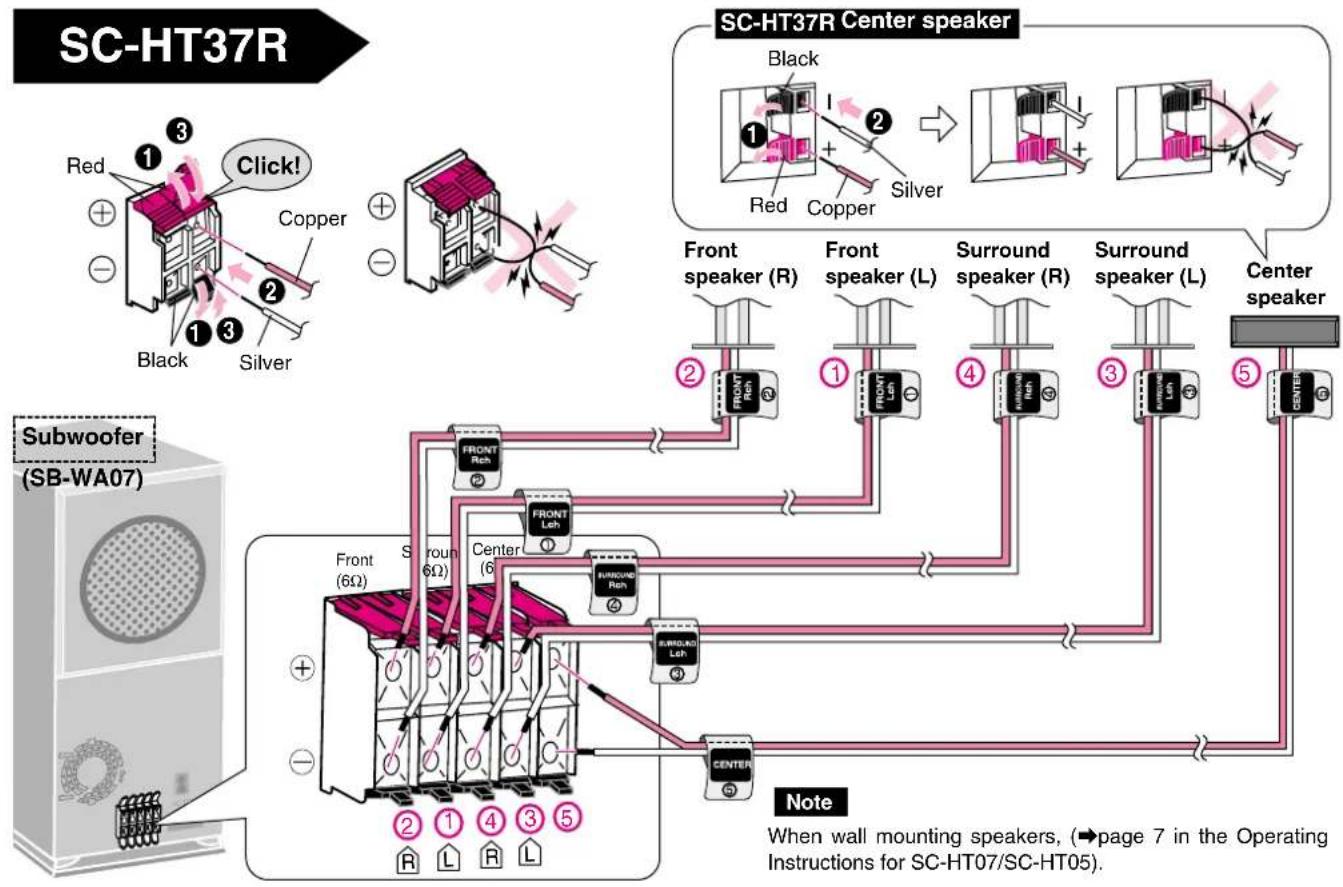
① Front speaker (L)
②Front speaker (R)
③Surround speaker (L)
④Surround speaker (R)
⑤Center speaker
Connect the speakers
flowchart
graph TD
    A["Subwoofer (SB-WA07)"] --> B["SC-HT37R Center speaker"]
    B --> C["SC-HT37R Center speaker"]
    C --> D["SC-HT37R Center speaker"]
    D --> E["SC-HT37R Center speaker"]
    E --> F["SC-HT37R Center speaker"]
    F --> G["SC-HT37R Center speaker"]
    G --> H["SC-HT37R Center speaker"]
    H --> I["SC-HT37R Center speaker"]
    I --> J["SC-HT37R Center speaker"]
    J --> K["SC-HT37R Center speaker"]
    K --> L["SC-HT37R Center speaker"]
    L --> M["SC-HT37R Center speaker"]
    M --> N["SC-HT37R Center speaker"]
    N --> O["SC-HT37R Center speaker"]
    O --> P["SC-HT37R Center speaker"]
    P --> Q["SC-HT37R Center speaker"]
    Q --> R["SC-HT37R Center speaker"]
    R --> S["SC-HT37R Center speaker"]
    S --> T["SC-HT37R Center speaker"]
    T --> U["SC-HT37R Center speaker"]
    U --> V["SC-HT37R Center speaker"]
    V --> W["SC-HT37R Center speaker"]
    W --> X["SC-HT37R Center speaker"]
    X --> Y["SC-HT37R Center speaker"]
    Y --> Z["SC-HT37R Center speaker"]
    Z --> AA["SC-HT37R Center speaker"]
    AA --> AB["SC-HT37R Center speaker"]
    AB --> AC["SC-HT37R Center speaker"]
    AC --> AD["SC-HT37R Center speaker"]
    AD --> AE["SC-HT37R Center speaker"]
    AE --> AF["SC-HT37R Center speaker"]
    AF --> AG["SC-HT37R Center speaker"]
    AG --> AH["SC-HT37R Center speaker"]
    AH --> AI["SC-HT37R Center speaker"]
    AI --> AJ["SC-HT37R Center speaker"]
    AJ --> AK["SC-HT37R Center speaker"]
    AK --> AL["SC-HT37R Center speaker"]
    AL --> AM["SC-HT37R Center speaker"]
    AM --> AN["SC-HT37R Center speaker"]
    AN --> AO["SC-HT37R Center speaker"]
    AO --> AP["SC-HT37R Center speaker"]
    AP --> AQ["SC-HT37R Center speaker"]
    AQ --> AR["SC-HT37R Center speaker"]
    AR --> AS["SC-HT37R Center speaker"]
    AS --> AT["SC-HT37R Center speaker"]
    AT --> AU["SC-HT37R Center speaker"]
    AU --> AV["SC-HT37R Center speaker"]
    AV --> AW["SC-HT37R Center speaker"]
    AW --> AX["SC-HT37R Center speaker"]
    AX --> AY["SC-HT37R Center speaker"]
    AY --> AZ["SC-HT37R Center speaker"]
    AZ --> BA["SC-HT37R Center speaker"]
    BA --> BB["SC-HT37R Center speaker"]
    BB --> BC["SC-HT37R Center speaker"]
    BC --> BD["SC-HT37R Center speaker"]
    BD --> BE["SC-HT37R Center speaker"]
    BE --> BF["SC-HT37R Center speaker"]
    BF --> BG["SC-HT37R Center speaker"]
    BG --> BH["SC-HT37R Center speaker"]
    BH --> BI["SC-HT37R Center speaker"]
    BI --> BJ["SC-HT37R Center speaker"]
    BJ --> BK["SC-HT37R Center speaker"]
    BK --> BL["SC-HT37R Center speaker"]
    BL --> BM["SC-HT37R Center speaker"]
    BM --> BN["SC-HT37R Center speaker"]
    BN --> BO["SC-HT37R Center speaker"]
    BO --> BP["SC-HT37R Center speaker"]
    BP --> BQ["SC-HT37R Center speaker"]
    BQ --> BR["SC-HT37R Center speaker"]
    BR --> BS["SC-HT37R Center speaker"]
    BS --> BT["SC-HT37R Center speaker"]
    BT --> BU["SC-HT37R Center speaker"]
    BU --> BV["SC-HT37R Center speaker"]
    BV --> BW["SC-HT37R Center speaker"]
    BW --> BX["SC-HT37R Center speaker"]
    BX --> BY["SC-HT37R Center speaker"]
    BY --> BZ["SC-HT37R Center speaker"]
flowchart
graph TD
    A["Subwoofer (SB-WA05)"] --> B["SC-HT25R All Speakers"]
    B --> C["Front speaker (R)"]
    B --> D["Front speaker (L)"]
    B --> E["Surround speaker (R)"]
    B --> F["Surround speaker (L)"]
    B --> G["Center speaker"]
    C --> H["FRONT Rch"]
    D --> I["FRONT Lch"]
    E --> J["FRONT Rch"]
    F --> K["FRONT Lch"]
    G --> L["FRONT Rch"]
    H --> M["FRONT Lch"]
    I --> N["FRONT Rch"]
    J --> O["FRONT Lch"]
    K --> P["FRONT Rch"]
    L --> Q["FRONT Lch"]
    M --> R["FRONT Rch"]
    N --> S["FRONT Lch"]
    O --> T["FRONT Rch"]
    P --> U["FRONT Lch"]
    Q --> V["FRONT Rch"]
    R --> W["FRONT Lch"]
    S --> X["FRONT Rch"]
    T --> Y["FRONT Lch"]
    U --> Z["FRONT Rch"]
    V --> AA["FRONT Lch"]
    W --> AB["FRONT Rch"]
    X --> AC["FRONT Lch"]
    Y --> AD["FRONT Rch"]
    Z --> AE["FRONT Lch"]
Step 4

Optical fiber cable
(1) (1) (1) (1)
(DVD recorder)

Audio/video cable

RF coaxial lead

Video cable (not included)
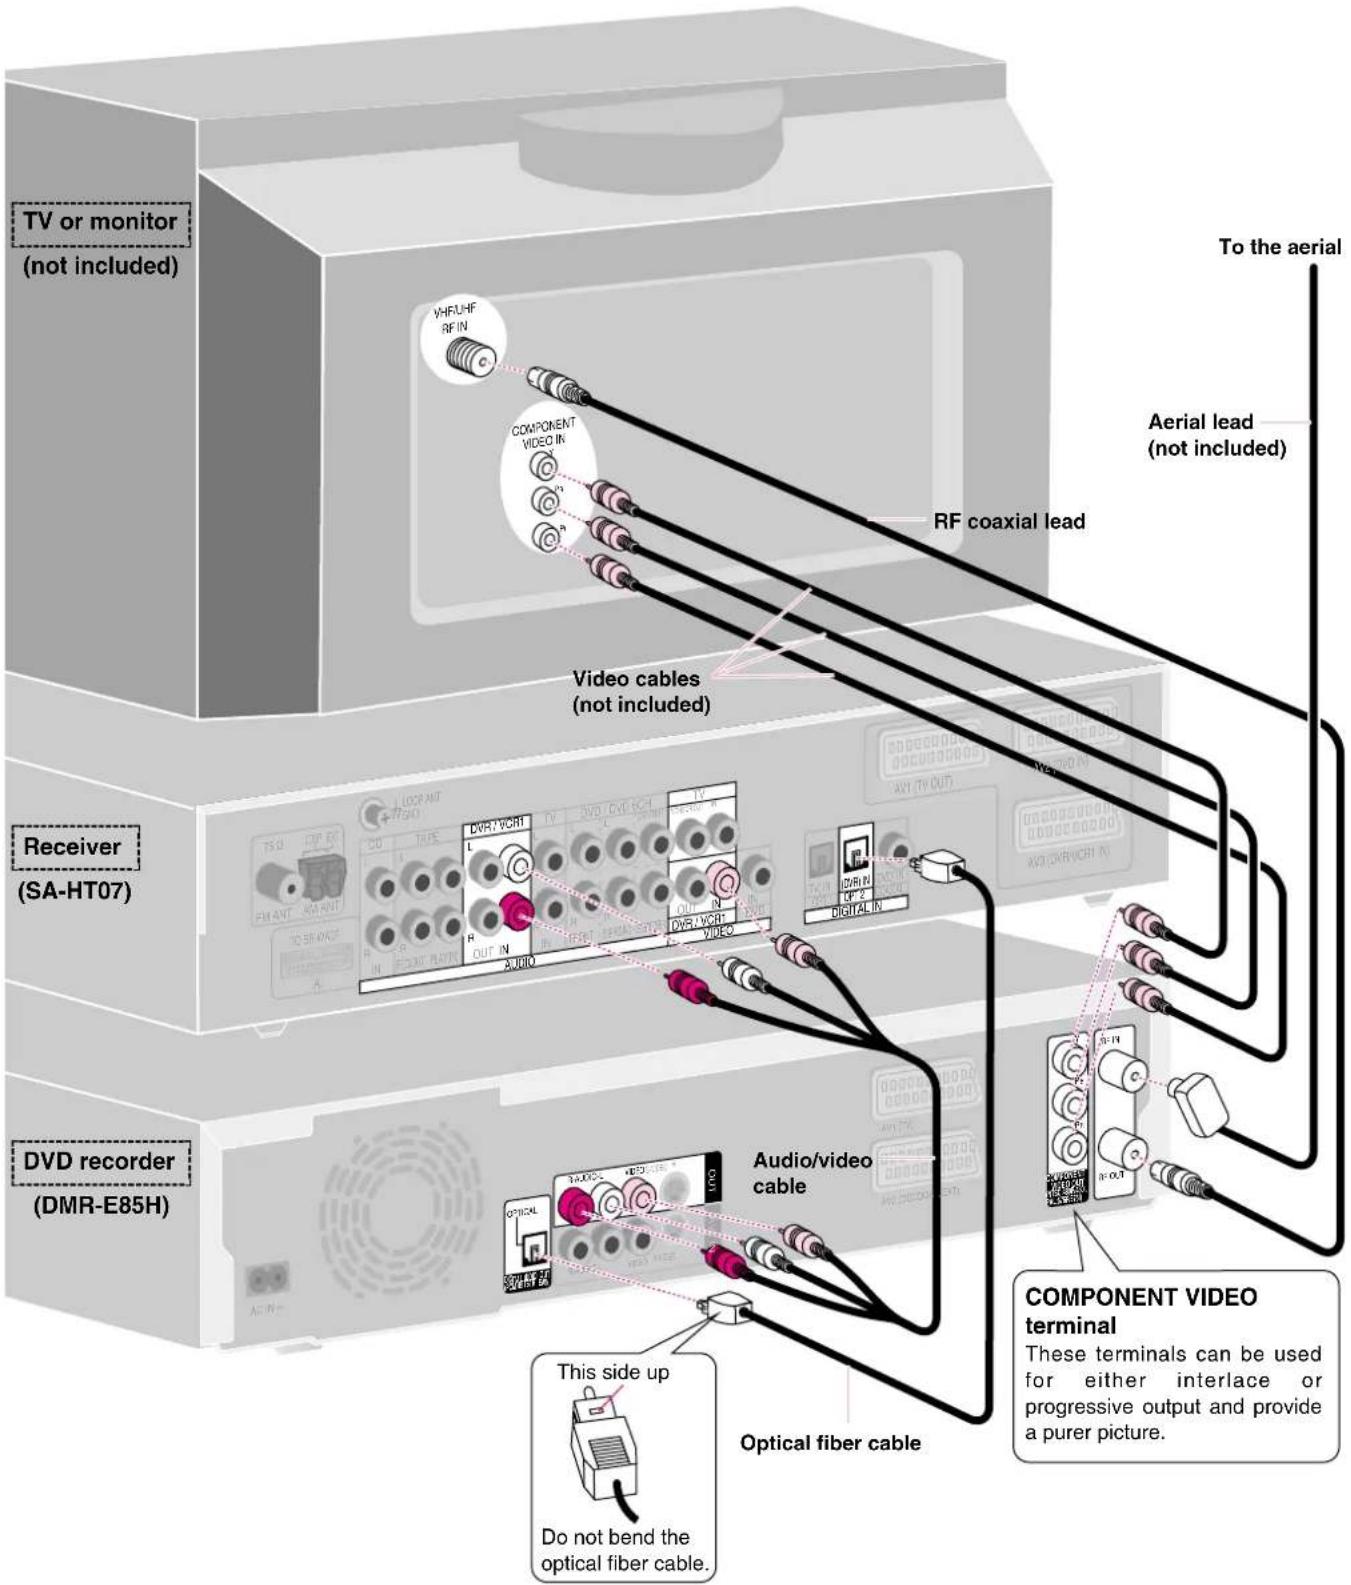
Connect the receiver, DVD recorder, and TV or monitor
Choose the connection that suits your system.
A Basic connection to a TV (monitor) with a VIDEO IN RCA terminal
B Connection to a TV (monitor) with an AV IN SCART terminal
C Connection to a TV (monitor) with COMPONENT VIDEO IN terminal
Actual connections depend on your television.
Refer to the connection explanations in the Operating Instructions for the television, DVD recorder (DMR-E85H or DMR-E55), and receiver (SC-HT07/SC-HT05).

Basic connection to a TV (monitor) with a VIDEO IN RCA terminal
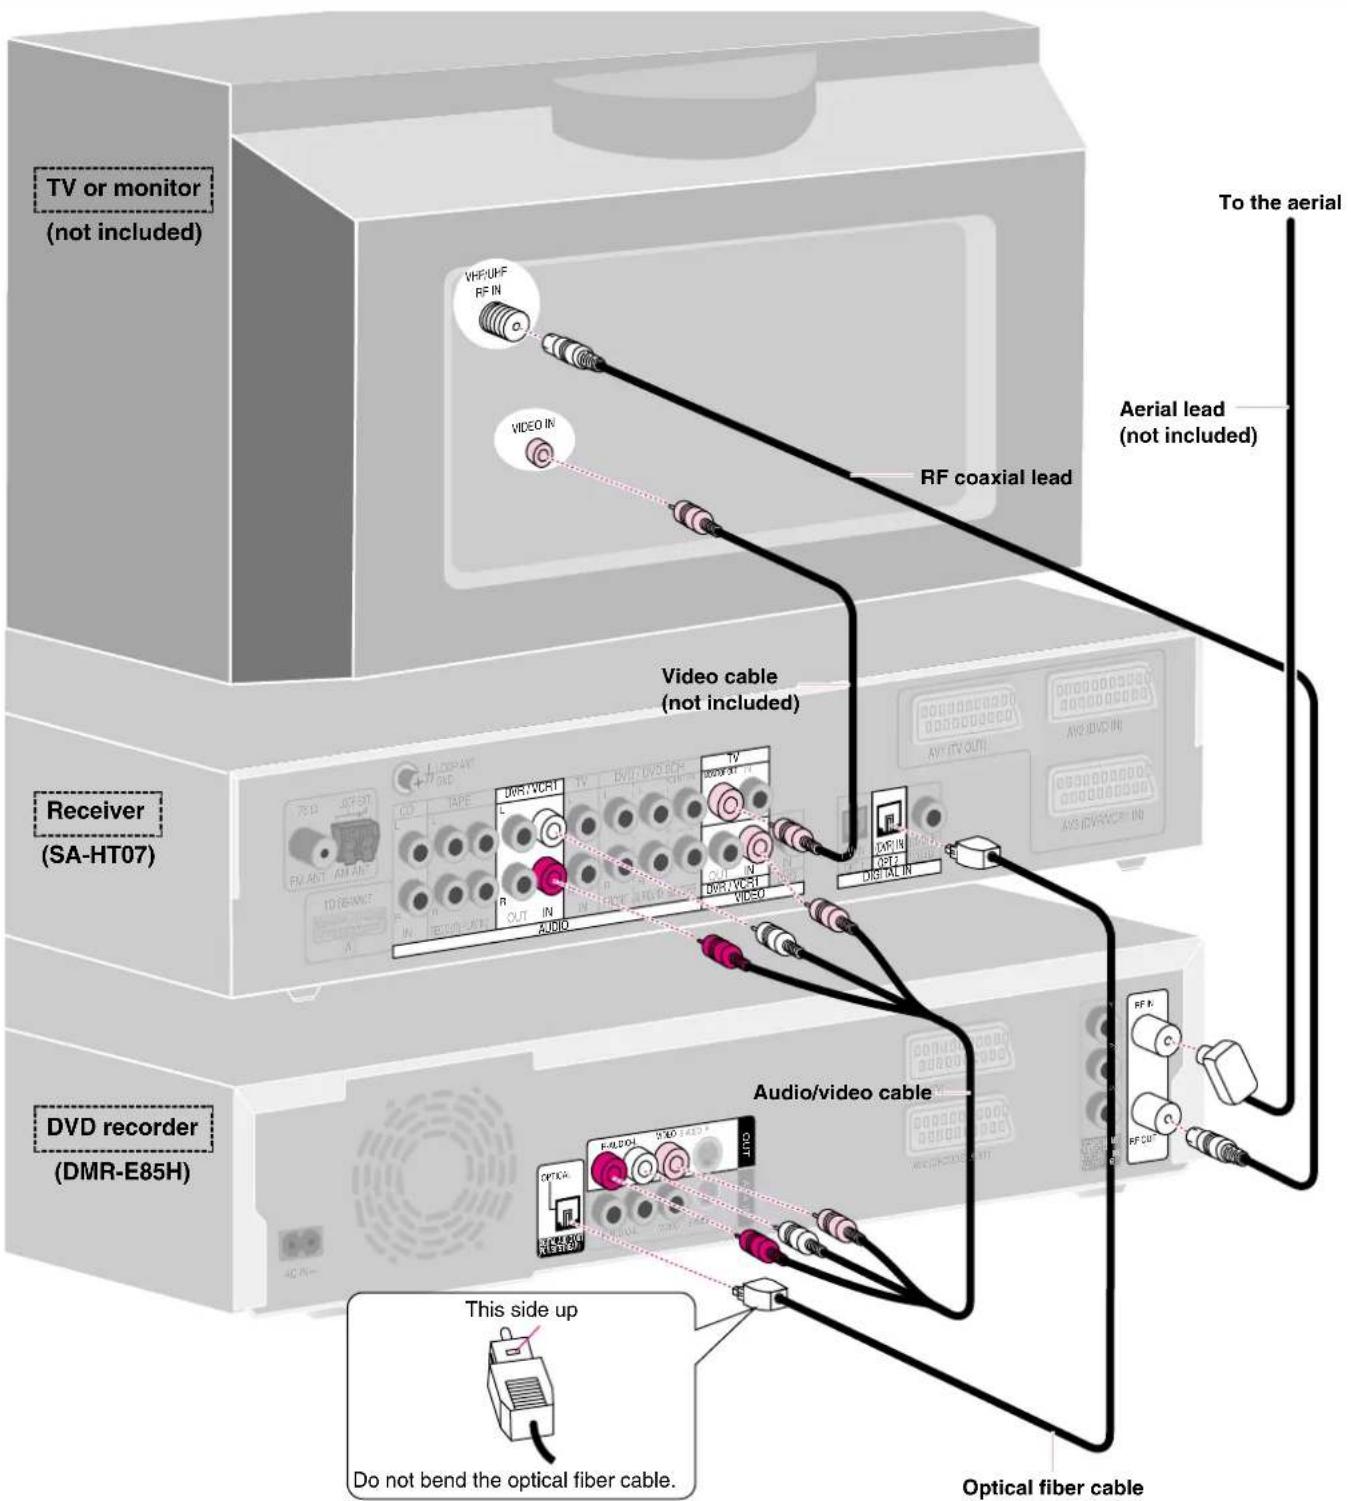

Optical fiber cable
(DVD recorder)

RF coaxial lead

21-pin Scart lead (not included)
B Connection to a TV (monitor) with an AV IN SCART terminal
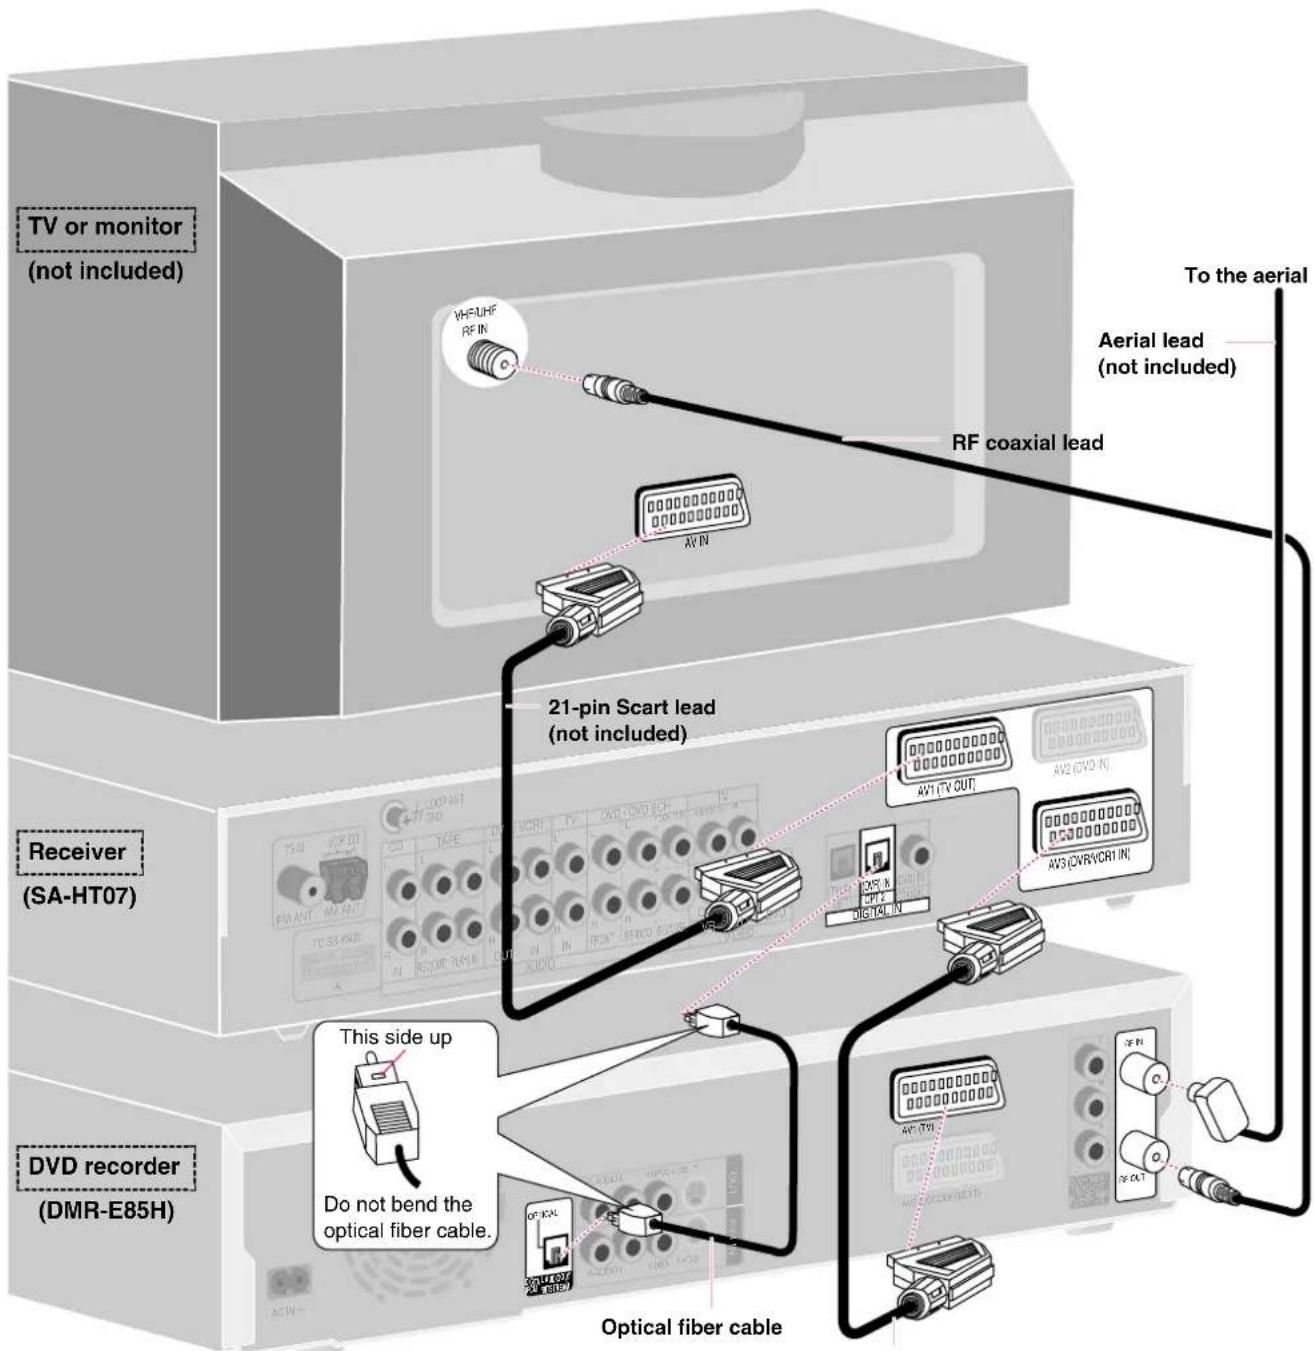
21-pin Scart lead (not included)
Settings
If you make these connections, change the settings on the receiver and DVD recorder as follows.
Receiver
Set AV OUTPUT to "VCR" and "SCART" (→ page 22 in the Operating Instructions for SC-HT07/SC-HT05).
DVD recorder
To output in RGB select "RGB (without component)" from "AV1 Output" in the SETUP menu (→ page 43 in the DMR-E85H Operating Instructions for the United Kingdom, or page 41 for Continental Europe. Page 41 in the DMR-E55 Operating Instructions for the United Kingdom or page 39 for Continental Europe).
Step 4
☐ Optical fiber cable

(DVD r Audio/video cable

RF coaxial lead Video cables

(not included)
(1) (1) (1) (3)
Connect the receiver, DVD recorder, and TV or monitor

Connection to a TV (monitor) with COMPONENT VIDEO IN terminal
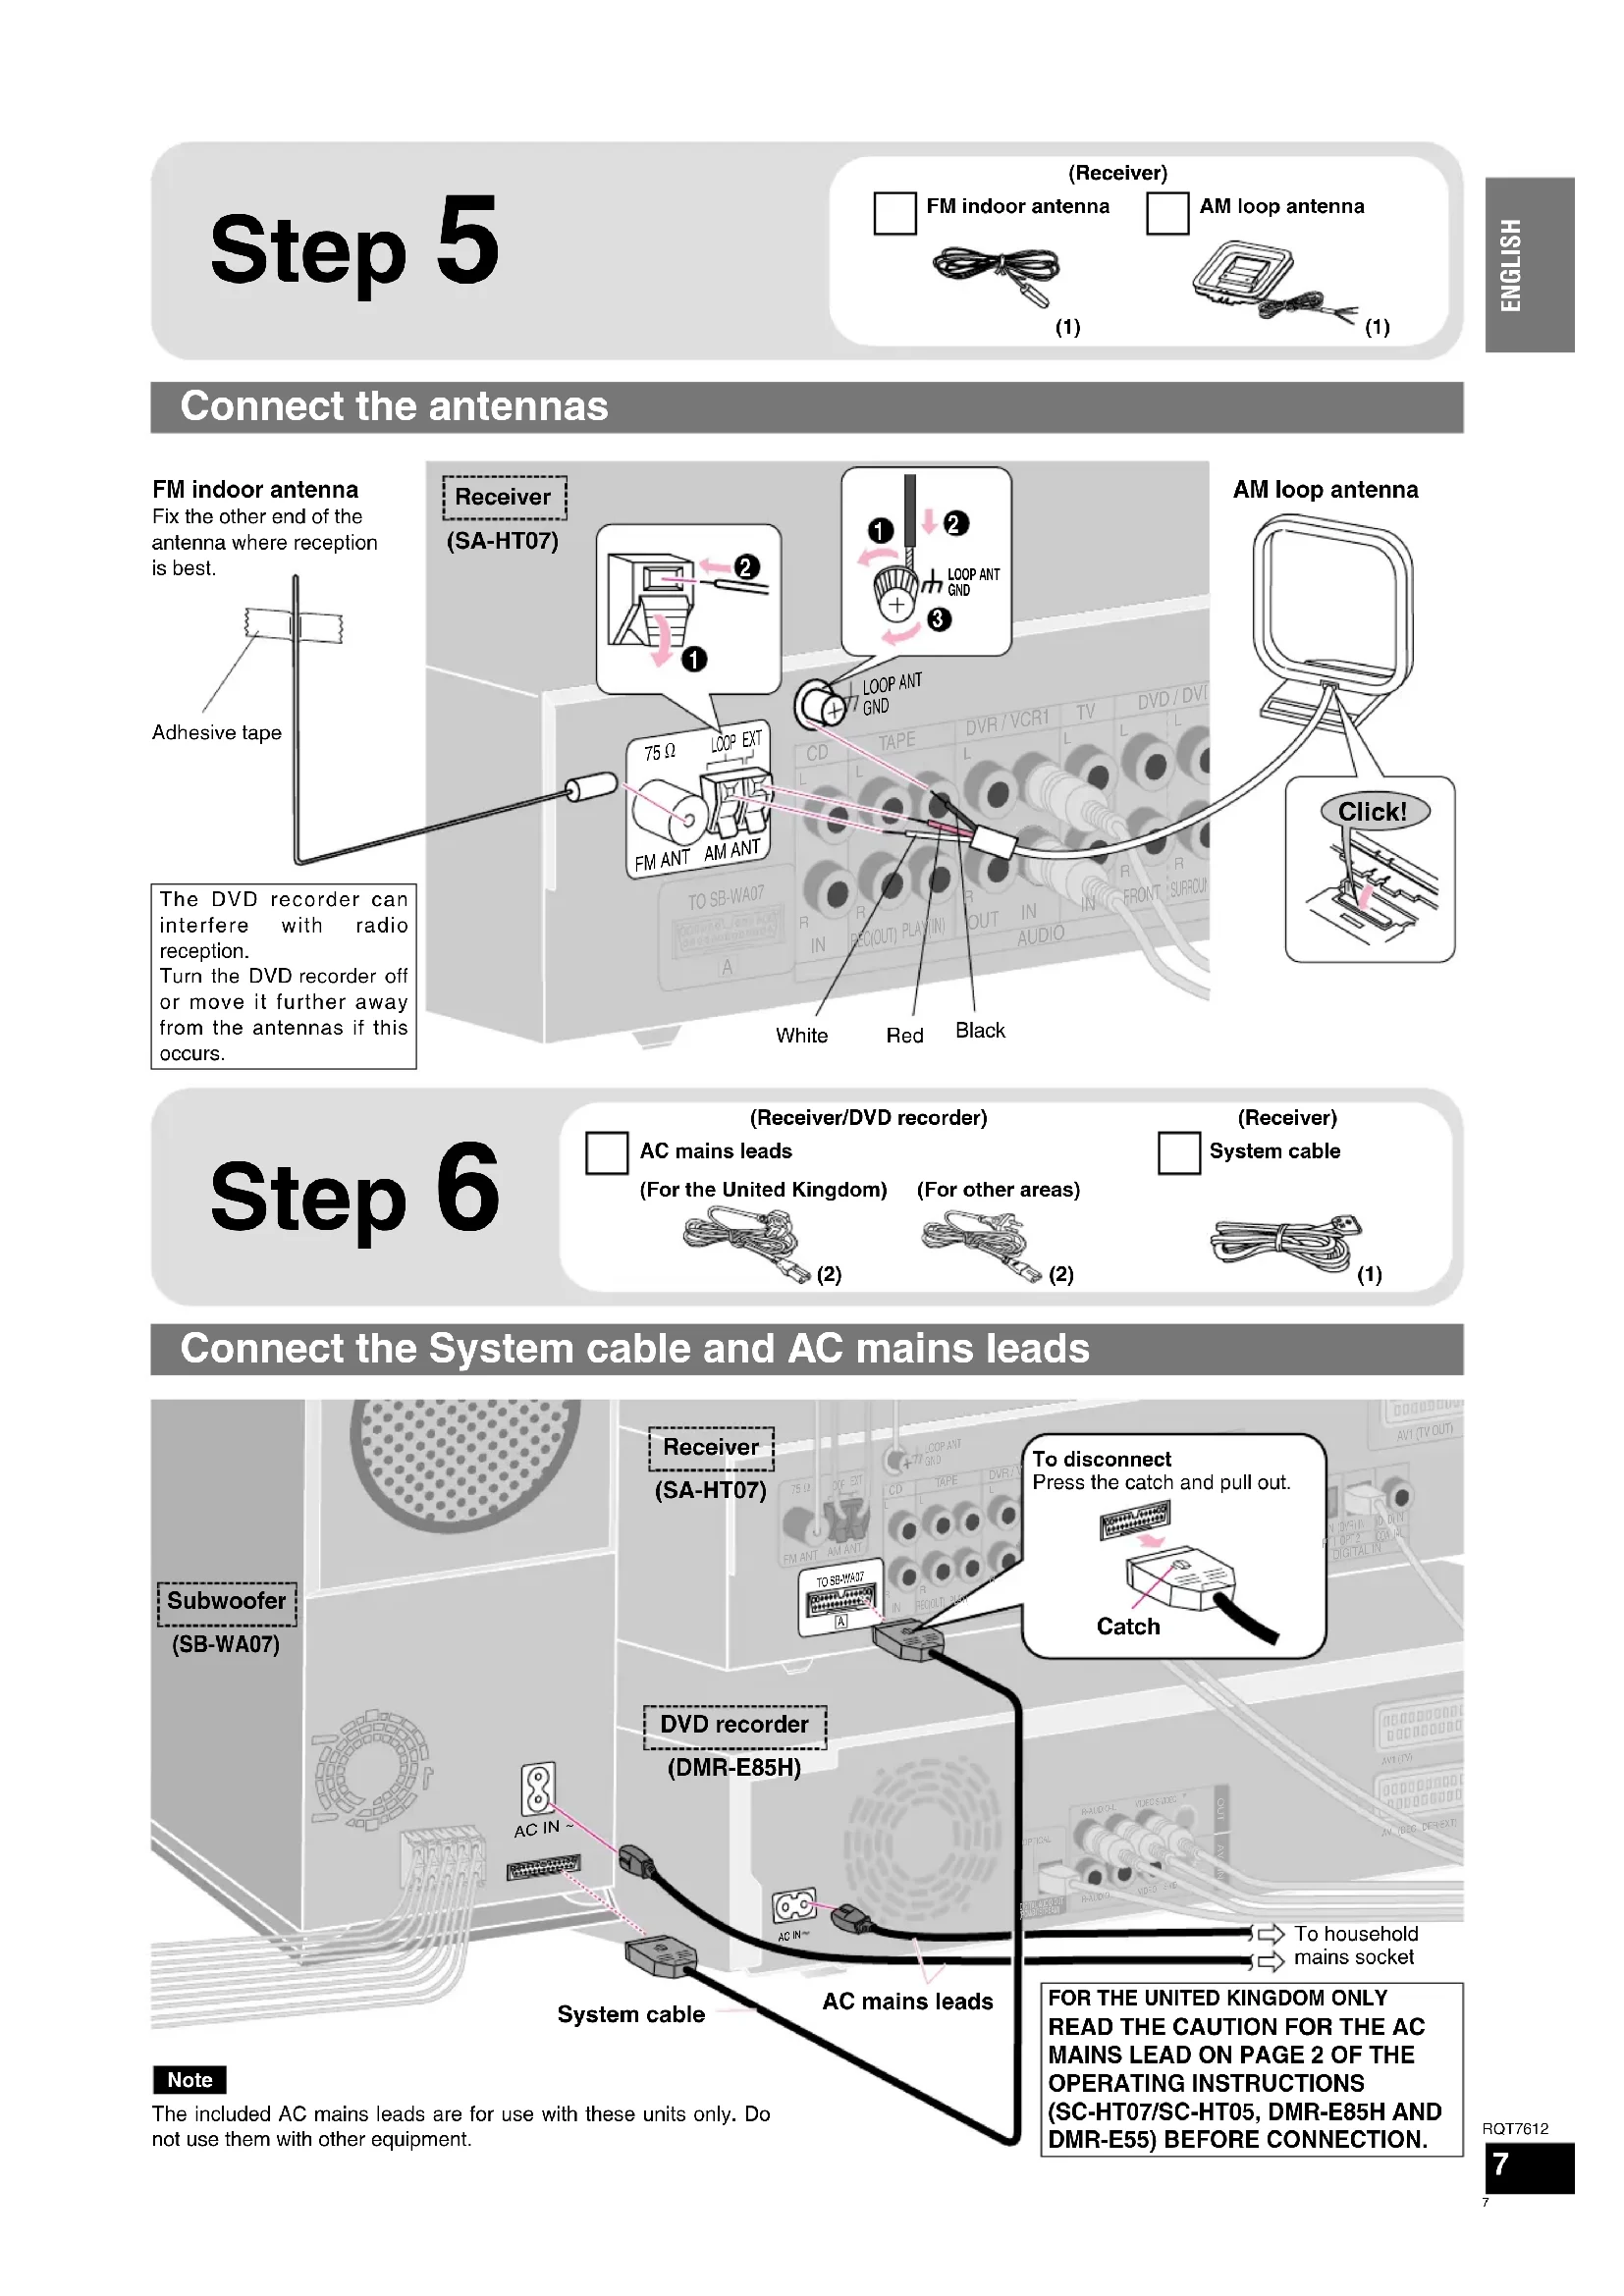
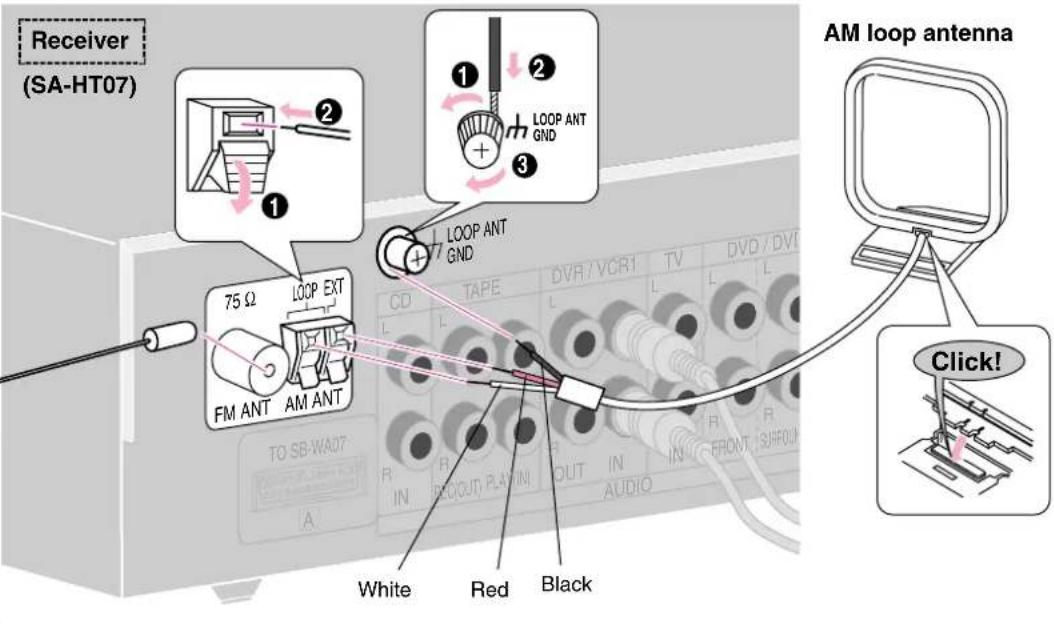
Step 5
(Receiver)

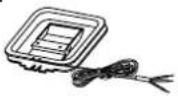
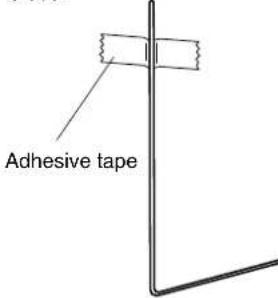
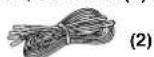
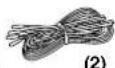
FM indoor antenna

(1)

AM loop antenna
(1)
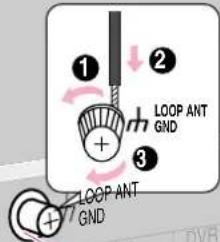
Connect the antennas
FM indoor antenna
Fix the other end of the antenna where reception is best.
The DVD recorder can interfere with radio reception.
Turn the DVD recorder off or move it further away from the antennas if this occurs.
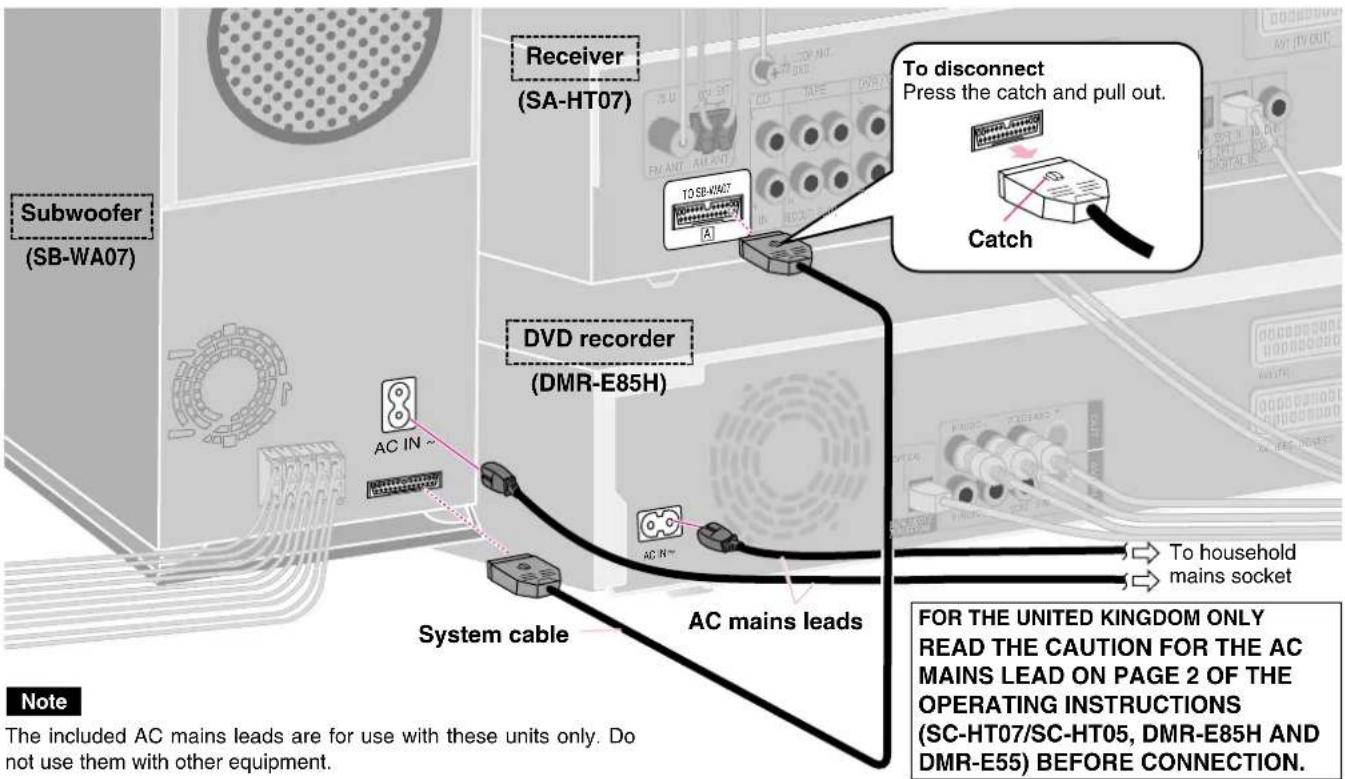
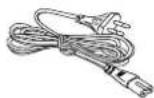
Step 6
(Receiver/DVD recorder)

AC mains leads
(For the United Kingdom)
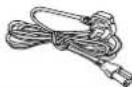
(2)
(For other areas)
(Receiver)
System cable
(1)
Connect the System cable and AC mains leads
Step 7
For the United Kingdom only
Channel reception settings
Preset Download (Setup with Q Link functions)
When connecting to a television that has the Q Link function (→Operating Instructions, page 49 for DMR-E85H, or page 46 for DMR-E55) with a fully wired 21-pin Scart lead (→page 5).
You can download the tuning positions from the television. DVD recorder's Auto Clock Setting function synchronizes the time when the TV channel that is broadcasting time and date information is tuned.
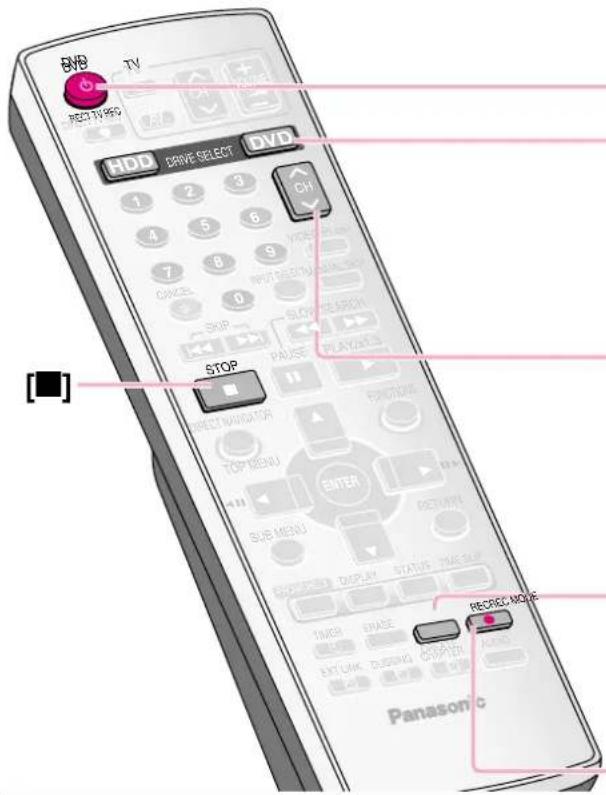
DMR-E85H Remote control
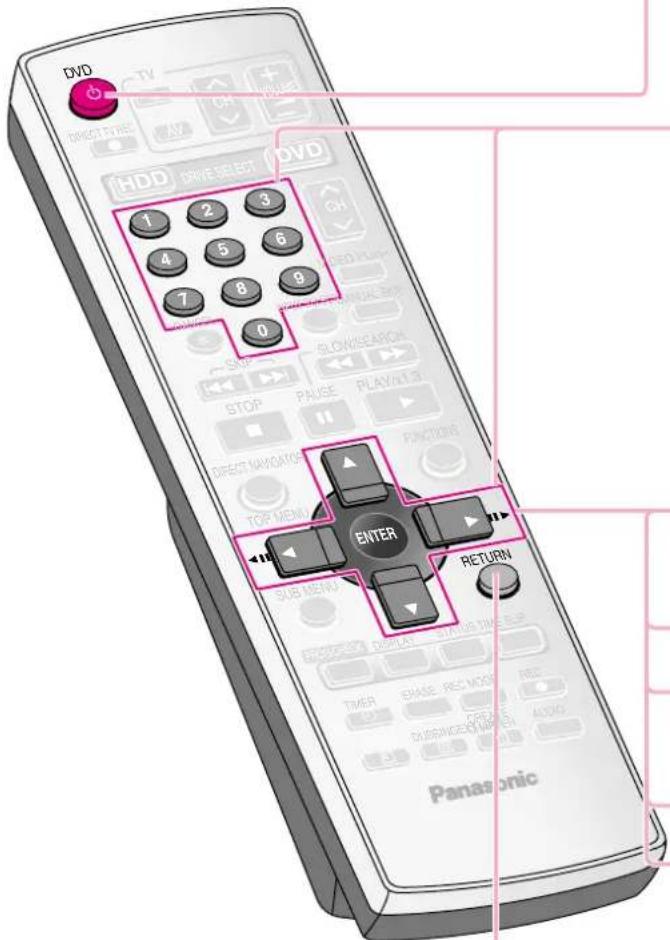
1 Turn on the television and select the appropriate AV input to suit the DVD recorder connections.
2 Press [播放 DVD] to turn the DVD recorder on.

Downloading from the television starts.
3 When downloading has completed, the Owner ID settings screen appears.
Press [▶] and press the numbered buttons to enter a 4-digit PIN number.
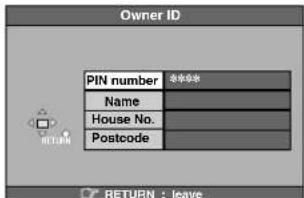
Make a note of the PIN number (don't forget), as it is not possible to return to the factory preset.
4 Press [ENTER] twice to store the PIN number.
The cursor moves to "Name".
5 Press [▶].
6 Press [▲, ▼] to select a letter and then press [▶].
Repeat this to enter the name.
7 Press [ENTER] to store the name.
8 Press [▼] and [▶], and then repeat steps 6, 7 to enter and store "House No." and "Postcode".
9 Press [RETURN].
The Owner ID settings screen disappears.
To stop partway
Press [RETURN].
■If the clock setting menu appears
Set the clock manually (→ Operating Instructions, page 46 for DMR-E85H, or page 44 for DMR-E55).
■If there is interference or a very poor picture appears on the TV screen
Refer to "Removing Interference" on the page 13 of the DMR-E85H or DMR-E55 Operating Instructions, and perform steps 1, 2 and 4 to stop the RF output. In step 2, press [0] to select “--”.
Auto-Setup (Setup without Q Link functions)
When connecting to a television that does not have the Q Link function (→Operating Instructions, page 49 for DMR-E85H, or page 46 for DMR-E55) with the AUDIO/VIDEO OUT (→page 4) or COMPONENT VIDEO OUT terminal (→page 6).
The DVD recorder's Auto-Setup function automatically tunes all available TV stations and synchronizes the time when the TV channel that is broadcasting time and date information is tuned.
DMR-E85H Remote control
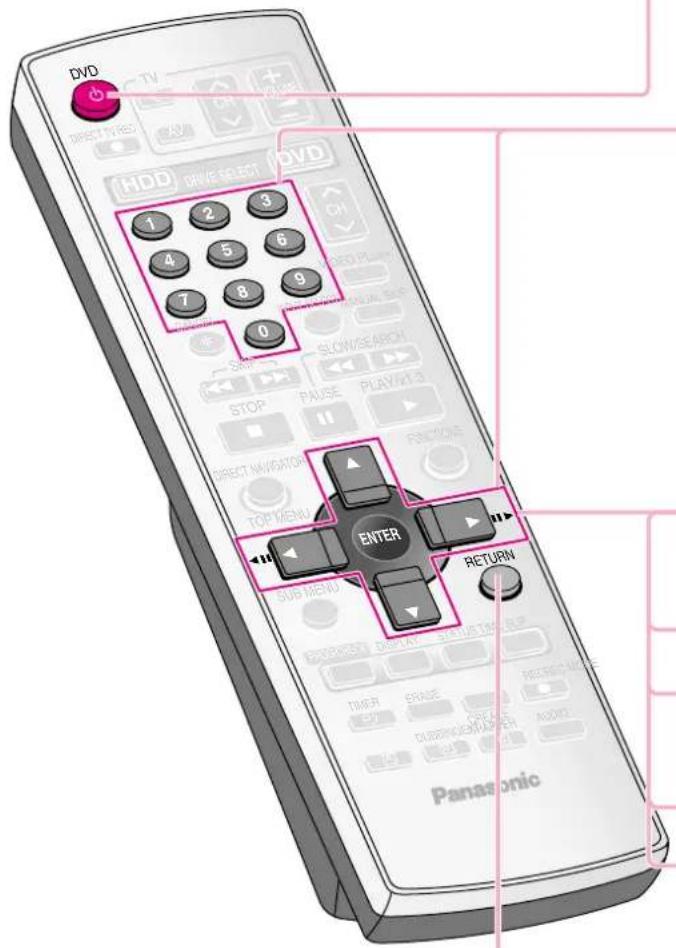
1 Turn on the television and select the appropriate AV input to suit the DVD recorder connections.
2 Press [∅ DVD] to turn the DVD recorder on.
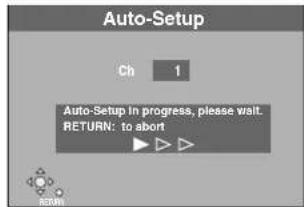
Auto-Setup starts. This takes about 5 minutes.
(When connecting to a television with RF socket only) Set the new RF output channel to TV (refer to the instructions for your TV).
Select an unused channel pre-set on your TV and tune it to the RF output channel number shown on the unit's display. (When the Auto-Setup screen does not appear clearly even after performing the above operations, re-tune the channel until the Auto-Setup screen becomes clear.)
3 When Auto-Setup has completed, the Owner ID settings screen appears.
Press [▶] and press the numbered buttons to enter a 4-digit PIN number.
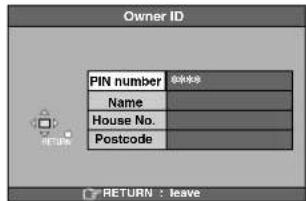
Make a note of the PIN number (don't forget), as it is not possible to return to the factory preset.
4 Press [ENTER] twice to store the PIN number.
The cursor moves to "Name".
5 Press [▶].
6 Press [▲, ▼] to select a letter and then press [▶].
Repeat this to enter the name.
7 Press [ENTER] to store the name.
8 Press [▼] and [▶], and then repeat steps 6, 7 to enter and store "House No." and "Postcode".
9 Press [RETURN].
The Owner ID settings screen disappears.
Check installation by recording from the TV
(SC-HT37R only) DVD-RF
- It is not possible to record continuously from one side of a double sided disc to the other. You will need to eject the disc and turn it over.
- It is not possible to record CPRM (→ page 48 in the DMR-E85H Operating Instructions for the United Kingdom, or page 46 for Continental Europe. Page 45 in the DMR-E55 Operating Instructions for the United Kingdom or page 43 for Continental Europe) protected material onto DVD-R or 2.8 GB DVD-RAM discs.
Preparation
- Turn on the television and select the appropriate video input on the television to suit the connections for the receiver and DVD recorder.
For Continental Europe and other areas
- First, do the channel reception settings (→ pages 10 and 11 in the Operating Instructions for DMR-E85H or DMR-E55).
DMR-E85H Remote control
To stop recording
Press [■].
Recorded as 1 title until the position where stopped.
HDD (DMR-E85H only)
When continuously recording for long durations, titles are automatically divided every 8 hours.
DVD-R
It takes about 30 seconds for the unit to complete recording management information after recording finished.
When you finish recording
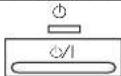
Be sure to reduce the volume and press [∅/l] to switch the DVD recorder and receiver to standby.
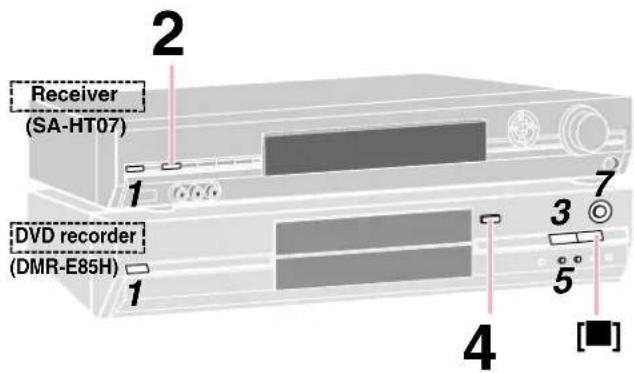
1 Switch on.

ReceiverD
d/1

2 Select "DVR/VCR1 (DVR/VCR)".

SA-HT07

3 DMR-E85H only
Select [HDD] or [DVD] as the recording drive.


The HDD or DVD indicator lights up on the DVD recorder.
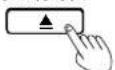
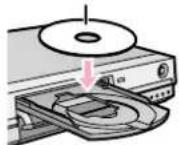
4 If you selected the DVD drive (DMR-E85H only)
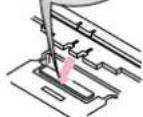
^T Open the tray and insert a disc.
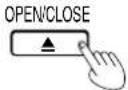
Press [▲OPEN/CLOSE] again to close the tray.
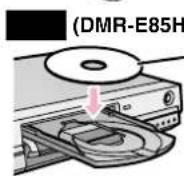
only) DVD-R
ert label-up.
Insert with the arrow facing in.
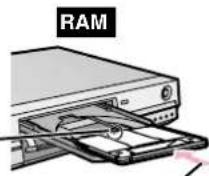
Insert fully so it clicks into place.
DMR-E85H only
If you put a disc in while the HDD is selected, the DVD indicator on the DVD recorder will flash while the DVD recorder reads the disc.
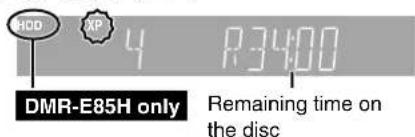
5 Select the channel with [∧∨CH].
![PANASONIC SCHT37R - Select the channel with [∧∨CH]. - 1](/content/2026/02/373856/images/bc2be386030c5a88458a32e2d9e599b941bdef5a213bad5cd8a816ddcf28e2e3.jpg)
DMR-E85H only
![HDD SF 4 P3400 To select with the numbered buttons: e.g., 5: [0] → [5] 15: [1] → [5]](/content/2026/02/373856/images/934a3db1cd63ee47611ee6eca286f5f204fc707451809ec3b2c904c23436dff8.jpg)
6 Select "REC MODE".

7 Start recording.
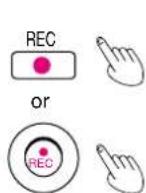
DMR-E85H
Recording will take place on free space on the HDD (DMR-E85H only) or on the disc. Existing data will not be overwritten.
You cannot change the channel or recording mode during recording.
Check installation by playing a DVD
Preparation
Turn on the television and select the appropriate video input on the television to suit the connections for the receiver and DVD cecorder.
SC-HT37R only
When playing back a title recorded on the HDD, ensure that you match the "TV System" setting to the title (→ page 45 in the DMR-E85H Operating Instructions for the United Kingdom, or page 43 for Continental Europe).
1 Switch on.
![Receiver D recorder (DVR/VCR)". INPUT SELECTOR SA-HT07 DVR/VCR SA-HT05 DVR/VCR Select [HDD] or [DVD] as the playback drive. DRIVE SELECT The HDD or DVD indicator lights up on the DVD recorder. Receiver (SA-HT07) DVD recorder (DMR-E85H)](/content/2026/02/373856/images/867ea53b315d8c26b20c299593ca075d31c18ef78a6423862fd788ce940f73de.jpg)
4 If you selected the DVD drive (DMR-E85H only)
Open the tray and insert a disc.
OPEN/CLOSE
Press [▲OPEN/CLOSE]
again to close the tray.
HDD (DMR-E85H only)
DVD-R
Insert label-up.
RAM
Insert with the arrow facing in.
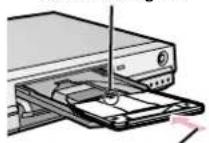
Insert fully so it clicks into place.
DMR-E85H only
If you put a disc in while the HDD is selected, the DVD indicator flashes while the disc is read.
5 Start playing.
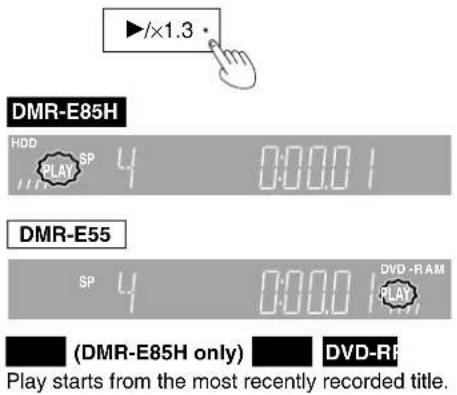
6 Adjust the volume.

To stop play
Press [■].
When you finish listening
- Be sure to reduce the volume and press [∅/l] to switch the DVD recorder and receiver to standby.
- When left unused for long periods of time, the system should be unplugged from the household mains socket.
Nur SC-HT37R/SC-HT37R soltanto
natural_image
Simple 3D diagram of a block with two vertical connectors and a horizontal line, no text or symbols present.Schritt 6
Passo 6
(Receiver/Ricevitore)/(DVD-Recorder/Registratore DVD)

Nur SC-HT37R/SC-HT37R soltanto
(1) (10 m, surround (G) (D)) (10 m, Surround (L) (R))
Fixez les collants aux câbles d'enceinte/Bevestig de stickers aan de luidsprekerkabels
Étape 6 Stap 6
ex. 5: [0] → [5] 15: [1] → [5]
The Ground Truth image displays a single, solid horizontal line. According to Rule 2 (UNDERSCORE & LINE RULES), this is a stylistic or background line, not a placeholder underscore. Therefore, the OCR result must ignore it. The provided OCR content is "\_\_\_\_", which consists of four underscores. This is an incorrect interpretation of the line as a placeholder, violating the rule that stylistic lines must be ignored. The OCR has hallucinated underscores where none should exist based on the GT's visual context. Hence, the OCR result is inconsistent with the Ground Truth.
DVD-RF
(10 m, Surround (V) (H)) (10 m, Surround (V) (H))

(2)
natural_image
Two black electrical power plugs connected in a line, with two outlets above (no text or symbols visible)Netledningerne Nätkablarna
Receiver/Receiver
0/1
2 Vælg "DVR/VCR1 (DVR/VCR)".Välj "DVR/VCR1 (DVR/VCR)". SA-HT07


SA-HT05

Gælder kun DMR-E85H/Endast DMR-E85H
Vælg [HDD] eller [DVD] som optagedrev. Välj [HDD] eller [DVD] som inspelningsenhet.


eller
eller
DRIVE SELECT

natural_image
Simple 3D diagram of two vertical objects mounted on a rectangular block, connected by lines (no text or symbols)(10 m, ambiental (I) (D))
(No text)
(10 m, surround (L), (P))
(10 m, prostorové (L) (P))
Blanco Biały Bílá
natural_image
Simple line drawing of a computer monitor with a stand and cable (no text or symbols)Haga clic! Klik! Klik!
Paso 6/Punkt 6/Krok 6
(Receptor/Odbiornik/Přijímač)/(Grabadora DVD/Nagrywarka DVD/DVD rekordér)

Cables de alimentación de CA Przewody zasilania Kabel sitového prívodu

Environment friendly printed on chlorine free bleached paper.

- For the United Kingdom and Republic of Ireland
- Sales and Support Information
- SC-HT37R only
- Speaker assembly (→ page 4 to 5, SC-HT07/SC-HT05 Operating Instructions)
- Step 1
- Placement
- Step 2
- Attach the stickers to the speaker cables
- Connect the speakers
- Step 4
- Connect the receiver, DVD recorder, and TV or monitor
- Choose the connection that suits your system.
- Settings
- Connection to a TV (monitor) with COMPONENT VIDEO IN terminal
- Step 5
- Connect the antennas
- Step 6
- Connect the System cable and AC mains leads
- Step 7
- For the United Kingdom only
- Channel reception settings
- Preset Download (Setup with Q Link functions)
- To stop partway
- Auto-Setup (Setup without Q Link functions)
- Check installation by recording from the TV
- (SC-HT37R only) DVD-RF
- Preparation
- For Continental Europe and other areas
- To stop recording
- HDD (DMR-E85H only)
- DVD-R
- When you finish recording
- Switch on.
- Select "DVR/VCR1 (DVR/VCR)".
- DMR-E85H only
- If you selected the DVD drive (DMR-E85H only)
- DMR-E85H only
- Select the channel with [∧∨CH].
- Select "REC MODE".
- Start recording.
- Check installation by playing a DVD
- Open the tray and insert a disc.
- To stop play
- When you finish listening
- Nur SC-HT37R/SC-HT37R soltanto
- Schritt 6
- Passo 6
- Fixez les collants aux câbles d'enceinte/Bevestig de stickers aan de luidsprekerkabels
- Étape 6 Stap 6
- The Ground Truth image displays a single, solid horizontal line. According to Rule 2 (UNDERSCORE & LINE RULES), this is a stylistic or background line, not a placeholder underscore. Therefore, the OCR result must ignore it. The provided OCR content is "\_\_\_\_", which consists of four underscores. This is an incorrect interpretation of the line as a placeholder, violating the rule that stylistic lines must be ignored. The OCR has hallucinated underscores where none should exist based on the GT's visual context. Hence, the OCR result is inconsistent with the Ground Truth.
- DVD-RF
- Vælg "DVR/VCR1 (DVR/VCR)".Välj "DVR/VCR1 (DVR/VCR)". SA-HT07
- Gælder kun DMR-E85H/Endast DMR-E85H
- Paso 6/Punkt 6/Krok 6
Brand : PANASONIC
Model : SCHT37R
Category : Home Theater System