
SC-BTT268 - Home Theater System PANASONIC - Free user manual and instructions
Find the device manual for free SC-BTT268 PANASONIC in PDF.
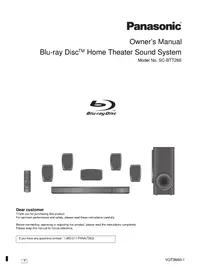


| Product Type | Home Theater System |
| Model Number | SC-BTT268 |
| Brand | Panasonic |
| Main Unit Dimensions (W x H x D) | 430 x 62 x 300 mm |
| Main Unit Weight | 3.5 kg |
| Speaker System | 5.1 channel surround |
| Front Speaker Dimensions (each) | 260 x 1000 x 260 mm |
| Front Speaker Weight (each) | 3.0 kg |
| Center Speaker Dimensions | 260 x 100 x 100 mm |
| Center Speaker Weight | 1.2 kg |
| Subwoofer Dimensions | 180 x 400 x 360 mm |
| Subwoofer Weight | 4.5 kg |
| Power Consumption | 150 W |
| Standby Power Consumption | 0.5 W |
| Power Supply | AC 220-240 V, 50/60 Hz |
| Disc Playback | Blu-ray, DVD, CD |
| Audio Formats Supported | Dolby Digital, DTS, MP3, WMA |
| Video Outputs | HDMI, Component, Composite |
| Audio Outputs | Optical, Analog Audio |
| Radio Tuner | FM with RDS |
| Connectivity | USB, Ethernet, Wi-Fi (optional) |
| Cleaning Instructions | Wipe with a soft, dry cloth. Do not use solvents. |
| Safety Notes | Keep ventilation slots uncovered. Do not expose to moisture. |
| Spare Parts Availability | Contact Panasonic support for replacement parts. |
| Repairability Index | 7.2 / 10 |
Frequently Asked Questions - SC-BTT268 PANASONIC
User questions about SC-BTT268 PANASONIC
0 question about this device. Answer the ones you know or ask your own.
Ask a new question about this device
Download the instructions for your Home Theater System in PDF format for free! Find your manual SC-BTT268 - PANASONIC and take your electronic device back in hand. On this page are published all the documents necessary for the use of your device. SC-BTT268 by PANASONIC.
USER MANUAL SC-BTT268 PANASONIC
Dear customer,
Thank you for purchasing this product.
For optimum performance and safety, please read these instructions carefully.
Before connecting, operating, or adjusting this product, please read the instructions completely.
Please keep this manual for future reference.
If you have any questions, contact: 1-800-211-PANA (7262)
FCC Note:
This equipment has been tested and found to comply with the limits for a Class B digital device, pursuant to Part 15 of the FCC Rules.
These limits are designed to provide reasonable protection against harmful interference in a residential installation. This equipment generates, uses, and can radiate radio frequency energy and, if not installed and used in accordance with the instructions, may cause harmful interference to radio communications.
However, there is no guarantee that interference will not occur in a particular installation. If this equipment does cause harmful interference to radio or television reception, which can be determined by turning the equipment off and on, the user is encouraged to try to correct the interference by one or more of the following measures:
• Reorient or relocate the receiving antenna. • Increase the separation between the equipment and receiver. • Connect the equipment into an outlet on a circuit different from that to which the receiver is connected. • Consult the dealer or an experienced radio/TV technician for help.
FCC Caution: To assure continued compliance, follow the attached installation instructions and use only shielded interface cables when connecting to peripheral devices. Any changes or modifications not expressly approved by the party responsible for compliance could void the user's authority to operate this equipment.
This device complies with Part 15 of the FCC Rules.
Operation is subject to the following two conditions:
(1) This device may not cause harmful interference, and (2) this device must accept any interference received, including interference that may cause undesired operation.
Responsible Party:
Panasonic Corporation of North America
One Panasonic Way
Secaucus, NJ 07094
Support Contact:
Panasonic Consumer Electronics Company
Telephone No.: 1-800-211-PANA (7262)
WARNING
Unit
To reduce the risk of fire, electric shock or product damage,
- Do not expose this unit to rain, moisture, dripping or splashing.
- Do not place objects filled with liquids, such as vases, on this unit. – Use only the recommended accessories.
- Do not remove covers.
- Do not repair this unit by yourself. Refer servicing to qualified service personnel.
CAUTION
Unit
- This unit utilizes a laser. Use of controls or adjustments or performance of procedures other than those specified herein may result in hazardous radiation exposure.
- Do not place sources of naked flames, such as lighted candles, on this unit.
Placement
To reduce the risk of fire, electric shock or product damage,
- Do not install or place this unit in a bookcase, built-in cabinet or in another confined space. Ensure this unit is well ventilated.
- Do not obstruct this unit's ventilation openings with newspapers, tablecloths, curtains, and similar items.
IMPORTANT SAFETY INSTRUCTIONS
Read these operating instructions carefully before using the unit. Follow the safety instructions on the unit and the applicable safety instructions listed below. Keep these operating instructions handy for future reference.
1 Read these instructions. 2 Keep these instructions. 3 Heed all warnings. 4 Follow all instructions. 5 Do not use this apparatus near water. 6 Clean only with dry cloth. 7 Do not block any ventilation openings. Install in accordance with the manufacturer's instructions. 8 Do not install near any heat sources such as radiators, heat registers, stoves, or other apparatus (including amplifiers) that produce heat. 9 Do not defeat the safety purpose of the polarized or grounding-type plug. A polarized plug has two blades with one wider than the other. A grounding-type plug has two blades and a third grounding prong. The wide blade or the third prong are provided for your safety. If the provided plug does not fit into your outlet, consult an electrician for replacement of the obsolete outlet. 10 Protect the power cord from being walked on or pinched particularly at plugs, convenience receptacles, and the point where they exit from the apparatus. 11 Only use attachments/accessories specified by the manufacturer. 12 Use only with the cart, stand, tripod, bracket, or table specified by the manufacturer, or sold with the apparatus. When a cart is used, use caution when moving the cart/apparatus combination to avoid injury from tip-over. 13 Unplug this apparatus during lightning storms or when unused for long periods of time. 14 Refer all servicing to qualified service personnel. Servicing is required when the apparatus has been damaged in any way, such as power-supply cord or plug is damaged, liquid has been spilled or objects have fallen into the apparatus, the apparatus has been exposed to rain or moisture, does not operate normally, or has been dropped.

CAUTION
RISK OF ELECTRIC SHOCK DO NOT OPEN

CAUTION: TO REDUCE THE RISK OF ELECTRIC SHOCK, DO NOT REMOVE SCREWS. NO USER-SERVICEABLE PARTS INSIDE. REFER SERVICING TO QUALIFIED SERVICE PERSONNEL.

The lightning flash with arrowhead symbol, within an equilateral triangle, is intended to alert the user to the presence of uninsulated “dangerous voltage” within the product’s enclosure that may be of sufficient magnitude to constitute a risk of electric shock to persons.

The exclamation point within an equilateral triangle is intended to alert the user to the presence of important operating and maintenance (servicing) instructions in the literature accompanying the appliance.

(Inside of product)
-If you see this symbol-
Information on Disposal in other Countries outside the European Union

This symbol is only valid in the European Union.
If you wish to discard this product, please contact your local authorities or dealer and ask for the correct method of disposal.
Table of contents
IMPORTANT SAFETY INSTRUCTIONS...... 3
Getting started
Accessory.... 5
Control reference guide.... 6
- Remote control.... 6
- Main unit (Front).... 7
1
•POWER-SAVING FEATURES.... 7
- Main unit (Rear).... 7
Playable discs/Cards.... 8
Unit and media care.... 9
Using the remote control.... 9
STEP 1: Preparing the speakers.... 10
•Preparing cables and making connection .... 10
STEP 2 : Positioning .... 10
STEP 3: Connections.... 11
- Speaker cable connection.... 11
•Radio antenna connection 11
- Connection to a TV 12
- Connection with Set Top Box, etc.... 14
- Connection to a broadband network 15
STEP 4: AC power supply cord connection ... 15
STEP 5: Easy setup.... 16
•Network Easy Setting.... 17
•Reprogramming the remote control.... 17
•Firmware updates.... 17
Inserting or removing media.... 18
HOME menu 18
Enjoying sound effects from all speakers..... 19
-Enjoying surround sound effects.... 19
Playback
Playing video contents 20
- Other operations during play.... 20
- Useful functions.... 21
-Enjoying BD-Live or picture-in-picture in BD-Video...... 21
Enjoying 3D video 22
-3D settings 22
-Useful functions.... 22
Playing still pictures.... 23
-Useful functions.... 23
Playing music.... 24
- Playing a track in another folder.... 24
Radio
Listening to the Radio.... 24
- Presetting stations automatically 24
- Presetting stations manually.... 24
- Listening/confirming the preset channels 25
TV
Enjoying TV with unit's speakers.... 25
- Surround sound effects.... 25
•Sound modes.... 25
Linked operations with the TV
(VIERA Link™ "HDAVI Control™")...... 26
- Setting the audio link 26
- Easy control only with VIERA remote control 27
Other devices
Using the iPod®/iPhone® 27
• iPod/iPhone Connection 27
• iPod/iPhone Playback.... 28
Advanced operations
Enjoying VIERA CAST™ 29
Playback menu.... 30
Setup menu 31
- Speaker settings.... 35
Optional speaker settings
Speaker installation option 36
Reference
Troubleshooting guide.... 36
Messages 39
Supplemental information.... 40
Specifications 42
Limited Warranty 43
Index...... Back cover
Operations in this Owner's Manual are described mainly with the remote control, but you can perform the operations on the main unit if the controls are the same.
| System SC-BTT268 | ||
| Main unit SA-BTT268 | ||
| Speaker system Front speakers SB-HF270 | ||
| Center speaker SB-HC270 | ||
| Surround speakers SB-HS270 | ||
| Subwoofer SB-HW270 | ||
- Some accessories and external devices mentioned in this Owner's Manual that are not included with this product may not be on sale in certain regions.
- Please note that the actual controls and components, menu items, etc. of your Blu-ray Disc Home Theater Sound System may look somewhat different from those shown in the illustrations in this Owner's Manual.
Accessory
Check the supplied accessories before using this unit.
For accessories of speakers, refer to page 10.
□ 1 Remote control (N2QAYB000629) □ 2 Batteries for remote control □ 1 Sheet of speaker cable sticker ☐ 1 FM indoor antenna (RSAX0002)

☐ 1 AC power supply cord (K2CB2CB00021)

- Product numbers provided in this Owner's Manual correct as of December 2010. These may be subject to change.
- Do not use AC power supply cord with other equipment.
- To order accessories, refer to "Accessory Purchases (United States and Puerto Rico)" on page 43.
Control reference guide

Remote control
1 Turn the unit on and off
2 Select title numbers, etc./Enter numbers or characters
(→ 29)
3 Select the source (→ 18)
4 Basic playback control buttons (→ 20)
5 Select preset radio stations
6 Show status messages (→ 20)
7 Display the Home screen of VIERA CAST (→ 29)
8 Selection/OK, Frame-by-frame (→ 20)
9 Show sub menu (→ 21)
10 These buttons are used when;
- Operating a BD-Video disc that includes Java™ applications (BD-J).
- Operating contents of VIERA CAST (→ 29)
11 Set the sound mode (→ 19)/Select speaker channel (→ 19)
12 Select surround sound effects (→ 19)/Set the sleep timer
① Press and hold [-SLEEP].
② While "SLEEP ××" is displayed, press [-SLEEP] several times to select the time (in minutes).
- Timer selection is up to 120 minutes.
- Select "OFF" when canceling the setting.
• To confirm the remaining time, press and hold the button again.
13 TV operation buttons
[⏻]: Turn the television on and off
[AV, INPUT]: Switch the input select
[+ - VOL]: Adjust the volume
14 Adjust the volume of the main unit
15 Mute the sound
- "MUTE" flashes on the unit's display while the function is on.
• To cancel, press the button again or adjust the volume.
- Muting is canceled if the unit is turned off.
16 Show NETFLIX screen
17 Select radio stations manually (⇒ 24)
18 Exit the menu screen
19 Show HOME menu (⇒ 18)
20 Show Pop-up menu/Top menu/Direct Navigator (⇒ 20)
21 Return to previous screen
22 Show Playback menu (→ 30)/Select audio (→ 20)
Main unit (Front)

1 Standby/on switch (POWER ⏻/I) (⇒ 16)
Press to switch the unit from on to standby mode or vice versa. In standby mode, the unit is still consuming a small amount of power.
2 Open or close the disc tray (⇒ 18) 3 Adjust the volume of the main unit 4 Disc tray 5 Stop (⇒ 20)
6 Start play (⇒ 20) 7 SD card slot (⇒ 18) 8 Remote control signal sensor
Distance: Within approx. 7 m (23 ft.)
Angle: Approx. 20° up and down, 30° left and right
9 Display
10 Connect iPod/iPhone (⇒ 27)
POWER-SAVING FEATURES
The main unit is designed to conserve its power consumption and save energy.
• Automatic power-down function
The main unit will automatically switch to standby mode after 30 minutes if the main unit is inactive as follows.
e.g.
- There is no audio signal from an external device. —Disc playback is stopped/paused. -iPod/iPhone playback is stopped/paused. —The disc menu is displayed and play is not selected.
(This function may not work depending on the application type of discs.)
Main unit (Rear)

1 AC IN terminal (⇒ 15) 2 Speaker terminals (⇒ 11) 3 Cooling fan 4 LAN port (⇒ 15) 5 HDMI AV OUT (ARC) terminal (→ 13)
6 FM radio antenna terminal (⇒ 11) 7 DIGITAL AUDIO IN terminal (⇒ 12, 13) 8 AUX terminal (→ 12) 9 VIDEO OUT terminal (⇒ 12)
playable discs/Cards
| Type | Logo examples | Type detail | Playable contents (→ 40) |
| BD |  | BD-Video Video | |
| BD-RE | Video JPEG/MPO (3D still picture) | ||
| BD-R Video | |||
| DVD |  | DVD-Video Video | |
 | DVD-R | Video AVCHD MP3 JPEG/MPO (3D still picture) | |
 R DL R DL | DVD-R DL | ||
 | DVD-RW | Video AVCHD | |
| — | +R/+RW/+R DL | ||
| CD |  | Music CD Music [CD-DA] | |
| — | CD-R CD-RW | Music [CD-DA] MP3 JPEG/MPO (3D still picture) | |
| SD |  | SD Memory Card (8 MB to 2 GB) SDHC Memory Card (4 GB to 32 GB) SDXC Memory Card (48 GB, 64 GB) (Compatible with both mini and micro types) (as of December 2010) | MPEG2 AVCHD JPEG/MPO (3D still picture) |
■ Discs that cannot be played in this unit
Any other disc that is not specifically supported or previously described.
- DVD-RAM
- Super Audio CD
- Photo CD
- DVD-Audio • Video CD and Super Video CD
- WMA discs
- DivX discs
- PAL discs
- HD DVD • BD-Video discs recorded at a rate of 50 fields/sec
■ Region management information
BD-Video
This unit plays BD-Video marked with labels containing the region code "A".
Example:


DVD-Video
This unit plays DVD-Video marked with labels containing the region number "1" or "ALL".
Example:



Finalize
DVD-R/RW/R DL, +R/+RW/+R DL and CD-R/RW recorded by a recorder, etc. need to be finalized by the recorder to play on this unit. Please refer to the recorder's instructions.
BD-Video
This unit supports high bit rate audio (Dolby Digital Plus, Dolby TrueHD, DTS-HD High Resolution Audio and DTS-HD Master Audio) adopted in BD-Video.
■ Music CD
- Operation and sound quality of CDs that do not conform to CD-DA specifications (copy control CDs, etc.) cannot be guaranteed.
- The digital audio content side of a DualDisc does not meet the technical specifications of the Compact Disc Digital Audio (CD-DA) format so playback may not be possible.
3D
- 3D videos and 3D still pictures can be played back when this unit is connected to a 3D compatible TV using a High Speed HDMI Cable.
- 2D video can be enjoyed as 3D virtually. (→ 22)
Unit and media care
■ Clean this unit with a soft, dry cloth
- Never use alcohol, paint thinner or benzine to clean this unit.
- Before using chemically treated cloth, carefully read the instructions that came with the cloth.
■ Clean the lens
- Use the lens cleaner (not supplied) to clean the unit's lens.
■ Clean discs
DO DO NOT
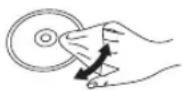
Wipe with a damp cloth and then wipe dry.
■ Disc and card handling precautions
- Handle discs by the edges to avoid inadvertent scratches or fingerprints on the disc.
- Do not attach labels or stickers to discs.
- Do not use record cleaning sprays, benzine, thinner, static electricity prevention liquids or any other solvent.
- Clean any dust, water, or foreign matter from the terminals on the rear side of the card.
- Do not use the following discs:
– Discs with exposed adhesive from removed stickers or labels (rented discs etc). —Discs that are badly warped or cracked. —Irregularly shaped discs, such as heart shapes.
■ To dispose or transfer this unit
The unit may keep the user settings information in the unit. If you discard this unit either by disposal or transfer, then follow the procedure to return all the settings to the factory presets to delete the user settings. (⇒ 36, “To return all settings to the factory preset”)
- The operation history may be recorded in the memory of this unit.
■ SD card
- miniSD Cards, microSD Cards, microSDHC Cards and microSDXC Cards can be used, but must be used with an adaptor card. These are usually supplied with such cards, or otherwise customer provided.
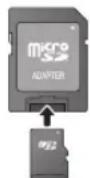
- Keep the Memory Card out of reach of children to prevent swallowing.
- To protect the card's contents, move the record prevention tab (on the SD card) to "LOCK".
- This unit is compatible with SD Memory Cards that meet SD Card Specifications FAT12 and FAT16 formats, as well as SDHC Memory Cards in FAT32 format (Does not support long file name.) and SDXC Memory Cards in exFAT.
- If the SD card is used with incompatible computers or devices, recorded contents may be erased due to the card being formatted etc.
- Useable memory may be slightly less than the card capacity.

- It may not be possible to play the above media in some cases due to the type of media, the condition of the recording, the recording method and how the files were created.
- The producers of the disc can control how discs are played. So you may not always be able to control play as described in this Owner's Manual. Read the disc's instructions carefully.
Using the remote control
Insert so the poles (+ and −) match those in the remote control.

Point it at the remote control signal sensor on this unit. ( ⇒ 7)

Mishandling of batteries can cause electrolyte leakage which can damage items the fluid contacts and may cause a fire.
- Do not mix old and new batteries or different types at the same time.
- Do not heat or expose to flame.
- Do not leave the battery(ies) in a car exposed to direct sunlight for a long period of time with doors and windows closed.
- Do not take apart or short circuit.
- Do not attempt to recharge alkaline or manganese batteries.
- Do not use batteries if the covering has been peeled off. Remove batteries if the remote control is not going to be used for a long period of time. Store in a cool, dark place.
CAUTION
- Danger of explosion if battery is incorrectly replaced. Replace only with the type recommended by the manufacturer.
- When disposing the batteries, please contact your local authorities or dealer and ask for the correct method of disposal.
STEP 1 : Preparing the speakers
Preparing cables and making connection

5 Speaker cables
(REEX1266A: RED)
(REEX1267A: WHITE)
(REEX1268: GREEN)
(REEX1269: GRAY)
(REEX1270: BLUE)

1 Use of the speaker cable stickers is convenient when making cable connections.
e.g. Front speaker (L)
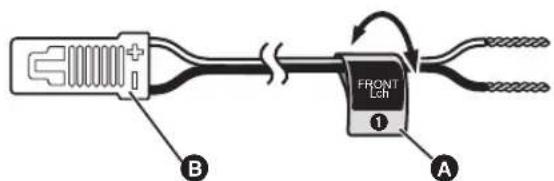

Speaker cable sticker (supplied)

Connector
| Speaker cable sticker Color | |
| 1 FRONT (L) WHITE | |
| 2 FRONT (R) RED | |
| 3 SURROUND (L) BLUE | |
| 4 SURROUND (R) GRAY | |
| 5 CENTER GREEN | |
| 6 SUBWOOFER PURPLE |
Be sure to match the number on each sticker with the connector color.
2 Connecting the speaker cables. Insert the wire fully, taking care not to insert beyond the wire insulation.
e.g. Surround speaker


- Be careful not to cross (short-circuit) or reverse the polarity of the speaker wires as doing so may damage the speakers.
- Don't use a front speaker as a surround speaker or vice versa. Verify the type of speaker with the label on the rear of the speaker before connecting the appropriate cable.
- To avoid injury by falling or dropping the speaker, place the speaker cables with care not to stumble or hook.
- Do not hold the speaker in one hand to avoid injury by dropping the speaker when carrying.
STEP 2 : Positioning

Caution
- The main unit and supplied speakers are to be used only as indicated in this setup. Failure to do so may lead to damage to the amplifier and/or the speakers, and may result in the risk of fire. Consult a qualified service person if damage has occurred or if you experience a sudden change in performance.
- Do not attempt to attach these speakers to walls using methods other than those described in this manual.
- Do not touch the front netted area of the speakers. Hold by the sides.
How you set up your speakers can affect the bass and the sound field.
Setup example
Place the front, center and surround speakers at approximately the same distance from the seating position. The angles in the diagram are approximate.

- Keep your speakers at least 10 mm ( 13/32 ) away from the system for proper ventilation.

A Center speaker
- Put on a rack or shelf not to interfere with the TV's various sensors (ambient light, etc.). Vibration caused by the speaker can disrupt the picture if it is placed directly on the TV.
B Front speakers
© Subwoofer
D Surround speakers
- Place the speakers at the same height or higher than ear level.

• Use only supplied speakers
Using other speakers can damage the unit, and sound quality will be negatively affected. - You can damage your speakers and shorten their useful life if you play sound at high levels over extended periods. - Positioning speakers in front It is possible to locate all the speakers in front of the listening position. However, the optimal surround sound effect may not be obtainable. - Place speakers on flat secure bases. - Placing speakers too close to floors, walls, and corners can result in excessive bass. Cover walls and windows with thick curtains. - For optional wall mount, refer to page 36.
■ If irregular coloring occurs on your TV, turn the TV off for about 30 minutes.
If it persists, move the speakers further away from the TV.
STEP 3: Connections
Turn off all equipment before connection and read the appropriate owner's manual. Do not connect the AC power supply cord until all other connections are complete.
Speaker cable connection
Connect to the terminals of the same color.

⑥ PURPLE Subwoofer ⑤ GREEN Center speaker ② RED Front speaker (Rch) ① WHITE Front speaker (Lch) ④ GRAY Surround speaker (Rch) ③ BLUE Surround speaker (Lch)
Radio antenna connection
■ Using an indoor antenna ■ Using an outdoor antenna
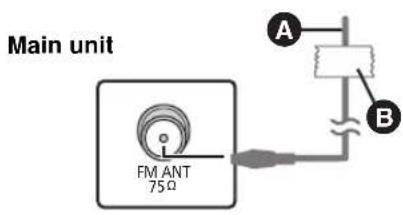
A FM indoor antenna (supplied) B Adhesive tape Affix this end of the antenna where reception is best.
Use outdoor antenna if FM radio reception is poor.
e.g.,

A FM outdoor antenna [Using a TV antenna (not supplied)] The antenna should be installed by a competent technician. B 75 Ω coaxial cable (not supplied) © Antenna plug (not supplied)
Connection to a TV
- The basic connection is shown in the included Easy Setting Guide, however, there are more connection examples to optimize your system setting.

- Do not make the video connections through the VCR. Due to copy guard protection, the picture may not be displayed properly.
- Turn off all equipment before connection.
■ OPTICAL IN
- After making the digital audio connection, make settings to suit the type of audio from your digital equipment. (→ 20)
HDMI
The HDMI connection supports VIERA Link "HDAVI Control" (→ 26) when used with a compatible Panasonic TV.
- Please use High Speed HDMI Cables that have the HDMI logo (as shown on the back cover). It is recommended that you use Panasonic's HDMI cable. When outputting 1080p signal, please use HDMI cables 5.0 meters (16.4 ft.) or less.
Recommended part number (High Speed HDMI Cable): RP-CDHS15 (1.5 m/4.9 ft.), RP-CDHS30 (3.0 m/9.8 ft.), RP-CDHS50 (5.0 m/16.4 ft.), etc.
- Audio will be output through the system's speakers when "Off" is selected in "HDMI Audio Output". (⇒ 33)
Connection for the standard picture and audio
![graph TD TV["TV"] --> AudioOut1["AUDIO OUT"] AudioOut1 --> AudioIn1["AUDIO IN"] AudioIn1 --> VideoOut1["VIDEO OUT"] VideoOut1 --> AudioOut2["AUX"] AudioOut2 --> AudioIn2["AUX"] AudioIn2 --> VideoOut2["VIDEO OUT"] VideoOut2 --> AudioOut3["AUX"] AudioOut3 --> AudioOut4["AUX"] AudioOut4 --> VideoOut4["…](/content/2026/06/1343441/images/7676c1fb5973ca5d861023f6f03f783225cd10576905e72cb76c6170a86b8f4a.jpg)
To enjoy TV audio from this home theater system's speakers:
1 Connect the TV and the main unit with the Audio cable (not supplied). 2 Select "AUX" as a source (⇒ 18).
Audio cable (not supplied) B Video cable (not supplied)
Connection for the better audio
![graph TD TV["TV"] --> OpticalOut1["OPTICAL OUT"] OpticalOut1 --> DigitalAudioIn["DIGITAL AUDIO IN"] DigitalAudioIn --> OpticalCable["CABLE/SAT TV"] OpticalCable --> VideoOut1["VIDEO OUT"] OpticalCable --> VideoOut2["VIDEO OUT"] OpticalCable --> AudioIn1["Audio In"] OpticalCable --> AudioIn2["Audio I…](/content/2026/06/1343441/images/78301948021669bc186646a46a13021e3d6806c04aef3e6e6f1282f00d36168d.jpg)
To enjoy TV audio from this home theater system's speakers:
1 Connect the TV and the main unit with the Optical digital audio cable (not supplied). 2 Select "DIGITAL IN" or "D-IN" as a source (⇔ 18).
A Optical digital audio cable (not supplied) B Video cable (not supplied)
Connection for the best picture and audio
- When connecting to a TV using an HDMI cable, check the HDMI terminal on the TV. If the HDMI terminal is labeled "HDMI (ARC)", you can connect the unit simply with a single HDMI cable.
- It is possible to playback 3D videos and 3D still pictures by connecting this unit with a 3D compatible TV.
- For details, refer to the operating instructions of your TV.
■ When the HDMI terminal on the TV is labeled "HDMI (ARC)"

What is ARC?
ARC is an abbreviation of Audio Return Channel, also known as HDMI ARC. It refers to one of the HDMI functions. When you connect the unit to the terminal labeled "HDMI (ARC)", the optical digital audio cable that is usually required in order to listen to sound from TV is no longer required, and TV pictures and sound can be enjoyed with a single HDMI cable.
To enjoy TV audio from this home theater system's speakers:
Select "ARC" as a source (⇒ 18).
A HDMI cable (not supplied)
■ When the HDMI terminal on the TV is not labeled "HDMI (ARC)"
![graph TD TV["TV"] --> HDMI_HDMI["HDMI"] HDMI_HDMI -->|A| AV_OUT["AV OUT"] AV_OUT --> HDMI_HDMI_AVO["HDMI AV OUT"] HDMI_HDMI --> Optical_OUT["OPTICAL OUT"] Optical_OUT --> Optical_Cable["SABLE/SAT/TV"] Optical_Cable --> DigitalAUDIO["N"]_Digital Optical_Cable --> Optical_AV_IN["Optical AUDIO IN"]](/content/2026/06/1343441/images/5738d9d2ebfb30d77254eedb3853105b2cecee4cffe9f51ba2455efc3c4220e0.jpg)
To enjoy TV audio from this home theater system's speakers:
1 Connect the TV and the main unit with the Optical digital audio cable (not supplied). 2 Select "DIGITAL IN" or "D-IN" as a source (⇒ 18).
A HDMI cable (not supplied) B Optical digital audio cable (not supplied)
Connection with Set Top Box, etc.
![graph TD A["TV"] <--> B["Optical OUT"] B --> C["Digital Audio In"] B --> D["Optical Cable/Sat/TV"] D --> E["Output"]](/content/2026/06/1343441/images/21f1a2203d0cf147ebbd04bb5a476f0be303729077b01a3ccb072540ddebe68a.jpg)
To enjoy TV audio from this home theater system's speakers:
1. Connect the STB and the main unit with the Optical digital audio cable (not supplied). 2. Select "DIGITAL IN" or "D-IN" as a source (⇒ 18).
A. Refer to the operating instructions of the respective devices for the optimal connections. B. Optical digital audio cable (not supplied) C. Set Top Box (Cable/Satellite), etc.
Connection to a broadband network
The following services can be used when this unit is connected to broadband.
- Firmware can be updated (⇒ 17)
- You can enjoy BD-Live (⇒ 21)
- You can enjoy VIERA CAST (→ 29)
For details about connection method, refer to the instructions supplied with the connected equipment.
■ LAN cable connection
![graph TD A["LAN"] --> B["Switch"] B --> C["Server"] subgraph Port_A D["LAN 4"] --> E["Switch"] F["LAN 3"] --> G["Switch"] H["LAN 2"] --> I["Switch"] J["LAN 1"] --> K["Switch"] end subgraph Port_B L["LAN 4"] --> M["Switch"] N["LAN 3"] --> O["Switch"] P["LAN 2"] --> Q["Switch"] R["LAN 1"] --> S["Switc…](/content/2026/06/1343441/images/316a5308101706be0899aa4235c7048445b7020956db6b97fd75d204c35bc3a2.jpg)
A. LAN Cable (not supplied) B. Broadband router, etc. C. Modem (Broadband) *Provided by ISP
- Use category 5 or above straight LAN cables (STP) when connecting to peripheral devices.
- Inserting any cable other than a LAN cable in the LAN terminal can damage the unit.
STEP 4: AC power supply cord connection
Connect only after all other connections are complete.

A AC power supply cord (supplied) B To a household AC outlet
Main unit
- This unit consumes a small amount of AC power, even when it is turned off. : approx. 0.4 W*
* When the "Quick Start" setting is "Off"
In the interest of power conservation, if you will not be using this unit for a long time, unplug it from the household AC outlet.
Install this unit so that the power cord can be unplugged from the socket outlet immediately if any problem occurs.
STEP 5: Easy setup
The Easy setup assists you to make necessary settings.
Follow the on-screen prompts to make basic settings for the system.

Preparation
Turn on your TV and select the appropriate video input mode (e.g., VIDEO 1, AV 1, HDMI, etc.) to suit the connections to this unit.
1 Press [⏻].
Setup screen appears.
If this unit is connected to a Panasonic TV (VIERA) supporting HDAVI Control 2 or later via an HDMI cable, then setting information on the TV such as "On-screen Language" is acquired by this unit.
2 Follow the on-screen instructions and make the settings with [▲, ▼, ◀, ▶] and press [OK].
Language
Select the language used on menu screen.
TV Aspect
Select the aspect to suit your TV and preference.
Speakers position
Specify the positioning of the surround speakers.
Speaker check
Check if the connection to each speaker is valid.
Speaker Output
Make surround sound setting for speaker output.
Cinema Surround Plus
(Effective when the surround layout is selected in "Speakers position".)
The function creates the sound of virtual speakers to enhance the realistic surround feeling as if the sound comes from all directions.
TV Audio
Select the audio input connection from your TV, [item with “(TV)”.
Quick Start
Speed of startup from power off is increased.
3 Press [OK] several times to finish the "Easy setup".
After completing "Easy setup", you can perform "Network Easy Setting".
![PANASONIC SC-BTT268 - Press [OK] several times to finish the "Easy setup". - 1](/content/2026/06/1343441/images/1b7c9a5a346ae9b13150b531e7b7ea077e3e682a907538acf38eee39bf5ad0d0.jpg)
- You can perform this setup anytime by selecting "Easy setup" in the Setup menu. (→ 34)
Network Easy Setting
The configuration of your network is about to begin. If you failed to make the settings, refer to "When you experience problems with settings".
When you experience problems with settings
Network Easy Setting (Home Network Connection Check)
| Network Easy Setting (Home Network Connection Check) | |
| Complete. | |
| 1. LAN cable connection | : Fail |
| 2. IP address setting | : Fail |
| 3. Connection to gateway | : Fail |
| Display | Check the following |
| 1. LAN cable connection :Fail ● Connection of2. IP address setting :Fail3. Connection to gateway :Fail | the LAN cables (⇒ 15) |
| 1. LAN cable connection :Pass ● Connection2. IP address setting :Fail3. Connection to gateway :Fail | and settings of the hub and router● Settings of “IP Address / DNS Settings”(⇒ 34) |
| 1. LAN cable connection :Pass2. IP address setting :Pass3. Connection to gateway :Fail |
Network Easy Setting (Internet Connection Check)
| Network Easy Setting (Internet Connection Check) | |
| Complete. | |
| - Connection to the Internet : Fail(Error code: B019) | |
| Failed the connection test. | |
| Cannot find the server.(Error code: B019) | |
| Please refer to the owner's manual for the cause of the error and the solution for it. | |
| Press [OK]. |
| Display Check the following | |
| Cannot find the server.(Error code: B019) | “Primary DNS” and “SecondaryDNS” Settings of “IP Address /DNS Settings” (⇒ 34) |
| Failed to connect to the server.(Error code: B020) | The server may be busy or the service may have been suspended. Please wait a few moments, and then try again.Settings of “Proxy Server Settings” (⇒ 34) and the router. |

• Refer to the operating instructions of the hub or router. - You can perform this setup anytime by selecting "Network Easy Setting" in the Setup menu. (→ 34) - You can redo these settings individually using "Network Settings". (→ 34) - Please be aware that connecting to a network without encryption may result in the content of the communication being illegitimately viewed by a third party, or the leaking of data such as personal or secret information.
Reprogramming the remote control
If you have more than one Panasonic player/recorder and the remote control operates both products at once, you will need to change the remote control code on one product to prevent this occurrence. (⇒ 34, "Remote Control Code")
Firmware updates
Occasionally, Panasonic may release updated firmware for this unit that may add or improve the way a feature operates. These updates are available free of charge.
This unit is capable of checking the firmware automatically when connected to the Internet via a broadband connection. When a new firmware version is available, the following message is displayed.
New firmware is available. Please update firmware in Setup.
To update the firmware
Press [HOME] ⇒ select "Others" ⇒ [OK] ⇒ [OK] ("Setup") ⇒ select "Others" ⇒ [OK] ⇒ select "Firmware Update" ⇒ [OK] ⇒ select "Update Now" ⇒ [OK]
DO NOT DISCONNECT the unit from the AC power or perform any operation while the update takes place.
After the firmware is installed, "FINISH" will be displayed on the unit's display. Unit will restart and the following screen will be displayed.


- If downloading on this unit fails or this unit is not connected to the Internet, then you can download the latest firmware from the following website and burn it to a CD-R to update the firmware. http://panasonic.jp/support/global/cs/ (This site is in English only.) To show the firmware version on this unit. ( ⇒ 34, “System Information”)
- Downloading will require several minutes. It may take longer or may not work properly depending on the connection environment.
- If you do not want to check for the latest firmware version, set "Automatic Update Check" to "Off". (⇒ 34)
Inserting or removing media
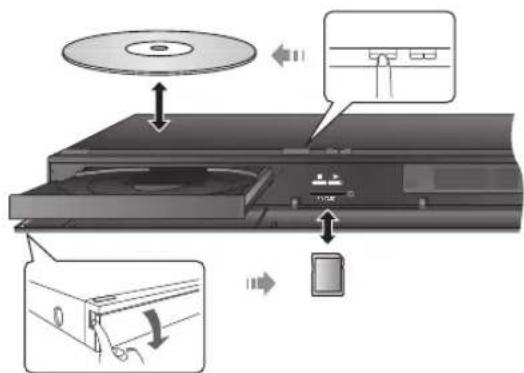
- When inserting a media item, ensure that it is facing the right way up.
- While the reading indicator is displayed, do not turn off the unit or remove the media. Such action may result in loss of the media's contents.
- When removing the SD card, press on the center of the card and pull it straight out.
■ Selecting the source by the remote control
| Button Source | |
| DISC/SD | Select disc drive or SD card driveBD/DVD or SD card (SD) (⇒ 20) |
| RADIO/EXT-INiPod | Select iPod/iPhone, FM tuner or external audio as the sourceiPod (IPOD) (⇒ 27)FM Radio (FM) (⇒ 24)To enjoy sound from the TV (⇒ 25)AUX*1ARC*1DIGITAL IN*(D-IN)To enjoy sound from other devices(⇒ 25)DIGITAL IN*(D-IN) |
HOME menu
Major functions of this unit can be operated from the HOME menu. Preparation
Turn on the television and select the appropriate video input on the television.
1 Press [⏻] to turn on the unit. 2 Press [▲, ▼, ◀, ▶] to select the item and press [OK].

- When a media is inserted, the contents selection screen for that media is displayed. • If there are any other items, repeat this step.
- To return to the HOME menu, select "HOME" or press [RETURN] several times.
| Videos/Photos/Music | Disc | Play back the contents.(⇒ 20, 23, 24)When multiple contents are recorded, select the types of contents or the title. |
| SD card | ||
| Internet Content | Displays the Home screen of VIERA CAST(⇒ 29) | |
| iPod All | (⇒ 27) | |
| Music | ||
| Videos | ||
| FM Radio | To enjoy the FM radio (⇒ 24) | |
| EXT IN | AUX*1 | When using an Audio cable |
| ARC*1 | When using an HDMI cable(Available when using an ARC compatible TV) | |
| DIGITAL IN*1,2 | When using an Optical digital audio cable | |
| Sound | Select sound quality (equalizer). (⇒ 19) | |
| Others Setup (⇒ 31) | ||
| SD Card Management(⇒ 21) | ||
| WallpaperChanges the screen background of the HOME menu. | ||
To show the HOME menu
Press [HOME].

- Items to be displayed may vary with the media.
- When the selector is switched, it may take time to playback the selected video and/or audio. *1 "(TV)" is displayed next to items set for TV AUDIO input. *2 "(CABLE/SATELLITE)" is displayed next to DIGITAL IN when set for CABLE/SATELLITE AUDIO input.
Enjoying sound effects from all speakers
Enjoying surround sound effects
1 Press [SURROUND] several times to select the effect.
STANDARD
Sound is output as it was recorded/encoded.
Speaker output varies depending on the source.
MULTI-CHANNEL
You can enjoy sound from the front speakers, as well as the surround even when playing a 2-channel sound or non-surround sound.
MANUAL
- The selected effect will only be displayed on the main unit.
2 While "MANUAL" is displayed, press [◀, ▶] and select the desired effect.
Suitable for movie software, or the one recorded in Dolby Surround.
DOLBY PRO LOGIC II MUSIC
Adds 5.1-channel effects to stereo sources.
You can enjoy 6.1/7.1-channel surround-like effect using 5.1-channel speakers.
SUPER SURROUND
You can enjoy sound from all speakers with stereo sources.
2CH STEREO
You can play any source in stereo. Sound will be output to the front speakers and the subwoofer only.
- When you set to "7.1CH VIRTUAL SURROUND", "SUPER SURROUND" and "2CH STEREO", "Cinema Surround Plus" (⇒ 31) is not activated.
■ Adjusting speaker level during play
① Press and hold [-CH SELECT] to activate the speaker setting mode. ② Press [-CH SELECT] several times to select the speaker. Each time you press the button:

L R: Front speaker
(left and right: only the balance is adjustable.)
- Press [◀, ▶] to adjust the balance of the front speakers.
C: Center speaker
RS: Surround speaker (right)
LS: Surround speaker (left)
SW: Subwoofer
- The channels not included in the playing audio will not be displayed (subwoofer is displayed even if it is not included).
③ Press [▲] (increase) or [▼] (decrease) to adjust the speaker level for each speaker.
-6 dB to +6 dB
■ Changing the sound modes
① Press [SOUND] several times to select the mode.
- The selected mode will only be displayed on the main unit.
② While the selected mode is displayed
Press [◀, ▶] and select the desired setting.
EQUALIZER
You can select sound quality settings.
FLAT
Cancel (no effect is added).
HEAVY
Adds punch to rock.
CLEAR
Clarifies higher sounds.
SOFT
For background music.
SUBWOOFER LEVEL
You can adjust the amount of bass.
1 (Weakest effect) to 4 (Strongest effect) - The setting you make is retained, and recalled every time you play the same type of source.
H.BASS
You can enhance low-frequency sound so that heavy bass sound can be heard clearly, even if the acoustics of your room are not optimal.
- The setting you make is retained, and recalled every time you play from the same type of source.
CENTER FOCUS
(Effective when playing audio containing center channel sound.)
You can make the sound of the center speaker seem like it is coming from within the TV.
WHISPER-MODE SURROUND
You can enhance the surround effect for low volume sound. (Convenient for late night viewing.)
- The sound effects/modes may not be available or have no effect with some sources.
- You may experience a reduction in sound quality when these sound effects/modes are used with some sources. If this occurs, turn the sound effects/modes off.
Playing video contents
BD DVD CD SD
1 Insert the media.
If the menu is displayed, press [OK] or [▲, ▼, ◀, ▶] to select the item. (⇒ 18)
2 Press [▲, ▼] to select the title and press [OK].
When a message screen is displayed while playing back 3D compatible video software, play back in accordance with the instructions.
■ To show menus
You can show Top Menu, DIRECT NAVIGATOR or Pop-up Menu.
Press [POP-UP MENU, TOP MENU].
- Press [▲, ▼, ◀, ▶] to select the item and press [OK].
■ To show the status messages
While playing, press [STATUS].
The status messages give you information about what is currently being played. Each time you press [STATUS], the display information may change or will disappear from the screen.
e.g. BD-Video
T: Title, C: Chapter, PL: Playlist

[Non-Text]
- DISCS CONTINUE TO ROTATE WHILE MENUS ARE DISPLAYED. Press [■STOP] when you finish to preserve the unit's motor and your television screen.
- Depending on media and contents, the display may change or may not appear.
- It is not possible to playback AVCHD and MPEG2 video which have been dragged and dropped, copied and pasted to the media.
Other operations during play
These functions may not work depending on the media and its contents.
Stop
Press [■STOP].
The stopped position is memorized.
Resume play function
Press [▶ PLAY] to restart from this position.
- The position is cleared if the tray is opened or you press [■STOP] several times to display "STOP" on the unit's display.
- On BD-Video discs including BD-J, the resume play function does not work.
Pause
VQT3M40
Press [IIIPAUSE].
- Press [■■PAUSE] again or [▶ PLAY] to restart play.
Search/Slow-motion
Search
While playing, press [SEARCH◀◀] or [SEARCH▶▶].
• Music and MP3: The speed is fixed to a single step.
Slow-motion
While paused, press [SEARCH◀◀] or [SEARCH▶▶].
- BD-Video and AVCHD: Forward direction [SEARCH▶▶] only.
The speed increases up to 5 steps.
- Press [▶ PLAY] to revert to normal playback speed.
Skip
While playing or paused, press [◀◀] or [▶▶].
Skip to the title, chapter or track you want to play.
• Each press increases the number of skips.
Frame-by-frame
While paused, press [◀] (◀▶) or [▶] (▶▶).
- Press and hold to change in succession forward or backward.
- Press [▶ PLAY] to revert to normal playback speed.
- BD-Video and AVCHD: Forward direction [▶] (■■) only.
Changing audio
1 Press and hold [-AUDIO] to activate the audio setting mode.
2 Press [-AUDIO] several times to select the audio.
You can change the audio channel number or soundtrack language, etc.
■ Selecting the type of audio from the DIGITAL AUDIO IN terminal
Select to suit the type of audio from the DIGITAL IN terminal on the main unit.
① Press [EXT-IN] several times to select "DIGITAL IN" (D-IN). ② Press and hold [−AUDIO] to activate to select the type. ③ Press [-AUDIO] several times to select the type.
MAIN
SAP*
MAIN+SAP* (stereo audio)
* "SAP" = Secondary Audio Program
(Only works with Dolby Dual Mono)
- “MAIN” or “SAP” is not available if “On” is selected in “PCM-FIX” of “DIGITAL IN”. (→ 32)
[Non-Text]
- Audio that is input through the DIGITAL AUDIO IN or AUX terminals are not output from the HDMI AV OUT terminal.
Useful functions
1 Press [SUB MENU].
2 Select an item and press [OK].
While DIRECT NAVIGATOR screen is displayed
| Properties | To display the titles properties (recording date, etc.) |
| View Chapters | To select the chapter |
| View Playlists | To play playlists |
| View Titles To | select the title. |
While playing
| Screen Aspect | When black bars are shown at the top, bottom, left, and right sides of the screen, you can enlarge the image to fill the screen. |
| Top Menu To display Top Menu. | |
| Pop-up Menu | To display Pop-up Menu. |
| Menu To display Menu. | |
| 3D Settings | 2D video can be virtually output as 3D, or output effect of the 3D video can be setup.(→ 22) |
- Depending on the played contents, if you perform "Screen Aspect", there may be no effect.
- When "TV Aspect" (⇒ 33) is set to "4:3" or "4:3 Letterbox", the "Zoom" effect in "Screen Aspect" is disabled.
![PANASONIC SC-BTT268 - Select an item and press [OK]. - 1](/content/2026/06/1343441/images/5c03a8305e4560824741a4cf07249e45b2c06f0d28660a50061daba6483bb083.jpg)
• Depending on the media and contents, displayed items are different.
Enjoying BD-Live or picture-in-picture in BD-Video
Enjoying BD-Live discs with Internet
BD-Live allows you to enjoy more functions such as subtitles, exclusive images and online games by connecting this unit to the Internet. Since most of the BD-Live compatible discs are played back using the BD-Live function, additional contents are required to be downloaded into the external memory (local storage).
- This unit is using an SD card as a local storage device. BD-Live function cannot be used when there is no SD card inserted.
1 Perform network connection and settings. (⇒ 15, 17)
2 Insert an SD card with 1 GB or more free space.
3 Insert the disc.
■ Deleting data/Formatting SD cards
If you no longer need data recorded on the SD card, you can delete data with the following operation.
① Insert an SD card. ② Press [HOME]. ③ Press [▲, ▼, ◀, ▶] to select "Others" and press [OK]. ④ Press [▶] to select "SD Card Management" and press [OK]. ⑤ Press [▲, ▼] to select "BD-Video Data Erase" or "Format SD Card" and press [OK].

⑥ Press [◀, ▶] to select "Yes" and press [OK]. ⑦ Press [◀, ▶] to select "Start" and press [OK].
Playing picture-in-picture
To turn on/off secondary video and audio [DISPLAY] ⇒ select “Disc” ⇒ [▶] ⇒ select “Signal Type” ⇒ [OK] ⇒ set “Video” and “Soundtrack” in “Secondary Video” to “On” or “Off”

A Secondary video B Primary video

- The usable functions and the operating method may vary with each disc, please refer to the instructions on the disc and/or visit their website.
- Some BD-Live content available on the Blu-ray discs may require an Internet account to be created in order to access the BD-Live content. Follow the screen display or instruction manual of the disc for information on acquiring an account.
- To use the BD-Live functions, it is recommended that you format the card on this unit. If the SD card you use is formatted, all data on the card will be erased. It cannot be recovered.
- "BD-Live Internet Access" may need to be changed for certain discs (⇒ 32).
- When discs supporting BD-Live are played back, the player or disc IDs may be sent to the content provider via the Internet.
- During search/slow-motion or frame-by-frame, only the primary video is displayed.
- When "BD-Video Secondary Audio" in "Digital Audio Output" is set to "Off", secondary audio will not be played (⇒ 32).
Enjoying 3D video
You can enjoy powerful 3D videos with realistic sensations by connecting this unit with a High Speed HDMI Cable to a 3D compatible TV.

The illustration is an image.
Preparation
Connect a 3D compatible TV to an HDMI AV OUT terminal of this unit using a High Speed HDMI Cable and select HDMI video input mode on the TV. (=> 12, 13)
• Perform the necessary preparations for the TV.
The method of playback is the same as normal disc playback. (=> 20)
- Playback following the instructions displayed on the screen.
3D settings
Perform the following settings as necessary.
| 3D BD-VideoPlayback | It is also possible to play back 3D discs in 2D (conventional video). (⇒ 31) |
| 3D Type If 3D video | cannot be played back in 3D, change the settings as required by the connected TV format. (⇒ 33)Change the settings for 3D on the TV also when “Checker board” or “Side by side” is selected. |
| 3D Playback Precautions | Hide the 3D viewing warning screen. (⇒ 33) |
| Pop-Out Level Adjust | just the pop-up position for the Playback menu or message screen etc. (⇒ 30) |
Useful functions
1 While playing,
Press [SUB MENU].
2 Press [▲, ▼] to select "3D Settings" and press [OK]. 3 Select an item, then press [OK].
| Signal Format | Original Keep original picture format. | |
| Side by side 3D | picture format comprising of left and right screens. | |
| 2D to 3D Converts | 2D pictures to 3D effect. | |
| 3D Picture Mode | Normal Playback | pictures with normal 3D effects. |
| Soft You can enjoy | 3D pictures with a feeling of broadness, holding back the depth perception. | |
| Manual Settings | Set 3D effect manually.DistanceSet the amount of depth perception.Screen TypeSelects how the screen appears during 3D playback (flat or round).Frame WidthSet the amount of feathering at the edge of screen.Frame ColorSet the color of feathering at the edge of screen. | |

- Depending on the contents, displayed items are different.
- Please refrain from viewing 3D images if you do not feel well or are experiencing visual fatigue.
In the event that you experience dizziness, nausea, or other discomfort while viewing 3D images, discontinue use and rest your eyes.
- Depending on the connected TV, the video being played back might switch to 2D video due to changes in resolution etc. Check the 3D setting on the TV.
- 3D images may not output as settings of "HDMI Resolution" and "24p Output". (⇒ 33)
Playing still pictures
BD DVD CD SD
(BD-RE, DVD-R/R DL, CD-R/RW, SD Card)
In order to play back 3D still pictures (MPO), this unit should be connected to a Full HD 3D compatible TV via an HDMI terminal.
1 Insert the media.
If the menu is displayed, press [OK] or [▲, ▼, ◀, ▶] to select the item. (⇒ 18)
2 Press [▲, ▼] to select the folder and press [OK].
"3D View": 3D still pictures (MPO) are sorted here. To play back in 3D, select from "3D View". (Still pictures in "2D View" are played back in 2D)

To select folders or still pictures that are played on slideshow.
3 Press [▲, ▼, ◀, ▶] to select the still picture and press [OK].
Press [◀, ▶] to display the previous or next still picture.
To exit the screen
Press [RETURN].
■ To show the still picture properties
While playing, press [STATUS] once or twice.
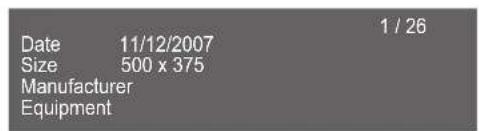
To exit the screen
Press [STATUS].
Useful functions
1 Press [SUB MENU].
2 Select an item, then press [OK].
While Photo View screen is displayed
| Slideshow | Start SlideshowYou can display still pictures one by one at a constant interval.Display IntervalChange the display interval.Transition EffectSet display method.Repeat PlayRepeat slideshow.Random SoundtrackBackground music is played in random order.SoundtrackAn MP3 on the iPod/iPhone or a music CD can be played back during the slideshow of JPEG on the SD card. |
While playing
| Start Slideshow | Start the slideshow. |
| Screen Aspect | Switch the screen mode. |
| Status | Show the still picture properties. |
| Rotate Right | Rotate the still picture. |
| Rotate Left | |
| Wallpaper | Set the still picture to the wallpaper of HOME screen. (⇒ 18) |
| Pop-Out Level | Pop-up position for the Playback menu or message screen etc. can be adjusted during 3D playback. |
![PANASONIC SC-BTT268 - Select an item, then press [OK]. - 1](/content/2026/06/1343441/images/5607fae4b47a387b108f73f6dc6e45f473a3db2ee13e741bd9124dec33d5b198.jpg)
- Depending on the condition of the unit and media contents, displayed items are different.
- When viewing a 3D still picture, some functions may not work.
- When a still picture with large number of pixels is played, the display interval may become longer. Even if the setting is changed, the display interval may not become shorter.
- When both a music CD and an iPod/iPhone is inserted to this unit, the iPod/iPhone has a priority to be played back as background music.
- Still pictures displayed as " cannot be played back with this unit.
Playing music
DVD CD
(DVD-R/R DL, music CD, CD-R/RW)
1 Insert the media.
If the menu is displayed, press [OK] or [▲, ▼, ◀, ▶] to select the item. (⇒ 18)
2 Press [▲, ▼] to select the track and press [OK].

“ ” indicates the track currently playing.
Playing a track in another folder
1 While the DIRECT NAVIGATOR screen is displayed, press [SUB MENU].
2 Press [▲, ▼] to select "Select Folder" and press [OK].

- You cannot select folders that contain no compatible tracks.
Listening to the Radio
Presetting stations automatically
Up to 30 stations can be set.
1 Press [RADIO] to select "FM".
2 Press [STATUS] to select the position to start the auto preset search.
LOWEST:
To begin auto preset with the lowest frequency (FM87.9 or FM87.5).
CURRENT:
To begin auto preset with the current frequency.*
* To change the frequency, refer to "Presetting stations manually".
3 Press and hold [OK].
Release the button when "AUTO" is displayed.
The tuner starts to preset all the stations it can receive into the channels in ascending order.
![PANASONIC SC-BTT268 - Press and hold [OK]. - 1](/content/2026/06/1343441/images/f7ab75b6f3095b01bf5c5814dcc46d2c25664c6dbb5a7baae313bd385fc341f4.jpg)
- "SET OK" is displayed when the stations are set, and the radio tunes to the last preset station.
- "ERROR" is displayed when automatic presetting is unsuccessful. Preset the stations manually.
Presetting stations manually
Preparation
Select a radio broadcast.
① Press [RADIO] to select "FM". ② Press [SEARCH◀◀] or [SEARCH▶▶] to select the frequency. - To start automatic tuning, press and hold [SEARCH◀◀], [SEARCH▶▶] until the frequency starts scrolling. Tuning stops when a station is found.
1 While listening to the radio broadcast, press [OK].
2 While "P" is flashing on the display, press the number buttons to select a channel.
To select a 1-digit number
e.g., 1: [1] → [OK].
To select a 2-digit number
e.g., 12: [1] ⇒ [2]

- A station previously stored is overwritten when another station is stored in the same channel preset.
Listening/confirming the preset channels
1 Press [RADIO] to select "FM". 2 Press the number buttons to select the channel.
To select a 1-digit number
e.g., 1: [1] ⇒ [OK].
To select a 2-digit number
e.g., 12: [1] ⇒ [2].
Alternatively, press [∧, ∨] or [▲, ▼].
■ Display on the main unit
TUNED/STEREO:
Displayed when receiving stereo broadcasting.
TUNED:
Displayed when receiving monaural broadcasting or when monaural sound is selected.
■ If noise is excessive
① Press and hold [−AUDIO] to activate the selection type. ② Press [−AUDIO] to display “MONO”.
The sound becomes monaural.
Press the button again in step ② to cancel the mode. "AUTO STEREO" will be displayed on the main unit. Depending on the broadcast system, stereo or monaural will be selected. "MONO" is also canceled when you change the frequency.
- This setting can be preset for each broadcasting station.
■ FM frequency step
Main unit:
The factory setting is set to 0.2 MHz, but it can be changed to receive broadcasts allocated in 0.1 MHz steps. You may need to change this setting if the tuner seems to skip over the correct frequency for stations in your area.
① Press [RADIO] to select "FM". ② Press and hold [RADIO].
After a few seconds the display changes to show the current lowest frequency. Continue to hold the button down. The lowest frequency changes and the step is changed.
To return to the original settings, repeat steps ① and ②.

- After changing the setting, previously preset frequencies will be cleared. Preset them again.
Enjoying TV with unit's speakers
Preparation
Turn on your TV and select the appropriate audio input mode [AUX, ARC, D-IN] to suit the connections to this unit. (=> 18)
Surround sound effects
You can enhance stereo sources with surround sound effect.
1 Press [SURROUND] several times to select the effect. 2 While "MANUAL" is displayed on the unit's display, press [◀, ▶] and select the desired effect.
Surround modes to enjoy TV audio or stereo sources from all speakers:
• DOLBY PRO LOGIC II MOVIE • DOLBY PRO LOGIC II MUSIC - SUPER SURROUND
For more detailed information on this operation, please refer to the “Enjoying surround sound effects” section on page 19.
Sound modes
You can adjust the mode depending on the source or situation.
1 Press [SOUND] several times to select the mode. 2 While the selected mode is displayed on the unit's display,
press [◀, ▶] and select the desired setting.
For more detailed information on this operation, please refer to the "Changing the sound modes" section on page 19.
Linked operations with the TV (VIERA Link™ “HDAVI
Control™")
What is VIERA Link "HDAVI Control"?
VIERA Link™ is a new name for EZ Sync™.
VIERA Link “HDAVI Control” is a convenient function that offers linked operations of this unit, and a Panasonic TV (VIERA) under “HDAVI Control”.
You can use this function by connecting the equipment with an HDMI cable. See the operating instructions for connected equipment for operational details.
Preparation
① Set "VIERA Link" to "On" (⇒ 33). (The default setting is "On".) ② Set the "HDAVI Control" operations on the connected equipment (e.g., TV). ③ Turn on all "HDAVI Control" compatible equipment and select this unit's input channel on the connected TV so that the "HDAVI Control" function works properly. When the connection or settings are changed, repeat this procedure.
Setting the audio link
■ Setting the audio link with the TV
With the remote control:
- Select the actual TV audio connection on the main unit. ① Press [HOME]. ② Press [▲, ▼, ◀, ▶] to select "Others" and press [OK]. ③ Press [OK] to select "Setup". ④ Press [▲, ▼] to select "TV / Device Connection". ⑤ Press [▲, ▼] to select "TV Audio Input". ⑥ Press [◀, ▶] to switch "AUX", "ARC" or "DIGITAL IN" and press [OK].
- Select "AUX" or "ARC" in "TV Audio Input" when the DIGITAL AUDIO IN terminal is used for the STB connection.
Whenever the connection or settings are changed, reconfirm the points above.
■ Setting the audio link with the STB
With the remote control:
- Select the STB input channel on the TV. ① Press [EXT-IN] to select "D-IN". ② Press [STATUS] to select "CABLE/SATELLITE AUDIO ON".
- If the input channel of the STB on the TV is changed or if you want to change the device allocated for the linked operations, select "CABLE/SATELLITE AUDIO OFF" in step ② above and then repeat steps ① to ②.

- VIERA Link "HDAVI Control", based on the control functions provided by HDMI which is an industry standard known as HDMI CEC (Consumer Electronics Control), is a unique function that we have developed and added. As such, its operation with other manufacturers' equipment that supports HDMI CEC cannot be guaranteed.
- This unit supports "HDAVI Control 5" function. "HDAVI Control 5" is the newest standard (current as of December, 2010) for Panasonic's HDAVI Control compatible equipment. This standard is compatible with Panasonic's conventional HDAVI equipment.
- Please refer to individual manuals for other manufacturers' equipment supporting VIERA Link function.
Speaker control
You can select whether audio is output from the unit's speakers or the TV speakers by using the TV menu settings.
Home theater
This unit's speakers are active.
- When this unit is in standby mode, changing the TV speakers to this unit's speakers in the TV menu will automatically turn the unit on and select, "AUX" 2 , "ARC" 1, 2 or "D-IN" (DIGITAL IN) 2 as the source.
- You can control the volume setting using the volume or mute button on the TV's remote control.
- If you turn off this unit, TV speakers will be automatically activated.
TV
TV speakers are active.
- The volume of this unit is set to "0".
• Audio output is 2-channel audio.

- When switching between this unit's speakers and TV speakers, the TV screen may be blank for several seconds.
- The audio from "AUX", "DIGITAL IN", "FM Radio" or "iPod" will be output from this unit's speakers even though the TV speakers are selected.
Automatic input switching (Power on link)
When the following operations are performed, the television will automatically switch the input channel and display the corresponding action. When the TV is off, the TV will automatically turn on.
—When play starts on the unit
- When an action that uses the display screen is performed (e.g., DIRECT NAVIGATOR screen)
- When you switch the TV input to TV tuner mode, this unit will automatically switch to "AUX"*2, "ARC"*1,*2 or "D-IN" (DIGITAL IN)*2.
- This function does not work when the iPod/iPhone selector is chosen. (→ 28)
Automatic lip-sync function (for HDAVI Control 3 or later)
Delay between audio and video is automatically adjusted, enabling you to enjoy smooth audio for the picture (→ 32, "Audio Delay").
- This function works only when "BD/DVD", "SD", "AUX"*2, "ARC"*1,*2, "D-IN" (DIGITAL IN)*2 is selected as the source on this unit.
*1 The selection works only when using an ARC compatible TV.
*2 "AUX", "ARC" or "D-IN" works depending on the setting in "Setting the audio link".
Power off link
All connected equipment compatible with "HDAVI Control", including this unit, automatically turns off when you switch the television off.
Playing music continuously even after turning off the TV (When the unit is connected to a Panasonic TV (VIERA) that supports HDAVI Control 2 or later.)
Select "Video" in "Power Off Link" (=> 33)
Easy control only with VIERA remote control
Only TV supports "HDAVI Control 2" or later
By using the TV remote control, you can play discs using the "Control Panel" and display the Top Menu or Pop-up Menu, etc.
- This works only during "BD/DVD" or "SD" playback and resume modes.
1 Press [SUB MENU].
e.g. BD-Video

2 Select an item, then press [OK].
- The sub menu may not appear while the Top Menu for BD-Video or DVD-Video is displayed.
- The buttons that you can use for this unit can vary depending on the TV. For details, refer to the operating instructions of the TV.
- The operation of this unit may be interrupted when you press incompatible buttons on the TV remote control.
- Depending on the menu, some button operations cannot be performed from the TV's remote control.
Using the iPod®/iPhone®
Compatible iPod/iPhone (as of December 2010)
- Update your iPod/iPhone with the latest software before using this unit.
- Compatibility depends on the software version of your iPod/iPhone.
- iPod/iPhone compatibility assures music, video playback and battery charge functions of this unit as a home theater system.
| Name Memory Size | |
| Pod touch® 4th generation | 8 GB, 32 GB, 64 GB |
| Pod nano® 6th generation* 8 GB, 16 GB | |
| Pod touch® 3rd generation | 32 GB, 64 GB |
| Pod nano® 5th generation (video camera) | 8 GB, 16 GB |
| Pod touch® 2nd generation 8 GB, 16 GB, 32 GB | |
| Pod classic® | 120 GB, 160 GB (2009) |
| Pod nano® 4th generation (video) | 8 GB, 16 GB |
| Pod classic® | 160 GB (2007) |
| Pod touch® 1st generation | 8 GB, 16 GB, 32 GB |
| Pod nano® 3rd generation (video) | 4 G B , 8 G B |
| Pod classic® | 80 GB |
| Pod nano® 2nd generation (aluminum) | 2 GB, 4 GB, 8 GB |
| Pod® 5th generation (video) | 60 GB, 80 GB |
| Pod® 5th generation (video) | 30 GB |
| Pod nano® 1st generation 1 GB, 2 GB, 4 GB | |
| Phone® 4 | 16 GB, 32 GB |
| Phone® 3GS | 8 GB, 16 GB, 32 GB |
| Phone® 3G | 8 GB, 16 GB |
* Playback functions on the main unit may be limited in the "All" mode. In some locations, reception status of an iPhone may be poor when it is loaded on this unit.

- When the iPhone receives a call while connected to this unit, playback, etc. of the iPhone may stop. To prioritize the operation with the iPhone connected to this unit, make the setting so that the iPhone does not receive calls.
iPod/iPhone Connection
Preparation
- Before connecting/disconnecting the iPod/iPhone, turn the main unit off or reduce the volume of the main unit to its minimum.
- Make sure that the video cable connection is made to view photos/videos from the iPod/iPhone.
1 Push the center of drawer (A), and pull out fully until it clicks to open the Dock for iPod/iPhone (C). 2 Install a Dock adapter (not supplied) (B) before inserting your iPod/iPhone into the dock. 3 Connect the iPod/iPhone (not supplied) firmly.

A The center of drawer B Dock adapter (not supplied)
- Please be sure to use the adapter that is compatible with your model of iPod/iPhone.
- Attach the dock adapter until it is firmly in place.
- To purchase a dock adapter, consult your local iPod/iPhone dealer.
© Dock for iPod/iPhone D Make sure to match when inserting.
- Carefully insert and remove the iPod/iPhone to ensure long lasting product enjoyment.
- Check that the connector has no dust or foreign materials before connecting.

- The 3D logo on the Dock for iPod/iPhone does not mean that the iPod/iPhone has 3D capabilities.
About recharging the battery
- iPod/iPhone will start recharging regardless of whether this unit is on or off.
- "IPOD *" will be shown on the main unit's display during iPod/iPhone charging in main unit standby mode.
- Once fully recharged, additional recharging will not occur.
iPod/iPhone Playback
Preparation
- Make sure that the "IPOD" source is selected. Press [iPod] to select the source.
- To view photos/videos from the iPod/iPhone Operate the iPod/iPhone menu to make the appropriate photo/video output settings for your TV.
- To display the picture, turn on the TV and select the appropriate video input mode.
Enjoy music/video
1 Press [iPod] to select "IPOD". 2 Press [STATUS] several times to select the music menu or videos menu.
- You can also select "Videos" or "Music" by using HOME menu. (⇒ 18)
3 Press [▲, ▼] to select an item and press [OK].
- Repeat this step until the selected title starts playback.
- Press [◀, ▶] to display the previous or next page.
e.g., music playback screen

A Album artwork
- If album artwork is contained in the data of a song, it will appear on the TV. If there is no album artwork, "will be appear on TV.
- Depending on the software version of your iPod/ iPhone, the album artwork may not appear properly.
- It may take time to read the album artwork.
- Some operations may not work while reading the album artwork.
To exit, press [RETURN].
Basic controls
(For music and video playback only)
| Buttons Functions | |
| [▶ PLAY] Play | |
| [■STOP] Pause | |
| [■IPAUSE] | |
| [◀◀, ▶▶I] Skip | |
| (Press and hold)[SEARCH◀◀, SEARCH▶▶] | Search |
Enjoy photos
1 Press [iPod] to select "IPOD".
2 Press [STATUS] several times to select "ALL" on the unit's display.
- You can also select "All" by using HOME menu. (→ 18)
3 Switch the TV input to video in.
4 Play a slideshow on your iPod/iPhone.
The picture will be displayed on your TV.
To use the iPod touch/iPhone features
① Press the Home button on the iPod touch/iPhone.
② Select the iPod touch/iPhone features on the touch screen to operate.
You can use the remote control to operate the iPod/iPhone menu.
The operation may vary among iPod/iPhone models.
• [▲, ▼]: To navigate menu items
• [OK]: To go to the next menu.
- [RETURN]: To return to the previous menu.
Other methods of playback
1 Press [SUB MENU].
2 Press [▲, ▼] to select the item and press [OK].
Playback Mode
Shuffle (For music playback only.)
Songs:
Play all songs on iPod/iPhone in random order.
Albums:
Play all songs on an album in random order.
Repeat
One:
Play a single song/video repeatedly.
All:
Play all songs/videos from selected items (e.g., Playlists,
Albums, etc.) repeatedly.
iPod Information
Display the firmware version of iPod/iPhone.
3 Press [▲, ▼] to select the setting and press [OK].

- The setting of the playback mode will be kept until changes are made on the same iPod/iPhone.
- This function does not work when "All" is selected.
- Surround sound effect and sound mode are available (⇒ 19).
Enjoying VIERA CAST™
You can access a selection of Internet services from the Home screen with VIERA CAST, for example YouTube, Picasa Web Albums. (Current as of December 2010)
Preparation
• Network connection (→ 15)
• Network setting (⇒ 17)
1 Press [VIERA CAST].
• NETFLIX can be accessed directly by [NETFLIX] button. - Message is displayed. Please read these instructions carefully and then press [OK].
2 Press [▲, ▼, ◀, ▶] to select the item and press [OK].
Operable buttons:
[▲, ▼, ◀, ▶], [OK], [RETURN], colored buttons, number buttons
VIERA CAST Home screen;

Images are for illustration purposes, contents may change without notice.
To exit from VIERA CAST
Press [EXIT], [HOME] or [POP-UP MENU].

- When playing content from a disc/SD card, VIERA CAST cannot be accessed by pressing [VIERA CAST].
- In the following cases, settings are possible using "Internet Content Settings" (→ 34)
- When restricting the use of VIERA CAST.
- When the audio is distorted.
- When wrong time is displayed.
- If using a slow Internet connection, the video may not be displayed correctly. A high-speed Internet service with a speed of at least 6 Mbps is recommended.
- Be sure to update the firmware when a firmware update notice is displayed on the screen. If the firmware is not updated, you will not be able to use the VIERA CAST function. (→ 17) • VIERA CAST home screen is subject to change without notice.
- The services through VIERA CAST are operated by their respective service providers, and service may be discontinued either temporarily or permanently without notice. Therefore, Panasonic will make no warranty for the content or the continuity of the services.
- All features of websites or content of the service may not be available.
- Some content may be inappropriate for some viewers.
- Some content may only be available for specific countries and may be presented in specific languages.
Playback menu
1 Press [DISPLAY].
e.g., BD-Video

Menus Items Settings
2 Press [▲, ▼] to select the menu and press [▶]. 3 Press [▲, ▼, ◀, ▶] to select the item and press [▶]. 4 Press [▲, ▼] to select the setting.
Some items can be changed by pressing [OK].
To exit the screen
Press [DISPLAY].
Depending on the condition of the unit (playing, stopped, etc.) and media contents, there may be some items that you cannot select or change.
Regarding Language: (→ 40)
Disc
Signal Type
| Primary Video | Video | The recording method of original video appears. |
| Soundtrack | Select the type of audio or language. | |
| Secondary Video | Video | Select on/off of images. The recording method of original video appears. |
| Soundtrack | Select on/off of audio and the language. |
Video
The recording method of original video appears.
Soundtrack
Show or change the soundtrack.
Subtitle
Turn the subtitle on/off, and change the language depending on the media.
Subtitle Style
Select the subtitle style.
Audio channel
Select the audio channel number.
(⇒ 20, "Changing audio")
Angle
Select the number of the angle.
Play
Repeat Play
(Only when the elapsed time is being displayed on the unit's display.)
Select the item which you want to repeat. The items displayed differ depending on the type of media.
Select "Off" to cancel.
Random
Select whether or not to play random.
Pop-Out Level
[Only when "Full HD" is selected in "3D Type" (=> 33).]
Pop-up position for the Playback menu or message screen etc. can be adjusted during 3D playback.
Video
Picture
Select the picture quality mode during play.
Advanced Setting
Chroma Process
The high-resolution processing of HDMI chroma signals produces a high-resolution picture with rich picture quality.
Detail Clarity
The picture is sharp and detailed.
Super Resolution
Pictures of normal image quality are corrected to sharp and detailed images when output as 1080i/1080p from HDMI AV OUT.
Progressive
Select the method of conversion for progressive output to suit the type of material being played.
- When the content is distorted, change the settings from "Auto" to "Video".
24p
Movies and other material recorded on DVD-Video at 24p are output at 24p.
- Only when you have selected "On" in "24p Output" (⇒ 33)
Audio
Movie Sound Effect
Select the sound effect of the movie.
• Cinema Surround Plus:
The function creates the sound of virtual speakers to enhance the realistic surround feeling as if the sound comes from all directions.
Music Sound Effects *1,*2
Select the sound effect of the music.
• Digital Tube Sound:
This feature gives you warm sound, like that produced by a vacuum tube amplifier.
- Re-master:
This feature gives you brighter sound by increasing the high frequency portion of the audio. (Discs recorded at 48 kHz or less)
Recommended settings:
| Re-master 1 Pop and rock | |
| Re-master 2 Jazz | |
| Re-master 3 Classical |
High Clarity Sound
When connected to TV via the HDMI AV OUT terminal for outputting image, it produces clearer sound.
- Only when you have selected "Enable" in "High Clarity Sound" (⇔ 32).
*1 When audio is output from the HDMI AV OUT terminal this function is effective only when "Dolby D/Dolby D +/Dolby TrueHD" or "DTS/DTS-HD" is set to "PCM". (⇒ 32)
*2 This function has no effect when the type of audio is Dolby Pro Logic II.
Setup menu
Change the unit's settings if necessary. The settings remain intact even if you switch the unit to standby.
1 Press [HOME]. 2 Press [▲, ▼, ◀, ▶] to select “Others” and press [OK]. 3 Press [OK] to select "Setup".
| Setup |
| Disc |
| Video |
| Audio |
| Display |
| TV / Device Connection |
| Network |
| Others |
4 Press [▲, ▼] to select the menu and press [OK]. 5 Press [▲, ▼] to select the item and press [OK].
If there are any other items, repeat these steps.
6 Press [▲, ▼, ◀, ▶] to select the option and press [OK].

- There may be differences in operation methods. If this happens, follow the on-screen instructions for the operation.
About the password
The following items use the same password.
Don't forget your password.
• "DVD-Video Ratings" - "BD-Video Ratings" - “Lock” (⇒ 34)
Disc
DVD-Video Ratings
Set a ratings level to limit DVD-Video play.
- Follow the on-screen instructions. Enter the 4-digit password with the number buttons when the password screen is shown.
BD-Video Ratings
Set an age limit of BD-Video play.
- Follow the on-screen instructions. Enter the 4-digit password with the number buttons when the password screen is shown.
3D BD-Video Playback
Select the playback method of 3D compatible video software.
Audio Language
Choose the language for audio.
- If "Original" is selected, the original language of each disc will be selected.
- Enter a code (=> 40) with the number buttons when you select "Other *****".
Subtitle Language
Choose the language for the subtitle.
- If "Automatic" is selected and the language selected for "Audio Language" is not available, subtitles of that language will automatically appear if available on that disc.
- Enter a code (=> 40) with the number buttons when you select "Other ****".
Menu Language
Choose the language for the disc menus.
- Enter a code (=> 40) with the number buttons when you select "Other *****".
BD-Live Internet Access (=> 21)
You can restrict Internet access when BD-Live functions are used.
- If "Allow (Limited)" is selected, Internet access is permitted only for BD-Live contents which have content owner certificates.
Video
Still Mode (paused video)
Select the type of picture shown when you pause playback.
| Auto Automatically selects the type of picture shown. | |
| Field Select if | jittering occurs when “Auto” is selected. |
| Frame Select if | small text or fine patterns cannot be seen clearly when “Auto” is selected. |
Seamless Play
The chapter segments in playlists are played seamlessly.
- Select "On" when the picture freezes for a moment at the chapter segments in playlists.
Black Level Control
Select lighter or darker for adjusting the black level control to the desired setting for picture enhancement.
Audio
Dynamic Range Compression
You can listen at low volumes but still hear dialog clearly. (Dolby Digital, Dolby Digital Plus and Dolby TrueHD only) "Auto" is effective only when playing Dolby TrueHD.
Digital Audio Output
Press [OK] to show the following settings:
Dolby D/Dolby D +/Dolby TrueHD DTS/DTS-HD
Select the audio signal to output.
- Select "PCM" when the connected equipment cannot decode the respective audio format.
- Not making the proper settings may result in noise.
BD-Video Secondary Audio
Select whether to mix or not mix the primary audio and secondary audio (including the button click sound). (=> 21)
- If "Off" is selected, the unit outputs the primary audio only.
Digital Audio Input
Press [OK] to show the following settings:
PCM-FIX
Select the following audio signal to input.
-ARC
-DIGITAL IN
- "On": PCM is available.
- "Off": DTS, PCM and Dolby Digital are available.
Select "On" if the sound is cut off intermittently.
Downmix
Select the downmix system to enjoy multi-channel or 2-channel sound.
- Select "Surround encoded" to enjoy the surround sound.
- There is no downmix effect on the bitstream audio signal.
- The audio will be output in "Stereo" in the following cases:
- AVCHD playback – Dolby TrueHD playback
- Playback of secondary audio (including the button click sound).
High Clarity Sound
When connected to TV via the HDMI AV OUT terminal for outputting image, it produces clearer sound.
- Set to "Enable" and then set "High Clarity Sound" on the Playback menu to "On". (⇒ 31)
Audio Delay
Mis-sync between the video and audio is corrected by delaying the audio output.
Speaker
Refer to page 35
Display
Status Messages
Choose whether to show status messages automatically.
On-screen Language
Choose the language for menus and on-screen messages.
Screen Saver Function
This is to prevent burn-in on the screen.
- When this is set to "On": If there is no operation for 5 minutes or more, DIRECT NAVIGATOR screen switches to HOME menu automatically.
- While playing and pausing, etc., this function is not available.
- While playing music (CD-DA or MP3), after about 5 minutes DIRECT NAVIGATOR screen switches to a blank screen with "Screen Saver" message.
Front Panel Display
Changes the brightness of the unit's display.
- If "Auto" is selected, the display is dimmed but brightens when you perform some operations.
License
Information about the software used by this unit is displayed.
TV / Device Connection
3D Settings
Press [OK] to show the following settings
3D Type
Select the format of the connected TV.
- Change the settings for 3D on the TV also when "Checker board" or "Side by side" is selected.
3D Playback Precautions
Set to display or hide the 3D viewing warning screen when playing back 3D compatible video software.
TV Aspect
Set to match the type of television connected.
When connected to a 4:3 aspect television and playing 16:9 ratio image:
| 4:3 | The sides are cut off so the picture fills the screen. When playing BD-Video, video is output as “4:3 Letterbox”. |  |
| 4:3Letterbox | Black bands appear at the top and bottom of the picture. |  |
When connected to a 16:9 widescreen television and playing 4:3 ratio image:
| 16:9 Video is displayed as a 4:3 ratio image in the center of the screen. |
HDMI Connection
Press [OK] to show the following settings:
HDMI Resolution
The items supported by the connected devices are indicated on the screen as “*”. When any item without “*” is selected, the images may be distorted.
- If "Auto" is selected, automatically selects the output resolution best suited to the connected television.
- To enjoy high-definition video up-converted to 1080p, you need to connect the unit directly to a 1080p compatible HDTV (High Definition Television). If this unit is connected to an HDTV through other equipment, it must also be 1080p compatible.
24p Output
When this unit is connected to a TV supporting 1080/24p output using an HDMI cable, movies and other material recorded at 24p are output at 24p.
- When playing DVD-Video, set to "On" and then also set "24p" in "Video" (⇒ 30) to "On".
- When BD-Video images other than 24p are played, images are output at 60p.
- 24p : A progressive image recorded at a rate of 24 frames per second (motion-picture film). Many BD-Video movie contents are recorded in 24 frames/second in accordance with the film materials.
HDMI Color Mode
This setting is for selecting color-space conversion of the image signal when the unit is connected using an HDMI cable.
HDMI Audio Output
This setting selects whether or not to output audio from HDMI.
- Audio will be output through the system's speakers when "Off" is selected.
VIERA Link
Set to use "HDAVI Control" function when connected with an HDMI cable to a device that supports "HDAVI Control".
- Select "Off" when you do not want to use "HDAVI Control".
Deep Color Output
This setting is for selecting whether to use Deep Color output when a television that supports Deep Color is connected.
Contents Type Flag
Depending on the playback content, the TV will output adjusting to the optimal method when a TV that supports this function is connected.
Power Off Link
Select the desired power off link setting of this unit for VIERA Link operation (=> 27). (This works depending on the settings of the connected VIERA Link “HDAVI Control” compatible equipment.)
Video/Audio:
When the TV is turned off, this unit will turn off automatically.
Video:
When the TV is turned off, this unit will turn off except during the following conditions:
-CD or MP3 audio playback -iPod/iPhone mode -Radio mode —“AUX”, “ARC” or “D-IN” (DIGITAL IN) mode (non-selected TV AUDIO setting for VIERA Link) - "D-IN" (DIGITAL IN) mode (non-selected CABLE/SATELLITE AUDIO setting for VIERA Link)
TV Audio Input
Select the TV audio input to work with the VIERA Link operations.
Network Others
Network Easy Setting (=> 17)
Network Settings
Perform network-related settings individually.
Press [OK] to show the following settings:
IP Address / DNS Settings
This is for checking the state of the network connection and setting the IP address and DNS-related.
Press [OK] to show the respective setting.
- "Connection Speed Setting" is enabled only when "Auto Detect Connection Speed" is turned "Off".
Proxy Server Settings
This is for checking the state of connection with the Proxy server and performing settings.
Press [OK] to show the respective setting.
Internet Content Settings (=> 29) (VIERA CAST)
Press [OK] to show the following settings:
Lock
You can restrict the usage of VIERA CAST.
- Follow the on-screen instructions. Enter the 4-digit password with the number buttons when the password screen is shown.
Audio Auto Gain Control
Volume that is different depending on the contents is adjusted automatically to the standard volume while using the VIERA CAST.
- Depending on contents, this function effect will not work.
- Select "Off" when the audio is warped.
Time Zone
By selecting the time zone, it is possible to set the unit's time to match your location.
- Some VIERA CAST contents require the time zone to be set. Set the time zone if necessary.
DST
Select "On" when using Daylight Saving time.
MAC Address
Displays the MAC address of this unit.
Remote Control Code
Change the remote control code, when other Panasonic products react to this remote control.
Quick Start*
Speed of startup from power off is increased.
- Internal control unit will be powered when it is set to "On", so contents of the following will be different from the time it is set to "Off".
- Idle power consumption will increase. (More about the power consumption ⇒ 42) * Depending on the power conserving setting activated on the TV, this function may have less effect when the unit is started by the power on link function. (→ 26)
Easy setup ( ⇒ 16)
You can execute basic settings to optimize your home theater system.
This returns all values in the Setup menu and the Playback menu, except for "Remote Control Code", "On-screen Language", "IP Address / DNS Settings", "Proxy Server Settings", "Lock", "DVD-Video Ratings" and "BD-Video Ratings" etc. to the default settings.
System Information
Display firmware version of this unit.
Firmware Update ( ⇒ 17)
Press [OK] to show the following settings:
Automatic Update Check
When this equipment remains connected to the Internet, it will check for the latest firmware version when it is turned on and you can update it if necessary.
Update Now
You can update the firmware manually.
Speaker settings
Delay time
For optimum listening with 5.1-channel sound, all the speakers, except for the subwoofer, should be the same distance from the seating position. If either distance Ⓐ or Ⓑ is less than Ⓒ, find the difference in the relevant table and adjust the delay time to make up for the difference.
![graph TD A["A"] --> B["B"] B --> C["C"] C --> D["D"] D --> E["R"] E --> F["SU"] F --> G["RS"] G --> H["LS"] H --> I["LS"] I --> J["LS"] J --> K["LS"] K --> L["LS"] L --> M["L"] M --> N["C"] N --> O["A"] O --> P["C"] P --> Q["A"] Q --> R["R"] R --> S["SU"] S --> T["RS"] T --> U["LS"] U --> V["LS"] V…](/content/2026/06/1343441/images/c1c8de1f3355f59612c0bb6c492382fedf06a95f1e1d123357b4f67ca318efab.jpg)
Ⓐ Ⓑ Ⓒ: Primary listening distance A Approximate room dimensions B Actual speaker position © Ideal speaker position D Circle of constant primary listening distance
1 Press [▲, ▼, ◀, ▶] to select the distance box (and press [OK]).
e.g., 5.1ch setting

A Center (C) B Left Surround (LS), Right Surround (RS)
2 Press [▲, ▼] to select the setting and press [OK].
A Center speaker
| Difference Setting | |
| Approx. 34 cm (1 ft. 1 in.) 1.0 ms | |
| Approx. 68 cm (2 ft. 2 in.) 2.0 ms | |
| Approx. 102 cm (3 ft. 4 in.) | 3.0 ms |
| Approx. 136 cm (4 ft. 5 in.) | 4.0 ms |
| Approx. 170 cm (5 ft. 6 in.) | 5.0 ms |
B Surround speaker
| Difference Setting | |
| Approx. 170 cm (5 ft. 6 in.) | 5.0 ms |
| Approx. 340 cm (11 ft. 1 in.) | 10.0 ms |
| Approx. 510 cm (16 ft. 8 in.) 15.0 ms | |
Adjusting speaker level
Volume (Channel balance) (dB) (Effective when playing multi-channel audio)
1 Select "Test" and press [OK].
A test signal is output.
2 While listening to the test signal Press [▲, ▼] to adjust the volume of each speaker.
The volume can be adjusted between +6 dB to -6 dB. - Set each speaker level according to the volume of the Front (L) and Front (R) speaker volume respectively.
3 Press [OK].
The test signal stops.
e.g., 5.1ch setting

A Center (C) B Test C Left Surround (LS), Right Surround (RS)
To finish the speaker setting
Press [▲, ▼, ◀, ▶] to select "Complete" and press [OK].
Speaker installation option
Attaching to a wall
You can attach all of the speakers (except subwoofer) to a wall.
- The wall or pillar on which the speakers are to be attached should be capable of supporting 10 kg (22 lbs) per screw. Consult a qualified building contractor when attaching the speakers to a wall. Improper attachment may result in damage to the wall and speakers.
- Do not attempt to attach these speakers to walls using methods other than those described in this manual.
1 Drive a screw (not supplied) into the wall.
A At least 30 mm (1 3/16") B ∅ 4.0 mm (1/32") C ∅ 7.0 mm to ∅ 9.4 mm (9/32" to 3/8") D Wall or pillar E 5.5 mm to 7.5 mm (7/32" to 5/16")
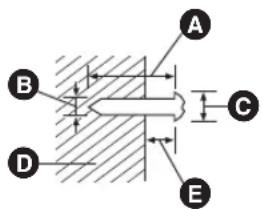
2 Fit the speaker securely onto the screw(s) with the hole(s).
| e.g., Front speaker | |
| DO NOT DO | |
| [YS28]In this position, the speaker will likely fall if moved to the left or right. |  Move the speaker so that the screw is in this position. Move the speaker so that the screw is in this position. |
Use the measurements indicated below to identify the screwing positions on the wall.
- Leave at least 20 mm (25/32") of space above the speaker and 10 mm (13/32") on each side to allow enough space for fitting the speaker.
Front speaker, Surround speaker
F 40 mm (1 9/16") G 17.6 mm (11/16") H 98.7 mm (3 7/8")
Center speaker
23 mm (29/32) J 95 mm to 97 mm (3 3/4" to 3 13/16") K 26 mm (1 1/32") 16.7 mm (21/32) M 63.7 mm (2 1/2")
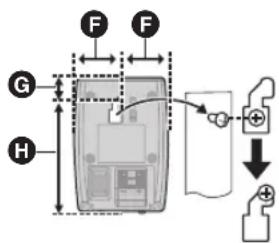

Troubleshooting guide
Before requesting service, please perform the following steps.
Do you have the latest firmware installed?
Firmware updates may be released to correct operating irregularities that are discovered with certain movies. (⇒ 17)
Make the following checks and visit our website for more information.
http://www.panasonic.com/help
Enter the model number.

Or visit our website to find a service center.
You can find a service center near you easily on our website.
Other support information:
"Customer Services Directory (United States and Puerto Rico)" (⇒ 43)
The following do not indicate a problem with this unit:
- Regular disc rotating sounds. – Image disturbance during search.
- Image disturbance when replacing 3D discs.
■ Unit does not respond to the remote control or front panel buttons.
Press and hold [POWER ⬇/I] on the main unit for 5 seconds. – If still unable to power the unit off, disconnect the power cord, wait 1 minute, then reconnect the power cord.
■ Cannot eject disc.
The unit may have a problem.
While the unit is off, press and hold [▶▶] on the remote control and [▲ OPEN/CLOSE] on the unit at the same time for more than 5 seconds.
General operation
To return to the factory preset
- Select "Yes" in "Restore Default Settings" in the Setup menu. (⇒ 34)
To return all settings to the factory preset
- Reset the unit as follows:
While the unit is off, press and hold [+ VOLUME], [▲ OPEN/CLOSE] and [POWER ⏻/I] on the main unit at the same time for more than 5 seconds.
The remote control doesn't work properly.
- Change the batteries in the remote control. (→ 9)
- The remote control and main unit are using different codes. If "SET □" is displayed on the unit's display when a button is pressed on the remote control, change the code on the remote control. (⇒ 34)
Disc cannot be played.
- The disc is dirty. (=> 9)
- Check the region code.
Still pictures (JPEG) do not playback normally.
- The images that were edited on the PC, such as Progressive JPEG, etc., may not playback.
The TV tuner mode is not displayed when the TV is switched on.
- This phenomenon may occur, depending on the TV setting, when "Quick Start" is set to "On".
- Depending on the TV, this phenomenon may be prevented by reconnecting the HDMI cable to a different HDMI input terminal or by changing the HDMI auto connection setting.
You have forgotten your ratings password. You want to cancel the ratings level.
The ratings level returns to the factory preset.
① While the unit is on, press and hold [OK], [B] and [Y] on the remote control at the same time for more than 5 seconds. —"00 RET" is displayed on the unit's display. ② Repeatedly press [▶] (right) on the remote control or [POWER ⏻/I] on the unit until "03 VL" is displayed on the unit's display. ③ Press [OK] on the remote control or [▲ OPEN/CLOSE] on the unit.
Power
No power.
- Insert the AC power supply cord securely into a household AC outlet. (=> 15)
The unit switches to standby mode.
- This unit will automatically turn to standby mode after 30 minutes if it is inactive. (=> 7)
- When the time set for the sleep timer has passed, the power will be turned off. (⇒ 6)
- One of the unit's safety devices is activated. Press [POWER ⏻/I] on the main unit to turn the unit on.
This unit is turned off when the input for the TV is switched.
- This is a normal phenomenon when using VIERA Link (HDAVI Control 4 or later). For details please read the operating instructions for the TV.
The unit does not turn off.
① Press and hold [POWER ⏻/l] on the main unit for 5 seconds. (If still unable to power the unit off, disconnect the power cord, wait 1 minute, then reconnect the power cord.) ② Reset the unit as follows: While the unit is off, press and hold [+ VOLUME], [▲ OPEN/CLOSE] and [POWER ⏻/l] on the main unit at the same time for more than 5 seconds.
Displays
The display is dim.
- Change "Front Panel Display" in the Setup menu. (⇒ 32)
TV screen and video
The images from this unit do not appear on the TV. Picture is distorted.
Jittering occurs.
- An incorrect resolution is selected in "HDMI Resolution". Reset the setting as follows: ① While the unit is on, press and hold [OK], [B] and [Y] on the remote control at the same time for more than 5 seconds. —“00 RET” is displayed on the unit’s display. ② Repeatedly press [▶] (right) on the remote control or [POWER ⏻/I] on the unit until "04 PRG" is displayed on the unit's display. ③ Press and hold [OK] on the remote control or [▲ OPEN/CLOSE] on the unit for at least 3 seconds. Set the item again. (⇒ 33)
- When Dolby Digital Plus, Dolby TrueHD, and DTS-HD audio are not output in bitstream, select "Yes" in "Restore Default Settings" and make proper settings. (⇒ 34)
- When "3D BD-Video Playback" in the Setup menu is set to "Automatic", images may not be output depending on the connection method. After removing the disc from this unit, select "Set before play" in the Setup menu, and select "2D Playback" in the setup screen displayed when playing 3D discs. (⇒ 31)
Video is not output.
- Set "High Clarity Sound" in the Playback menu to "Off" to use the VIDEO OUT terminal. (⇒ 31)
Video is not output in high-definition.
- Confirm that "HDMI Resolution" in the Setup menu is set properly. (⇒ 33)
3D video is not output.
- Are the settings on this unit and the TV correct? (⇒ 22)
3D video is not output correctly as 2D.
- Select "Set before play" in the Setup menu, and select "2D Playback" in the setup screen displayed when playing 3D discs. (⇒ 31)
- Discs that have recorded titles with Side by side (2 screen structure) and that can be enjoyed in 3D are played back in accordance with the settings of the TV.
No subtitles.
- When progressive output is on, closed captions/subtitles cannot be displayed.
The subtitles overlap closed captions recorded on discs.
- Turn off the subtitles or turn off the closed caption setting on the TV. (⇒ 30)
A black band is displayed around the edge of the screen. The aspect ratio of the screen is abnormal.
- Confirm the "TV Aspect" is set properly. (⇒ 33)
- Adjust the aspect setting on the television.
Sound
No sound.
Low volume.
Distorted sound.
Cannot hear the desired audio type.
- Check connections to speakers and other equipment. (⇒ 10–15)
- Ensure the speaker settings for your speakers are correct. (⇒ 35)
- To output audio from a device connected with an HDMI cable, set "HDMI Audio Output" to "On" in the Setup menu. (⇒ 33)
- When "BD-Video Secondary Audio" is set to "On", Dolby TrueHD, Dolby Digital Plus, DTS-HD Master Audio and DTS-HD High Resolution Audio are output as Dolby Digital or DTS Digital Surround.
- Re-master will not work when the bitstream signal is output from the HDMI AV OUT terminal. (⇒ 31)
- Depending on the connected equipment, the sound may be distorted if this unit is connected with an HDMI cable.
- The multi-channel audio from a device connected to the TV is not output in its original multi-channel form.
- If the device has an optical audio output terminal, connect the device to this unit's "OPTICAL" terminal. (See pages 14, 25)
No surround sound.
- Press [SURROUND] to select a surround effect. (See page 19)
Cannot switch audio.
- When audio is output from the HDMI AV OUT terminal, set "Dolby D/Dolby D +/Dolby TrueHD" or "DTS/DTS-HD" to "PCM". (See page 32)
No sound from the TV.
- Press [EXT-IN] to select the corresponding source. (See page 18)
- When connecting the unit to a TV using an HDMI cable, check whether the HDMI terminal on the TV is labeled "HDMI (ARC)". If not labeled in this way, connect using the HDMI cable in combination with an optical digital audio cable. (See pages 12, 13)
- If there is no sound from the equipment connected to this unit's DIGITAL AUDIO IN terminal, please make sure that the optical audio output of the equipment is set to PCM.
iPod/iPhone operation
Cannot charge or operate.
- Check that the iPod/iPhone is connected firmly. (See page 27)
- The battery of the iPod/iPhone is depleted. Charge the iPod/iPhone, and then operate again.
- When unexpected operation occurs while using the iPod/iPhone, connect the iPod/iPhone again or try to restart the iPod/iPhone.
Cannot display iPod/iPhone videos/photos on the TV.
- Make sure that the TV is connected to the VIDEO OUT terminal on this unit. (⇒ 12)
- Operate the iPod/iPhone menu to make the appropriate video/photo output settings for your TV. (Refer to the operating instructions for your iPod/iPhone.)
The TV input channel unintentionally changes to HDMI input.
- When the main unit is connected with an "HDAVI Control" compatible TV and VIDEO IN is selected for iPod/iPhone video or photo playback, the TV input channel will automatically change to the HDMI input channel when [HOME] is pressed.
- Re-select the TV's VIDEO IN input channel.
Radio
Distorted sound or noise is heard.
- Adjust the position of the antenna.
- Use an outdoor antenna. (⇒ 11)
A beat sound is heard.
Try to keep a certain amount of distance between the antenna and the TV.
Network
I can't connect to the network.
- Confirm the network connection and settings. (→ 15, 17, 34)
- Check the operating instructions for each device and connect accordingly.
Other difficulties with playback
BD-Video or DVD-Video is not played.
- Ensure the disc is for the correct BD-Video region code or DVD-Video region number, and is not defective. (⇒ 8)
- You have set a ratings level to limit BD-Video or DVD-Video play. Change this setting. (⇒ 31) • Some BD-Video can only be output with HDMI.
I cannot play back BD-Live.
- The SD card is write-protected. (⇒ 9)
- Confirm that this unit is connected to the broadband Internet. (⇒ 15)
- Confirm the "BD-Live Internet Access" settings. (→ 32)
- Confirm an SD Card is inserted into the SD Card slot. (→ 18)
Alternative soundtrack and subtitles cannot be selected.
• The languages are not recorded on the disc. - You may not be able to use the playback menu to change the soundtrack and subtitles on some discs. Use the disc's menus to make changes. (⇒ 20)
Angle cannot be changed.
- Angles can only be changed during scenes where different angles are recorded.
Messages
The following messages or service numbers appear on the television or unit's display when something unusual is detected during startup and use.
On the television
Cannot play.
- You inserted an incompatible disc. (Discs recorded in PAL video, etc.)
Cannot display on this unit.
- You tried to play a non-compatible image.
No disc is inserted.
- The disc may be upside down.
⊗ This operation is not available.
- Some operations are unsupported by the unit. For example; -BD-Video: During playback, reverse slow-motion or reverse frame-by-frame is not possible.
IP address is not set.
- The "IP Address" in "IP Address / DNS Settings" is "---. ---. ---. ---". Set the "IP Address", "Subnet Mask", and "Default Gateway". (Select the automatic address acquisition if necessary.)
No Video
- Depending on the connected iPod/iPhone, video menu may not be available on the TV. Select "ALL" on the unit's display and operate video playback from your iPod/iPhone menu. (⇒ 29)
On the unit's display
F99
- The unit fails to operate properly. Press [POWER ⏻/I] on the main unit to switch the unit to standby for 3 seconds. Now press [POWER ⏻/I] on the main unit again to turn the unit on.
U59
- The unit is hot. The unit switches to standby for safety reasons. Wait for about 30 minutes until the message disappears. Select a position with good ventilation when installing the unit. Do not block the ventilation hole on the rear and side of the unit.
HDMI ONLY
- Some BD-Video discs can only be output with HDMI.
NET
- While connecting to a network.
No PLAY
- There is a viewing restriction on a BD-Video or DVD-Video. (⇒ 31)
No READ
- The media is dirty or badly scratched. The unit cannot play.
PLEASE WAIT
- The unit is carrying out an internal process. This is not a malfunction. You cannot operate the unit while "PLEASE WAIT" is displayed.
SET □
("□" stands for a number.)
- The remote control and main unit are using different codes. Change the code on the remote control.
Press and hold [OK] and the indicated number button at the same time for more than 5 seconds.

H□□ or F□□
("□" stands for a number.)
- Check and correct the speaker cable connections.
- There is something unusual.
- Check the unit using the troubleshooting guide. If the service number does not disappear, do the following.
① Disconnect the plug from the household AC outlet, wait a few seconds, then reconnect it.
② Press [POWER ⏻/l] to turn the power on. If the service number does not disappear despite doing the above, request service from the dealer. Inform the dealer of the service number when requesting service.
UPD□/□
(“□” stands for a number.)
- The firmware is being updated. Please do not turn off power.
IPOD OVER CURRENT ERROR
- The iPod/iPhone is drawing too much power. Remove the iPod/iPhone, and turn the unit off and on again.
START
- The system is being restarted during the firmware update. Please do not turn off the power.
FINISH
- The firmware update is completed.
NOT CONDITIONAL
- The requested operation cannot be performed.
Supplemental information
■ Display languages list
| Display | Language | Display | Language | Display | Language |
| ENG | English | JPN | Japanese | ARA | Arabic |
| FRA | French | CHI | Chinese | HIN | Hindi |
| DEU | German | KOR | Korean | PER | Persian |
| ITA | Italian | MAL | Malay | IND | Indonesian |
| ESP | Spanish | VIE | Vietnamese | MRI | Maori |
| NLD | Dutch | THA | Thai | BUL | Bulgarian |
| SVE | Swedish | POL | Polish | RUM | Romanian |
| NOR | Norwegian | CES | Czech | GRE | Greek |
| DAN | Danish | SLK | Slovak | TUR | Turkish |
| POR | Portuguese | HUN | Hungarian | * | Others |
| RUS | Russian | FIN | Finnish |
■ Language code list
| Language | Code | Language | Code | Language | Code |
| Abkhazian | 6566 | Gujarati: | 7185 | Rhaeto-Romance: | |
| Afar: 6565 | Hausa: | 7265 | 8277 | ||
| Afrikaans: 6570 | Hebrew: | 7387 | Romanian: | 8279 | |
| Albanian: 8381 | Hindi: | 7273 | Russian: | 8285 | |
| Amharic: | 6577 | Hungarian: 7285 | Samoan: | 8377 | |
| Arabic: 6582 | Icelandic: | 7383 | Sanskrit: | 8365 | |
| Armenian: 7289 | Indonesian: | 7378 | Scots Gaelic: | 7168 | |
| Assamese: 6583 | Interlingua: | 7365 | Serbian: | 8382 | |
| Aymara: 6589 | Irish: | 7165 | Serbo-Croatian: | 8372 | |
| Azerbaijani: | 6590 | Italian: | 7384 | Shona: | 8378 |
| Bashkir: 6665 | Japanese: 7465 | Sindhi: 8368 | |||
| Basque: 6985 | Javanese: | 7487 | Singhalese: | 8373 | |
| Bengali: Bangla: | Kannada: | 7578 | Slovak: | 8375 | |
| 6678 | Kashmiri: 7583 | Slovenian: | 8376 | ||
| Bhutani: 6890 | Kazakh: | 7575 | Somali: | 8379 | |
| Bihari: | 6672 | Kirghiz: | 7589 | Spanish: | 6983 |
| Breton: | 6682 | Korean: | 7579 | Sundanese: | 8385 |
| Bulgarian: | 6671 | Kurdish: 7585 | Swahili: | 8387 | |
| Burmese: | 7789 | Laotian: | 7679 | Swedish: | 8386 |
| Byelorussian: | 6669 | Latin: | 7665 | Tagalog: | 8476 |
| Cambodian: | 7577 | Latvian, Lettish: | 7686 | Tajik: | 8471 |
| Catalan: | 6765 | Lingala: | 7678 | Tamil: | 8465 |
| Chinese: | 9072 | Lithuanian: 7684 | Tatar: | 8484 | |
| Corsican: | 6779 | Macedonian: 7775 | Telugu: | 8469 | |
| Croatian: | 7282 | Malagasy: | 7771 | Thai: | 8472 |
| Czech: 6783 | Malay: | 7783 | Tibetan: 6679 | ||
| Danish: | 6865 | Malayalam: | 7776 | Tigrinya: | 8473 |
| Dutch: | 7876 | Maltese: | 7784 | Tonga: | 8479 |
| English: | 6978 | Maori: | 7773 | Turkish: | 8482 |
| Esperanto: | 6979 | Marathi: | 7782 | Turkmen: | 8475 |
| Estonian: | 6984 | Moldavian: | 7779 | Twi: | 8487 |
| Faroese: | 7079 | Mongolian: | 7778 | Ukrainian: | 8575 |
| Fiji: | 7074 | Nauru: | 7865 | Urdu: | 8582 |
| Finnish: | 7073 | Nepali: 7869 | Uzbek: 8590 | ||
| French: | 7082 | Norwegian: | 7879 | Vietnamese: 8673 | |
| Frisian: | 7089 | Oriya: | 7982 | Volapük: | 8679 |
| Galician: | 7176 | Pashto, Pushto: | 8083 | Welsh: | 6789 |
| Georgian: 7565 | Persian: | 7065 | Wolof: | 8779 | |
| German: | 6869 | Polish: | 8076 | Xhosa: 8872 | |
| Greek: | 6976 | Portuguese: | 8084 | Yiddish: | 7473 |
| Greenlandic: 7576 | Punjabi: | 8065 | Yoruba: | 8979 | |
| Guarani: | 7178 | Quechua: | 8185 | Zulu: | 9085 |
File format
| File format | Extension | Reference |
| MP3 | “.MP3”,“.mp3“ | ID3 tags (Only titles and the names of artists) |
| JPEG | “.JPG”,“.jpg“ | MOTION JPEG and Progressive JPEG is not supportedYou may not be able to play back the file if you have edited the folder structure or the file name on a PC or other device. |
- With certain recording states and folder structures, the play order may differ or playback may not be possible.
Java and all Java-based trademarks and logos are trademarks or registered trademarks of Sun Microsystems, Inc. in the United States and other countries.
Manufactured under license from Dolby Laboratories. Dolby, Pro Logic, and the double-D symbol are trademarks of Dolby Laboratories.
Manufactured under license under U.S. Patent #'s: 5,451,942; 5,956,674; 5,974,380; 5,978,762; 6,226,616; 6,487,535; 7,392,195; 7,272,567; 7,333,929; 7,212,872 & other U.S. and worldwide patents issued & pending. DTS and the Symbol are registered trademarks, & DTS-HD, DTS-HD Master Audio | Essential and the DTS logos are trademarks of DTS, Inc. Product includes software. © DTS, Inc. All Rights Reserved.
This item incorporates copy protection technology that is protected by U.S. patents and other intellectual property rights of Rovi Corporation. Reverse engineering and disassembly are prohibited.
HDMI, the HDMI Logo, and High-Definition Multimedia Interface are trademarks or registered trademarks of HDMI Licensing LLC in the United States and other countries.
This product is licensed under the AVC patent portfolio license and VC-1 patent portfolio license for the personal and non-commercial use of a consumer to (i) encode video in compliance with the AVC Standard and VC-1 Standard ("AVC/VC-1 Video") and/or (ii) decode AVC/VC-1 Video that was encoded by a consumer engaged in a personal and non-commercial activity and/or was obtained from a video provider licensed to provide AVC/VC-1 Video. No license is granted or shall be implied for any other use. Additional information may be obtained from MPEG LA, LLC. See http://www.mpegla.com.
HDAVI Control™ is a trademark of Panasonic Corporation.
VIERA Link™ is a trademark of Panasonic Corporation.
VIERA CAST™ is a trademark of Panasonic Corporation.
EZ Sync™ is a trademark of Panasonic Corporation.
MPEG Layer-3 audio coding technology licensed from Fraunhofer IIS and Thomson.
"AVCHD" and the "AVCHD" logo are trademarks of Panasonic Corporation and Sony Corporation.
SDXC Logo is a trademark of SD-3C, LLC.
"DVD Logo" is a trademark of DVD Format/Logo Licensing Corporation.
YouTube and Picasa are trademarks of Google, Inc.
Made for

iPod iPhone
"Made for iPod" and "Made for iPhone" mean that an electronic accessory has been designed to connect specifically to iPod, or iPhone, respectively, and has been certified by the developer to meet Apple performance standards.
Apple is not responsible for the operation of this device or its compliance with safety and regulatory standards.
Please note that the use of this accessory with iPod, or iPhone may affect wireless performance.
iPhone, iPod, iPod classic, iPod nano, and iPod touch are trademarks of Apple Inc., registered in the U.S. and other countries.
This product incorporates the following software:
(1) the software developed independently by or for Panasonic Corporation, (2) the software owned by third party and licensed to Panasonic Corporation, (3) the software licensed under the GNU General Public License, Version 2 (GPL v2), (4) the software licensed under the GNU LESSER General Public License, Version 2.1 (LGPL v2.1) and/or, (5) open sourced software other than the software licensed under the GPL v2 and/or LGPL v2.1
For the software categorized as (3) and (4), please refer to the terms and conditions of GPL v2 and LGPL v2.1, as the case may be at http://www.gnu.org/licenses/old-licenses/gpl-2.0.html and http://www.gnu.org/licenses/old-licenses/lgpl-2.1.html. In addition, the software categorized as (3) and (4) are copyrighted by several individuals. Please refer to the copyright notice of those individuals at http://www.am-linux.jp/dl/AWBPP11
The GPL/LGPL software is distributed in the hope that it will be useful, but WITHOUT ANY WARRANTY, without even the implied warranty of MERCHANTABILITY or FITNESS FOR A PARTICULAR PURPOSE.
At least three (3) years from delivery of products, Panasonic will give to any third party who contacts us at the contact information provided below, for a charge no more than our cost of physically performing source code distribution, a complete machine-readable copy of the corresponding source code covered under GPL v2/LGPL v2.1.
Contact Information cdrequest@am-linux.jp
Source code is also freely available to you and any other member of the public via our website below. http://www.am-linux.jp/dl/AWBPP11
For the software categorized as (5) includes as follows.
- This product includes software developed by the OpenSSL Project for use in the OpenSSL Toolkit. (http://www.openssl.org/)
- This product includes software developed by the University of California, Berkeley and its contributors.
- FreeType code.
- The Independent JPEG Group's JPEG software.
gSOAP Public License 1.3
Part of the software embedded in this product is gSOAP software. Portions created by gSOAP are Copyright (C) 2001-2009 Robert A. van Engelen, Genivia inc. All Rights Reserved. THE SOFTWARE IN THIS PRODUCT WAS IN PART PROVIDED BY GENIVIA INC AND ANY EXPRESS OR IMPLIED WARRANTIES, INCLUDING, BUT NOT LIMITED TO, THE IMPLIED WARRANTIES OF MERCHANTABILITY AND FITNESS FOR A PARTICULAR PURPOSE ARE DISCLAIMED. IN NO EVENT SHALL THE AUTHOR BE LIABLE FOR ANY DIRECT, INDIRECT, INCIDENTAL, SPECIAL, EXEMPLARY, OR CONSEQUENTIAL DAMAGES (INCLUDING, BUT NOT LIMITED TO, PROCUREMENT OF SUBSTITUTE GOODS OR SERVICES; LOSS OF USE, DATA, OR PROFITS; OR BUSINESS INTERRUPTION) HOWEVER CAUSED AND ON ANY THEORY OF LIABILITY, WHETHER IN CONTRACT, STRICT LIABILITY, OR TORT (INCLUDING NEGLIGENCE OR OTHERWISE) ARISING IN ANY WAY OUT OF THE USE OF THIS SOFTWARE, EVEN IF ADVISED OF THE POSSIBILITY OF SUCH DAMAGE.
Specifications
GENERAL
Power consumption: 85 W
Power consumption
in standby mode: Approx. 0.4 W
Power supply: AC 120 V, 60 Hz
iPod/iPhone Connector:
Dimensions (W×H×D):
Mass (Weight):
Operating temperature range: 0
Operating humidity range:
DC OUT 5 V 1.0 A MAX
430 mm×38 mm×279 mm
(16 15/16" × 1 1/2" × 10 31/32")
Approx. 2.7 kg (6 lbs)
(Dimensions and Weight do not
include speakers)
°C to 40 °C
(32 °F to 104 °F)
35 % to 80 % RH
(no condensation)
AMPLIFIER SECTION
RMS TTL POWER OUTPUT: 1000 W
1 kHz, 10 % total harmonic distortion
FTC TTL POWER OUTPUT: 430 W
120 Hz to 20 kHz, 1.0 % total harmonic distortion
45 Hz to 120 Hz, 1.0 % total harmonic distortion
SUBWOOFER: 100 W (3 Ω)
Audio Input
AUX: × 1
Digital Audio Input
Optical: × 1
Sampling frequency: 32 kHz, 44.1 kHz, 48 kHz
Audio Format: PCM, Dolby Digital, DTS
FM TUNER SECTION
Frequency range:
87.9 MHz to 107.9 MHz (200 kHz step),
87.5 MHz to 108.0 MHz (100 kHz step)
75 Ω (unbalanced)
Antenna terminals:
SPEAKER SECTION
FRONT SPEAKERS
SB-HF270
Type: 1 WAY 1 SPEAKER Bass-ref.
Full range: 6.5 cm (2 1/2") CONE TYPE
Impedance: 3 Ω
Output sound pressure: 78 dB/W (1 m)
Frequency range: 105 Hz to 25 kHz (-16 dB),
130 Hz to 22 kHz (-10 dB)
Dimensions (W×H×D): 80 mm×117 mm×70.5 mm
(3 5/32" × 4 19/32" × 2 15/16")
Mass (Weight): Approx. 0.35 kg (0.77 lbs)
CENTER SPEAKER
SB-HC270
Type: 1 WAY 1 SPEAKER Bass-ref.
Full range: 6.5 cm (2 1/2") CONE TYPE
Impedance: 3 Ω
Output sound pressure:
Frequency range:
Dimensions (W×H×D):
Mass (Weight):
79 dB/W (1 m)
90 Hz to 25 kHz (-16 dB),
115 Hz to 22 kHz (-10 dB)
145 mm × 81 mm × 70.5 mm
(5 23/32" × 3 3/16" × 2 15/16")
Approx. 0.5 kg (1.1 lbs)
SURROUND SPEAKERS
SB-HS270
Type: 1 WAY 1 SPEAKER Bass-ref.
Full range: 6.5 cm (2 1/2") CONE TYPE
Impedance: 3 Ω
Output sound pressure: 78 dB/W (1 m)
Frequency range:
Dimensions (W×H×D):
Mass (Weight): Approx. 0.35 kg (0.77 lbs)
SUBWOOFER
SB-HW270
Type: 1 WAY 1 SPEAKER Bass-ref.
Woofer: 16 cm (6 1/2") CONE TYPE
Impedance: 3 Ω
Output sound pressure: 78 dB/W (1 m)
Frequency range: 40 Hz to 220 Hz (-16 dB),
45 Hz to 180 Hz (-10 dB)
Dimensions (W×H×D): 145 mm×289.5 mm×258 mm
(5 23/32" × 11 13/32" × 10 5/32")
Mass (Weight): Approx. 2.8 kg (6.2 lbs)
TERMINAL SECTION
Ethernet: 10BASE-T/100BASE-TX 1 system
SD card slot: Connector: 1 system
VIDEO SECTION
Signal system: NTSC
Video output
Output level: 1.0 Vp-p (75 Ω)
Output connector: Pin jack (1 system)
HDMI AV output
Output format: 1080p/1080i/720p/480p
Output connector: Type A (19 pin)
This unit supports "HDAVI Control
5" function.
LASER Specification:
Class I LASER Product
Wave length: 790 nm (CDs)/655 nm (DVDs)/
405 nm (BDs)
Laser power: No hazardous radiation is emitted
with the safety protection
Specifications are subject to change without notice.
Limited Warranty
Panasonic Consumer Electronics Company, Division of Panasonic Corporation of North America
One Panasonic Way, Secaucus, New Jersey 07094
Panasonic Blu-ray and DVD Products Limited Warranty
Limited Warranty Coverage (For USA and Puerto Rico Only)
If your product does not work properly because of a defect in materials or workmanship, Panasonic Consumer Electronics Company (referred to as "the warrantor") will, for the length of the period indicated on the chart below, which starts with the date of original purchase ("warranty period"), at its option either (a) repair your product with new or refurbished parts, (b) replace it with a new or a refurbished equivalent value product, or (c) refund your purchase price. The decision to repair, replace or refund will be made by the warrantor.
| Product or Part Name Parts Labor | ||
| Blu-ray Disc Player, Portable Blu-ray Disc Player | 1 year 90 days | |
| Blu-ray Home Theater System 1 year | 1 year | |
| DVD Player, Portable DVD Player | 1 year 90 days | |
| DVD Recorder 1 year 90 days | ||
| Rechargeable Batteries (pack), DVD-RAM Disc (defective exchange) | 10 days Not | Applicable |
During the “Labor” warranty period there will be no charge for labor. During the “Parts” warranty period, there will be no charge for parts. This Limited Warranty excludes both parts and labor for non-rechargeable batteries, antennas, and cosmetic parts (cabinet). This warranty only applies to products purchased and serviced in the United States or Puerto Rico. This warranty is extended only to the original purchaser of a new product which was not sold “as is”.
Mail-In Service
For assistance in the U.S.A. and Puerto Rico in obtaining repairs, please ship the product prepaid to:
Panasonic Exchange Center
4900 George McVay Drive
Suite B
McAllen, TX 78503
panacare@us.panasonic.com
When shipping the unit, carefully pack it, include all accessories, and send it prepaid, adequately insured, and preferably in the original carton. If Lithium Ion batteries are shipped by air, the package must be labeled "Contains Lithium Ion Battery (No lithium metal)". Damaged batteries are prohibited from shipment by US Mail. Batteries must be securely packed in a manner to prevent short-circuiting, and a package cannot contain more than 3 Lithium Ion batteries. Include a letter detailing the complaint, a return address, and provide a daytime phone number where you can be reached. A valid registered receipt is required under the Limited Warranty.
IF REPAIR IS NEEDED DURING THE WARRANTY PERIOD, THE PURCHASER WILL BE REQUIRED TO FURNISH A SALES RECEIPT/PROOF OF PURCHASE INDICATING DATE OF PURCHASE, AMOUNT PAID, AND PLACE OF PURCHASE. CUSTOMER WILL BE CHARGED FOR THE REPAIR OF ANY UNIT RECEIVED WITHOUT SUCH PROOF OF PURCHASE.
Limited Warranty Limits And Exclusions
This warranty ONLY COVERS failures due to defects in materials or workmanship, and DOES NOT COVER normal wear and tear or cosmetic damage. The warranty ALSO DOES NOT COVER damages which occurred in shipment, or failures which are caused by products not supplied by the warrantor, or failures which result from accidents, misuse, abuse, neglect, mishandling, misapplication, alteration, faulty installation, set-up adjustments, misadjustment of consumer controls,
improper maintenance, power line surge, lightning damage, modification, introduction of sand, humidity or liquids, commercial use such as hotel, office, restaurant, or other business or rental use of the product, or service by anyone other than a Factory Service Center or other Authorized Servicer, or damage that is attributable to acts of God.
THERE ARE NO EXPRESS WARRANTIES EXCEPT AS LISTED UNDER "LIMITED WARRANTY COVERAGE".
THE WARRANTOR IS NOT LIABLE FOR INCIDENTAL OR CONSEQUENTIAL DAMAGES RESULTING FROM THE USE OF THIS PRODUCT, OR ARISING OUT OF ANY BREACH OF THIS WARRANTY.
(As examples, this excludes damages for lost time, travel to and from the servicer, loss of or damage to media or images, data or other memory or recorded content. The items listed are not exclusive, but for illustration only.)
ALL EXPRESS AND IMPLIED WARRANTIES, INCLUDING THE WARRANTY OF MERCHANTABILITY, ARE LIMITED TO THE PERIOD OF THE LIMITED WARRANTY.
Some states do not allow the exclusion or limitation of incidental or consequential damages, or limitations on how long an implied warranty lasts, so the exclusions may not apply to you.
This warranty gives you specific legal rights and you may also have other rights which vary from state to state. If a problem with this product develops during or after the warranty period, you may contact your dealer or Service Center. If the problem is not handled to your satisfaction, then write to the warrantor's Consumer Affairs Department at the addresses listed for the warrantor.
PARTS AND SERVICE, WHICH ARE NOT COVERED BY THIS LIMITED WARRANTY, ARE YOUR RESPONSIBILITY.
Customer Services Directory (United States and Puerto Rico)
Obtain Product Information and Operating Assistance; locate your nearest Dealer or Service Center; purchase
Parts and Accessories; or make Customer Service and Literature requests by visiting our Web Site at:
http://www.panasonic.com/help
or, contact us via the web at:
http://www.panasonic.com/contactinfo
You may also contact us directly at:
1-800-211-PANA (7262)
Monday-Friday 9am-9pm,
Saturday-Sunday 10am-7pm EST
For hearing or speech impaired TTY users, TTY: 1-877-833-8855
Accessory Purchases (United States and Puerto Rico)
Purchase Parts, Accessories and Instruction Books online for all Panasonic Products by visiting our Web Site at:
http://www.pstc.panasonic.com
Or, send your request by E-mail to:
npcparts@us.panasonic.com
You may also contact us directly at:
1-800-332-5368 (Phone) 1-800-237-9080 (Fax Only)
(Monday-Friday 9am-9pm EST)
Panasonic Service and Technology Company
20421 84th Avenue South, Kent, WA 98032
(We accept Visa, MasterCard, Discover Card, American Express, and Personal Checks)
For hearing or speech impaired TTY users, TTY: 1-866-605-1277
As of November 2009
User memo:
DATE OF PURCHASE
DEALER NAME
DEALER ADDRESS
TELEPHONE NUMBER
The model number and serial number of this product can be found on either the back or the bottom of the unit.
Please note them in the space provided below and keep for future reference.
MODEL NUMBER SC-BTT268
SERIAL NUMBER
Index
A
Audio
Changing audio....20
Language . . . . . . . . . . . . . . . . . . . . . . . . . . . . . . . . . . . . . . . . . . 30, 31
B
BD-Live....21
©
Chapter....21
F
File format ....40
Firmware update....17
1
iPod/iPhone .....27
L
LAN 15
Language
Audio 30,31
Menu 32
On-screen 32
Soundtrack. 30
Subtitle....30, 32
N
Network
Connection....15
Setting 17,34
P
Playlists....21
Pop-up menu 20
Q
Quick Start 34
R
Radio 24
Re-master.... 31
Restore Default Settings.... 34
Resume play function 20
S
Subtitle 30
V
VIERA CAST™ 29
VIERA Link™ "HDAVI Control™" .... 26
24p 30,33
3D 22



HDMI
VIERA Link™

AVCHD™


As an ENERGY STAR® Partner, Panasonic has determined that this product meets the ENERGY STAR® guidelines for energy efficiency.
Panasonic Consumer Electronics Company,
Division of Panasonic Corporation of North America
En
One Panasonic Way, Secaucus,
New Jersey 07094
http://www.panasonic.com
© Panasonic Corporation 2010
Printed in Malaysia
VQT3M40-1
F1210MH1120
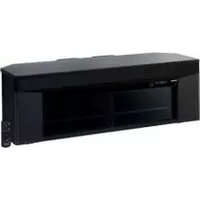

- DEAR CUSTOMER
- FCC NOTE
- WARNING
- UNIT
- CAUTION
- PLACEMENT
- IMPORTANT SAFETY INSTRUCTIONS
- RISK OF ELECTRIC SHOCK DO NOT OPEN
- IF YOU SEE THIS SYMBOL
- INFORMATION ON DISPOSAL IN OTHER COUNTRIES OUTSIDE THE EUROPEAN UNION
- TABLE OF CONTENTS
- GETTING STARTED
- PLAYBACK
- RADIO
- TV
- OTHER DEVICES
- ADVANCED OPERATIONS
- OPTIONAL SPEAKER SETTINGS
- REFERENCE
- ACCESSORY
- CONTROL REFERENCE GUIDE
- REMOTE CONTROL
- MAIN UNIT (FRONT)
- STANDBY/ON SWITCH (POWER ⏻/I) (⇒ 16)
- POWER-SAVING FEATURES
- THE MAIN UNIT IS DESIGNED TO CONSERVE ITS POWER CONSUMPTION AND SAVE ENERGY
- AUTOMATIC POWER-DOWN FUNCTION
- MAIN UNIT (REAR)
- DISCS THAT CANNOT BE PLAYED IN THIS UNIT
- REGION MANAGEMENT INFORMATION
- BD-VIDEO
- DVD-VIDEO
- FINALIZE
- MUSIC CD
- D
- UNIT AND MEDIA CARE
- CLEAN THIS UNIT WITH A SOFT, DRY CLOTH
- CLEAN THE LENS
- CLEAN DISCS
- DISC AND CARD HANDLING PRECAUTIONS
- TO DISPOSE OR TRANSFER THIS UNIT
- SD CARD
- USING THE REMOTE CONTROL
- STEP 1 : PREPARING THE SPEAKERS
- USE OF THE SPEAKER CABLE STICKERS IS CONVENIENT WHEN MAKING CABLE CONNECTIONS
- CONNECTING THE SPEAKER CABLES. INSERT THE WIRE FULLY, TAKING CARE NOT TO INSERT BEYOND THE WIRE INSULATION
- STEP 2 : POSITIONING
- SETUP EXAMPLE
- A CENTER SPEAKER
- USE ONLY SUPPLIED SPEAKERS
- IF IRREGULAR COLORING OCCURS ON YOUR TV, TURN THE TV OFF FOR ABOUT 30 MINUTES
- STEP 3: CONNECTIONS
- SPEAKER CABLE CONNECTION
- RADIO ANTENNA CONNECTION
- CONNECTION TO A TV
- OPTICAL IN
- HDMI
- CONNECTION FOR THE STANDARD PICTURE AND AUDIO
- CONNECTION FOR THE BETTER AUDIO
- CONNECTION FOR THE BEST PICTURE AND AUDIO
- WHEN THE HDMI TERMINAL ON THE TV IS LABELED "HDMI (ARC)
- WHAT IS ARC
- WHEN THE HDMI TERMINAL ON THE TV IS NOT LABELED "HDMI (ARC)
- CONNECTION WITH SET TOP BOX, ETC
- CONNECTION TO A BROADBAND NETWORK
- LAN CABLE CONNECTION
- STEP 4: AC POWER SUPPLY CORD CONNECTION
- MAIN UNIT
- STEP 5: EASY SETUP
- THE EASY SETUP ASSISTS YOU TO MAKE NECESSARY SETTINGS
- PREPARATION
- PRESS [⏻]
- FOLLOW THE ON-SCREEN INSTRUCTIONS AND MAKE THE SETTINGS WITH [▲, ▼, ◀, ▶] AND PRESS [OK]
- PRESS [OK] SEVERAL TIMES TO FINISH THE "EASY SETUP
- NETWORK EASY SETTING
- WHEN YOU EXPERIENCE PROBLEMS WITH SETTINGS
- NETWORK EASY SETTING (INTERNET CONNECTION CHECK)
- REPROGRAMMING THE REMOTE CONTROL
- FIRMWARE UPDATES
- INSERTING OR REMOVING MEDIA
- SELECTING THE SOURCE BY THE REMOTE CONTROL
- HOME MENU
- ENJOYING SOUND EFFECTS FROM ALL SPEAKERS
- ENJOYING SURROUND SOUND EFFECTS
- PRESS [SURROUND] SEVERAL TIMES TO SELECT THE EFFECT
- STANDARD
- MULTI-CHANNEL
- MANUAL
- WHILE "MANUAL" IS DISPLAYED, PRESS [◀, ▶] AND SELECT THE DESIRED EFFECT
- DOLBY PRO LOGIC II MUSIC
- SUPER SURROUND
- CH STEREO
- ADJUSTING SPEAKER LEVEL DURING PLAY
- CHANGING THE SOUND MODES
- EQUALIZER
- FLAT
- HEAVY
- CLEAR
- SOFT
- SUBWOOFER LEVEL
- H.BASS
- CENTER FOCUS
- (EFFECTIVE WHEN PLAYING AUDIO CONTAINING CENTER CHANNEL SOUND.)
- WHISPER-MODE SURROUND
- PLAYING VIDEO CONTENTS
- BD DVD CD SD
- INSERT THE MEDIA
- PRESS [▲, ▼] TO SELECT THE TITLE AND PRESS [OK]
- TO SHOW MENUS
- PRESS [POP-UP MENU, TOP MENU]
- TO SHOW THE STATUS MESSAGES
- WHILE PLAYING, PRESS [STATUS]
- [NON-TEXT]
- OTHER OPERATIONS DURING PLAY
- STOP
- PRESS [■STOP]
- RESUME PLAY FUNCTION
- PAUSE
- PRESS [IIIPAUSE]
- SEARCH/SLOW-MOTION
- SEARCH
- WHILE PLAYING, PRESS [SEARCH◀◀] OR [SEARCH▶▶]
- SLOW-MOTION
- WHILE PAUSED, PRESS [SEARCH◀◀] OR [SEARCH▶▶]
- SKIP
- WHILE PLAYING OR PAUSED, PRESS [◀◀] OR [▶▶]
- FRAME-BY-FRAME
- WHILE PAUSED, PRESS [◀] (◀▶) OR [▶] (▶▶)
- CHANGING AUDIO
- PRESS AND HOLD [-AUDIO] TO ACTIVATE THE AUDIO SETTING MODE
- PRESS [-AUDIO] SEVERAL TIMES TO SELECT THE AUDIO
- SELECTING THE TYPE OF AUDIO FROM THE DIGITAL AUDIO IN TERMINAL
- MAIN
- USEFUL FUNCTIONS
- PRESS [SUB MENU]
- SELECT AN ITEM AND PRESS [OK]
- ENJOYING BD-LIVE OR PICTURE-IN-PICTURE IN BD-VIDEO
- ENJOYING BD-LIVE DISCS WITH INTERNET
- PERFORM NETWORK CONNECTION AND SETTINGS. (⇒ 15, 17)
- INSERT AN SD CARD WITH 1 GB OR MORE FREE SPACE
- INSERT THE DISC
- DELETING DATA/FORMATTING SD CARDS
- PLAYING PICTURE-IN-PICTURE
- ENJOYING 3D VIDEO
- D SETTINGS
- PLAYING STILL PICTURES
- PRESS [▲, ▼] TO SELECT THE FOLDER AND PRESS [OK]
- PRESS [▲, ▼, ◀, ▶] TO SELECT THE STILL PICTURE AND PRESS [OK]
- TO EXIT THE SCREEN
- TO SHOW THE STILL PICTURE PROPERTIES
- SELECT AN ITEM, THEN PRESS [OK]
- PLAYING MUSIC
- PRESS [▲, ▼] TO SELECT THE TRACK AND PRESS [OK]
- PLAYING A TRACK IN ANOTHER FOLDER
- LISTENING TO THE RADIO
- PRESETTING STATIONS AUTOMATICALLY
- PRESS AND HOLD [OK]
- PRESETTING STATIONS MANUALLY
- LISTENING/CONFIRMING THE PRESET CHANNELS
- DISPLAY ON THE MAIN UNIT
- TUNED/STEREO
- TUNED
- IF NOISE IS EXCESSIVE
- FM FREQUENCY STEP
- ENJOYING TV WITH UNIT'S SPEAKERS
- SURROUND SOUND EFFECTS
- SOUND MODES
- LINKED OPERATIONS WITH THE TV (VIERA LINK™ “HDAVI
- CONTROL™")
- WHAT IS VIERA LINK "HDAVI CONTROL
- SETTING THE AUDIO LINK
- SETTING THE AUDIO LINK WITH THE TV
- SETTING THE AUDIO LINK WITH THE STB
- SPEAKER CONTROL
- HOME THEATER
- AUTOMATIC INPUT SWITCHING (POWER ON LINK)
- AUTOMATIC LIP-SYNC FUNCTION (FOR HDAVI CONTROL 3 OR LATER)
- POWER OFF LINK
- EASY CONTROL ONLY WITH VIERA REMOTE CONTROL
- USING THE IPOD®/IPHONE®
- IPOD/IPHONE CONNECTION
- ABOUT RECHARGING THE BATTERY
- IPOD/IPHONE PLAYBACK
- ENJOY MUSIC/VIDEO
- BASIC CONTROLS
- ENJOY PHOTOS
- OTHER METHODS OF PLAYBACK
- ENJOYING VIERA CAST™
- PLAYBACK MENU
- PRESS [DISPLAY]
- DISC
- VIDEO
- SOUNDTRACK
- SUBTITLE
- SUBTITLE STYLE
- AUDIO CHANNEL
- ANGLE
- PLAY
- REPEAT PLAY
- RANDOM
- POP-OUT LEVEL
- PICTURE
- ADVANCED SETTING
- CHROMA PROCESS
- DETAIL CLARITY
- SUPER RESOLUTION
- PROGRESSIVE
- P
- AUDIO
- MOVIE SOUND EFFECT
- MUSIC SOUND EFFECTS
- HIGH CLARITY SOUND
- SETUP MENU
- ABOUT THE PASSWORD
- DVD-VIDEO RATINGS
- BD-VIDEO RATINGS
- D BD-VIDEO PLAYBACK
- AUDIO LANGUAGE
- SUBTITLE LANGUAGE
- MENU LANGUAGE
- BD-LIVE INTERNET ACCESS (=> 21)
- STILL MODE (PAUSED VIDEO)
- SEAMLESS PLAY
- BLACK LEVEL CONTROL
- DYNAMIC RANGE COMPRESSION
- DIGITAL AUDIO OUTPUT
- DOLBY D/DOLBY D +/DOLBY TRUEHD DTS/DTS-HD
- BD-VIDEO SECONDARY AUDIO
- DIGITAL AUDIO INPUT
- PCM-FIX
- DOWNMIX
- AUDIO DELAY
- SPEAKER
- DISPLAY
- STATUS MESSAGES
- ON-SCREEN LANGUAGE
- SCREEN SAVER FUNCTION
- FRONT PANEL DISPLAY
- LICENSE
- TV / DEVICE CONNECTION
- D TYPE
- D PLAYBACK PRECAUTIONS
- TV ASPECT
- HDMI CONNECTION
- HDMI RESOLUTION
- P OUTPUT
- HDMI COLOR MODE
- HDMI AUDIO OUTPUT
- VIERA LINK
- DEEP COLOR OUTPUT
- CONTENTS TYPE FLAG
- VIDEO/AUDIO
- TV AUDIO INPUT
- NETWORK OTHERS
- NETWORK EASY SETTING (=> 17)
- NETWORK SETTINGS
- IP ADDRESS / DNS SETTINGS
- PROXY SERVER SETTINGS
- INTERNET CONTENT SETTINGS (=> 29) (VIERA CAST)
- LOCK
- AUDIO AUTO GAIN CONTROL
- TIME ZONE
- DST
- MAC ADDRESS
- REMOTE CONTROL CODE
- QUICK START
- EASY SETUP ( ⇒ 16)
- SYSTEM INFORMATION
- FIRMWARE UPDATE ( ⇒ 17)
- AUTOMATIC UPDATE CHECK
- UPDATE NOW
- SPEAKER SETTINGS
- DELAY TIME
- ADJUSTING SPEAKER LEVEL
- SPEAKER INSTALLATION OPTION
- ATTACHING TO A WALL
- DRIVE A SCREW (NOT SUPPLIED) INTO THE WALL
- FIT THE SPEAKER SECURELY ONTO THE SCREW(S) WITH THE HOLE(S)
- FRONT SPEAKER, SURROUND SPEAKER
- CENTER SPEAKER
- TROUBLESHOOTING GUIDE
- DO YOU HAVE THE LATEST FIRMWARE INSTALLED
- MAKE THE FOLLOWING CHECKS AND VISIT OUR WEBSITE FOR MORE INFORMATION
- OR VISIT OUR WEBSITE TO FIND A SERVICE CENTER
- OTHER SUPPORT INFORMATION
- THE FOLLOWING DO NOT INDICATE A PROBLEM WITH THIS UNIT
- UNIT DOES NOT RESPOND TO THE REMOTE CONTROL OR FRONT PANEL BUTTONS
- CANNOT EJECT DISC
- THE UNIT MAY HAVE A PROBLEM
- GENERAL OPERATION
- TO RETURN TO THE FACTORY PRESET
- TO RETURN ALL SETTINGS TO THE FACTORY PRESET
- THE REMOTE CONTROL DOESN'T WORK PROPERLY
- DISC CANNOT BE PLAYED
- STILL PICTURES (JPEG) DO NOT PLAYBACK NORMALLY
- THE TV TUNER MODE IS NOT DISPLAYED WHEN THE TV IS SWITCHED ON
- YOU HAVE FORGOTTEN YOUR RATINGS PASSWORD. YOU WANT TO CANCEL THE RATINGS LEVEL
- POWER
- NO POWER
- THE UNIT SWITCHES TO STANDBY MODE
- THIS UNIT IS TURNED OFF WHEN THE INPUT FOR THE TV IS SWITCHED
- THE UNIT DOES NOT TURN OFF
- DISPLAYS
- THE DISPLAY IS DIM
- TV SCREEN AND VIDEO
- THE IMAGES FROM THIS UNIT DO NOT APPEAR ON THE TV. PICTURE IS DISTORTED
- JITTERING OCCURS
- VIDEO IS NOT OUTPUT
- VIDEO IS NOT OUTPUT IN HIGH-DEFINITION
- D VIDEO IS NOT OUTPUT
- D VIDEO IS NOT OUTPUT CORRECTLY AS 2D
- NO SUBTITLES
- THE SUBTITLES OVERLAP CLOSED CAPTIONS RECORDED ON DISCS
- A BLACK BAND IS DISPLAYED AROUND THE EDGE OF THE SCREEN. THE ASPECT RATIO OF THE SCREEN IS ABNORMAL
- SOUND
- NO SOUND
- LOW VOLUME
- DISTORTED SOUND
- CANNOT HEAR THE DESIRED AUDIO TYPE
- NO SURROUND SOUND
- CANNOT SWITCH AUDIO
- NO SOUND FROM THE TV
- IPOD/IPHONE OPERATION
- CANNOT CHARGE OR OPERATE
- CANNOT DISPLAY IPOD/IPHONE VIDEOS/PHOTOS ON THE TV
- THE TV INPUT CHANNEL UNINTENTIONALLY CHANGES TO HDMI INPUT
- DISTORTED SOUND OR NOISE IS HEARD
- A BEAT SOUND IS HEARD
- NETWORK
- I CAN'T CONNECT TO THE NETWORK
- OTHER DIFFICULTIES WITH PLAYBACK
- BD-VIDEO OR DVD-VIDEO IS NOT PLAYED
- I CANNOT PLAY BACK BD-LIVE
- ALTERNATIVE SOUNDTRACK AND SUBTITLES CANNOT BE SELECTED
- ANGLE CANNOT BE CHANGED
- MESSAGES
- ON THE TELEVISION
- CANNOT PLAY
- CANNOT DISPLAY ON THIS UNIT
- NO DISC IS INSERTED
- ⊗ THIS OPERATION IS NOT AVAILABLE
- IP ADDRESS IS NOT SET
- NO VIDEO
- ON THE UNIT'S DISPLAY
- F
- U
- HDMI ONLY
- NET
- NO PLAY
- NO READ
- PLEASE WAIT
- SET
- H□□ OR F
- UPD
- IPOD OVER CURRENT ERROR
- START
- FINISH
- NOT CONDITIONAL
- SUPPLEMENTAL INFORMATION
- GSOAP PUBLIC LICENSE
- SPECIFICATIONS
- GENERAL
- AMPLIFIER SECTION
- FM TUNER SECTION
- SPEAKER SECTION
- TERMINAL SECTION
- VIDEO SECTION
- LIMITED WARRANTY
- PANASONIC BLU-RAY AND DVD PRODUCTS LIMITED WARRANTY
- LIMITED WARRANTY COVERAGE (FOR USA AND PUERTO RICO ONLY)
- MAIL-IN SERVICE
- PANASONIC EXCHANGE CENTER
- GEORGE MCVAY DRIVE
- IF REPAIR IS NEEDED DURING THE WARRANTY PERIOD, THE PURCHASER WILL BE REQUIRED TO FURNISH A SALES RECEIPT/PROOF OF PURCHASE INDICATING DATE OF PURCHASE, AMOUNT PAID, AND PLACE OF PURCHASE. CUSTOMER WILL BE CHARGED FOR THE REPAIR OF ANY UNIT RECEIVED WITHOUT SUCH PROOF OF PURCHASE
- LIMITED WARRANTY LIMITS AND EXCLUSIONS
- THERE ARE NO EXPRESS WARRANTIES EXCEPT AS LISTED UNDER "LIMITED WARRANTY COVERAGE
- THE WARRANTOR IS NOT LIABLE FOR INCIDENTAL OR CONSEQUENTIAL DAMAGES RESULTING FROM THE USE OF THIS PRODUCT, OR ARISING OUT OF ANY BREACH OF THIS WARRANTY
- ALL EXPRESS AND IMPLIED WARRANTIES, INCLUDING THE WARRANTY OF MERCHANTABILITY, ARE LIMITED TO THE PERIOD OF THE LIMITED WARRANTY
- CUSTOMER SERVICES DIRECTORY (UNITED STATES AND PUERTO RICO)
- FOR HEARING OR SPEECH IMPAIRED TTY USERS, TTY
- ACCESSORY PURCHASES (UNITED STATES AND PUERTO RICO)
- INDEX
- A
- B
- ©
- L
- N
- Q
- R
- S
- V
Brand : PANASONIC
Model : SC-BTT268
Category : Home Theater System