
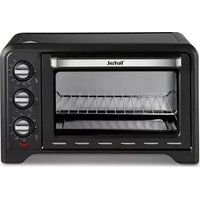
5203 - Oven TEFAL - Free user manual and instructions
Find the device manual for free 5203 TEFAL in PDF.
| Product Type | Tabletop oven (grill) |
| Brand | Tefal |
| Model | 5203 |
| Maximum Dish Dimensions (H x W x D) | 155 mm x 275 mm x 290 mm |
| Temperature Range | 120 °C to 280 °C |
| Number of Rack Positions | 3 positions |
| Control Type | Single rotary knob (off/thermostat) |
| Energy Consumption (heat-up to 200 °C) | 0.07 kWh |
| Energy Consumption (maintain 200 °C for 1 h) | 0.37 kWh |
| Energy Consumption (total) | 0.44 kWh |
| Power Supply | AC, grounded plug |
| Rack Maintenance | Cleanable with water and detergent or dishwasher |
| Interior Walls and Door Maintenance | Water with detergent, soft sponge |
| Exterior Maintenance | Wipe with sponge |
| Important Safety Instructions | Unplug after use, do not immerse in water, supervise children |
| Usage | Household only, do not build in |
Frequently Asked Questions - 5203 TEFAL
User questions about 5203 TEFAL
0 question about this device. Answer the ones you know or ask your own.
Ask a new question about this device
Download the instructions for your Oven in PDF format for free! Find your manual 5203 - TEFAL and take your electronic device back in hand. On this page are published all the documents necessary for the use of your device. 5203 by TEFAL.
USER MANUAL 5203 TEFAL
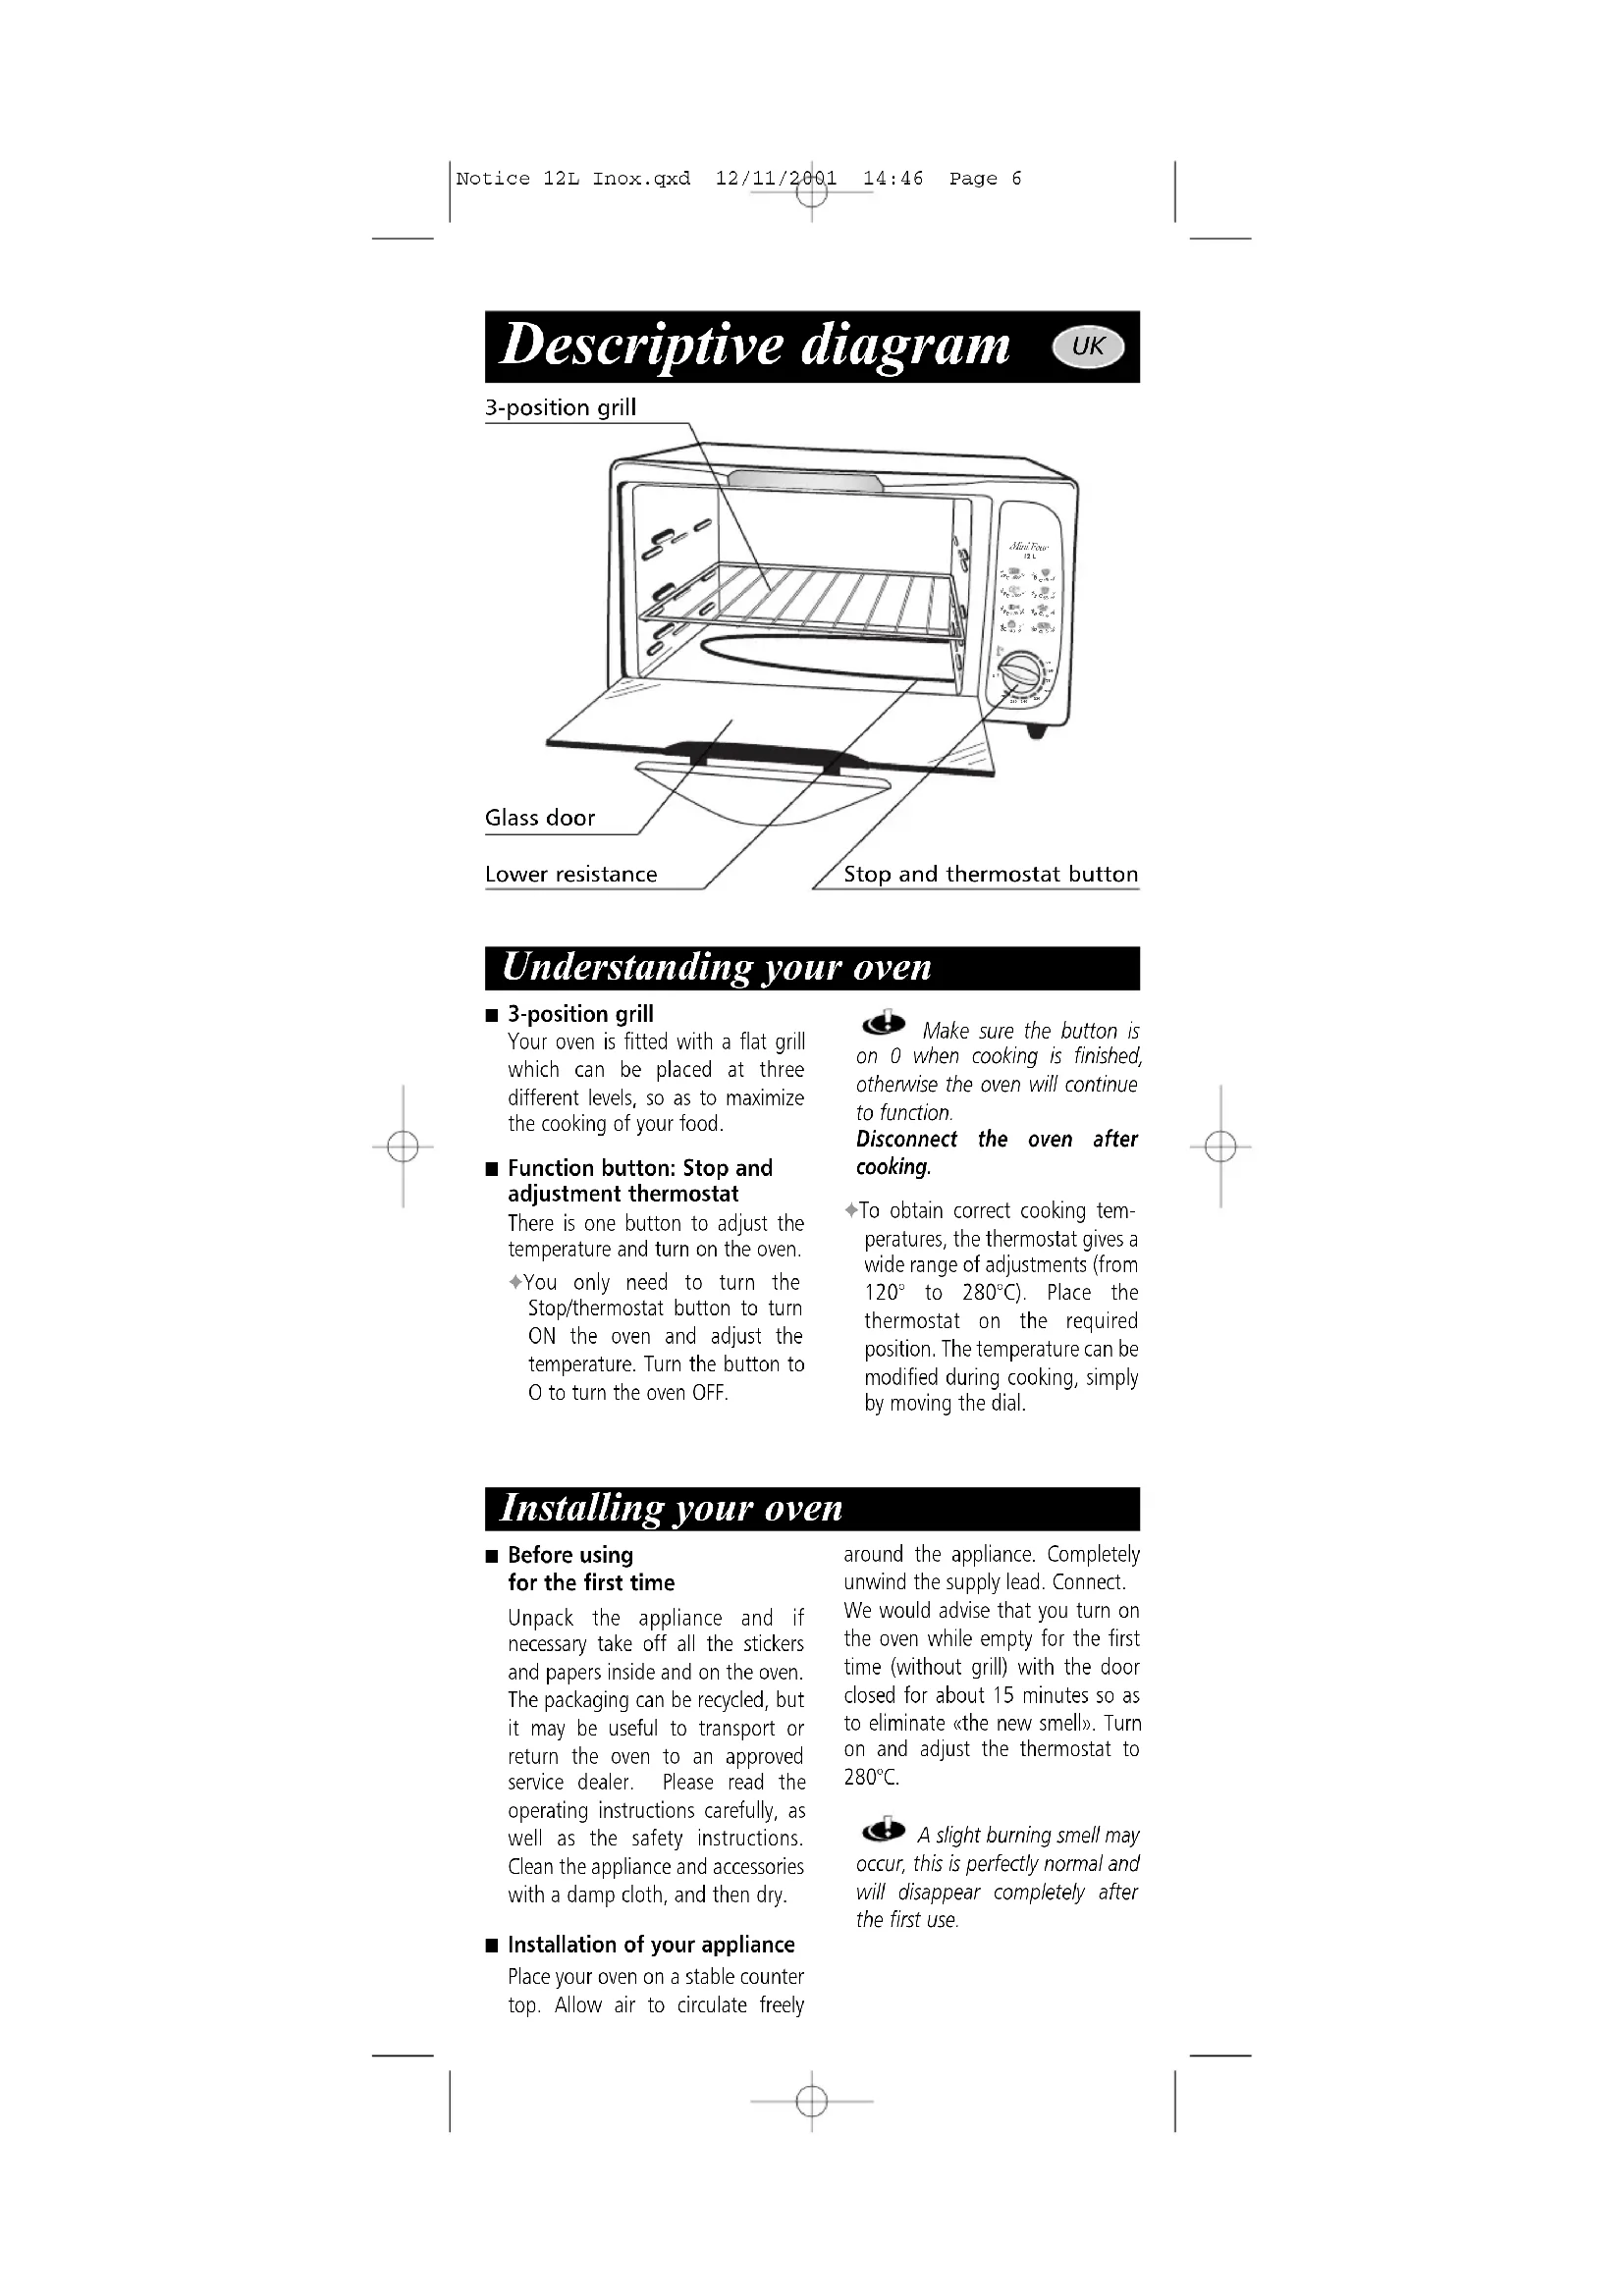
Understanding your oven
3-position grill
Your oven is fitted with a flat grill which can be placed at three different levels, so as to maximize the cooking of your food.
Function button: Stop and adjustment thermostat
There is one button to adjust the temperature and turn on the oven.
You only need to turn the Stop/thermostat button to turn ON the oven and adjust the temperature. Turn the button to O to turn the oven OFF.
Make sure the button is on 0 when cooking is finished, otherwise the oven will continue to function.
Disconnect the oven after cooking.
To obtain correct cooking temperatures, the thermostat gives a wide range of adjustments (from 120^ to 280^ ). Place the thermostat on the required position. The temperature can be modified during cooking, simply by moving the dial.
Installing your oven
Before using for the first t
Unpack the appliance and if necessary take off all the stickers and papers inside and on the oven. The packaging can be recycled, but it may be useful to transport or return the oven to an approved service dealer. Please read the operating instructions carefully, as well as the safety instructions. Clean the appliance and accessories with a damp cloth, and then dry.
Installation of your appliance
Place your oven on a stable counter top. Allow air to circulate freely
around the appliance. Completely unwind the supply lead. Connect. We would advise that you turn on the oven while empty for the first time (without grill) with the door closed for about 15 minutes so as to eliminate «the new smell». Turn on and adjust the thermostat to 280^ .
A slight burning smell may occur, this is perfectly normal and will disappear completely after the first use.
Using your oven
Starting-up and cooking
Choose the dish appropriate for your preparation.
Place the grill at the required height.
Put the dish of food to cook in the oven and close the door.
Adjust the thermostat to the right temperature by turning the button.
The oven heats up. Watch the cooking from time to time.
End of cooking
At the end of cooking time, turn off the oven by turning the thermostat button to 0, and disconnect.
Control the cooking
Table of thermostat adjustment positions
Use this table if your recipe does not give cooking temperatures. The thermostat temperatures are given
as an indication, and vary depending on weight, size, thickness or temperature of the food (deep-frozen):
| Thermostat position | |||||||||
| 120° | 150° | 175° | 205° | 225° | 240° | 260° | 280° | ||
| Hot plate | ◆ | ||||||||
| Heating | ◆ | ◆ | ◆ | ◆ | ◆ | ◆ | ◆ | ||
| Frozen foods | ◆ | ◆ | ◆ | ◆ | ◆ | ◆ | ◆ | ◆ | |
| Fish | ◆ | ◆ | ◆ | ◆ | |||||
| Quiche | ◆ | ◆ | ◆ | ||||||
| Poultry | ◆ | ◆ | ◆ | ||||||
| Meats | ◆ | ◆ | ◆ | ◆ | ◆ | ||||
| Pastries | ◆ | ◆ | ◆ | ◆ | ◆ | ◆ | |||
Advice and precautions
For roast meats and fowl, use high-sided dishes (minimum 5 cm) in order to reduce splashes of fat on the sides of the oven.
For pastries, preferably use non
stick dishes which make turning out easier.
When choosing dishes and moulds, consider the following maximum sizes:
Height Width Depth
155 mm 275 mm 290 mm
Cleaning your oven
Before any upkeep or cleaning, disconnect and leave the appliance to cool down.
Never throw water on the toughened glass door while it is still hot.
Clean the door and the inside metal sides with water and detergent. Then dry.
Do not use scouring products (notably soda-based removers), scouring pads or Scotchbrite.
For models with stainless steel hoods, use a soft cloth with a cleaning product suitable for cleaning windows. Do not use special metal cleaning products (stainless steel, copper, etc...).
Clean the grill tray with water and detergent or in the dishwasher.
Just wipe the outside of the oven with a damp sponge.
It is advisable to clean the oven each time it is used to avoid persistent odours and tastes.
Safety instructions
Please take the time to read the instructions thoroughly and refer to the «User's Guide».
- This appliance is in compliance with the safety rules and conditions in force, as well as with the following directives: - Electromagnetic Compatibility Directive 89/336/ EEC, modified by Directives 92/31/EEC and 93/68/EEC, - Low Voltage Directive 73/23/EEC, modified by Directive 93/68/EEC.
- Like any cooking appliance, take great care which using your oven near children. Never leave it within reach of children.
- Considering the diversity of standards in force, if this appliance is used in a different country from where it was purchased, have it checked by an approved service.
- Do not place the appliance near a source of heat.
- Check that the mains' voltage corresponds to the figure indicated on the appliance (AC only).
- Do not leave the lead trailing or touching the hot parts of the oven. Do not disconnect the appliance by pulling out the lead.
Always connect the appliance on an earthed socket. - Only use a connection in good condition, with an earthed socket, and with a wire at least equal in diameter to the wire supplied with the product.
Make sure that the electricity installation is sufficient to supply an appliance of this capacity. -
The temperature of the door and outside surface may be hot when the appliance is working. Use the handles and buttons. If necessary, use gloves.
-
In order to avoid electric shocks, keep the electric wire, plug or appliance away from water or any other liquid.
- If certain parts of the product happen to ignite, never try to extinguish using water. Smother the flames with a damp cloth.
- Do not store inflammable products near to or under the surface where the oven is placed.
-
Do not use the appliance if:
-
the latter has a faulty lead, or,
- has fallen and shows visible damage or operation anomalies.
In this case, the appliance must be returned to the nearest approved after-sales centre so as to avoid all danger.
- Do not use the appliance under a wall cupboard, shelf or near inflammable materials such as blinds, curtains or hangings, etc ...
This appliance is not designed to be built-in. - Do not use the appliance as a source of heat.
- Never put paper, cardboard or plastic in the oven, and never put anything on top (utensils, objects, etc.).
- Never put anything in the air vents or block them up.
- For your own safety, never dismantle the appliance yourself - call up an approved service centre.
- This appliance has been designed for domestic use only - any professional use, not appropriate or not in compliance with the operating instructions does not bind the liability or the guarantee of the maker.
Please keep these instructions
Power consumption (kWh) :
Build-up to 200^:0.07
Keep at 200^ for 1 hour: 0.37
TOTAL
0.44
Wiring Instructions (for U.K. only)
WARNING : All appliances must be earthed
Important : The wires in this lead are coloured in accordance with the following codes :
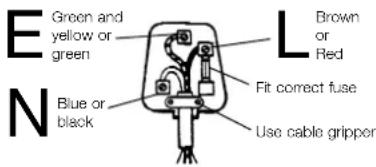
Green and Yellow : Earth
Brown:Live
Blue:Neutral
Connect the Green/Yellow wire to the terminal in the plug marked «E» or by the earth symbol or coloured Green or coloured Green and Yellow.
Connect the Brown wire to the terminal in the plug marked L or coloured Red.
Connect the Blue wire to the terminal in the plug marked N or coloured Black.
A 13 amp fuse should be fitted when the appliance is connected to a BS 1363A plug.
- Seek professional advice if you are unsure of the correct procedure for the above.
About your factory fitted plug
(for U.K. only - supplied with selected models)
The cord is already fitted with a plug incorporating an appropriate fuse. If the plug does not fit your socket outlet, see paragraph below. Should you need to replace the fuse in the plug supplied an appropriately rated approved BS 1362 fuse must be used (refer to wiring instructions for fuse rating).
If the plug supplied does not fit your socket outlet, it should be removed from the mains lead and disposed of safely. The flexible cord insulation should be stripped back
as appropriate and a suitable alternative plug fitted. The replacement plug must be equipped with an appropriate fuse.
If the plug has external access to the fuse (non-rewirable type plug) please note that the fuse cover is an important part of the plug. Please ensure that it is always refitted correctly. If you lose this cover please do not use the plug. You may contact Tefal UK Limited for a replacement.
Customer relations helpline
If you need any help or advice, please call our customer relation's team on:
-08456021454(forUK)
- (1) 677 41 76 (for Ireland)
Salita a 200^:0.07
Mantenimento a 200^ C per 1 ora: 0.37
TOTALE
0.44
Al primo utilizzato
Subida a 200^:0.07
Mantém a 200^ C durante 1 hora : 0.37
TOTAL
0.44
Beskrivelse

Installation of ovenen


- Understanding your oven
- 3-position grill
- Function button: Stop and adjustment thermostat
- Installing your oven
- Before using for the first t
- Installation of your appliance
- Using your oven
- Starting-up and cooking
- End of cooking
- Control the cooking
- Table of thermostat adjustment positions
- Advice and precautions
- Height Width Depth
- Cleaning your oven
- Safety instructions
- Please take the time to read the instructions thoroughly and refer to the «User's Guide».
- Please keep these instructions
- Power consumption (kWh) :
- Wiring Instructions (for U.K. only)
- WARNING : All appliances must be earthed
- About your factory fitted plug
- (for U.K. only - supplied with selected models)
- Customer relations helpline
- Al primo utilizzato
- Beskrivelse
- Installation of ovenen
Brand : TEFAL
Model : 5203
Category : Oven