
DO2625CB - Microwave DOMO - Free user manual and instructions
Find the device manual for free DO2625CB DOMO in PDF.
| Product Type | Microwave oven combined with convection, grill, and bread function |
| Brand | DOMO |
| Model | DO2625CB |
| Power Supply | 230 V / 50 Hz, grounded plug |
| Microwave Power | Multiple levels: 100% (100P), 80% (30P), 60% (50P), 40% (40P), 20% (20P) |
| Main Functions | Microwave, convection, combination (C1, C2), auto defrost (meat, poultry, fish), auto cooking (10 menus), bread cooking (7 menus), timer, memory function |
| Oven Capacity | Approximately 25-30 liters (estimation) |
| Turntable | Yes, glass |
| Grill Included | Yes, metal grill |
| Bread Pan Included | Yes, with kneading hook, measuring cup and spoon |
| Display | Digital screen with clock, cooking time, temperature |
| Child Lock | Yes, activation by pressing pause.cancel for 3 seconds |
| Convection Power | Adjustable from 80 °C to 230 °C, max 180 °C in combination mode |
| Timer | Up to 99 min 99 sec, delayed start |
| Warranty | 2 years |
| Compatible Materials | Ceramic, heat-resistant glass, suitable plastic (no metal) |
| Maintenance and Cleaning | Interior and exterior: soft cloth with warm water, mild detergent. Do not use abrasive products. Do not remove the microwave guide. |
| Safety | Operation impossible with door open, automatic shutdown in case of problem, child lock, overheat protection (code Err2) |
| Repairability | Repair by authorized service mandatory; damaged cord must be replaced by a professional |
| Provided Accessories | Glass turntable, rotating ring, grill, bread pan with kneading hook, measuring cup and spoon |
Frequently Asked Questions - DO2625CB DOMO
User questions about DO2625CB DOMO
0 question about this device. Answer the ones you know or ask your own.
Ask a new question about this device
Download the instructions for your Microwave in PDF format for free! Find your manual DO2625CB - DOMO and take your electronic device back in hand. On this page are published all the documents necessary for the use of your device. DO2625CB by DOMO.
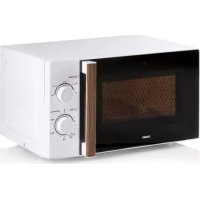
USER MANUAL DO2625CB DOMO
natural_image
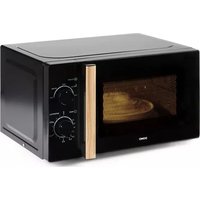
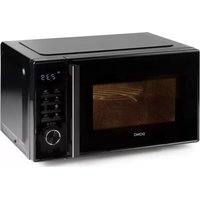
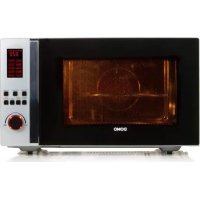
Exterior view of a modern microwave oven with a digital display and control panel (no visible text or symbols)DO-2625CB
PRODUCT OF LINEA 2000
GARANTIEVOORWAARDEN
CONDITIONS DE GARANTIE
This appliance has a two year warranty period. During this period the manufacturer is responsible for any failures which are the direct result of construction failure. When these failures occur the appliance will be repaired or replaced if necessary. The warranty will not be valid when the damage to the appliance is caused by wrong use, not following the instructions or repairs executed by a third party. The warranty will only be valid if the warranty application has been completed by the dealer at the time of purchase. All parts, such as brushes and batteries, which are subject to wear, are excluded from the warranty.
Type nr. Apparaa
RECYCLING INFORMATIONEN
RECYCLING INFORMATION
The symbol 📄 on the product or on its packaging indicates that this product may not be treated as household waste. Instead it shall be handedover to the applicable collection point for recycling of electrical and electronic equipment. by ensuring this product is disposed of correctly, you will help prevent potential negative consequences for the environment and human health, which could otherwise be caused by inappropriate waste handling of this product. For more detailed information about recycling of this product, please contact your local city office, your household waste disposal service of the shop where you purchased the product.
WERKINGSTHEORIE VAN EEN MICROGOLFOVEN
natural_image
Interior view of a microwave oven with a metal pot and labeled parts (no text or symbols on the main subject)Nota :
^ C): stevige cake
Sponge cake (175
°C):zachtere cake

natural_image
Interior view of a microwave oven with a metal pot and labeled parts (no text or symbols on the pot itself)Note:
natural_image
Interior view of a stainless steel kitchen appliance with labeled parts (no text or symbols visible)Anmerkung:
American cake (220 °C) : fester Kuchen
Sponge cake (175 °C): weicherer Kuchen
Microwave is a kind of high frequency electromagnetic wave, which is commonly distributed in the nature. But the existing form of microwave is dispersed so that it cannot be collected together for heating purpose. The key component of magnetron of microwave oven will transform the energy of electricity to microwave and huge energy of microwave fi eld is established under the closed cavity. So the molecule o food is caused to vibrate at very high speed and the friction heat produced will cook the food in a fast way
There is 3 properly of microwave:
a) absorbability, the microwave can cause the excess vibration of molecule of various food so as to obtain the heating purpose. But the infi ltration ability is largely dependent on the size, thickness and properties of the food.
b) penetrability, microwave can penetrate through ceramics, glass, temperature-resistant plastics. It is required to use the containers whose material have good microwave penetrability to achieve best heating result. See the below utensils guide. c) refl ectivity, microwave would be reflected by the metal wall of interior cavity so a to establish an even magnetic fi eld, thus can prevent the overheating of partial area
1) To ensure sufficient ventilation, the distance of back of oven to the wall or cabine should be at least 10cm,
side of oven to the wall or cabinet should be at least 5cm, the top of oven to the ceiling or cabinet should be at least 20cm.
2) Do not place any object on the top of oven.
3) The position of the oven shall be such that it is far from the TV, Radio or antenna as picture disturbance or noise may occur.
4) The oven shall be so installed so that the plug is accessible.
UTENSILS GUIDE
It is strongly recommended to use the containers which are suitable and safe for microwave cooking. Generally speaking, the containers which are made of heat-resistant ceramic, glass or plastic are suitable for microwave cooking. Never use the metal containers for microwave cooking and combination cooking as spark is likely to occur. You can take the reference of below table
| Material of container | Microwave | Grill | Combi | Notes |
| Ceramic | Yes | No | No | Never use the ceramics which are decorated with rim or glazed |
| Heat-resistant plastic | Yes | No | No | Can not be used for long time microwave cooking |
| Heat-resistant glass | Yes | No | No | |
| Grill rack | No | Yes | Yes | |
| Plastic fi lm | Yes | No | No | It should not be used when cooking meat or chops as the overtemperature may do damage to the fi ln |
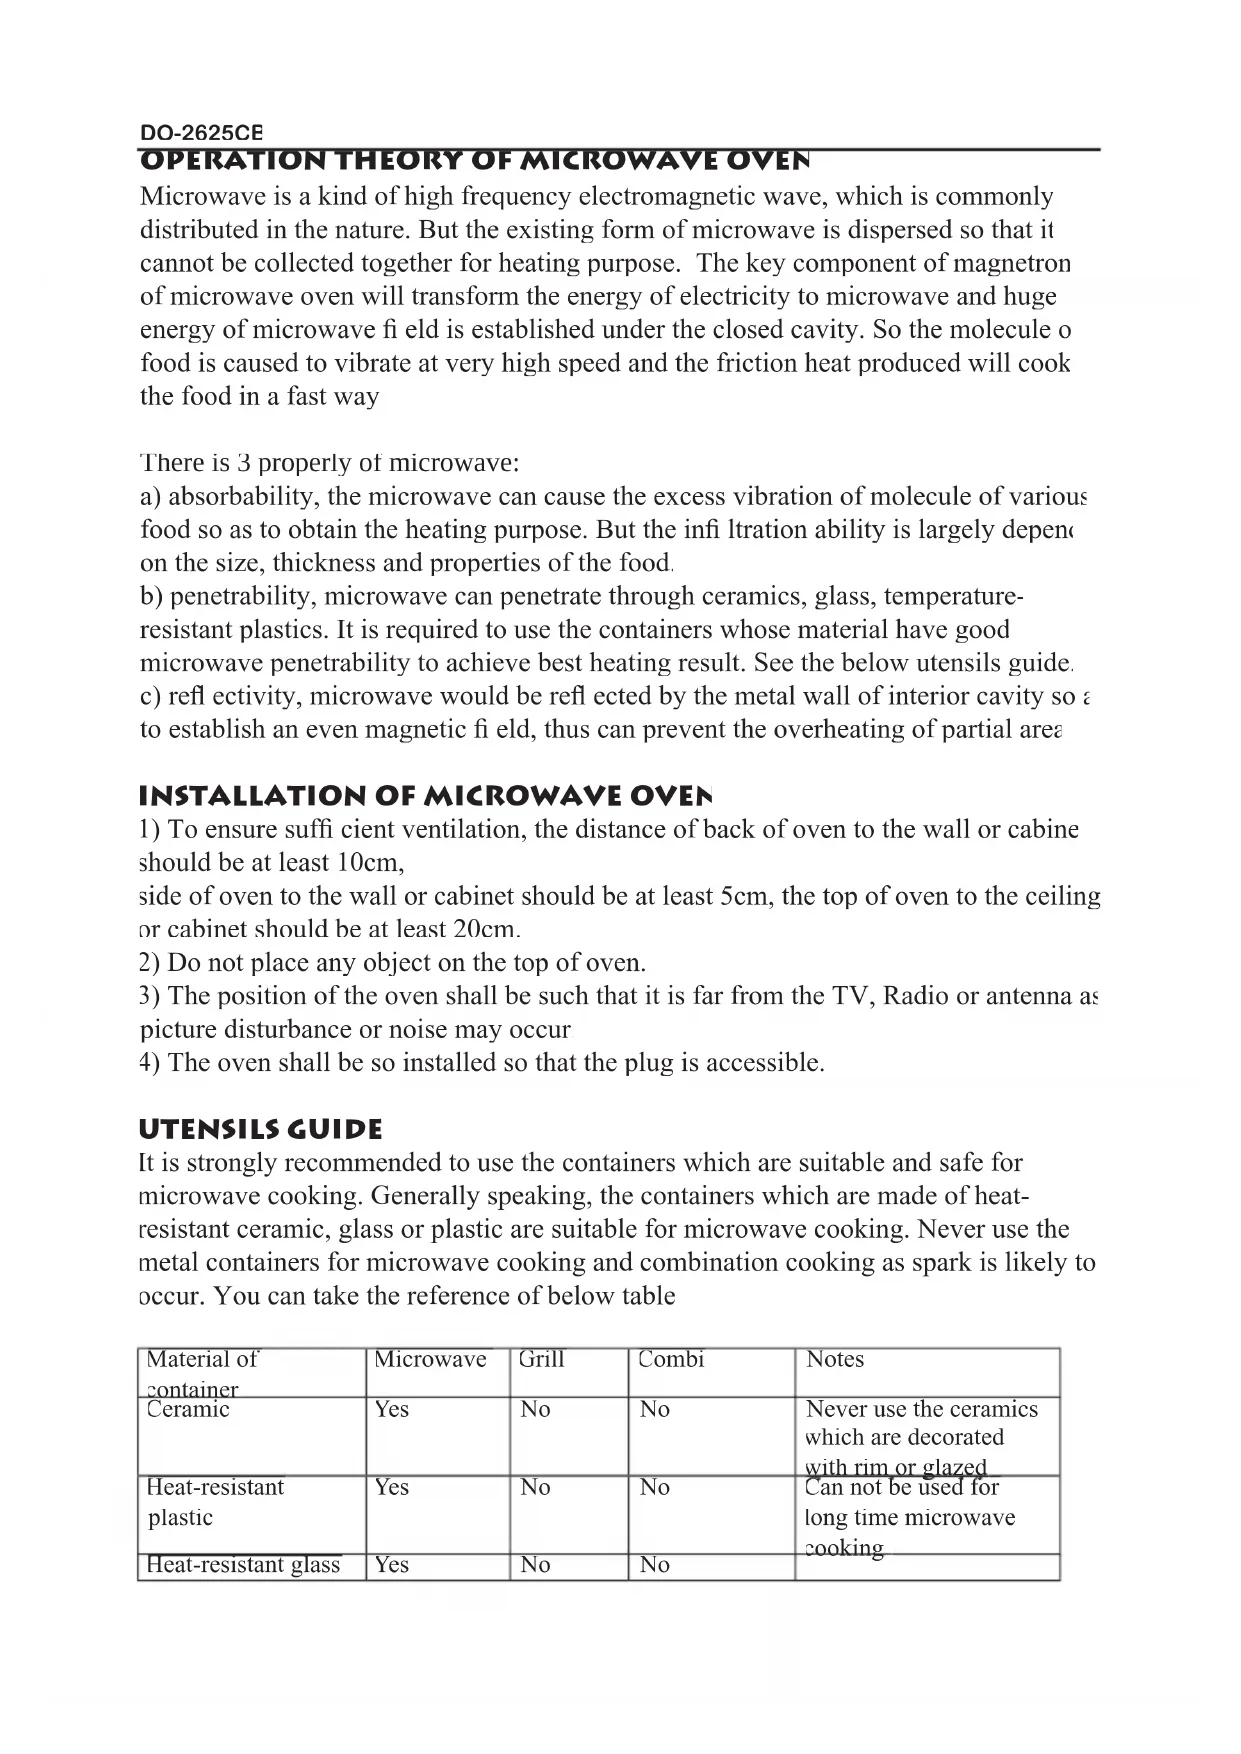
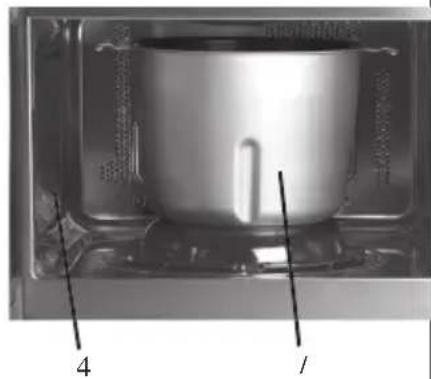
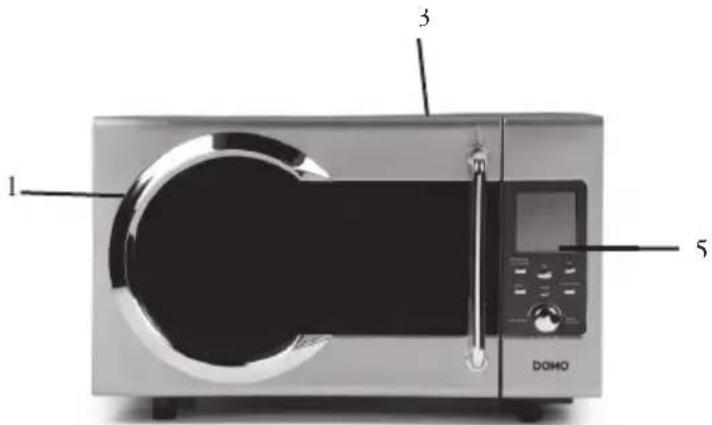
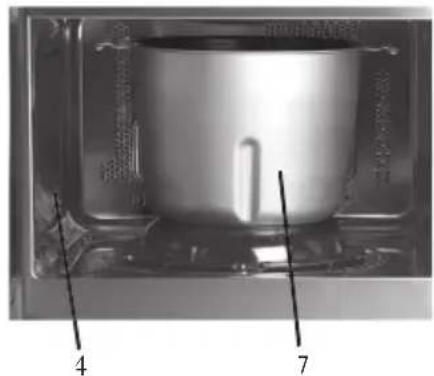
PARTS
- Oven door
- Turntable
- Housing
- Waveguide cover (inside)
- Control panel
- Grill rack
- Bread pan
natural_image
Interior view of a stainless steel pot inside a transparent container, with numbered annotations pointing to the interior (no readable text or symbols)Notes:
- The oven cannot be activated without the door properly closed. This is a safety feature, never intend to damage it.
- The operation of control panel is illustrated in next page.
- Do not remove the Waveguide cover during cleaning.
IMPORTANT SAFEGUARDS
The following basic precautions should always be followed when using electrical appliance:
- Read all instructions before using.
-
Make sure the voltage in your living area corresponding to the one shown on the rating label of the appliance. And the wall socket is properly earthed.
-
To reduce the risk of fire in the oven cavity
A. Do not overcook the food.
B. Remove wire twist-ties from paper or plastic bags before placing bags in the oven.
C. Do not heat oil or fat for deep drying as the temperature of oil cannot be controlled.
D. After use wipe the waveguide cover with a damp cloth, followed by dry cloth to
remove any food splashes and grease. Built-up grease may overheat and begin to cause smoke or catch fire
E. If materials inside the oven should smoke or ignite, keep oven door closed, turn oven off and disconnect the power supply
G. Close supervision is necessary when using disposable containers made from plastic, paper or other combustible material.
- To reduce the risk of explosion and sudden boiling
A. Do not place sealed containers in the oven. Baby bottles fitted with a screw cap of teat are considered to be sealed containers.
B. When boiling liquid in the oven, use the wide-mouthed container and stand about 20 seconds at the end of cooking to avoid delayed eruptive boiling of liquids.
5. Never operate the oven further if the door is damaged or the oven malfunction or supply cord is damaged. Return the appliance to the nearest authorised service centre for repair and maintenance. Never try to adjust or repair the oven yourself.
6. If the supply cord is damaged it must be replaced by the manufacturer or its service agent or a qualified technician in order to avoid a shock hazard
7. After cooking, the container is very hot. Using gloves to take out the food and avoid steam burns by directing steam away from the face and hands.
8. Slowly lift the furthest edge of dishes cover and microwave plastic wrap and carefully open popcorn and oven cooking bags away from the face.
9. To prevent the turntable from breaking
A. Let the turntable cool down before cleaning
B. Do not place hot foods or utensils on the cold turntable.
C. Do not place frozen foods or utensils on the hot turntable.
10. Make sure the utensils do not touch the interior walls during cooking.
11. Do not store food or any other things inside the oven.
12. Do not operate the oven without any liquid or food inside the oven. This would do damage to the oven.
13. This appliance is not intended for use by young children or infirm persons without supervision.
14. Only allow children to use the oven without supervision when adequate instructions have been given so that the child is able to use the oven in a safe way and understand the hazards of improper use.
15. Any accessories not recommended by the manufacturer may cause injuries to persons.
16. Do not use outdoors.
17. Save these instructions.
HOUSEHOLD USE ONLY
CONTROL PANEL
- The LED Display will flash 3 times when plugged in power supply. Then it will flash, Prompt you set the current clock. See below Clock setting
2. Clock setting
- Touch "preset clock" button
- Turn "Time weight/Auto Defrost" knob set clock
- Touch "preset clock" button again
- Turn "Time weight/Auto Defrost" knob set minute
-
Touch "preset clock" one more time
-
Increase or decrease cooking time during operation by turning auto defrost time weight button if necessary.
4. Lock
Use this selection when you want to block the control panel. This way children won't be able to use the oven unwanted.
Press the "stop clear" button durin 3 sec. Until a key symbol appears on the display.
You'll hear a biep signal and all buttons will be locked.
For unlocking the control panel press the "stop clear" button again for 3 sec.
5. Auto reminder
When the selected cooking time has passed, the display shows "end" and you'll hear 6 biep signals. When not pressing the "stop clear" button or opening the door, a biep signal will be heard every 3 min.
6. Stop
Press the "stop clear" button once to :
- s top the oven temporarily during cooking
- to empty the program when you have made a mistake
Press the "stop clear" button twice to end the programm during cooking.
7. Microwave cooking
Every time you press the “micro power” button, another another power mode is selected.
Following modes are possible :
100P: High power, the magnetron is energized all the operation time
80P: Medium High power, 80% microwave power.
60P: Medium power, 60% microwave power.
40P: Medium Low Power, 40% microwave power.
20P: Low power, 20% microwave power.
Select the desired microwave power by touching Power button consecutively.
After select power, set cooking time by turning the Time weight /Auto Cooking knob.
NOTE : The max time you can set is 99 minutes and 99 seconds.
Press the "instant start" button.
Never use the oven empty.
When you want to turn over the food, simple open the door. Close the door and pres the “start” button and the the selected cooking time will run on.
When you want to remove the food before the cooking time is done, press the “stop clear” button twice. When you don’t press this button the cooking time will continue when you close the door.
8. Combination
When pressing the "conv/combi" button, following modes will be displayed:
C : for operation the oven only on hot air. When making this selection only hot air will circulate the oven, like a traditional oven, to cook the food gold brown and crispy
C1 : Combination of convection and microwave. This combination will make juicy meats or chicken, with a nice brown exterior. Meat and poultry are best, when prepared on a grill. You can place a dish under the grill to collect the juices.
C2: Also a combination of convection and microwave, but with the use of more microwave time than C1. This can be used for larger pieces of meat or poultry.
Temperature selections :
You can select the temperature depending on the food to be cooked.
For baking select a temperature between : 120°C and 180°C.
For defrosting a temperature selection between : 80°C and 100°C.
For the preparation of meat or poultry between 180°C and 230°C
When using a combination of microwave and convection, you can select a max. temperature of 180^ C.
Pre heat :
When using the covenction mode it is best to pre heat the oven for the best result.
When using a combination microwave - convection, pre heat is not necessary
When the code “Err2” is shown on the display, you have to re-se lect the temperature or wai for the unit to cool down.
Selection :
Press the "conv/combi" button for the selection of the desired mode.
Select the convection temperature by turning the “auto cooking/time temp. weight” button.
Press "instant start" button.
Select the desired cooking time by turning “the auto cooking/time temp weight” button. Also remember the pre heat time when working in convection mode.
Generally a heat up time of 15 min. is necessary.
Press the "instant start" button again.
Note :
on the display you'll be able to follow the temperature until the desired temperature is reached. The temperature indication starts at 80^ and will increase gradually until the desired temperature is reached, and the pre heat time has lapsed
The oven cannot be used without the turn table and turning ring, when not baking bread. Always make sure the turn table can move freely
Never cover the turn table or grill will aluminium foil.
Round pizza pans are very suited for preparing food, when only using convection. Use pan without stand out handles.
Check the food for doneness when the selected time is lapsed. When the food isn't done yet, place it back in the oven for a few more minutes.
6. Auto Defrost
When pressing the “auto defrost” button, following indications will be shown on the display :
MEAT : to defrost meat, weight selection between 0,1 and 2,0 kg.
POULTRY : to defrost poultry, weight selection between 0,2 and 3,0 kg
SEAFOOD : to defrost fish an other seafood , weight selection between 0,1 and 0,9 kg
Turn the “auto cooking/time temp. weight” button to select the desired weight.
Press the "instant start" button to confirm
During defrosting you'll hear a biep signal twice, to indicate you have to turn over the food. Open the oven door and turn the food. Close the door and press "instant start" button, to continue the defrosting cycle.
When defrosting food that of uneven thickness, cover up the thin parts to prevent over defrosting.
7. Auto cooking
Your oven has fixed cooking programs for the making of bread (7 menus) and the preparation of surtain foods (10 menus). When the display shows “:” you can turn the “auto cook/ time temp. weight” button counter clockwise. On the display will be shown the following menus. After selecting the desired menu press the “start” button, to start the programm.
MENU INSTRUCTIONS
Basic Kne
ading, rizing and baking. Can be used for both white or grey bread. This is the only menu on which you can select
the crust colour.
Sweet Kneading, rizing and bac
king, for sweet bread with a
cri
spy crust.
French Kneading, rizing and backing same as basic, but
with a
longer rizing time. For baking a soft bread with a crispy curst.
MENU INSTRUCTIONS
| Wholewheat heat up time an this menu | Kneading | , rizing and backing of wholewheat bread. longer d the bread is soft and fl exible. When using we recommend not to use the timer, for a better result. |
| Quick | Kneading, rizing dan basic. The bread will | and baking, but in a shorter period of time be smaller with a denser structure. |
| Dough for | Kneading and rizing. Can be used for the making of dough rolls, cake, ... |
Cake Kneading, rizing and backing, for dough prepared with baking powder. There are two possible menus: American Cake (220°C) : fi rm cake Sponge cake (175°C) : soft cake
Fish For the preparation of fish with a weight of 450g. Place the fi sh on a fl at round dish. fl avour the fi sh . After the cooking time is done, leave the fi sh in the oven for 2 min. for further cooking.
Rice For preparing rice or pasta. Leave the rice to soak for 30 min. in the following amounts of water: Rice : 100g /180ml, 200g/330ml, 300g/480ml pasta : 100g/300ml, 200g/600ml, 300g/900ml * when the rice is done, leave it for 5 min to absorb the water. * when preparing pasta, stir regularly. Let the pasta rest for 1 or 2 min. after cooking.
Steak The t hinnest bit of the steak must be placed in the middle, the dickest p art on the ouside. You can also cover the thir pieces to prevent over cooking.
Pizza To heat up a piece of cold pizza of 150g.
Potato For co oking of potatoes, choose potatoes of average size. Total weight of the potatoes must be between 450g and 650g Place the potatoes in a large dish and cover it. If necessary turn over the potatoes after half the cooking time is lapsed.
Popcorn For preparing prepacked popcorn.
MENU INSTRUCTIONS
Chicken For the preparation of chicken. Again place the thickest part in the middle. And if necessary cover the thinnest piece to prevent over cooking.
Beverage For he ating up a cup of 250 or 500 ml. The temperatur of the liquid to be heated may n ot be colder than 5°C-10°C. Use a cup with a large opening
Fresh vegetable Place the vegetables of 200g to 800g in the oven, add water and cover. Stir after cooking and let it rest. Add water according to the amount of vegetables: - 200 - 400g : 2 table spoons - 500 - 800g : 4 table spoons Frozen vegetables same as fresh vegetables
Note:
- The cook time above based on the food which is of the room temperature of 20-25 C except specially noted in the above cooking menu A4 and A5. Time may vary for the food in different temperature.
- when cooking the potatoes and fi sh it is suggested to cover the food with a layer of plastic thin fi lm to prevent the loss of water
- The temperature, weight and shape of food will largely influence the cooking effect. If any deviation has been found to the factor noted on above menu, you can adjust the cooking time for best result.
- For preparing bread the room temperature must be between 15^ C and 34^ C. To high a temperature can make the bread sour, while a to low temperature may influence the rising process. The size of the bread depends on the room temperature.
Using auto cooking programs :
- Turn the auto cooking/ time temp. weight" button to select the desired menu.
- Pres "instant start" button.
- Turn the “auto cooking/time temp. weight” button again to select the weight.
- Press “instant start” button again. The auto cooking program will start. You can read the remaining cooking time on the display.
11. Bread making
add the ingredients in the bread pan according to the below list :
- water
- sugar
- salt
- butter
-
fl out
-
Add the yeast as the last ingredient. Always make sure the yeast doesn't come in
contact with the water and the salt.
- Place the bread pan in the oven. Turn the bread pan clockwise to lock. Close the door and plug in the unit.
- Set the current time, if you wish to work with the timer
- Turn the "auto cooking/time temp. weight" button, to select the desired menu.
- When you select “basic” menu, you can select the crust colour, by gently turning the “auto cooking/time temp. weight” button. For all other menus you can’t select the crust colour
- Press the "instant start" button to confirm the selection
- Turn the “auto cooking/time temp. weight” again to select the wiehgt.
- Press the “preset clock” button to return to the current time. If you want to set the timer, press the “preset clock” button for 3 sec. No set the time, on which you wish the programm to start. Press the “preset clock” button again to confirm the set time 10. Press “instant start” button.
- After the backing process is done, you'll hear 6 biep signals. Open the oven door and take out the bread pan using oven mittens. When not taking the bread immediately out of the oven, the oven will keep warming the bread for 1 hour. You can cancel the process by pressing the "stop clear" button for 3 seconds;
Note : always be very careful when handling the bread pan, it can be very hot.
As long as the bread pan is in the oven, you may not use the microwave function.
12. Memory function
When there is a power failure during the backing process, the programm will continue automatically, on the condition that the power failure doesn't exceed 10 min. After 10 min. you must reprogramm the unit and if necessary use new ingredients.
13. Timer
When using the timer function during cooking, take following actions :
-
Set the current time :
-
press the "preset clock" button
· turn the “auto cooking/time temp. weight” button to select the hour - press the "preset clock" button again to confirm the time
- Turn the “auto cooking/ time temp. weight” button to select the minutes.
-
Press the “preset clock” button to confirm
-
Select the desired cooking function and set the timer :
· (microwave, convection, bread)
- Press and keep the "preset clock" button until the time starts blinking.
- Set the time on which the programm must start working.
- Press the “preset clock” button again to confirm the set tiem and return to the current time.
- You can check the set timer by pressing the “preset clock” button shortly.
NOTE : Always make sure to programm the correct current time on your appliance,
before using the automatic start function.
If you want to cancel the automatic start, press the “stop clear” button.
14. Cooking with different settings
The perfect cooking result, may require different cooking methods. For example fi rs microwave, convection afterwards.
You can programm this as follows :
- Press the “micro power” button to select the microwave function.
- Turn the “auto cooking/time temp. weight” button to select the desired time
- Press the “conv. combi” button to select the convection.
- Turn the “auto cooking/time temp weight” button to select the desired temperature.
- Pres the "instant start" button to cconfi rm
- Turn the "auto cooking/ time temp weight" button again, to select the desired time
- Press the "instant start" button, to start the cooking process.
CLEANING AND MAINTENANCE
Clean the oven at regular intervals
Disconnect the power supply cord before cleaning.
Exterior:
The outside may be cleaned with mild soap and warm water, wipe clean with a damp cloth. Avoid the use of harsh abrasive cleaners
Door:
Wipe the door and window on both sides, the door seals and adjacent parts frequently with a damp cloth to remove any spills or spatters. Do not use abrasive cleaners.
Control panel:
Care should be taken in cleaning the control panel. Wipe the panel with a cloth dampened slightly with water only.
Do not scrub or use any sort of chemical cleaners. Avoid the use of excess water
Interior walls:
To clean the interior surfaces, wipe with a soft cloth and warm water for hygienic reasons. After use wipe the waveguide cover in the oven with a soft damp cloth to remove any food splashed. Build up splashes may overheat and begin to smoke or catch fire. Do not remove the waveguide cover. Do not use a commercial oven cleaner abrasive or harsh cleaners and scouring pads on any part of your microwave oven.
Never spray oven cleaners directly onto any part of your oven.
Avoid using excess water. After cleaning the oven, ensure any water is removed with a soft cloth.
Turn table
Wash with mild soapy water and dry thoroughly
1) Arrange food carefully, place thickest areas toward outside of dish
2) Watch cooking time, cook for the shortest amount of time indicated and add more
time as needed.
3) Cover foods before cooking check recipe for suggestions: paper towels, microwave plastic wrap or a lid. Covers prevent spattering and help foods to cook evenly. (Helps keep oven clean).
4) Stir foods: From outside to centre of dish once or twice during cooking, if possible.
5) Turn foods. Foods such as chicken, hamburgers or steaks should be turned over once during cooking
6) Rearrange foods: Like meatballs halfway through cooking both from top to bottom and from the centre of the dish to the outside.
7) Allow standing time. After cooking ensure adequate standing time. Remove food from oven and stir if possible.
Cover for standing time which allows the food to finish cooking without overcooking
8) Check for doneness. Look for signs indicating that cooking temperature has been reached. Doneness signs include:
-Food steams throughout, not just at edge.
-Poultry thigh joints move easily
-Pork and poultry show no pinkness..
-Fish is opaque and flakes easily with a fork
9) Condensation. A normal part of microwave cooking. The humidity and moisture in food will influence the amount of moisture in the oven. Generally, covered food will not cause as much condensation as uncovered foods. Ensure that the ventilation openings are not blocked
10) Microwave safe plastic wrap for cooking food with high fat content, do not bring the wrap in contact with the food as it may melt.
11) Microwave safe plastic cookware. Some microwave safe plastic cookware are not suitable for cooking foods with high fat and sugar content.

- GARANTIEVOORWAARDEN
- CONDITIONS DE GARANTIE
- RECYCLING INFORMATIONEN
- RECYCLING INFORMATION
- WERKINGSTHEORIE VAN EEN MICROGOLFOVEN
- Nota :
- Note:
- Anmerkung:
- UTENSILS GUIDE
- PARTS
- Notes:
- IMPORTANT SAFEGUARDS
- HOUSEHOLD USE ONLY
- CONTROL PANEL
- Clock setting
- Lock
- Auto reminder
- Stop
- Microwave cooking
- Combination
- Note :
- Auto Defrost
- Auto cooking
- MENU INSTRUCTIONS
- Using auto cooking programs :
- Bread making
- Memory function
- Timer
- Cooking with different settings
- CLEANING AND MAINTENANCE
- Exterior:
- Door:
- Control panel:
- Interior walls:
- Turn table
Brand : DOMO
Model : DO2625CB
Category : Microwave