HCWBT10 - Alarm clock radio KONIG - Free user manual and instructions
Find the device manual for free HCWBT10 KONIG in PDF.
User questions about HCWBT10 KONIG
0 question about this device. Answer the ones you know or ask your own.
Ask a new question about this device
Download the instructions for your Alarm clock radio in PDF format for free! Find your manual HCWBT10 - KONIG and take your electronic device back in hand. On this page are published all the documents necessary for the use of your device. HCWBT10 by KONIG.
USER MANUAL HCWBT10 KONIG
text_image
KÖNIG ELECTRONICHC-WBT10
natural_image
Close-up of a white electronic device with two small icons and a green button labeled 'RESET' (no readable text or symbols beyond basic design)EN - LED Wash & Brush Timer
text_image
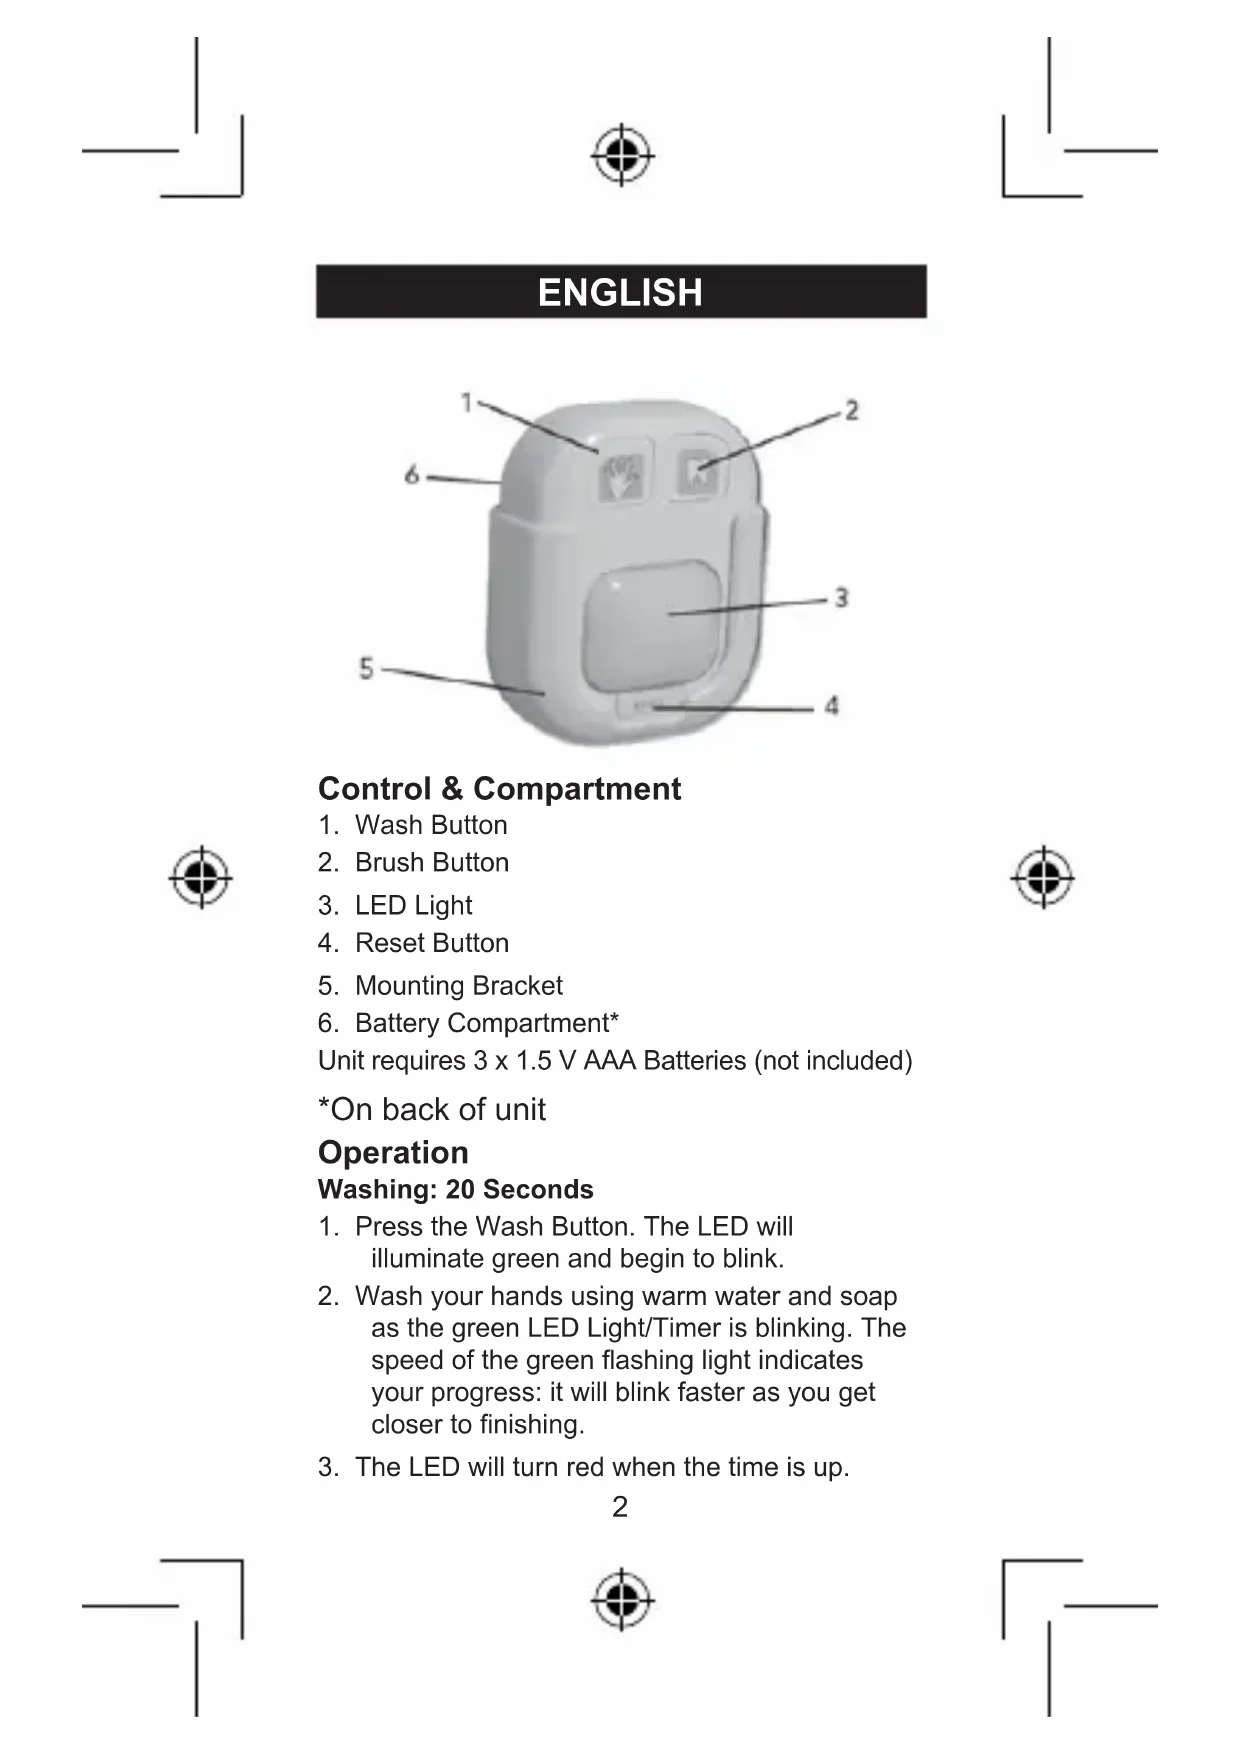
Labeled diagram of a 3D device with numbered parts for identificationControl & Compartment
- Wash Button
- Brush Button
- LED Light
- Reset Button
- Mounting Bracket
- Battery Compartment*
Unit requires 3 x 1.5 V AAA Batteries (not included)
*On back of unit
Operation
Washing: 20 Seconds
- Press the Wash Button. The LED will illuminate green and begin to blink.
- Wash your hands using warm water and soap as the green LED Light/Timer is blinking. The speed of the green flashing light indicates your progress: it will blink faster as you get closer to finishing.
- The LED will turn red when the time is up.
Brushing: 2 Minutes
- Press the Brush Button. The LED light will illuminate green and begin to blink.
- Brush your teeth using your favourite toothpaste as the green LED Light/Timer is blinking. The speed of the green flashing light indicates your progress.
- The LED will turn red when the time is up.
NOTE: If you accidentally press the wrong button, simply press the rest button to reset the unit.
Mounting the Timer
Hook and Loop Tape (included):
- Check the location of where you want to place the Timer. Make sure it is clean and that there is no dust.
- Remove the suction cup from the back of the bracket by sliding it down and pulling it away from the bracket.
- The two sides of the hook and loop tape come pre-attached for ease of mounting. Remove the paper covering on one sticky side of the tape.
NOTE: Hook and loop tape may be cut to desired size for easier removal.
-
Place the tape in the recessed area in the centre at the back of the Mounting Bracket.
-
Remove the paper covering on the other sticky side of the tape.
-
Place the Mounting Bracket in the desired location. Press firmly and hold for five seconds so that the tape adheres to the surface.
CAUTION: Be cautious of what surface the hook and loop adhesive is attached to, as it may remove paint or damage the surface.


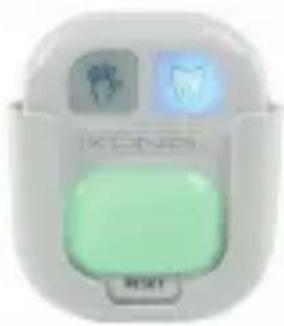
Screw (included):
You can secure the Timer mounting bracket to almost any surface using a screw. To do so, remove the Timer from the bracket by sliding it up and out of the bracket.
text_image
Keyhole Slot Hook & Loop Tape Area Mounting Bracket- Drill a pilot hole in the location where you want to mount the Timer. Place screw (included) in pre-drilled hole. Tighten slightly until secure, but do not tighten all the way. Slide the Mounting Bracket keyhole slot over screw head and into position.
- Tighten screw to secure mounting bracket to wall. Take care to not over tighten.
- Place the Timer in the mounting bracket.

Suction Cup (included):
Use the suction cup to secure the mounting bracket to surfaces such as tile.
- Slightly moisten the suction cup and press it onto the mounting surface.
- The suction cup has a small pull tab for ease of release from mounting surface.
NOTE: If suction cup releases from mounting surface over time, repeat step 1 above.
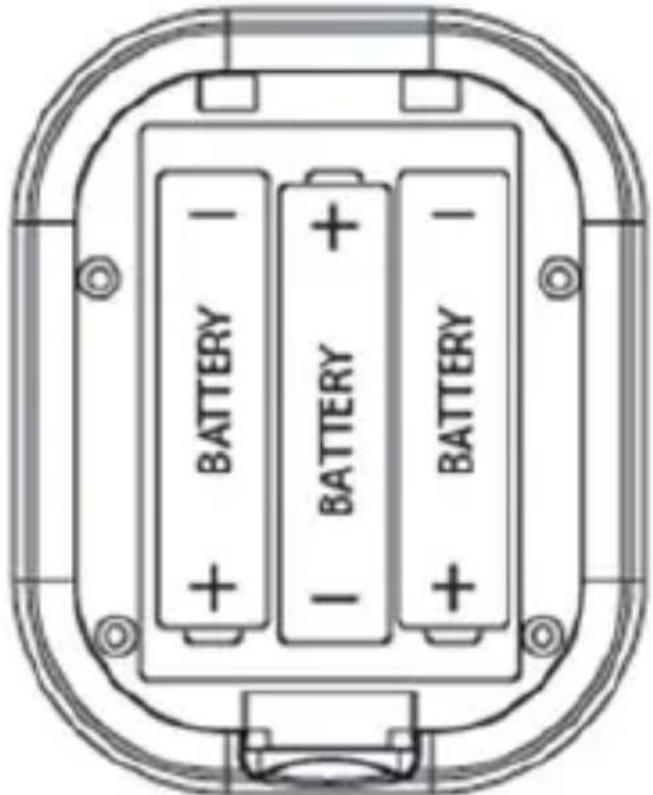
Battery Installation/Replacement
If the illuminated LED appears to be dim or does not light at all, it means the batteries need to be replaced.

text_image
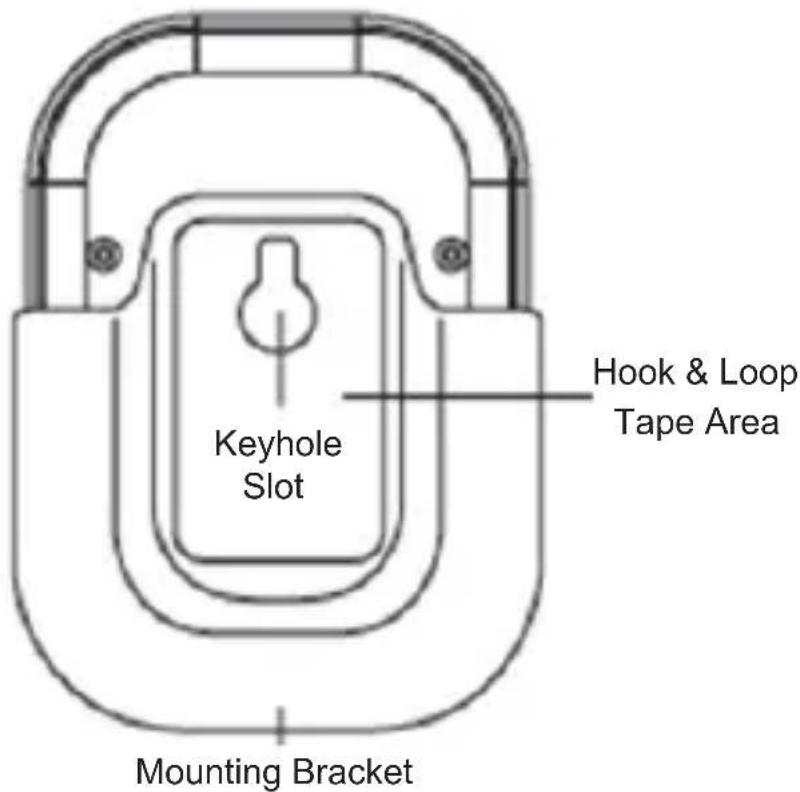
BATTERY BATTERY BATTERY BATTERY- Remove the Timer from its Mounting Bracket by sliding it up and out of the bracket.

- Pull up on the battery compartment housing tab on the back of unit to open the battery compartment.
- Remove the old batteries (if replacing).
- Insert 3 new AAA batteries. Be sure to correctly match the battery polarity when installing new batteries.
- Replace the battery compartment cover.
Battery Precautions
- Use only the size and type of batteries specified.
- Always purchase the correct size and grade of battery most suitable for intended use.
- Be sure to follow the correct polarity when installing the batteries as indicated in the battery compartment. Reversed batteries may cause damage to the device.
- Do not mix alkaline, standard (Carbon-Zinc), or rechargeable (Nickel Cadmium) batteries.
- Replace all batteries of a set at the same time. Do not mix old and new batteries.
- Clean the battery contacts and also those of the device prior to battery installation.
- Do not dispose of batteries in fire.
- Remove batteries if consumed or if product is to be left unused for an extended period of time.
Safety precautions:


text_image
CAUTION RISK OF ELECTRIC SHOCK DO NOT OPEN
To reduce risk of electric shock, this product should ONLY be opened by an authorized technician when service is required. Disconnect


the product from mains and other equipment if a problem should occur. Do not expose the product to water or moisture.
Maintenance:
Clean on ly with a dry cloth. Do not use cleaning solvents or abrasives.
Warranty:
No guarantee or liability can be accepted for any changes and modifications of the product or damage caused due to incorrect use of this product.
General:
Designs and specifications are subject to change without notice.
All logos brands and product names are trademarks or registered trademarks of their respective holders and are hereby recognized as such.
Keep this manual for future reference.
Attention:
This product is marked with this symbol. It means that used electrical and electronic products should not be mixed with general household waste. There is a separate collections system for these products.
DEUTSCH

text_image
Labeled diagram of a 3D device with numbered parts for identificationtext_image
Diagram of a digital camera with numbered parts labeled 1 through 6text_image
Diagram of a 3D device with numbered parts labeled 1 through 621

text_image
Labeled diagram of a 3D device with numbered parts for identificationtext_image
Labeled diagram of a 3D device with numbered parts for identificationtext_image
Labeled diagram of a 3D device with numbered parts for identificationEllenőrzés & Részek
- Kézmosás gomb

text_image
Diagram of a 3D device with numbered parts labeled for identification46

Ohjaus & Kotelo
- Pesupainike
- Harjauspainike
- LED-valo
- Uudelleenasetuspainike (Reset)
- Pidike
- Paristolokero*
text_image
Labeled diagram of a 3D device with numbered parts for identification52

text_image
Labeled diagram of a 3D device with numbered parts for identification58


text_image
Labeled diagram of a 3D device with numbered parts for identification64

text_image
Diagram of a 3D device with numbered parts labeled 1 through 6Ρύθμιση & Μονάδα
text_image
Diagram of a 3D device with numbered parts labeled 1 through 6Kontrol & Rum
- Vaskeknap
- Børsteknap
- LED lys
- Genindstillingsknap
- Monteringsbeslag
- Batteri rum*