PV1500 - Iron UFESA - Free user manual and instructions
Find the device manual for free PV1500 UFESA in PDF.
User questions about PV1500 UFESA
0 question about this device. Answer the ones you know or ask your own.
Ask a new question about this device
Download the instructions for your Iron in PDF format for free! Find your manual PV1500 - UFESA and take your electronic device back in hand. On this page are published all the documents necessary for the use of your device. PV1500 by UFESA.
USER MANUAL PV1500 UFESA
natural_image
Line drawing of a 2000 W air iron with Max branding and brand logo (no text or symbols on the device itself)PV1500 (TYPE: CKBD23)
PV1505 (TYPE: CKBD23)
INSTRUCCIONES DE USO
OPERATING INSTRUCTIONS
MODE D'EMPLOI
INSTRUÇÕES DE USO
HASZNÁLATI UTASÍT &
إرشادات التشفيل
ES
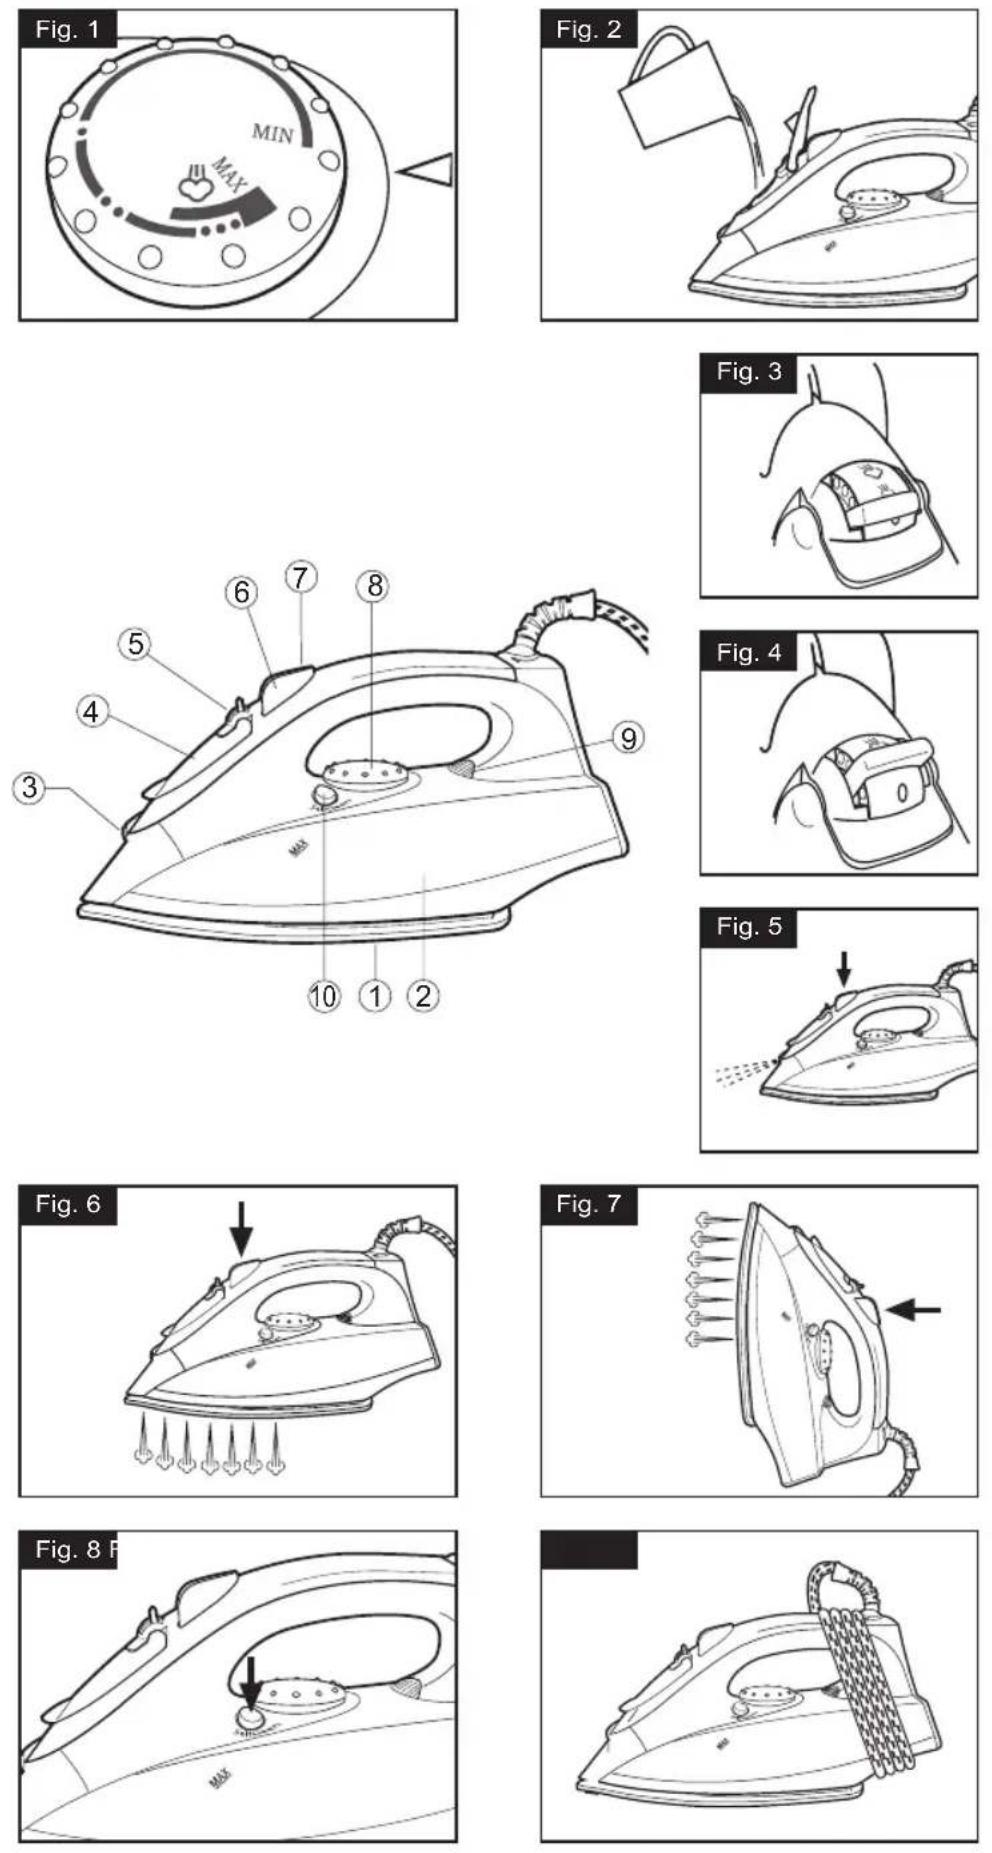
- Soleplate
- Water tank
- Spray nozzle
- Water tank cover
- Steam regulator
- Spray button
- Super steam button
- Temperature regulator
- Pilot Lamp
- SelfClean button
FR
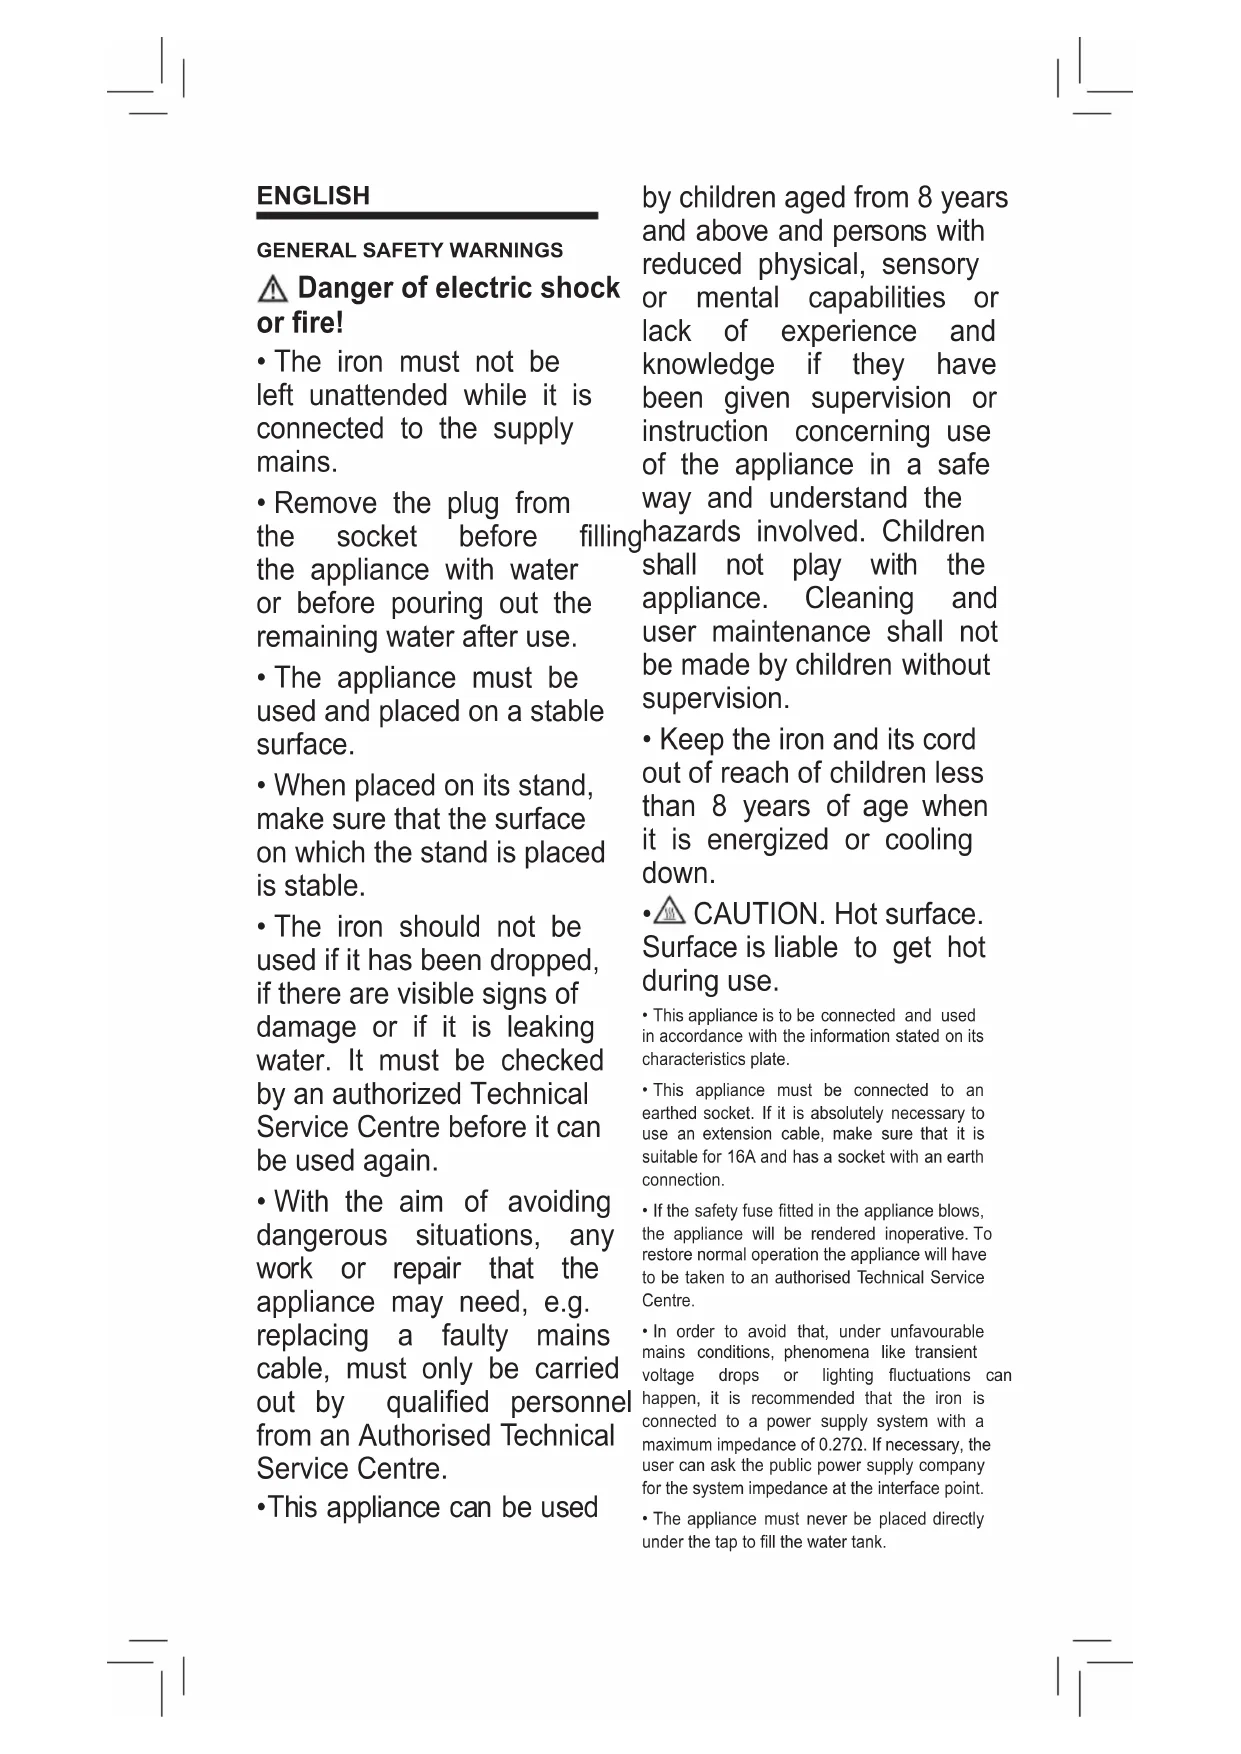
⚠️ Danger of electric shock or fire!
- The iron must not be left unattended while it is connected to the supply mains.
- Remove the plug from the socket before filling the appliance with water or before pouring out the remaining water after use.
- The appliance must be used and placed on a stable surface.
- When placed on its stand, make sure that the surface on which the stand is placed is stable.
- The iron should not be used if it has been dropped, if there are visible signs of damage or if it is leaking water. It must be checked by an authorized Technical Service Centre before it can be used again.
- With the aim of avoiding dangerous situations, any work or repair that the appliance may need, e.g. replacing a faulty mains cable, must only be carried out by qualified personnel from an Authorised Technical Service Centre.
•This appliance can be used
by children aged from 8 years and above and persons with reduced physical, sensory or mental capabilities or lack of experience and knowledge if they have been given supervision or instruction concerning use of the appliance in a safe way and understand the hazards involved. Children shall not play with the appliance. Cleaning and user maintenance shall not be made by children without supervision.
- Keep the iron and its cord out of reach of children less than 8 years of age when it is energized or cooling down.
- CAUTION. Hot surface. Surface is liable to get hot during use.
- This appliance is to be connected and used in accordance with the information stated on its characteristics plate.
- This appliance must be connected to an earthed socket. If it is absolutely necessary to use an extension cable, make sure that it is suitable for 16A and has a socket with an earth connection.
- If the safety fuse fitted in the appliance blows, the appliance will be rendered inoperative. To restore normal operation the appliance will have to be taken to an authorised Technical Service Centre.
- In order to avoid that, under unfavourable mains conditions, phenomena like transient voltage drops or lighting fluctuations can happen, it is recommended that the iron is connected to a power supply system with a maximum impedance of 0.27 . If necessary, the user can ask the public power supply company for the system impedance at the interface point.
- The appliance must never be placed directly under the tap to fill the water tank.
- Unplug the appliance from the mains supply after each use, or if a fault is suspected.
- The electrical plug must not be removed from the socket by pulling the cable.
- Never immerse the iron in water or any other fluid.
- Do not leave the appliance exposed to weather conditions (rain, sun, frost, etc.).
BEFORE USING THE IRON FOR THE FIRST TIME
Fill the iron's water tank (2) and set the temperature regulator (8) to the "MAX" position.
Plug the appliance in and when the iron reaches the selected temperature (the pilot lamp (9) will go out), evaporate the water by setting the steam regulator (5) to the ( ) position and pressing the super steam button (7) repeatedly.
When using the steam for the first time, first try it away from the clothes just in case there is any dirt lodged in the steam chamber.
HOW TO USE THE IRON
The pilot lamp (9) will stay lit while the iron is heating up and go out as soon as it has reached the selected temperature. Once the iron is hot, you can start ironing even while it continues to heat itself.
Sort your garments out based on their cleaning symbol labels, always starting with clothes that have to be ironed at low temperatures.
• Synthetic fibres Low temperature
• Silk - Wool Medium temperature
... Cotton - Linen High temperature
FILLING THE WATER TANK
Set the steam regulator (5) to the "0" position (Fig. 3) and unplug the iron from the wall socket.
Only use clean tap water, without any type of additive. Any other type of liquid could damage the appliance.
The water level should not exceed the "Max" line marked.
To obtain better and longer steam production mix tap water with distilled water in the measures shown in the table below:
| Water hardness | Amount of distilled water per tap water |
| Very soft / soft 0 | |
| Average 0 | |
| Hard Approx 1 | |
| Very hard Approx 2 |
Your water supply company can provide you with the hardness levels for your area. Do not fill beyond the maximum water level.
IRONING WITHOUT STEAM
Set the steam regulator (5) to the "0" position (Fig. 3) and slide the temperature control to the desired position. The Spray and Super steam functions may be used if required.
IRONING WITH STEAM
Unplug the iron from the mains supply. Turn the steam regulator (5) to the "0" position, open the lid on the filling spout and fill the tank with water. (Fig. 2)
Plug the iron into the mains supply and select a suitable temperature. The pilot lamp (9) will stay lit while the iron is heating up and go out as soon as it has reached the selected temperature.
As soon as the iron is hot turn the steam regulator (5) to the (↑) position. You can always regulate the amount of the steam by turning the steam selector between (↓) and ( ). Fig. 4
When ironing with steam, make sure that the temperature control is always between the ·· and Max settings.
When using the steam iron for the first time, try it away from the clothes just in case there is any dirt in the steam chamber.
When you have finished ironing, set the si regulator (5) to the "0" position and empty the tank.
SPRAY (Fig. 5)
You can get an additional burst of spray, whether ironing dry or with steam, in the following way:
- Press the spray button (6). Do not use the spray for ironing silk as this may leave water marks.
IRONING WITH SUPERSTEAM (Fig. 6)
Just as with the Spray function you can also get an additional burst of steam when ironing with or without steam by doing the following:
- Set the temperature regulator (8) between the •• and Max settings and wait until the iron reaches temperature.
- Raise the iron slightly up off the material and press the super steam button (7) down firmly.
- Pause for at least 5 seconds between each jet of steam.
CREASE REMOVAL IN VERTICAL (Fig. 7)
- Set the temperature regulator (8) between the •• and Max settings and wait until the iron reaches temperature.
- Hang the garment on a hanger and place the iron some 10-20 cm away. Never iron a garment if somebody is wearing it at the time.
- Press the super steam push button (7) pausing for at least 5 seconds between each press.
SELF-CLEANING (Fig. 8)
CAUTION! Do this operation over a sink. To keep steam production constant occasional cleaning is recommended as limescale can build up inside the steam ducts and steam chamber.
To do this fill the water tank (2), temperature regulator (8) to the "MAX" position. Plug the appliance in and when the lamp (9) goes out press the "SelfClean" button (10) down.
Keep the button held down until water stops coming out through the steam holes.
EMPTYING OUT THE WATER TANK
Take the plug out of the mains socket, open the lid on the filling spout and empty out the tank by holding the iron pointed-end down and shaking it gently.
STORAGE (Fig. 9)
The iron can be stored away with the cable coiled up in the rear area. It is advisable to store the iron in the upright position with the water tank empty and the steam regulator set to "0".
CLEANING & MAINTENANCE
Avoid scratching the iron; do not pass it over hard surfaces. Traces of starch or sprays can be removed from the base by using damp cotton wool or a non abrasive cleaning product.
Do not put chemicals or detergents into the water tank.
The outside surfaces can be cleaned down with a damp cloth, without ever having to use abrasive agents or solvents.
ADVICE ON DISPOSAL:

Our goods come in optimized packaging.
This basically consists in using non-contaminating materials which should be handed over to the local waste disposal service as secondary raw materials.
This product complies with EU Directive 2002/96/CE.
The crossed wheelie bin symbol shown on the appliance indicates that when
it comes to dispose of the product it must not be included in with household refuse. It must be taken to a special refuse collection point for electric and electronic appliances or returned to the distributor when purchasing a similar appliance. Under current refuse disposal regulations, users who fail to take
discarded appliances to special refuse collection points may be penalized. Correct disposal of discarded appliances means that they can be recycled and processed ecologically, helping the environment and allowing materials used in the product to be reused. For more information on available waste disposal schemes contact your local refuse service or the shop where the product was purchased. Manufacturers and importers are responsible for ecological recycling, processing and disposal of products, whether directly or via a public system.
setting the Your local town council can provide you with information about how to dispose of obsolete appliance.