
SC88B0 - Vacuum Cleaner SAMSUNG - Free user manual and instructions
Find the device manual for free SC88B0 SAMSUNG in PDF.
User questions about SC88B0 SAMSUNG
0 question about this device. Answer the ones you know or ask your own.
Ask a new question about this device
Download the instructions for your Vacuum Cleaner in PDF format for free! Find your manual SC88B0 - SAMSUNG and take your electronic device back in hand. On this page are published all the documents necessary for the use of your device. SC88B0 by SAMSUNG.
USER MANUAL SC88B0 SAMSUNG
Vacuum Cleaneruser manual
Planet
100%
First
Recycled Paper
This manual is made with 100% recycled paper.
-
Before operating this unit, please read the instructions carefully.
-
For indoor use only.
English
imagine the possibilities
Thank you for purchasing a Samsung product.
To receive more complete service,
please register your product at
www.samsung.com/register
SAMSUNG
SAFETY INFORMATION

- Before operating the appliance, please read this manual thoroughly and retain it for your reference.

- Because the following operating instructions cover various models, the characteristics of your vacuum cleaner may differ slightly from those described in this manual.
CAUTION/WARNING SYMBOLS USED
| WARNING | Indicates that a risk of death or serious injury exists. |
| CAUTION | Indicates that a risk of personal injury or material damage exists. |
OTHER SYMBOLS USED
| Represents something you must NOT do. | |
| Represents something you must follow. | |
| Indicates that you must disconnect the power plug from the socket. |

This vacuum cleaner is designed for domestic household use only. Do not use this vacuum cleaner to clear building waste or debris. Do not use this vacuum cleaner with any of the filters removed as this could cause damage to the internal components and void your warranty.
SAVE THESE INSTRUCTIONS
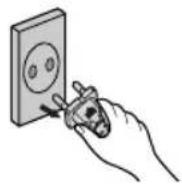
POLARIZED PLUG INSTRUCTIONS
- To reduce the risk of electric shock, this appliance has a polarized plug (one blade is wider than the other). This plug will fit in a polarized outlet only one way. If the plug does not fit fully in the outlet, reverse the plug. If it still does not fit, contact a qualified electrician to install the proper outlet. Do not change the plug in any way.
2_safety information
IMPORTANT SAFETY INSTRUCTIONS
When using an electrical appliance, you should always follow these basic precautions: READ ALL INSTRUCTIONS BEFORE USING YOUR CANISTER VACCUM WARNING - To reduce the risk of fire, electric shock, or injury:
- Do not leave the appliance unattended when it is plugged in. Unplug from the outlet when not in use and before servicing.
- Do not use outdoors or on wet surfaces.
- Do not allow the vacuum to be used as a toy. Pay close attention when the vacuum is used by or near children.
- Use only as described in this manual. Use only manufacturer's recommended attachments.
- Do not use with a damaged cord or plug. If the appliance is not working as it should, has been dropped, damaged, left outdoors, or dropped into water, bring it to a service center.
- Do not pull or carry by the cord, use the cord as a handle, close a door on the cord, or pull the cord around sharp edges or corners. Do not run appliance over the cord. Keep the cord away from heated surfaces.
- Do not unplug by pulling on the cord. To unplug, grasp the plug, not the cord.
- Do not handle the plug or appliance with wet hands.
- Do not put any object into openings. Do not use with any opening blocked. Keep free of dust, lint, hair, and anything that may reduce air flow.
- Keep hair, loose clothing, fingers, and all parts of your body away from openings and moving parts.
- Turn off all controls before unplugging.
- Use extra care when cleaning on stairs.
- Do not use to pick up flammable or combustible liquids, such as gasoline, or use in areas where they may be present.
- Do not pick up anything that is burning or smoking, such as cigarettes, matches, or hot ashes.
- Do not use without the dirt cup and/or fi Iters in place.
- Do not use the vacuum cleaner in an enclosed space filled with vapors given off by oil base paint, paint thinner, some moth proofing substances, flammable dust, or other explosive or toxic materials.
- Do not pick up hard or sharp objects such as glass, nails, screws, coins, etc.
- Hold the plug when rewinding onto the cord reel. Do not allow the plug to whip when rewinding.
ASSEMBLING THE VACUUM
05 Assembling the vacuum

ASSEMBLING THE VACUUM
06 Power cord

06 On/Off switch
07 Power control
MAINTAINING THE TOOLS AND
FILTERS

08 Using accessories
09 Maintaining floor tools
10 Emptying the dust bin
11 Cleaning the dust pack
13 Cleaning the outlet filter
13 Changing the battery
TROUBLESHOOTING

assembling the vacuum

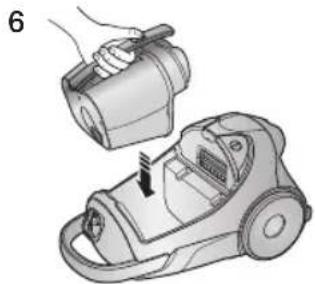
01 ASSEMBLING THE VACUUM

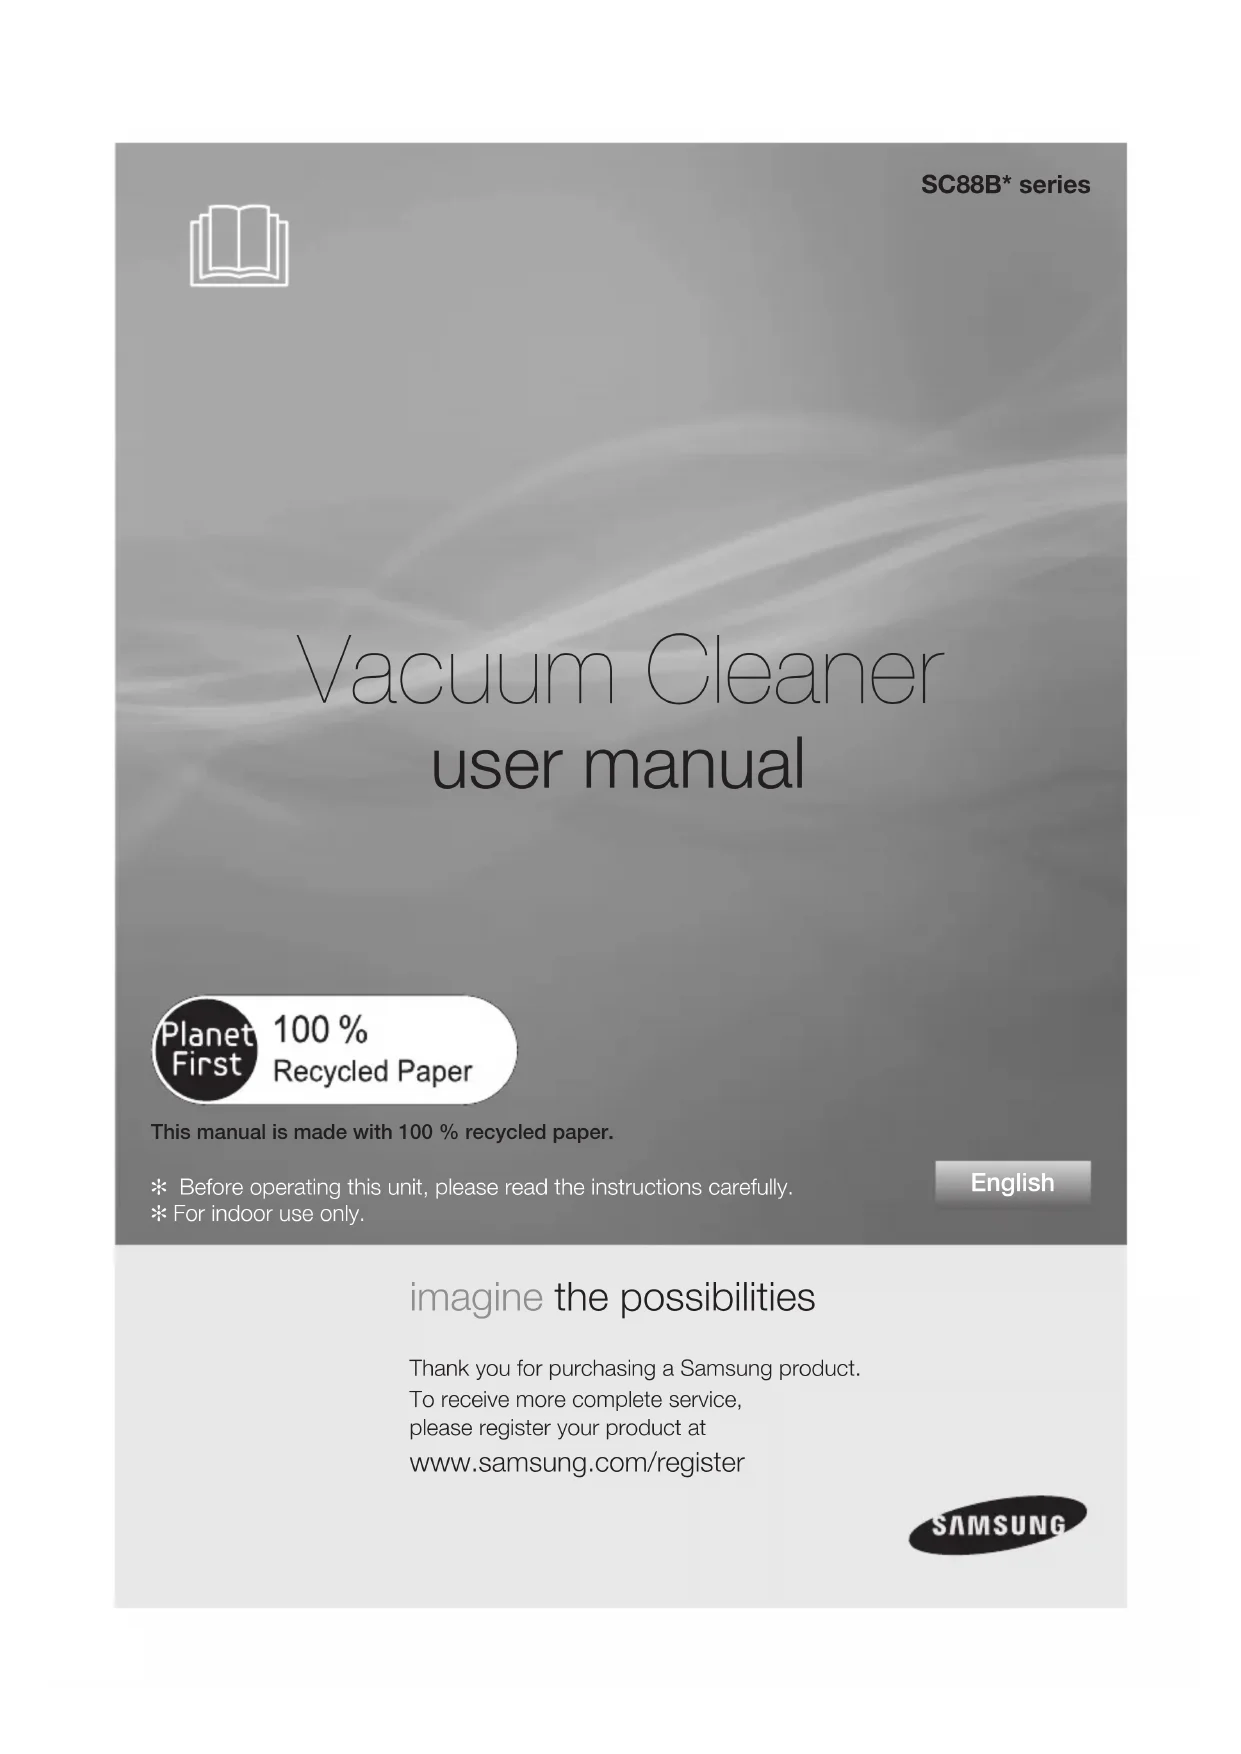
- Please do not push the button of the dust bin handle when carrying the machine. (See page 10 for exact location.)

- When storing, park the floor nozzle.
operating the vacuum
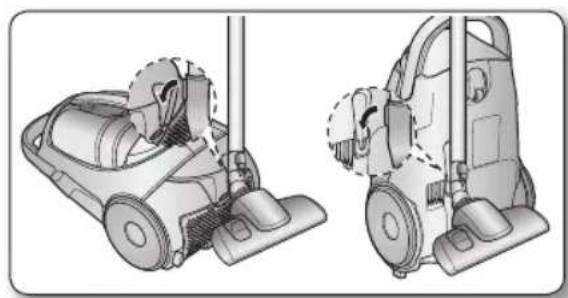
POWER CORD
- When removing the plug from an electrical outlet, grasp the plug, not the cord.
ON/OFF SWITCH

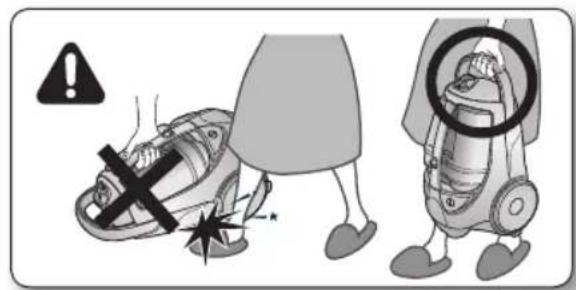
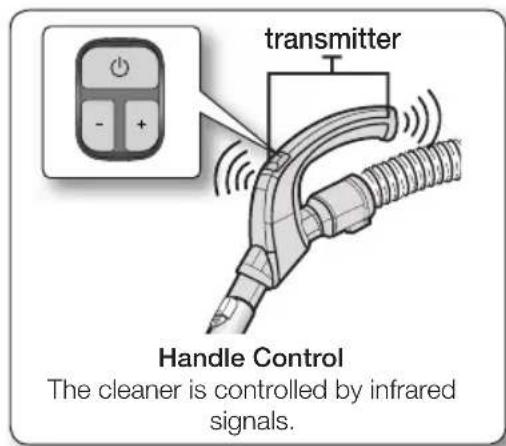
INFRARED REMOTE-CONTROL
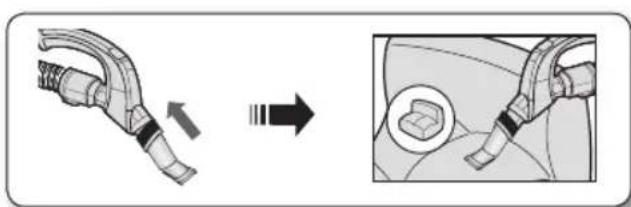
HOSE
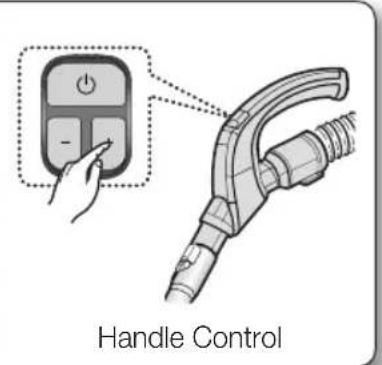
1. Vacuum cleaner ON/OFF(
Press the ON/OFF button to operate the vacuum cleaner. Press again to stop the vacuum cleaner.
2. Vacuum cleaner (+, -)
Press the (+) button to operate the vacuum at high suction power. Press the (-) button to operate the vacuum at low suction power.

Don't cover the handle transmitter when you use a handle control button.
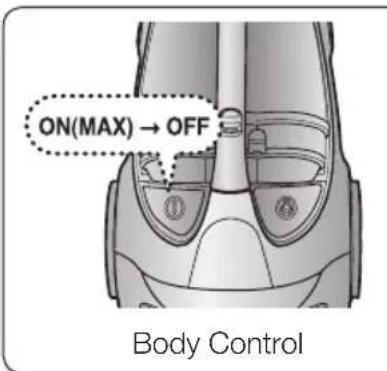
BODY
Press the power ON/OFF button repeatedly to start and to stop the vacuum cleaner.
(OFF ON OFF)

If the remote handle control is not working, the cleaner can be operated using the ON/OFF button on the body of the machine.
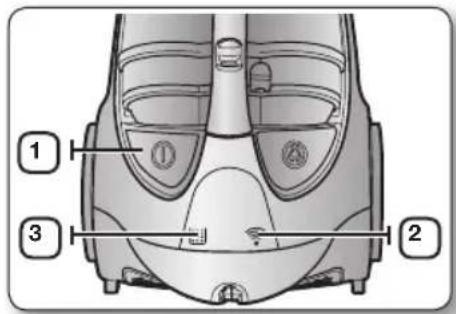
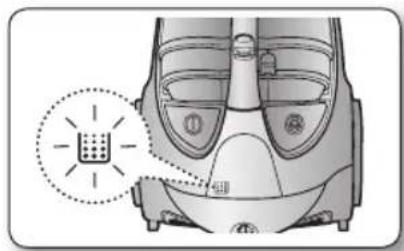
| 1 | The ON/OFF button operates the vacuum cleaner or stops it. |
| 2 | The INFRARED light indicates the part that receives the infra-red signal from the handle control. |
| 3 | The fi liter light is illuminated when the dust pack requires checking or emptying. An audio signal will also sound. |
maintaining the tools and filters
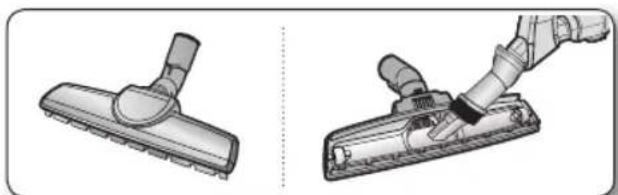
USING ACCESSORIES
PIPE
- Adjust the length of the telescopic pipe by sliding the length control button located in the center of the telescopic pipe back and forth.
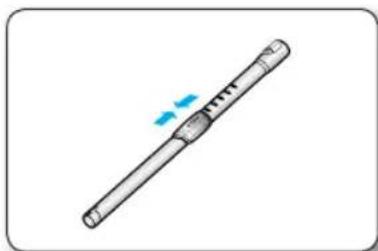
- To check for blockages, separate the telescopic pipe and adjust to shorten. This allows for easier removal of waste clogging the tube.
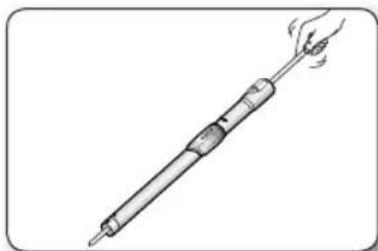
ACCESSIONS (OPTIONAL)
- Push the accessory onto the end of the hose handle.
Pull out and turn the dusting brush to clean delicate areas.
- To use the upholstery tool, push the accessory onto the end of the hose handle.
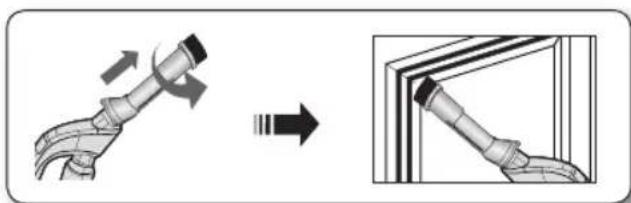
2-STEP BRUSH (OPTION)
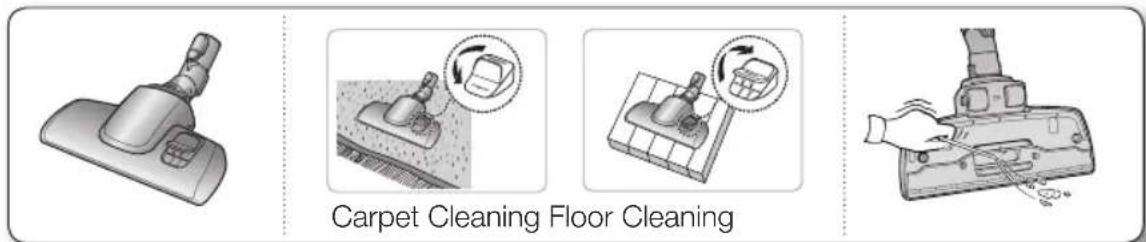
- Adjust the inlet lever according to the floor surface.
- Remove waste matter completely from the inlet if the inlet is blocked.
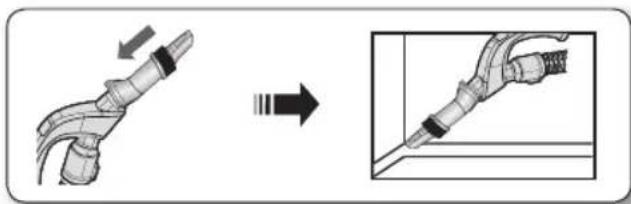
PARQUET MASTER BRUSH (OPTIONAL)
Vacuums dust in a wide area at once.
- Remove waste matter completely from the inlet if the inlet is blocked.

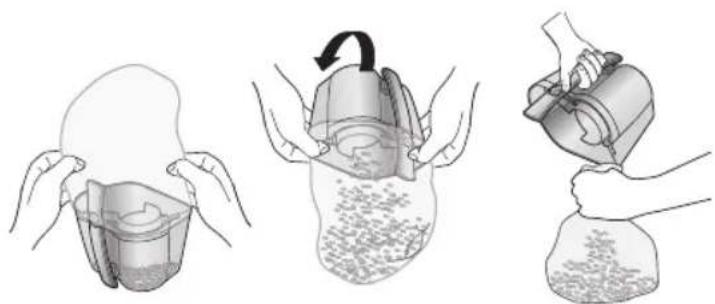
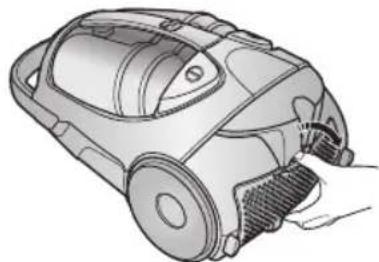
Once dust reaches the dust full mark, empty the dust bin.
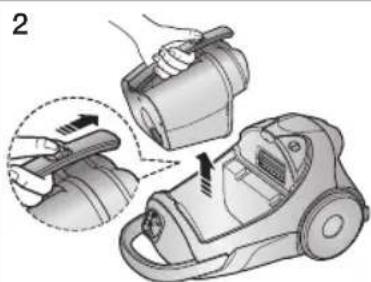
To remove the dust bin, push the button on the dust bin handle. Then, lift the dust bin out.
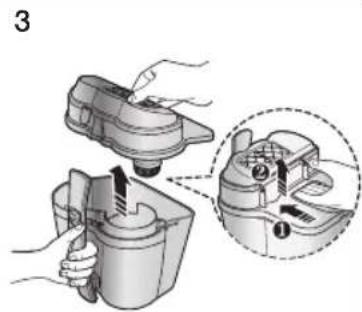
Separate the dust bin cover.
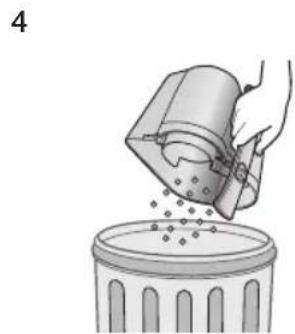
Throw the dust in the bin away.
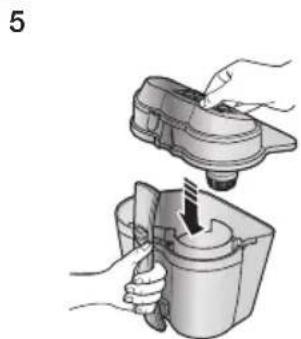
Close the dust bin cover.
Before use, push the dust bin into the main body of the vacuum cleaner until you hear a "click" sound.
- To empty into a plastic bag: (recommended for asthma/allergy sufferers)
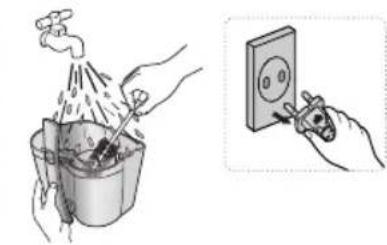
Rinse the dust bin with cold water only.
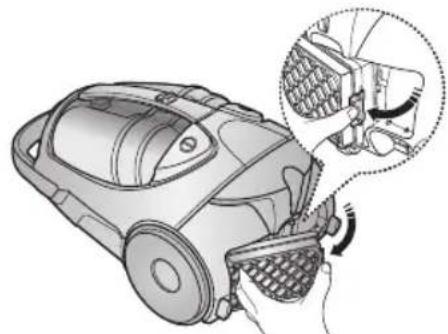
CLEANING THE DUST PACK
WHEN TO CLEAN THE DUST PACK
The lamp will turn red when suction is reduced. If the light comes on, please clean the dust pack.
TO CONFIRM THE DUST PACK NEEDS CLEANING
- Turn the vacuum power to 'MAX'.
If the fi tter check indicator turns red with the inlet held 10cm (4 inches) above a fl at floor, clean the dust pack.
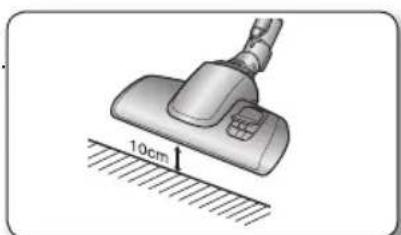

If suction is noticeably and continuously reduced or the vacuum cleaner overheats abnormally, please clean the dust pack.
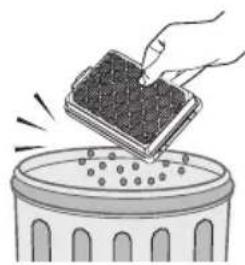
| 1 Remove the dust bin. | 2 Separate the dust bin cover from the dust bin. | 3 Remove the fi xed frame of the dust pack cover. |
| 4 Separate the dust pack from the dust bin cover. | 5 Remove the sponge and fi liter from the dust pack. | 6 Shake the sponge and fi liter over a garbage can to remove loose dust, then wash the sponge and fi liter of the dust pack with water. |
| 7 Let the sponge and fi liter dry in the shade for more than 12 hours. | 8 Put the sponge and fi liter into the dust pack. | 9 Put the assembled dust pack into the cover. |
| 10 Before reassembly, align the dust pack cover and dust pack correctly. | 11 12 Close the dust bin cover. | Before use, push the dust bin into the main body of the vacuum cleaner until you hear a "click" sound. |

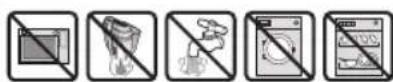
Make sure the filter is completely dry before putting it back into the vacuum cleaner. Allow 12 hours for it to dry.


1
Press the fixed frame part at the back of the main body to remove.
2
Remove the dust bin and HEPA Filter as shown.
Clean the HEPA fi Iter. If cleaning the fi Iter does not resolve the problem, replace the fi Iter.

- When suction is noticeably and continuously reduced or the vacuum cleaner overheats abnormally, please clean the outlet filter.
Note: Do not wash the HEPA fi Iter. If cleaning does not resolve the problem, please replace the blocked fi Iter.
- Replacement fi Iters are available at your local Samsung distributor.
CHANGING THE BATTERY

- If the vacuum cleaner does not work, replace the batteries in the handle. If the problem persists, please contact an authorized dealer.
- Use 2 AAA batteries.

- Never disassemble or recharge the batteries.
WARNING - Never heat up the batteries or throw them into a fire.
- Do not reverse the (+) ,(-)poles.
- Dispose of the batteries property.
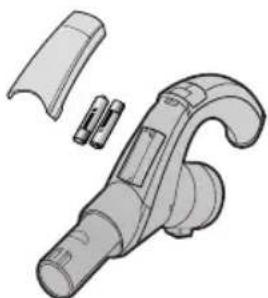
BATTERY TYPE : AAA Size

troubleshooting
| PROBLEM SOLUTION | |
| Motor does not start | ·Check the cable, plug, and socket. ·Let cool. |
| Suction force is gradually decreasing | ·Check for a blockage and remove. |
| Cord does not rewind fully | ·Pull the cord out 2-3m (6.5 - 9.75 ft.) and push the cord rewind button. |
| Vacuum cleaner does not pick up dirt | ·Check the hose and replace if necessary. |
| Low or decreasing suction | ·Please check the fi iters and, if needed, clean as illustrated in the instructions. If the fi iters are clogged and cannot be cleaned, replace with new ones. |
| Body overheating | ·Please check the fi iters. If needed, clean as illustrated in the instructions. |
| Static electricity discharge | ·Please decrease power suction. ·This can also occur when the air in the room is very dry. Please ventilate the room to increase the humidity. |
SAMSUNG
BOUTON DE MISE SOUS/HORS TENSION

TELECOMMANDE INFRAROUGE
-TUYAU
ACCESSIONS (EN OPTION)
If you have any questions or comments relating to Samsung products, please contact the SAMSUNG customer care center.
| Country | Customer Care Center | Web Site |
| U.S 1-800-SAMSUNG www.samsung.com | ||
| CANADA 1-800-SAMSUNG (726-7864) www.samsung.com | ||