
SC21K5170HG - Vacuum Cleaner SAMSUNG - Free user manual and instructions
Find the device manual for free SC21K5170HG SAMSUNG in PDF.

| Product Type | Canister Vacuum Cleaner |
| Brand | Samsung |
| Model | SC21K5170HG |
| Power Consumption | 2000 W |
| Voltage | 220-240 V |
| Frequency | 50/60 Hz |
| Dust Capacity | 2 L |
| Cord Length | 6 m |
| Weight | 5.5 kg |
| Filtration | Washable dust filter and outlet filter (sponge) |
| Accessories | 2-step brush, parquet master, anti-tangle tool, upholstery tool, dusting brush, crevice tool |
| Safety Features | Auto shutoff after 30 minutes of inactivity, safety device prevents dust bin detachment |
| Maintenance | Wash dust filter with neutral detergent, dry 12 hours in shade; replace outlet filter yearly |
| Warranty | Standard Samsung warranty (consult service agent) |
Frequently Asked Questions - SC21K5170HG SAMSUNG
User questions about SC21K5170HG SAMSUNG
0 question about this device. Answer the ones you know or ask your own.
Ask a new question about this device
Download the instructions for your Vacuum Cleaner in PDF format for free! Find your manual SC21K5170HG - SAMSUNG and take your electronic device back in hand. On this page are published all the documents necessary for the use of your device. SC21K5170HG by SAMSUNG.
USER MANUAL SC21K5170HG SAMSUNG
- Before operating this unit, please read the instructions carefully.
- For indoor use only.

natural_image
Black-and-white photo of a modern lounge chair with white leather backrest and metallic X-shaped legs, featuring headphones placed on the backrest (no text or symbols visible)SAMSUNG
PREPARATION
Safety information 3
Safety information 3
Important safety instructions 4
INSTALLATION
Name of the parts 10
Accessories 11
OPERATIONS
Using the vacuum cleaner 12
Using the body 12
Using the handle control 12
Using the brushes 13
MAINTENANCE
Cleaning and maintaining 14
When to empty the dust bin 14
Cleaning the dust bin 14
Cleaning the dust filter 15
Cleaning the outlet filter 15
Cleaning the brush 16
Cleaning the pipe 16
Cleaning the hose 16
Storing the vacuum cleaner 16
APPENDICES
Notes and cautions 17
In use 17
Cleaning and maintenance 18
Troubleshooting 19
Safety information
WARNING
- Before operating the appliance, please read this manual thoroughly and retain it for your reference.
WARNING
- Because these following operating instructions cover various models, the characteristics of your vacuum cleaner may differ slightly from those described in this manual.
Caution/Warning symbols used
WARNING
Indicates that a danger of death or serious injury exists.
CAUTION
Indicates that a risk of personal injury or material damage exists.
Other symbols used
NOTE
Indicates that the following text contains additional important information.
Important safety instructions
When using an electrical appliance, basic precautions should be observed, including the following:
WARNING
This vacuum cleaner is designed for household use only.
Do not use this vacuum cleaner to clean building waste and debris.
Regularly keep the filters in clean conditions to prevent of collecting fine dust in them. Replace if the filter is deformed.
Do not use this vacuum cleaner with any of the filters removed.
Always clean the dust bin & filters after vacuuming carpet cleaners or fresheners, powders and fine dust.
Failure to meet these requirements could cause damage to the internal parts and void your warranty.
General
- Read all instructions carefully. Before switching on, make sure that the voltage of your electricity supply is the same as that indicated on the rating plate on the bottom of the cleaner.
- WARNING: Do not use the vacuum cleaner when rug or floor is wet.
- Close supervision is necessary when any appliance is used by or near children. Do not allow the vacuum cleaner to be used as a toy. Do not allow the vacuum cleaner to run unattended at any time. Use the vacuum cleaner only for its intended use as described in these instructions.
- Do not use the vacuum cleaner without a dust bin.
- Empty the dust bin before it is full in order to maintain the best efficiency.
-
Do not use the vacuum cleaner to pick up matches, live ashes or cigarette butts. Keep the vacuum cleaner away from stoves and other heat sources. Heat can deform and discolour the plastic parts of the unit.
-
Avoid picking up hard, sharp objects with the vacuum cleaner as they may damage the cleaner parts.
- Do not stand on the hose assembly. Do not put weight on the hose.
- Do not block the suction or the exhaust port.
- Switch the vacuum cleaner off on the body of the machine before unplugging from the electrical outlet. Disconnect the plug from the electrical outlet before emptying the dust bin. To avoid damage, please remove the plug by grasping the plug itself, not by pulling on the cord.
- This appliance can be used by children aged from 8 years and above and persons with reduced physical, sensory or mental capabilities or lack of experience and knowledge if they have been given supervision or instruction concerning use of the appliance in a safe way and understand the hazards involved. Children shall not play with the appliance. Cleaning and user maintenance shall not be made by children without supervision.
- Children should be supervised to ensure that they do not play with the appliance.
- The plug must be removed from the socket outlet before cleaning or maintaining the appliance.
- The use of an extension cord is not recommended.
- If your vacuum cleaner is not operating correctly, switch off the power supply and consult an authorized service agent.
- If the supply cord is damaged, it must be replaced by the manufacturer or its service agent or a similarly qualified person in order to avoid a hazard.
- Don't carry the vacuum cleaner by holding the hose. Use the handle on the vacuum cleaner set.
-
Unplug the cleaner when not in use. Turn off the power switch before unplugging.
-
Do not use to suck up water.
- Do not immerse in water for cleaning.
- The hose should be checked regularly and must not be used if damaged.
- Please contact the manufacturer or service agent for a replacement.
Power related
- Please prevent any risk of electric shock or fire.
- Do not damage the power cord.
- Do not pull the power cord too hard or touch the power plug with wet hands.
- Do not use a power source other than the national rated voltage and also do not use a multi outlet to supply power to number of devices at the same time.
- Do not leave the power cord carelessly on the floor.
- Do not use a damaged power plug, power cord or loose power outlet.
- Turn off the power before connecting or disconnecting the power plug to the power outlet and make sure your fingers don't come in contact with the pin of the power plug.
- Do not disassemble or modify the vacuum cleaner. When power cord is damaged, contact the manufacturer or service agent to get it replaced by certified repairman.
- Clean dust or any foreign matters on the pin and contact part of the power plug.
- If there's any gas leak or when using combustible sprays such as a dust remover, do not touch the power outlet and open the windows to ventilate the room.
- There is a risk of explosion or fire.
In use
- Do not use this product outdoors since it's designed for household use only.
- There is a risk of malfunction or damage.
* Outdoor cleaning : A stone, Cement
* A billiard room : Powder of a chalk
* An aseptic room of a hospital
- Do not use the vacuum cleaner to suck up liquids(such as water), blades, pins or embers.
- There is a risk of malfunction or damage.
- Be sure children do not touch the vacuum cleaner when you use it.
- The children may get burn if the body is overheated.
- Do not mount or make any physical impacts on the body.
- It may result in injury or damage.
- Use the carrying handle for lifting or carrying the vacuum cleaner.
Cleaning and maintenance
- Do not lift or carry the vacuum cleaner putting a brush in the groove for storage.
- Use a dry cloth or towel to clean the body and make sure to unplug the vacuum cleaner before cleaning. Do not spray water directly or use volatile materials(such as benzen, thinner or alcohol) or combustible sprays(such as a dust remover) for cleaning.
- If water or other liquid gets into the product and cause malfunction, turn off the vacuum cleaner, unplug the power plug and then consult a service agent.
- Do not use alkaline or industrial detergents, air fresheners or (acetic) acids to clean the washable parts of the vacuum cleaner. (Refer to the following table.)
- It may cause damage, deformation or discoloration of the plastic parts.
| The washable parts Dust bin of the body, Dust filter, Sponge filter, | |
| Available detergent Neutral detergent Kitchen cleaner | |
| Unavailable detergent Alkaline detergent Bleach, Mold cleaner, etc. | |
| Acid detergent Paraffin oil, Emulsifier, etc. | |
| Industrial detergent NV-I, PB-I, Opti, Alcohol, Acetone, Benzene, Thinner, etc. | |
| Air freshener Air freshener(Spray) | |
| Oil Animal or vegetable oil | |
| Etc. | Edible acetic acid, Vinegar, Glacial acetic acid, etc. |
CAUTION
In use
- Do not use the pipe for anything other than its intended purpose.
- It may result in injury or damage.
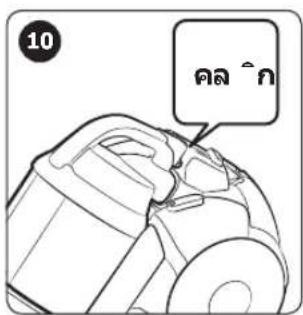
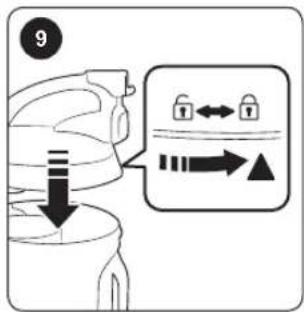
- When you lift up the handle of dust bin while using the vacuum cleaner, safety device will be activated and there might be changes in operating noise.
- Operating noise may change when you hold the handle of the dust bin while using the vacuum cleaner, but the circular tube on bottom of the dust bin prevents dust from spilling out.
- Do not pull the power cord beyond the yellow mark and hold the power cord with one hand when rewinding it
- If you try to pull it beyond the yellow mark, power cord can be damaged and if you don't hold the power cord while rewinding, it may lose control and cause injury or damage to people or objects around it.
- If any abnormal sounds, smells or smoke come from the vacuum cleaner, immediately unplug the power plug and contact a service agent.
- here is a risk of fire or electric shock.
- Do not use the vacuum cleaner in any places near heating appliances (such as stove), combustible spray or flammable materials.
- It may cause fire or deformation of the product.
Cleaning and maintenance
- Unplug the vacuum cleaner if you do not use it for a long time.
- It may cause electric shock or fire.
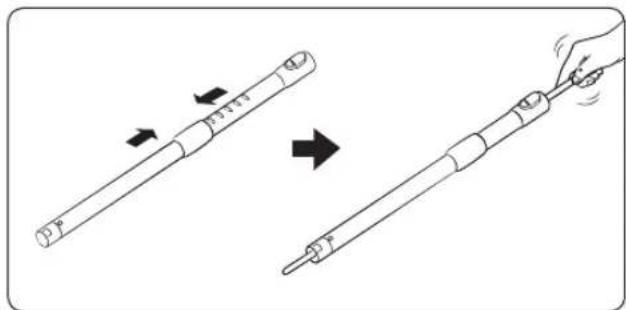
Name of the parts
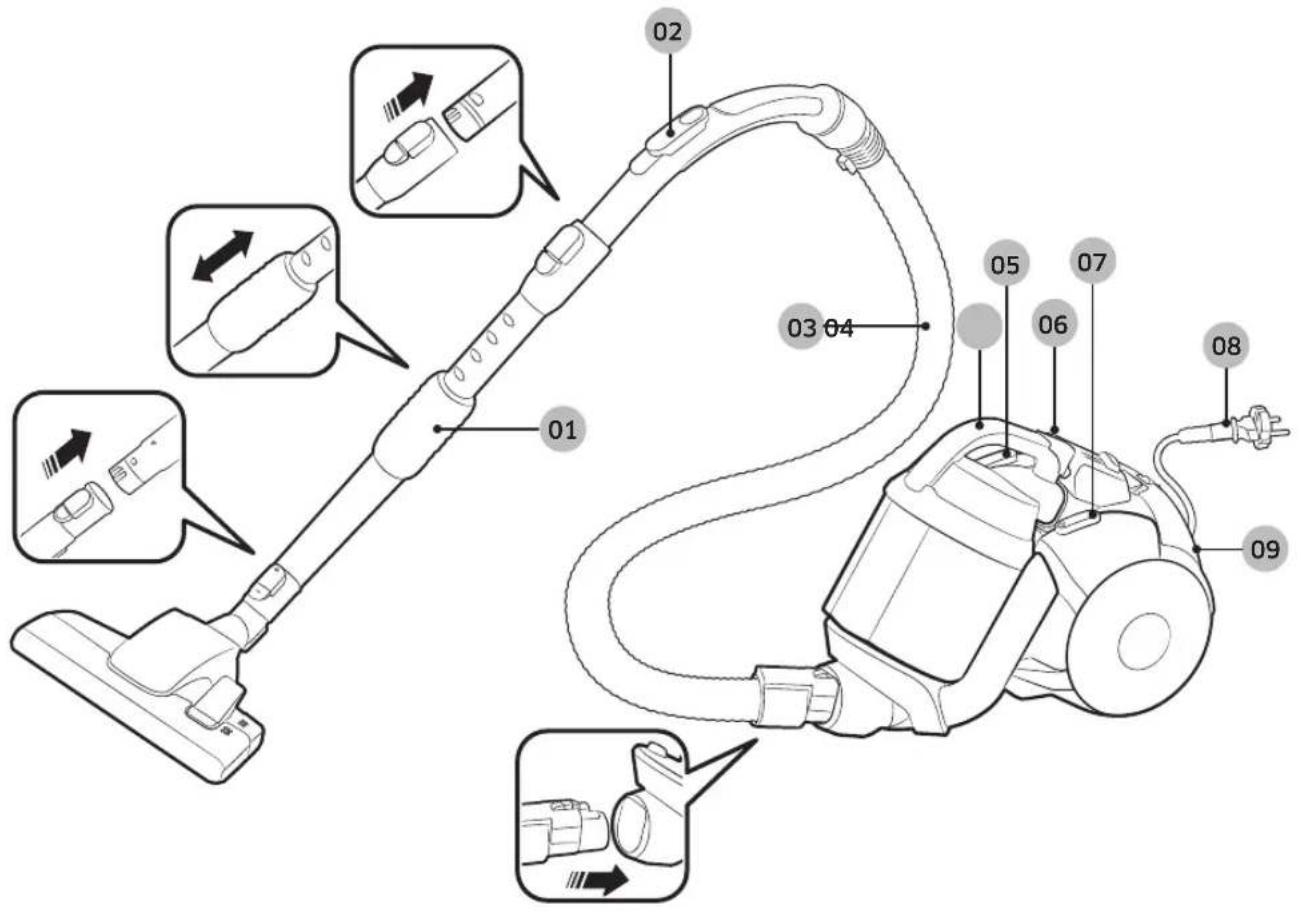
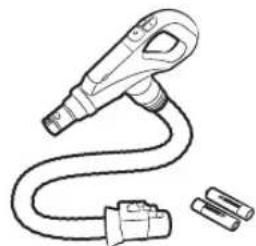
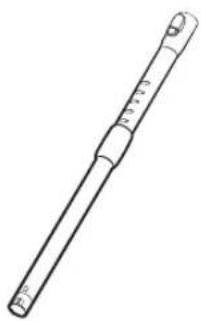
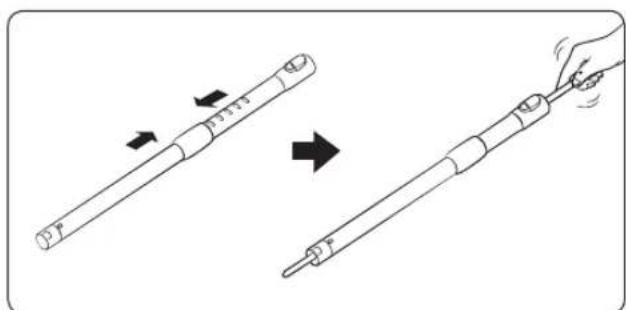
01 Pipe
02 Handle control
03 Hose
04 Dust bin
05 Cord rewind button
06 Filter light
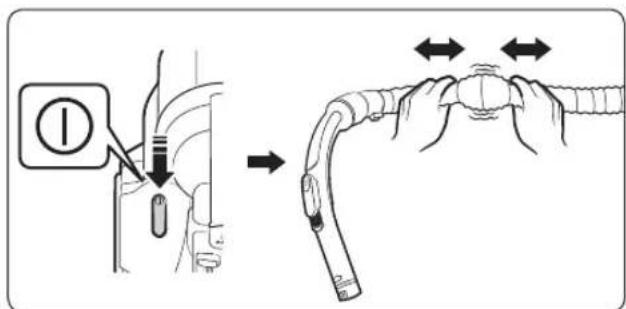
07 Power button
08 Power cord
09 Outlet filter
natural_image
Line drawing of an electric vehicle charging plug with attached cable and connectors (no text or symbols)RF hose Pipe (Option) Pipe (Option)
natural_image
Line drawing of a cylindrical mechanical tool or rod with a flanged end (no text or symbols)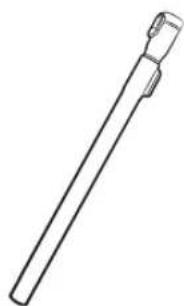
natural_image
Simple line drawing of a cylindrical object with a protruding handle (no text or symbols)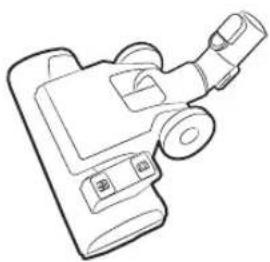
natural_image
Line drawing of a handheld device with a handle and control buttons (no text or symbols)2-step brush (SC07K51**** SERIES)
natural_image
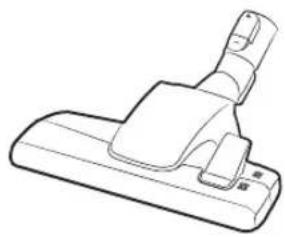
Line drawing of a vacuum cleaner blade assembly (no text or symbols)2-step brush (SC21K51**** SERIES)

natural_image
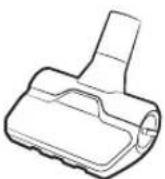
Simple line drawing of a mechanical clip or handle (no text or symbols)Parquet master (Option)
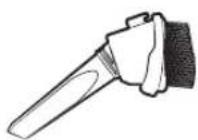
Anti-Tangle tool (Option) 3-in-1 accessory User manual

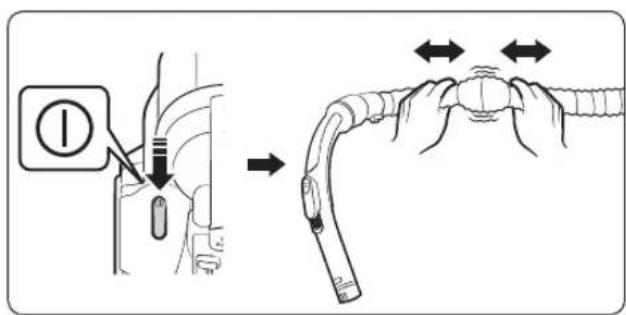
Using the vacuum cleaner
Using the body
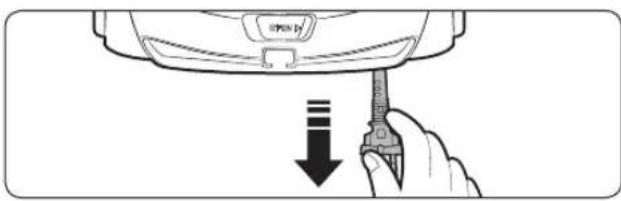
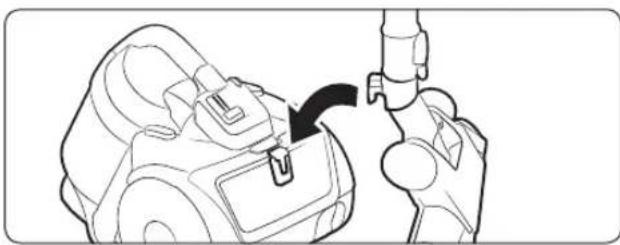
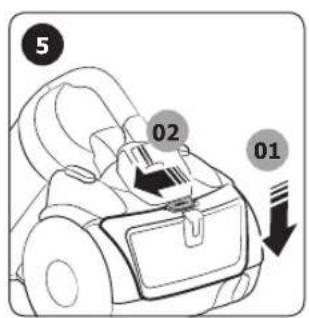
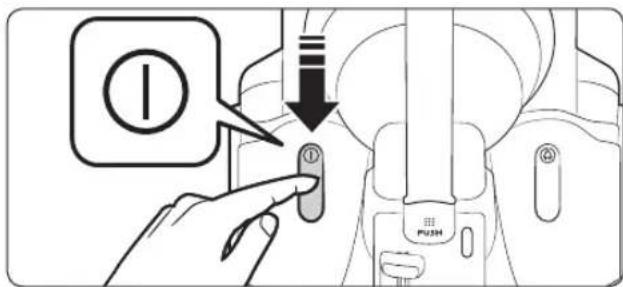
Power cord
natural_image
Illustration of a hand using a screwdriver to press down a device component (no text or symbols visible)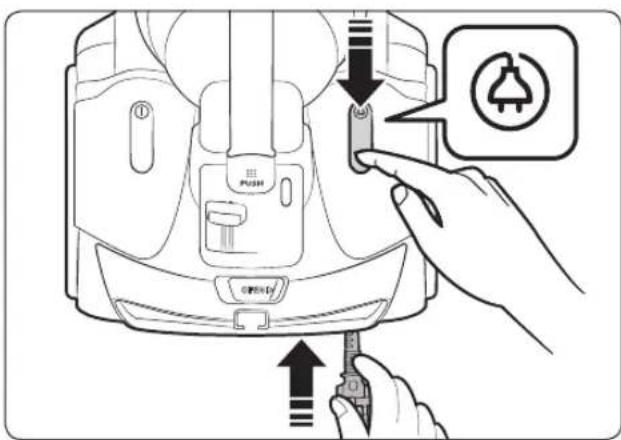
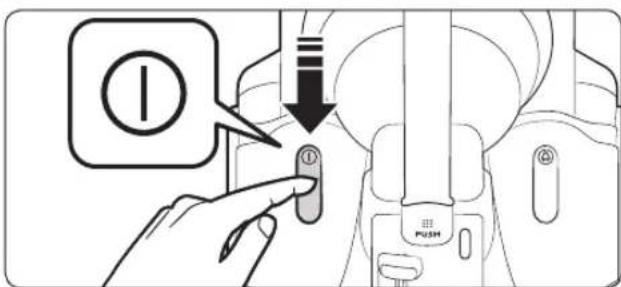
On/Off

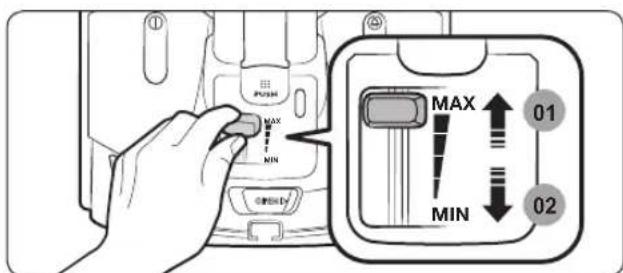
Suction
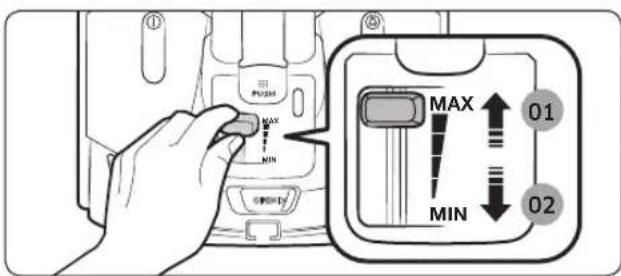
01 Higher power
02 Lower power
Using the handle control
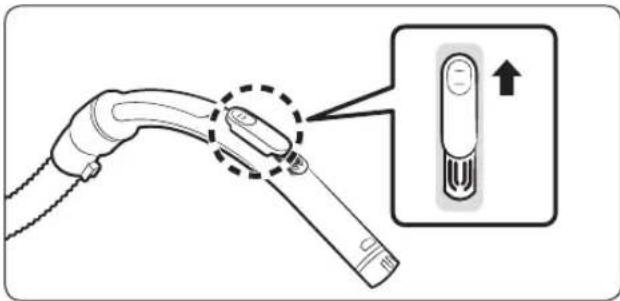
NOTE
- For cleaning fabrics, push the button downward to reduce suction.
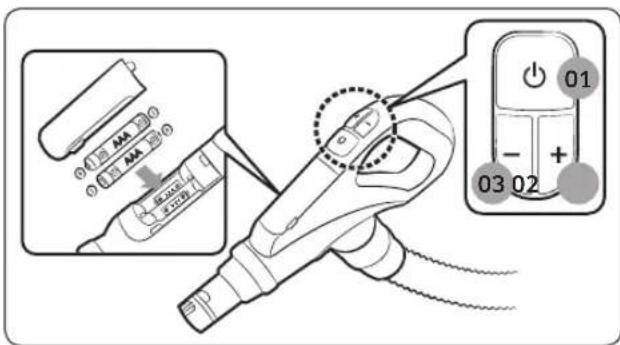
01 Power ON/OFF
02 Increasing suction power
03 Decreasing suction power
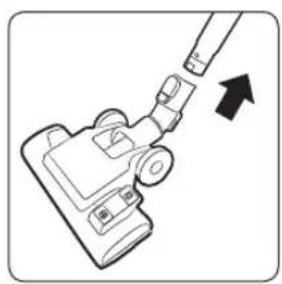
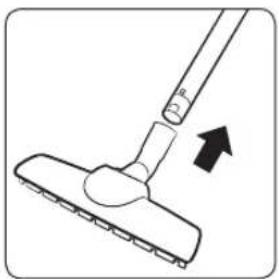
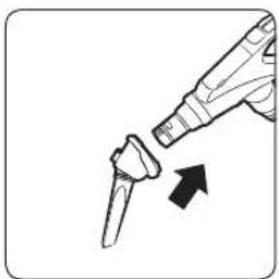
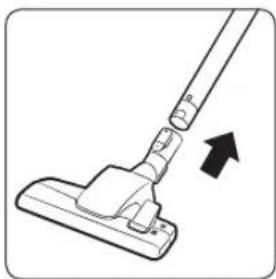
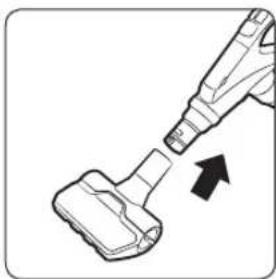
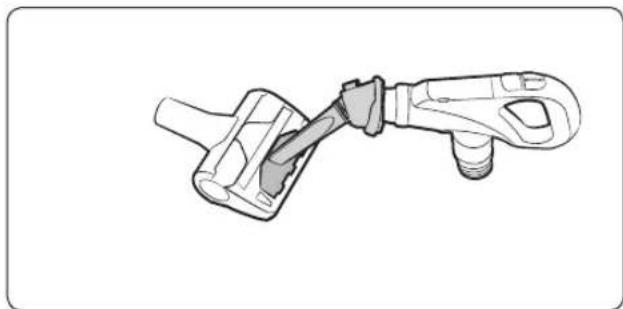
Using the brushes
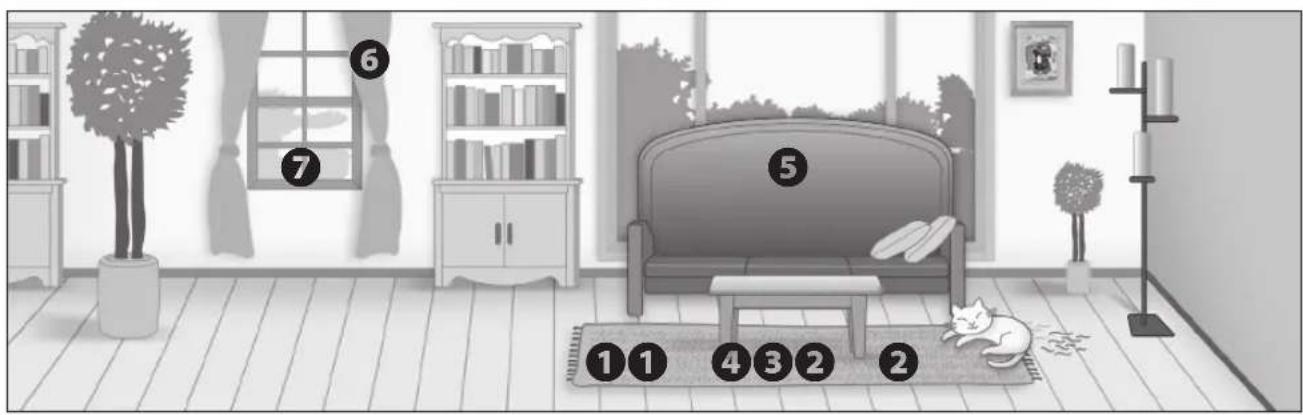
Where to use the brushes
natural_image
Diagram of a handheld device with a cable inserted, showing a black arrow pointing to the cable (no text or symbols present)① 2-step brush
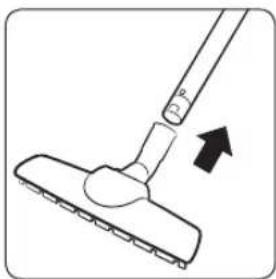
natural_image
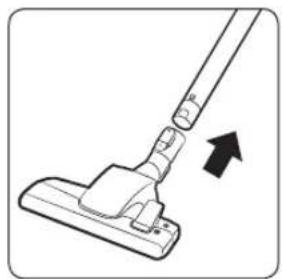
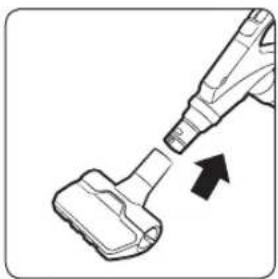
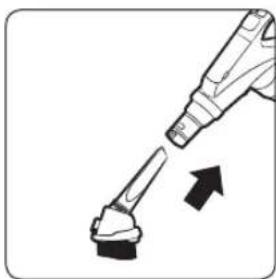
Line drawing of a mobile phone with a handle and arrow indicating action (no text or symbols)② 2-step brush
natural_image
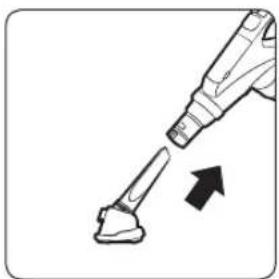
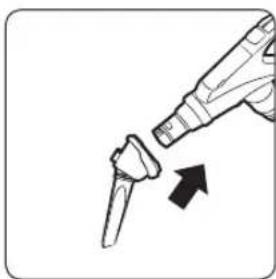
Simple line drawing of a mop with an arrow indicating motion (no text or symbols)③ Parquet master
natural_image
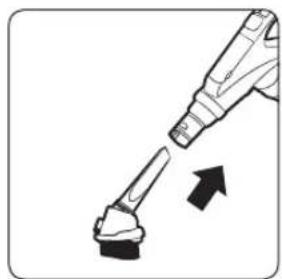
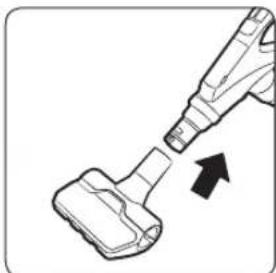
Diagram of a mechanical device with a lever and arrow indicating motion (no text or symbols)④ Anti-Tangle tool
natural_image
Illustration of a medical or laboratory tool with an arrow indicating direction (no text or symbols)⑤ upholstery tool
natural_image
Illustration of a tool emitting powder from a nozzle, with an arrow indicating direction (no text or symbols)⑥ Dusting brush
natural_image
Illustration of a soldering iron being inserted into a tip, with an arrow indicating the insertion direction (no text or symbols present)⑦ Crevice tool

Cleaning and maintaining
You must unplug the vacuum cleaner before cleaning it.
When to empty the dust bin
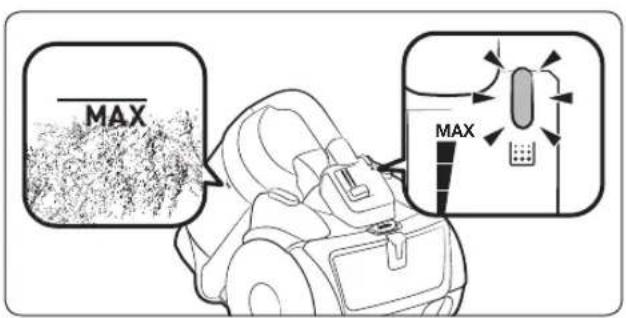
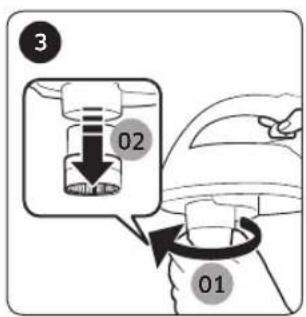
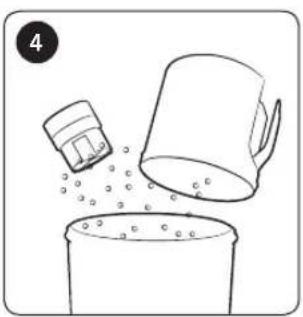
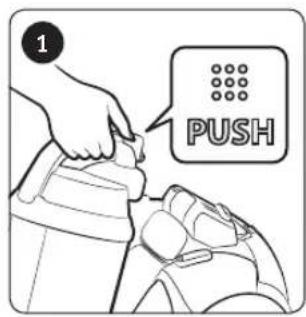
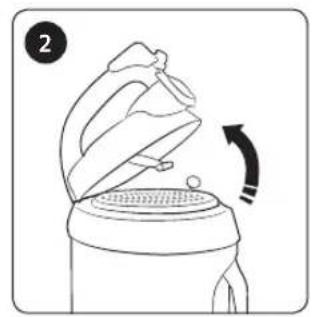
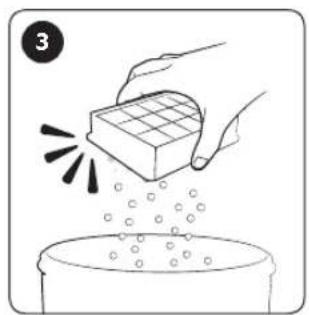
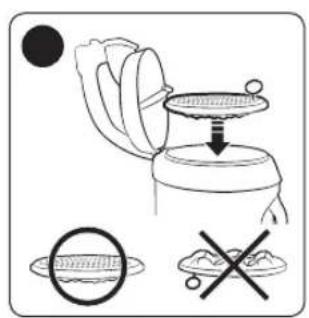
Cleaning the dust bin
Clean the dust bin if there's too much dust in the dust bin.
natural_image
Illustration of a bucket pouring liquid into a container with a small container nearby (no text or symbols)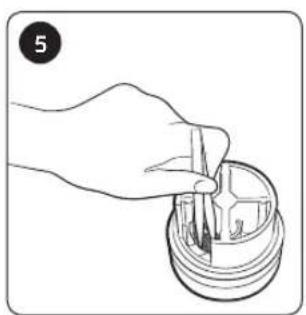
natural_image
Line drawing of a hand holding a cylindrical object with a cross-shaped feature, no text or symbols present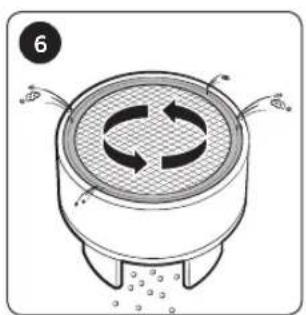
natural_image
Diagram of a circular steamer with three curved arrows indicating rotational flow, no text or symbols present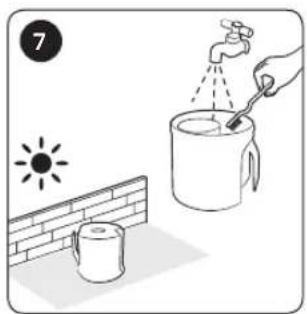
natural_image
Illustration of a water tap spraying mist from a cup onto a brick wall, with sun and another watering can nearby (no text or symbols)
* Anti-Tangle Turbine(Cyclone Force) - Based on internal testing. Tested at the turbine fan using a mix of hair, pet hair on Floor.
CAUTION
- If tool is required for cleaning, please be careful not to hurt the mesh.
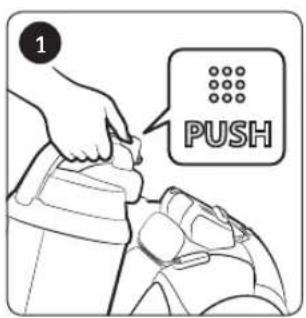
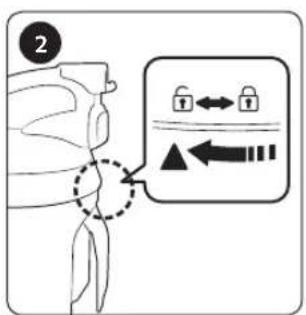
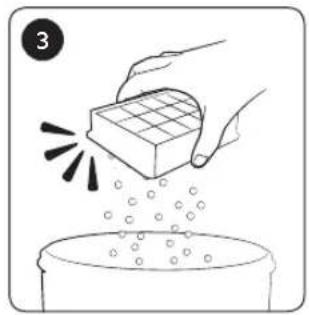
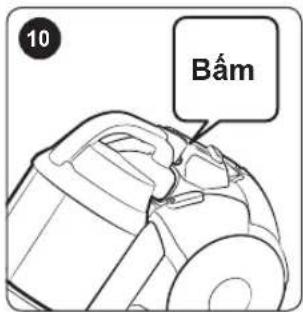
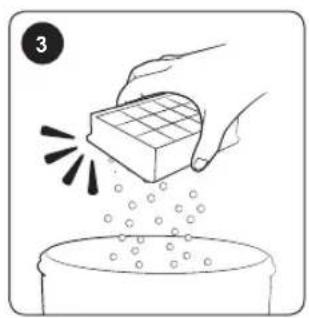
How to empty the dust bin easily

natural_image
Illustration of three steps of pouring liquid into a container, showing different stages of pouring (no text or symbols present)Cleaning the dust filter
If the filter check indicator turns red with the inlet floating 10 cm above flat floor, clean the dust filter.
natural_image
Line drawing of a steam iron on a toilet with a rotating button indicating motion (no text or symbols)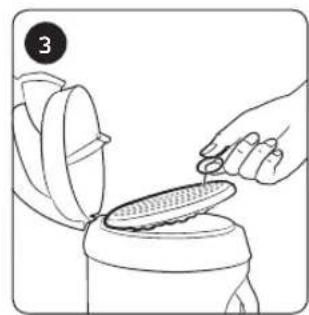
natural_image
Line drawing of a hand pouring liquid into a container with a lid, no text or symbols present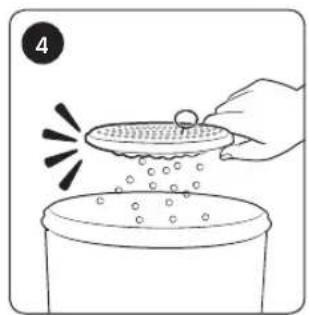
natural_image
Illustration of a hand pouring liquid from a container onto a lid, with no text or symbols present.

natural_image
Line drawing of a mechanical device with a curved arrow indicating rotation (no text or symbols)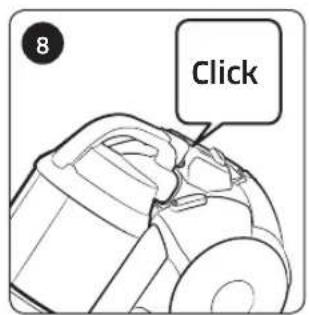
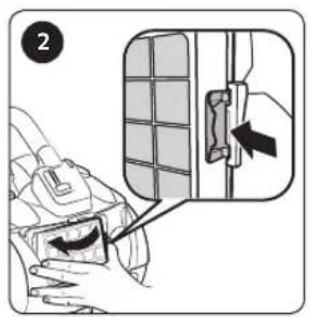
Cleaning the outlet filter
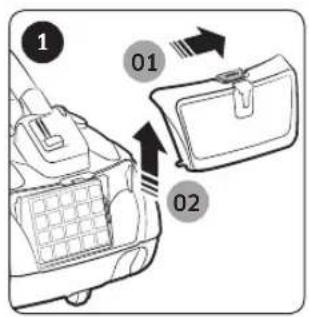
natural_image
Illustration of hands pouring liquid from a cube into a basin (no text or symbols)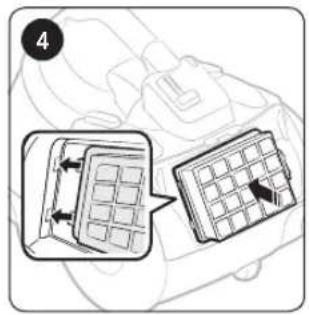
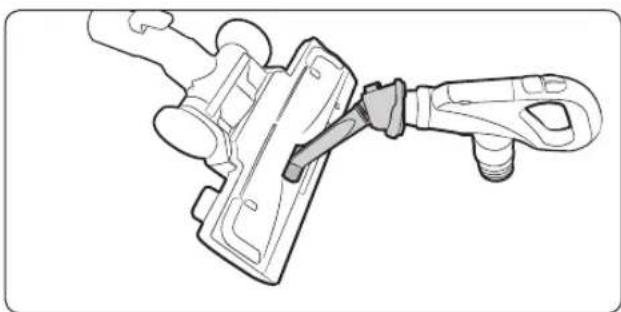
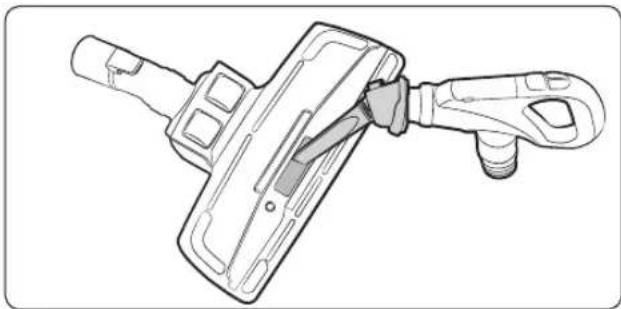
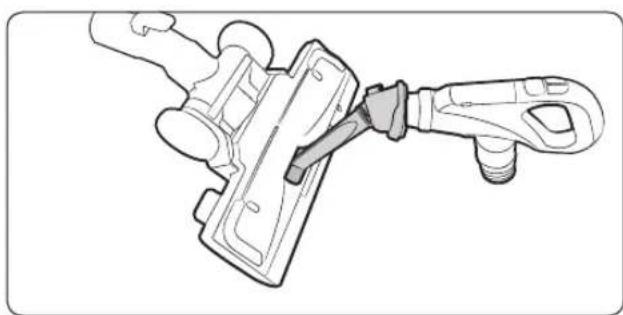
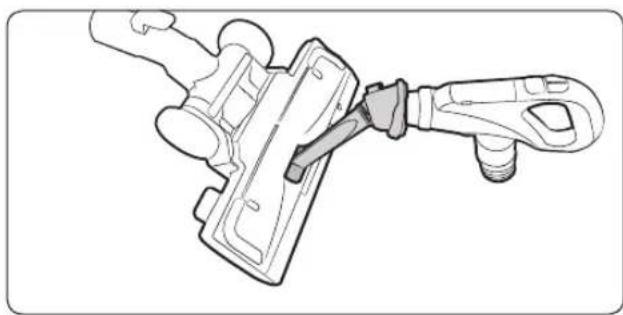
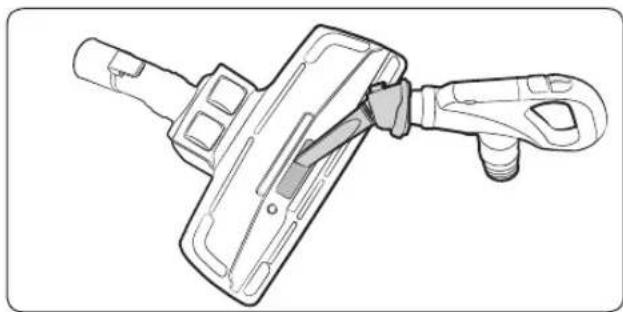
Cleaning the brush
natural_image
Technical line drawing of a mechanical clamp or connector assembly (no text or symbols)2-step brush
natural_image
Technical line drawing of a mechanical device with a handle and lever mechanism (no text or symbols)2-step brush

natural_image
Diagram of a mechanical device with a lever and handle, showing internal components (no text or symbols)Anti-Tangle tool

natural_image
Technical line drawing of a mechanical clamp or bracket assembly (no text or symbols)Parquet master
Cleaning the pipe
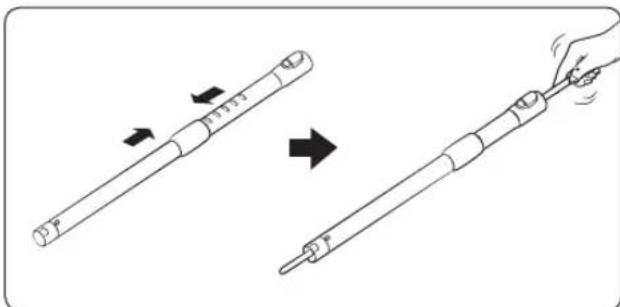
natural_image
Illustration of a hand holding a pen with arrows indicating motion (no text or symbols)Cleaning the hose
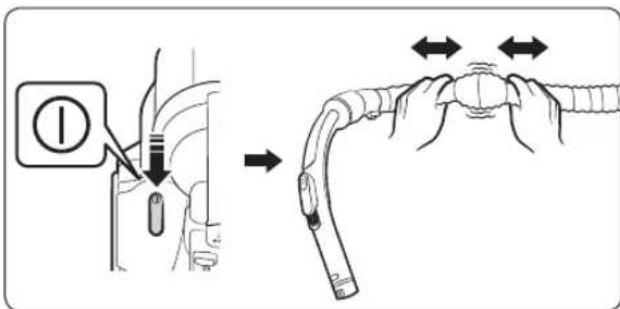
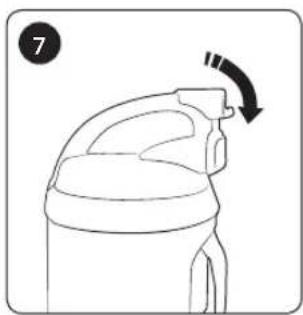
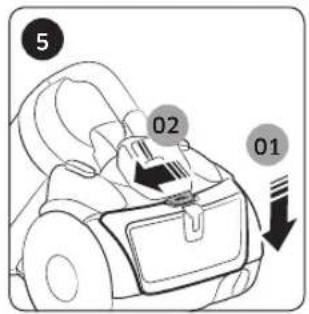
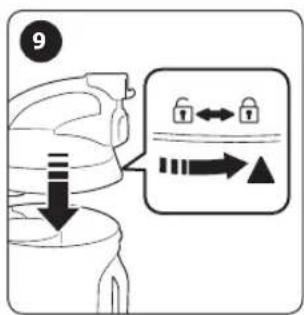
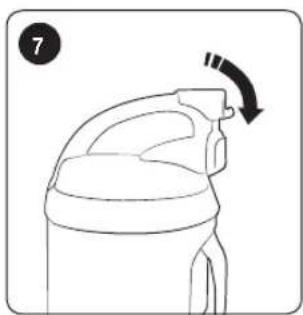
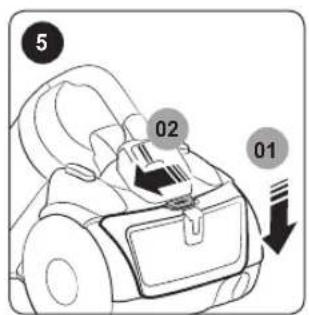
Storing the vacuum cleaner
natural_image
Line drawing of a person using a tool to adjust or install a mechanical component (no text or symbols present)In use

NOTE
- Safety device will cut off the power when the vacuum cleaner was on for more than 30 minutes without any button input. In this case, press the [Power] button on the body or unplug the power plug and then plug it again.
- If the handle control is not working, the vacuum cleaner can be operated using the [Power] button on the body.
- When you use the dusting brush or crevice tool, you may feel vibration from the vacuum cleaner.
- Please do not press the button of dust bin handle when carrying the vacuum cleaner.
- The operating noise may change once the safety device is activated to prevent the dust bin from getting detached.
- The circular tube on bottom of the dust bin prevents dust from spilling out.

CAUTION
- When removing the power plug from the electrical outlet, grasp the plug, not the cord.
Cleaning and maintenance

NOTE
- To make the dust filter cleaner, add neutral detergent into lukewarm water and soak the filter for 30 minutes before washing it.
- Do not wash the outlet filter with water.
- To maintain the best performance of the outlet filter, replace them once a year.
- To prevent floors from scratches, inspect condition of the brush and replace it if it is worn down.
- Replacement filters are available at your local Samsung service agent.
- Hold the power cord and then press the Cord rewind button since you can get injured if the power cord may lose control while rewinding it.
- If the power cord is not rewinding well, press the Cord rewind button again after pulling the power cord about 2 \~ 3 m

CAUTION
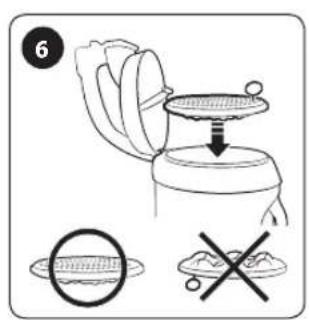
- Make sure the dust filter is completely dry before putting it back into the vacuum cleaner.
- Allow 12 hours for it to dry.
- Dry the dust filter in the shade, not under sunlight, to prevent transformation or discoloration.
- You may wash the dust bin with cold water.
- When suction is noticeably reduced continuously or vacuum cleaner abnormally overheats, please clean the outlet filter.
- Suction may reduce noticeably due to wrong reassembling of the dust filter.
- Please contact a nearest service agent if you cannot remove foreign matters from the hose.
- Store the vacuum cleaner in the shade to prevent deformation or discoloration.
| Symptom Checklist | |
| Motor does not start. | Check the cable, the power plug and outlet.Leave it to cool. |
| Suction force is gradually decreasing. | Check if there is any blockage, and remove it if required.Please check the filters, and if required, clean as illustrated in this manual.- If filters are out of condition, replace them to new ones. |
| Cord does not rewind fully. | Pull the power cord out 2 - 3 m and press the Cord rewind button. |
| Vacuum cleaner does not pick up dirt. | Check the hose, and replace it to new one if required. |
| Body overheating. | Check the filters, and clean as illustrated in the this manual if required. |
| Static electricity discharge. | Reduce suction.This may also occur when air in the room is very dry.Ventilate the room so that air humidity becomes a normal. |
เครื่องดูดฝุ่น
natural_image
Black-and-white photo of a modern lounge chair with white leather backrest and metallic X-shaped legs, featuring headphones placed on the backrest (no text or symbols visible)SAMSUNG
การจัดเตรียม
01 ท่อ
natural_image
Line drawing of an electric vehicle charging plug with attached connectors (no text or symbols)
natural_image
Line drawing of a cylindrical mechanical device with a flanged end and central shaft (no text or symbols)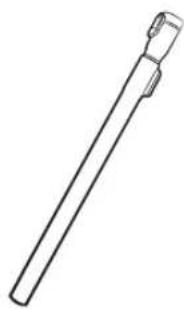
natural_image
Simple line drawing of a cylindrical object with a protruding handle (no text or symbols)natural_image
Line drawing of a handheld device with a handle and control buttons (no text or symbols)
natural_image
Line drawing of a vacuum cleaner blade assembly (no text or symbols)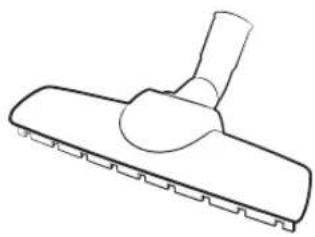
natural_image
Line drawing of a mechanical clip or handle with a handle and serrated base (no text or symbols)natural_image
Illustration of a hand using a tool to press down a car's seat, showing a downward arrow (no text or symbols present)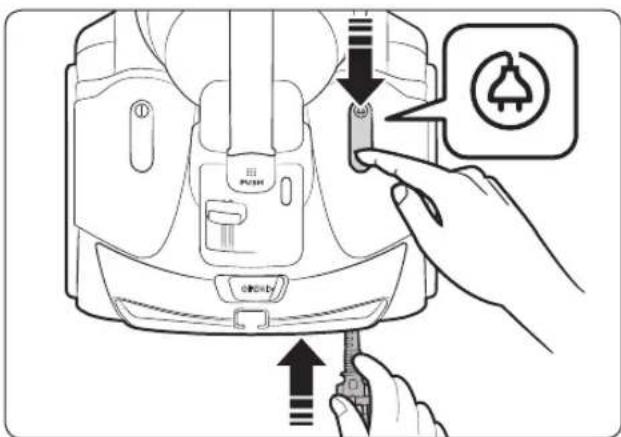
เปิด/ปิด
แรงดูด

หมายเหตุ
natural_image
Diagram of a handheld device with an arrow pointing to its connector (no text or symbols present)natural_image
Simple line drawing of a mop handle with an arrow indicating direction (no text or symbols)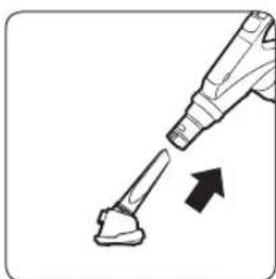
natural_image
Illustration of a medical or laboratory tool interacting with a small object, showing an arrow indicating direction (no text or symbols present)natural_image
Illustration of a handheld tool emitting powder from a small object, with an arrow indicating direction (no text or symbols)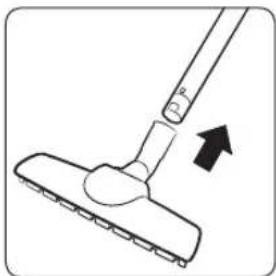
natural_image
Simple line drawing of a mop handle with an arrow indicating direction (no text or symbols)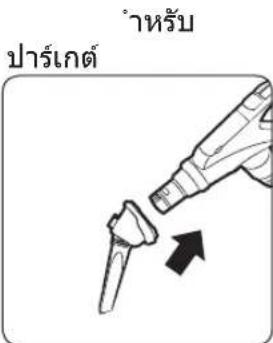
าหรับร่อง
natural_image
Diagram of a mechanical component with a black arrow indicating direction (no text or symbols)natural_image
Illustration of a bucket pouring liquid into a container with a small container nearby (no text or symbols)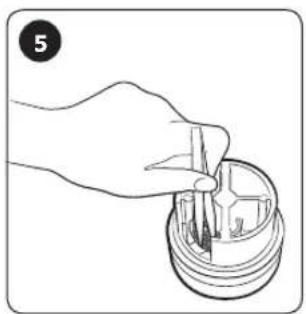
natural_image
Hand holding a mechanical component with a tool, no visible text or symbols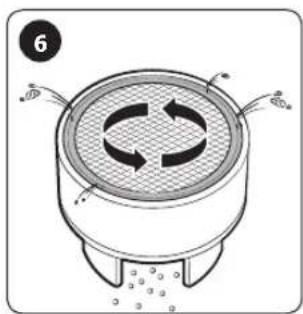
natural_image
Diagram of a steamer with circular arrows indicating circulation (no text or symbols)
natural_image
Illustration of a water spray system with a bucket, a mug, and a sun symbol (no text or labels)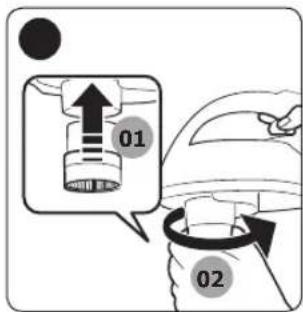
natural_image
Illustration of three steps of a container being handled, showing different states of pouring or lifting (no text or symbols present)natural_image
Line drawing of a steam iron with a rotating arm indicating airflow (no text or symbols)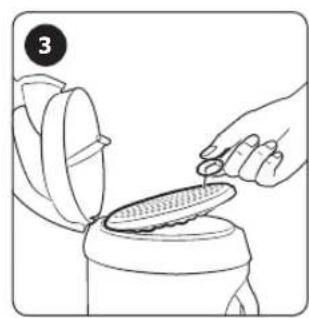
natural_image
Line drawing of a hand pouring liquid into a container with a textured lid (no text or symbols)
natural_image
Illustration of a hand pouring liquid from a container onto a lid, with no text or symbols present.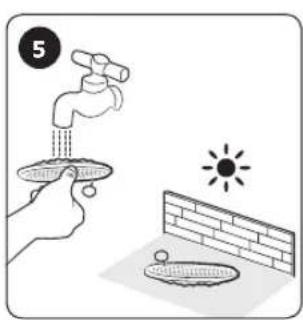

natural_image
Line drawing of a mechanical device with a curved arrow indicating rotation (no text or symbols)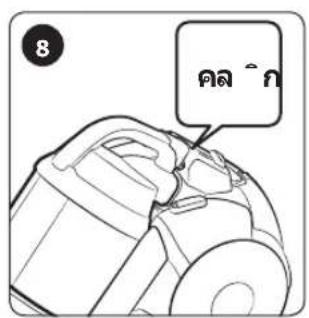
natural_image
Illustration of hands pouring liquid from a cube into a basin (no text or symbols)
การทำความสะอาดแปรง
natural_image
Technical line drawing of a mechanical clamp or bracket assembly (no text or symbols)แปรง 2 ขั้น
การทำความสะอาดท่อ
natural_image
Illustration of a hand holding a pen-like tool, showing the process from being inserted into a cylindrical device (no text or symbols present)natural_image
Technical line drawing of a mechanical clamp or bracket assembly (no text or symbols)แปรง 2 ขั้น
natural_image
Line drawing of a mechanical device with a handle and lever (no text or symbols)natural_image
Line drawing of a person using a handheld device to adjust or install a component (no text or symbols present)
natural_image
Technical line drawing of a mechanical clamp or bracket assembly (no text or symbols)แปรงสำหรับปาร์เกต์
ขณะใช้งาน
หมายเหตุ
natural_image
Black-and-white photo of a modern lounge chair with white leather backrest and metallic X-shaped legs, accompanied by headphones and books (no text or symbols visible)CHUẦN Bì
Thông tin an toàn 3
Thông tin an toàn 3
natural_image
Line drawing of an electric vehicle plug with attached cable and connectors (no text or symbols)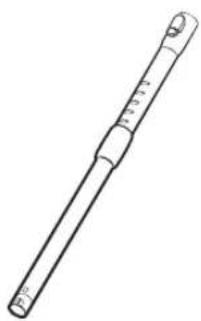
natural_image
Line drawing of a cylindrical mechanical tool with a flanged end and central shaft (no text or symbols)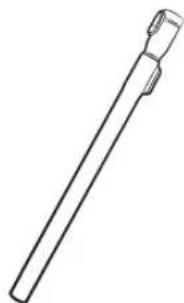
natural_image
Simple line drawing of a cylindrical object with a protruding handle (no text or symbols)natural_image
Line drawing of a handheld device with a scroll wheel and control buttons (no text or symbols)natural_image
Line drawing of a vacuum cleaner with handle and base (no text or symbols)natural_image
Line drawing of a mechanical clip or clamp component (no text or symbols)natural_image
Illustration of a hand using a screwdriver to press down a device component (no text or symbols visible)
Bật/tắt
Sức hút
LU'U Y
natural_image
Diagram of a vacuum cleaner with a cable inserted, showing mechanical components and an upward arrow indicating motion (no text or symbols present)① Bàn chải 2 bước
natural_image
Line drawing of a mobile phone with a hand holding the top handle and an arrow indicating left-hand rule (no text or symbols)② Bàn chải 2 bước
natural_image
Simple line drawing of a mop with an arrow indicating motion (no text or symbols)③ Sàn gỗ chính
natural_image
Diagram of a mechanical component with an arrow indicating direction (no text or symbols)④ Công cụ gỗ rối

natural_image
Illustration of a medical or laboratory tool interacting with a small object, showing an arrow indicating direction (no text or symbols present)⑤ Công cụ hút thảm
natural_image
Illustration of a tool emitting powder from a nozzle, with an arrow indicating direction (no text or symbols)⑥ Bàn chải quét bụi
natural_image
Illustration of a tool tip being inserted into a clip, with an arrow indicating direction (no text or symbols)natural_image
Simple line drawing of a bucket pouring liquid into a container (no text or symbols)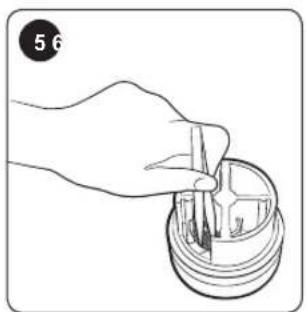
natural_image
Line drawing of a hand holding a cylindrical object with internal components (no text or symbols)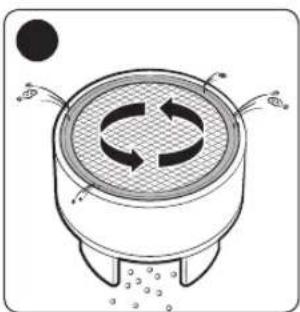
natural_image
Diagram of a circular steamer with three curved arrows indicating rotational flow, mounted on a base (no text or symbols)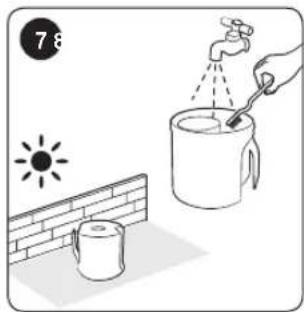
natural_image
Illustration of a water spray system with a hand pouring water from a cup onto a paint can, no text or symbols present.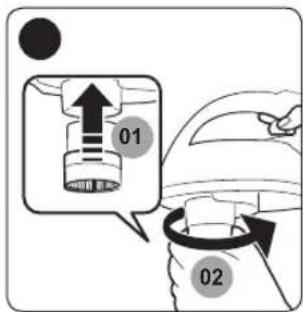
natural_image
Illustration of three steps of pouring liquid into a container, showing different stages of pouring (no text or symbols present)Vệ sinh bộ lọc bụi
natural_image
Line drawing of a steam iron in a container with a rotating arrow indicating motion (no text or symbols)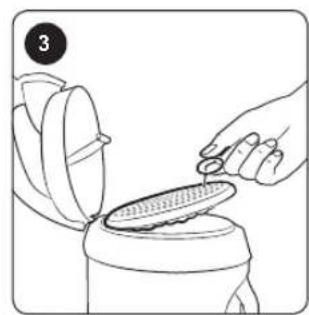
natural_image
Illustration of a hand pouring liquid into a container with a lid, next to a bag (no text or symbols)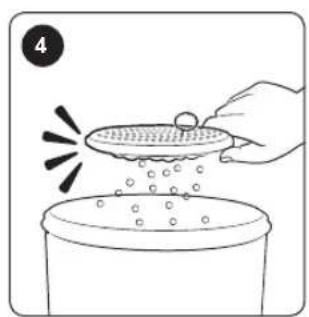
natural_image
Illustration of a hand pouring liquid from a container onto a top, with no text or symbols present.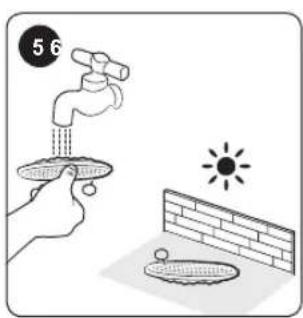
natural_image
Line drawing of a mechanical device with a curved arrow indicating rotation (no text or symbols)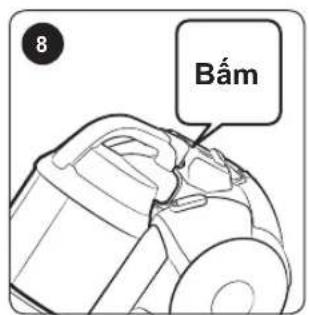
natural_image
Illustration of hands pouring liquid from a cube into a container (no text or symbols)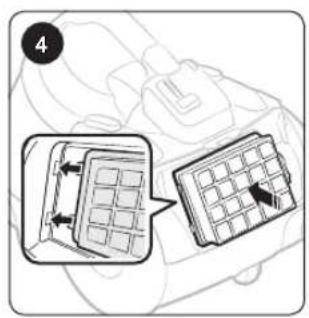
Vệ sinh bàn chải
natural_image
Technical line drawing of a mechanical clamp or bracket assembly (no text or symbols)Bàn chải 2 bước
natural_image
Technical line drawing of a mechanical clamp or bracket assembly (no text or symbols)Bàn chải 2 bước
natural_image
Line drawing of a mechanical device with a handle and lever (no text or symbols)Công cụ gỗ rối

natural_image
Technical line drawing of a mechanical clamp or bracket assembly (no text or symbols)Sàn gỗ chính
Vệ sinh ống
Vệ sinh ống hút
natural_image
Line drawing of a person using a handheld device to adjust or install a device (no text or symbols present)Trong sử dụng
LU'U Y
- PREPARATION
- INSTALLATION
- OPERATIONS
- MAINTENANCE
- APPENDICES
- Safety information
- WARNING
- Caution/Warning symbols used
- CAUTION
- Other symbols used
- NOTE
- Important safety instructions
- General
- Power related
- In use
- Cleaning and maintenance
- Name of the parts
- Using the vacuum cleaner
- Using the body
- Using the handle control
- Using the brushes
- Where to use the brushes
- Cleaning and maintaining
- Cleaning the dust bin
- Cleaning the dust filter
- Cleaning the outlet filter
- เครื่องดูดฝุ่น
- การจัดเตรียม
- หมายเหตุ
- ขณะใช้งาน
- CHUẦN Bì
- LU'U Y
- Vệ sinh bộ lọc bụi
- Trong sử dụng
Brand : SAMSUNG
Model : SC21K5170HG
Category : Vacuum Cleaner