
VS07G1840 - Vacuum Cleaner SIEMENS - Free user manual and instructions
Find the device manual for free VS07G1840 SIEMENS in PDF.
User questions about VS07G1840 SIEMENS
0 question about this device. Answer the ones you know or ask your own.
Ask a new question about this device
Download the instructions for your Vacuum Cleaner in PDF format for free! Find your manual VS07G1840 - SIEMENS and take your electronic device back in hand. On this page are published all the documents necessary for the use of your device. VS07G1840 by SIEMENS.
USER MANUAL VS07G1840 SIEMENS
Please keep this instruction manual. When passing the vacuum cleaner on to a third party, please also pass on this instruction manual.
Intended use
This vacuum cleaner is intended for domestic use only, not for commercial use.
This vacuum cleaner should only be used in accordance with the instructions in this manual.
The manufacturer will not accept any responsibility for damage caused by improper use or incorrect operation. Therefore, please note the following points.
The vacuum cleaner must only be operated with:
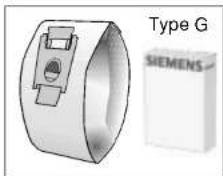
Original dust bags MEGAflitSuperTE
- Manufacturer's replacement parts, accessories and optional accessories
The vacuum cleaner is not to be used for:
Vacuuming persons or animals Vacuuming up:
- Insects and spiders
Hazardous, sharp-edged, hot or burning substances.
Damp or liquid substances.
- Highly flammable or explosive substances and gases.
Safety information
This vacuum cleaner complies with the recognised rules of technology and the relevant safety regulations. We confirm compliance with the following European directives: 89/336/EEC (amended by Directives 91/263/EEC, 92/31/EEC and 93/68/EEC). 73/23/EEC (amended by Directive 93/68/EEC).
Only connect to a power supply and operate the vacuum cleaner in accordance with the rating plate.
- Never use the vacuum cleaner without the MEGAAffilt SuperTEX dust bag.
=> This can damage the vacuum cleaner!
Only allow children to use the vacuum cleaner under supervision.
- Keep suction away from your face when using the handle, nozzles or pipe.
= > Risk of injury!
- Do not carry/transport the vacuum cleaner by the power cord.
- Remove the power cord completely from the power supply after using the vacuum cleaner continuously for several hours.
- When disconnecting the appliance from the mains, pull the plug, not the power cord.
- Do not pull the power cord around sharp corners or allow it to become trapped.
Unplug the power cord from the mains before carrying out any work on the vacuum cleaner or its accessories.
- Do not use the vacuum cleaner if it is damaged. Unplug the power cord from the mains if a fault is detected.
Only authorised after-sales service personnel are permitted to carry out repairs and fit replacement parts on the vacuum cleaner.
The vacuum cleaner should be protected from external weather conditions, moisture and sources of heat.
- Do not vacuum any drill dust or building rubble => this can damage the vacuum cleaner.
- Switch off the vacuum cleaner when it is not in use.
At the end of its life, the vacuum cleaner should be disposed of in an appropriate manner.
For safety reasons, vacuum cleaners with an output of 2.000 watts or more are fitted with a temperature safety switch, which automatically switches the vacuum cleaner off if it is blocked and overheating. Unplug the power cord from the mains and make sure that the nozzle, tube and hose are not blocked. Also check whether the dust bag needs changing. Having cleared the blockage, leave the vacuum cleaner to cool down for at least one hour. It can then be switched back on again.
Disposal information
Packaging
The packaging is designed to protect the vacuum cleaner from being damaged during transportation. It is made of environment-friendly materials and can be recycled. Dispose of unneeded packaging at the appropriate recycling points.
Used vacuum cleaners
Old appliances still contain many recyclable materials. Therefore, please take used appliances to your retailer or recycling centre so that they can be recycled. For current disposal methods, please enquire at your appliance dealership or local council.
Please note
The main'socket must be protected by a 16A fuse. If a fuse should blow when you switch on the vacuum cleaner, this may be because other electrical appliances which have a high current draw are connected to the same power circuit. To prevent the fuse from tripping, select the lowest power setting before switching the vacuum cleaner on, and increase the power only once it is running.
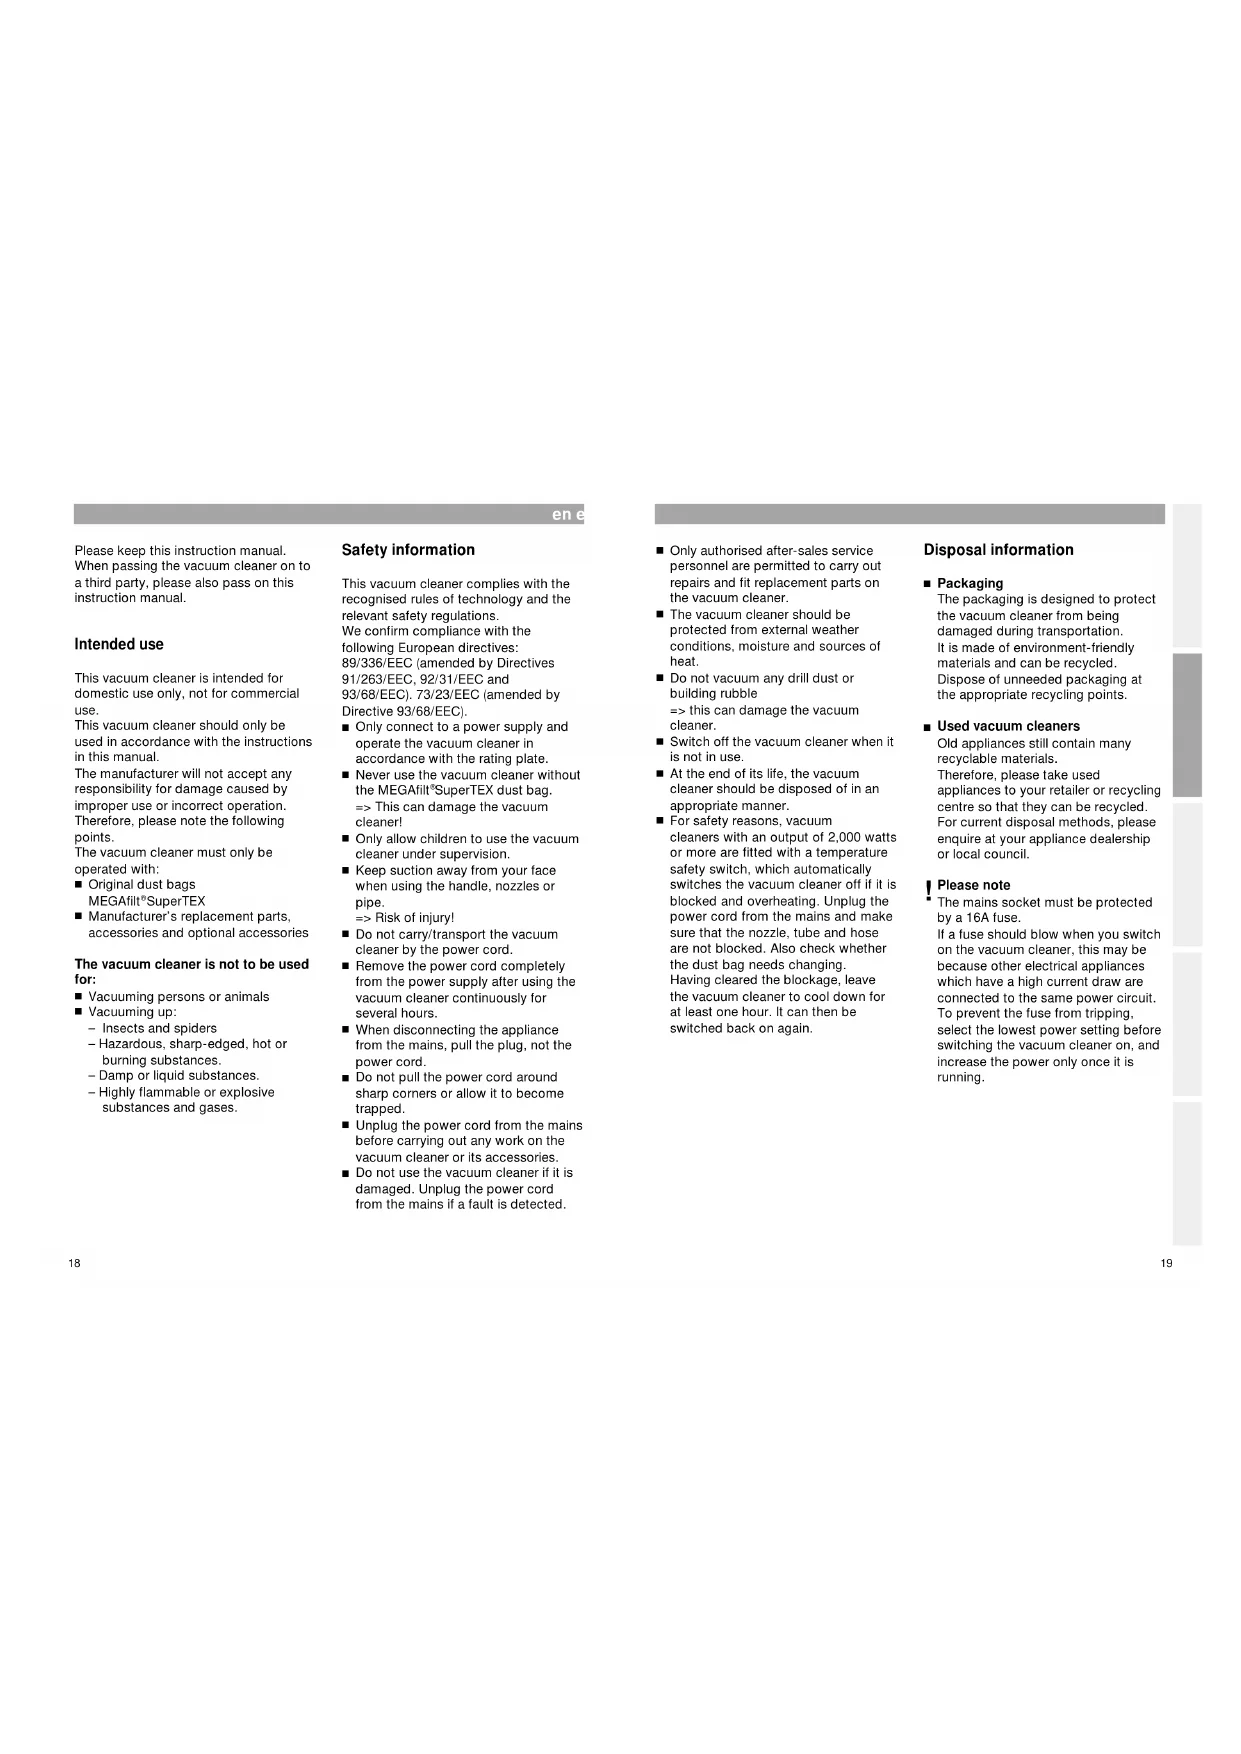
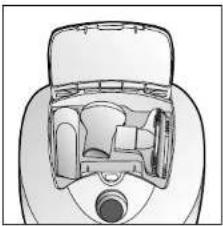
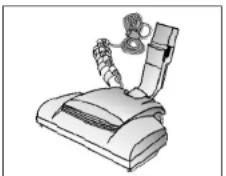
Your vacuum cleaner
en
1 Adjustable floor tool with locking collar
2 Turbo brush
3 Telescopic tube with adjusting sleeve and locking collar
4 Handle
5 Flexible hose
6 Connection for electromagnetic brush
7 Accessory compartment
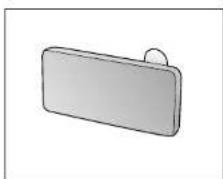
8 Furniture brush*
9Upholstery nozzle
0 Crevice nozzle
1 Dust bag change indicator
12 Cover
13 Electronic slide control
14 On/Off button
15 Power cord
16 Parking aid
17 Exhaust filter
18 Parking aid (on underside of unit)
19 Motor protection filter
20 MEGAfilt SuperTEX dust bag
*Depending on equipment
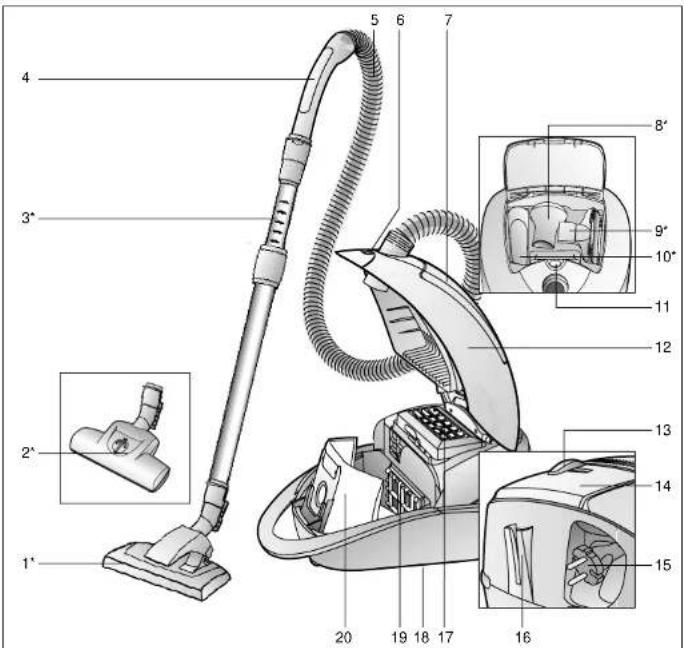
Setting up en
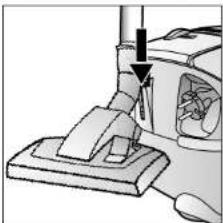
Insert the flexible hose connector into the opening on the vacuum cleaner until it engages.
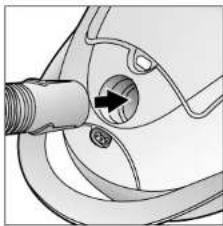
Push the handle into the telescopic tube until it engages.
- Depending on equipment level
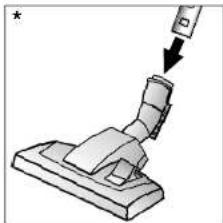
Push the telescopic tube into the connecting piece of the floor nozzle until it engages.
*Depending on equipment level
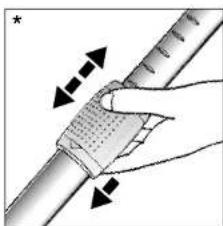
To adjust the length of the telescopic tube, press the adjusting button/adjusting sleeve in the direction of the arrow and adjust the tube to the required length.
- Depending on equipment level
Setting up en
Take the mains plug, pull the mains cable to the required length and insert the plug into a wall socket.
To switch your vacuum cleaner on, press the On/Off button in direction of arrow.
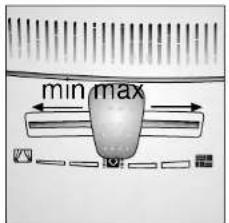
Use the slide control to adjust the suction to the required level.
Vacuuming en
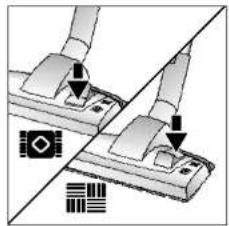
Adjusting the floor tool:
For cleaning rugs and carpets = >
For cleaning hard floors


Please refer to the enclosed operating instructions for information regarding maintenance of the ELECTROMATIC brush and TURBO-UNIVERSAL brush. (Depending on equipment level).
Vacuuming with accessories (attach to handle or suction pipe as required).
Crevicne nozzle For cleaning crevices and corners.
*Depending on equipment level
Upholstery nozzle For cleaning upholstered furniture, curtains, etc.
- Depending on equipment level
Vacuuming en
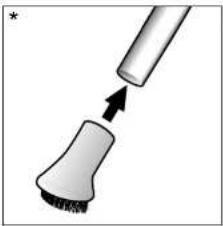
Furniture brush
For vacuuming picture frames, books, delicate furniture, etc.
*Depending on equipment level
Small accessories that you do not need can be stored in the vacuum cleaner lid.
You can use the parking aid on the back of the appliance during short pauses in vacuuming after switching off the vacuum cleaner. To do this, slide the catch on the floor tool into the groove on the back of the appliance.
When the work is done en
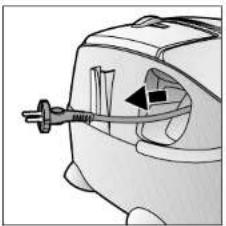
- Rewinding the power cord.
Tug the power cord and let go (the cable automatically rewinds).
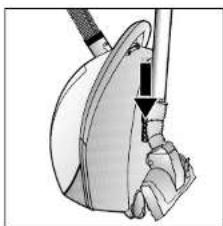
To store or transport the vacuum cleaner, use the storage aid on the underside of the cleaner.
Stand the vacuum cleaner up on its end.
Slide the catch on the floor tool into the groove on the underside of the appliance.
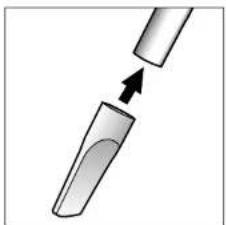
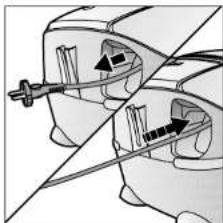
To remove the flexible hose, press the release button and pull out the hose.
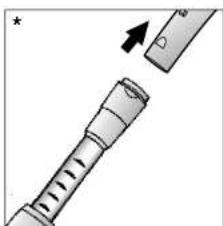
To release the connection, press the unlatching sleeve and pull the handle out.
- Depending on equipment level
When the work is done en
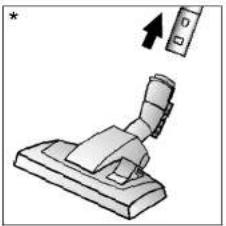
To release the connection, press the unlatching sleeve and pull the telescopic tube out.
*Depending on equipment level
Changing the dust bag en
Replacing the dust bag
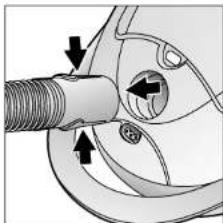
If the dust bag change indicator in the cover is completely yellow when the floor tool is lifted off the floor and the highest suction setting is selected, the dust bag must be replaced even if it should not be completely full yet. In this case it is essential to change the dust bag due to the type of material it contains. The nozzles, suction pipe and flexible hose should not be blocked, as this will also trigger the dust bag change indicator.
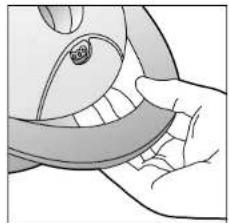
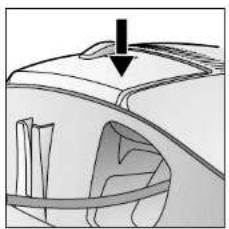
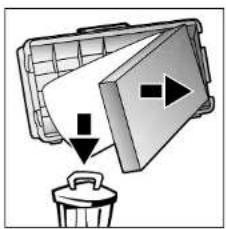
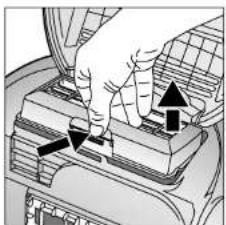
Open the cover by moving the locking lever in the direction of the arrow.
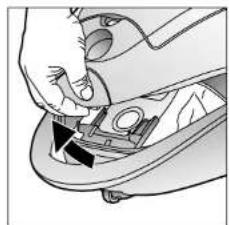
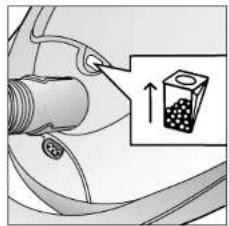
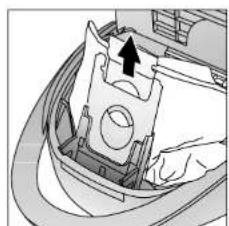
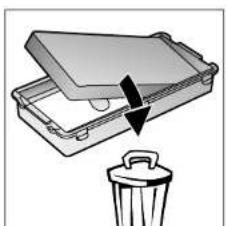
Seal and remove the MEGAfit*SuperTEX dust bag by pulling on the tab as shown.
Changing the dust bag en
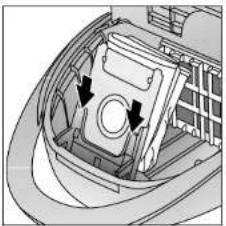
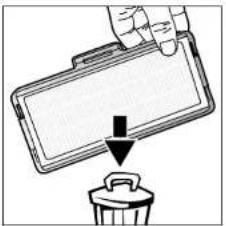
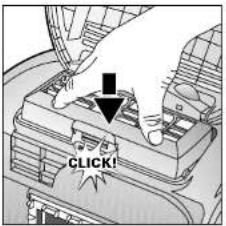
Place a new MEGAfit SuperTEX dust bag in the holder and close the dust bag compartment lid.
Caution: The cover only closes when a MEGAfill SuperTEXdust bag has been inserted.

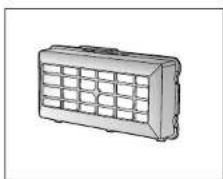
Cleaning the motor protection filter The motor protection filter should be cleaned at regular intervals by tapping it or washing it out.
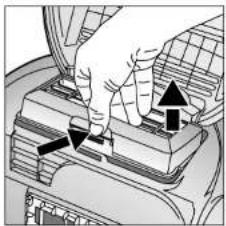
Open the dust compartment cover.
Remove the motor protection filter in the direction of the arrow.
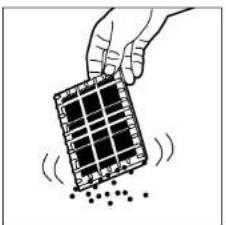
Empty the motor protection filter by tapping it.
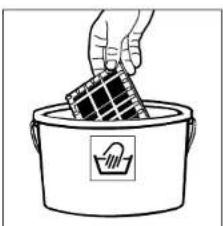
If the motor protection filter is very dirty, wash it out.
Leave the filter to dry for at least 24 hours.
After cleaning, insert the motor protection filter in the machine and close the dust compartment cover.
Changing the dust bag en
Replacing the micro-hygiene filter
The motor protection filter should be changed when starting a new pack of bags.
- Open the dust bag compartment lid
- Unlock the filter holder by pushing the locking tab in the direction of the arrow.
- Remove the foam and micro-hygiene filter. Place a new micro-hygiene filter and the foam in the filter holder.
- Insert the filter holder back into the vacuum cleaner and click it into place.
Replacing the activated carbon filter
If your vacuum cleaner is equipped with an activated carbon filter, this must be replaced every six months.
Open the dust bag compartment lid
Unlock the filter holder by pushing the locking tab in the direction of the arrow
Remove the activated carbon filter.
Fit a new activated carbon filter.
Insert the filter holder back into the vacuum cleaner and click it into place.
Changing the dust bag en
Replacing the HEPA filter
If your vacuum cleaner is equipped with a HEPA filter, this should be replaced once a year.
- Open the dust bag compartment lid
- Unlock the HEPA filter by pushing the locking tab in the direction of the arrow and remove it from the vacuum cleaner.
Insert the new HEPA filter and click it into place.
After vacuuming up fine dust particles, shake out the motor protection filter to clean it and replace the micro-hygiene filter, activated carbon filter or HEPA filter if necessary.
Care en
Always switch the vacuum cleaner off and disconnect the power cord from the mains before cleaning the vacuum cleaner.
- The vacuum cleaner and plastic accessories can be cleaned with a commercial plastic cleaner.
Do not use abrasive, glass or all-purpose cleaners.
Never immerse the vacuum cleaner in water.
The dust compartment can, if necessary, be cleaned with a second vacuum cleaner or simply wiped with a dry cloth or dusting brush.
Subject to technical changes.
Optional extra en
Replacement filter pack VZ52AFG1
Contains:
5 MEGAft*Super TEX replacement filters with lid
1 micro-hygiene filters

Textile bag (permanent bag) VZ10TFG
Reusable bag with Velcro(R) fastener.
HEPA filter (Class H12) VZ152HFB
Recommended for allergy sufferers. Ensures very clean exhaust air.
Replace annually.
Activated carbon filter VZ191AFB
Extra thick active carbon pad. Combats unpleasant odours. Replace twice a year. Can be used only in combination with a micro-hygiene filter. Remove foam from filter holder and insert activated carbon filter.
Please note
Combination of HEPA filter and activated carbon filter not possible.
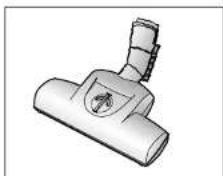
TURBO-UNIVERSAL brush VZ101TBB
All in one brushing and vacuuming of shallow pile rugs and carpets and all hard floor coverings. Especially suitable for picking up pet hair. The brush roller is driven by the suction of the air flow. No separate electrical connection is needed.
Optional extra en
ELECTROMATICsbrushVZ145EB
All in one brushing and vacuuming of shallow pile rugs and carpets and all hard floor coverings. Plumps and cares for carpet pile. Especially suitable for picking up pet hair.
Sac textile (permanent) VZ10TFG
Fallersleber Straße 50
40227 Dusseldorf
Oberbilker Allee 270 A
44287 Dortmund
Rodenbergstraße 47
45141 Essen
Bamlerstraße 1 a
47805 Krefeld
DieBemr Bruch 114 G
48153 Munster
Schuckert Stra3e 10
5082
Robert Bosch (Australia) Pty. Ltd
57-63 McNaughton Roads
3168 CLAYTON
+61(3)95415555 0
+61395415595www.bosch.com.cn/
www.bosch.com.au/sna/default.asp
BA Bosnia-Herzegovina
"HIGH" d.o.o.
Odobasa 57
Sarajevo
+387033)213513
Info-Line: +387 [061] 100 905
delicnanda@hotmail.de
BE Belgium, Belglen, B
BSH Home Appliances s.a.n.v. A 100-120-130-140-150-160-170
BSH Appliance Care Grand Union, Missouri
Grand Union House Old Wolfarton Road
Old Wolverton, JP.O.Box 118
MK12 5ZR Milton Keynes
+4487051678910
441908328660
www.boschappliances.co.uk
GR Greece
BSH Ikiakes Syskeves ABE
17km Ethnikis Odou Athinon-Lamias
& Potamou 20
14574 Kifissia
+30(210)4277-700
+30(210)4277-669
HK Hong Kong
BSH Home Appliances Limited
Unit 1&2B,7th Floor
North Block, Skyway House
3 Sham Mong Hoad
TaiKok Tsui-Hongkong/Kowloon 270102001
+852(25651615)0209195616020
+852236516252www.bosch-sho.com.hk
1
HR Croatia
Andabaka Commerce 60
Gurdulcev 91000, Turkey
21000Spilt 385,211,481,493
+359(21)481403Info:linel+385(21)322010
andaba@jnet.br
HU Hungary
Industrial Park North 71098 Ltd
71293L0d 070/0107
+9728)9777222073 0777215
+972,017977425csh-senw@zhaoy.net.l
C93-SCV@211av.net.cn
IR Ireland
Appliance Care
Unit 4
Baltimore Industrial Estate
walkinstov 二
Dublin 12, 352-114
353.114602689353.114602520
Outside of 01-area: 18903,22222
1
IS Iceland
Smith & Norland H/F
Noaluni 401-3
105 Reykjavik
054 0829-2000
+354(520)3000651(89)3010
+354(520)301
www.sinopec.gov.cn
Kundendienst-Zentren · Central-Service-Depots - Service Apres Vente - Servizio Assistenza
T
AChnrs Tanwco Co. Co. Co. Co. Co. Co. Co. Co. Co. Co. Co. Co. Co. Co. Co. Co. Co. Co. Co. Co. Co. Co. Co. Co. Co. Co. Co. Co. Co. Co. Co. Co. Co. Co. Co. Co. Co. Co. Co. Co. Co. Co. Co. Co. Co. Co. Co. Co. Co. Co. Co
6th floor, No 2, Sec.3
Miln Sheng E. Road 1
apei
-8862123216222
-886 8862 2397
www.achells.com.tw
UA Ukraine
KNEB
CDTpaC:Gpnc
TEN:044)568-51-50
100.00000000000000000
T07:(941)467-80-14
P01.64)407-60-40
GOO#PwCepn
161: (044) 585-93-99
VN Vietnam
T&Co.Ltd.
34 Nau Inorg To St
Bao Dinh District
B. Dinh District
Hangai
Fianor 94,40823040
-84(4)8230407884148107879
2441643787
Siemens-hmc@bdvn.vrd.net
YU Yugoslavia
SZB, Specijaelektro
III. Bulevar 34. Blok 23
11070 Novi Benograd
1100 Non-Geogr 291/111.147110
381/11 139689
Info-Ling:+381/11:138.552
spec.ei@ELnet.yu
710.2
ZA South Africa
BSH-SA
15 th Rd., Randjespark
Private Bag X36, Randjespark
1685 Midrand-Johannesburg
-27(11)2657800
-27112657867
DE Garantle
GB Conditions of guarantee
For this appliance the guarantee conditions as set out by our representatives in the country of sale apply. Details regarding same may be obtained from the dealer from whom the appliance was purchased. For claims under guarantee the sales receipt must be produced.