
Wakeup Light HF3500 - Light therapy PHILIPS - Free user manual and instructions
Find the device manual for free Wakeup Light HF3500 PHILIPS in PDF.
| Product type | Dawn simulator (light therapy) |
| Brand | Philips |
| Model | Wakeup Light HF3500 |
| Dimensions (approx.) | 20 x 15 x 15 cm |
| Weight (approx.) | 500 g |
| Power supply | Mains (electric outlet) |
| Power (approx.) | 15 W |
| Sunrise simulation | Yes, gradual increase in brightness over 30 minutes before wake-up time |
| Brightness levels | 10 levels (1 to 10) |
| Light and sound alarm | Yes (fixed sound, non-adjustable volume) |
| FM radio | No (only on HF3505) |
| Snooze | Yes, 9 minutes (fixed) |
| Demo mode | Yes, quick 90-second test |
| Screen brightness | Adjustable (high, medium, low, very low) |
| Time format | 12h or 24h |
| Display | Digital LED |
| Care and cleaning | Unplug before cleaning; use a dry cloth; do not use abrasive products |
| Safety | Do not immerse in water; no user-serviceable parts |
| Spare parts and repairability | Not available (no user-replaceable parts) |
| Recycling | Do not dispose with household waste (in accordance with WEEE directive) |
| General information | Register your product at www.philips.com/welcome |
Frequently Asked Questions - Wakeup Light HF3500 PHILIPS
User questions about Wakeup Light HF3500 PHILIPS
0 question about this device. Answer the ones you know or ask your own.
Ask a new question about this device
Download the instructions for your Light therapy in PDF format for free! Find your manual Wakeup Light HF3500 - PHILIPS and take your electronic device back in hand. On this page are published all the documents necessary for the use of your device. Wakeup Light HF3500 by PHILIPS.
USER MANUAL Wakeup Light HF3500 PHILIPS
natural_image
White circular digital nightstand with a digital display and control buttons (no visible text or symbols)
natural_image
White circular digital alarm clock with control buttons (no visible text or symbols)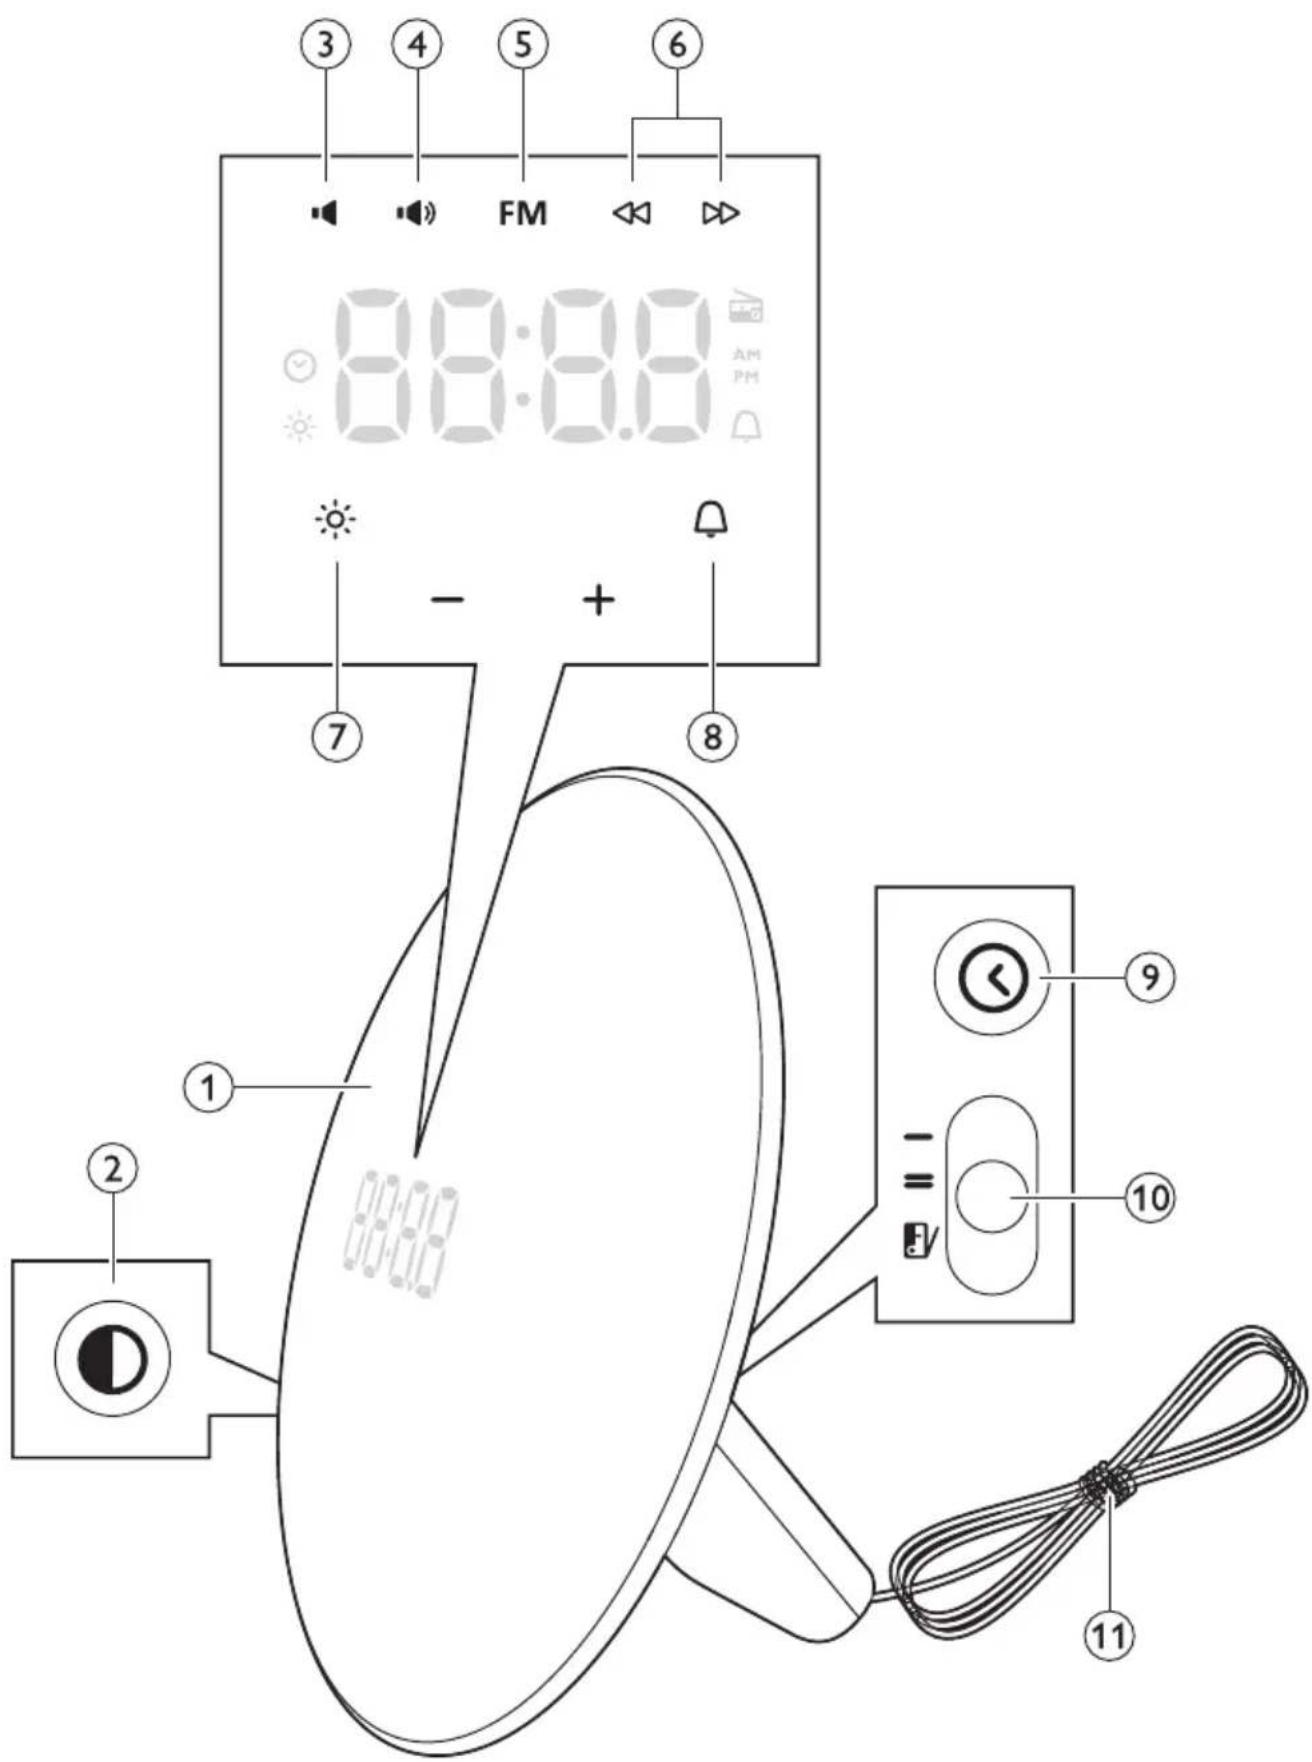
ENGLISH 4
DANSK 11
DEUTSCH 18
ESPAÑOL 25
SUOMI 32
FRANÇAIS 39
ITALIANO 46
NEDERLANDS 53
NORSK 60
PORTUGUÊS 67
РУССКИЙ 74
SVENSKA 81
Congratulations on your purchase and welcome to Philips!
To fully benefit from the support that Philips offers, register your product at www.philips.com/welcome.
The Philips Wake-up Light helps you wake up more pleasantly. The light intensity of the lamp gradually increases to the set level in the 30 minutes before the set wake-up time. The light gently prepares your body for waking up at the set time. To make waking up an even more pleasant experience, you can use natural wake-up sounds or the FM radio (HF3505 only).
The effects of the Wake-up Light
The Philips Wake-up Light gently prepares your body for waking up during the last half hour of sleep. In the early morning hours our eyes are more sensitive to light than when we are awake. During that period the relatively low light levels of a simulated natural sunrise prepare our body for waking up and getting alert. People who use the Wake-up Light wake up more easily, have a better overall mood in the morning and feel more energetic. Because the sensitivity to light differs per person, you can set the light intensity of your Wake-up Light to a level that matches your light sensitivity for an optimal start of the day.
For more information about the Wake-up Light, see www.philips.com.
1 Wake up light
2 Display brightness
3 Volume lower (HF3505 only)
4 Volume higher (HF3505 only)
5 Radio (HF3505 only)
6 FM scan (HF3505 only)
7 Light on/off
8 Alarm on/off
9 Clock time
10 Alarm sound types (HF3505 only)
11 Antenna (HF3505 only)
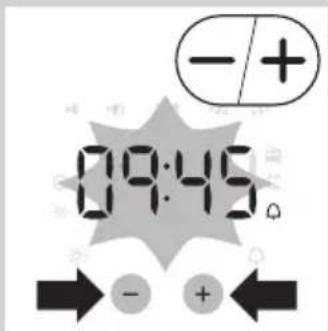
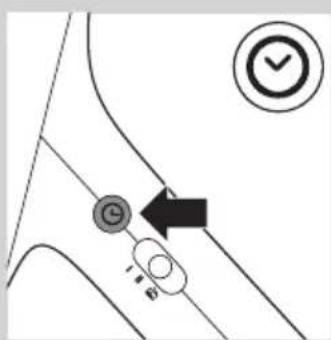
Setting the clock
Put the plug in the wall socket.
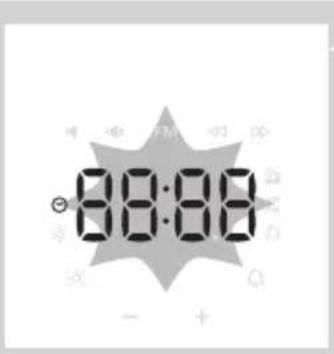
2 When plugging in, the clock time will automatically start blinking.
If the clock time does not start blinking, press the clock button on the side of the appliance.
The clock icon appears on the display.

3 Press the + or - button to set the hour and minutes.
Note: You can only do this when you are in the set clock time and when the time indication flashes. If this is not the case, press the clock button again, you are now in the set clock time.
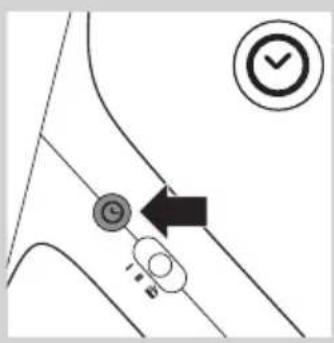
4 Press the Clock button to confirm.
You can also wait for 5 seconds before the clock is fixed.
Note: Every time you remove the plug from the wall socket, clock time setting is lost.
Using the appliance
Functions
Below you can find a list of all functions that can be set in this appliance:
- Clock time
- Time format
- Alarm time
- Alarm sounds (HF3505 only)
- FM (HF3505 only)
- Light level
- Display brightness
You can set these functions in the following way:
Using the light
You can use the appliance as a bedside lamp.
1 To switch on the light, press the lamp on/off button.
The light icon is shown in the display and the current light level 10 appears.
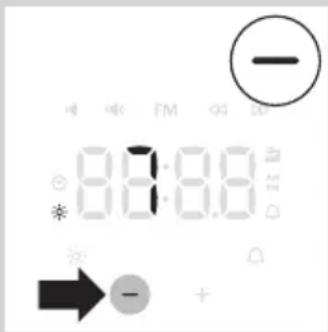
2 Press the + and - buttons to select a light intensity.
You can choose a light intensity between 1 and 10.
Note: The light intensity you have selected is automatically set as the light intensity level for the alarm as well.
3 To switch off the lamp, press the lamp on/off button again.
Note: The light level can be adjusted when light is on/off.
Setting time format
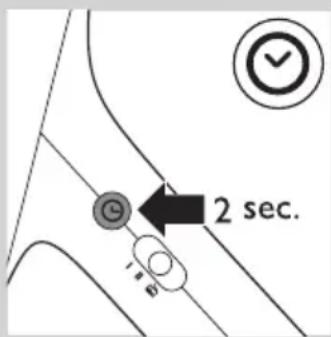
Switching between 24h and 12h time mode.
1 Press the Clock button for > 2 seconds.
When the 12h mode is active, PM or AM will be shown in display.
Note: To switch to the 24h mode, press the Clock button again for >2 seconds.
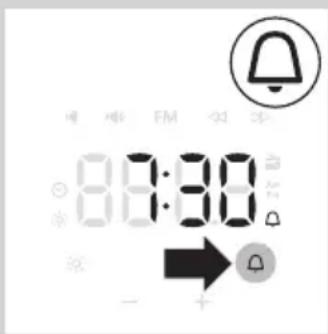
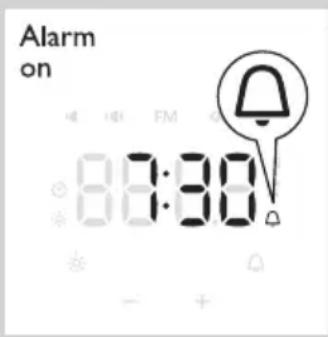
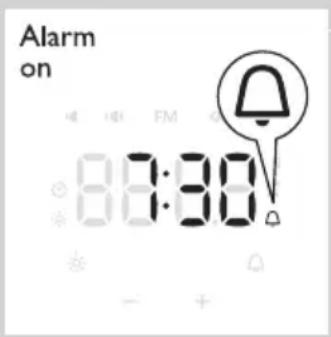
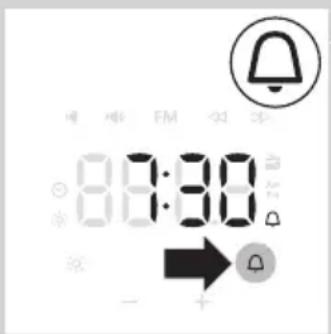
Setting the alarm
When you set the alarm, you choose an alarm time and (only in case of HF3505) the type of sound you want to wake up to. The alarm is activated when the alarm symbol is visible on the display. The light intensity slowly increases to the selected level during the last 30 minutes before the set alarm time. The sound slowly increases to the selected level after the set alarm time.
HF3505 only:
Light level range is 1-10, volume level range is 1-10. It is not possible to switch these functions off.
HF3500 only:
Light level range is 1-10 and there is no volume control for the type of the appliance. The alarm sound volume is fixed.
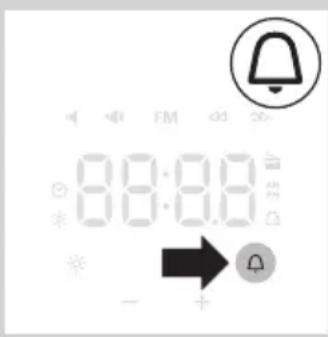


1 Press the alarm button to switch on the alarm.
The time indication of the alarm time flashes.
▶Alarm icon appears on display.
2 Press the + or - buttons to select the time.
Note: You can only do this when the time indication flashes. If this is not the case, press the alarm button again to enter the alarm time mode.
Tip: Press the + or - button >2 seconds to speed up the digit change.
3 Press the Alarm button to confirm or wait for 5 seconds.
Note: The alarm icon is shown in the display to indicate the alarm is ON.
The alarm time is now set.
Switching off the alarm
When the alarm goes off, you can switch off the alarm by pressing on the alarm button. The alarm will go off again the next day.
When you want to switch off the alarm for the next day, or before the alarm goes off, press the alarm button again.
Note: The alarm icon disappears from the display.
Note: The lamp stays on to light your room. You can switch off the lamp by pressing the light on/off button.
Note: The alarm (sound and/or light) automatically switches off after 90 minutes.
ENGLISH8
natural_image
Diagram showing a device with a circular button and a battery, connected to a line (no text or symbols)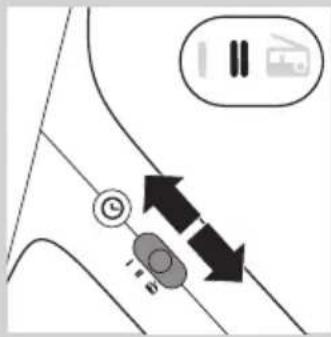

natural_image
Line drawing of a hand holding a circular object with a downward arrow, no text or symbols present
natural_image
Simple line drawing of a megaphone with a curved arrow and circular base (no text or symbols)
Setting the alarm sound (HF3505 only)
You can choose one of the following sounds by switching the function from:
- Sound I
- Sound II
- Radio
Note: When switching to a new alarm sound or radio, a preview of that sound/radio will be played for 5 seconds.
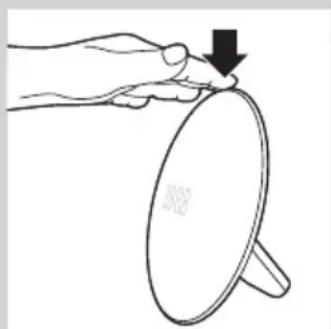
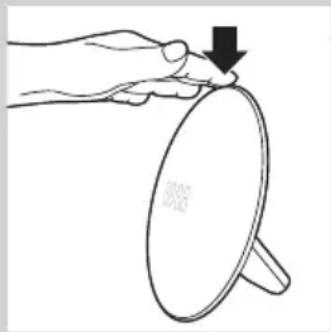
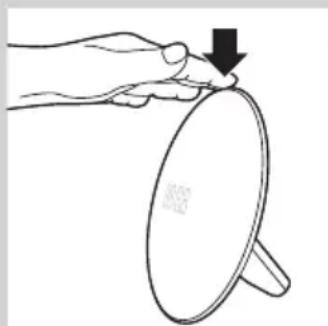
Snoozing
1 Tap on top of the appliance to snooze 9 minutes.
The lamp continues to be on at the selected intensity level, but the alarm sound stops. After 9 minutes, the wake-up sound is automatically played again.
Note: The 9-minute snooze time is fixed. This time cannot be adjusted.
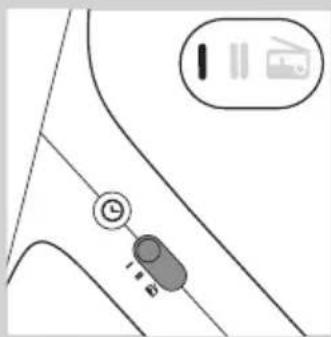
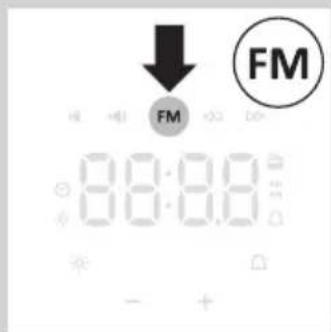
Radio/volume (HF3505 only)
Tip: Fully unwind the antenna to use the radio function.
1 To switch on the radio, press the radio on/off button.
The radio icon appears in the display.
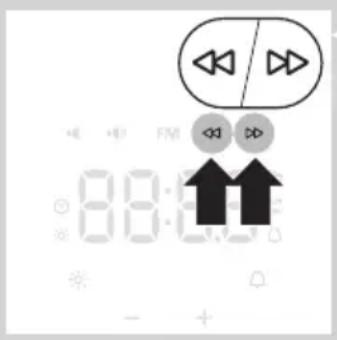

2 To select the desired radio frequency, press the « and » buttons.
Tip: To scan radio frequencies automatically, press and hold the « or » button for approx. 2 seconds.
Tip: To make sure you get a good radio signal, fully unwind the antenna and move it around until you have found a position at which reception is best.
Note: The current radio frequency is shown in the display for 5 seconds, before clock time is shown again.
3 To switch off the radio, press the radio on/off button again.
Volume
1 To set the volume, press the volume increase or decrease button. You can choose a volume level between 1 and 10.
Note: The volume level you have selected is automatically set as the volume level for the alarm as well.
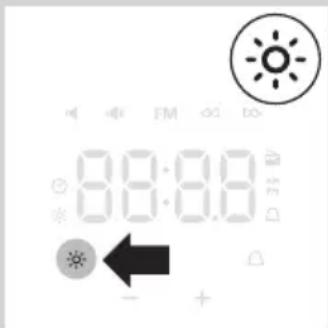
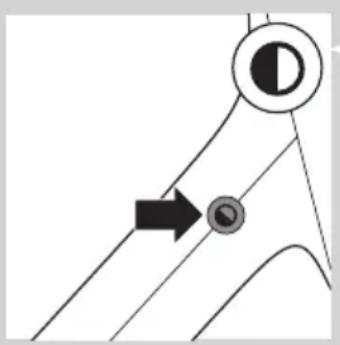
Adjusting the display brightness
natural_image
Diagram showing a curved line with a circular symbol and an arrow pointing to a circular feature (no text or labels)1 Press the display brightness button to adjust the display brightness. HF3505: You can change the brightness of the display from high, medium, low to off. If you choose the display to be off, you can see the display again by touching it. HF3500: You can change the brightness of the display from high, medium, low to very low.
Note: We advise you to set the display brightness in a dark bedroom. Choose a brightness level that is optimal for you to see the display at night.
Demo mode
If you want a quick demonstration (90 seconds) of the gradually increasing light intensity and sound level, switch on the test function of the appliance.
1 Press and hold the alarm button for at least 3 seconds.
2 The appliance starts the demonstration of the alarm.
3 To switch off the demonstration, press and hold the previously pressed alarm button for 3 seconds again.
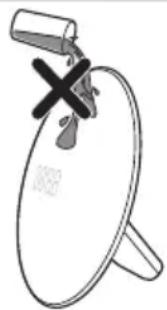
Cleaning and maintenance
natural_image
Simple line drawing of a circular object with a cross mark and a handle, no text or symbols present.Never use scouring pads, abrasive cleaning agents or aggressive liquids such as petrol or acetone to clean the appliance.
Regularly remove dust from the outside of the appliance with a dry cloth.
1 Unplug the appliance before you clean it.
2 Clean the outside of the appliance with a dry cloth.
Do not let water run into the appliance or spill water onto the appliance.
Replacement
This appliance does not contain any serviceable parts.
Recycling

natural_image
Symbol of a trash bin with crossed lines indicating no waste or restriction, accompanied by a solid black rectangle below (no text or symbols)- This symbol means that this product shall not be disposed of with normal household waste (2012/19/EU).
- Follow your country's rules for the separate collection of electrical and electronic products. Correct disposal helps prevent negative consequences for the environment and human health.
Introduktion
natural_image
Diagram of a satellite dish connected to a power outlet, showing directional arrows (no text or symbols)

natural_image
Diagram showing a device with a circular button and a battery, connected to a line (no text or symbols)Indstilling af alarmlyden (kun HF3505)
- Lyd II
- Radio
natural_image
Line drawing of a hand holding a circular object with a downward arrow, no text or symbols presentSnooze-funktion
1 Tryk oven på apparatet for at snooze 9 minutter.
natural_image
Simple line drawing of a megaphone with a curved arrow and circular base (no text or symbols)Radio/lydstyrke (kun HF3505)
Tip: Rul antennen helt ud for at bruge radiofunktionen.

natural_image
Pure diagram of a mechanical or optical setup with no text, numbers, or symbolsnatural_image
Simple line drawing of a circular object with a handle and a cross mark, no text or symbols present.natural_image
Symbol of a waste bin with crossed lines indicating no waste, and a solid black rectangle below (no text or labels)natural_image
Diagram of a speaker emitting sound waves into a microphone (no text or symbols)
natural_image
Diagram of a vehicle's rearview and side profile with no visible text or symbols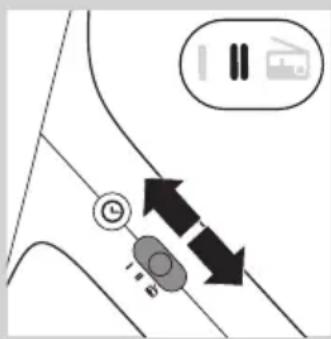
natural_image
Line drawing of a hand holding a circular object with a downward arrow, no text or symbols presentnatural_image
Simple line drawing of a megaphone with a circular base and a curved arrow symbol (no text or labels)natural_image
Pure diagram of a curved path with a circular target and arrow, no text or symbols presentnatural_image
Simple line drawing of a circular object with a cross mark on top, no text or symbols present.Introducción
natural_image
Diagram of a satellite dish connected to a power outlet with directional arrows indicating signal flow (no text or symbols)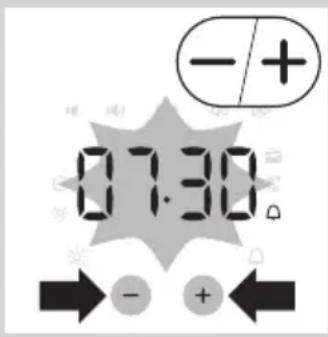


natural_image
Diagram of a vehicle's rearview and side profile with no visible text or symbols- Sonido II
- Radio
natural_image
Line drawing of a hand holding a magnifying glass with a downward arrow (no text or symbols)Alarma diferida
natural_image
Simple line drawing of a megaphone with a curved arrow and circular base (no text or symbols)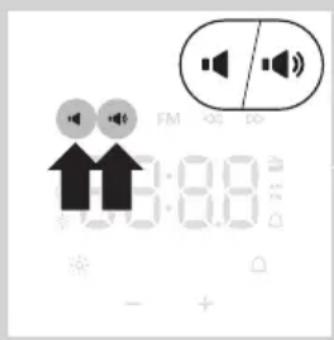
natural_image
Simple line diagram showing a curved path with an arrow pointing to a circular symbol (no text or labels)natural_image
Simple line drawing of a circular object with a handle and a cross mark, no text or symbols present.natural_image
Symbol of a waste bin with crossed lines indicating no waste, and a solid black rectangle below (no text or labels)natural_image
Diagram of a satellite dish antenna with directional arrows indicating signal flow (no text or symbols)4 Vahvista kellopainikkeella.
natural_image
Diagram of a vehicle's rearview and side profile with no visible text or symbols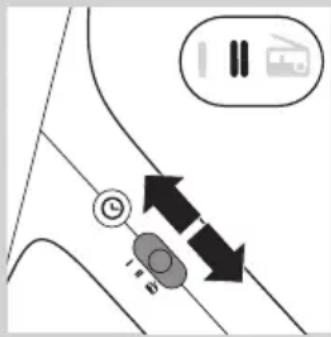

natural_image
Line drawing of a hand holding a magnifying glass with a downward arrow indicating force or direction (no text or symbols)
natural_image
Simple line drawing of a megaphone with a curved arrow and circular base (no text or symbols)
natural_image
Pure diagram of a curved path with a circular target and an arrow pointing to a circular detail (no text or symbols)natural_image
Simple line drawing of a circular object with a cross mark and a handle, no text or symbols present.natural_image
Symbol of a waste bin with crossed lines indicating no waste, above a solid black rectangle (no text or labels)natural_image
Diagram of a satellite dish connected to a power outlet with directional arrows indicating signal flow (no text or symbols)

natural_image
Diagram of a device with a circular button and indicator lights, no readable text or symbols present- Son II
- Radio
natural_image
Line drawing of a hand holding a circular object with a downward arrow, no text or symbols presentRépétition
natural_image
Simple line drawing of a speaker grille with a circular head and a curved arrow indicating sound (no text or symbols)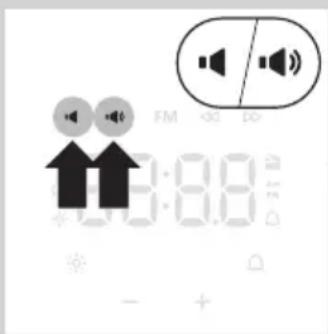
natural_image
Simple line diagram showing a circular object with an arrow pointing to a small circular feature, no text or symbols present.natural_image
Simple line drawing of a circular object with a cross mark and a handle, no text or symbols present.Remplacement
natural_image
Diagram of a mounted device with directional arrows indicating motion or force (no text or symbols)


natural_image
Diagram of a vehicle's rearview mirror and steering wheel (no text or symbols)
natural_image
Line drawing of a hand holding a magnifying glass with a downward arrow indicating force or direction (no text or symbols)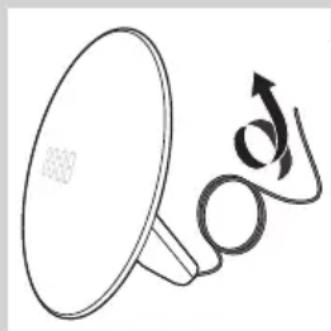
natural_image
Simple line drawing of a megaphone with a curved arrow and circular base (no text or symbols)
natural_image
Diagram showing a curved path with a circular symbol and an arrow pointing to a small circular object (no text or labels)natural_image
Simple line drawing of a circular object with a cross mark on top, resembling a stylized lamp or stand (no text or symbols)natural_image
Symbol of a trash bin crossed with no visible text or labelsInleiding
natural_image
Diagram of a satellite dish connected to a power outlet with directional arrows indicating signal flow (no text or labels)

- Geluid II
- Radio
natural_image
Line drawing of a hand holding a circular object with a downward arrow, no text or symbols presentSluimeren
natural_image
Simple line drawing of a megaphone with a curved arrow and circular base (no text or symbols)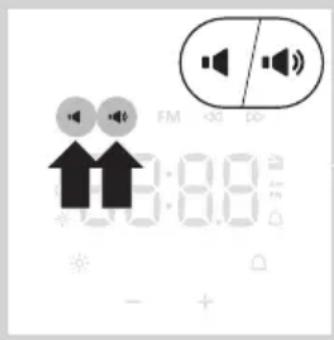
natural_image
Simple line diagram showing a circular object with an arrow pointing to a circular target (no text or symbols)natural_image
Simple line drawing of a circular object with a cross mark and a handle, no text or symbols present.natural_image
Diagram of a satellite dish connected to a wall-mounted device with directional arrows indicating motion (no text or symbols)


natural_image
Diagram showing a device with a circular button and a battery, connected to a line (no text or symbols)

natural_image
Line drawing of a hand holding a circular object with a downward arrow, no text or symbols present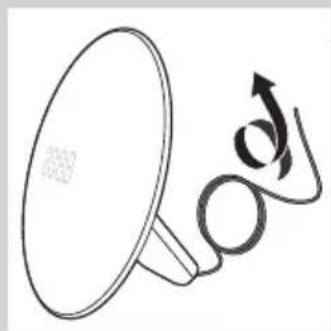
natural_image
Simple line drawing of a megaphone with a curved arrow and circular base (no text or symbols)
Stille inn alarmlyden (kun HF3505)
natural_image
Pure diagram of a curved path with a circular target and an arrow pointing to a circular detail (no text or symbols)natural_image
Simple line drawing of a circular object with a cross mark and a handle, no text or symbols present.natural_image
Symbol of a trash bin with crossed lines indicating no waste or restriction (no text or numbers present)natural_image
Diagram of a satellite dish connected to a power outlet with directional arrows indicating signal flow (no text or labels)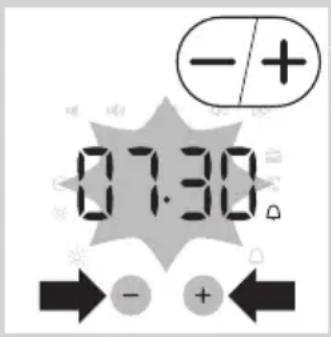


natural_image
Diagram of a vehicle's rearview and side profile with no visible text or symbolsDefinir o som de alarme (apenas HF3505)
- Som II
- Rádio
natural_image
Line drawing of a hand holding a magnifying glass with a downward arrow (no text or symbols)Snoozer
natural_image
Simple line drawing of a megaphone with a curved arrow and circular base (no text or symbols)
natural_image
Diagram showing a curved line with a circular symbol and an arrow pointing to a circular target (no text or labels)natural_image
Simple line drawing of a circular object with a cross mark and a handle, no text or symbols present.Nunca utilize esfregões, agentes de limpeza abrasivos ou líquidos agressivos, tais como petróleo ou acetona, para limpar o aparelho.
natural_image
Symbol of a trash bin with crossed lines indicating no waste or restriction (no text or numbers present)natural_image
Diagram of a radio receiver with an antenna and cable, showing directional arrows (no text or symbols)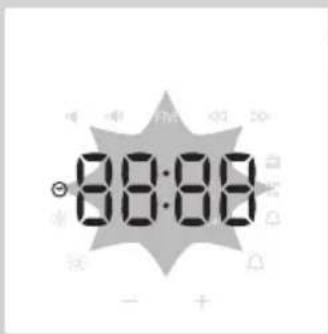


natural_image
Diagram of a device with a circular button and a battery, no text or symbols present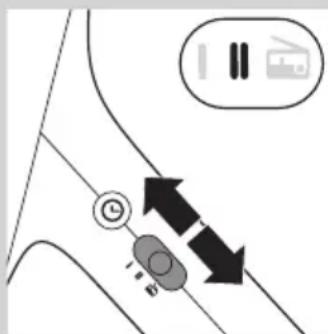
natural_image
Line drawing of a hand holding a circular object with a downward arrow, no text or symbols presentnatural_image
Simple line drawing of a megaphone with a circular base and an arrow symbol (no text or labels)natural_image
Simple line diagram showing a curved path with an arrow pointing to a circular symbol (no text or labels)natural_image
Simple line drawing of a circular object with a cross mark on top, resembling a lamp or stand (no text or symbols)natural_image
Symbol of a trash bin with crossed lines indicating no waste or restriction, and a solid black rectangle below (no text or labels)natural_image
Diagram of a satellite dish connected to a power outlet, showing directional arrows (no text or labels)

natural_image
Diagram of a device with a circular button and indicator lights, no readable text or symbols present- Ljud ll
- Radio
natural_image
Line drawing of a hand holding a circular object with a downward arrow, no text or symbols presentSnooze
natural_image
Simple line drawing of a megaphone with a curved arrow and circular base (no text or symbols)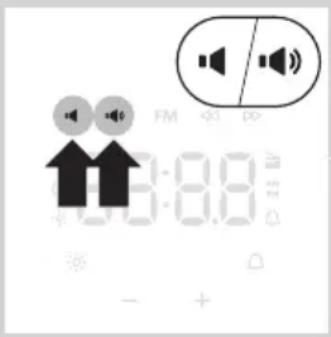
natural_image
Diagram showing a curved line with a circular symbol and an arrow pointing to a small circular feature (no text or labels)natural_image
Simple line drawing of a circular object with a cross mark and a handle, no text or symbols present.natural_image
Symbol of a trash bin crossed with a diagonal line, no text or numbers present
- The effects of the Wake-up Light
- Setting the clock
- Using the appliance
- Functions
- Using the light
- Setting time format
- Switching between 24h and 12h time mode.
- Setting the alarm
- Switching off the alarm
- ENGLISH8
- Setting the alarm sound (HF3505 only)
- Snoozing
- Radio/volume (HF3505 only)
- Volume
- Adjusting the display brightness
- Demo mode
- Cleaning and maintenance
- Replacement
- Recycling
- Introduktion
- Indstilling af alarmlyden (kun HF3505)
- Snooze-funktion
- Radio/lydstyrke (kun HF3505)
- Introducción
- Alarma diferida
- Répétition
- Remplacement
- Inleiding
- Sluimeren
- Stille inn alarmlyden (kun HF3505)
- Definir o som de alarme (apenas HF3505)
- Snoozer
- Snooze
Brand : PHILIPS
Model : Wakeup Light HF3500
Category : Light therapy