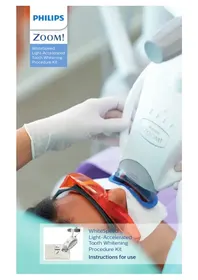
Zoom Zoom 2 DIS570 - Light therapy PHILIPS - Free user manual and instructions
Find the device manual for free Zoom Zoom 2 DIS570 PHILIPS in PDF.


| Product type | Light therapy lamp |
| Brand | Philips |
| Model | Zoom Zoom 2 DIS570 |
| Dimensions (L x W x H) | 30 x 20 x 50 cm |
| Weight | 1.2 kg |
| Power supply | Mains 220-240 V, 50/60 Hz |
| Light intensity | 10,000 lux at 30 cm |
| Color temperature | 5500 K (daylight) |
| Built-in timer | Yes, adjustable from 15 to 90 minutes |
| Tilt adjustment | Yes, vertical tilt from 0° to 45° |
| UV filter | Yes, UV-free |
| Material | ABS plastic, aluminium |
| Color | White |
| Warranty | 2 years |
| Care and cleaning | Wipe with a soft, dry cloth; do not use abrasive products |
| Spare parts and repairability | Available via Philips customer service; repairability index not disclosed |
Frequently Asked Questions - Zoom Zoom 2 DIS570 PHILIPS
User questions about Zoom Zoom 2 DIS570 PHILIPS
0 question about this device. Answer the ones you know or ask your own.
Ask a new question about this device
Download the instructions for your Light therapy in PDF format for free! Find your manual Zoom Zoom 2 DIS570 - PHILIPS and take your electronic device back in hand. On this page are published all the documents necessary for the use of your device. Zoom Zoom 2 DIS570 by PHILIPS.
USER MANUAL Zoom Zoom 2 DIS570 PHILIPS
WhiteSpeed Light-Accelerated Tooth Whitening Procedure Kit

WhiteSpeed Light-Accelerated Tooth Whitening Procedure Kit Instructions for use
English 6
Deutsch 19
Français 37
Hrvatski 59
Italiano 75
Română 89
Suomi 104
Български 120
Manufacturing information
Manufacturer:
Discus Dental, LLC
1700A South Baker Avenue
Ontario, CA 91761 USA
philipsoralhealthcare.com

EMERGO EUROPE
Prinsessegracht 20
2514 AP The Hague
The Netherlands

VITA is a registered trademark of the VITA
Bad Saeckingen, Germany.
Symbols

Consult instructions for use

Reference to enclosed or attached information

Caution

Keep away from sunlight, keep away from heat

Temperature limits

Conformity European
 | Manufacturer |
 | Use by date |
 | Batch code |
 | Catalogue number |
 | Authorized in the European Community |
 | Do not re-use. This product is intended for use on a single patient during a single procedure. |
| REFRIGERATE | Keep refrigerated |
Important information
Read and understand the information in these instructions for use and in the instructions for use provided with the Philips Zoom! Whitespeed Light-Accelerated Tooth Whitening Gel (whitening gel) prior to initiating whitening treatment.
The whitening gel must be removed from refrigeration and warmed to room temperature so it will thicken before it is applied to the patient's teeth. Either:
-Remove the syringe from refrigeration at least 6 hours before use (preferably the night before) or
-If removed just prior to use, place the syringe in a cup of hot water (49 °C) for 10 minutes. Remove the syringe from the water and wait 5 minutes before extruding gel.
Conditions of use
This product is to be distributed to and used by dental professionals exclusively. This product is intended for use on healthy patients aged 18 years and older who have no underlying oral health issues, are not perio-involved and do not exhibit failing restorations.
Contents
Philips Zoom! WhiteSpeed Light-Accelerated Whitening Procedure Kits (Light-Accelerated procedure kits) include:
-Sheets .040 EVA tray material (2), (not included in all Light-Accelerated procedure kits)
-Light guide (2)
-IsoPrep retractor (2)
Procedure tray (2) includes:
-Face bib (2)
-Gauze squares (6)
-Liquidam Soft Tissue Isolation Syringe, 2.9 g (1)
-Liquidam needle point tip (1)
-Liquidam black tip (1)
-Cotton rolls (2)
-Surgical suction tip (1)
-Application brush (1)
Post care and maintenance kits (not included in all Light-Accelerated procedure kits) include:
-NiteWhite/DayWhite Whitening Gel instructions for use (1)
-Relief ACP oral care gel instructions for use (1)
-Relief ACP oral care gel syringe, 2.4 ml (1)
-Whitening gel (1)
-Tray case (1)
Packaged separately:
-Philips Zoom! WhiteSpeed Light-Accelerated Tooth Whitening Gel
-Instructions for use (1)
-25 % Hydrogen Peroxide Whitening Gel syringe, 4.6 g (1)
-Mixing tip (1)
Product description
Philips Zoom! WhiteSpeed Light-Accelerated Tooth Whitening Procedure Kits are professional level (in-office) Light-Accelertated procedure kits and are for single patient use only.
Indications for use - candidate qualification
A screening exam is recommended to ensure the patient has no underlying oral health issues. You may want to treat existing issues before recommending this whitening treatment and disqualify any patient who is perio-involved, exhibits failing restorations or is otherwise in an unhealthy oral state.
Patient's expectations
Set realistic expectations about potential results based on the oral exam and explain the following:
-Results vary by patient.
-Most patients will experience a change of up to 6-8 shades on value-ordered VITA® Classical Shade Guide.
-Anatomy, calcifications, age, tooth condition, hygiene and starting shade affect the results.
-Teeth with yellow and brown stains will achieve the most noticeable results.
-Teeth with gray shading from tetracycline or other medications may experience less noticeable results but should improve.
-Teeth with multiple colorations, bands, splotches or spots due to tetracycline use or fluorosis do not whiten as well, may whiten unevenly, and may require additional whitening treatments.
-Previous orthodontic treatments may cause teeth to whiten unevenly either due to residual resin remaining on the teeth or overpolishing upon removal.
-Crowns and other tooth-colored restorations will not whiten.
-Tooth-colored restorations may require replacement following whitening to maintain a uniform color.
Pre-treatment for reducing tooth sensitivity
It is recommended to prescribe the following prior to the treatment:
-Treat with a desensitizing toothpaste with 5 % KNO 3 twice a day for 14 days before the procedure
-NSAID adhering to the respective drug's instructions for use 1 hour before the procedure
Warnings
-Do not place a composite/bonded restoration within seven days after whitening treatment to ensure color stability of the composite/bonded restoration and bond strength to enamel and dentin.
-Do not use tooth whitening gel on anesthetized teeth.
-Tooth whitening is not recommended when there are previous injuries in the gingival tissues.
-Avoid contact of whitening gel with eyes and soft tissue. If contact with eyes occurs, rinse eyes immediately with plenty of water and seek medical advice.
Intended use
Philips Zoom! Light-Accelerated WhiteSpeed Kits are for use with Zoom! WhiteSpeed Light-Accelerated Tooth Whitening Gel. The Light-Accelerated procedure kit contents are intended to be used as follows.
Kit contents Intended use
| Lip retractor Moves the lips and cheeks away from the teeth, protecting the lips, cheeks and tongue from coming into contact with the whitening gel. | |
| Face bib Help protect the patient's face from the light source. | |
| Liquidam (gingival barrier material) | Used as an isolation material to prevent the whitening gel from contacting gingival tissues. |
| Cotton rolls Separate the upper and lower vestibule during the procedure and help isolate the patient's lips from the teeth. | |
| Gauze squares Help isolate the patient's lip from the teeth and provide additional separation between the upper and lower vestibule. | |
| Saliva suction tip Remove excess liquid/saliva that may accumulate during the procedure. | |
| Whitening gel applicator brush | Apply whitening gel to the patient's teeth. |
| Light guide An accessory to the LED Accelerator used to help align the head to a specified distance between the LED Accelerator and the patient. | |
| Relief ACP oral care gel Relieve discomfort from dentin sensitivity. | |
Contraindications
Philips Zoom! WhiteSpeed Light-Accelerated Tooth Whitening Gel is not for use on or by:
-Pregnant or lactating women.
-Patients currently being treated for a serious illness or disorder, e.g. immune compromised, AIDS, etc.
-Patients under 18 years of age.
Possible side effects
-Teeth sensitivity or hypersensitivity.
-Gingival irritation or burn if Liquidam soft tissue isolation is not placed in accordance with the instructions in the Light-Accelerated procedure kit.
Frequency of use
Philips Zoom! WhiteSpeed Light-Accelerated Tooth Whitening Gel is intended for a single patient treatment. A single treatment typically consists of three to four 15-minute applications. A patient may be treated more than once at the discretion of the dental professional, allowing seven days between treatments.
Safety
-Dental professional and patient need suitable protective covering and Zoom! protective eyewear.
-Avoid whitening gel contact with soft tissue and eyes.
First aid instructions
-Contact a Poison Information Center or medical doctor immediately if a large quantity (over 25 % of the syringe) is swallowed. Provide the ingredient label if possible. Do not induce vomiting. Immediately give a glass of water.
-If whitening gel gets into the eyes, hold the eyelids apart and flush the eyes continuously with running water for at least 15 minutes.
-If improper isolation leaves a patient's soft tissue exposed to light, administer a nonsteroidal anti-inflammatory drug (NSAIDs) adhering to the respective drug's instructions for use.
Precautions
The whitening gel must be removed from refrigeration and warmed to room temperature so it will thicken before it is applied to the patient's teeth. Either:
-Remove the syringe from refrigeration at least 6 hours before use (preferably the night before) or
-If removed just prior to use, place the syringe in a cup of hot water (49 °C) for 10 minutes. Remove the syringe from the water and wait 5 minutes before extruding gel.
Note: Improper soft tissue isolation may result in irritation or burning of gingiva or swollen lips due to WhiteSpeed Accelerator light coming into contact with tissue. Improper soft tissue isolation may also results in chemical burn due to whitening gel coming into contact with tissue.
Note: Wait one week after whitening to place restorations. Patients with porcelain fused to metal crowns, amalgams, lingual bars or implants will feel excessive heat.
In-office whitening treatment
Before the in-office whitening treatment
Complete diagnosis of patient, treat for sensitivity (see 'Pre-treatment for reducing tooth sensitivity') and fabricate trays prior to whitening treatment (see EVA tray material instructions for use if provided).
In-office whitening treatment
1 Pumice teeth just prior to whitening.
2 Remove the light guide from the packaging and place it on the LED Accelerator.
3 Switch on the LED Accelerator using the power button located on the side of the power pack. When the light guide is attached, the display reads 'Guide Status–Guide Attached' followed by 'X of X Sessions'.
4 Place the surgical suction tip on the high vacuum suction.
5 Place the Zoom! protective eyewear on the patient.
Note: The retractor provided is necessary to ensure proper positioning of the LED Accelerator head and additional protection from light.

6 Insert the retractor at an angle, retracting one side at a time using a dental mirror to assist in placement.

Note: The retractor has been specifically engineered to work with the Philips Zoom! WhiteSpeed Light-Accelerated Whitening System. Do not substitute.

7 Take a retracted 'before' photo using a matched shade tab.
8 Fully recline the patient.

9 Place cotton rolls in the center of the upper and lower vestibules. If the cotton rolls are too large, unfold the gauze and twist it like a cotton roll.
Note: Do not substitute gauze. The gauze provided has been tested and proven to provide superior protection.

10 Fully open the gauze squares and fold them into triangles. Place the apex of the triangle into the posterior cheek, tuck the balance of material into the cheek, tucking the ends between the cotton rolls and the retractor.
11 Carefully place one face bib around the retractor, one side at a time. Add an additional bib for heavy salivators.
12 Remove the Liquidam syringe from the packaging, twist to remove the cap and attach the metal tip.
Note: Exposed dentin and tissue should be covered by barrier material. Use the 'no pink' rule.

13 Dry soft tissue (failure to do so may create imperfect seal and allow whitening gel to migrate onto soft tissue) and begin by scalloping barrier material to CEJ area (gingival margins) on the upper teeth slightly overlapping enamel and interproximal spaces to form enamel seal.

14 Cure the application of Liquidam using a curing light.
Note: Liquidam can become warm upon curing. Move the light back and forth across the arch using a sweeping motion for about 10 seconds.
15 Change to the plastic tip. Fill in from the cotton roll to just formed line of Liquidam and cure. Be sure to cover all interproximal areas leaving no soft tissue exposed.
On the lower arch, apply Liquidam using the same method.
Use the tip of the syringe to press lightly on the application to ensure that it is completely cured. The material should be solid and have no give.
If necessary, cure the arch again for an additional 5 seconds.
The application should extend distal at least one tooth beyond the area receiving the whitening gel and should be 2 mm thick.
16 Remove the cap from the room temperature whitening gel syringe. Attach the mixing tip by aligning the marking and secure it by turning it one quarter turn clockwise. Using the blue brush provided, apply whitening gel to the patient's teeth (1 - 2 mm thick).
Use caution not to disturb the barrier material. Gingival irritation can occur with prolonged exposure to the whitening gel.
Note: A small air gap or bubbles in the syringe due to degassing of the whitening gel is normal. If the air gap is near the front of the syringe, purge until both sides of the barrel extrude gel.
Note: A slight yellow or pink coloring of the whitening gel is a normal occurrence from the manufacturing process. There is no impact on the peroxide content, other chemical properties, or performance of the whitening gel. It will not discolor the patient's teeth.
17 Once the whitening gel application is complete, raise the back of the chair so the patient is in a slightly reclined position (-45 degree angle) and able to swallow comfortably while maintaining light pressure on the bite block.
Note: The light guide is designed to ensure proper distance and alignment to maintain correct light exposure on the smile zone.

18 Slide the LED Accelerator into place next to the patient. The arm of the LED accelerator should be movable, but stable. Position the LED Accelerator head by aligning the slots on the light guide with the retractor.
19 Follow the prompts on the display panel to switch on the light and to activate the timer.
Once the light is on, a countdown is displayed. Light emits from where the arrow points. Light emits from the LED accelerator head to shine on the patient's teeth.
It is normal for the light to flicker for the first few seconds.
The LED Accelerator beeps once when three minutes of the session are remaining and beeps three times in the final three seconds of the 15-minute session.
When the session is finished, the light goes out and you hear a long beep.
Note: If a session must be interrupted, press the 'Pause' button. The remaining session time flashes on the display. To reactivate the session, press either the 'Pause' or 'Start' button.
20 Inform the patient that the progress of each session are tracked by four white lights on top of the LED Accelerator head. Each light indicates one quarter of a session.
Note: During each 15-minute session, make sure the patient has a means of communication (e.g. a bell) or do not leave the patient unattended.
21 After each session, gently pull the LED Accelerator away from the patient, taking care not to dislodge isolation materials.
Note: At the end of each 15-minute session, the display indicates the number of remaining sessions left on the light guide. Press ,Start' to activate the light for the next session.
22 Carefully remove the whitening gel with the surgical suction tip and/or wipe the surface of enamel clean with damp gauze. Do not irrigate as the force of the water may pull the dam loose and saturate isolation materials.
23 Check the isolation materials to make sure 'no pink' tissue is visible. Replace or add isolation if needed.
24 Follow the same instructions as above for the remaining sessions.
25 When all sessions on a light guide are finished, the display reads 'Sessions Complete' for three seconds, followed by 'Guide Status – Replace Guide. Detach the light guide from the IsoPrep retractor and pull the LED Accelerator away from the patient.
Note: For sensitive patients, lower the intensity of the LED Accelerator. However, please note this could result in a fourth 15-minute session.
Tip: If the patient notes tooth sensitivity, place Relief ACP (found in the procedure kit or in the patient's Post Care & Maintenance kit) on the lingual surface(s) for the remaining sessions. After the last session is complete, detach the light guide from the retractor and pull the LED Accelerator away from the patient. Suction or wipe the whitening gel from the teeth. Moisten gauze and cotton rolls and remove the isolation materials. If barrier material remains interproximally, remove it with floss.

26 Reinsert the retractor and take a retracted 'after' photo with the lighter shade tab in place. Measure the shade change by counting the shade shift according to the value-ordered shade guide.
Maximizing results
Advise the patient not to consume coffee, tea, red wine and tobacco for two hours after the whitening treatment, until the salivary pellicle reforms on the teeth.
All tooth whitening requires maintenance. The patient may choose to have the whitening treatment again or to use a maintenance product 1-3 nights every 4-6 months, depending on their habits.
At home post care and maintenance
Sensitivity relief
Philips Relief ACP oral gel has been shown to decrease tooth sensitivity. Place Relief ACP oral care gel into the take-home trays and set on patient. Normal wear time is 10–30 minutes once per day. If the tray is not available, brush the product on the teeth. Do not spit for approximately 3 minutes. For the best results, do not drink or eat for 30 minutes after application. See the Relief ACP oral gel instructions for use for complete instructions.
At home whitening maintenance
24 hours after the whitening treatment, the patient may use NiteWhite or DayWhite Whitening Gel to maintain or further enhance their results. See the Zoom! NiteWhite/DayWhite patient instructions for use for complete instructions.
Storage instructions
Whitening gel should be stored at 2\ °C - 10\ °C . Storage temperature above 10\ °C will result in reduced shelf life.
1700A South Baker Avenue
Ontario, CA 91761 USA
philipsoralhealthcare.com

EMERGO EUROPE
Prinsessegracht 20
2514 AP Den Haag
Niederlande


philipsoralhealthcare.com

EMERGO EUROPE
Prinsessegracht 20
2514 AP Den Haag
Pays-Bas


1700A South Baker Avenue
Ontario, CA 91761 SAD
philipsoralhealthcare.com

EMERGO EUROPE
Prinsessegracht 20
2514 AP Hag
Nizozemska

-Philips Zoom! WhiteSpeed Light-Accelerated Tooth Whitening Gel
-Upute za uporabu (1)
-Štrcaljka za 25 % Hydrogen Peroxide gel za izbjeljivanje zubi, 4,6 g (1)


Napomena: Retraktor je posebno konstruiran za rad sa sustavom Philips Zoom! WhiteSpeed Light-Accelerated Whitening System. Nemojte ga zamjenjivati.
7 Snimite fotografiju „prije” s uvučenim usnicama i karticom s podudarnom nijansom zuba.
8 Potpuno nagnite pacijenta.

9 Role vate postavite u središte gornje i donje vestibule. Ako su role vate prevelike, odmotajte gazu i zamotajte je kao rolu vate.
Napomena: Nemojte zamjenjivati gazu. Gaza je testirana i dokazano osigurava vrhunsku zaštitu.

10 Potpuno otvorite kvadratne gaze i preklopite ih u trokute. Vrh trokuta postavite u posteriorni obraz, a ostatak materijala uvucite u obraz umećući krajeve između rola vate i retraktora.
Napomena: Izloženi dentin i tikvo moraju se prekriti barijernim materijalom. Vodite se pravilom „bez ružičastog”.
13 Osušite meko tkivo (ako to ne učinite, mogli biste stvoriti nepotpuno brtvljenje i omogućiti gelu za izbjeljivanje da prijeđe na meko tkivo) i započnite postavljanjem barijernog materijala na područje CEJ (gingivalne margine) na gornjim zubima tako da se malo preklapa s emajlom i interproksimalnim prostorom kako biste stvorili brtvu od emajla.

14 Stvrdnite Liquidam uporabom svjetla za stvrdnjavanje.
26 Ponovno umetnite retraktor i snimite fotografiju „poslije” s uvučenim usnicama i postavljenom karticom sa svjetlijim nijansama. Izmjerite promjenu nijanse brojeći pomak nijanse prema ključu boja.
1700A South Baker Avenue
Ontario, CA 91761 USA
philipsoralhealthcare.com

EMERGO EUROPE
Prinsessegracht 20
2514 AP L'Aia
Paesi Bassi


1700A South Baker Avenue
Ontario, CA 91761 USA
philipsoralhealthcare.com

EMERGO EUROPE
Prinsessegracht 20
2514 AP The Hague
Olanda


1700A South Baker Avenue
philipsoralhealthcare.com

EMERGO EUROPE
Prinsessegracht 20
2514 AP Haag
Alankomaat


1700A South Baker Avenue
Ontario, CA 91761 CALL
philipsoralhealthcare.com

EMERGO EUROPE
Prinsessegracht 20
2514 AP The Hague
Нидерландия


4235.021.4256.3 (07/2019)


- MANUFACTURING INFORMATION
- SYMBOLS
- IMPORTANT INFORMATION
- CONDITIONS OF USE
- CONTENTS
- PHILIPS ZOOM! WHITESPEED LIGHT-ACCELERATED WHITENING PROCEDURE KITS (LIGHT-ACCELERATED PROCEDURE KITS) INCLUDE
- PROCEDURE TRAY (2) INCLUDES
- POST CARE AND MAINTENANCE KITS (NOT INCLUDED IN ALL LIGHT-ACCELERATED PROCEDURE KITS) INCLUDE
- PACKAGED SEPARATELY
- PRODUCT DESCRIPTION
- INDICATIONS FOR USE - CANDIDATE QUALIFICATION
- PATIENT'S EXPECTATIONS
- PRE-TREATMENT FOR REDUCING TOOTH SENSITIVITY
- WARNINGS
- INTENDED USE
- CONTRAINDICATIONS
- POSSIBLE SIDE EFFECTS
- FREQUENCY OF USE
- SAFETY
- FIRST AID INSTRUCTIONS
- PRECAUTIONS
- IN-OFFICE WHITENING TREATMENT
- BEFORE THE IN-OFFICE WHITENING TREATMENT
- MAXIMIZING RESULTS
- AT HOME POST CARE AND MAINTENANCE
- SENSITIVITY RELIEF
- AT HOME WHITENING MAINTENANCE
- STORAGE INSTRUCTIONS
Brand : PHILIPS
Model : Zoom Zoom 2 DIS570
Category : Light therapy