USER MANUAL Wake-up Light HF3520 PHILIPS
IMPORTANT SAFETY INSTRUCTIONS 6
Introduction 8
Intended use 8
The effects of the Wake-Up Light 8
Icon explanation 8
Overview 9
First use: placing the Wake-Up Light 10
First use: setting the clock time 10
Setting your wake-up profile 11
Setting your wake-up sound 12
Adjusting the clock time 13
Setting the display brightness 14
Switching the lamp on/off 15
Switching the FM radio on/off 16
Switching the alarm on/off 17
Snooze 18
Fall-asleep 19
Adjusting the sunrise simulation time ____ 20
Demonstration mode 21
Audio feedback 21
Button backlight 21
Cleaning and storage 22
Disposal 22
Assistance 22
90-Day Money-Back Guarantee 22
Full Two-Year Warranty 23
Safety and compliance 24
Electromagnetic fields (EMF) 24
FCC and ICES information 24
Troubleshooting 25
Specifications 27
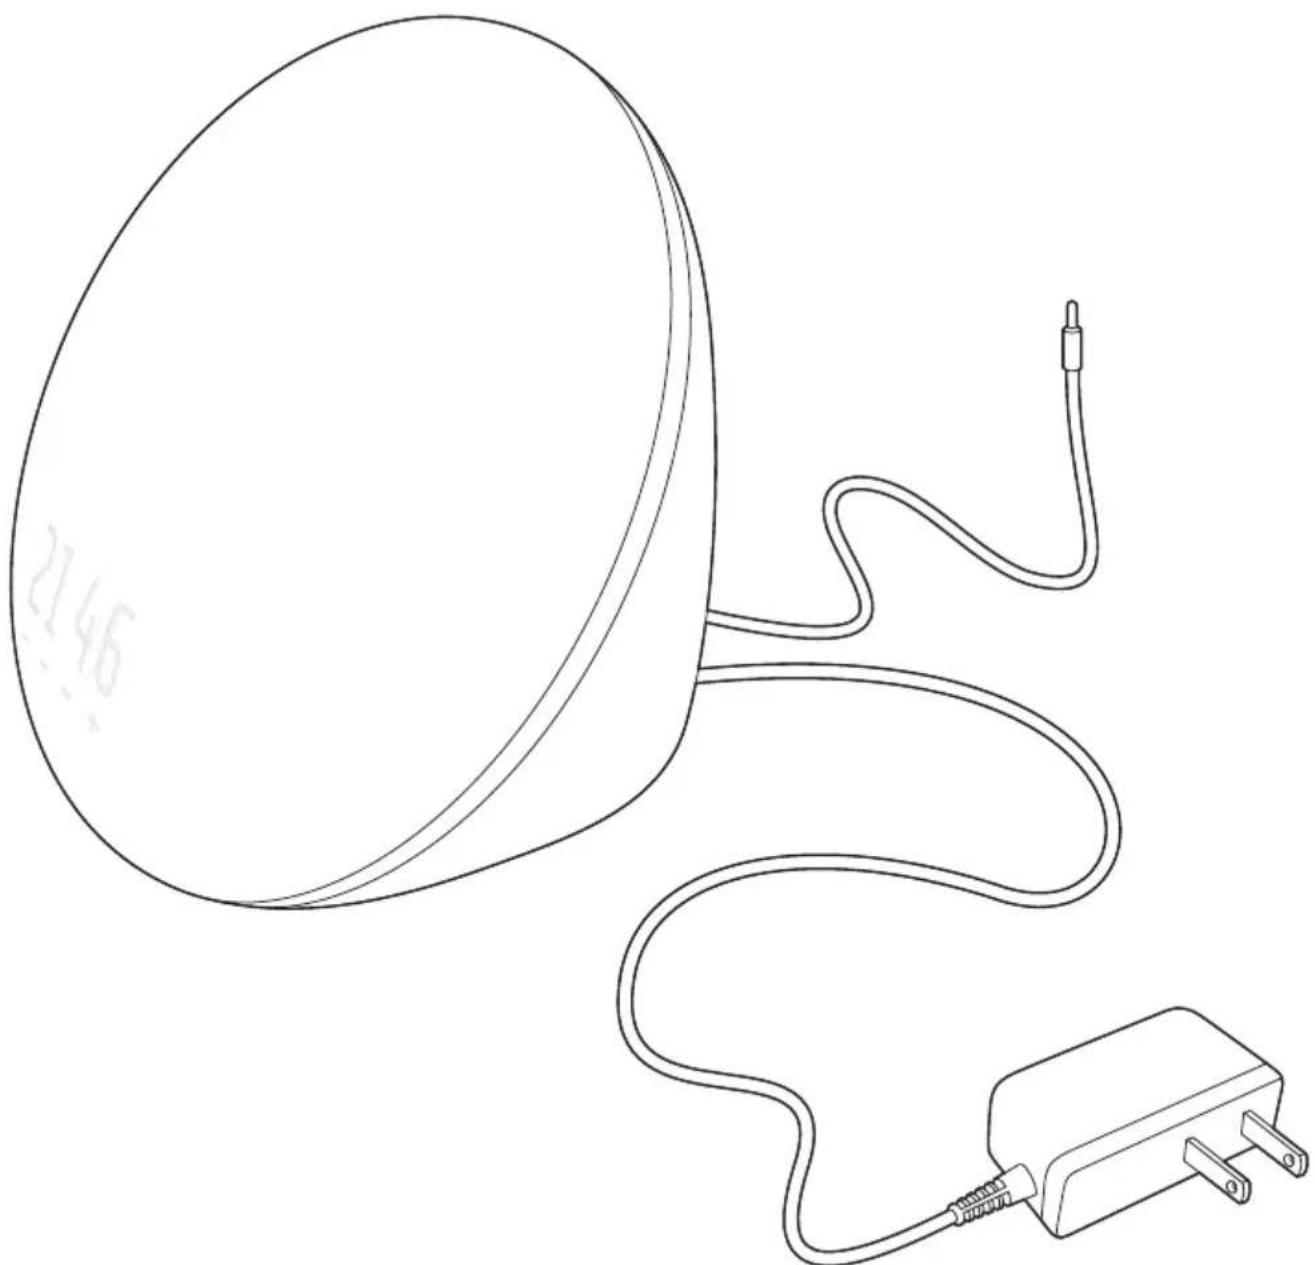
natural_image
Line drawing of a remote control device with a bulb and cable, no text or symbols present

IMPORTANT SAFETY INSTRUCTIONS
Read and follow all instructions in this user manual and heed all warnings.
WARNING
To reduce the risk of burns, fire, electric shock, or injury to persons:
-This appliance is for indoor use only.
- If the adapter, cord or appliance has been damaged in any way, liquid has spilled or objects have fallen into and/or onto the appliance, the appliance has been exposed to rain or moisture, does not operate normally or has been dropped or damaged, it should not be operated and needs servicing by qualified service personnel.
- Water and electricity are a dangerous combination. Do not use this appliance in wet surroundings (e.g. in the bathroom or near a shower or swimming pool).
-Make sure the adapter does not get wet.
- Do not let water run into the appliance or spill water onto the appliance.
-Do not immerse the appliance in water or rinse under the tap.
- The adapter contains a transformer, which converts an unsafe 100-240V AC to a safe 24V DC low voltage. Do not cut off the adapter to replace it with another plug, as this causes a hazardous situation.
- Only use the original adapter. Do not use the adapter or any of the other accessories if they are damaged. Call 1-866-832-4361 for assistance.
- Do not use the adapter in or near a power outlet that contains an electric air freshener to prevent damage to the adapter.
- Protect the power cord from being walked on or pinched, particularly at plugs, wall sockets and points where it exits from the lamp.
- The appliance has no on/off switch. To disconnect the appliance from the power source, remove the plug from the wall outlet.
- This appliance is not intended for use by persons (including children) with reduced physical, sensory or mental capabilities, or lack of experience and knowledge, unless they have been given supervision or instruction concerning use of the appliance by a person responsible for their safety.
- Do not install near any heat sources such as radiators, stoves, or other apparatus that produce heat.
- Do not impair the cooling of the appliance by covering the appliance with items such as blankets, curtains, clothes, papers, etc.
CAUTION
- Do not drop the appliance on the floor, hit it hard or expose it to other heavy shocks.
-Place the appliance on a stable, level and non-slippery surface.
- This appliance is only intended for household use, including similar use in hotels. Do not use attachments not recommended by Philips North America LLC (USA) or Philips Electronics Ltd (Canada).
- Check if the voltage indicated on the appliance corresponds to the local voltage before you connect the appliance.
- Unplug this appliance during lightning storms or when unused for long periods of time.
GENERAL
- Do not use this appliance as a means to reduce your hours of sleep. The purpose of this appliance is to help you wake up more easily. It does not diminish your need for sleep.
- Consult your doctor before you start using the appliance if you have suffered from or are suffering from depression.
- If you often wake up too early or with a headache reduce the set light intensity level and/or the set sunrise simulation time.
- If you often wake up by the alarm sound, increase the set light intensity level or the set sunrise simulation time.
- If you share a bedroom with someone else, this person may unintentionally wake up from the light of the appliance, even though this person is further removed from the appliance.
This is the result of differences in light sensitivity between people.
- The power consumption of the appliance is lowest if the lamp, radio and display are turned off.
SAVE THESE INSTRUCTIONS
Introduction
Congratulations on your purchase and welcome to Philips! To fully benefit from the support that Philips offers, register your product at www.philips.com/welcome. The Philips Wake-Up Light helps you wake up more pleasantly. In the set sunrise simulation time, the light intensity of the lamp gradually increases to the set level and the light color changes from deep morning red to bright daylight. The light gently prepares your body for waking up at the set time. To make waking up an even more pleasant experience, you can use natural wake-up sounds or the FM radio to wake up to.
Intended use
This Wake-Up Light allows you to choose the light intensity level you want to wake up to. This is not a general illumination product.
The effects of the Wake-Up Light
The Philips Wake-Up Light gently prepares your body for waking up during the last 30 minutes of sleep. In the early morning hours our eyes are more sensitive to light than when we are awake. During that period the relatively low light levels of a simulated natural sunrise prepare our body for waking up and getting alert. People who use the Wake-Up Light wake up more easily, have a better overall mood in the morning and feel more energetic.
Because the sensitivity to light differs per person, you can set the light intensity of your Wake-Up Light to a level that matches your light sensitivity for an optimal start of the day.
For more information about the Wake-Up Light, see www.philips.com.
Icon explanation
| 1 2 | Wake-up profile | FM | FM radio |
 | Wake-up sound Fall-asleep |  | |
 | Clock time Natural sounds |  | |
 | Display brightness Radio |  | |
 | Lamp Sunrise simulation |  | |
Overview

Press the MENU button to enter the menu
Press the + or - button to select a menu setting
Press SELECT to confirm

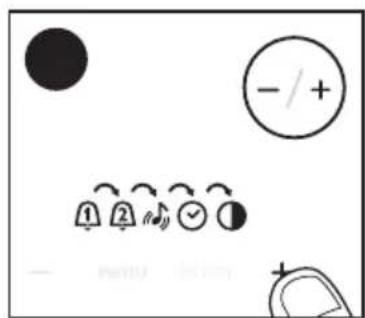
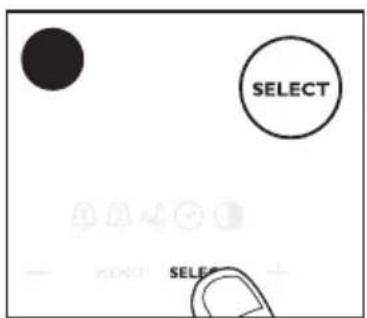
Note:
To exit the menu, either press the MENU button or wait for 30 seconds.
First use: placing the Wake-Up Light
Place the Wake-Up Light 16 in. – 20 in. / 40 cm – 50 cm from your head, for example on a bedside table.
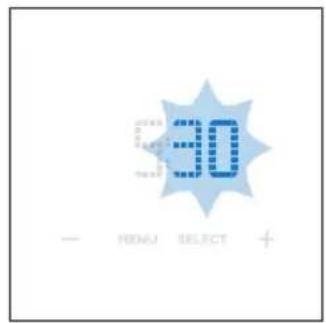
First use: setting the clock time
You have to set the clock time when you plug in the appliance for the first time and when the time back up has been exceeded (up to 8 hours).



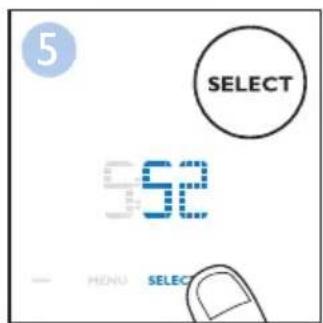

Setting your wake-up profile
When you set your wake-up profile, you set the wake-up time (steps 1 – 6), the light intensity (steps 7 and 8) and the sound level (steps 9 and 10). For each profile, you can set the time, sunrise simulation (see Adjusting the sunrise simulation time) and the type of sound.
You can set two different wake-up profiles (alarms). For example if you want to wake up at a different time in the weekend than on weekdays.
To set the wake-up profile for alarm 1 or 2, select the corresponding alarm at step 2.
To activate or deactivate an alarm, press alarm button 1 or 2 on the appliance (see 'Overview').

12 English
Setting your wake-up sound
You can use natural sounds or the FM radio as a wake-up sound.
The Wake-Up Light has several built-in natural sounds.
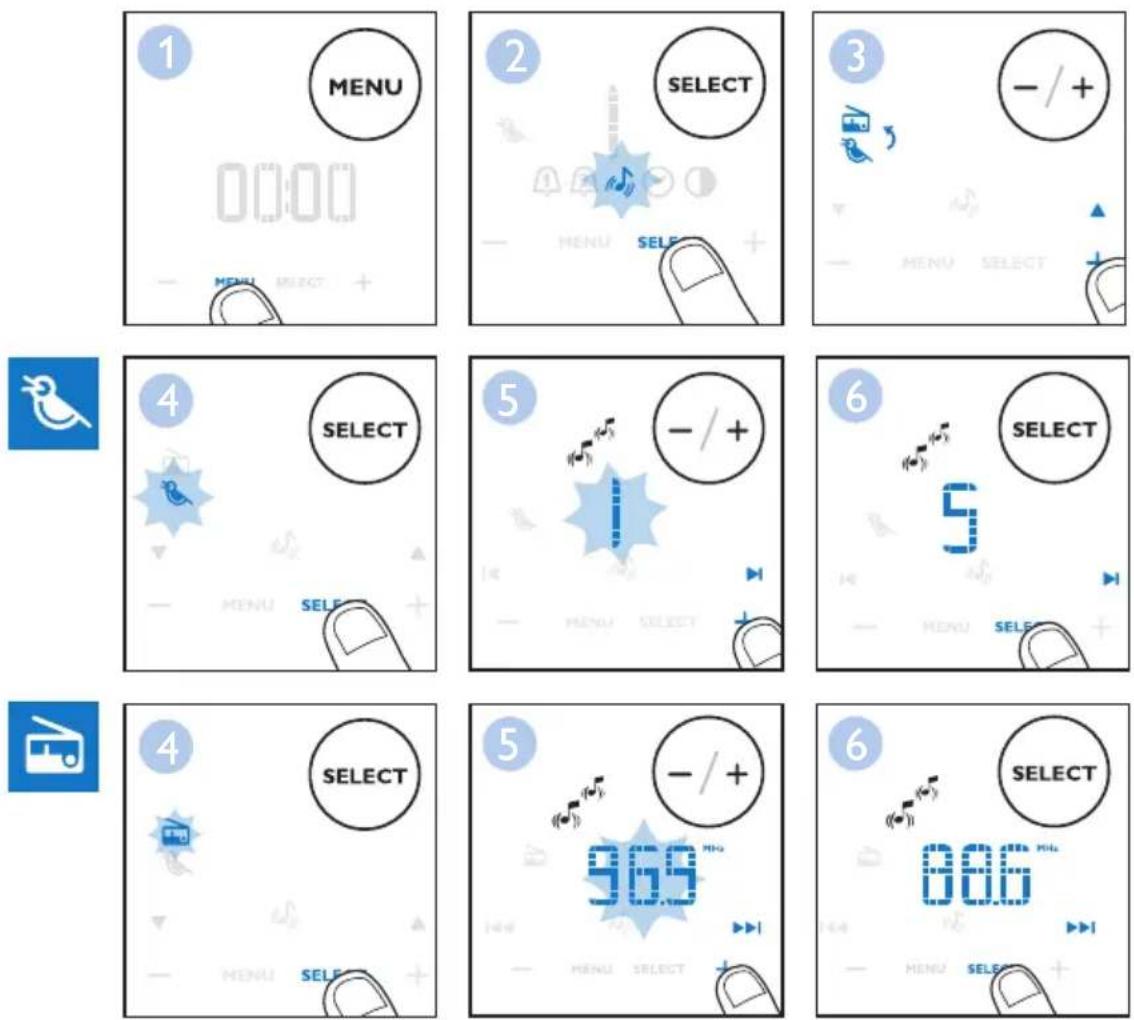
Adjusting the clock time
To set the clock time, choose between a 12-hour and a 24-hour clock and then adjust the time.

When there has been a power failure, the set clock time will be saved for up to 8 hours. If the power failure lasts longer, the set clock time will be lost. You have to set the correct clock time again.
14 English
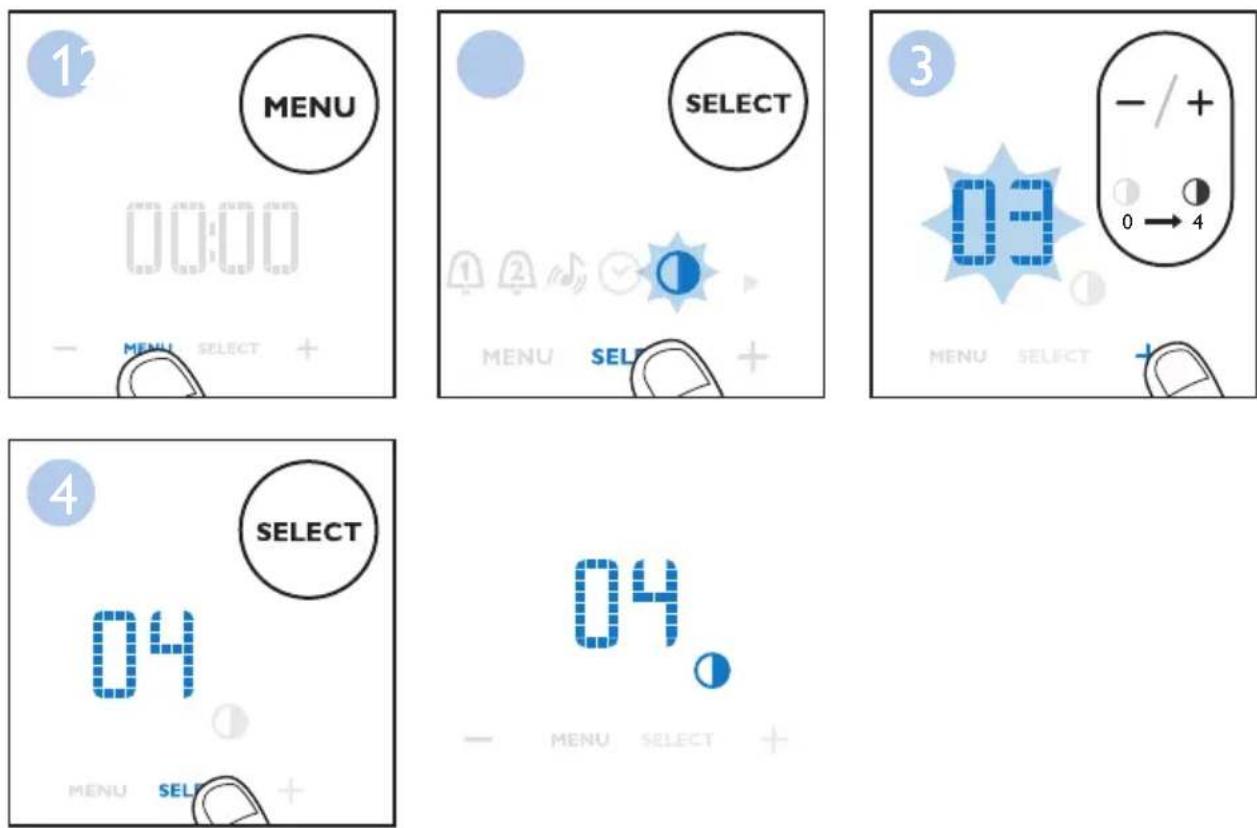
Setting the display brightness
You can adjust the display brightness from level 0 (off) to level 4. We advise you to set the display brightness in a dark bedroom. Choose a brightness level that is optimal for you to see the display at night. The display brightness will increase to a higher level when the Wake-Up Light measures a lot of light in the bedroom. This happens automatically, so you will always be able to see the display, even when the surroundings are lighter.
Note:
If you choose level 0 (display off), you can see the display again by touching it.
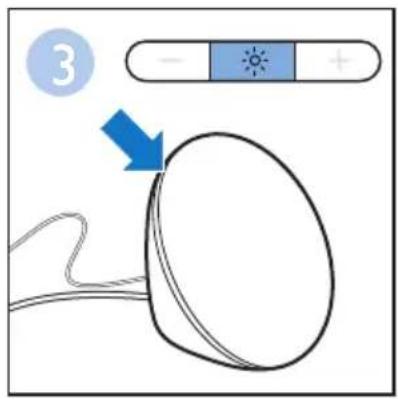
Switching the lamp on/off
Press the lamp on/off button to switch on the lamp and use it as a bedside lamp. You can adjust the light intensity by pressing the + and - buttons. To switch off the lamp, press the lamp on/off button again.


Switching the FM radio on/off
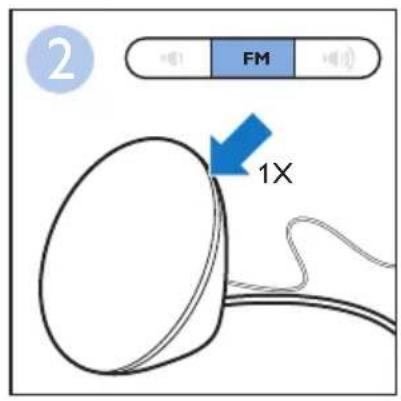
Press the FM on/off button to switch on the FM radio.

natural_image
Illustration of a medical device with a bulb, cable, and plug (no text or symbols)


Note:
To scan radio frequencies automatically, press and hold the menu - or + button for approx. 2 seconds.
Switching the alarm on/off
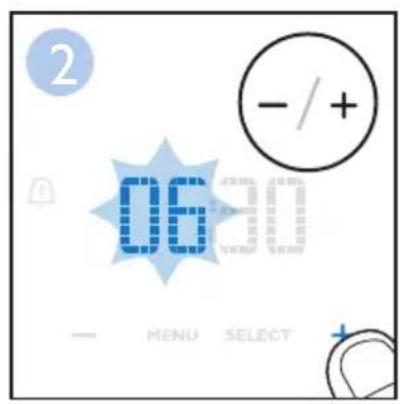
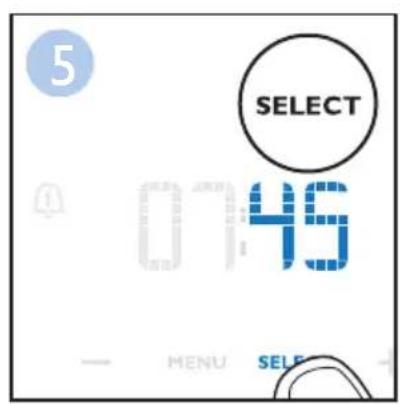
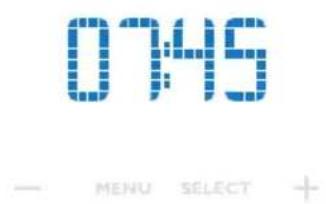
Press alarm 1 or alarm 2 if you want to switch the alarm on or off. The corresponding icon appears on the display when you switch on the alarm. It disappears when you switch off the alarm.
When you switch on the alarm, the hour indication starts to flash. If necessary, you can now adjust the alarm time.



Note:
If you want to adjust the light level or volume to wake up to, you have to use the menu.
See chapter 'Setting your wake-up profile'.
18 English
Snooze
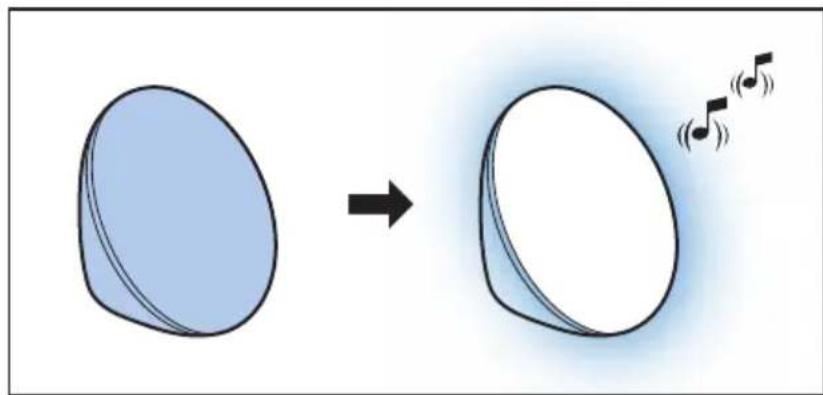
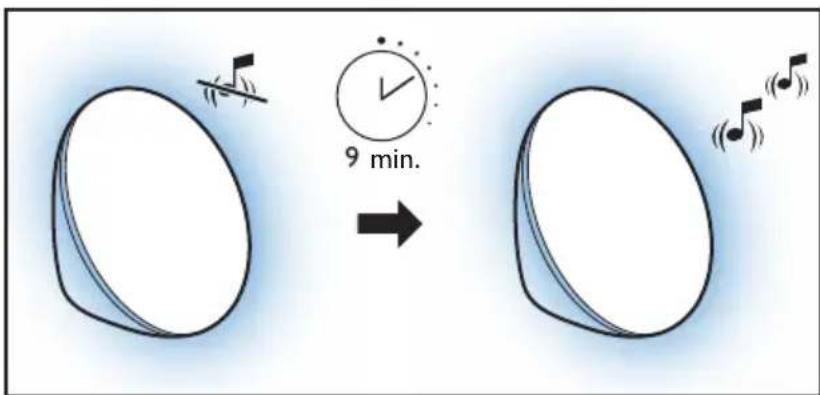
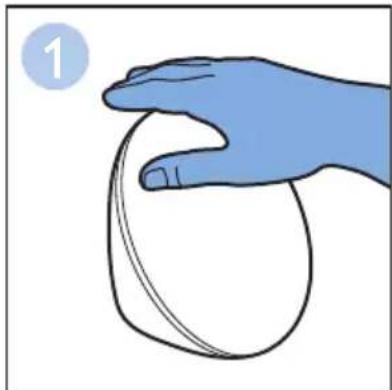
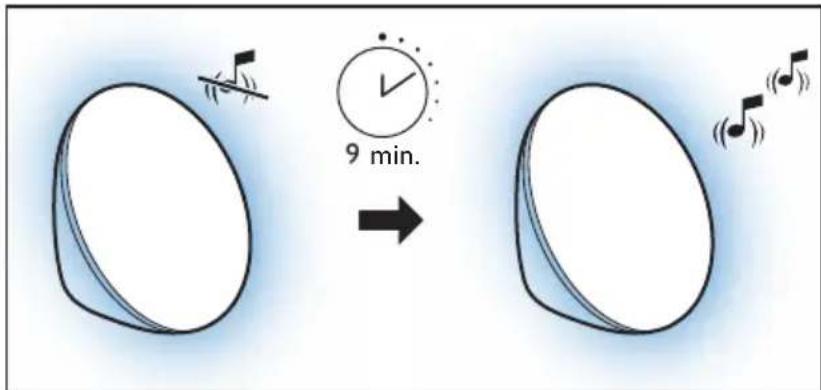
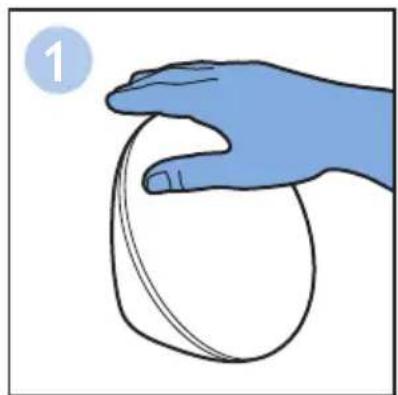
When the wake-up curve has ended (when the set maximum light intensity has been reached) and the alarm sound is playing, you can tap the top of the appliance to snooze.
The lamp stays on, but the sound is muted. After 9 minutes, the alarm sound starts playing again.
natural_image
Diagram showing a blue oval shape transforming into a white oval with musical notes (no text or symbols)

natural_image
Illustration of a hand holding a curved object, labeled with number 1 (no text or symbols on the object itself)
Note:
The alarm 1 or alarm 2 icon flashes on the display when the alarm is snoozed. If you press either the FM button, the fall-asleep button or the MENU button while the alarm sound is playing, the alarm stops and is not snoozed. If you press the alarm button while the alarm sound is playing, you disable the alarm function. The alarm icon disappears from the display. To reactivate alarm function, press the alarm button again.
Fall-asleep
To use the fall-asleep function you need to select a timer.
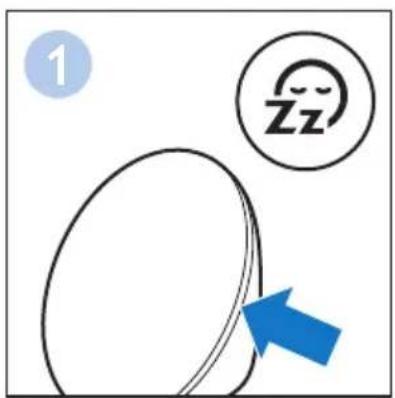
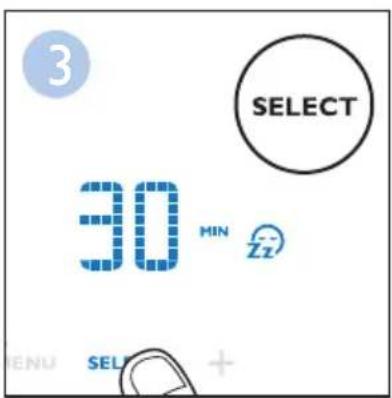
1 Press the fall-asleep button to switch on the fall-asleep function. The fall-asleep time flashes on the display for a few seconds.
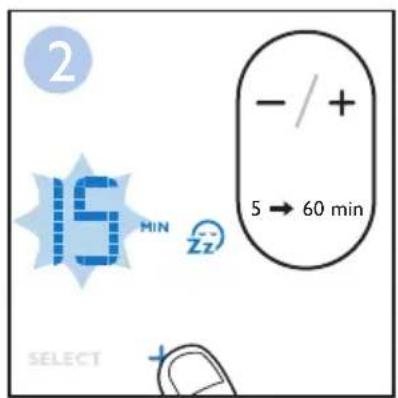
2 Press the + or - button to adjust the time (5 to 60 minutes). Press the SELECT button to confirm the timer setting.
Note: You can listen to the FM radio during the fall-asleep function. Turn on the radio and select your favorite station. Then press the fall-asleep button to activate the fall-asleep function.
The sound of the radio will gradually fade during the set fall-asleep time. If you turn on the radio after activating the fall-asleep function, the sound does not fade when the light dims. The sound will stop when the light goes out.
To switch off the fall-asleep function, press the fall-asleep button again. The fall-asleep icon disappears from the display.

Note:
If you press the fall-asleep button without setting the time, the lamp goes on and then dims gradually over 30 minutes.
Adjusting the sunrise simulation time
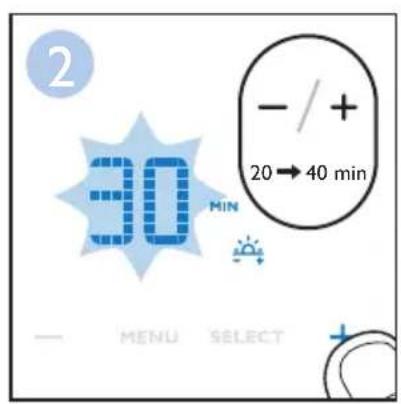
The sunrise simulation time is the time in which the light intensity of the lamp gradually increases to the set level before the alarm sound is played. The default sunrise simulation time is 30 minutes, but you can reduce the sunrise simulation time to 20 or 25 minutes or increase it to 35 or 40 minutes.
1 Simultaneously press and hold alarm 1 and alarm 2.
2 The default sunrise simulation time of 30 minutes appears on the display.
3 Press the + and - button to adjust the minutes.



Demonstration mode
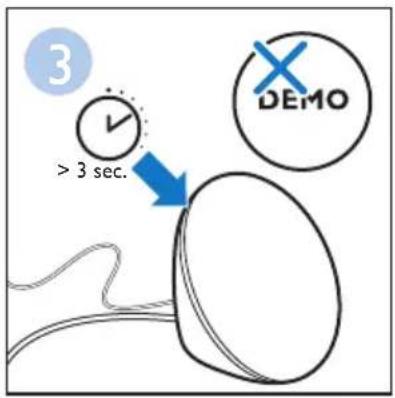
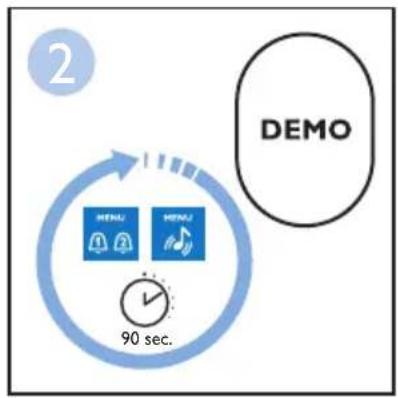
If you want a quick demonstration (90 seconds) of the gradually increasing light intensity and sound level, switch on the test function of the appliance.
1 Press and hold the alarm 1 or alarm 2 button for at least 3 seconds.
2 The appliance starts the demonstration of the corresponding alarm.
3 To switch off the demonstration, press and hold the previously pressed alarm button for 3 seconds again.


flowchart
graph TD
    A["MENU"] --> B["HENSUI"]
    B --> C["90 sec."]
    style A fill:#f9f,stroke:#333
    style B fill:#bbf,stroke:#333
    style C fill:#dfd,stroke:#333
    subgraph Legend
        D["DEMO"]
    end
Audio feedback
When you press a menu button, you hear a click. If you do not want to hear clicks when you press a button, press and hold the FM button for 5 seconds to switch off the audio feedback. You hear one click as a confirmation. To activate, press and hold the FM button again. You hear two clicks to confirm that the audio feedback is activated.
The menu buttons have a backlight to help you to find the buttons. If you move your fingers close to the buttons, the backlight lights up. If you don't press the button, the backlight goes out after a few seconds.
22 English
Cleaning and storage
-Clean the appliance with a soft cloth.
- Do not use abrasive cleaning agents, pads or cleaning solvents like alcohol, acetone, etc., as this may damage the surface of the appliance.
- If the appliance will not be used for an extended period of time, remove the power cord from the wall outlet and store the appliance in a safe, dry location where it will not be crushed, banged, or subject to damage.
-Do not wrap the power cord around the appliance when storing it.
Disposal
Your product is designed and manufactured with high quality materials and components, which can be recycled and reused. For recycling information, please contact your local waste management facilities or visit www.recycle.philips.com.
Assistance
For assistance visit our website: www.philips.com/support or call toll free: 1-866-832-4361.
Note: This appliance has no user-serviceable parts, except for the power adapter.
90-Day Money-Back Guarantee
If you are not fully satisfied with your product send the product back and we'll refund you the full purchase price.
The product must be shipped prepaid by insured mail, insurance prepaid, have the original sales receipt, indicating purchase price and date of purchase, and the money-back guarantee return authorization form enclosed.
We cannot be responsible for lost mail.
The product must be postmarked no later than 90 days after the date of purchase.
Philips reserves the right to verify the purchase price of the product and limit refunds not to exceed suggested retail price.
To obtain money-back guarantee return authorization form, call 1-866-832-4361 for assistance.
Delivery of refund check will occur 6–8 weeks after receipt of returned product.
Full Two-Year Warranty
Philips North America LLC (USA) and Philips Electronics Ltd (Canada) warrant this new product against defects in materials or workmanship for a period of two years from the date of purchase, and agree to repair or replace any defective product without charge.
IMPORTANT: This warranty does not cover damage resulting from accident, misuse or abuse, lack of reasonable care, or the affixing of any attachment not provided with the product or loss of parts or subjecting the product to any but the specified voltage or bateries.*
NO RESPONSIBILITY IS ASSUMED FOR ANY SPECIAL, INCIDENTAL OR CONSEQUENTIAL DAMAGES.
In order to obtain warranty service, go to www.philips.com/support for assistance. It is suggested that for your protection you return shipments of product by insured mail, insurance prepaid. Damage occurring during shipment is not covered by this warranty.
NOTE: No other warranty, written or oral, is authorized by Philips North America LLC.
This warranty gives you specific legal rights, and you may also have other rights which vary from state to state, province to province or country to country. Some states do not allow the exclusion or limitation of incidental or consequential damages, so the above exclusion and limitations may not apply to you.
* Read enclosed instructions carefully.
In US manufactured for: Philips Personal Health, a division of Philips North America LLC, P.O. Box 10313, Stamford, CT 06904.
In Canada imported by: Philips Electronics LTD, 1875 Buckhorn Gate, 5th Floor, Mississauga, Ontario, L4W 5P1.
PHILIPS and Philips shield are registered trademarks of Koninklijke Philips N.V.

©2022 Philips North America LLC. All rights reserved.
Safety and compliance
This appliance meets the safety requirements in the USA and Canada for:
-UL 153 and CSA C22.2 No. 250.4-14: Portable electric luminaires.
- UL 62368 and CAN/CSA C22.2 No. 62368: Audio/video, information and communication technology equipment.
-IEC 62471: Photobiological safety of lamps and lamp systems.
Electromagnetic fields (EMF)
This Philips appliance complies with all applicable standards and regulations regarding exposure to electromagnetic fields.
- This equipment has been tested and found to comply with the limits for a Class B digital device, pursuant to part 15 of the FCC rules and Canadian ICES-003 and ICES-005 standards. These limits are designed to provide reasonable protection against harmful interference in a residential installation. This equipment generates uses and can radiate radio frequency energy and, if not installed and used in accordance with the instructions, may cause harmful interference to radio communications. However, there is no guarantee that interference will not occur in a particular installation. If this equipment does cause harmful interference to radio or television reception, which can be determined by turning the equipment off and on, the user is encouraged to try to correct the interference by one or more of the following measures:
-Reorient or relocate the receiving antenna.
-Increase the separation between the equipment and the receiver.
- Connect the equipment into an outlet on a circuit different from that to which the receiver is connected.
-Consult the dealer or an experienced radio/TV technician for help.
- This device complies with Part 15 of the FCC rules / Industry Canada license-exempt RSS standard(s). Operation is subject to the following two conditions: (1) This device may not cause harmful interference, and (2) this device must accept any interference received, including interference that may cause undesired operation.
Troubleshooting
This chapter summarizes the most common problems you could encounter with the appliance.
If you are unable to solve the problem with the information below,
visit www.philips.com/support or call 1-866-832-4361 for assistance.
Problem Solution
| The appliance does not work at all. | Perhaps the adapter is not inserted properly in the wall socket. Put the adapter properly in the wall socket. |
| Perhaps the plug is not inserted properly in the appliance. Put the small plug in the appliance properly. |
| Perhaps there is a power failure. Check if the power supply works by connecting another appliance. |
| The appliance functions properly, but the lamp does not work anymore. | The appliance contains a durable LED lamp that should last a long time. However, if the lamp stops working, go to www.philips.com/support or call 1-866-832-4361 for assistance. |
| The appliance does not respond when I try to set different functions. | Remove the adapter from the wall socket and wait a few minutes before you reinsert it. |
| The lamp does not go on when the alarm goes off. | Perhaps you set a light intensity level that is too low. Increase the light intensity level in your wake-up profile. |
| Perhaps you switched off the alarm function.The alarm icon is visible on the display when the alarm function is active. |
| Perhaps the appliance is defective. Go to www.philips.com/support or call 1-866-832-4361 for assistance. |
| The lamp does not go on right away when I switch it on. | This is normal, the light gradually increase from 0 (only visible in dark conditions) to the set light level. This may take up to 5 seconds depending on the set light level. |
| I do not hear the alarm sound when the alarm goes off. | Perhaps you set a sound level that is too low. To set a higher sound level, increase the volume level of the wake-up sound in your wake-up profile. |
| Sound fades in when the alarm is triggered. |
| Perhaps you switched off the alarm function. The alarm icon is visible on the display when the alarm function is active. |
| If you selected the radio as the alarm sound, perhaps the radio is not tuned to a station. Tune it to a station. |
| If you selected the radio as the alarm sound, the radio may be defective. Switch on the radio after you switch off the alarm to check if the radio works. If it does not work, go to www.philips.com/support or call 1-866-832-4361 for assistance. |
Problem Solution
| The radio does not work. Perhaps you set the volume too low. Increase the volume level. |
| Perhaps the radio is not tuned to a station. Tune it to a station. |
| The radio may be defective. Go to www.philips.com/support or call 1-866-832-4361 for assistance. |
| The radio produces a crackling sound. | Perhaps the broadcast signal is weak. Adjust the frequency and/or change the position of the antenna by moving it around. Make sure you have unwound the antenna completely. |
| The alarm went off yesterday, but it did not go off today. | Perhaps you switched off the alarm function.The alarm icon is visible on the display when the alarm function is active. |
| Perhaps you set a volume level and/or light intensity level that is too low. Set a higher volume level and/or light intensity level in your wake-up profile. |
| Perhaps there was a power failure that lasted longer than the time backup. The set clock time is lost. You have to set the correct clock time again. |
| I wanted to snooze, but the alarm did not go off again after 9 minutes. | Tap on the top of the Wake-Up Light to snooze. If you press the alarm button, the FM button, or the MENU button, the alarm function will be deactivated. |
| The light wakes me too early. | Perhaps the light intensity level you have set is not appropriate for you. Try a lower light intensity level if you wake up too early. If light intensity 1 is not low enough, move the appliance further away from the bed. |
| The light wakes me too late. | Perhaps the appliance is positioned at a lower level than your head. Make sure the appliance is located at a height at which the light is not blocked by your bed, duvet or pillow. Also make sure the appliance is not placed too far away. |
Specifications
Adapter
| Manufacturer PHILIPS |
| Type number HF12; HF20 |
| Rated input voltage 100 V – 240 V AC |
| Rated input frequency 50 / 60 Hz |
| Rated output voltage 24.0 V DC |
| Rated output current 0.5 A (HF12); 0.75 A (HF20) |
| Rated output power 12.0 W (HF12); 18.0 W (HF20) |
| No-load power < 0.1 W |
| Efficiency class VI |
| Safety classification Class 2 power supply |
| Dimensions (height x width x depth) 35 x 78 x 47 mm (1.38 x 3.07 x 1.85 in.) |
| Weight Approx. 0.10 kg (3.5 oz.) (HF12);Approx. 0.12 kg (4.2 oz.) (HF20) |
| Cord length 183 cm (6 ft) |
Main unit
| Manufacturer PHILIPS |
| Type number HF3520 |
| Rated input voltage 24 V DC |
| Rated input current 0.5 A |
| Rated input power 12 W |
| Standby power appliance (main unit + adapter) | < 0.5 W (display at maximum brightness) |
| < 0.25 W (display off) |
| Conditions: night (12 h / 0 lux), day (12 h / 500 lux), all functions suspended |
| Light output (level 1 – 20) | Approx. 1 lux – 300 lux at 45 cm (approx. 1 lux – 300 lux at 17.7 in.) |
| Light color (level 1 – 20) | Approx. 1500 K – 2800 K |
| FM-radio frequency band | 87.5 MHz – 108.0 MHz |
| Dimensions (height x width x depth) | Approx. 20 x 20 x 15 cm (7.9 x 7.9 x 5.9 in.) |
| Weight Approx. 0.76 kg (26.8 oz.) |
Operating conditions
Temperature 5 °C to 35 °C (41 °F to 95 °F)
Relative humidity 20 % to 90 % (no condensation)
Atmospheric pressure 86 kPa to 106 kPa
Storage conditions
Temperature -20 °C to 50 °C (-4 °F to 122 °F)
Relative humidity 20 % to 90 % (no condensation)
Atmospheric pressure 86 kPa to 106 kPa
natural_image
Line drawing of a device with a bulb and plug, no text or symbols present
natural_image
Illustration of a medical device with a bulb, cable, and plug (no text or symbols)


flowchart
graph LR
    A["Speaker 1"] --> B["Speaker 20"]
    C["Play button"] --> D["Play button"]
Nota:
natural_image
Illustration of a hand holding a circular object, labeled with number 1 (no text or symbols on the object itself)
Nota:

flowchart
graph TD
    A["MENU Icon"] --> B["90 sec."]
    C["MENU Icon"] --> B
    D["DEMO"] --> B

Respuesta de audio
natural_image
Line drawing of a satellite dish connected to a plug, showing internal wiring and cable (no text or symbols)
IMPORTANTES CONSIGNES DE SÉCURITÉ
natural_image
Diagram showing a blue oval shape transforming into a white oval with musical notes (no text or symbols)
natural_image
Illustration of a hand holding a curved object, labeled with number 1 (no text or symbols on the object itself)

Remarque :
Remarque :
flowchart
graph TD
    A["MENU"] --> B["HENSUI"]
    B --> C["90 sec."]
    style A fill:#f9f,stroke:#333
    style B fill:#bbf,stroke:#333
    style C fill:#dfd,stroke:#333
    subgraph Legend
        D["DEMO"]
    end

Réaction acoustique
Specifications are subject to change without notice.
All rights reserved.


