7194116 - Monitor Legamaster - Free user manual and instructions
Find the device manual for free 7194116 Legamaster in PDF.
| Product Type | Interactive touch monitor (e-Screen) |
| Brand | Legamaster |
| Model | 7194116 |
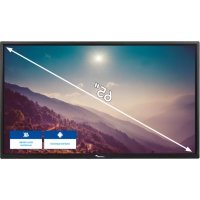
| Screen Size | 65 inches |
| Touch Technology | Touch (USB connection, compatible with stylus, finger, or glove) |
| Power Supply | 100-240 V ~ 5 A, 50/60 Hz |
| Main Switch | Yes, on the side (On/Off positions) |
| Power Consumption in Standby | Active standby mode (orange indicator) |
| Video Inputs | VGA, DVI-D, HDMI (x2), DisplayPort, Composite, S-Video, Component |
| Audio Inputs | PC Audio (mini-jack), RCA (L/R) |
| Audio Outputs | RCA line out (G/B/R) |
| Connectivity | RS232C (D-Sub 9), RS485 (RJ-45), LAN (RJ-45), USB for touch (type B) |
| Remote Control | Yes, with AAA batteries (included) |
| OSD Functions | On-screen display menu (image, sound, etc. settings) |
| Wall Mounting | Possible (follow instructions, minimum 10 cm clearance around) |
| Transport | Requires 2 persons, use the white handles |
| Operating Temperature | Avoid very hot or sunny rooms |
| Maintenance and Cleaning | Disconnect the device before cleaning. Use a soft, dry cloth. |
| Safety | Follow warnings: disconnect in case of smoke, water, fall. Do not obstruct ventilation openings. |
| Spare Parts and Repairability | Contact the retailer or a qualified technician. No consumer spare parts. |
Frequently Asked Questions - 7194116 Legamaster
User questions about 7194116 Legamaster
0 question about this device. Answer the ones you know or ask your own.
Ask a new question about this device
Download the instructions for your Monitor in PDF format for free! Find your manual 7194116 - Legamaster and take your electronic device back in hand. On this page are published all the documents necessary for the use of your device. 7194116 by Legamaster.
USER MANUAL 7194116 Legamaster
We make communication visible
ENGLISH
DEUTSCH
FRANÇAIS
NEDERLANDS
TÜRkçE
Legamas
We make communication

Legamaster

We make communication visible
QUICK SETUP GUIDE
For further information, see the User Manual that is downloadable from the e-legamaster.com website. Please retain this Quick setup guide for future reference.
Please contact Legamaster directly if you have questions on the use of the touch monitor after reading the Setup Guide and User Manual.
Important:
Please read the PRECAUTIONS, SAFETY INSTRUCTIONS and this SETUP GUIDE carefully before installing the touch monitor.
1 -Precautions and safety instructions
Before using the touch monitor, please read this quick setup guide thoroughly to help protect against damage to your own and other people's property and ensure your own and other people's personal safety.
- Be sure to observe the following instructions.
For your safety, be sure to observe the warnings contained in this guide.
-For installation or adjustment, please follow this quick setup guide and refer all servicing to qualified service personnel.
Safety Precautions
If smoke or a peculiar smell comes from the monitor, remove the power plug from the socket immediately.
Failure to do so may result in fire or electric shock. Contact your dealer for inspection.
If the monitor has been turned on but there isn't a picture, remove the power plug from the socket immediately.
Failure to do so may result in fire or electric shock. Contact your dealer for inspection.
If water is spilled or objects are dropped inside the monitor, remove the power plug from the socket immediately.
Failure to do so may result in fire or electric shock. Contact your dealer for inspection.
If the monitor is dropped or the cabinet is damaged, remove the power plug from the socket immediately.
Failure to do so may result in fire or electric shock. Contact your dealer for inspection.
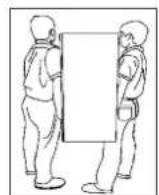
To turn off the power of the monitor, press "O" on the main power switch at side of monitor.
The power standby/on indicator will go off and the monitor cannot to be turned on/off by using the POWER button on the remote control. (To turn on/off the monitor by the remote control, press the main power switch again and the power standby/on indicator light will come on again.)
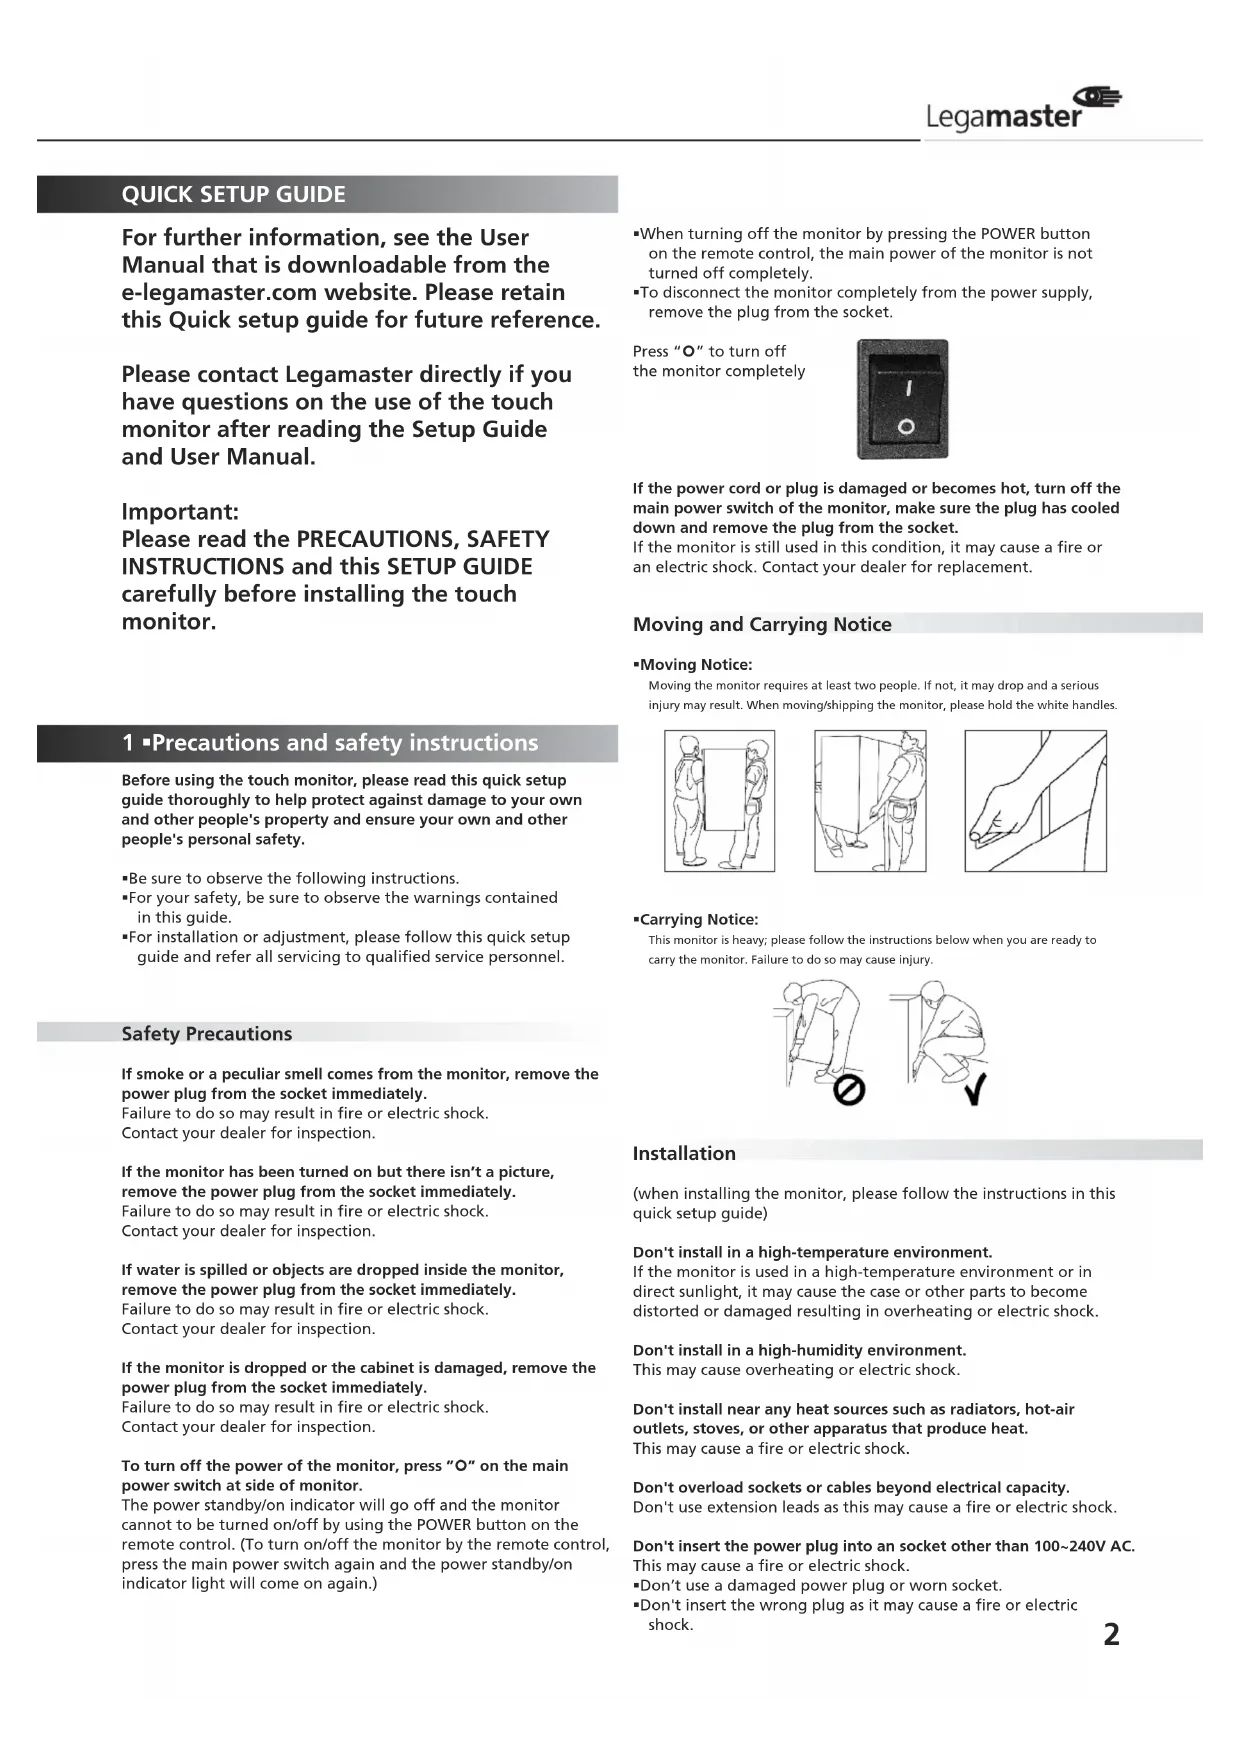
- When turning off the monitor by pressing the POWER button on the remote control, the main power of the monitor is not turned off completely.
- To disconnect the monitor completely from the power supply, remove the plug from the socket.
Press "O" to turn off the monitor completely
If the power cord or plug is damaged or becomes hot, turn off the main power switch of the monitor, make sure the plug has cooled down and remove the plug from the socket.
If the monitor is still used in this condition, it may cause a fire or an electric shock. Contact your dealer for replacement.
Moving and Carrying Notice
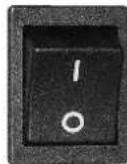
- Moving Notice:
Moving the monitor requires at least two people. If not, it may drop and a serious injury may result. When moving/shipping the monitor, please hold the white handles.
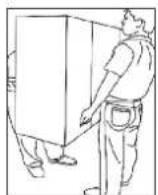
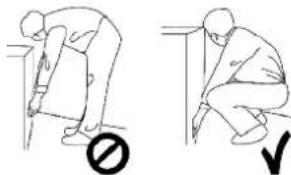
- Carrying Notice:
This monitor is heavy; please follow the instructions below when you are ready to carry the monitor. Failure to do so may cause injury.
Installation
(when installing the monitor, please follow the instructions in this quick setup guide)
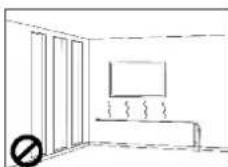
Don't install in a high-temperature environment.
If the monitor is used in a high-temperature environment or in direct sunlight, it may cause the case or other parts to become distorted or damaged resulting in overheating or electric shock.
Don't install in a high-humidity environment.
This may cause overheating or electric shock.
Don't install near any heat sources such as radiators, hot-air outlets, stoves, or other apparatus that produce heat.
This may cause a fire or electric shock.
Don't overload sockets or cables beyond electrical capacity.
Don't use extension leads as this may cause a fire or electric shock.
Don't insert the power plug into an socket other than 100~240V AC. This may cause a fire or electric shock.
- Don't use a damaged power plug or worn socket.
- Don't insert the wrong plug as it may cause a fire or electric shock.
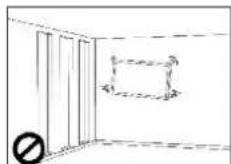
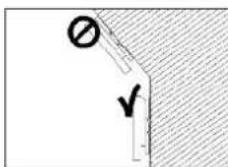
Do not place monitors on unstable shelves or surfaces. They could collapse and cause damage.
Only install the unit on vertical, stable and level surfaces.
Don't place objects on the touch monitor.
If the touch monitor is covered or the vents are blocked, the monitor could overheat and cause a fire.
If metal or liquid gets into the monitor, it may cause a fire or an electric shock.
- Do not place heavy objects on the monitor as they may fall causing injury.
- Please keep a minimum distance of 10cm between the monitor and the other objects for sufficient ventilation.
Don't move the touch monitor when it is connected to the power cord and AV cables.
- When moving the monitor, make sure you remove the plug and cables from the socket or source.
- When unpacking or carrying the monitor, at least 2 people are needed. Make sure the monitor is carried upright.
- Transport the monitor upright. Avoid placing the monitor face up or face down.
- Handle the monitor gently. Do not drop.
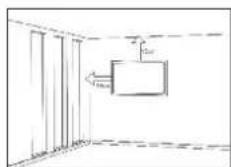
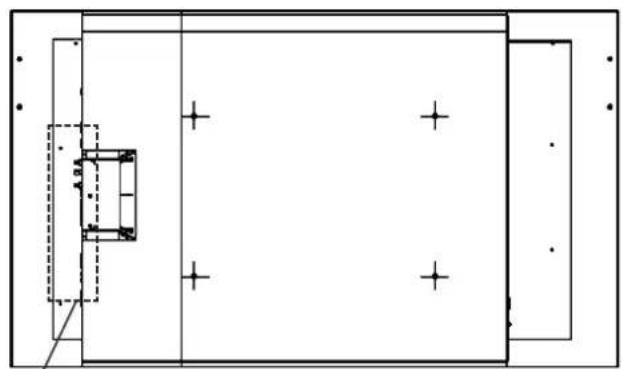
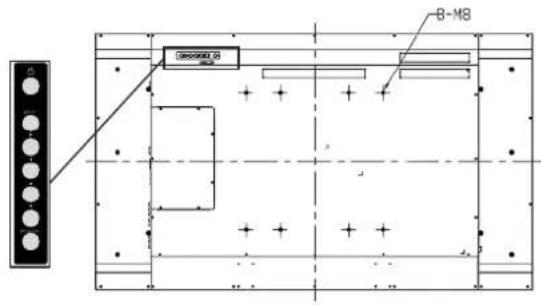
Wall mounting safety notes
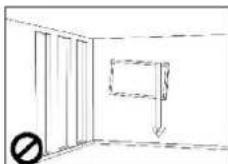
- Please make sure the bracket is fixed to a solid wall.
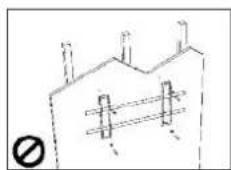
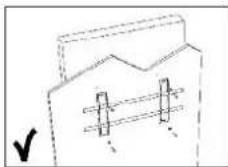
- After assembling, please don't pull or shake violently.
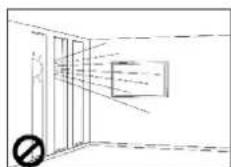
- Please don't install the bracket in direct sunlight or areas of humidity / high temperature for fear that the quality is affected.
- Install the bracket at a minimum distance of 10cm from other objects / walls on either side. Only attach to vertical walls.
2 Package contents
Unpacking
- The e-Screen is packed in a cardboard box and may be banded to 2 types of custom pallet depending on the number of units shipped. The e-Screen is packed using cushions to protect the monitor during shipping.
Before unpacking your monitor, prepare a stable, level, and clean surface near a wall socket. - Set the LCD Monitor box in an upright position and open from the top of the box before removing the top cushions.
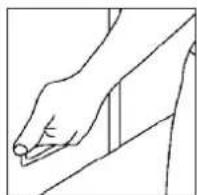
-Step 1: Remove the white handle and cut the banding.
-Step 2: Remove the top cushion and take the accessories bag out.
Packing list
Item Q'ty
1 e-Screen 1
2 Carton 1
3 Bottom cushion 1
4 Top cushion 1
5 Packing bag 1
6 Accessories bag 1
7 Ergonomic stylus 1 set
8 Carton lock 6
Contents of the Accessories Bag
- VGA Cable (D-sub)
- Power cord black
- OSD Remote control (2 batteries (AAA) included)
-USB cable - IR-Extender
- CD-Disk Ethernet VCOM driver
3 - Installation
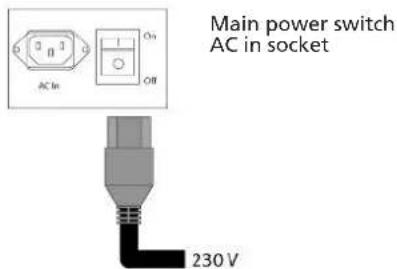
Power Input
Power Cord
The power cord, included, is used to connect the side controls of the LCD monitor and the wall socket.
Connect the power cord into main power of the monitor, "--" is power on,
"O" is power off.
Input: 100-240V~5A 50/60Hz

The side controls
Power Interface
Main power-switch & AC socket.
Please see the chapter "Power input"
The side controller of the monitor
The remote control (RCU)
Please see the chapter "Operating the monitor"
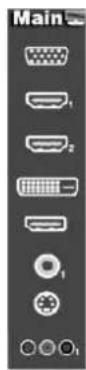
Signal Source Input
Input Interface
65" Connector
| 1 DisplayPort | |
| 2 HDMI 1 | |
| 3 HDMI 2 | |
| 4 DVI-D D-Sub 24 pin | |
| 5 VGA D-Sub 15 pin | |
| 6 PC Audio In Mini Jack | |
| 7 IR Extender Mini Jack | |
| 8 Line Out Mini Jack | |
| 9 RS232C D-Sub 9 pin | |
| 10 LAN | |
| 11 Component RCA G/B/R | |
| 12 Audio in (Component) RCA W/R | |
| 13 S-Video Mini Din 4 pin | |
| 14 Video RCA | |
| 15 Audio In (S-Video/Video) RCA W/R | |
| 16 Touch USB | Type B female |
| 17 Power Switch | ON/OFF |
| 18 AC in | IEC C14 |
| 19 RS485 | RJ-45 |

4 - Operating the monitor
The side controller of the monitor
- OSD Key Pad function List
Key Description
Power Power on/Power off
Source Source selection (toggle)
Menu/Exit Menu/Exit selection

Power ON-Stand by Indicator
Remote Control Receiver
-LED ON:
Power Status Condition
| Green Power on |
| Orange Power off |
| Power saving mode |
| Select LED on via menu |
| (Front LED: On) |
| Flashing orange No signal |
| Off AC off |
| Power on |
| Select LED on via menu |
| (Front LED: Off) |
-LED OFF:
The LED turns completely off when in the "off" mode regardless of the monitor being on or off.
The Remote Control (RCU) Instructions
No Function Description
| 1 Tows the monitor on and off | |
| 2 INFO | Provides source and resolution information |
| 3 VGA | Selects the PC RGB source |
| DVI | Selects the PC DVI source |
| HDMI 1 | Selects the HDMI source 1 |
| 4 COMP | Selects the Component source |
| AV (Video) | Selects the Composite Video source |
| HDMI 2 | Selects the HDMI source 2 |
| 5 PIP position | Selects the PIP position |
| DisplayPort | Select the DisplayPort source |
| 6 PIP | Turns the PIP feature on and off S-V | 2 3 4 |
| S-V | Selects the S-Video source | 5 |
| HD-SDI 2 | Not available in this model | 6 |
| 7 SWAP | Swaps the main source & sub source picture | 7 |
| 8 P-SOURCE | Selects the secondary sub-source | 9 |
| 9 MENU | Opens the monitor's on-screen menu system. If the menu system is already open, pressing this button will select the previous submenu Navigates through submenus and settings | 10 |
| 10 EXIT | Closes the menu system | |
| 11 ENTER | Selects highlighted menu choices | |
| 12 SCALING | Toggles between different aspect ratios (Auto, Native, 4x3, 16x9, 16x10 and Letterbox) | |
| FREEZE | Freezes the current source image | |
| MUTE | Turns off the sound | |
| BRIGHT | Adjusts the brightness | |
| CONTRAST | Adjusts the contrast | |
| AUTO | Synchronizes the monitor with the source | |
| SOURCE | Allows selection of the different sources | |
| VOLUME- | Decreases the sound volume | |
| VOLUME+ | Increases the sound volume |
Hot Key: OSD Menu Lock/Unlock Control
Lock: Press Enter, Enter, Exit, Exit, Enter and Exit
on the controller in sequence to lock OSD
Unlock: Press Enter, Enter, Exit, Exit, Enter and Exit
on the controller in sequence to unlock OSD
Display Mode
Turning the monitor on
- Correctly insert the power cord into the monitor and into the power socket
- Ensure the AC switch is set to "—"
- Press the power button on the remote or side control panel.
Turning the monitor off
With the power on, press the power button on the remote or side control panel to place the monitor in a standby mode. To turn off power completely, turn the AC switch to "O" or disconnect the AC power cord from the power outlet.
NOTE:
If there is no signal input for a period of time, the monitor will automatically revert to standby mode.
Adjusting the Volume
- Using the remote, press the VOLUME- or VOLUME+ to increase or decrease the volume.
- Press the MUTE button to temporarily turn off all sound. To restore the sound, press the MUTE button again.
Selecting the input source
- Using the remote, press the desired source button (VGA, HDMI 1, HDMI 2, DVI, DisplayPort, Composite Video, S-Video, Component)
- Or press SOURCE on the monitor keypad, use the arrow buttons ( ) to navigate to the desired input source, and press ENTER:
HDM1
HDM2
VGA
- Component
S-Video
Composite Video
DVI
-DisplayPort
- If the monitor cannot find a source, a
"No signal" message will appear.
Touch Operation
No calibration is required for first-time use. However, the touch panel might be required for calibration over time depending on the usage. Please find calibration instructions below for the different operating systems:
Installation:
- Connect the signal cable to the monitor and then turn on the monitor
- Connect one side of the USB cable (type-B USB connector) on the monitor side (see "Chapter 3, Signal Source Input" for exact location)
- Connect the other side of the USB cable (type-A USB connector) to the computer
- Turn the computer on
- Once the USB cable is connected, please wait for 5 seconds before the touch function is ready to go. It can be achieved by using a pen, finger or any other pointer. Touch function is plug & play: no driver is required. Please do not use landscape-type touch monitor in portrait mode, and vice versa
Windows 7: 16 Point Calibration Procedure
- Start USB configuration program on the computer
- Press "Calibrate"
- Wait for the beep. The cursor will move to the upper left-hand corner of the screen automatically
- Place your finger, gloved hand or any other pointer on the cursor and hold it there for 2 seconds (a beep will be heard when the pointer is placed on the cursor)
-
The cursor will then move to the next calibration point. Repeat action 4. After the beep, the cursor will move to the next calibration point
-
Repeat action 4 until you get to the last calibration point in the lower right-hand corner
- Complete the calibration by tapping anywhere between the 16 points. The calibration process now is complete and the touch monitor is ready to be used
MAC OS X V10.4 & above Calibration Procedure:
To operate with an Apple MAC computer, download the driver through link below:
http://www.nextwindow.com/nextwindow_support/ Touch_Screen_Calibration_for_Mac.html
Follow the steps given in the installation procedure and calibrate the e-Screen
Touch operation Linux-based (2.6X & above) operating systems
For calibration see: http://www.freedesktop.org/wiki/Software/xinput_calibrator and configure the e-Screen
5 Troubleshooting 6 Compliance and regulatory information
Before calling service personnel, please check the following chart for a possible cause to the trouble you are experiencing.
Perform the adjustments according to the instructions on the "Operating the monitor page"
If the problem you have experienced isn't described below or you can't correct the problem, stop using the monitor and call service personnel or your dealer.
Problem Check these things
| No Display Ensure the power plug is installed correctly at both ends. Check the main power switch is set to “—” Check that source equipment is operating correctly. Check the input signal is com- patible with this display. |
| The image is not centered Check the input signal is compatible with this display. |
| The image is not locked correctly Check the input signal is compatible with this display. |
| The remote control doesn’t work Make sure the batteries are new and installed correctly. Ensure the remote is aimed at the IR sensor on the front of the display |
| The picture color looks poor Check the picture settings. Reset the display. If you are using YUV terminals, make sure cables are correctly connected. |
FCC Compliance Statement:
This equipment has been tested and found to comply with the limits for a Class A digital device, pursuant to part 15 of the FCC Rules. These limits are designed to provide reasonable protection against harmful interference when the equipment is operated in a commercial environment. This equipment generates, uses and can radiate radio frequency energy and, if not installed and used in accordance with the quick setup guide and user manual, may cause harmful interference to radio communications. Operation of this equipment in a residential area is likely to cause harmful interference in which case the user will be required to correct the interference at their own expense.
Warning
This is a Class A product. In a domestic environment this product may cause radio interference in which case the user may be required to take adequate measures.
This device complies with Part 15 of the FCC Rules.
Operation is subject to the following two conditions :
(1) this device may not cause harmful interference, and
(2) this device must accept any interference received, including interference that may cause undesired operation.


EN 55022_EN 61000-3-2_EN-61000-3-3
EN 55024
EN 60950-1 [Low-Voltage Directive (73/23/EEC)]
Information in this document is subject to change without notice.
2012 Legamaster International B.V. All rights reserved.
Reproduction in any manner whatsoever without the written permission of Legamaster International is strictly forbidden.
Trademarks used in this text: Legamaster and the Legamaster logo are trademarks of edding AG; Windows is a registered trademark of Microsoft Corporation, Nextwindow is a registered trademark of Nextwindow.
Other trademarks and trade names may be used in this document to refer to either the entities claiming the marks and names or their products. Legamaster International disclaims any proprietary interest in trademarks and trade names other than its own.
KURZANLEITUNG
http://www.nextwindow.com/nextwindow_support/ Touch_Screen_Calibration_for_Mac.html
http://www.nextwindow.com/nextwindow_support/ Touch_Screen_Calibration_for_Mac.html
We make communication visible